How big does kale grow
How to Germinate, Water, and Harvest
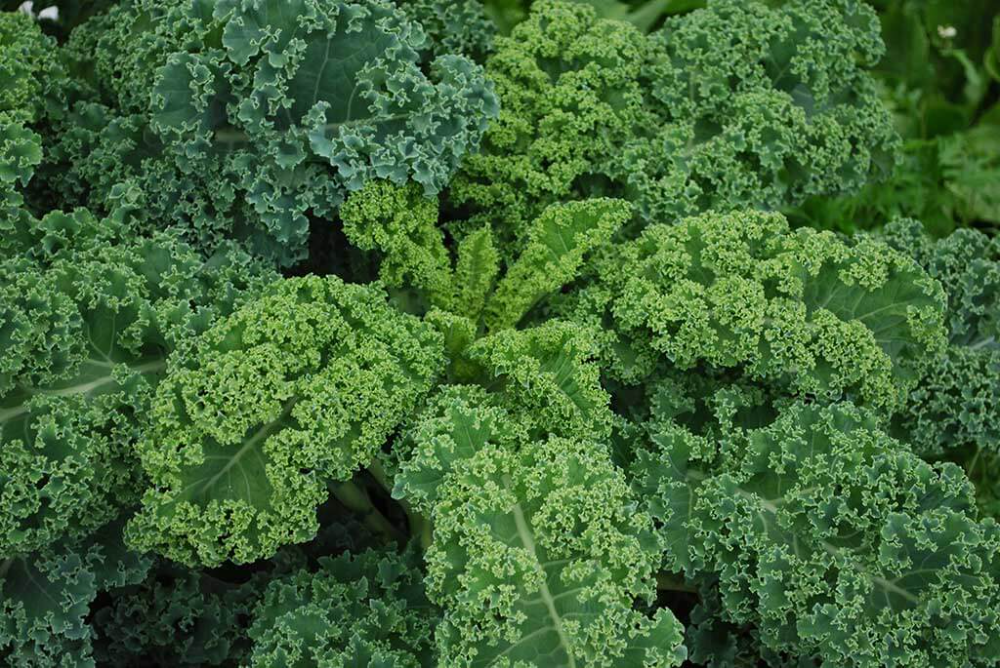
Kale (Brassica oleracea) is essentially a form of cabbage that doesn't have the tightly formed head associated with most cabbages, and it's grouped in the cooking greens category with collards, mustard, and Swiss chard. Kale plants can be quite ornamental, with textured and curly leaves that come in shades of green, purple, and other colors. Kale has a relatively fast growth rate and can grow from seed to harvest in about three months. It is best planted in the late winter or early spring and can also be planted in the late summer for a fall to winter harvest. Kale does come back every year, but this biennial plant takes two years to complete its growth cycle—so it grows leaves in its first year, while seeds and flowers develop in its second growing season.
| Common Name | Kale, ornamental kale |
| Botanical Name | Brassica oleracea |
| Family | Brassicaceae |
| Plant Type | Annual, biennial, vegetable |
| Mature Size | 1–2 ft. |
| Sun Exposure | Full sun, partial sun |
| Soil Type | Loamy, moist, well-drained |
| Soil pH | Acidic |
| Bloom Time | Spring |
| Hardiness Zones | 7–9 (USDA) |
| Native Area | Europe |
How to Plant Kale
Kale is a fast-growing vegetable that does best in a planting location with full sun. Plant kale seeds about 1/2 inch deep, leaving at least 1 1/2 to 2 feet between each plant. High nitrogen content in the soil is important for kale to grow its leaves, so adding a few inches of organic matter like compost to a well-draining soil mixture will encourage a healthy harvest.
When to Plant
Kale can be planted three to five weeks prior to your area’s projected last frost date in the spring. In most regions, gardeners can harvest kale in the summer by planting it at this time.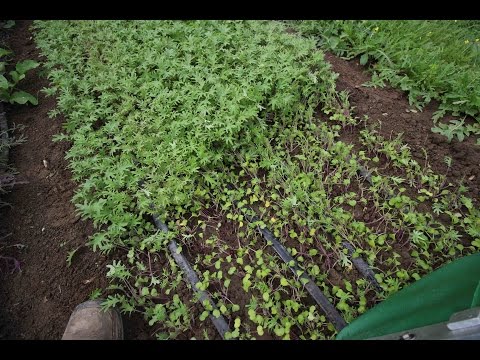 It can also be planted in late summer roughly six to eight weeks before your first fall frost.
Those in warm climates (zone 8 and above) can continue to plant in the early fall for a late fall to winter harvest. Kale takes roughly three months to reach maturity from seed, while cuttings will mature in about one month.
Tip
Cuttings are an inexpensive way to create new plants. Plant your kale in early spring if you plan to take cuttings in late summer. Kale cuttings should be taken in about three months once the plant has become established.
Selecting a Planting Site
Kale grows equally well in pots, garden soil, raised garden beds, and other containers. Kale can grow indoors as long as you have adequate lighting. Soil that’s rich in organic matter and has sharp drainage is ideal, and the planting site also should get ample sunlight. Be sure the kale isn't too close to taller plants that will shade it. Growing kale in a window box can also be successful in south- or west-facing windows, but in very hot climates, east-facing windows can help prevent scorching from the afternoon sun.
Spacing, Depth, and Support
Space kale plants roughly 1 1/2 to 2 feet apart, and plant them at the same depth they were growing in their nursery container. Seeds should be planted around 1/2 inch deep. No support structure is necessary.
Kale Care
The Spruce / Debbie Wolfe The Spruce / Debbie WolfeThe Spruce/Debbie Wolfe
Light
Kale needs full sun to partial shade in most climates, as the fullest growth will occur when the plant gets six or more hours of direct sunlight on most days. However, if you live in a hot, dry climate, provide your plant with some shade, especially from the strong afternoon sun. Heat can make the leaves wilt and lose their flavor.
Soil
Kale plants like to grow in a rich soil that's high in organic matter with a slightly acidic pH (6.5 to 6.8). The high nitrogen content provided by organic matter is crucial for healthy leaf growth. The soil also should drain well.
Water
Kale needs consistent amount of water to stay healthy, generally growing best in 1 to 1 1/2 inches of water per week.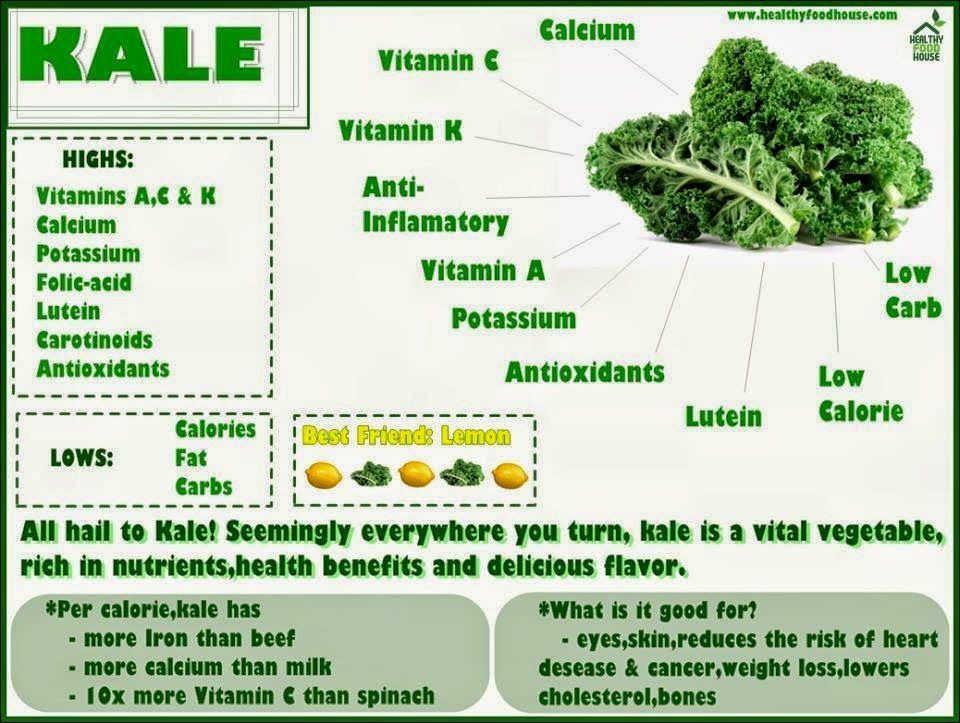 Water your kale plants regularly to keep the soil evenly moist but not soggy. Along with cool temperatures, moist soil helps to keep the kale leaves sweet and crisp, rather than tough and bitter. Mulching around your plants can help to keep the soil cool and to retain moisture.
Temperature and Humidity
The plant is usually considered a cool-weather vegetable and can handle some frost once they're mature. The optimal soil temperature for planting kale is 60 to 65 degrees. All varieties prefer cool temperatures and will be sweetened by a touch of frost. Hot weather turns kale bitter. Kale is a biennial plant, taking two growing seasons (or years) to complete its life cycle, but it's usually grown as an annual. It will collapse if exposed to heavy frosts or snow. But it can be grown throughout the winter in USDA zones 7 through 9 if the winters are mild and there is adequate water.
Fertilizer
When planting, mix fertilizer into the top 3 to 4 inches of soil. Then, feed your kale throughout the growing season, following the instructions on your fertilizer label. Use compost or a high-nitrogen vegetable fertilizer.
Types of Kale
There are many kale varieties, and they're all worth a try. The curly-leaf varieties tend to hang on longer in cold weather. But the flat-leaf types generally become established faster. Here are some varieties to consider:
- 'Hanover Salad' is a fast grower and an early producer. It has a pleasant taste for eating raw in salads.
- 'Lacinato' is a puckered heirloom kale from Tuscany. It is sometimes listed as Tuscan or dinosaur kale. Its thick leaves are hardy enough to be harvested even after a snowfall.
- 'Redbor' has magenta leaves with curly edges. It features a mild, crisp flavor and texture.
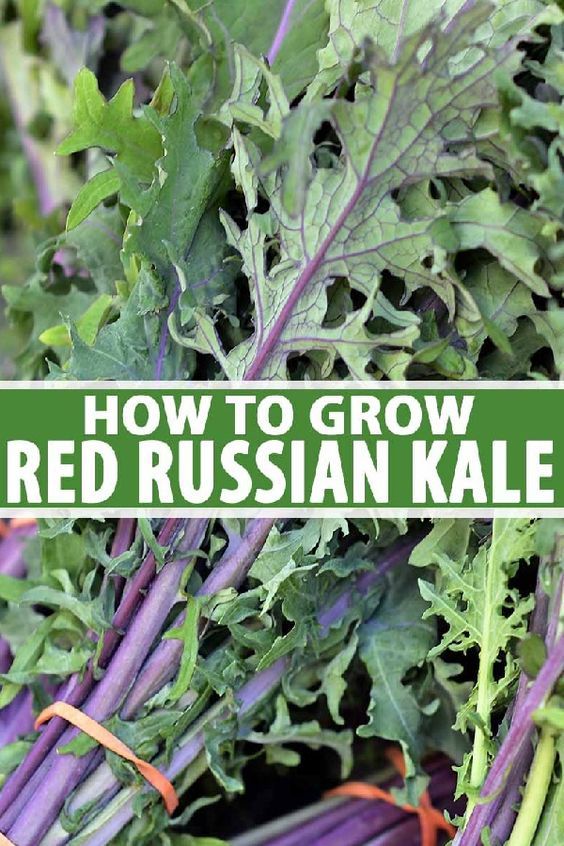
- 'Red Russian' has smooth, tender leaves with purple veins and edges. It is considered one of the sweetest varieties of kale.
- 'Vates' is a dwarf, curly, bluish-green kale that is both heat- and cold-tolerant. It is derived from 'Dwarf Blue Curled Scotch' kale.
Anna Yu/Getty Images
'Redbor' kalevalery_green/Getty Images
'Red Russian' kaleromiri/Getty Images
Kale vs. Chard
Kale and chard have similar appearances. Their leaves are often large, crisp, crinkled, and deep green. Their difference comes in their taste. Kale is generally stronger, with a bitter and earthy flavor. And chard is a much milder green. Plus, kale’s thick stems are typically best removed before eating while chard’s stems may be tenderized by cooking them.
Harvesting Kale
Expect to wait approximately two months for your kale plants to mature from seeds. Check the days to maturity on your seed packet or plant label for more precise timing. Spring-planted kale will be good for harvesting throughout the summer months, but it's especially tasty after a light frost.
You can harvest young kale leaves to use fresh in salads or allow your plants to mature for use as a cooked green. Remove the older outer leaves, and allow the center of the plant to continue producing. Kale will keep in the refrigerator, ideally in the crisper drawer, for about a week.
How to Grow Kale in Pots
Kale is easy to keep in pots. Not only does this make the plant mobile so that you can move it into adequate sunlight and protect it from severe weather as needed, but it also helps to protect it from garden critters, such as rabbits, that might munch on the leaves. Plus, container growth is ideal if you don’t have garden space or the right soil conditions.
Select a pot with at least a 12-inch diameter. It also should have ample drainage holes. An unglazed clay container is a good option because it will allow excess soil moisture to escape through its walls, helping to prevent root rot. Use a quality potting mix; an organic mix made for growing vegetables is a good option. Transplant your kale into the pot at the same depth it was growing in its previous container, and water it after planting.
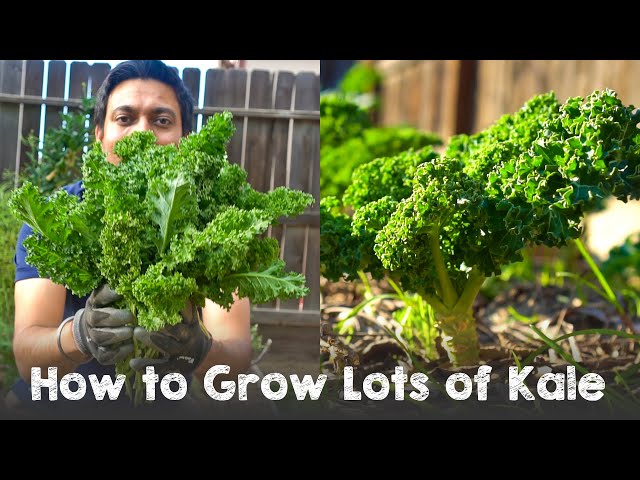
Propagating Kale
Kale is most commonly planted from seeds or nursery plants, but it can also be propagated via cuttings. Kale does regrow after cutting, but it requires a specific propagation process. To pick kale to keep it growing healthy, cuttings must be taken from the oldest leaves. Here’s how:
- Use gardening shears to cut a stem from the bottom of the plant on its side, choosing one with multiple leaves from the main stem (do not propagate from the plant's center). Remove the leaves on the lower half of the stem. Trim the bottom of the stem right below a leaf node at a 45-degree angle.
- Dip the cut end in rooting hormone.
- Plant the bottom half of the stem in a moistened soilless potting mix in a small container with drainage holes.
- Continue to keep the growing medium moist. Roots should develop in a few weeks.
 If you can gently tug on the stem and feel resistance, you’ll know roots have formed. After that, it’s ready for transplanting.
How to Grow Kale From Seed
Growing kale from seed can begin inside or outside depending on your region. Kale can be direct seeded in the garden or started indoors and transplanted into the garden. You can direct seed in cold climates as soon as the soil temperature is at least 45 degrees Fahrenheit.
- Start plants indoors in a seed-starting mix about six weeks before your last expected frost date. Kale seeds germinate quickly in warm soil and should sprout up within five to eight days.
- Cover the seeds with about 1/2 inch of soil, and keep the growing medium moist.
- Transplant your seedlings from indoors after the danger of frost has passed.
Common Pests and Plant Diseases
Kale is a member of the cabbage family, which is notorious for attracting insect pests and for rot diseases. Kale is susceptible to black rot and clubroot, as well as aphids, cabbage loopers, cabbageworm, cutworms, flea beetles, and slugs. The best defense is to monitor the plants often for signs of eggs or feeding, such as holes in the leaves. Treat problems as soon as they arise.
Watch Now: How to Make Tuscan Kale and Squash Salad Crisps
Article Sources
The Spruce uses only high-quality sources, including peer-reviewed studies, to support the facts within our articles. Read our editorial process to learn more about how we fact-check and keep our content accurate, reliable, and trustworthy.
Kale. Cornell University Growing Guides.
Kale Spacing: How Far Apart to Plant
When you plan your cool season vegetable garden, you’ll certainly want to include kale, the versatile star of many a plant-based meal – from salads and smoothies to stir fries and stews.
But to harvest the most abundant and delicious leafy greens from this member of the Brassicaceae family, it’s important to provide adequate spacing between these leafy veggies.
What exactly are these magic numbers, the number of inches between plants that will encourage your crop to thrive while still allowing you to make efficient use of your garden’s footprint?
Those magic numbers depend on a few different factors.
We link to vendors to help you find relevant products. If you buy from one of our links, we may earn a commission.
Are you planning on harvesting young leaves or large ones from this cruciferous crop? Will you be planting your leafy greens in rows, raised beds, or containers? And what varieties will you be growing?
Before we get started, you’ll want to answer these questions for yourself so that you can use the recommendations in this article for your particular situation – and decide what your own magic numbers are.
Here’s a quick overview of what I’ll cover:
What You’ll Learn
- Why You Shouldn’t Crowd Kale
- Spacing for Baby Greens
- Baby Greens From Seed
- Baby Greens From Transplants
- Spacing for Full Sized Plants
- In Rows
- In Raised Beds
- In Containers
- Spacing for Different Varieties
- Larger and Smaller Varieties
- Calculating Your Kale Spread
Why You Shouldn’t Crowd Kale
Before we get to deciphering the magic numbers, let’s remind ourselves why we are interested in properly spacing our kale plants in the first place.
Planning for the right distance between these leafy greens can be the difference between a bountiful harvest – and a meager one.
Here’s why:
- Leaving enough room around your plants helps to ensure that the leaves get plenty of sun, resulting in healthy, thriving crops.
- When you can clearly identify each individual plant instead of picking through a mass of tangled leaves, it is much easier to harvest your greens properly.
- Keeping these vegetables well-spaced instead of crowded makes it easier to inspect for cabbage worms and other pests.
- Ensuring good airflow around leaves helps ward off fungal infections, and makes it easier to spot the first signs of disease.
- If you do experience a disease outbreak, a little extra room between each plant will help you keep infected specimens isolated. This way you can quickly treat or remove them, and prevent the problem from spreading.
- Crowded veggies may compete with one another for nutrients and water, resulting in wilted greens.
- And finally, crowding does not increase your harvest. An article in the International Society for Horticultural Science journal by J. A. Chweya details a study he carried out on kale spacing and yield. The results? Widely spaced crops had a higher overall yield than ones that were planted close together.
And even if you interplant your kale crop with good companions like I do, you’ll still want to know how much room each of your plants will need so that you can plan your garden accordingly.
Spacing for Baby Greens
If your preferred way to eat kale is in salads, you’ll probably prefer to harvest this veggie in its young stage, as tender baby greens.
Recommendations for baby greens are the same whether you’re planting in rows, garden beds, or containers.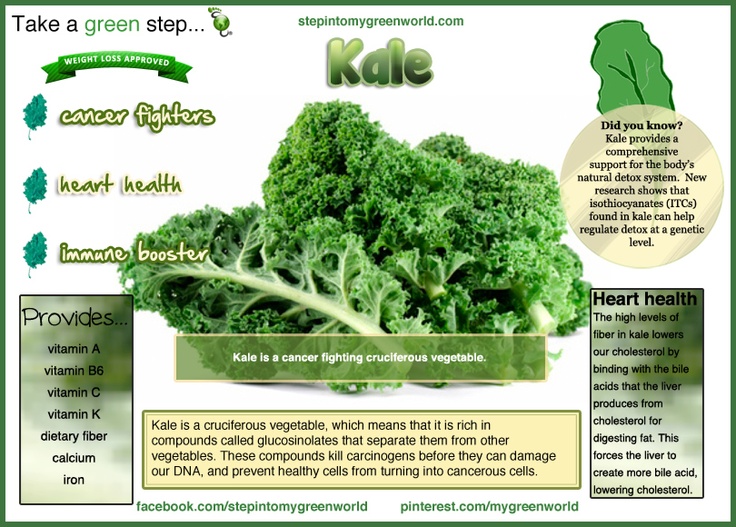
Baby Greens From Seed
When planting seeds for a harvest of baby greens, start by sowing your seeds approximately one inch apart. See our guide on when to sow kale seeds here.
As the seedlings grow, thin them at any stage, using the thinned greens in salads or as a garnish.
You can eat kale seedlings at any size, including when they are teeny tiny microgreens.
Make sure to refer to our guide if you need to brush up on your harvesting technique for this leafy veggie.
Continue thinning your seedlings throughout the growing season until plants are 4-8 inches apart – our first set of magic numbers.
With this method, your constant harvesting of small, tender leaves will prevent the veggies from maturing and getting too big, thus the need for less room.
Baby Greens From Transplants
If you are planting your crop from transplants instead of from seed, you’ll use the same rule of thumb for spacing, only you’ll skip the seeding and thinning part.
Set out transplants 4-8 inches apart. Jill MacKenzie at the University of Minnesota Extension recommends the tighter end of the range, just 4 inches between plants.
Spacing for Full Sized Plants
If you have your culinary sights set on stir fries rather than salads then you’ll likely want to harvest large leaves from full sized plants, getting more produce from each one.
Although spacing for full sized plants is similar for rows, raised beds, and containers, there are some slight differences, which I’ll go over here.
In Rows
When planting this cole crop in rows, thin your seedlings or set out your transplants so that they are 12-18 inches apart, with 2-3 feet between rows.
These are the recommendations of Jeff Schalau, the Agriculture and Natural Resources Agent at the University of Arizona Cooperative Extension in Yavapai County.
After an informal survey of around a dozen other extension offices, this seems to be the general consensus – so this is our next set of magic numbers for spacing between plants: 12-18 inches.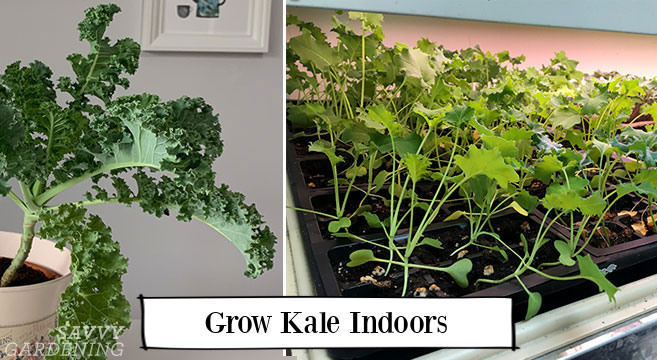
A recommended distance of 12-18 inches between the plants will allow you to harvest and inspect each one easily, as well as making sure it gets plenty of water and sunshine.
It also allows for adequate airflow to help prevent fungal infections.
In Raised Beds
If your preferred gardening method is to grow your veggies in raised beds, you are probably using some form of square foot gardening to guide your planting layout.
In this case, your magic numbers are 12 by 12 inches – the traditional amount of space recommended for kale in square foot gardening.
Plant each transplant in the center of one of the squares of your grid.
If you’re starting with seeds instead of transplants, sow several seeds in the center point of your square.
When the seedlings are 4-5 inches tall, snip the weaker seedlings off just above the soil, leaving only the strongest one to grow.
In Containers
Perhaps you are planning to grow this brassica in containers.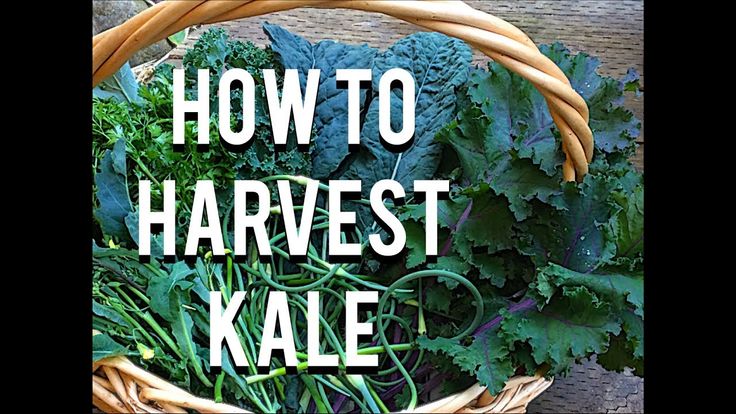 And what is a container but a much smaller version of a raised bed?
The big difference between growing veggies in containers compared to raised beds is that the soil has a tendency to dry out much more quickly.
Taking this factor into account, don’t plant your kale more densely in a container than you would in a raised bed if you want full-sized plants. (If small ones sound fine to you, though, then refer to the spacing advice in the baby greens section above.)
So what are the magic numbers for growing kale in containers?
For full-sized plants, allow at least one square foot of space each.
Spacing for Different Varieties
The above recommendations are guidelines that work well for average-sized kale.
One cultivar that fits nicely within this average, ‘Nero Toscana,’ a type of Lacinato kale that grows up to 14 inches wide.
‘Nero Toscana,’ a Lacinato-type cultivarFor Lacinato varieties, allowing 18 inches per plant works better, giving each individual plant enough room to reach its full span and still have a little wiggle room.
But – I bet you have been wondering – what if you’re planting a special cultivar that is larger or smaller than average?
Good question!
Larger and Smaller Varieties
When your variety is smaller or larger than average, you’ll need to adjust your magic numbers.
Chinese kale, for example, is a variety that grows on the small side, and only has a spread of about 8 inches.
Chinese kaleOn the other end of the spectrum, some varieties grow much wider than 12-18 inches.
The somewhat misleadingly named ‘Dwarf Blue Curled’ is one such cultivar. Mature plants can grow up to 30 inches wide.
The more common ‘Red Russian’ variety can grow up to 24 inches wide at maturity.
‘Red Russian’And the rare ‘Thousand Head’ cultivar has leaves that can grow up to 3 feet long, so you might need 6 feet or more between individual plants.
So to be sure your cultivars have enough room, check with the seed company or grower to find out what the expected width of the mature plant is.
Then add a couple of inches of wiggle room to this number, and voila, another set of magic numbers.
Calculating Your Kale Spread
But what do you do if you can’t find how wide the variety you have chosen is supposed to grow? This information is not always supplied on seed packets, unfortunately.
Nevertheless, there is a way you can get a rough estimate of your variety’s expected spread, and you’re going to use your seed packet to do your calculation.
One piece of information that is usually supplied on seed packets is the expected leaf length at maturity.
Since most kale varieties grow from a central stem, you can take the leaf length and multiply it by two to get the approximate spread of your plant.
This isn’t an exact approach since kale varies greatly in terms of how upright the leaves grow – some varieties hold their leaves very upright, like Lacinato types, while curly leaf types tend to sprawl.
So our magic numbers for spacing between kale can also be calculated as leaf length multiplied by 2, plus another 2 inches.
This may leave you with a little extra room between crops, but better to err on the side of a bit of additional space than too much crowding.
Let Your Veggies Space Out
Whether you are growing your kale in containers, raised beds, or rows, for young tender leaves or big thick ones, and no matter what variety you pick, you should now have a solid idea of how far apart to space them.
So it’s time to get planting and be well on your way to delicious, nutritious homegrown salads and stir fries.
Did this article help you find your magic numbers, the ones you can use to space out your kale for perfectly placed plants? Let us know in the comments.
For more information about growing kale in your garden, try these guides next:
- Sun Recommendations for Planting Kale
- 6 Best Types of Kale for Cold Climates
- How to Naturally Kill Insects on Kale: The Best Organic Solutions
© Ask the Experts, LLC. ALL RIGHTS RESERVED. See our TOS for more details. Originally published on February 18, 2020. [lastupdated]. Uncredited photos: Shutterstock.
Recommendations for the cultivation of white cabbage
Approximate need for nutrients
But when determining the signs of a lack of nutrients, it must be taken into account that similar changes can occur under the influence of other reasons, such as: low temperature, lack or excess of moisture, disease damage or exposure to chemical protection, pest damage. For example, the signs of a lack of nitrogen and water, a lack of potassium and an excess of chlorine are similar. Therefore, when conducting diagnostics, it is necessary to take into account all the conditions for the growth and development of culture. nine0003
Microelements are of no small importance for the normal growth, development and formation of the crop. Despite the fact that their removal by plants is negligible, however, with a good supply of basic fertilizers, the role of microelements increases significantly. To provide the plant with microelements, foliar fertilizing is usually carried out with solutions of fertilizers containing the necessary microelements in forms available to the plant.
Signs of lack of essential nutrients
White cabbage is also very responsive to organic fertilization. The application of organic fertilizers significantly improves soil fertility, compensates for the lack of organic matter, improves water, thermal and air conditions in the soil, becomes a source of carbon dioxide for plants, and enhances soil microbiological processes. It is better to use organic fertilizers in crop rotation and in the form of humus to avoid the spread of weeds.
Growing seedlings
Growing seedlings is one of the key technological elements in cabbage production. After all, there is no need to explain - what will be the start, such is the result. It is best to grow seedlings in film greenhouses of medium volume, in areas where cucumbers and tomatoes will grow in the future. The optimal placement of the greenhouse is from east to west, which makes it possible to achieve uniform illumination throughout the day. It is desirable that the greenhouse be equipped with a heating system (this is important for early sowing) and that it can be ventilated. nine0003
Sowing
The best way to grow is in a cassette. There are many proposals for price, shape and material on the market. When choosing, it should be taken into account that the larger the cell size, the better the root system develops, respectively, better survival, less stress after transplantation. Seeding into the cassette can be done either manually or with mechanical seeders designed for such sowing. It is possible to grow seedlings without the use of cassettes - direct sowing into the soil of the greenhouse. But it must be borne in mind that with this method, the possibility of injury to the root system during transplantation increases sharply, respectively, the survival rate is worse. Higher seed consumption. Sowing can also be done manually or with a seeder. The optimum seeding depth is 2–3 cm. The temperature must be kept at around 20°C until emergence.
Soil
Soil for cassettes is peat plus complex fertilizers and trace elements. Approximately 1.5-2 kg of saltpeter, 1.7-2.5 kg of superphosphate, 0.4-0.8 kg of potassium chloride should be added per 1 m 3 of pure peat. The introduction of bacterial preparations is also welcome. Trace elements can be applied immediately, or later in the form of top dressing. Lime is applied in such a way that the acidity of the mixture is at the level of 6.5–6.8. With direct sowing, it is also necessary to apply all the necessary fertilizers and first free the soil from weeds. It is undesirable to use the soil repeatedly, as there is an accumulation of various pathogens of cabbage, such as keel. nine0003
Care
After sowing, the cassettes must be placed in a chamber with a temperature of about 23-25°C and a humidity of 98% in order to provoke seed germination and ensure uniformity of seedlings. Then the cassettes are placed in the greenhouse on boards (pallets). You can not put them directly on the greenhouse soil, as the root system can grow into the soil of the greenhouse, which can cause additional stress and injury when transferring the cassette.
Seedlings are watered with water at a temperature of 18–20 ° C only as the soil dries. When cotyledon leaves appear, it is necessary to treat with an insecticide to combat cruciferous fleas. Further processing may need to be repeated. Approximately 12–15 days before planting seedlings in the ground, it is necessary to start the hardening procedure, that is, reduce the temperature in the greenhouse to + 10–12 ° C during the day and to 6–8 ° C at night by airing. Gradually, the temperature in the greenhouse is equalized to street temperature (the side walls of the greenhouse are opened). This will allow the seedlings to adapt to the conditions in the field. 1–2 days before planting cassette seedlings in the field, it is shed with the preparation AKTARA , VDG at a dosage of up to 300 g per hectare norm of seedlings at half the depth of the cassette cell.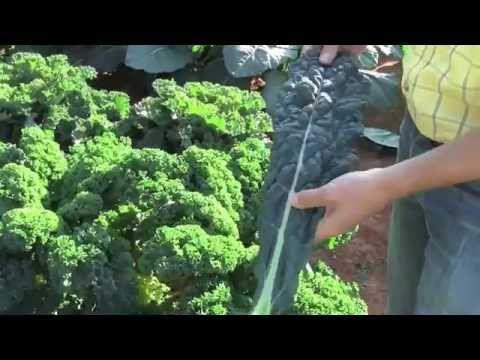 This procedure allows you to protect the seedlings from leaf-eating insects in the field and, very importantly, from damage by the cabbage fly.
Start planting in the field when the seedlings are 35-40 days old. The optimal height is 7–8 cm, the number of leaves is 3–4. Seedlings do not need to be "pulled out", they should be short and elastic. Remember that the main task is the formation of a powerful root system, and not a leaf apparatus, therefore it is desirable to use drugs that stimulate the development of the root system. nine0003
Methods and schemes of planting (seeding)
Sowing (planting) of cabbage can be done both by seedlings and by direct sowing in open ground. When choosing the second method, the time for sowing is significantly reduced, but it must be borne in mind that all the procedures that are carried out in the greenhouse when growing seedlings will need to be done in the field on a much larger area. Particular attention should be paid to preparing the soil (finely cloddy structure), maintaining soil moisture, choosing and setting up a seeder to obtain friendly strong seedlings.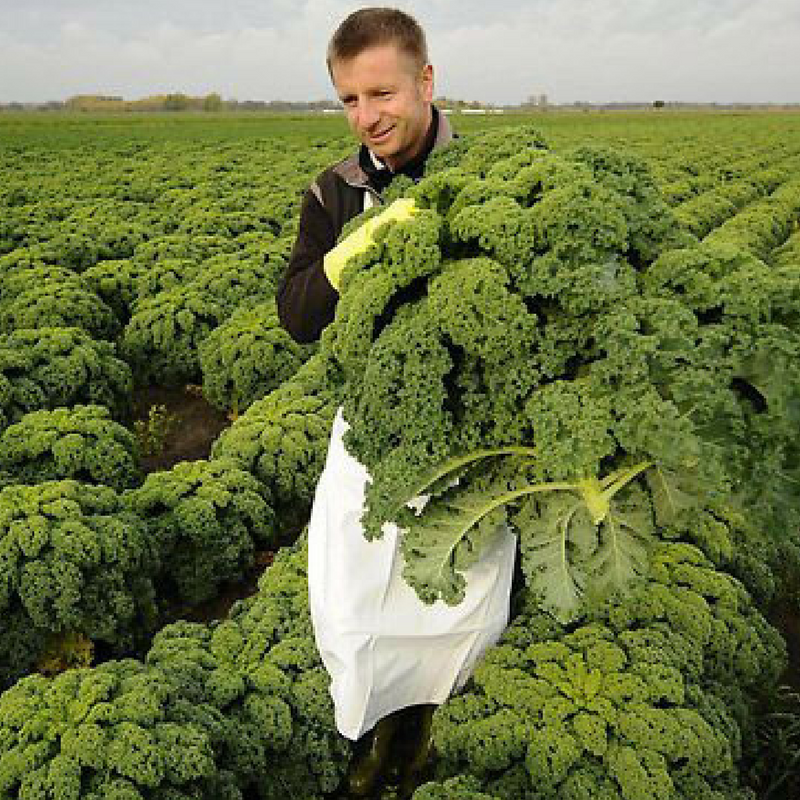 The rate of seed consumption with direct sowing usually increases by 40–80%. In the catalogs of the Syngenta company, you can always find recommendations on the planting density of a particular hybrid. Schemes may also differ slightly from each other; the most common is a row spacing of 70 cm. When growing early cabbage under covering material, the row spacing can be reduced to 45–50 cm.
Watering
White cabbage is a very moisture-loving crop, so in areas with moderate rainfall, it is necessary to organize irrigation either by sprinkling or drip irrigation. The advantage of drip irrigation is that with this method of irrigation, it is possible to simultaneously introduce nutrients into the soil, and when watering by sprinkling, it is possible to reduce the air temperature around the plants, thereby reducing the stress load during the daytime. When watering cabbage, you need to maintain soil moisture at 80% of HB. A decrease in soil moisture to 70% HB, even for up to 5–6 days, leads to a decrease in yield. The maximum irrigation rate during sprinkling is limited by the formation of surface runoff. Since late and medium hybrids of cabbage are planted at a later date, it is necessary to pay special attention to preplant watering. nine0003
Inter-row treatments
Periodic inter-row treatments are essential to ensure optimum water/air balance and weed control. During their implementation, it is necessary to choose such working bodies of cultivators so that there is no injury to the crop, and the untreated zone would be minimal.
At the present time, the most appropriate use of cultivators with finger-type working bodies, which carry out the processing not only in the aisle, but also between plants in a row. Cultivators of this type allow simultaneously with cultivation to apply mineral fertilizers and carry out spraying. nine0055 Pests: treatment and prevention
“Schi and porridge are our food,” says an old proverb. And what are cabbage soup without cabbage? Let's talk about her.
Currently, there are more than 100 species and many varieties of this crop, among which there are favorites that give a good harvest and have excellent taste.
Botanical description
Cabbage belongs to the cruciferous family, together with rapeseed, mustard and some other plants. The most common are white and red heads, Savoy, Brussels, kohlrabi, color and Beijing. The last two are annual crops, unlike the others, which live for 2 years.
All types of cabbage differ in appearance, but they have a similar type of reproduction - with the help of seeds formed after flowering. They have a spindle-like root, from which a single stem grows, covered with dense leaves arranged alternately. In some varieties, they gradually form a head. The flowers are collected in a brush, often differ in yellow. After flowering, a pod with small seeds is formed. nine0003
Species and varieties
Cabbage is often grown in household plots and dachas throughout Russia. The choice of seedlings depends on the region of growth, as well as taking into account the purpose of use. For example, red-headed species are not used in salting, for baking and are not added to soups, but in salads it is especially good. In the Moscow region, the most popular are early, varieties, medium-late, as well as options for the average ripening period. Among them, several names stand out in particular. nine0003
Rinda
This white cabbage is a first generation hybrid and has already become a real legend. It has been grown in Russia since 1993. A compact rosette of powerful leaves is slightly raised, but changes its position with age, starting to go around a head of cabbage, up to 3.7 kg in size.
It has a neat shape and looks spectacular in the autumn garden. Round, slightly flattened, outside it is colored light green, and in the context it has a white color with a yellowish tinge. The texture is dense, the vegetable crunches pleasantly, very juicy and tasty.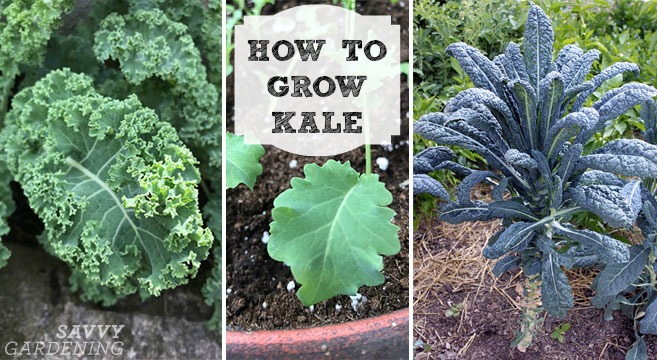 Refers to mid-season, on average, the crop can be harvested 130 days after planting. nine0003
Benefits:
- Good yield.
- Resistant to most plants.
- Unpretentious care, excellent germination.
- Not afraid of temperature changes.
Disadvantages:
- Moisture-loving, does not tolerate long droughts.
- Needs full sun, does not grow well in shady areas. nine0056
- It is not recommended to plant it in lowlands where there is a risk of stagnant water.
Nadezhda
The variety has been grown by gardeners for several decades and has proven itself well when grown in central Russia. The cabbage head is rounded, slightly flat, distinguished by density and elasticity. The size is medium, the stalk is small. The leaves are light green, tightly adjacent to each other, white on the cut. nine0003
Advantages:
- Yield does not depend on weather conditions, heads are formed even in drought or excess moisture.
- Beautiful appearance attracts attention, goes well with excellent taste.
- Early growth, allowing you to get a harvest in August.
Shortcomings:
- No significant shortcomings of the variety were recorded by plant growers. nine0056
Megaton
Mid-late hybrid with even, slightly flattened heads. The leaves are dense, rounded, tightly fitting each other, the inside is white. The average weight of a vegetable is 3-5 kg, but it can be 2-3 times higher than this figure under good weather conditions and proper care.
Benefits:
- Small stump even when growing up to 15 kg. nine0055 Cold resistance.
- Excellent taste.
- Resistant to most diseases, including clubroot.
Flaws:
- Leaf stiffness after harvest.
- Short shelf life - 1-3 months.
Aggressor
Mid-late hybrid variety bred by Dutch breeders.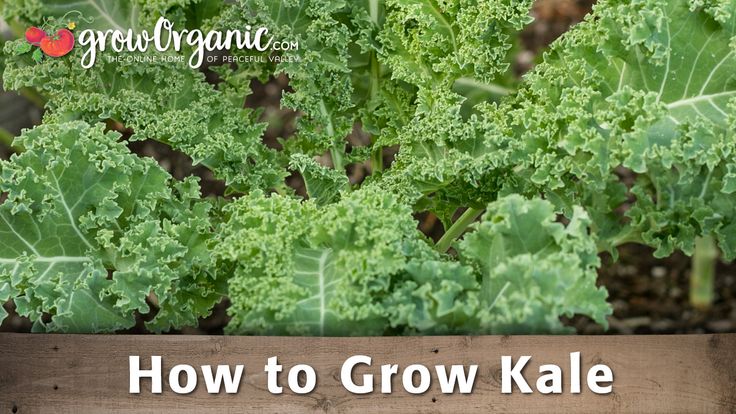 It features a neat shape of forks weighing up to 6 kg. The socket is voluminous, raised above the ground. The covering leaves are grayish-green, have a bluish tint. On the cut are bright white, there may be a slight yellowness. The taste is pleasant, sweet, there is juiciness and crunch. nine0003
Advantages:
- Characterized by good germination and yield.
- Undemanding in care, easily tolerates adverse weather conditions.
- Resistant to fusarium and spot necrosis.
Faults:
- Not immune to keel, attracts aphids.
- When sour, it may be slightly bitter.
Kalibos
Red-head varieties are not so popular among summer residents, since most of them are hard, inconvenient when used fresh and when preparing salads. However, in Kalibos, the leaves are tender, they are juicy and with a mild taste. Many gardeners note the spectacular appearance of heads of cabbage, reminiscent of buds.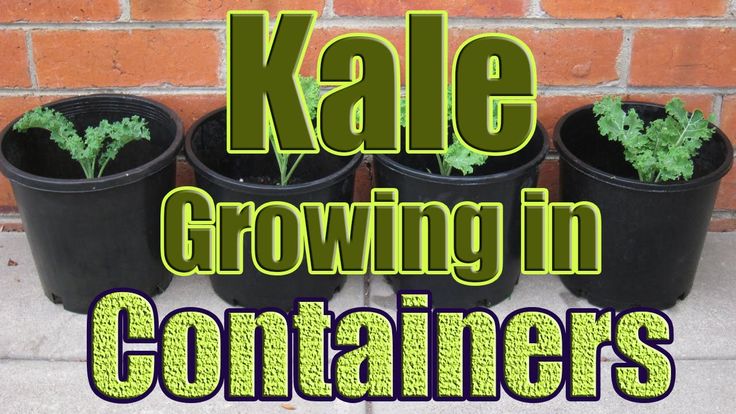
Advantages:
- Regardless of the place of growth, it gives a high-quality and abundant harvest. nine0056
- Not afraid of cold weather.
- Possesses resistance to pests, is practically not subject to various diseases.
Disadvantages:
- Does not tolerate long-term transportation.
- Needs bright sunlight.
- Has an average ripening period.
Movir 74
Cauliflower bred for cultivation in all regions of Russia. It belongs to mid-season varieties, is universal in use, suitable for dietary dishes and baby food. Delicious stewed, can be used boiled, baked, fried. The bushes are low, compact, the outlet is not more than 70 cm in diameter. The head is snow-white, can reach 30 cm. It has no voids, has a delicate taste without bitterness. nine0003
Advantages:
- High yield and keeping quality.
- Resistant to heat and frost.

- Has immunity to infections.
- Handles transportation well.
Faults:
- May be attacked by small pests.
Brilliant
A late-ripening hybrid that allows you to grow high-quality Brussels sprouts throughout Russia. The fruits are bluish-green in color, there can be 30–60 of them on one plant. Differ in excellent tastes. nine0003
Benefits:
- Increased yield.
- Has resistance against most diseases.
Flaws:
- No significant flaws were found.
Savoy cabbage Golden Early may turn out to be interesting for summer residents, since this low-calorie vegetable contains more vitamins and microelements compared to white cabbage. Also in the Central European part of Russia, kohlrabi is successfully grown, among which the Delicious Belaya variety stands out. Fans of Beijing cabbage will like the Manoko hybrid, which is resistant to shooting and withstands cold snap well. nine0003
Cultural history
The name of the vegetable has ancient Roman roots. It comes from the word "kaputum", translated as "head". This culture was first described by the ancient Greek naturalist Theophrastus around 372–287 BC.
However, the origin of the popular vegetable remains unknown. History has not preserved information about who and where discovered the sprouts of wild cabbage, because all varieties known today are cultivated. The most likely contenders for the right to be called the birthplace of culture are Italy, Greece and Georgia, but it turned out to be especially popular in Ancient Rome. The population of this country began to grow its varieties, which previously did not arouse interest. nine0003
The plant has been known in Rus' for a long time. The first vegetables were grown in Transcaucasia, where they were brought by the Greeks and Romans, approximately in the 7th-5th centuries BC, and it was from there that they spread throughout the territory of the Russian state.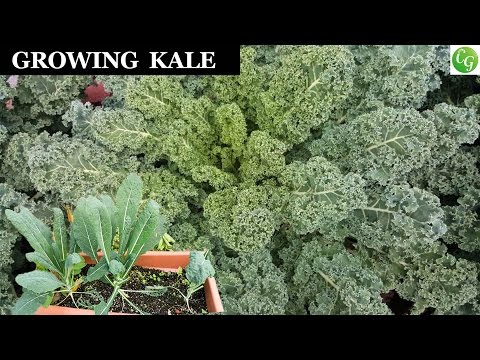 Strong heads of cabbage soon became a favorite crop of both peasants and nobility. The gardens in which they were grown were called skits. One of them was even given by the Smolensk prince Rostislav Mstislavovich to his friend as a particularly valuable gift. nine0003
Benefits and harms
A vegetable has many useful properties, but depending on the variety and species, the beneficial properties may vary. So, white cabbage, due to the presence of ascorbic acid in the composition, reduces the likelihood of developing malignant neoplasms and strengthens the immune system, and the folic acid content improves the functioning of the thyroid gland and regulates metabolic processes.
Red cabbage has a high content of carotene and anthocyanins. It strengthens the walls of blood vessels, makes them elastic and resilient, and prevents leukemia. It is useful with an increased background radiation, as it reduces its detrimental effect on the body.
Cauliflower is better digestible than other types and can be used as a diet food. It has a high content of biotin, which prevents inflammation of the skin. Its regular consumption reduces the risk of cancer. nine0003
Beijing cabbage strengthens bone tissue better than other types, Savoy cabbage perfectly copes with the normalization of blood pressure and relieves swelling. With a lack of iron and the need to normalize cholesterol levels, you should pay attention to Brussels. Kohlrabi also did not stand aside - it helps to normalize digestion and contains many useful substances.
However, this healthy vegetable can be harmful to the body. In addition to individual intolerance, contraindications include allergic reactions. White and red cabbage are not recommended for diseases of the gastrointestinal tract (GIT), the latter is also contraindicated in vascular diseases, as it reduces their patency. nine0003
Those who suffer from high blood pressure should avoid white and red cabbage. It is banned for those who have recently undergone a surgical operation, and the purines that make up the colored variety of the vegetable are absolutely contraindicated for gout. With caution, it should be used in kidney disease.
Savoy cabbage should be excluded from the diet if the thyroid gland is disturbed. Brussels is not recommended for exacerbations of the gastrointestinal tract, as well as for gastritis. It has no special contraindications to the use of kohlrabi. nine0003
Planting time
Planting rules vary depending on the climatic conditions of the growing region. For example, in the Moscow region, with a predominance of cloudy weather and fewer sunny days, compared to the southern regions, the seedling method of growing will be the most successful. When planting seeds in open ground, shelter is necessary until stable weather is established.
Early and hybrid varieties for seedlings are best planted in mid or late March, mid-late varieties will give a good harvest when sown in mid-April - early May. Late ones are planted at the end of May and until the beginning of June. When planting in open ground, these terms are shifted by 25–30 days. In the Urals and Siberia, seedling preparation begins later. nine0003
Plant care
When growing in central Russia, with its temperate continental climate, gardeners will not have any particular difficulties. However, in the first days after planting, plants should be covered with agrofiber or film. In the Moscow region, due to the instability of weather conditions in the spring, growing on warm beds showed the best results.
A necessary condition for a good harvest is regular irrigation with water. The first time after planting the seedlings, watering should be done at least every 2-3 days to prevent the top layer of soil that feeds the roots from drying out. After rooting, this interval can be reduced to a week, but without allowing the earth to dry out. A good solution would be a drip irrigation system. nine0003
Dusting with wood ash after irrigation is also recommended. It is done to repel insects and to feed the bushes. Important: 3 weeks before harvest, watering is stopped to avoid cracking the forks.
Loosening and hilling is necessary for the normal development of cabbage. On heavy soils, this procedure is carried out after rooting, after 10 days and after watering in the absence of mulching. The first loosening is carried out to a depth of about 5 cm, the second - 6–8 cm. In the future, a deepening of 8–10 cm is necessary. Hilling is carried out 2 weeks after planting the seedlings and repeated as needed. nine0003
Propagation
Cabbage is propagated by seeds formed after flowering. In two-year-old varieties, it occurs in the 2nd year of life. Head species are also sometimes grown from the stalks. To get seeds, you need to wait for flowering, but it is better to ignore the first arrows - the seeds from them will be weak. Further, the following recommendations should be followed:
- Having chosen the strongest plants, remove them from the soil along with the root, without shaking off the soil. nine0056
- Leave 3 cover leaves on heads before storing.
- Treat with ashes, dip the roots in a liquid mixture of clay and earth.
- Place in a room with a temperature of 1-2°C.
- In March-April, cut the stalk to a conical shape, leaving the top kidney intact and transfer to humus.
- At the end of April, plant in the ground, washing the clay from the roots.
Cauliflower seeds are obtained in the first year. To do this, choose the most healthy bush. After reducing the density of the head, the central part is removed. Among the side shoots, the strongest ones are left, no more than 5 pcs. The cut is treated with ash to avoid rotting. Flowering occurs in about a month, while the tops of the shoots should be pinched. nine0003
Diseases: treatment and prevention
Cabbage, like other home grown crops, can be subject to various diseases. In order to prevent the death of the crop, preventive measures are important. The most common diseases are:
- Root rot and blackleg.
 Prevention is the protection of seedlings from bacteria that provoke the disease. For this, Trichodermin or its analogues are used, strictly according to the instructions. When a disease occurs, the bushes should be disposed of by burning. nine0056
 - Kila. The fungus that causes the disease develops in a greenhouse, getting on plants during watering or ventilation. An infected plant is noticeable by a mutilated root system, on which growths and swellings are present. Later, the bush turns yellow and stops growing. There is no cure, and the parasitic fungus can persist in the soil for years. It is recommended to choose varieties that are immune to the disease.
- Cabbage mosaic. nine0032 The disease is carried by aphids. Causes "fading" and twisting of the leaves. It is not subject to treatment, so it is important to protect the seedlings from the spreading insect.
Pests: treatment and prevention
Modern varieties are generally resistant to pests, but this is not always the case.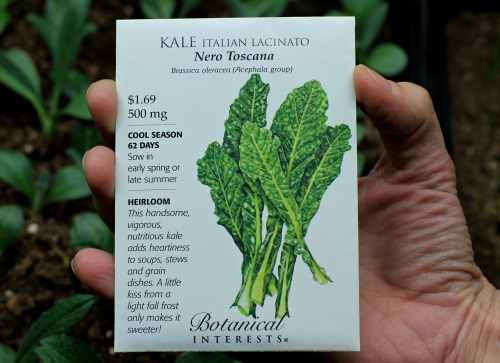 Therefore, you should know the main pests and quickly take measures to combat them. Most often, the vegetable is attacked by the following insects:
- Aphid. Particularly active in hot weather. You can fight it with special preparations, for example, Aktofit, and mechanical methods. As a preventive measure, nightshade, as well as garlic or onions, are planted next to the cabbage beds.
- Slugs. Intavir will help prevent their appearance, which should be sprinkled on the plant. This method also helps with cruciferous fleas. nine0055 Cruciferous bug. A small bright red parasite, up to 1 cm long. It sucks the juice from the leaves, which greatly harms the yield. As a preventive measure, calendula, tansy and wormwood are planted near cabbage bushes. The fight is carried out with a soap suspension (300 g per 8 l) or preparations such as Fosbecid, Aktara and similar, used according to the instructions.
Ripening and fruiting
Early varieties are cut from July, often leaving the stalk in place. Sometimes they manage to grow another small head of cabbage. Late cabbage is harvested in September-October, along with the stalk, after which it is cut to a few centimeters. It is preferable to store them on wooden racks. nine0003
Harvesting is carried out when the temperature drops to -2 C by digging up the plants with roots. Important: if vegetables are planned to be stored without salting, harvesting should not be started at temperatures above 8 C. To prevent spoilage, heads of cabbage are treated with crushed chalk.
Interesting facts and useful tips
The well-known theatrical skits appeared thanks to this culture. Initially, village festivities were called skits on the occasion of the end of the harvest of cabbage and the beginning of its preparation. In the 19th century, skits began to be called comic performances arranged by theater actors in a narrow circle of the troupe and especially invited guests, who were offered a modest treat in the form of pies with cabbage.