How do you clean kitchen cabinets
Cleaning Kitchen Cabinets: 9 Dos and Don'ts
Photo: istockphoto.com
Most of us spend the majority of our kitchen cleaning time focusing on the big three—sink, counters, and floors. It’s easy to forget that the cabinets require regular attention too, especially the doors. That’s where tiny droplets of cooking grease, food splatters, and steam tend to settle. This mess then attracts and holds dust, leading to dingy, dull, or streaked surfaces.
While a bit tedious, cleaning kitchen cabinets isn’t a difficult task, nor does it require the use of odiferous or potentially toxic chemicals. Whether your cabinets are painted or finished wood, they’ll perk right up with a bit of elbow grease and few common ingredients—just take care not to damage their finish with an overzealous approach. Here’s how to do the job right.
Some jobs are better left to the pros
Get free, no-commitment estimates from licensed cleaning professionals near you.
Find Pros Now
+ DO use a gentle cleaning solution.Leave the abrasive cleaners and scrub brushes to your sink; harsh scrubbing can damage kitchen cabinets’ finish or paint. Instead, prepare your own gentle cleaner by mixing one part mild dishwashing soap with two parts hot water, or the same ratio of distilled white vinegar to hot water. (When cleaning greasy kitchen cabinets, warmer water helps soften the grunge so you’ll be able to wipe it away more easily.) Pour your cleaning mixture into a spray bottle, and you’re ready to go.
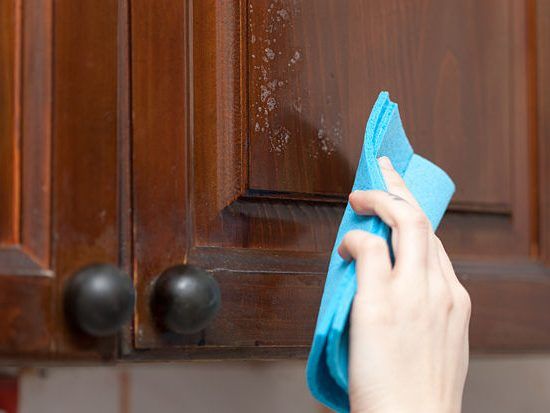
DON’T get your cabinets too wet.Spray the cleaning mixture onto a microfiber cloth or soft rag until it’s damp but not soaking wet. Too much moisture can damage your cabinets’ paint or finish. Wipe each cabinet door from top to bottom, paying extra attention to any trim or molding where dust and grime tend to accumulate. Don’t forget to wipe cabinet hardware, and the insides of the cabinet doors. Spritz more cleaning solution onto your cloth as needed, and squeeze excess solution into the sink if necessary.
Photo: istockphoto.com
DO tackle crevices and cabinet hardware with an old toothbrush.Some kitchen cabinets have ornate trim or deep grooves that a rag just can’t access. If this describes your cabinets, dip an old toothbrush into your cleaning solution and use it to gently scrub those hard-to-reach spots. Don’t forget the crevices around the cabinet handles or knobs, and the edges of the cabinet doors, which can be tricky to reach with a rag.
RELATED: How to Remove Grease From Kitchen Cabinets
DON’T let water seep into the hinges.Although your cleaning solution is safe for finished or painted wood, as well as laminate, it’s not intended for your cabinets’ hinges. You don’t want your efforts spent cleaning kitchen cabinets to leave you with rusted hardware. Instead, use a dry microfiber cloth to wipe away dust and grime from the metal. If there’s a particularly greasy or grungy spot, spray just a drop or two of cleaning solution onto your cloth, scrub the dirty spot, and then wipe the metal dry.
Advertisement
DO wipe away the cleaner with a final rinse and a quick dry.Once you’ve cleaned your cabinets, go over them once more with a clean cloth lightly dampened with warm water. This removes any lingering cleaning solution or grime. As with your cleaner, it’s best to work from the top of the cabinets to the bottoms to avoid drips.
Letting cabinets air dry after rinsing them can damage or bubble the finish. Instead, use a soft cloth to dry all damp surfaces and buff them to a shine.
RELATED: These Cabinet Customizations Are Totally Worth It, According to Pro Organizers
Photo: istockphoto.com
DON’T forget to clean the glass.If your cabinets have glass insets, spray a clean cloth with your vinegar mixture or a commercial glass cleaner (see and wipe the glass thoroughly on both sides. It’s generally fairly easy to remove dried food splatters, grease, and other kitchen grunge from glass, but you might need to tackle the spot twice to completely eliminate it. Don’t use anything abrasive on the glass, and wipe the panels dry once you’ve finished cleaning them.
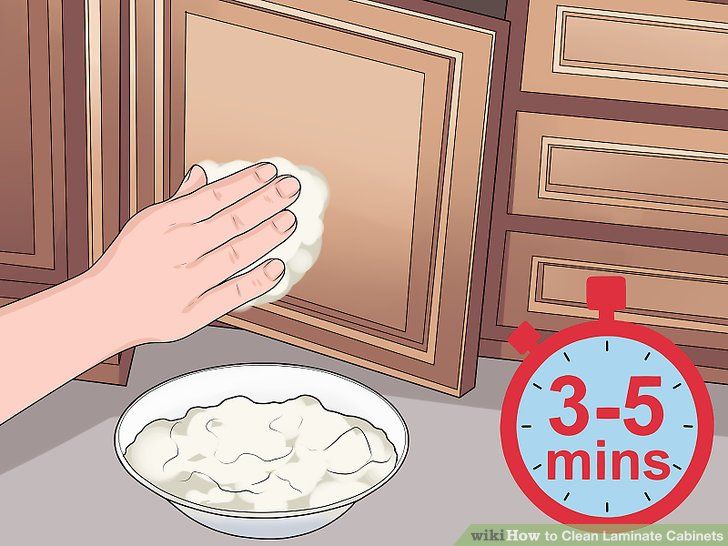
If stains, dried grunge, or grease remain on your cabinets even after you’ve finished your kitchen cabinet cleaning, you’ll need to add an extra step. In a small bowl, mix one part baking soda with two parts water. Use a clean, dry cloth to dab the paste onto the dirty spots. Let the paste sit for a few minutes, and then wipe it away with a damp cloth, gently rubbing until the grunge is gone. Wipe the spot again with a water-dampened cloth, and then dry with your microfiber cloth or soft rag.
RELATED: How Much Does it Cost to Refinish Cabinets?
Advertisement
Photo: istockphoto.com
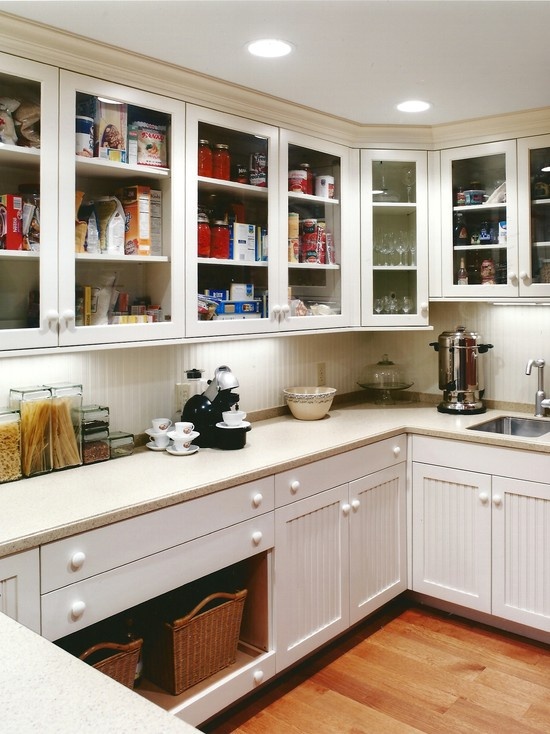
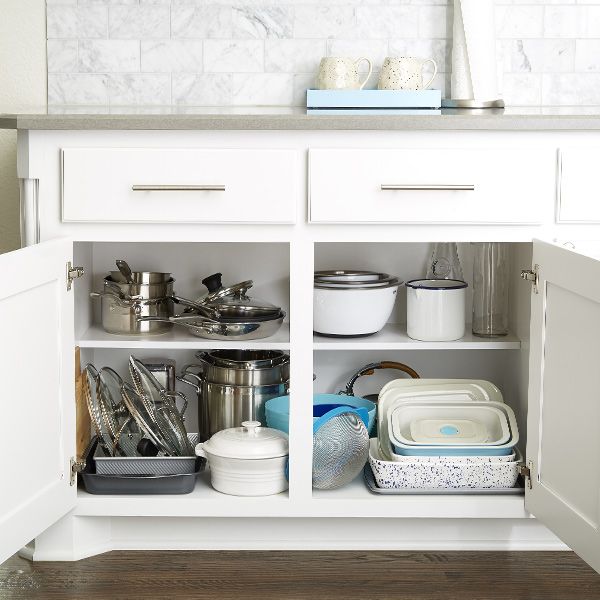
DON’T skip periodic deep cleaning.At least twice per year, take your kitchen cabinet cleaning up a few notches: Empty your cabinets entirely, and then wipe down the shelves, inside of drawers, and cabinet interiors along with the outer surfaces of the cabinets, using the same cleaning supplies and procedures outlined above. Before returning items to the cabinets, consider whether they are worth keeping. Toss or donate anything you no longer need or use, and get rid of heavily chipped dishes, cracked mugs, plastic storage containers with missing lids, and the other useless odds and ends that tend to accumulate in the deepest recesses of kitchen cabinets.
Some jobs are better left to the pros
Get free, no-commitment estimates from licensed cleaning professionals near you.
Find Pros Now
+How to Clean Kitchen Cabinets the Easy Way
Kitchen cabinets take a lot of abuse, suffering accidental spills, cooking splatters, and a continuous barrage of fingerprints. Yet those hardworking uppers and lowers tend to get short shrift during regular weekly cleaning, so by the time you realize they’ve been neglected, grease, grime, dirt, and smears may have built up considerably.
Related
How to Clean Marble
This is not merely unsightly: Oft-handled cabinet hardware can harbor germs, and food crumbs hiding in back corners can invite bugs and vermin. Plus, most kitchen cabinets are made of wood, a porous material that can become stubbornly sticky yet calls for a gentler approach than you might use on metal or laminate.
To get those crucial cupboards into pristine condition, follow this step-by-step guide—and make cleaning kitchen cabinets an open and shut case!
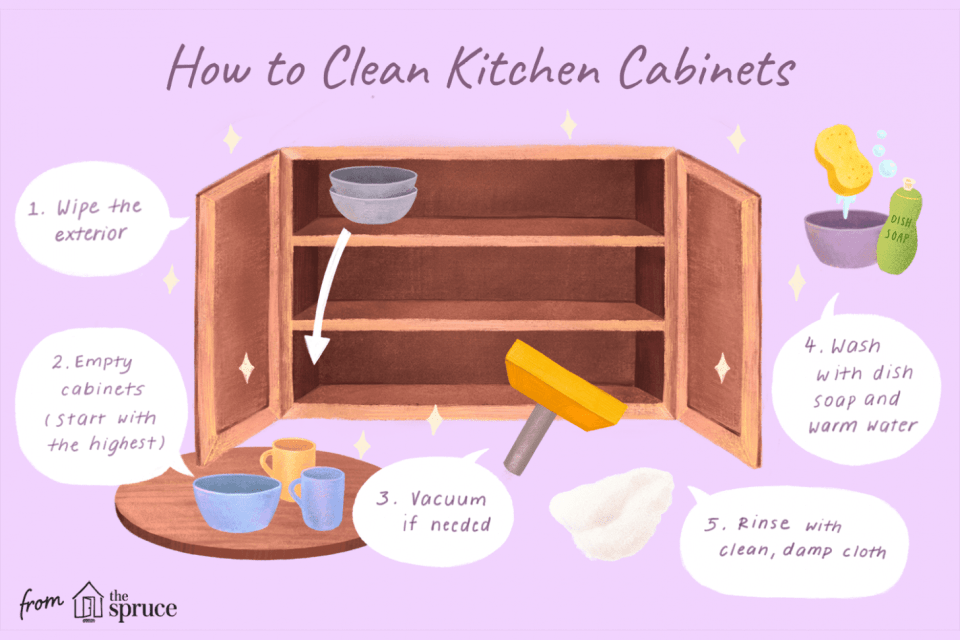
Step 1: Empty them out
- You may opt to stagger cabinet cleaning rather than attempt it all in one day since you’ll need to remove and temporarily store the contents on countertops or elsewhere.
- Once cabinets are empty, peel off and discard past-its-prime shelf paper if necessary.
- Vacuum or wipe crumbs and dust from the shelves and drawers.
Step 2: Tackle the tops
When cabinets aren’t ceiling height, those few inches atop the uppers can be a major mess magnet. Go at it on a sturdy step stool or ladder. If it’s just dust, deal with it using a long-handled duster or the small round brush attachment of a vacuum.
If grease has combined with dust, removing it may be the nastiest part of your cabinet cleaning mission.
- Squirt the surface with straight white vinegar, sprinkle on some baking soda, and give it several minutes of dwell time.
- Scrub with a sponge, then scrape with a firm straight edge, like an old credit card, wiping off the gunk with a rag or paper towels.
- Spray again lightly and wipe dry with a clean cloth.
Step 3: Mix up a gentle cleaner
The goal is to clean, not damage, your cabinets.
- A few squirts of mild dish soap in hot water is a safe and effective formula to use on painted and finished wood (as well as metal, laminate, and vinyl). It will purge dirt, smudges, and moderate grease buildup; to give the solution sanitizing oomph, add some white vinegar, which has antibacterial properties.
- To use: Mix in a spray bottle, but apply onto a microfiber cloth or sponge rather than directly on the cabinet surface, as it’s best to avoid saturating wood.
Step 4: Clean high to low
- Start with the uppers and work your way down.
 Do interiors first: the back wall, then the sides, then the shelves and drawers. Give extra attention to corners, spritzing cleaning solution on a toothbrush and scrubbing gently if necessary.
 - Follow with a cloth/sponge lightly moistened with plain water to remove any soap residue. Wipe dry completely after rinsing, then close the cabinets.
- Clean the sides of the boxes and do the doors/drawer fronts last.
Step 5: Go at the grease
A mild abrasive paste of one-part baking soda to two-parts water is a natural, cost-effective weapon against sticky, yellowish grease buildup that could do the trick.
- Apply to stuck-on grease, let it penetrate for several minutes, then scrub gently (no scraping!) with a soft-bristled brush.
- Rinse with a moist rag, sponge, or microfiber cloth, then dry.
If opting to tackle grease with a commercial product, spot test first on an inconspicuous area. Be especially cautious with magic erasers; these blocks of non-toxic melamine foam have the texture of super-fine sandpaper that can damage varnished wood and glossy paint finishes.
Step 6: Treat the trim
Grease and dirt love crevices, so both are bound to settle in cabinet trim—the more ornate, the cruddier it can become.
- Patiently purge with your basic cleaning solution and a soft toothbrush or cloth wrapped around your index finger.
- Rinse with a clean cloth moistened with plain water and dry.
Step 7: Handle hinges and hardware right
Go at metal aspects of cabinets properly.
- Wrap a dry cloth on your index finger to clean the hinges. If you encounter stubborn grease, spray a 50/50 water-white vinegar mixture on an old soft toothbrush to scrub it off, then dry.
- Employ the toothbrush approach to metal or ceramic hardware, and the areas around these handles, knobs, and pulls, all of which can accumulate grime and grease.
Step 8: Get the glass gleaming
- If you’ve got glass-fronted cabinet doors, use commercial glass cleaner or a homemade spray solution of one cup of rubbing alcohol, one cup of water, and one tablespoon of white vinegar on inner and outer panes.
Step 9: Clean the contents
- Before refilling shelves and drawers, inspect the cookware, dishes, food packages, etc. to ensure that those items aren’t dusty or dirty. Even if everything looks pristine, giving the contents a swipe with a microfiber cloth will warrant it worthy of returning to your sparkling clean cabinets.
How to clean a wooden kitchen set? Folk remedies.
If mothers and grandmothers were able to cope with grease and wash it off kitchen furniture without resorting to chemicals, then what prevents us from doing the same? wonder a large number of housewives in every corner of our vast country, and they are right. By adopting recipes that have been proven over the years, you can effectively deal with any type of pollution, and even stubborn ones. In this article you will find a detailed description of 6 magical recipes that will change your life once and for all. nine0003
Folk recipe No. 1. Mustard Powder
Mustard has long been a part of the life of mankind and has established itself as a multifunctional agent, so it is used not only for food, but also for cleaning furniture made of solid pine, birch, oak, beech. In addition, they wash dishes with mustard, they resort to its help to remove complex contaminants from the surfaces of various household appliances.
- Mustard powder treatment is very simple:
- Moisten the contaminated area with water. nine0010
- Sprinkle mustard powder on a damp surface of furniture, stove or household appliances.
- Rub with a dry kitchen towel.
- Wash the cloth with water, lather with laundry soap and remove mustard residue from the panel to be treated.
Therefore, mustard is a mild abrasive fat dissolver. It gently scrapes greasy dirt from the surface of your wooden kitchen without damaging the finish of the headset. However, this method is only suitable for cleaning fresh stains or minor old ones. nine0003
Folk recipe №2. Soap and Soda Combination (or Soap and Soda Solution)
Soap and soda solution works on the same principle as mustard, but is much more effective. The soap and soda combination easily cleans not only kitchen furniture made of solid pine, birch, beech and oak, but also kitchen appliances and household cutlery, ceiling and linoleum from greasy deposits.
In order to clean a solid pine, birch, oak, pine kitchen in this way, then you need to follow the sequence described below with complete accuracy:
- First you need to grind laundry soap (half of a bar), for this you need to use a food coarse grater.
- Then fill the chips obtained from soap with water, as a result you should get a cloudy and slightly viscous homogeneous solution.
- Use the resulting solution to clean the contaminated area with soapy water.
- Sprinkle some baking soda on the sponge immediately after applying the solution.
- And rub the treated area with soda. nine0010
- Watch for 20 minutes, let the dirt soak.
- After the required time, dampen a clean cloth and wash off the baking soda with soapy water.
Using a soap and soda solution, you can clean up and disinfect almost your entire kitchen, not only solid wood furniture, but also household appliances and utensils, from a microwave oven to enameled pans. If the furniture is glossy or varnished, it is worth resorting to a different cleaning method, since such surfaces are strictly forbidden to come into contact with even mild abrasives in order to prevent the slightest chance of scratches and other types of surface damage..
Folk recipe No. 3. Oil with soda
The combination of baking soda and vegetable oil cleans grease stains in the kitchen well, as it belongs to folk remedies that allow not only to remove dirt, but also to take care of wood.
- Make a creamy mixture of baking soda and sunflower oil by mixing the ingredients 1:2.
- Process the cured fat on a wooden chest of drawers.
- Use a soft brush to gently remove grease. nine0010
If furniture stains are difficult to remove, allow the mixture to penetrate into the structure of the stain for about 15 minutes, rub again and wash off the residue with a damp sponge and detergent.
Folk recipe No. 4. Alcohol-acetic solution
If you are interested in not only cleaning kitchen furniture made of pine, birch, beech and oak, but also its disinfection, then this method is right for you, as it will perfectly cope with washing a set of solid pine, birch, oak and beech, various kitchen appliances and various table utensils:
- Mix together one part of table vinegar with the same amount of alcohol (if alcohol is not at hand, you can use vodka, as it also does an excellent job of disinfecting).
- Now add two parts of ordinary water to the resulting liquid.
- Then add a third of a teaspoon of essential oil to the resulting mixture, as a recommendation we advise you to choose tea tree oil, because it also has excellent disinfectant properties. nine0010
- After the mixture is ready, you need to pour it into a spray bottle and use it to apply the product to the contaminated surface.
- Then allow the alcohol-vinegar solution to soak in for 10-15 minutes.
- And after this time, all you have to do is wipe the kitchen furniture made of solid pine, birch and beech from grease with a damp sponge or cloth.
It is also worth noting the fact that essential oils not only perfectly disinfect, but also bring pleasant notes of freshness to your kitchen, which will scatter all over the room in no time, adding even more coziness and comfort. nine0003
Folk recipe No. 5. Ammonia
Each of us, one way or another, has ammonia in the house.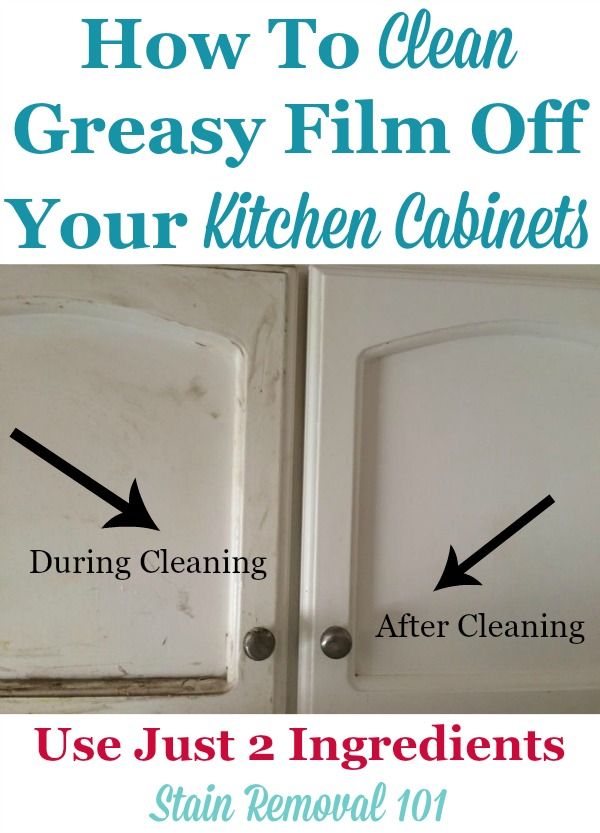 Look in the first aid kit and there you will easily find it. But few people know that it can also turn out to be an excellent tool for combating grease pollution, it is able to save your wooden kitchen set made of pine, oak, beech, birch from unpleasant stains on the surface.
But before you start working with this tool, you need to take care of opening the window. nine0003
The algorithm for working with this tool is very simple:
- First, mix a tablespoon of ammonia with a liter of water.
- Then soak a sponge or cloth in the solution.
- Walk it over all surfaces that have been contaminated.
- Wait literally 5 minutes.
- After 5 minutes, remove the solution with a damp sponge.
With this easy and affordable tool, you can instantly wash kitchen sets made of solid pine, birch, oak, beech and household appliances. nine0003
Folk recipe No. 6. Hydrogen peroxide (peroxide)
A mixture of hydrogen peroxide and soda will help you clean the baking sheet to a shine. Fat contamination affects not only household appliances and kitchen sets made of solid pine, birch, oak and beech, but also dishes. It is especially difficult to remove dirt from a baking sheet. Hydrogen peroxide (peroxide) can facilitate this task:
- Add soda to a small amount of hydrogen peroxide (peroxide) until a sour cream consistency is formed. nine0010
- Spread the resulting mixture on a baking sheet, leave it to sour for at least half an hour.
- Use a brush to remove any remaining grease and rinse the tray with clean water.
Summing up
Cleaning is not a pleasant process, especially if you are faced with the dilemma of how to clean the kitchen set from solid pine, birch, oak and beech from fat. Tables, cabinets and stoves get dirty very quickly and accumulate on their surface traces of cooking, which are extremely difficult to get rid of over time, and it takes a long time to wipe them clean. For this reason, it is necessary to have at least some idea of how and with what it is possible to quickly and effectively wash grease stains from the surface of furniture, thereby greatly facilitating one’s task
After the proposed options and recipes, you should have no more questions than to clean the fat in the kitchen. You just have to choose the appropriate option and enjoy perfectly clean surfaces.
Modern housewives have in front of them a huge selection of various cleaning products, from which some simply run their eyes. But even with such a wide variety, more and more housewives are resorting to the help of old and time-tested cleaning methods, adopting effective folk remedies. nine0003
How and with what to clean kitchen cabinets from dirt and grease? — Domashnosti.ru
Contents:
You probably clean kitchen tables and kitchen floors every day, or at least regularly. On the other hand, your kitchen cabinets may not get the attention they should. All day they collect dirt, dust, splashes, grease and other food debris; over time, this mixture sticks to cabinet surfaces like a tacky adhesive that is difficult to remove. In addition to being an eyesore, dirty kitchen cabinets can pose a health hazard: bacteria such as salmonella can settle on handles and shelves. Therefore, kitchen cabinets need simple and regular cleaning. nine0003
How often should kitchen cabinets be cleaned?
Ideally, kitchen cabinet surfaces should be wiped down every week or at least twice a month. But every few months, kitchen furniture needs a deep cleaning. The idea of cleaning out all the lockers at once can seem daunting, so it's best to do it gradually. For example, if all of your dishes are in the dishwasher at the moment, you can use this feature to clean the area where they are normally stored. nine0003
How do you clean kitchen cabinets from the outside?
Most kitchen fronts made of metal, plastic, painted solid wood, chipboard, MDF or coated with self-adhesive film can be cleaned with a solution of liquid dishwashing detergent and warm water. This simple and gentle solution is enough to remove food residue, dust and minor grease from cabinets. Dishwashing detergent degreases and can even remove some of the hard deposits on the cabinet door. You can also use a specific furniture cleaner, but it's important to test it in an inconspicuous area to make sure it doesn't damage the front of your cabinet. And don't forget to read the instructions. nine0003
Start washing from the top and work your way down each cupboard. If there are no food and utensils nearby, you can spray the detergent with a spray bottle directly onto the surface; otherwise, spray onto a cleaning cloth and then wipe the cabinets. Don't forget the sides of your cabinets.
Wipe thoroughly with another clean and damp cloth before wiping dry. Water left on cabinets can discolor and damage them.
Use window cleaner to clean glass or mirror cabinets. Spray the cleaner onto a lint-free cloth or paper towel. Never spray the product directly onto the glass as it may seep into the woodwork or other parts of the cabinet and cause discolouration. nine0003
Don't forget to wipe cabinet handles and parts. For metal mechanisms on wooden cabinets, dip a toothbrush in a 50/50 solution of vinegar and warm water and brush the metal parts. Do this carefully so as not to discolor the base material of the furniture.
How to clean shelves and drawers?
Empty each cabinet shelf and drawer, starting at the top. If necessary, remove any torn or discolored lining. If cabinets have a lot of crumbs and food leftovers, they should be removed. You can use a vacuum cleaner for this. nine0003
Wash the inside of cabinets and drawers with warm water and a mild detergent.
Rinse again with another clean damp cloth. Wipe dry with a clean cloth to remove any moisture that could damage the surface of the cabinet.
Wipe dusty jars and containers with a damp cloth. Throw away any food that has expired. Dry items thoroughly before returning them to shelves and drawers. Leave cabinets open for 1-2 hours to dry completely before filling them. nine0003
How to remove heavy dirt?
Buildups of a greasy orange or yellowish sticky substance on kitchen cabinets are noticeable but not easily removed. A grease remover can help, but you should test it on a small area of your furniture to make sure it doesn't damage the furniture.