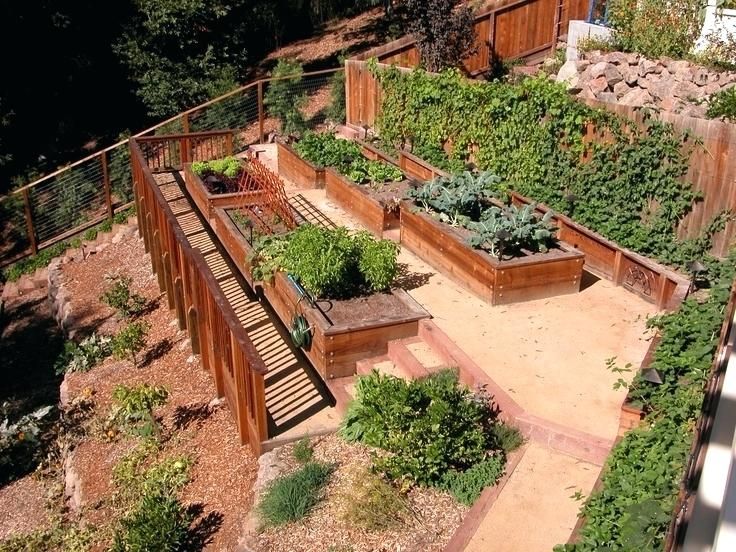
Hillside terrace garden
Here's a Quick Way to Terrace a Hill [+ Free Download]
Are you challenged with sloping land? Here’s a solution to stop erosion on a hillside and create an easily-navigable terrace garden. Oh, and don’t forget to grab your FREE DOWNLOAD: Building a Check Log Terrace Quick Start Guide at the end of the article.
This page may contain affiliate links. Please read my disclosure for more info.
In 2011, I started Hillside Community Garden, and as the name implies, we had a steep challenge. The hillside was prone to land-sliding and erosion. Any topsoil and nutrients that may have been there at one time had since washed away.
We were looking for a garden terrace solution that not only helped stabilize the hillside, but also helped increase fertility (to make up for all that had washed away). Oh, and the solution needed to be cheap and low tech, because after all, we’re just a volunteer group operating on a small budget.
Check Logs: A Garden Terrace for a Slope
I sought council from local permaculture practitioners, who suggested that I look into the concept of check logs.
I had no idea what check logs were, but I found more information in Edible Forest Gardens as well as in Rainwater Harvesting for Drylands and Beyond, where they are referred to as check dams.
A Check Log Terrace Summary
So what is a check log terrace?
In this method, logs and brush are laid across the hillside like a beaver dam and held in place with wooden stakes. Organic matter is added above the dam.
Perennials are planted above and/or below the dam, whose roots will soak up and slow the rain and nutrients as they rush down the hill.
Want to grow fruits, vegetables, and herbs in your front yard landscape without sacrificing curb appeal? Check out my ebook, The Permaculture Inspired Edible Landscape.
Building a Check Log Terrace in 8 Steps
The following are the steps to build your own check log terrace.
#1: Drive stakes along an elevation contour line.
Contour lines are those that you see on an elevation map.
Imagine a flat dinner plate with a tablespoon of water on it. When the edges of the plate are level (all on the same elevation contour), the water stays on the plate. However, if one edge dips to the side (changes elevation), the water runs off.
When building terraces, find the contour line to keep the rainwater on the plate (terrace) so it can slowly sink in. A low-tech gadget called an A-frame level can help identify contours. Read all about this tool and how to build one here.
Drive stakes in along the contour line every 2-6 feet. The steeper the slope, the closer together the stakes should be.
Make stakes out of waste wood, buy 2 x 2 x 36-inch untreated pine stakes from a home improvement store, or buy untreated wooden deck balusters.
#2: Lay cardboard as a weed barrier behind the stakes. (We covered enough space to make a garden terrace three feet wide).
Free cardboard is a great weed blocker in managed garden areas. Lay cardboard like shingles on a roof—start at the bottom, top pieces at the top of the slope. Overlap the pieces by several inches on all sides—weeds will find any openings.
#3: Lay logs, limbs and brush uphill of the stakes to act as a dam.
We used logs and limbs that we cleared from the area in preparation for this project. If your check log area is already cleared, a local tree trimming company may be able to supply you with the wood you need.
Logs and limbs 1-4 inches in diameter work best. Logs that are 6-8 inches in diameter will work, too, but first, dig a little trench for them to sit in, to take some pressure off the stakes.
Pile the logs up so that they’re slightly higher than level, because the terrace will settle over time. Like this:
#4: Plug up the holes.
Pack twigs, brush, and leaf litter into the logs and limbs to act as a filter and hold in soil.
For this reason, fall is a perfect time to build a check log terrace!
#5: Add soil uphill of the limbs and brush, on top of the cardboard.
Fill soil on top of the cardboard until it’s level with the terrace.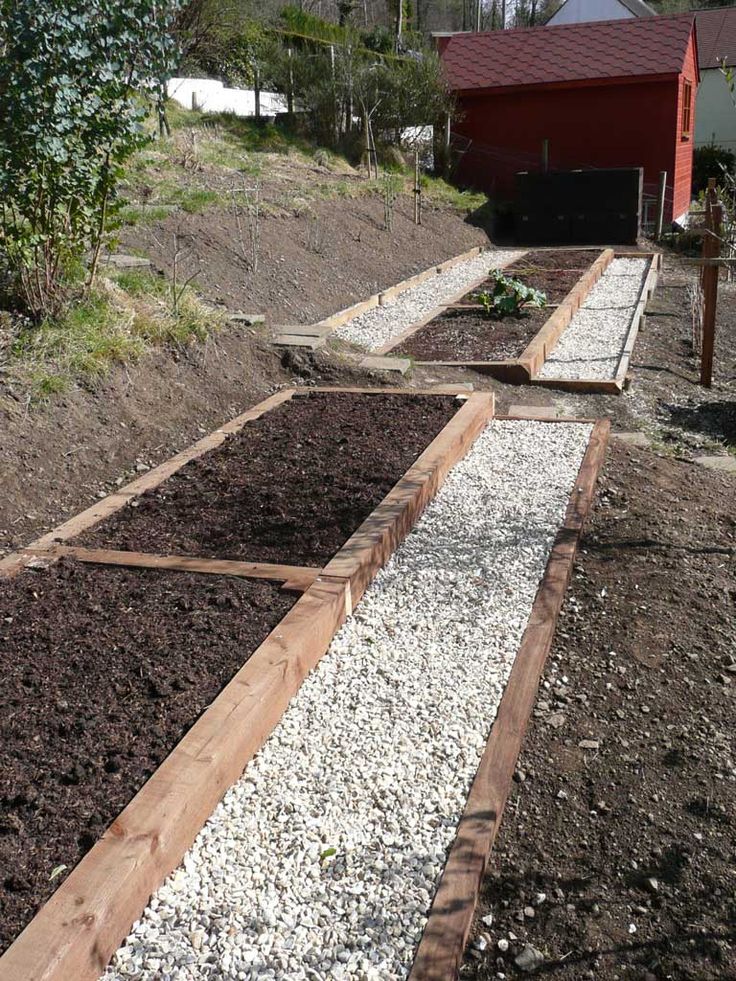 The soil will settle over time, so expect to add more in the future.
If you want to plant below the dam instead of above it, you can skip this step.
#6: Observe the terrace after a couple of hard rains.
How did it hold up? Are there any low spots that need more logs, leaf litter, or soil?
Check log terraces provide the foundation for wood chip paths to flank either side of this to-be fruit tree terrace.
Check log terraces provide the foundation for wood chip paths to flank either side of this to-be fruit tree terrace.
Do you have a grand vision for your site? If so, check out my Permaculture Design Program and become your own designer!
#7: Plant perennials in the new soil.
At this test garden, we’re planting fruit trees, berry bushes, and edible/medicinal herbs. It’s best to focus on perennials, whose roots will be permanent fixtures in the terrace to stabilize the hillside.
For my favorite planting ideas, see:
- Create a Food Forest
- How to Build a Fruit Tree Guild
- 4 Berry Bushes That Fertilize, Too!
The lower cinder block terrace includes strawberries, while the upper terrace is planted with raspberries.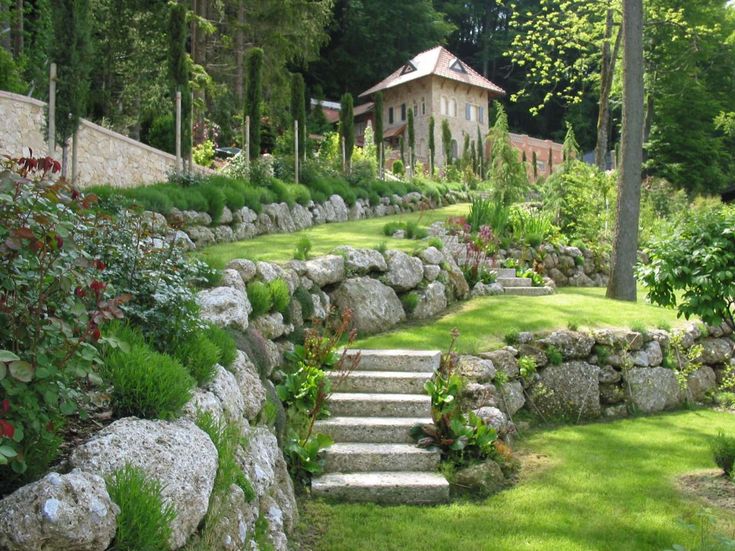
Mulch the planting area well to reduce erosion and to stabilize the soil in these new planting areas. I like white clover. For more ideas, see: Mulching in the Permaculture Garden.
#8: Observe over time.
As the terrace settles and decomposes over time, there may be little spots here and there that need to be plugged up, or a stake that needs replaced.
In general though, this little ecosystem you’ve built will do a good job of stabilizing itself without a whole lot of work on your part.
6 Benefits of the Check Log Terrace Garden
#1: Aerate Soil
Check logs loosen and aerate this soil so you can have a successful hillside garden.
#2: Catch Nutrients
Check logs are like nets, catching essential nutrients before they rush away in the rain.
See: How to Prevent Soil Erosion in Gardens and on Farms.
#3: Improve Plant Life
In check log terraces, plants thrive in the loose, aerated soil, rich in nutrients.
#4: Increase Organic Matter
Rich, aerated soil attracts worms and other beneficial soil organisms. As they go about their daily business, they wiggle in and out of the new and old soil, forming little tunnels and fertilizing everywhere they go.
Worms excrete a sticky exudate in these tunnels, which holds the loosened soil together so it doesn’t wash away. The tunnels allow air, water, and nutrients to penetrate deeper into the soil, preventing even more runoff and building nutrient-rich soil to support thriving plants.
#5: Attract Beneficial Fungi
Fungi are an indication of healthy, mature soil, and show up fairly quickly in check log terraces because of the decomposing logs. These fungal networks form beneficial relationships with the roots of the plants, and catch and hold both soil and nutrients.
#6: Build an Ecosystem With Very Little Work
Ultimately, a check log terrace on a slope will become its own self-sustaining ecological system, drastically improving the stability of the hillside and contributing to the regeneration of an eroded landscape.
SUMMARY
A check log terrace is so simple that it’s worth a try on your hillside today. Even better: if you change your mind, it’s just as cheap and easy to deconstruct 🙂
What do you think? Will a check log terrace garden improve your hillside?
READ NEXT:
- Front Yard Rainwater Catchment
- 5 Reasons to Grow Chives
- 6 Flowers to Grow in the Vegetable Garden
Avoid common mistakes of terracing
Knowing the Central Coast underground as he does, Rich Casale recommends that homeowners planning to terrace their properties proceed with extreme caution. His advice is pertinent throughout the hilly Bay Area.
Casale, an erosion and sediment control specialist for nearly 32 years with the USDA Natural Resources Conservation Service, serves as district conservationist for Santa Cruz County. "I see situations all the time where people terrace slopes, and then in some big rainfall year, the terrace ends up failing and causing damage to their home," Casale said.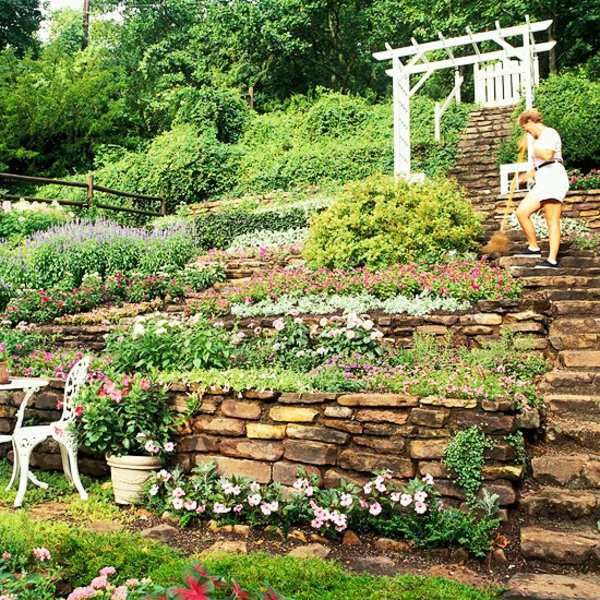 "When you don't have proper stability, or you cut into a slope that was unstable to begin with, you can trigger a landslide, a debris flow, a mud slide, or any number of slope instability conditions by that one act of grading a terrace."
Terraces on sloping properties can create level ground for fruits, vegetables, herbs and flowers. But they also can change how water drains off a slope, both the surface water and, in the case of a "cut" terrace, the underground water as well.
There are two ways to level the soil on the upslope side of a terrace's retaining wall. One is to bring in soil from elsewhere to fill the space, creating the so-called "fill" terrace. The other is to dig or "cut" into the hillside, shoveling the soil toward the retaining wall until a level area behind and slightly below the height of the wall is formed.
A fill terrace has some risks. Any retaining wall acts as a dam for the soil and water behind it. Like a dam, a retaining wall will fail if the pressure behind it grows too great. Heavy rains can cause a retaining wall to fail; so too can construction on a neighboring property that changes the flow of water downhill. The collapse of even a fill terrace can cause significant damage.
Cut terraces involve an additional dimension of risk. Clay often lies under a slope's more porous top layers. When it rains, excess water percolating through these layers will accumulate and spread out in a thin sheet once it reaches clay. Where a terrace cut has penetrated through to clay, water that accumulates on top of the clay layer during a storm can begin to flow or "daylight."
"You're creating a plane on which surface soil, once it gets completely saturated and becomes almost like a liquid, can begin to move. The whole mass can move on that slick clay layer," said Casale.
Casale says that cutting into a slope is always destabilizing and that the twitchy geology around the Bay Area doesn't help matters.
First reconsider whether a terrace is needed. Rather than attempting to grow annual vegetables and flowers on the slopes, the better choice might be fruit trees and perennial flowering shrubs.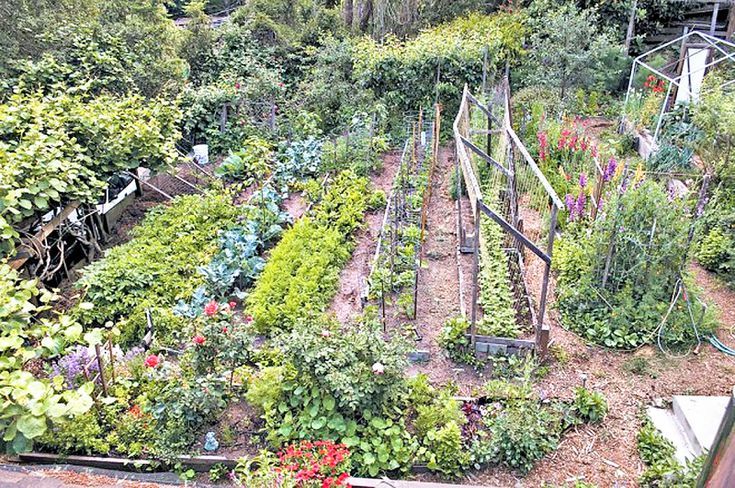 Trees and woody perennials don't disturb the soil much and can do fine on slopes. If the property contains both flat and hilly sections, planting annuals on the flat areas and perennials on the hillsides is better.
Otherwise, the design will help to minimize risk.
Avoid cutting into the slope. Trucking in fill will increase the cost of the project but may significantly reduce slope destabilization.
Casale generally recommends building several terraces with short walls instead of one deeper terrace with a higher wall to leave underlying clay layers alone during digging and leveling.
Beware ponding water
Make sure that the terraces can drain to reduce the pressure on the retaining wall. Also, take care that the terrace bed does not angle back in toward the slope and create an area where water will pond. Ponding water adds weight and pressure behind a terrace wall and can cause erosion if it begins to channel off to either side of the terrace.
Avoid situating the terrace where it will intercept additional runoff, perhaps from the roofs of houses and garages, or from drainage pipes farther up the hill.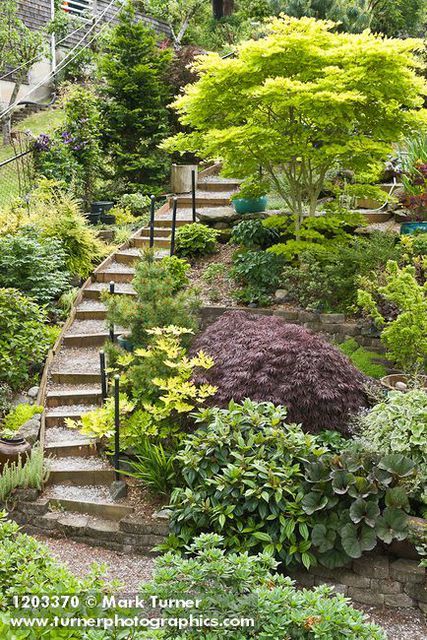
Bear in mind that a terrace is a long-term project. "Anytime you do something structural on the landscape, you're married to it," said Casale. And the marriage will need work. "By structurally altering a slope, you're building a lot of operation and maintenance into your hillside," said Casale.
Signs of trouble
Keeping an eye out for telltale signs of emerging problems can help prevent terrace failure. Look for water coming unexpectedly to the surface -- maybe up through gopher holes, or in new springs or seeps -- and ponding water. It can be a sign of poor drainage.
So too can the appearance of water-loving plants like reeds and rushes. Keep an eye on changes upslope that may influence how water moves off the hillside: new cuts in the hillside, for example, or a neighbor's new drainpipe. Monitor the walls for any sign of bowing outward. Act quickly if any signs of a problem emerge. "When terraces fail, they usually fail miserably."
Additional terrace tips from Rich Casale
When irrigating terraces in late summer and early fall, keep the soil below "fill capacity" to accommodate the added water load from early rainfall.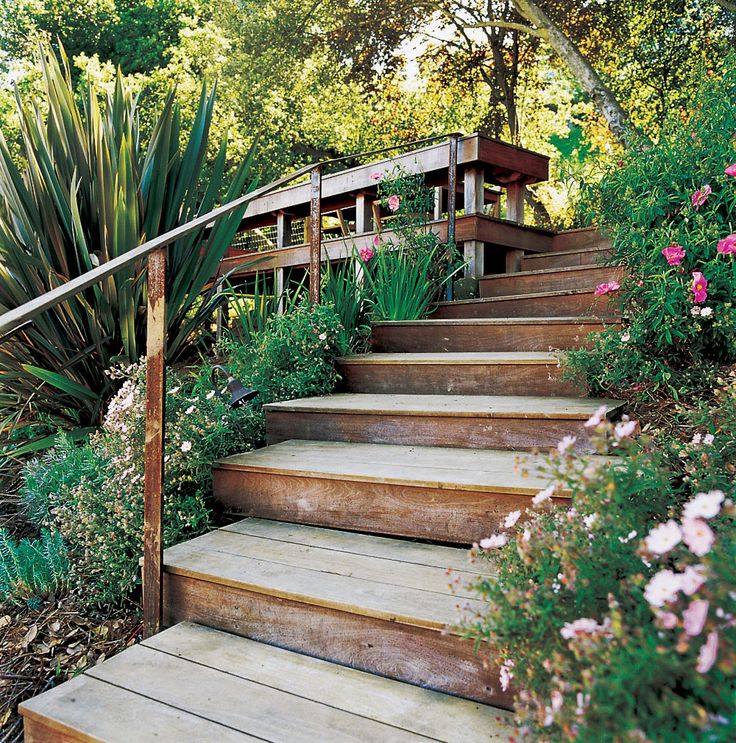
Continually improve your soil with the incorporation of organic material to improve water penetration. Mulch the soil surface to reduce the potential for surface runoff.
Terrace failure is usually caused by a combination of factors, including the immediate geology, the depth of the terrace, the number of cuts made, and heavy rains in a short time period. Try to consider them all before building, and seek local knowledge.
Know that you can be liable for damage caused to a neighbor's property when you change the flow of water down a hillside.
Take the time to build a terrace right; you will be living with it.
In heavy, potentially slope-destabilizing storms, don't be lulled into a false sense of security by the presence of a landscape terrace. If advised to leave your home, do so.
90,000 terrace on a slope (94 photos) 1Landscape architect Terrance
2
Terrace on a slope of
3
Mediterranean landscape Terrance
4
View from the terrace to the plot
5
Terrance of slopes in Garden 9000 garden slopes
7
slope landscape
8
slope terrace
9
Helen park + landscape
10
Terrance of hills
11
“House in the hill” Arthur Quormby
12
Terrance of slopes in the garden
13,0002 Terrance of hills
14,0002 terrace on the slope of
Landscap Terrance
9000 9000 9000 9000 9000 9000 9000 9000 9000 9000 9000 9000 9000 9000 9000 9000 9000 9000 9000 9000 9000 9000 9000 9000 9000 16Slope paths
17
Slope terracing in Crimea
18
Switzerland terracing big
19
Steps to veranda
20,0002 Terrance of hills
21
House on a slope with a terrace
22
Terrace landscape of a summer cottage
23
Pluging landscape of the site
24
Houses on the slope of the terrace
9000 25 DAY on the slope of the landscape 2021g 921G 9,000
26
Slope Terrace Garden
27
San Francisco Slope House
28
Alexander Park Terracing
29
Eco House in California
30
House on a slope with a terrace
31
Country House
32
Garden on a slope of
33
Terrace on the slope of the site
34
Renaissance Gardens
9000 9000 35Terracing of hillsides
36
Terracing of slopes in the garden
37
House with a veranda on a slope
38
Landscape of a narrow suburban area
39
Terrace landscape
40
Terrance of the site 10 acres of
41
House with a veranda on a slope of
42
Baskets on the slope of the ravine
43
Terras on the site
44
Garden on the slope of
9000 2 slope46
Chalet style shed roof cottage
47
Forest house with pool
48
Country house patio
49
Geoplasty Terrance
50
Garden on a slope of
51
Cozy courtyard in the dacha
52
Basin with wooden terrace
53
Scandinavian landscape style
54
Dacha house on slope
9000 55,0002 TERSION HOME56
Eco terrace
57
Forest view terrace
58
Slope terrace
59
Eco garden
60
Patio of wooden flooring
61
Modern architecture in the landscape
62
Modern villa in Italy
63
A country house with a terrace
64
House on the slope Tersing
65
House on the slope Landscape Holland retaining wall
67
Rockery terraced slope
68
Modern house on the slope
69
Landscape in front of veranda
70
Ecostil exterior
71
Terrance of slopes in the garden
72
Terrance of hills
73
Holland Landfinch wall
74
Transing walls
75
Bench on a slop slope project
77
Geoplastic retaining walls
78
Terraced slope lawn
79
John Brooks landscaper
80
Improvement of the site on a slope of
81
Gardens Louis 13 Terrance
82
House on a slope
83
Eco House in California
84
Rocariah Schele
85
Persona wooden sloped
87
Yard terracing
88
Terraced garden sloped
89
Chalet house exterior
90
Tyrolean house chalet
91
Terrace on a slope
92
House on an uneven plot
93
Landscape terracing on a slope
94
Terracing a vegetable garden
Garden and garden terracing on a slope (photo tips) | Do -it -yourself
Content ✓
- ✓ How to make a terrace
- ✓ Sad and a site on a slope - advice on readers from readers
- ✓ Video
Many owners of personal plots complain about the territory for their garden and their garden and a shortage for their garden and gardens, but at the same time, sometimes they have rather large undeveloped plots behind their fence, as a rule, they do not belong to anyone, suitable for registration for rent or ownership.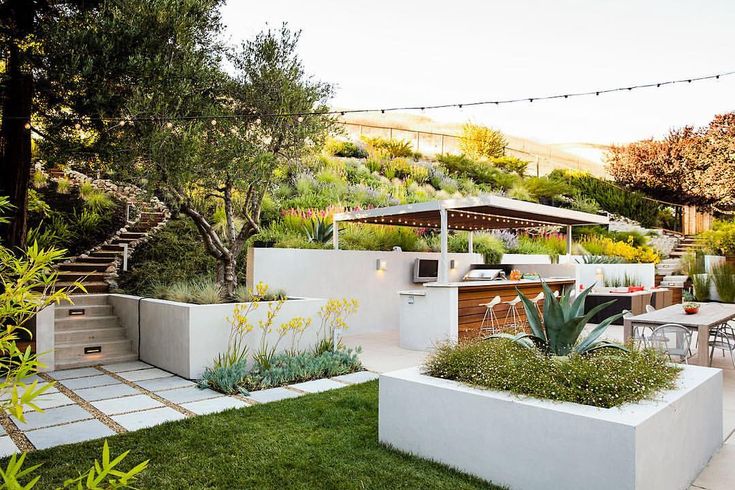 The main limiting factors are the lack of development of these areas, inconvenient terrain (slope or hillock), and clutter.
We once encountered a similar problem on our plot and made a fateful decision, which, on the one hand, kept our family busy for several years ahead, but on the other hand, allowed us to get the first harvests from a beautiful and beautiful garden in these few years.
Opposite our village house there is a ravine. Historically, this ravine was a road linking the village to the river floodplain. Since the slope itself is quite steep, the exit to the river was carried out along this ravine. But when we bought our house in the late 80s, this ravine was already heavily overgrown and partially littered with garbage (photo 1). Frankly, for a long time we also dumped our garbage into this ravine.
EVERYTHING YOU NEED FOR THIS ARTICLE IS HERE >>>
However, in the late 90s, bottles and old shoes were replaced by modern plastic packaging, and the volume of garbage increased greatly, unpleasant odors, rodents and flies began to overcome us that breed in this area.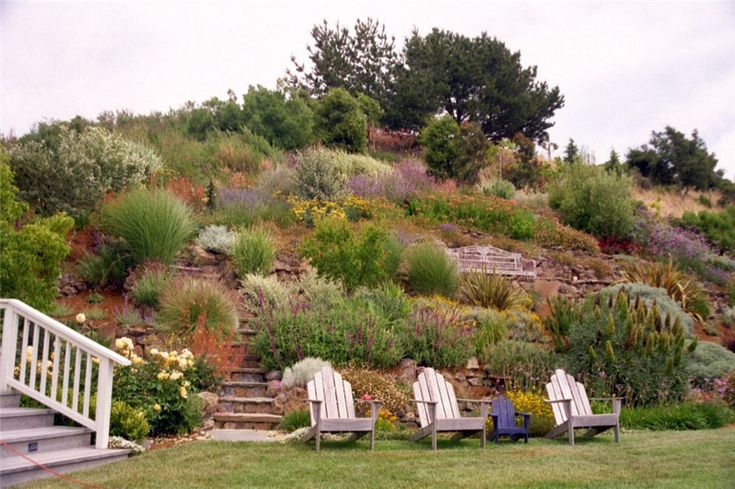 In addition, our main plot became small for us, it was time to start a garden, and we needed land.
So in 2004 we decided to rent a piece of land with a landfill. Having gone through all the difficulties with paperwork, we began to sort out the garbage. It would seem that a good deed should please the neighbors, but after the ban on the use of this landfill, for several years we faced opposition from some citizens and frequent scandals. Someone did not like to take out their garbage in containers or carry it to more distant places, and someone, apparently, was simply jealous.
At first, we had difficulty imagining what we would end up with, and so the first task was to take out all the garbage accumulated in the landfill over the years. The area covered with a thick layer of debris amounted to more than 6 acres. The rest of the area was littered, but not so much.
We raked the garbage onto a shovel, loaded it onto a hand wheelbarrow, and then unloaded it into the trolley of our minitractor (photo 2).
In total, in the autumn of 2004, about 40 tractor carts of garbage were removed (that's 7-8 KamAZ trucks).
See also: House and hillside plot - design and layout
The second stage of clearing included cutting trees. In total, 8 huge willows and one elm grew in this area, all with a trunk diameter of at least 50 cm, as well as many young trees and shrubs. The trees were used for firewood, with which we heated the bath for the next few years, and the branches and bushes were burned and gave about 20 full buckets of ash to fertilize the site. Also, in the process of garbage collection, we chose scrap metal, which later turned out to be one and a half tons.
We felt like we were archeologists a little while sorting through the rubbish. First, a fresh layer of the 90s - early 2000s was filmed with its plastic and bags, and then there was the old Soviet layer with tarpaulin boots, candlesticks, beds. Two toilet bowls were found (we did not understand where they came from in the village, where everyone has toilets on the street).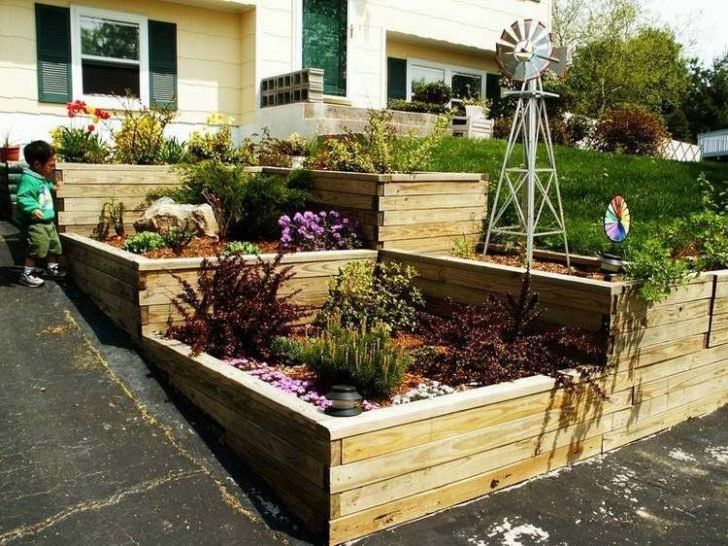 We left some kitchen utensils as a keepsake.
The following year, they began to improve the site. First of all, having hired a bulldozer, they developed 4 terraces on the right (north-western) slope of the ravine for the future garden (photo 3).
The soil on the slope was so poor that we often used this sand to make mortar and concrete. After a while, various weeds began to appear here and there on the bare sand. We began to mow them regularly, and thus, by autumn, we had achieved a sparse, but stable forb lawn on the terraces (photo 4). I note that we did not sow any special grasses in this area.
Thanks to weeds, we now have a stable lawn that has to be mowed up to 6 times per season. Moreover, we remove part of the mowed organic matter from this site for mulching plants. The main types of grasses on the site now are wheatgrass, dandelion, clover.
On the left (southeastern) part of the slope, we have been installing slate terraces for 4 years (photo 5). Slate was chosen as retaining walls because of its availability, durability, and strength. The free space of the terraces was filled with sod, which was cut in the field with a plow (photo 6). The cut strips were chopped into pieces with a shovel, manually loaded into a tractor cart and also manually unloaded. At first, this kind of soil gave a draft, so it was applied to the terraces with a margin, making the level slightly higher than the edge of the slate.
In total, in the period from 2005 to 2008 (the period of the construction of terraces), about 30-40 tractor carts of soddy land were imported per season. Additionally,
10 KamAZ trucks of ordinary infertile land were brought to fill the terraces where no beds were planned.
See also: How to plant trees and shrubs on a slope
In 2006, we fenced off a site with a total area of more than 20 acres. In the same year, tomatoes were planted for the first time on the finished terraces, which showed a very good yield due to the ideal location on the southeastern slope.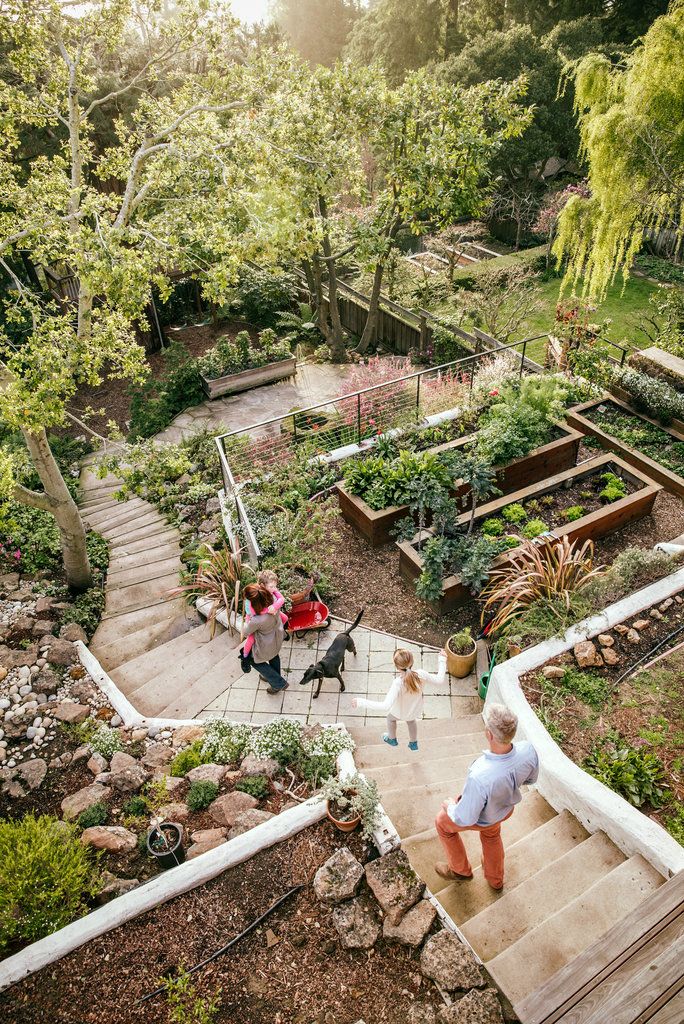
Due to the poverty of the soil in the future garden, about 70 planting holes were prepared for planting trees (photo 7). On the eastern side, a vineyard was planted and 17 bushes of various grape varieties were planted.
In the fourth year of development of the site, in 2007, all finished terraces were planted with tomatoes, peppers, eggplants, and grapes were already successfully growing on one of them. In the planting pits prepared in the fall of 2006, we planted the first fruit trees - apple trees, pears. In the lower part of the left slope, it was decided to make a greenhouse recessed into the slope (photo 8). The walls of the greenhouse were made of old glass, the back lower part of the wall was reinforced with slate, and the roof was covered with cellular polycarbonate. The result is the hottest greenhouse with a south-east slope and a back wall that accumulates heat well.
In the spring of 2008, 10 vines were planted in this greenhouse, which still produce the very first berries and delight with yield. In the summer of the same year, the first brushes were obtained from the open ground vineyard.
In 2008, two ladders were installed for ease of movement between the terraces. They were made of monolithic concrete, pouring steps on the formwork of slate.
In one place on the slope, where the terraces are located, groundwater was close, and we made a well there. The rings for the well were also made by ourselves, casting them from concrete in a special formwork with reinforcement. Now a well 2 m deep is filled with water by three quarters, and only in the dry year of 2010 there was very little water in it.
Next to the well, where the soil is constantly moist, we grow several bushes of blueberries, which love moisture very much. This culture, once in good conditions, annually pleases with a good harvest.
A garden is a place not only for work, but also for relaxation and contemplation. To this end, we built a small open gazebo, which overlooks our entire garden and the Moksha River, which flows 100 meters from the site.
In the spring of 2009, the grown orchard bloomed for the first time, with cherry, apricot, cherry plum, pear and apple trees giving their first harvest.
In 2010, an arched bridge was made for the convenience of crossing from one part of the ravine to another (photo 9). At the moment, a garden is growing on the site of the former landfill, which has 27 apple trees, 18 pears, 12 cherries, 23 apricots, 5 cherry plum trees, 6 plums, 7 cherries, 31 grape bushes, and in addition, 13 blueberry bushes, 5 blackberries, 2 felt cherries, 3 hazelnut bushes, several ornamental shrubs (photo 10). Introducers were also planted as an experiment: more than 30 bushes of various forms of walnut, 10 dogwood bushes, and a small zone of conifers was also planted. Such a large number of fruit trees, being, in fact, a mother garden, made it possible to engage in NURSERY.
Every year we grow more than 100 tomato bushes, about 30 pepper bushes, 20 eggplant bushes, cucumbers, beans, early root crops and green crops on the terrace beds, and plant vacant places on the terraces with various annual flowers.
With proper installation and organization of terraces, their operation does not cause trouble. Every year, before planting annual garden crops, we add a little humus to the planting pits. Once every 5-6 years, we fertilize the garden with manure, scattering it into tree trunks, which provides nutrition not only for the trees, but also for the lawn around them.
In 6 years we have turned the landfill into a beautiful garden. We hope that our experience will help other gardeners not be afraid to take on long-term and very laborious projects to change the environment around them.
See also: How to strengthen the slopes of ravines in the country
13 years have passed like a moment, and now only photos can tell us how things have changed. As they say, the eyes are afraid - the hands do, and after the hands rest - the eyes rejoice.
HOW TO MAKE A TERRACE
It is rare for anyone to clear landfills, but many people have to arrange their garden on the slopes, and sometimes the slope in the plots is so strong that artificial terraces are indispensable.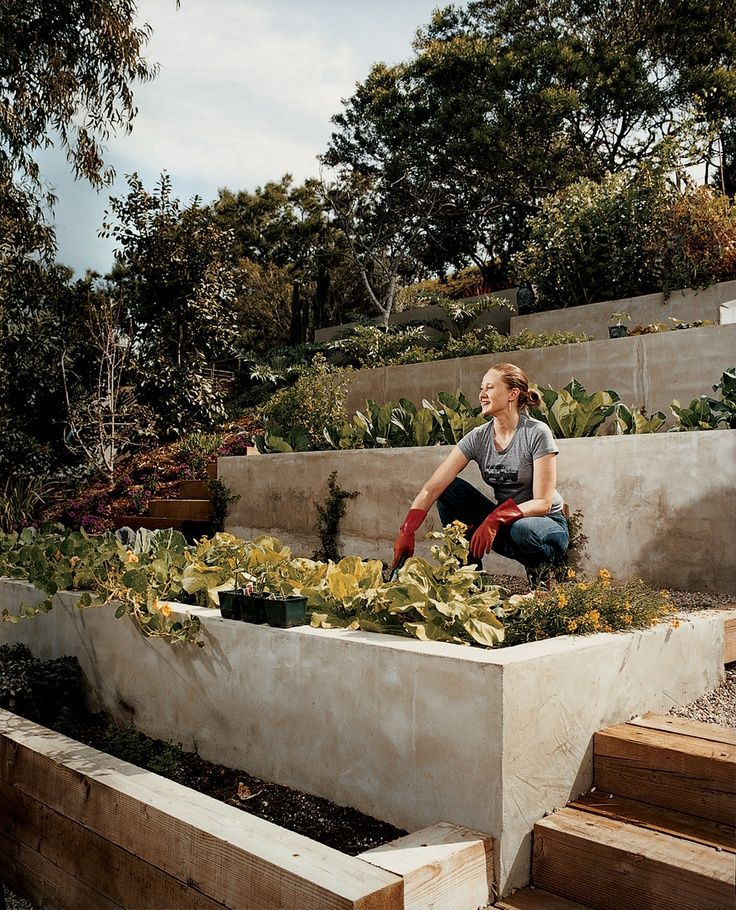 We tried to make different terraces - both from a whole sheet of slate (taking into account the depth, the difference between the terraces was about 150-160 cm), and from short sheets (where the height of the terraces was 25-40 cm).
Both options have the right to exist, but are not always optimal. High drops give a large horizontal surface area, but require great effort during installation and large volumes of soil to fill, in addition, such sheets have a large load of soil, they need to be better fixed. Small terraces with a rather high slope will give very narrow beds with more of them.
It is not always convenient in terms of landings and passages along them. We came to the conclusion that when the slope of the site is from 20-40 °, it is optimal to cut the slate sheet in half along the length. During installation, such sheets are buried 10-15 cm into the soil of the lower terrace and have a height of 60-70 cm. In addition, cutting the sheet in half allows optimal use of the material, with virtually no waste.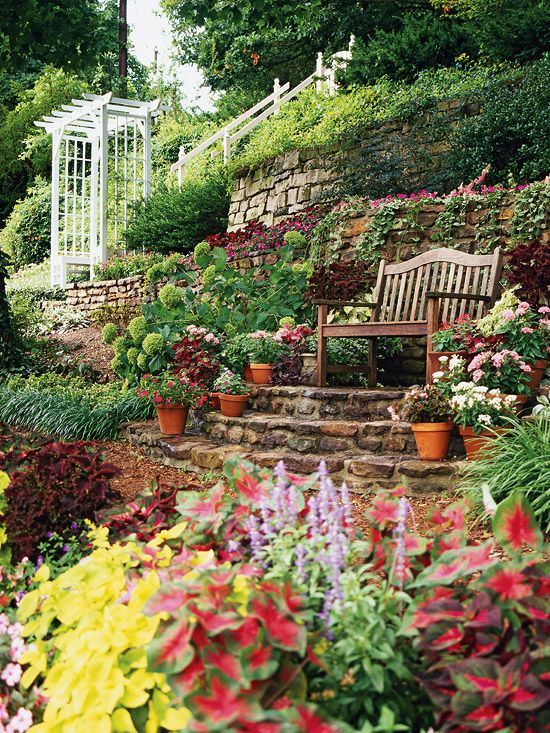
In order for the terrace to be stable, the slate must be installed with an inclination towards the top, so that the deviation from the vertical axis by the length of half the slate sheet is about 10 cm. contribute to the eversion of the lower part of the slate buried in the ground.
We fixed all the slate sheets on our terraces with anchors at the rate of 3 anchors per 1 pot. m terrace. Two holes were drilled on both sides of the wave and the sheet was fixed with steel wire 3–4 mm in diameter. And in the depths of the terrace, an anchor was driven in and a wire was tied to it.
Twisting the wire allowed to create a slight tension, thanks to which the slate sheet was fixed in the desired position. The depth of the wire depends on how the soil on the terrace will be cultivated. We often dig planting holes for various crops with a shovel, so we buried the wire 25-30 cm below the top of the slate sheet, and therefore the level of the soil on the terrace.
At the time when we had to make our own terraces, used slate was quite scarce, we even had to buy it.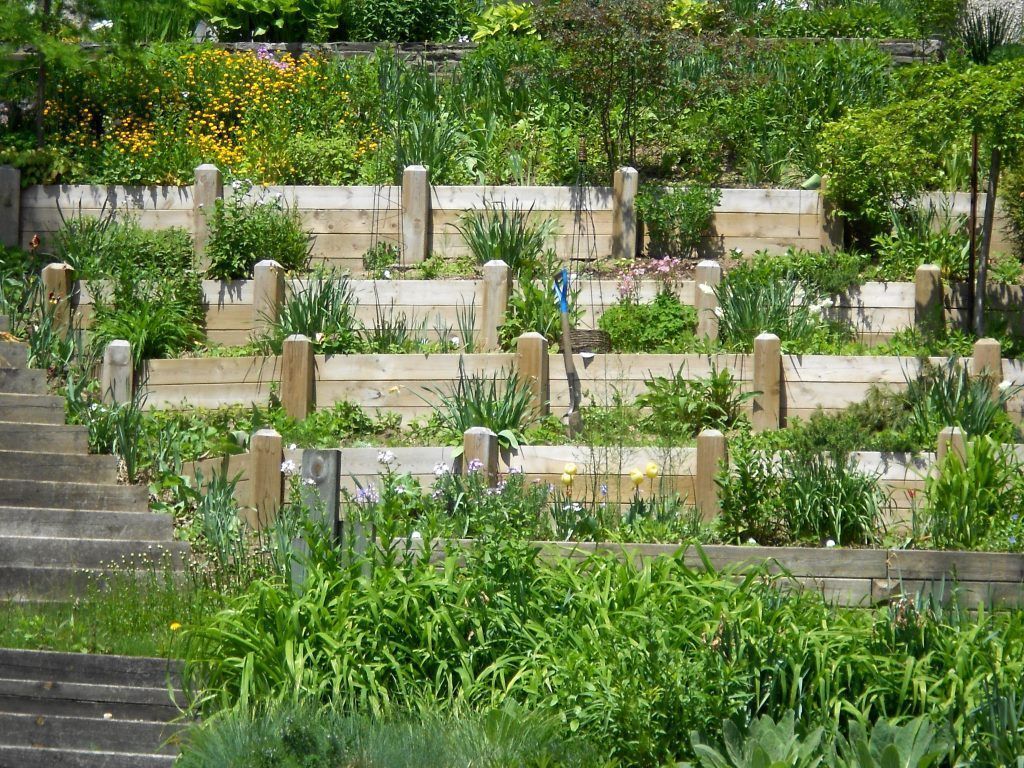 Now, many are changing slate for other coatings and are even ready to give it away just like that, if only they would take it with their own hands. So at present, making slate terraces is even more profitable and easier.
© Author: V. KUBIS, gardener, Penza
Watch this video on YouTube
GARDEN AND PLOT ON THE SLOPE - TIPS ON DESIGN FROM READERS
IT IS NOT WORSE TO LIVE ON THE SLOPE
If you become the owner of a summer cottage with uneven terrain - do not despair! An unpleasant surprise can be turned in a favorable direction. I will share advice on how to strengthen and make a hillside attractive, because I "passed" all this firsthand.
Pros - cons
What could be the pros - objected to me when I first bought a plot on a hillside. But these: stagnation of rainwater is completely excluded here. The area facing the sun is well lit, so everything grows well on the slope, especially on the south side.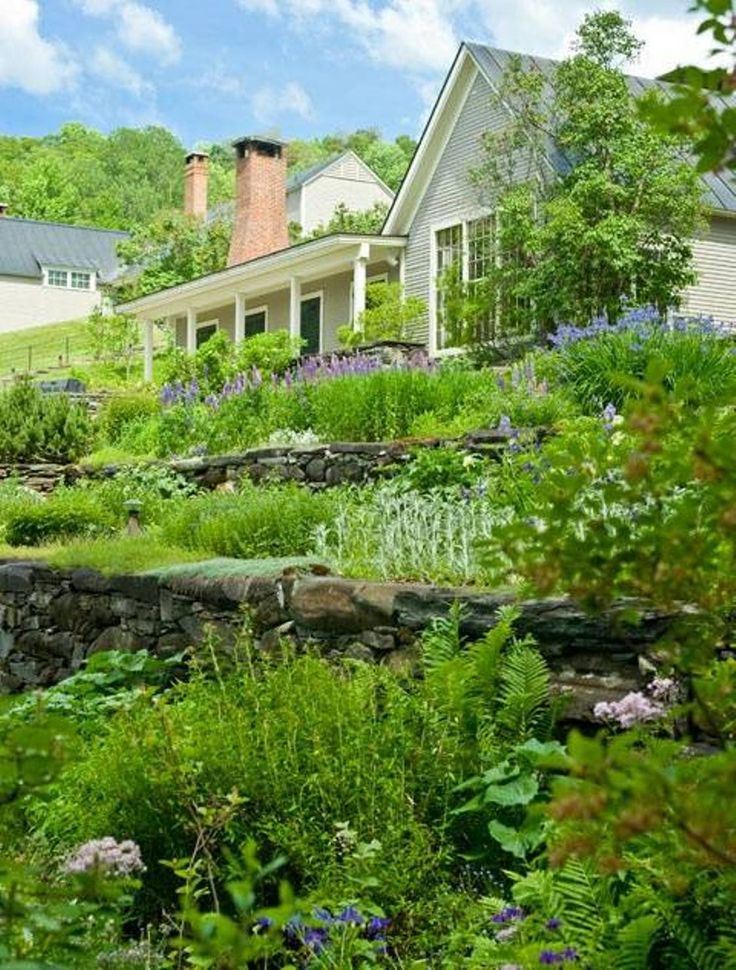
Of course, but there are no downsides. Additional watering is required, and sooner or later you have to think about strengthening the slope. True, there is another option: simply level the entire area by pouring imported soil, but this is very expensive and laborious.
Note
Broom, elderberry, viburnum, Japanese quince, skumpia, barberry, cotoneaster, wild rose are well suited for decorating a steep edge or ravine.
Slope - Steep
Steep slopes require a more serious approach, they can be reinforced with retaining walls of kamcha and logs. These materials are laid on the outside of the slope, fixed in various ways: with cement or fixing in the ground (burrowing into the ground).
Geogrid
I solved the problem by using a volumetric geogrid. It is a kind of honeycomb made of polymer material. Perhaps this method will seem more complicated than all the others, because the soil must first be prepared (cleaned, removed large plants, leveled and compacted), decomposed, deepening a little into the ground, “honeycomb”, and then fill their cells with sand or earth . But, as calculations and practice have shown, this is the simplest, most affordable and reliable option. In this way, you can even fix the slope of the ravine.
Thanks to the strengthening of our slope, we arranged beautiful terraces and an alpine hill on the site, and there was also a place for beds and a berry patch. All this looks very unusual.
Slope - gentle
So, if you need to strengthen the slope, several factors should be taken into account: soil structure, degree of slope, the likelihood of landslides, erosion, shedding. For a gentle slope (when the angle of inclination does not exceed 8-10 degrees), it is enough to plant plants that will fix the soil with their roots and stop the process of destruction. The correct glazing of the beds will also help: it is better to place vegetable beds among the soddy land in small strips across the slope, without being carried away by excessive digging.
Green manure should be sown in the near-stem circles of fruit trees to fix the soil.