Herb basket ideas
Herb planter ideas – ways to grow in containers and pots
(Image credit: Leigh Clapp)
Are you looking for herb planter ideas? Whether you want to grow herbs inside on your window sill or you want ideas for growing and displaying herbs in containers in the garden, we've got plenty of inspiration.
Used in cooking and for infusing hot drinks, as well as for their aroma and for medicinal purposes, herbs have so many benefits so it’s worth growing your own and the great thing is, you don’t need a large garden to grow them – most herbs grow well in containers which are perfect for small gardens, patio areas or inside on window sills. From hanging baskets to old wheelbarrows, almost any container is suitable provided it has drainage holes; the options are endless, so why not let your imagination run riot.
See: Kitchen garden ideas – easy ways to get started
(Image credit: Getty Images)
Whatever you choose, it is useful to position container grown herbs near a back door, or close to the house, so that they are easy to access for harvesting. It is also important to include grit in your compost when planting herbs into containers.
In his monthly blog gardening expert Monty Don shares his tips for growing herbs stating that, 'if the water does not flow almost immediately through the pot that they are in then the drainage is not good enough. If you are planting herbs in a container mix general purpose peat-free compost with at least an equal measure of grit or sharpsand.'
1. Grow herbs in a strawberry planter
(Image credit: Leigh Clapp)
Strawberry planters make brilliant planters for growing herbs, particularly low growers such as oregano, thyme or mint. Large pots with several pockets, the containers allow an array of different herbs in one place. It’s recommended to opt for terracotta as terracotta is a porous material which allows air and moisture to pass through easily resulting in healthier plants.
See: Herb garden ideas – for indoors and outdoors
2.
 Create an attractive display by arranging potted herbs on staggered shelves
 (Image credit: Future / Tim Young)
If you’re short of patio space then try arranging potted herbs on a plant stand such as the Aldsworth design Garden Trading. Using an array of pot styles, from traditional terracotta, to colorful glazed and galvanised metal designs, will help add bring variety and interest.
See: Planning a kitchen garden – from designing a layout to picking plants
3. Save space by creating hanging herb planters
(Image credit: Future / Oliver Gordon )
Planting herbs in an array of outdoor planters and suspending them is a brilliant way to maximise floor space on a small patio or balcony area. Lightweight plastic containers or old tin cans would work well, or you could even use an old colander – perfect with its readymade drainage holes.
4. Use potted herbs to create a fragrant escape
(Image credit: Getty Images)
Ornamental as well as practical, potted herbs in a range of heights can be arranged on a patio area to create a pretty feature, but they also great for adding fragrance to a garden seating area.
See: Companion planting – your ultimate guide
5. Use recycled tins as herb planters for an eye-catching display
(Image credit: Future / Tim Young)
Saving up old tomato tins with retro labels and repurposing them as herb planters is a great way to cut down on your waste but also to create a fun display with a Mediterranean twist. Simply drill holes in the bottoms for drainage.
6. Use reclaimed vessels as herb planters
(Image credit: Future / Judith Everitt)
Offering a rustic, weathered patina from years of use, reclaimed metal containers such as farm troughs, old galvanised baths and dolly tubs – historically used for washing clothes – make characterful planters for herbs.
7. Arrange potted herbs on an old crate for a rustic display
(Image credit: Leigh Clapp)
Old creates can be easily picked up from flea markets will bring vintage charm to a patio space and can be easily moved indoors or throughout the garden.
8. Opt for a window box herb planter
(Image credit: Getty Images)
You don't need a garden to grow herbs; most can be grown inside in individual pots on a window sill or in a window box by a sunny window. Growing herbs on the kitchen window sill is really convenient for cooking.
9. Maximise space by thinking vertically
(Image credit: Getty Images)
Make the most of a small garden by using every inch of space. Consider fixing planters to garden walls and clustering potted herbs on old chairs to help make extra space for more pots on the ground. Growing herbs at different levels will also add decorative interest, too.
10. Add vintage charm by displaying herbs in enamelware
(Image credit: Future)
Displaying shop bought herbs in colorful vintage enamel cups and teapots is a great way to disguise unsightly plastic pots – just make sure they are left sitting in water.
Is it better to plant herbs in pots or in the ground?
Most herbs can be grown in the ground or in containers. Sometimes, it is preferable to grow certain herbs in containers. Growing slightly tender herbs such as myrtle, lemon verbena and scented geraniums in pots or containers is preferable to borders because it means they can easily be moved indoors during winter months. It is also recommended to grow invasive plants such as mint in containers to help control its growth and prevent them from taking over.
One thing to remember when growing herbs in containers rather than in the ground is that herbs in containers is that in hot weather they can be quick to dry out, be sure to keep an eye on them and to keep them well watered.
What herbs can be planted together?
Many herbs can be planted together provided they like the same growing conditions and have the same irrigation needs. Many herbs are Mediterranean in origin – such as rosemary, thyme and oregano, – and so all thrive in sunny conditions and free –draining soil and work well when planted together. Herbs such as parsley and basil on the other hand will require more constant moisture.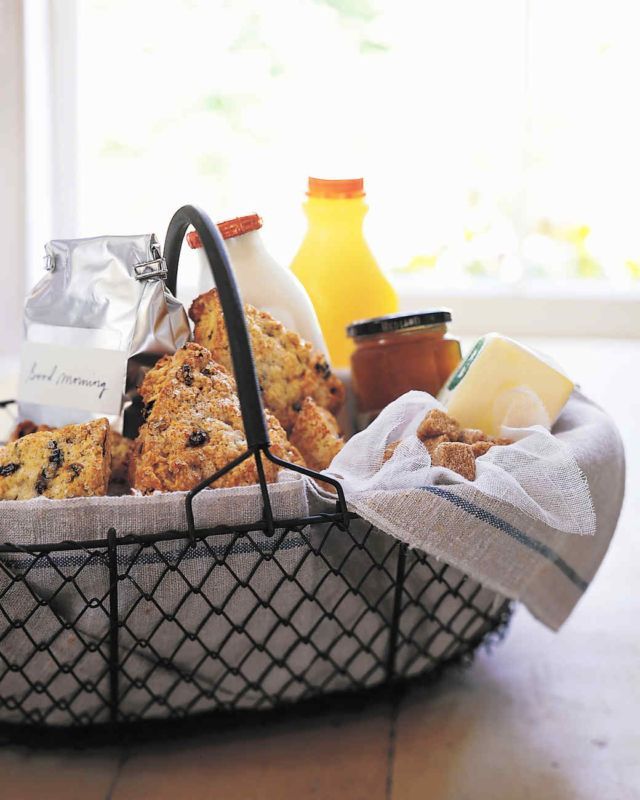
Pippa is Content Editor on Homes & Gardens online contributing to Period Living and Country Homes & Interiors print issues. A graduate of Art History and formerly Style Editor at Period Living, she is passionate about architecture, creating decorating content, interior styling and writing about craft and historic homes. She enjoys searching out beautiful images and the latest trends to share with the Homes & Gardens audience. A keen gardener, when she’s not writing you’ll find her growing flowers on her village allotment for styling projects.
12 Best Herbs for Hanging Baskets | Top Hanging Herbs
Search
Want to grow herbs vertically? Discover the names of the
Best Herbs for Hanging Baskets to grow them in small spaces.Herbs are pretty versatile and easy to grow. This attribute makes them perfect for planting in many ways. All the less upright and softwood herbs can be the Best Herbs for Hanging Baskets. Some of them are listed below.
Best Herbs for Hanging Baskets
1. Mint
Botanical Name: Mentha
Mint grows aggressively and doesn’t need much attention. This spilling herb is very suitable for hanging baskets. What’s more? There are 20 types of mints available to choose from!
Here is all you need to know for growing mint2. Creeping Thyme
Botanical Name: Thymus praecox
Creeping thyme is a small ground cover perennial herb, often planted for ornamental purposes. It’ll look beautiful with stems dangling down the sides of your hanging basket.
Check out our article on growing thyme here3.
 Creeping Rosemary
Botanical Name: Rosmarinus officinalis prostratus
The trailing rosemary is a cascading herb. It’s perfect for pots and hanging baskets than other rosemary cultivars.
Here’s all the information on growing Rosemary in pots4. Winter Savory
Botanical Name: Satureja montana
Its compact height of 10-12 inches makes it an ideal choice for hanging baskets. The fresh leaves taste great, and the dry leaves are preserved for their pungent flavor.
Growing Tip: Grow in full sun to partial shade.
5. Parsley
Botanical Name: Petroselinum crispum
Both the flat-leaf and curly parsley doesn’t mind growing in hanging baskets. Just keep the soil moist to keep them happy.
Here’s everything you need to know about growing parsley6. Marjoram
Botanical Name: Origanum majorana
This fragrant culinary herb with square branching stems has beautiful oval-shaped hairy leaves that look excellent in hanging baskets.
7. Salad Burnet
Botanical Name: Sanguisorba minor
An attractive and easy-growing herb, you can select this herb for your hanging basket. You can harvest its fresh leaves for salads, sandwiches, and lemonades.
Growing Tip: Does great in full sun and part shade.
8. Rocket
Botanical Name: Eruca vesicaria ssp. sativa
Apart from adding a delicious peppery flavor to your cuisines, it also works as a filler plant in hanging baskets.
Growing Tip: Keep well-watered to maintain the taste of the leaves.
9. Lavender
Botanical Name: Lavandula
Any dwarf lavender species can grow in a hanging basket, and because this flowering herb prefers good air circulation and soil on a drier side, it’s a good idea.
To grow lavender in pots, have a look at our detailed article here10.
 Oregano
Botanical Name: Origanum vulgare
If you can plant marjoram in a hanging basket, why not the oregano? You can grow it alone or with other herbs to create a hanging herb basket.
Here’s all you need to know about growing oregano in pots11. Indian Mint
Botanical Name: Satureja douglasii
Not a true mint, but this fragrant, cascading herb is perfect for hanging baskets. It can be used for teas.
12. Basil
redditBotanical Name: Ocimum basilicum
The best part about growing basil is that you don’t need a big basket. It is happy to thrive in a shallow basket and does well in bright light.
Join our 2.8 Million Followers
Social Followers
2.5MFollowers
219kFans
36kSubscribers
YouTube
master class from improvised materials
A do-it-yourself basket can be made from improvised materials at home, in the office or in the country. Look at the ideas and choose the option that suits you best.
In this article we have collected the most popular models for the manufacture of this ancient piece of furniture. You can build a basket for its intended purpose - for picking berries, mushrooms, harvest. In this case, you will have to stock up on vines, twigs or straw.
Related article: Interior baskets: 150 ideas
Contents
Newspaper tubes
Quite a budget option, which makes beautiful baskets of any shape and size.
Newspapers can be knitted free of charge in the mailbox. Or replace them with promotional magazines, which are available in almost every store (where promotions are posted for a month).
Cut newspapers or magazines into strips 15-20 centimeters wide. You can use a whole sheet for a straw. Arm yourself with a knitting needle and glue.
For making paper straws, it is better to use a long needle No. 3 - 4 (the size is always indicated on each needle).
A hot glue gun is more convenient, although regular glue stick or PVA can be used.
We wind a lot of tubes as shown in the video. The process itself is simple, after several attempts you will do it automatically. Make sure that the tubes are the same width and length (if possible). Glue the end.
How to make a newspaper tube
Some needlewomen paint each tube with a special stain. You can not do this (the newspaper drawing itself turns out to be quite original). Or cover a ready-made basket with a stain of the desired shade. Colors are different.
Any weave. From standard to more complex. The bottom can be square, rectangular, round. The bottom is woven flat, then the sticks are bent up, and the weaving continues.
How to weave the bottom of the basket
There are several ways. Choose the one you like best:
How to lengthen the straw
When the length of the straw in the weave ends, insert a new straw into it and secure it tightly (you can use glue). That is, continuous weaving is obtained.
Remember it's paper! Even if you cover the finished basket with a special varnish, the product will still get wet. So use the basket indoors. For interior or storage.
Application
Baskets made of paper straws are widely used in the house and in the country. They can be used like:
- Flower pot
- Bread box, candy box
- For bath towels
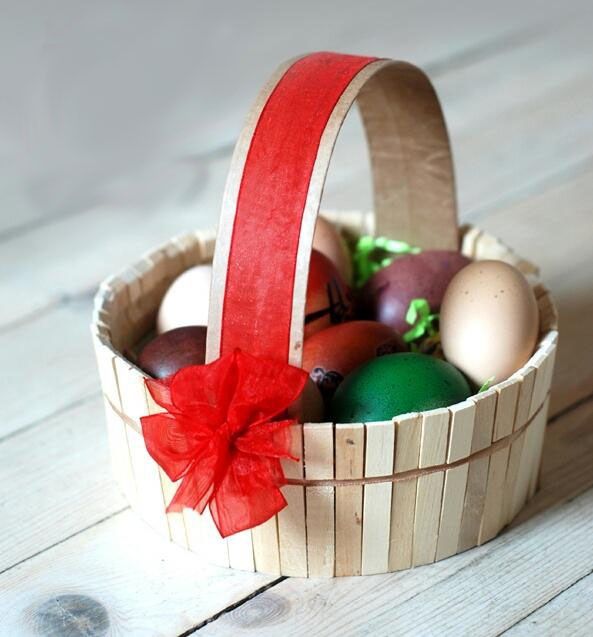
- Like egg basket
- Like picnic basket
- For children's toys
- Like a magazine rack
DIY unusual baskets made of newspaper tubes
It is not necessary to weave. You can simply fold the tubes in the form of different shapes and fasten them as shown in the photo:
From Chinese (bamboo) chopsticks
Bamboo chopsticks, which are eaten in Asian, Japanese, Chinese restaurants, are a ready-made building material for making DIY crafts. Our site already has an article Crafts from Chinese sticks (there are a lot of interesting ideas).
Chopsticks can be washed after use, especially when you like to order sushi at home. It will take a while to get a whole package.
There are quite a few options for making a basket with your own hands from bamboo sticks. You can use glue or just fasten them with thread, rope, etc.
This example used sticks, hot glue stick and jute for the sides of the basket.
First we fasten the bottom. Lay out 4 sets of sticks around the perimeter (new, not yet divided). Glue them with glue. The hot glue gun dries in seconds.
Lay out and glue the sticks in a checkerboard pattern so that the sharp and wide ends go through one. It turns out a square bottom. It can also be made rectangular without making a perimeter at the beginning, but simply by laying out more sticks in length.
Be sure to cover the work surface with newspapers, plastic bags or oilcloth.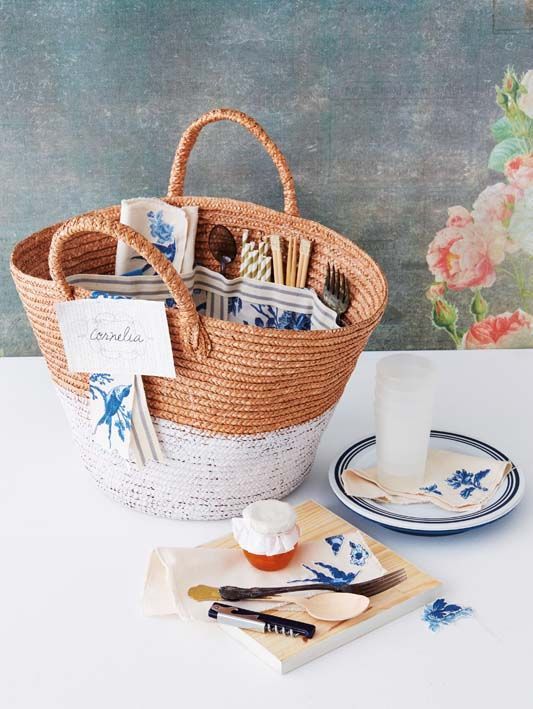 The glue gets dirty.
Glue 4 sticks on both sides as a basis for the frame of the basket.
And we glue the rest of the sticks on them, making large or small (at your discretion) gaps between them.
You can do the other two sides in the same way - by gluing sticks. Or use jute. Also gluing it to the sticks - verticals.
This wooden basket can be used for any purpose and purpose: for books, small things, as a planter, etc.
Craft paper or paper bag
The whole world is moving towards eco-consumption, so paper bags are everywhere now. It is not very convenient to use them for garbage, but for various crafts they will come in handy.
It is very easy to make a basket from craft bags.
Cut off the handles. Cut the bag into pieces at the seams. And we cut this paper into strips (1.5 - 2 cm).
The most primitive weaving technique, the one we were taught in kindergarten.
First, weave the bottom of the desired size (one bag will make a rather large basket).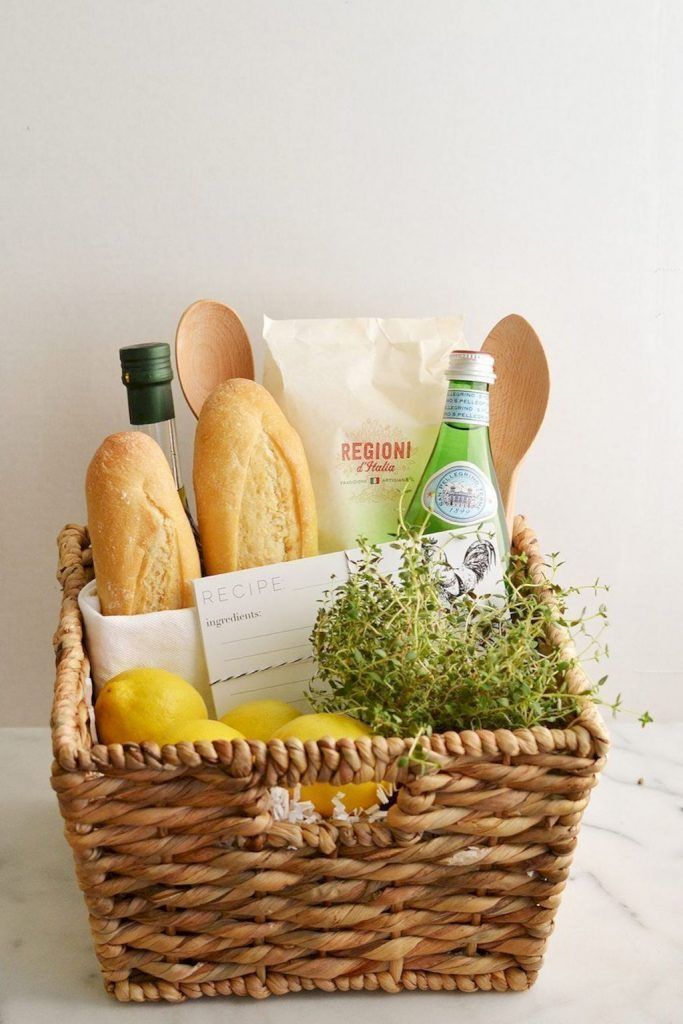 Then we bend the strips and start weaving up. When the strip ends, simply glue the next one to it (with glue or a stapler) and continue weaving.
The whole process is on video:
For a denser basket, you can make a double paper strip. That is, cut them into 4-5 centimeters, fold them in half. Then you get already thin cardboard. It is easier to weave from it, and the basket will be more stable.
This principle applies to any paper. Can be made from beautiful, gift. Or use the same newspapers and magazines.
Basket made of ribbons
If you need to urgently make a basket from improvised materials, then this idea will help you.
You will need:
- Frame: any cardboard box (it can be cut to the desired height)
- Ribbons in two colors (can be replaced with colored paper, scraps of fabric and other materials at hand)
- Stapler
- Scissors
- Gift paper.
 Or any craft paper
DIY
- Cut off the frame of the basket. In this case, it is a box from household appliances.
2. Tape the box from one end to the other, covering the entire bottom. We attach with a stapler on both sides. Do this with the other side as well. So that the whole box is covered with blue ribbons.
3. Take a ribbon of a different color and thread it in a checkerboard pattern into blue. Fasten the beginning and end of the pink ribbon and tuck the tip under the blue stripe.
4. Cut off a large piece of gift paper. And we distribute it inside in such a way that it is not back-to-back, but freely located. The paper will wrinkle and form wrinkles at the corners. It's OK. From the outside, fasten with a stapler. Cut off excess paper.
5. Tie a bow up to cover the traces of paper clips.
If you have all the right materials on hand, it will take only 30 to 40 minutes to make a ribbon basket.
Often in the office for some kind of event or corporate event, a beautiful box or basket is required. And there you can just find all the necessary materials for this craft.
Basket made of thread and PVA glue
A simple way to make a basket is to wrap a ball with ordinary yarn and glue.
Required:
- Balloon
- Yarn of desired color (not too thin and not too thick), for knitting or crochet No. 2-3
- PVA glue
Inflate the balloon to the size that we want to see in the future basket. Tie tightly. Spread half of the ball with PVA glue. A layer of thread in a chaotic manner: it is not necessary to wind it evenly around the circumference of the ball, uneven bindings will look even more beautiful. Another layer of glue. And we wind the thread again. In total, make 3 - 5 layers (the thinner the yarn, the more layers you need).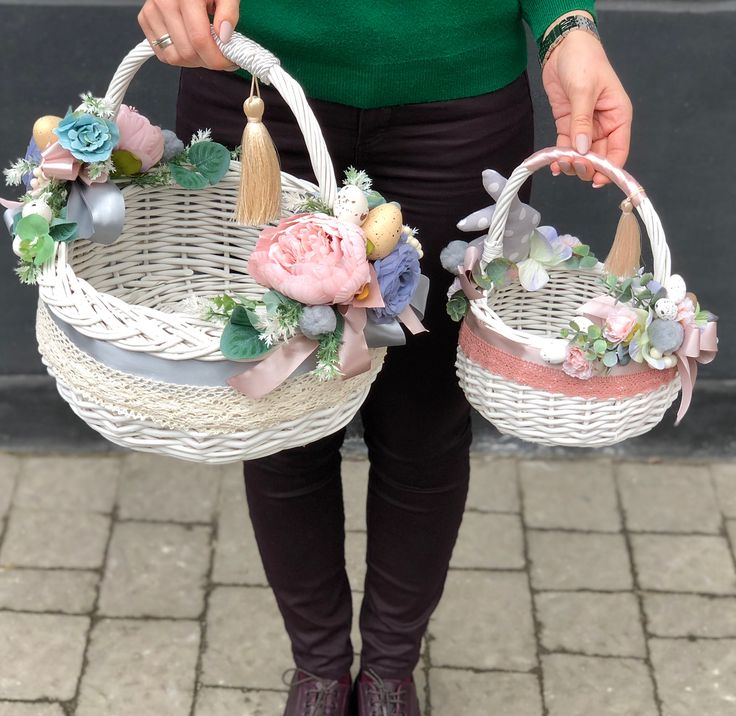
At the end make a handle for the basket. To do this, spread a strip of glue from one side of the future basket to the other. Wrap with yarn in several layers.
After drying, blow off the balloon and remove any residue. The finished basket can be cut with scissors if there are irregularities somewhere.
Crocheted from rope or jute
Even if you don't know how to crochet, it's not as hard as it looks. Do you like this type of basket? It is suitable for any interior: from the most modern to authentic.
Jute or rope is sold in all hardware stores, markets, fixed prices and many other places. The price will depend on the size and quality. Jute can be different: in color, shape, thickness, material used (there is prickly, interspersed like natural wool; there is smooth).
Production
First crochet the bottom. In this case, it is round (but you can make it square). Evenly adding loops to increase the diameter; that is, we knit two loops into one loop of the previous row in the same places.
Then stop adding stitches and knitting automatically goes up to the desired length of the basket.
Bottom diameter and height can be adjusted independently.
DIY knitted baskets
If you can't or don't want to knit a basket, the rope is still an excellent material for a basket. It can be simply glued with hot glue. Just choose thicker.
Use any template as a basis. It can be a bowl, saucepan, container, etc. It will depend on what kind of basket you want: large, small, round, square, etc. And based on this request, choose a pattern.
And already on it we begin to glue the rope from the bottom, simply gluing the strips. Pretty fast and pretty.
Life hack. Everyone used to have door mats made of jute. In the Soviet Union and the mid-90s, only these were sold. They can also be used as ornamental material for making baskets. Rows fall apart easily. And they can be glued in the form of a basket. Only, of course, before this, the rug will need to be washed well.
With prefabricated wooden base
The wooden base can be purchased at art and craft stores. Any diameter and shape.
And crochet it as shown in the photo.
The same bottom can be used as a basis; and glue jute, bamboo sticks, newspaper tubes, etc. on it.
Crochet basket tutorial with step by step description:
- Knitted yarn basket with wooden bottom
- Crocheted ribbon yarn basket
- Crocheted basket
From polypropylene thread
This thread is now quite popular among needlewomen and DIY enthusiasts. The thread is strong, not afraid of water, easy to weave.
You can crochet just such a basket. It is easy to knit: the bottom is according to the scheme of the grandmother's square , and then up three double crochets without increments.
Crochet basket
Bottom and height can be any.
At the end, double crochet the handle, attach it to the opposite side of the basket, fasten the thread.
This basket can be placed in the bathroom for cosmetics. You can even go to the forest with her if you tie her more. And this one is suitable for a child who loves to collect mushrooms, cones and other gifts of nature.
Clay and polymer clay basket
If you can buy or dig real clay, that's great! This material will make an excellent decorative basket. In the store you can also find polymer clay, from which it is quite easy to make any crafts, including baskets.
It is more difficult to sculpt from natural clay, it is better to mold a monolithic product and create an imitation of weaving (draw with a spatula or stick). Or make holes, also creating a resemblance to a real basket. But it will be an eco-friendly, natural basket.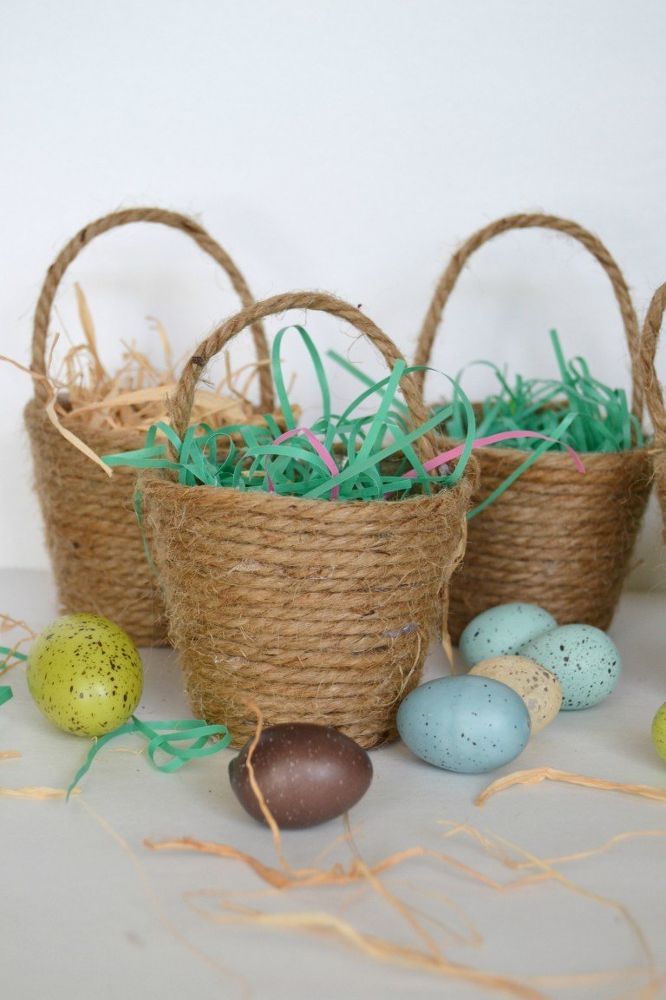
Polymer has its advantages:
- Easy to mold
- Can be used to make tubes, ribbons, etc.
- It is easy for her to weave
- No dirt
It looks a bit like plasticine. There are many colors, spatulas for work and workshops for the manufacture of all kinds of products: from interior items to costume jewelry. Related article: Polymer clay modeling: step by step instructions with real examples in the photo. Recommendations + master class
You can literally weave a basket out of polymer clay, because the material is very malleable.
Putty, rotband, cement
Excellent durable baskets are obtained. They are made quite simply.
Need a dry mix of one of these building materials. We dilute a small amount in a bucket, gradually adding water and actively mixing until the consistency of sour cream.
This mix hardens fairly quickly, keep this in mind when making the basket. In 15 - 20 minutes it will harden in a bucket.
Then we take a pre-prepared template. This can be a plastic bowl or container of the right size. The template is not required. Many people use a regular plastic bag to give the desired shape.
Spread the diluted mixture evenly, about 2 - 3 centimeters thick. Try not to have any voids, it is better to use a small spatula or do it with gloved hands.
Don't forget to cover your work surface!
In this example, the basket is made of putty. It is better to use rotband or cement, it is more durable.
If you want to add some elements, do it right away. It can be strips imitating weaving. Or leaves (you can attach a real maple or any other leaf, you get a beautiful print; attached, it fixed, carefully remove it). And leave the basket to dry completely. Time will depend on wall thickness, air temperature, humidity and other parameters. It usually takes 3 to 7 days to set.
After drying, the basket can be painted in any color and covered with a protective varnish.
If you have an old basket, it is perfect for decorating with cement. Just dip it in the mixture diluted with water and let it dry.
Vine
Vine is found almost everywhere in Russia, so products from it were made in ancient times. And now they have regained their popularity. Baskets from a rod strong, durable, beautiful.
I'll have to go to the forest to get some bars. But it's worth it.
How and when to harvest the vine
The vine can be cut down or broken off all year round. But before you do this, you need to check the bush. Without breaking off the rod, bend it to the ground. If the rods bend well, do not break or crack, then they can be used for weaving.
A few tips:
- Use straight bars
- Give preference to length. Better 10 long rods than 20 small ones. There will be fewer attachment points during the weaving process.
- Cut bars of the same thickness
Before starting to weave the basket, the vine is skinned, freed from the bark, and dried in the sun.
Of twigs
Not only the vine is suitable for weaving baskets, but also other twigs that are found in the forest.
They are woven, glued, connected with a thread.
Rods from raspberries, blackberries and other climbing berries are suitable: they are dense, long, do not break.
It is better to cut thin trunks in the middle of summer, as it is easier to weave a basket from them.
Straw and grass
Grass is folded into small long bundles and then woven together with a thread. You can do this with a thick thread and a needle, or twine.
Grass is best dried in the sun to make hay. Such straw will be more malleable to weaving, and the basket from it will be durable.
Basket weaving options
These methods work for any material. You can use thread, glue or weave tightly, without auxiliary materials.
We showed many options for weaving baskets with our own hands from improvised materials.
As soon as you start making them, you will probably wonder if it's worth it, because all kinds of baskets are sold in stores.
Indeed, now the assortment is huge. From simple in a fixed price to baskets made of natural materials, vines, birch bark.
It's up to you, but it's worth trying to make a basket with your own hands, suddenly you will find your purpose in this work and, perhaps, even build a business on this hobby.
Now all handicrafts are highly valued. Yes, and in your apartment or in the country it is always nice to have handmade things, they are definitely more advantageous than store ones.
Interior baskets: what to store, where to put
A large square basket can be placed in the living room and used instead of a coffee table. You can store some things inside, and if you attach wheels to the base, such an impromptu table can be easily moved when cleaning. If you glue strips of genuine leather as shown in the photo, the resemblance to a vintage travel suitcase will be very large.
In combination with the wooden finishing of the room and textiles, a very harmonious and cozy interior is created.
Photo: homepic.com.ua
Chest
Calculate the exact cost of repairs on the online calculator
and get a free detailed estimate for repairs
Calculate
In ancient times, a huge wooden chest was an indispensable element of decor in many rustic interiors. It kept pronaphthalene winter things, tablecloths and bed linen, a dowry for future brides. Now such a wicker chest can fulfill the same role, decorating any room where you want to put it. Such items are very durable, so you can easily pass it along with all the contents to your children.
Photo: homepic.com.ua
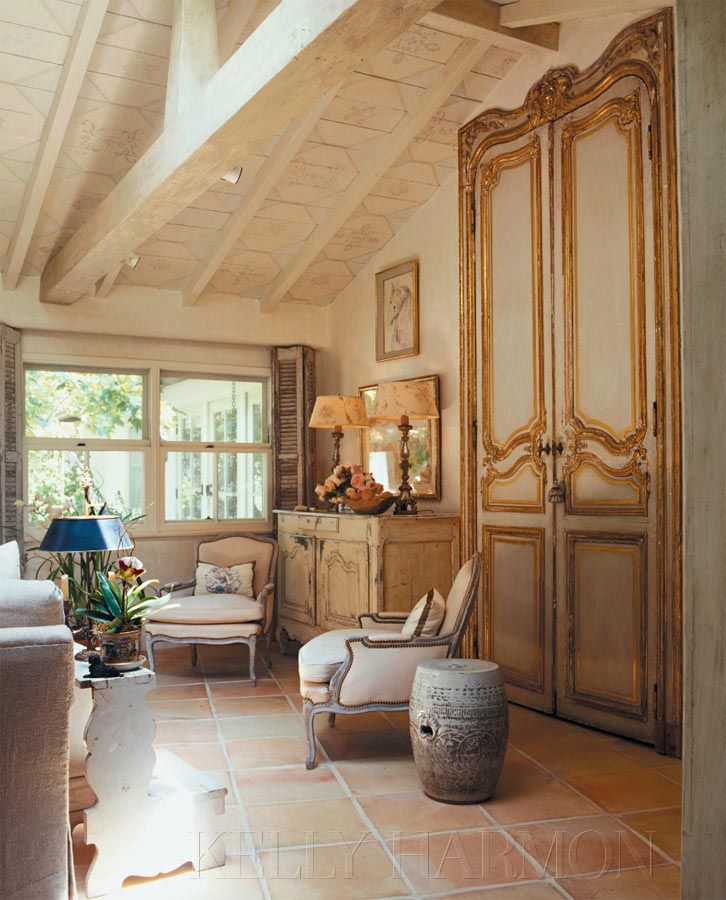
Living room
Small baskets with handles seem to be designed to provide comfort in the living room. In such a basket you can put knitting, a book, a magazine - and put it next to your favorite chair. Everything is at hand - and no mess.
If your living room has a real fireplace, you can put logs and kindling in a basket by the hearth. And even if it is a fake fireplace that will decorate any living room, baskets with logs will help to create the impression that the fire is real and the whole atmosphere is very natural.
Photo: casatreschic.blogspot.com
Photo: khatimah.com
Photo: homedit.com
Storage system
The best way to use wicker baskets is to arrange a storage system out of them. You can place it in any room using a rack of any height and width. The main thing is that the baskets fit into the cells and look like a single logical composition. To combat clutter - a great solution!
Photo: homedit.com
Corridor
Another room where the risk of disorder is highest is the corridor. Here, baskets can hold a lot of shoes, including those that you usually keep in your closet until the next season. Shoe polishes, bags, scarves, panamas and hats can all be stored in wicker baskets.
Photo: worldivided.co
Photo: frasesdeconquista.com
Bedroom
The same storage system can be arranged under the bed in the bedroom. It will accommodate spare pillows, blankets, blankets and other necessary items that usually take up a lot of space in the closet, and are not used every day. If you still prefer to use cabinets and shelves, one or two wicker baskets will come in handy in the bedroom for storing small items that are always lost and fall off the table. You can also put extension cords, chargers, batteries and remotes here.
Photo: shairoom.com
Photo: bed.taffetedesigns.com
Nursery
No, the corridor is not the most potentially cluttered place in any apartment. The first place in chronic disorder holds the children's room. Of course, if you still have not bought comfortable wicker baskets and have not shown your baby how to arrange toys in them. books and all sorts of treasures that you would gladly throw in the trash when you do your next cleaning.
Photo: stylemepretty.com
Photo: inspirecriedecore.blogspot.com
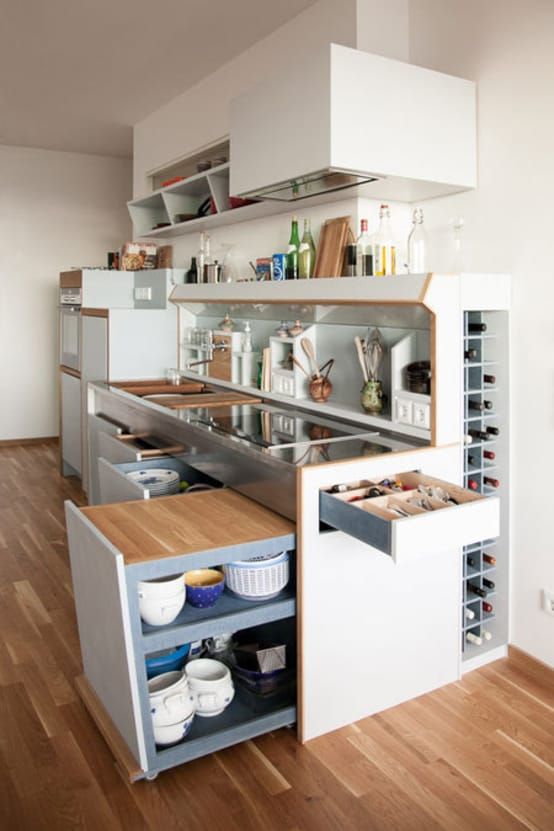
Kitchen
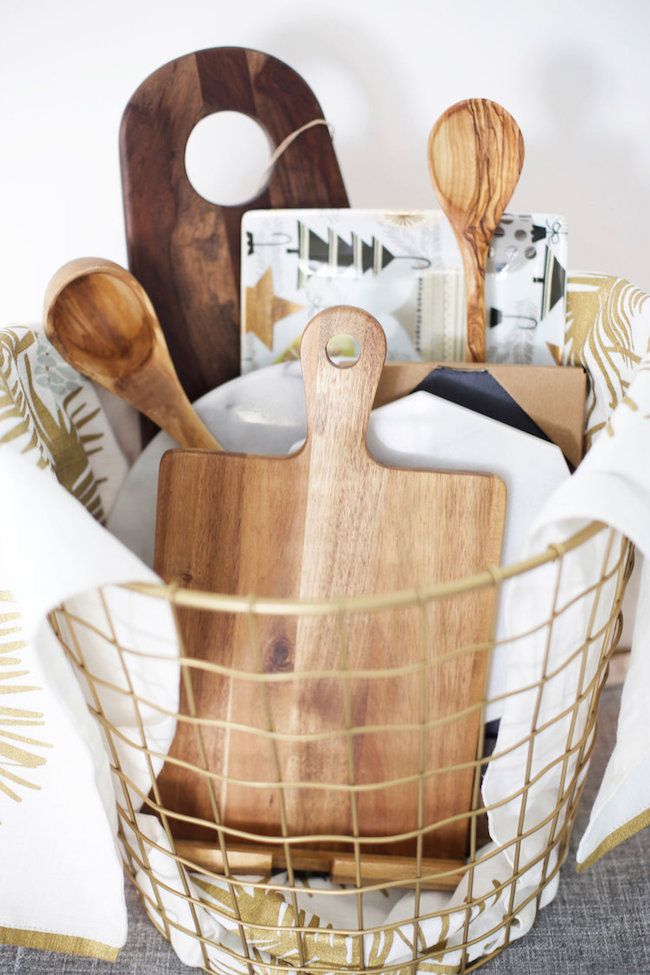
Where you spend several hours a day preparing breakfast, lunch and dinner, everything should be as convenient and beautiful as possible. In wicker baskets you can keep greens, bread, vegetables, utensils and jars of spices.
Photo: babesuumodi.blogspot.com
Photo: cs.toolboxprodhouse.com
Photo: frasesdeconquista.com
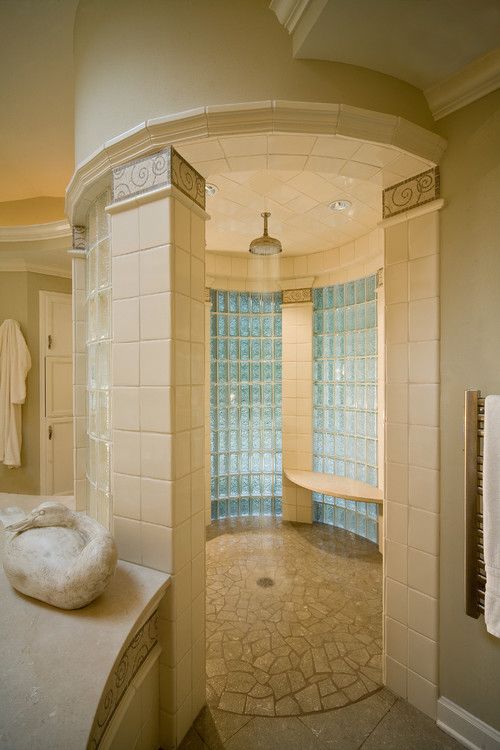
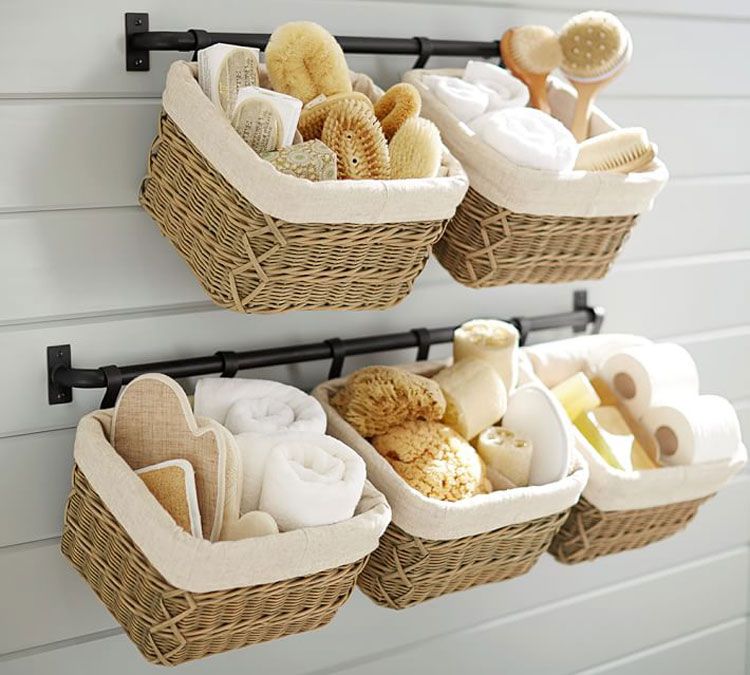
Bathroom
Whatever the style of your bathroom, a wicker basket will be very appropriate here. Plastic large containers for dirty laundry are a thing of the past. But if you feel sorry for throwing away such an artificial monster, place it inside a large beautiful basket made of natural material. The bathroom will be instantly transformed. In another basket you can store towels, in the third - bath items or stocks of soap, paste and toothbrushes. Does a fourth basket fit? Put boxes of powders and household chemicals in it.
Photo: archidea.com.ua
Photo: houzz.jp
Photo: frasesdeconquista.com
Storage room
The capacity of even a small storage room increases several times if you put all your supplies in wicker baskets. Put them on narrow racks or shelves and stick labels: cereals, sugar, pasta, jar lids, dried herbs, picnic plates, and so on.
Photo: shabbypassion.blogspot.com
Photo: casatreschic.blogspot.com
Needlework
There is no better place to store balls, knitting needles, embroidery threads and many other needlework items than wicker baskets and boxes! Everything is sorted, does not get lost and does not crumble, just get it and put it back.
Photo: tips-ua.com
Corridor
A fashionable item for storing umbrellas in the corridor can be made in the form of a tall wicker basket. It is very convenient to keep it in the corner, where it takes up very little space.