Hanging flower baskets ideas
Hanging basket ideas: 16 designs to make yours stand out from the crowd
(Image credit: LECHUZA)
Gardening Etc Newsletter
The Home Of Outdoor Living
Thank you for signing up to . You will receive a verification email shortly.
There was a problem. Please refresh the page and try again.
By submitting your information you agree to the Terms & Conditions and Privacy Policy and are aged 16 or over.There are plenty of hanging basket ideas you can try for stunning results. Experiment with all sorts of plants – it doesn’t have to be all petunias and fuchsias (although we’re big fans of those too). There’s so much more choice available, particularly if you want to achieve a more contemporary feel for your garden.
Just like our container gardening ideas, hanging basket ideas offer a fabulous opportunity to breathe new life into a lacklustre space – whether it's a front garden porch, a patio, or a pergola.
No matter your style, there's sure to be a design you're drawn to. Try hanging containers filled with plants of all one color, or use striking foliage to give a more textural look. And you can’t go far wrong with high-rise plantings of edible crops. Try baskets of cherry tomatoes, tumbling strawberries, sprouting salads and fragrant herbs – none are afraid of heights and they all flourish in containers.
Hanging basket ideas can also add impact to small areas like narrow balconies and courtyards, allowing you to max up your growing space. There are options for sunny or shady spots too, so it doesn’t matter what the aspect of your garden is as there will be something to suit.
So what are you waiting for? Simply read on for our favorite hanging basket ideas and get inspired to create your own. And once you're raring to get started, head over to our tips on how to make a hanging basket for more advice.
1. Plant lush hanging basket ideas for a shady spot
Choose lots of greenery for contemporary hanging basket ideas
(Image credit: Future)
Choose a combination of greenery for your hanging basket ideas, such as ferns, hostas and vines that don’t need sun to thrive and look good for months on end without any deadheading.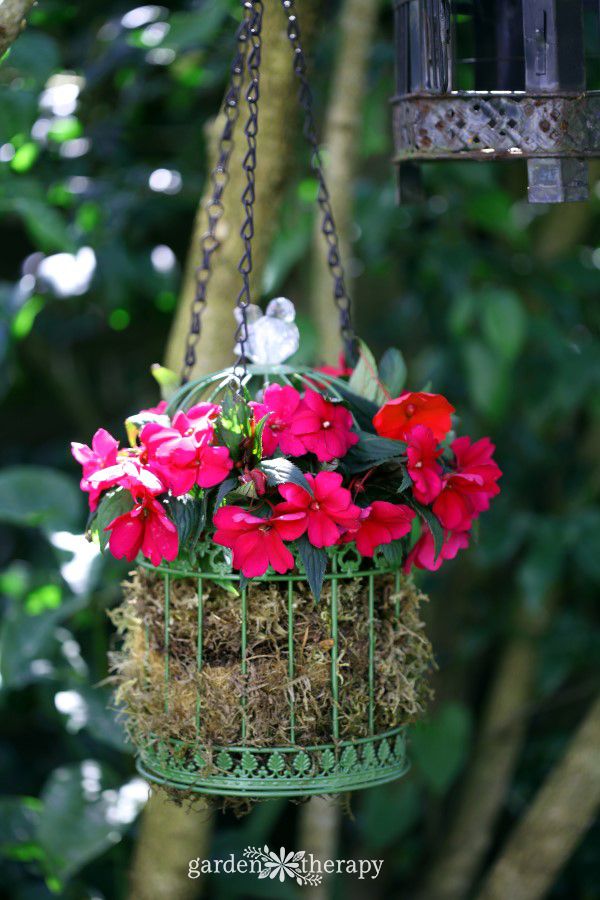
The sculptural outlines of these plants provide shape and structure, while trailing plants help to soften the edges and add a graceful draped effect as they spill out of the basket.
From the top, this willow basket is planted with stars of the show lady fern Athyrium filix-femina and hosta fortunei ‘albopicta’. The fillers are the ornamental nettle lamium and golden creeping Jenny.
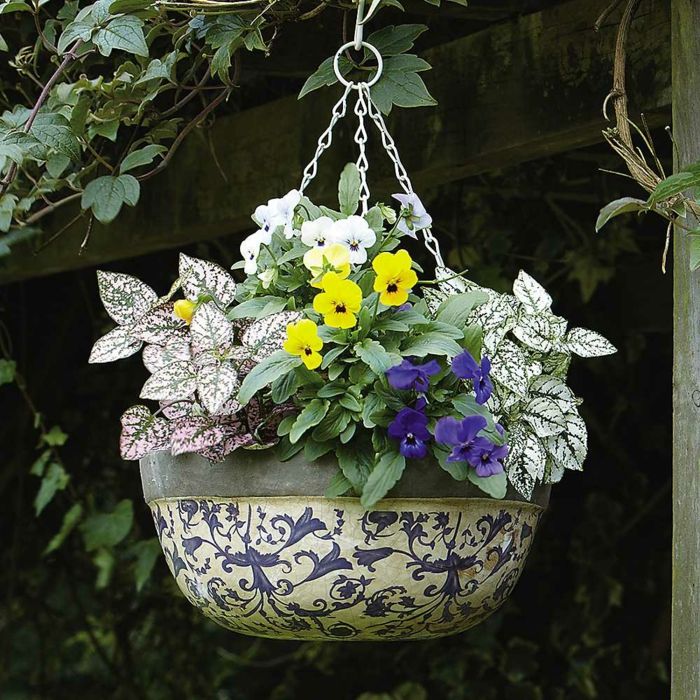
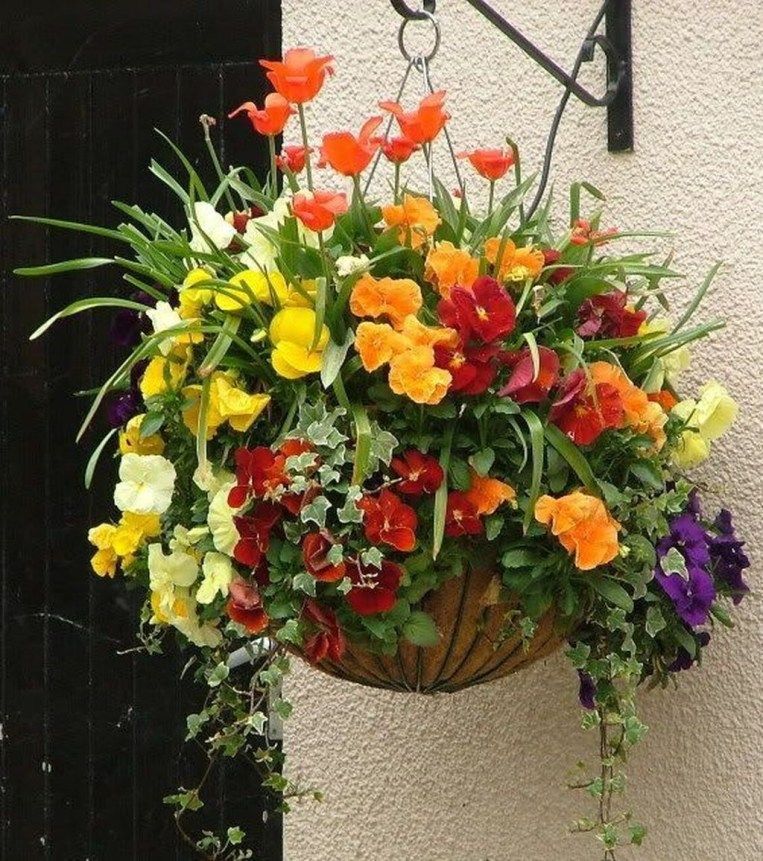
2. Perk up a hot spot
‘Profusion’ is a trouble-free and dependable choice. Hanging aged ribbed bowl from Crocus
(Image credit: Crocus)
If you’re looking for one of the best plants for hanging baskets in a garden space that gets full sun, Mexican daisies (also known as fleabane) are a great choice. They thrive wherever you plant them but look particularly eye catching in a loose arrangement that spills out of hanging baskets.
Another benefit of positioning it up high is that you won’t miss the butterflies as they come seeking nectar from the flowers as the basket dances in the breeze. One pot of fleabane can be divided to create a pretty hanging basket display that lasts for months.
3. Grow easy edibles that look as good as they taste
Try Hundreds and Thousands tomato seeds from Suttons – they’re perfect for baskets
(Image credit: Suttons)
If space is tight, growing produce in baskets is a great way of boosting your crop. But some are so pretty they tick the box of being ornamental too.
Plant a selection of herbs in the sides of your hanging basket – using or making holes in the liner – then why not try planting radishes, beetroot or even short Chantenay carrots in the top of the basket?
Tumbling tomato varieties are the natural choice. Try an easy-to-grow heirloom variety like Hundreds and Thousands (pictured). These cascading plants will give bite-sized tomatoes all summer long. They don’t need to be staked and you don’t need to take out the side shoots either so they’re faff free. Just put them in a sunny position and water regularly.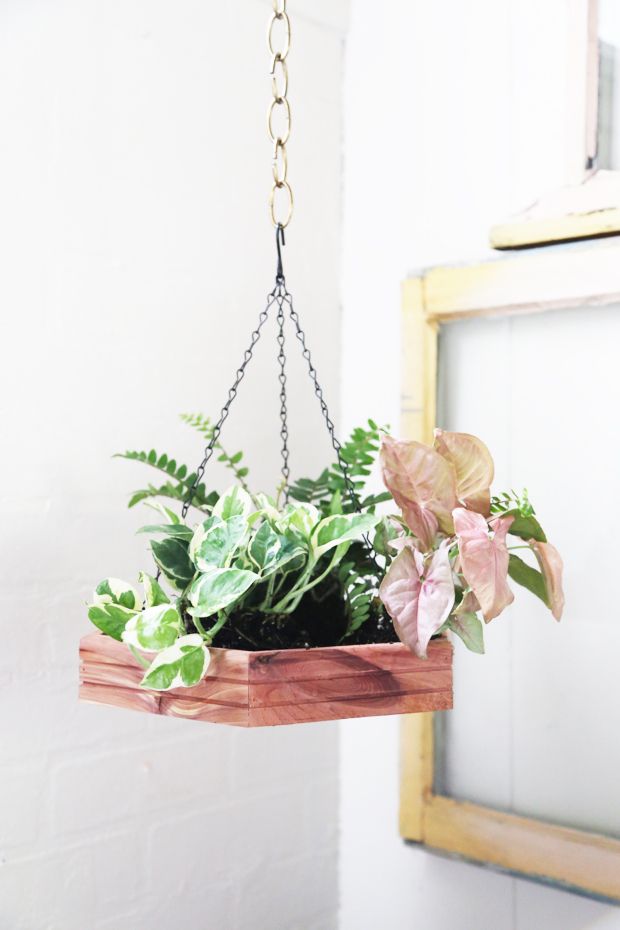
Similarly, the smaller varieties of cherry tomatoes are well suited to container planting. Include some basil plants too. All you'll need to add is the mozzarella and you're sorted for a tasty alfresco lunch in the garden.
4. Combine blue and white for a soothing style
Pair a delicate mix of woodland flowers in tranquil hues
(Image credit: iBulb)
Recreate a serene woodland theme in your hanging baskets with white wood anemones (Anemone nemorosa). Their star-shaped blooms look gorgeous as they sprawl upwards and outwards.
Forget-me-nots provide a blue-hued contrast which offsets the look beautifully. And, by sticking to a two-tone palette, the design maintains a considered and on-trend look – making it perfect for modern or more classic-style plots alike.
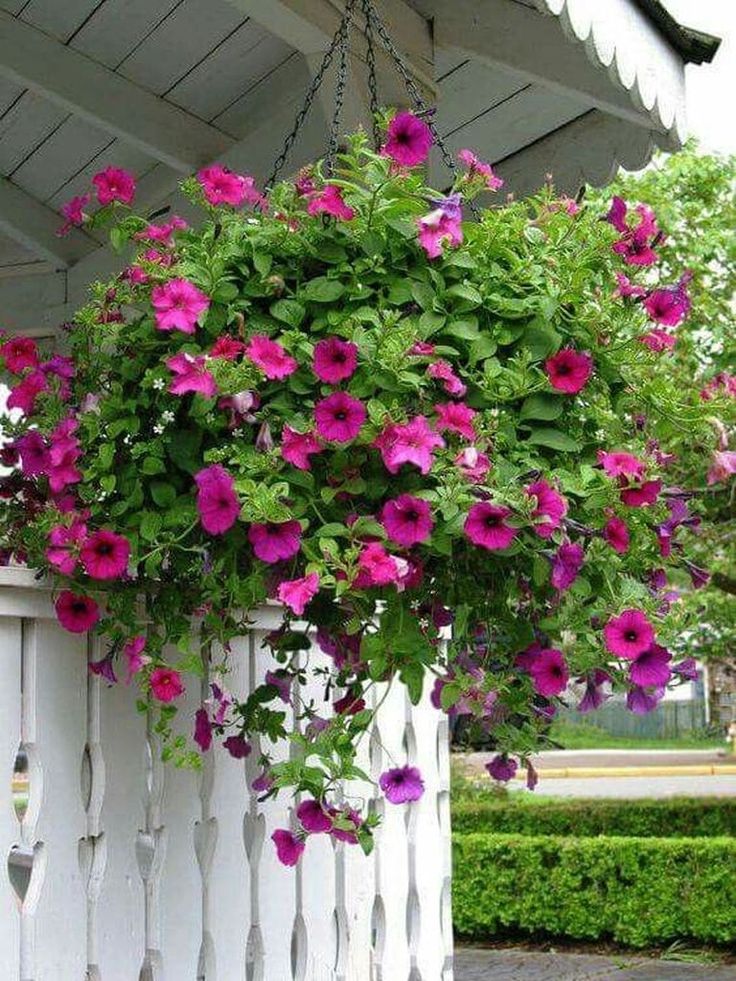
5. Liven up your railings
Fences can be given a boost with pretty hanging baskets
(Image credit: Alena Kravchenko/EyeEm/Getty Images)
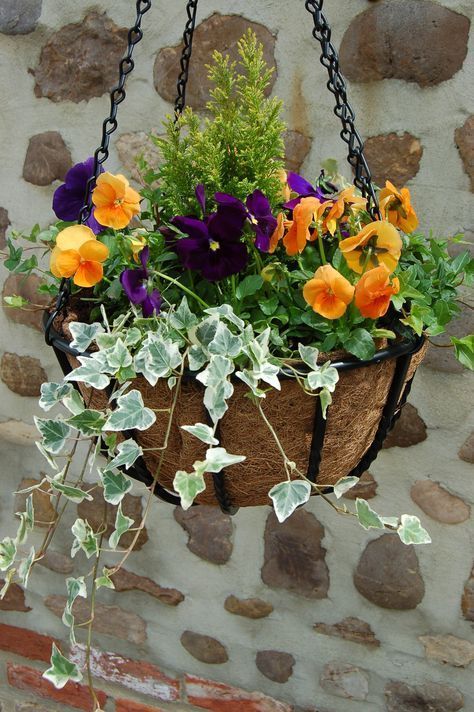
Hanging basket ideas don't have to be positioned way up high.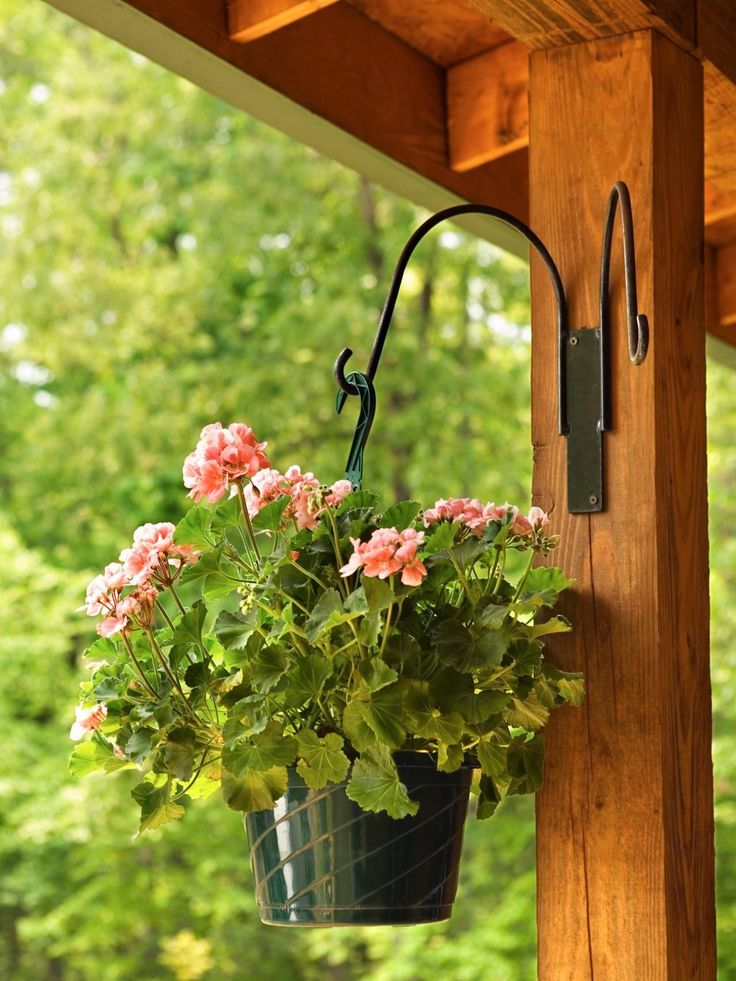 Take these frothy silver displays, for example, which add a touch of elegance to sturdy black railings.
They're a great way to pep up your garden fence ideas, and why not use a couple for maximum impact? We love the use of variegated ivy in this display, alongside a prettily-pastel shade of lobelia (try 'Regatta Sky Blue').
6. Choose one variety for impact
Hanging teardrop basket from Waitrose Garden
(Image credit: Waitrose Garden)
Choose one type of flower in a dramatic color and let it shine as a solo performer. A trailing geranium or fuchsia in dark red works well, or try a verbena in a vibrant shade of pink. Planted in this teardrop basket, it will look good from May through to late autumn and doesn’t need as much deadheading as some other trailing favorites.
Try ‘Superbena Burgundy’. It can be planted straight out into a basket in May (as long as there’s no chance of frost). Use a compost especially designed for hanging baskets such as Westland Multi Purpose with John Innes and position in direct sunlight, feed once a month and it might even flower until Christmas.
Want your hanging basket ideas to make an impact? Opt for vibrant hues
(Image credit: Marco Bicci/EyeEm/Getty Images)
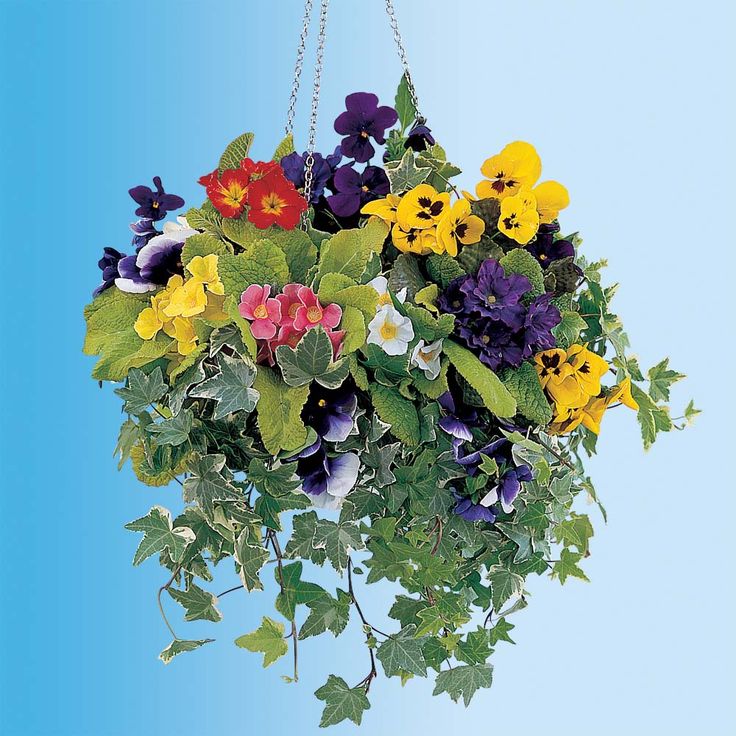
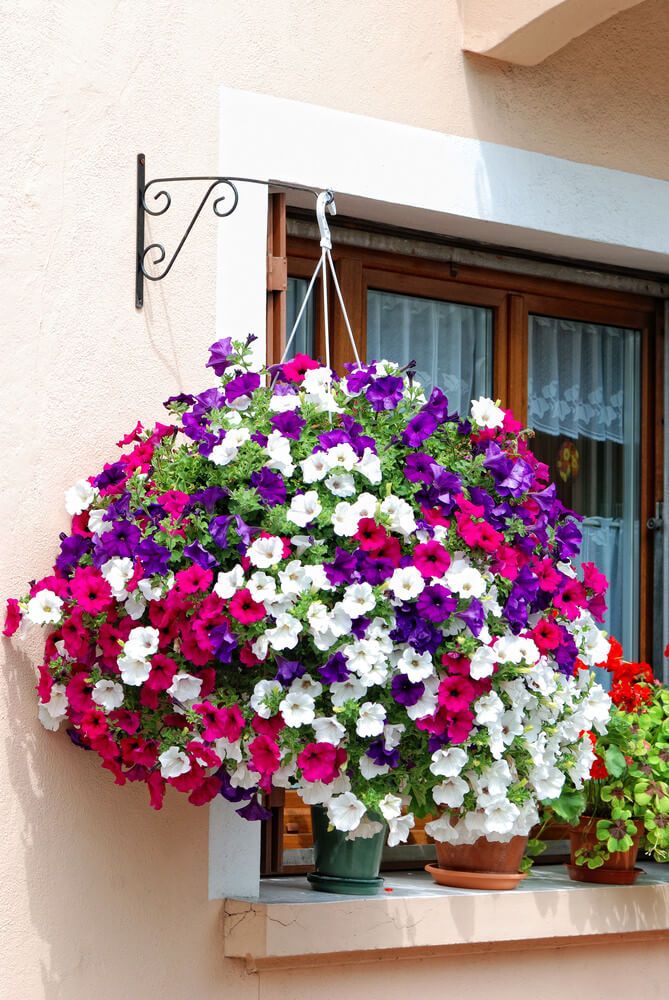
Of course, petunias are a classic choice when it comes to hanging basket ideas – and there's a reason why they're so popular.
These sun-loving, low maintenance blooms offer an abundant display all summer long, and come in a huge range of colors. So, if you're looking to create a show-stopping look like the one above, they're a safe bet. There's lots of trailing varieties available too – perfect for hanging up high or to add to your window box ideas.
For maximum head-turning potential, pair with a vibrantly-hued wall. If you don't already have one, perhaps now's the time to get the brushes out.
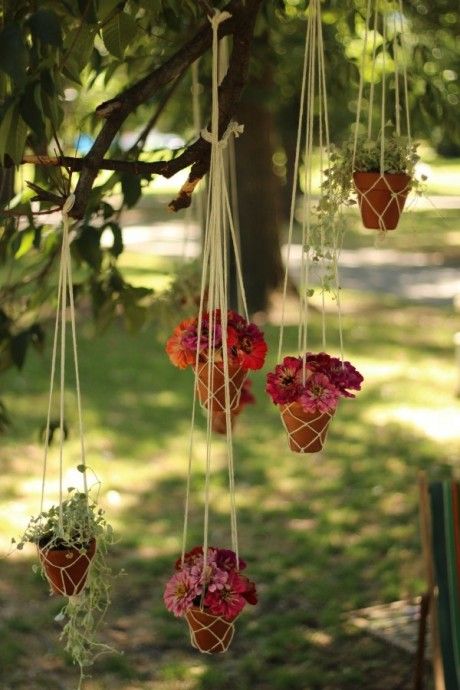
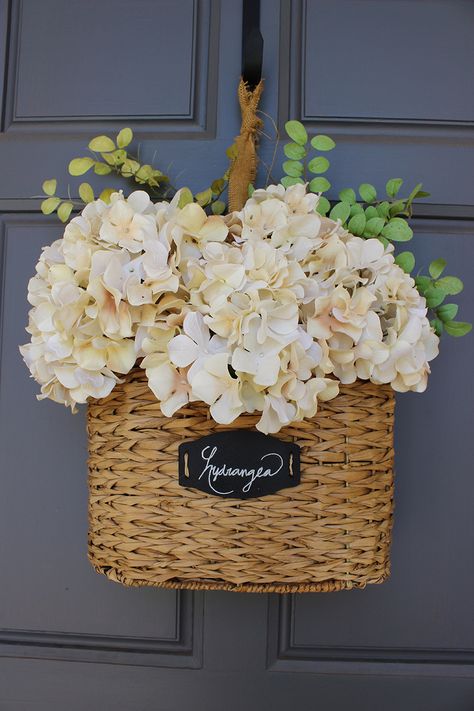
8. Create a warm welcome in your front garden
Bright yellow begonias add a positive vibe to this plot
(Image credit: iBulb)
Give your front garden ideas a lift with a cheery hanging basket or two.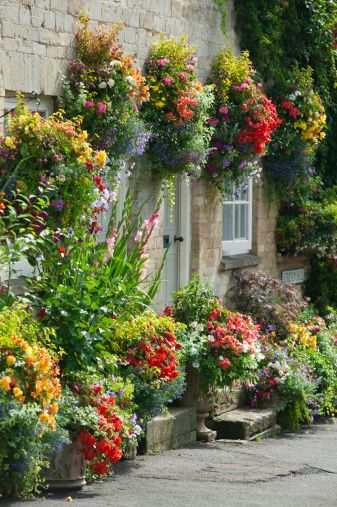 Majestic begonias with their flouncy demeanour will bring joy to passers-by, especially if you opt for a sunshine-like hue.
Position in a porch, either side of your front door, or, as seen here, hang them from a sturdy tree. Attach a sign for your house number for a pretty finishing touch.
9. Make a purple-hued display
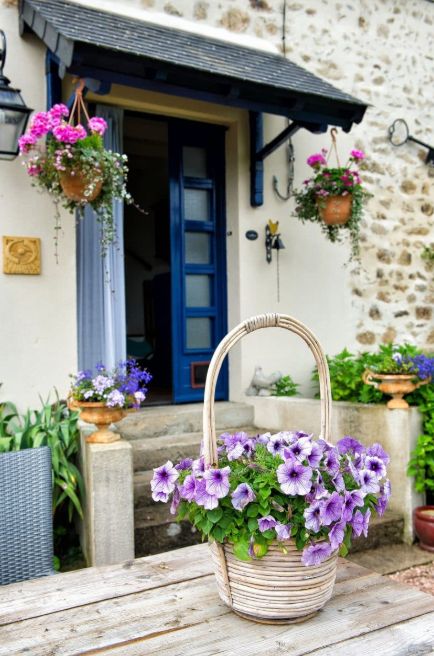
Mix purple petunias and lobelia for an eye-catching look
(Image credit: Difydave/Getty Images)
Purple is a well-loved choice for garden color schemes and is often used for cottage-garden styles. Plus, opting for a one-tone look offers a sense of cohesion to a space.
Mix up the size of your blooms to create extra visual interest – the blousy petunias here complement the delicate lobelia well. And, you can bet that pollinators will love the display, too.
10. Fill with interesting foliage
A mix of foliage plants makes a striking hanging display in this Abari tapered aged zinc container by Nkuku at Amara
(Image credit: Nkuku at Amara)
Fill your hanging basket with a selection of striking foliage plants to give a contemporary look – great for modern garden ideas.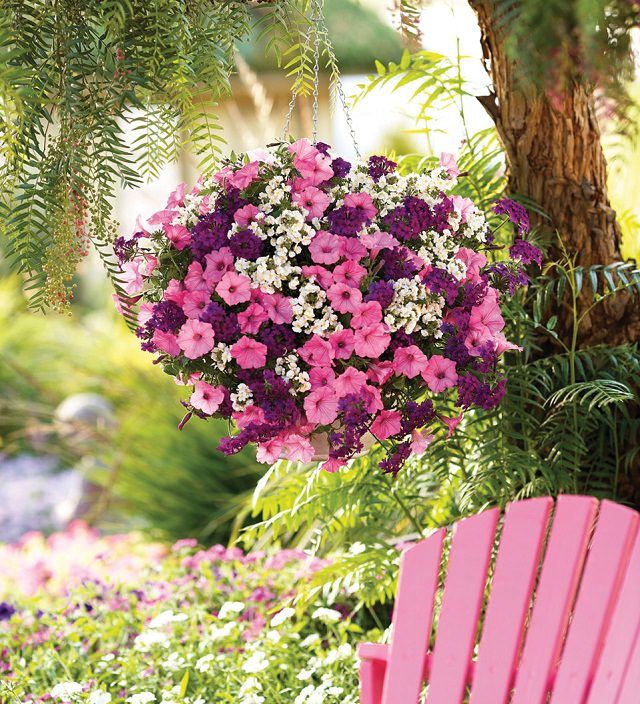 The effect will be lush and textured rather than bright and colorful but can be every bit as dramatic.
Make sure you include plants with different shaped and colored leaves for extra interest. Here are some plants worth looking at for their foliage alone:
- Trailing nepeta
- Lysimachia numularia 'Aurea' (Creeping Jenny)
- Athyrium (Lady Fern)
- Dichondra 'Silver Falls'
- Hedera helix (Gold Trailing Ivy) – good for winter baskets
- Brassica oleracea (Ornamental cabbage) – good for winter baskets
Add extra levels to your display
(Image credit: Mint Images/Helen Norman/Getty Images)
Speaking of foliage, how's this for an impressive display? Sure, it's slightly more on the understated side than masses of bright bedding plants. But, it still packs a punch, in a sophisticated way.
It's a brilliant solution for upping the greenery in a patio, courtyard, or balcony space – especially if you're looking for an alternative to a living wall.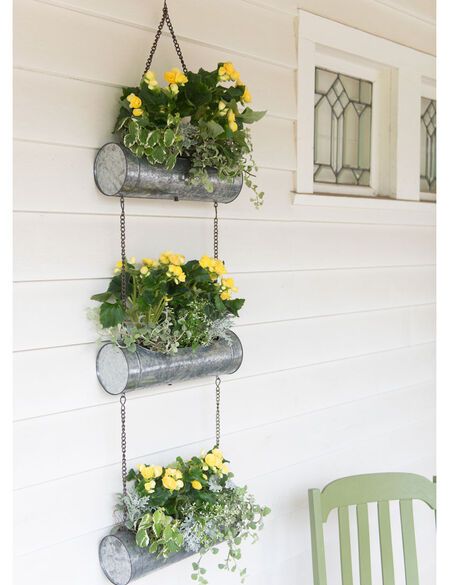 Of course, if you want a more vibrant scene, you could always switch the foliage out with colorful blooms.
12. Grow strawberries as part of your hanging basket ideas
Grow your own dessert in your hanging basket ideas – strawberries are a tasty option
(Image credit: Getty Images)
There's no reason at all why you shouldn't plant edible crops at eye-level. Because of their trailing habit, strawberries are ideal for hanging basket ideas, and will be decorative as well as tasty.
The trick is to select plant varieties that produce small berries and are suited to the job. You'll also get to enjoy their flowers first before the vibrant red fruit.
Love the idea of growing your own crops without the need for raised beds? Our guide to growing vegetables in pots has more tips.
Today's best strawberry plants deals
£5.99
View Deal
£5. 99
99
View Deal
No price information
Check Amazon
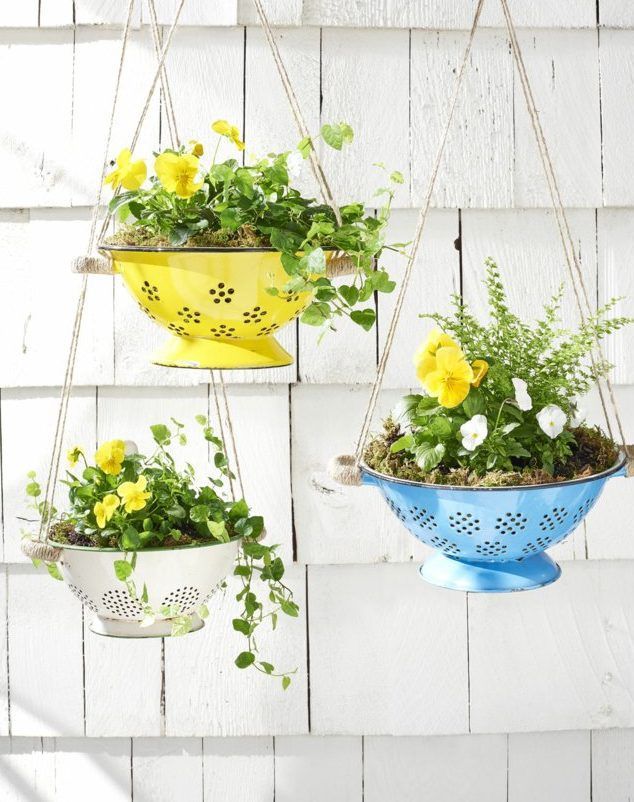
13. Plant up unusual containers
Hanging container ideas don't always have to be baskets. Here, upcycled tin can planters are fixed to the side of a shed and planted up with herbs
(Image credit: Karen Darlow)
Think outside the box when it comes to your hanging basket ideas. There's no reason why you can't use any kind of container you like, so long as you have a means of hanging it up.
Try recycling your baked bean tins or galvanised buckets (just make sure there are some drainage holes so your plants don't become waterlogged). Old tea pots, watering cans, fruit baskets and biscuit tins can all be turned into quirky hanging containers, provided you have a solid hook or chain to take the combined weight of the compost, plants and container.
Not only is it an eco-friendly option, but it's also good if you're looking for budget garden ideas.
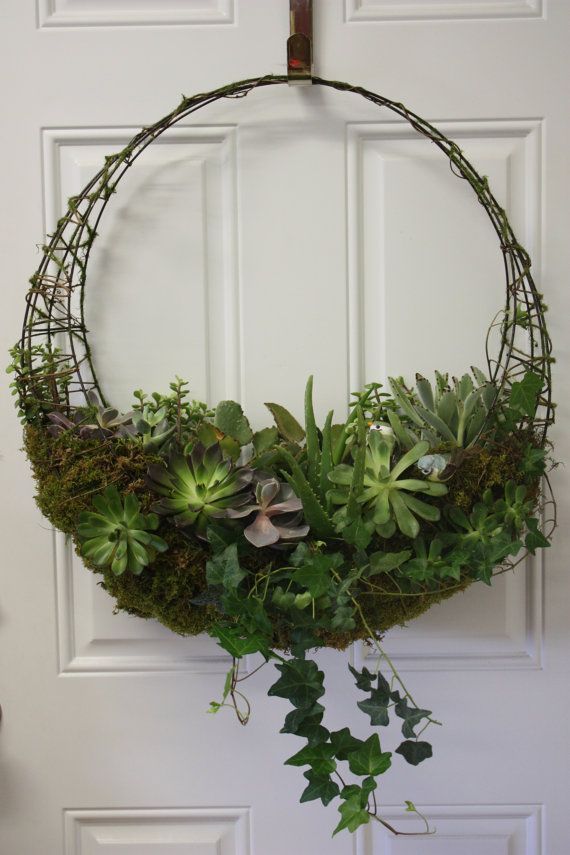
14. Try drought-resistant plants for your hanging basket ideas
Go for trendy succulents for your hanging basket ideas
(Image credit: Leigh Clapp)
Succulents, cacti and other drought-resistant plants are increasingly popular, and understandably so. Needing very little water and thriving in hot, dry, sunny places they are the plants that just keep on giving.
Succulents are an unusual choice for outdoor hanging baskets but with so many textural, colorful and tactile varieties to choose from there are plenty of options for a more contemporary setting. You'll need to choose a hardy or semi-hardy variety – try sempervivum or sedum.
Head over to our tips on how to grow succulents for more advice.
Today's best succulent deals
£2
View Deal
£5. 99
99
View Deal
No price information
Check Amazon
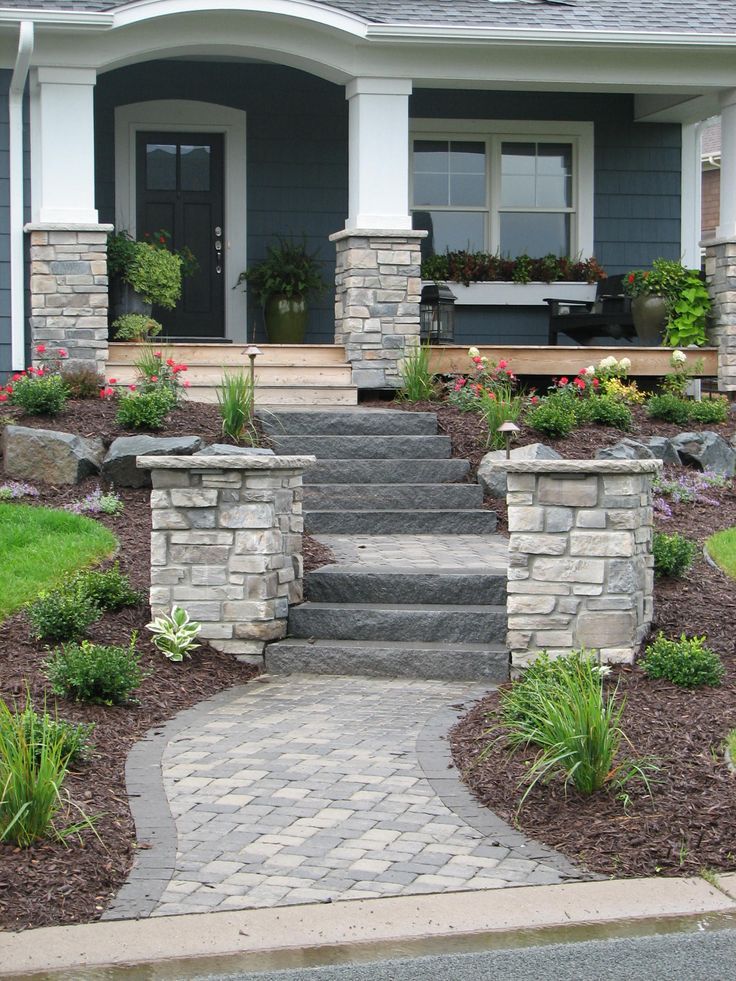
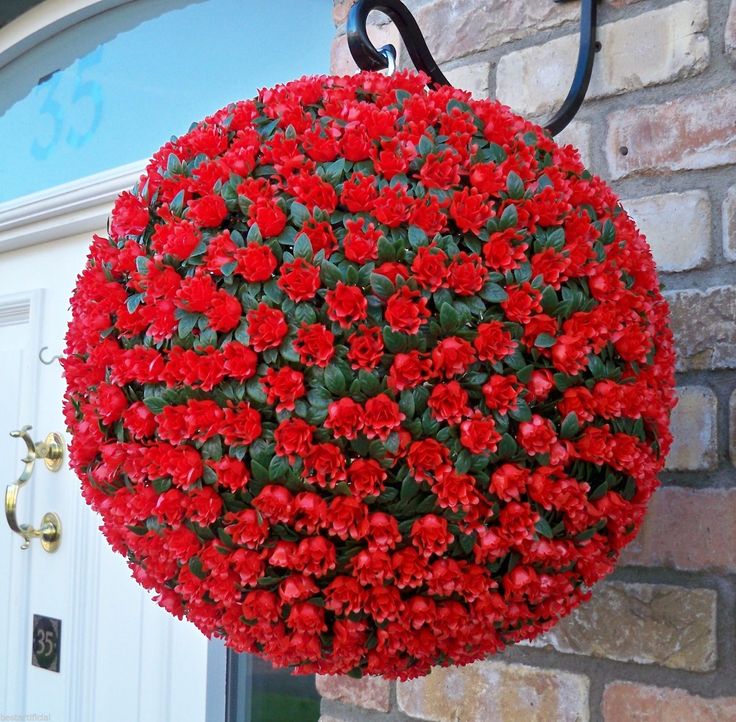
15. Make an impact with just one plant
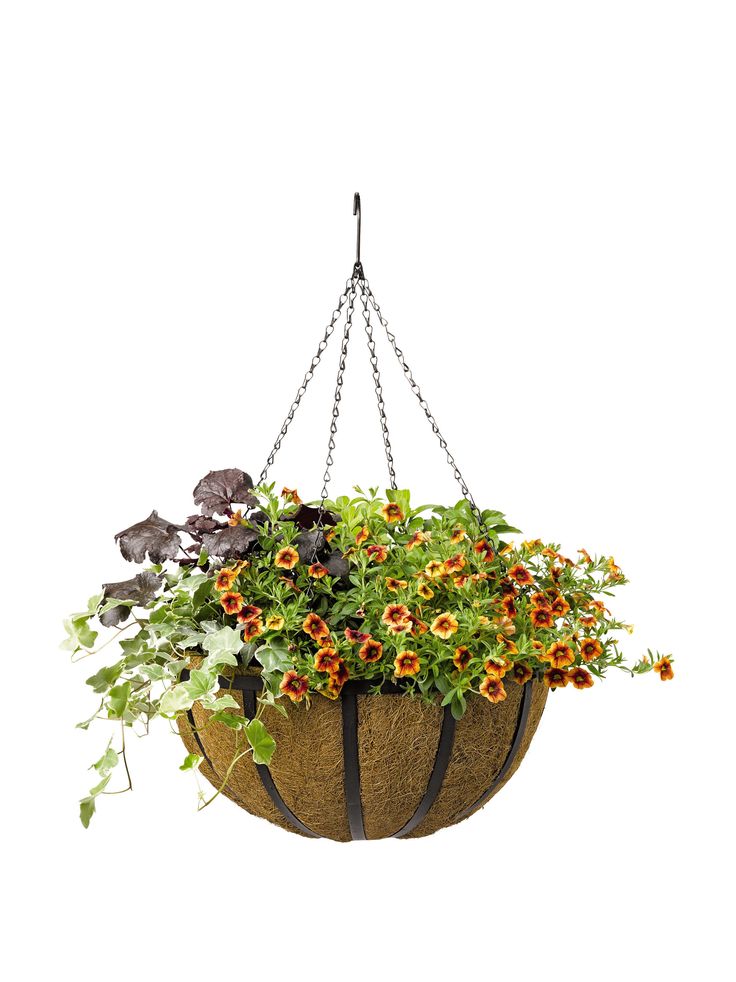
The fiery shades of calibrachoa are vibrant enough on their own in this single variety hanging basket, from Thompson & Morgan
(Image credit: Thompson & Morgan)
Planting up your hanging basket with plants in just one or two colors can be very effective. Use a row of baskets in the same color palette for maximum impact.
Keep things extra simple by sticking to just one variety of plant and you'll be rewarded with a dramatic block of color that really stands out. And when choosing your plant, consider your surroundings – this fiery orange scene complements the navy front door beautifully.
16. Take the indoors outside
Clear glass Viri hanging planter, from Heavenly Homes & Gardens
(Image credit: Heavenly Homes & Gardens)
Trailing sedums look sensational if you let them holiday in the garden for the summer as part of your hanging basket ideas. They need very little water, making them a low-maintenance choice for styling up the patio.
Trailing String of Pearls will do well in partial sunlight, away from the midday sun. Dependable echeveria is ideal for a sunny spot, while upright cactus varieties like crassula add a sculptural touch. These eye-catching glass containers are made from recycled glass and can be layered up with compost and gravel, then easily transferred indoors later on in the year.
What is the best soil for hanging baskets?
NIDO cottage white hanging basket from LECHUZA
(Image credit: LECHUZA)
You can use a good-quality, peat-free multipurpose compost for your hanging basket ideas, as suggests the RHS . This will do the job just fine for a year-long display. However, check your plant's ideal conditions – some, such as flowering heathers, prefer an acidic soil so will need ericaceous compost.
Sue Sanderson at Thompson & Morgan also suggests to add 20% perlite to your compost, as well as water-retaining granules and slow-release fertiliser.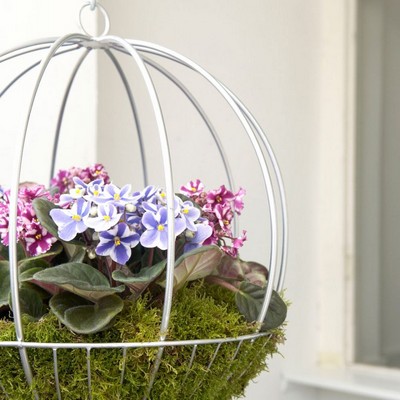
If you're looking for an alternative to soil, then you can also use a special mineral substrate mix. For instance, the team at LECHUZA explains how their LECHUZA-PON product has been designed with a slow-release fertiliser, whilst also allowing strong root growth and preventing mould due to its aeration system. What's more, it helps to regulate water uptake, whilst reducing the risk of your plants becoming waterlogged.
How often should you water hanging baskets?
A trailing red begonia makes a dramatic impact for hanging basket ideas
(Image credit: iBulb)
Similarly to other arrangements in your garden planter ideas, hanging baskets often need regular watering, especially during the hot summer months. A good way to tell is by touching the soil – if it no longer sticks to your finger and feels dry, then it's time to give it a good soaking. Avoid letting them dry out to the point where your flowers or foliage wilts – they're often difficult to revitalise.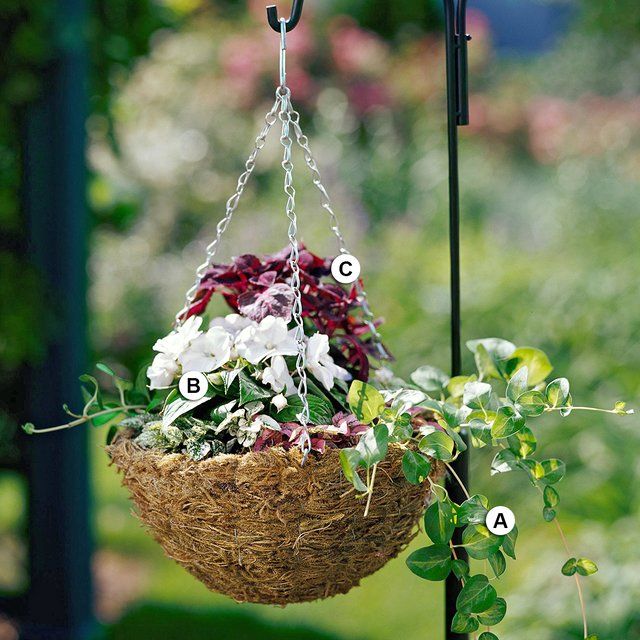
Of course, you want to avoid overwatering, too – this can cause hanging baskets to become waterlogged and consequently damage the plants. Good drainage helps, which is why it's important to have holes in the bottom of your planter.
In terms of the best time to water – go for early morning, before the sun is at its highest, to prepare your arrangements for the day ahead.
Lifestyle journalist Sarah Wilson has been writing about gardens since 2015. She's written for Gardeningetc.com, Livingetc, Homes & Gardens, Easy Gardens and Modern Gardens magazines. Having studied introductory garden and landscape design, she is currently putting the skills learned to good use in her own space where the dream is establishing a cutting garden.
How To Create A Gorgeous Hanging Flower Basket
By Brittney Smart | Published on Reviewed by Stefan Gheorghe
Buy Now
Learn how easy it is to create a gorgeous hanging flower basket with our definitive, step-by-step guide.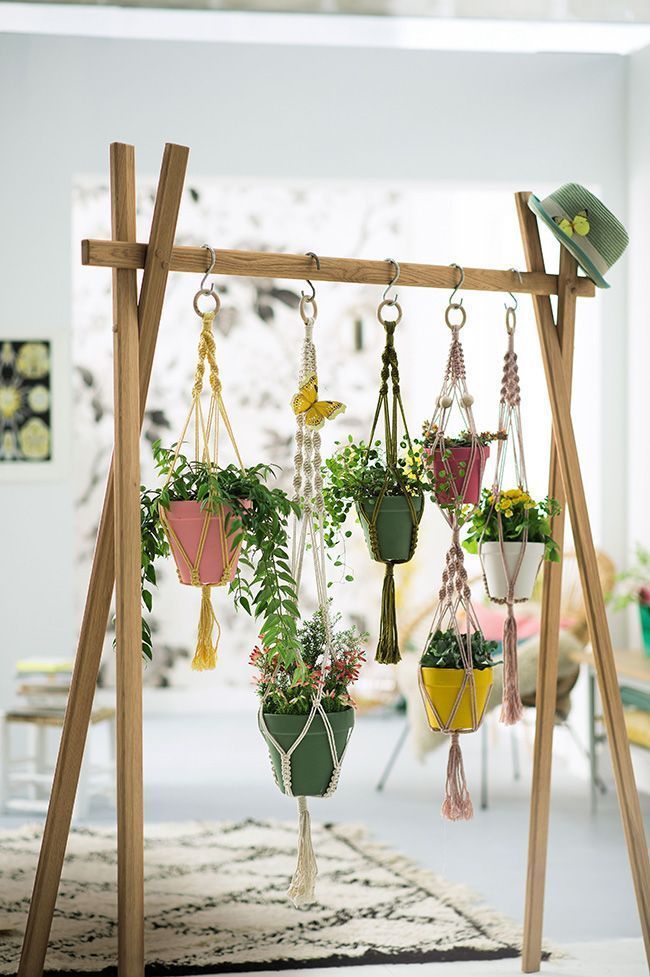
All you need is to choose your favorite flowers, buy a basket, some wire, and quality potting soil, and you’re on your way to a beautiful outdoor design.
Choosing the Best Soil for Hanging BasketsWhere are You Hanging It?
If you’re hanging them in direct sunlight for several hours a day, then opt for a potting soil that has slow-release fertilizer and wetting agents.
What’s Available Locally?You might be limited to options for good potting soil at your local stores. Shop around, ask landscapers, and if you can’t find what you need, shop online.
Look for Good Water Retention and DrainageDefinitely choose a potting soil mix that has ingredients to help retain excess water but also releases that same water when the soil has gone too dry. This helps control moisture and protects the plants.
Ingredients- Wetting Agents: Things such as bark and mulch to keep the soil moist
- Fertilizers: Usually a slow-release ingredient that feeds the soil over time
- Clays: Can replicate a lot of the nutrients and minerals you need
- Polymers: Absorbs excess water and releases when soil is too dry
There are many flowers that are perfect for outdoor hanging flower baskets.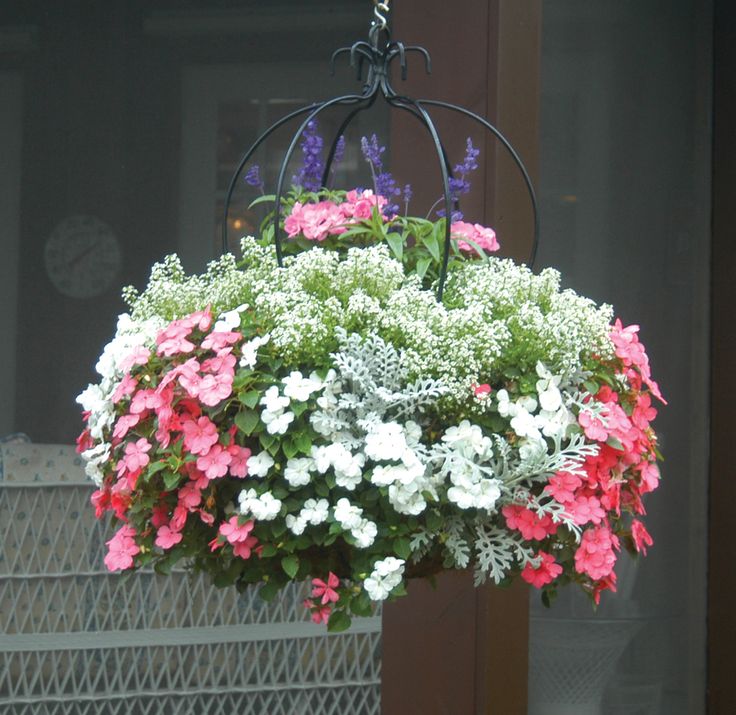
Below are the top 5 to consider when creating your flower basket hanger.
LobeliaLobelia is a great option for hanging flower baskets. This dark blue floral is known for its bold hue. Since it’s an annual flower, it finds full bloom in the late spring and lulls midsummer. So don’t be surprised if your basket looks less full by August!
BegoniaBegonias have flair and versatility. These flowers are known for their drooping look which works perfectly in outdoor hanging flower baskets. They come in a wide variety of colors from orange to pink.
PetuniasPetunias are a quintessential choice for hanging baskets. These beautiful, fragrant florals love the sun and come in a splash of colors: purple, pink, yellow, and red.
FuschiaFuschias are ideal for climates that get cool, wet summers. These lovely blooms come in myriad shades from classic white to pretty purple. Requiring light misting, you’ll enjoy them all summer long.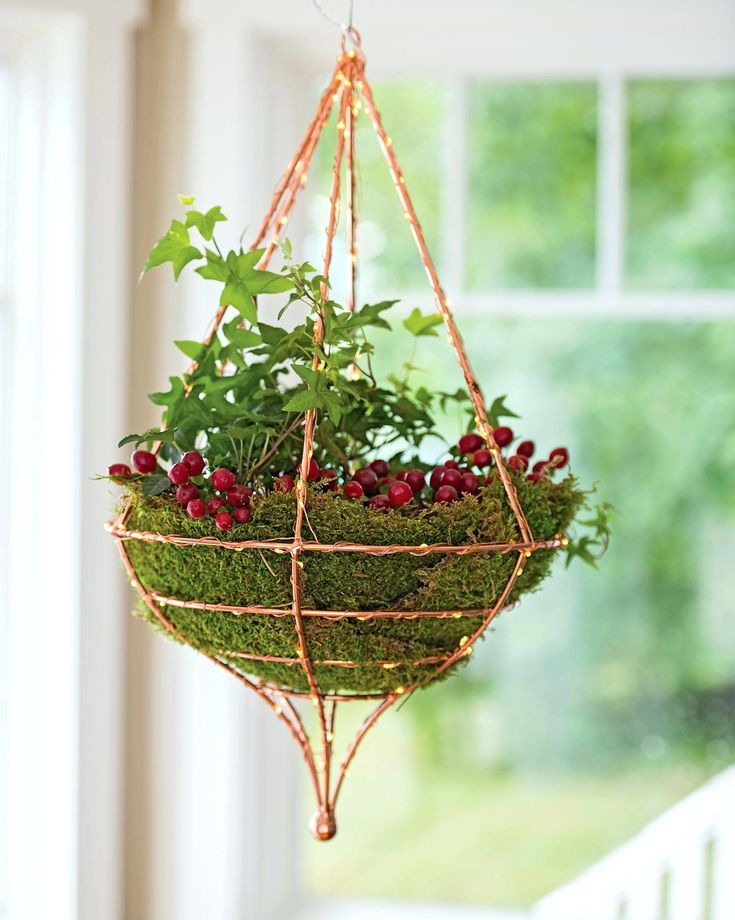
Bacopa flowers are trailing, which is ideal for baskets. These beauties come in shades of purple, blue, and white. They love the sun, so place your basket on a porch for full bloom!
How to create a hanging flower basket
View in gallery
Materials Needed to Make a DIY Hanging Flower Basket:To make your flower hanging basket, first make sure to gather the neccessary supplies. These are pretty simple items, and this DIY shouldn’t take too long!
- Flower starts (example shows blue cascade petunias and purple Wave petunias)
- Hanging basket with holes on the sides
- Potting mix (NOT soil)
Hanging flowers basket – step by step guide:
Step One: Prep Your FlowersView in gallery
Have your flowers ready to go.
If you need flower ideas for hanging baskets, scroll up and reconsult our list!
Note: This example shows a combination of petunias – cascade blue (the darker purple blooms; the flower world tends to label purple as “blue”) and wave purple (the fuchsia blooms).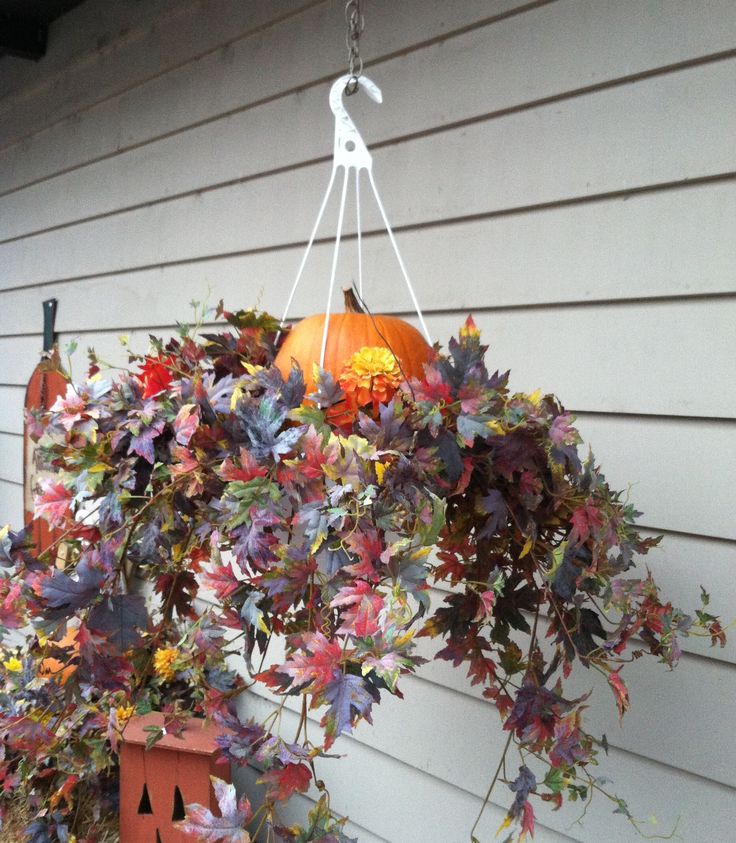
Step Two: Grab Your Basket
View in gallery
Have your plastic hanging basket ready to go as well.
Pro Tip: We recommend one with holes on the side as shown above.They range from 1- to 6-gallon sizes, with varying numbers of planting slots.
Step Three: Get the Potting Soil Ready
View in gallery
Lastly, have your potting mix ready to go.
Great soil medium is imperative in the success of a hanging basket, and you’ll want to choose potting mix rather than potting soil for a few reasons:
(1) potting soil is dirt, whereas potting mix is a soil-less growing media designed for containers.
(2) a high quality potting mix has larger particles than soil particles, which is key in containers because it makes the growing medium capable of holding both more air and water than actual soil.
This allows for the circulation of fresh air and water without drowning your container plants.
Step Four: Fill Bucket
View in gallery
Pour some potting mix into a bucket, wet it down, and stir it. It should be wet enough to be sticky, but not quite mud.
Step Five: Fill the Basket
View in gallery
Fill the bottom of your hanging basket up to the bottom of your first row of side slots.
View in gallery
Smooth the soil then pat it down gently. (Note: Although I use the word “soil” for simplicity in this tutorial, I am actually referring to potting mix.)
Step Six: Add Flower Starts
View in gallery
Working on just the bottom row of side slots, add in your flower starts. It’s easiest to work with the flower, feeding it into the pot from the outside in (if the soil base of the start is small enough; otherwise, you’ll need to carefully feed the flower plant through the slot from the inside).
View in gallery
Work the flower/soil in until the base of the flower is even with the side of the hanging basket. Carefully spread the roots.
Step Seven: Contune Adding Starts
View in gallery
Feed-in the flower start on the slot directly across from the one you just did. If you are creating a combination basket, pay attention to which flower you’re putting where. This example shows two purple wave petunias planted directly across from each other.
View in gallery
Two blue cascade petunias were added into the remaining two slots on the bottom row. These two flowers are also directly across from each other. This will create a lovely combination effect in the blooming basket, so the colors won’t be split directly down the middle.
Step Eight: Add More Potting Mix
View in gallery
Gently add more potting mix into the hanging basket, on top of the roots, up to the bottom of the second row of side slots.
View in gallery
Your pot will look something like this, with first-row roots fully covered and soil gently and evenly patted down.
Step Nine: Make Your Second Row
View in gallery
Repeat the planting method of your flower starts on this second row. Again, if you’re creating a combination basket, alternate the type/color of flowers as you plant them in the slots.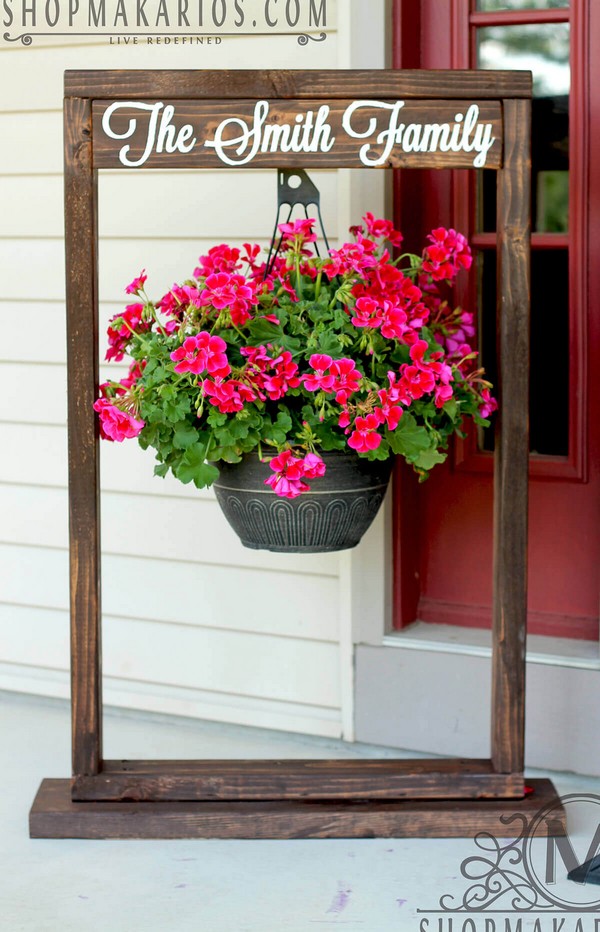
View in gallery
You’ll notice a gap between the base of the flower start and the top of the planting slot. That’s okay, because the moistened soil layers will cover those up and fill them in without too much trouble.
Step Ten: Add More Soil
View in gallery
When the second layer is planted and complete, carefully add more potting mix to an inch or two below the top rim of your hanging basket.
View in gallery
Gently pat down the soil. Remember that when you water this basket, the potting mix will compress a bit, so you want to have enough in your basket from the beginning that this won’t be a problem and expose your flower start roots and/or starve them of their needed nutrients.
Step Eleven: Make Holes
View in gallery
Make holes big enough for planting flower starts in this top layer.
Step Twelve: Add More Starts
View in gallery
Plant the starts, taking care to keep roots covered. Add a little more potting mix around each flower start as needed.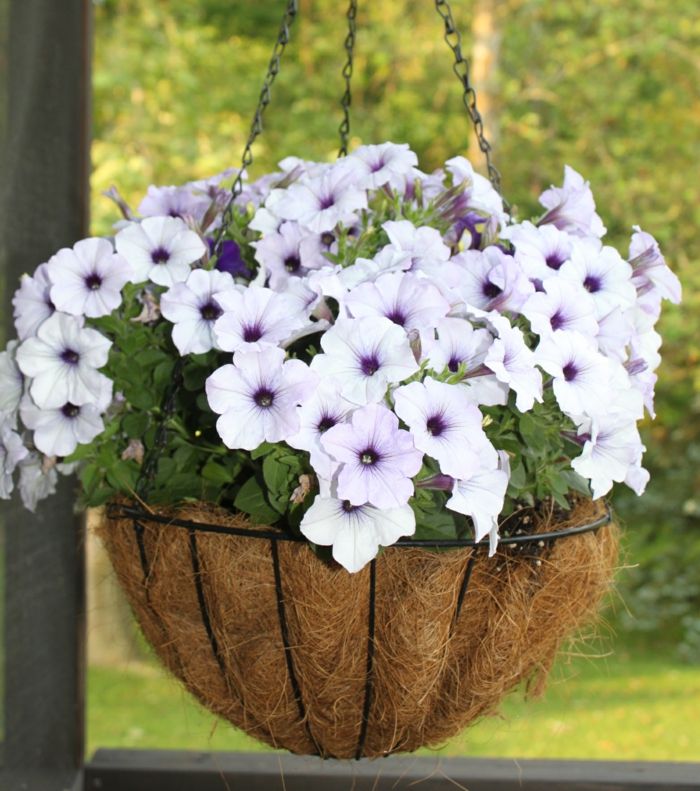
View in gallery
In this example’s 2-gallon pot, we planted four flower starts in the top, two each of blue cascades and purple waves, both types directly across from each other.
Step Thirteen: Add the Wire
View in gallery
Feed the wire hangers into the pre-punched holes on your hanging basket.
View in gallery
Taking care to keep the wire lengths even, bend them back against themselves and secure by twisting the wire ends around the wires themselves several times.
View in gallery
Note: Be sure to add container-focused fertilizer to your plants two to three times a week, following the dilution ratios on your fertilizer.
Also, these flowers benefit from having the fertilizer applied to the leaves occasionally, so one of the weekly fertilizations include a sprinkling over all the foliage.
On other days in between fertilization, simply water the basket.
View in gallery
This photo shows the growth in the flower starts about two weeks after potting.
View in gallery
This photo shows another purple flower in hanging basket, planted at the same time as the tutorial.
View in gallery
You can see the beautiful shape and silhouette of the wave brand of petunia for hanging baskets in this photo, taken just three or four weeks after potting.
View in gallery
The green pot has almost disappeared behind the beautiful flowering. Note: Learn how to create a grape arbor, seen in the background, in this step-by-step tutorial.
Frequently Asked Questions (FAQ)FAQ
What's the best flowers for hanging baskets?
Some of the best flowers for hanging baskets are: Fuchsias, petunias, lobelia, and geraniums. Though the choice is yours! You can always check out hanging flower baskets at lowes to get a preview of the types of flowers you love the most.
What flowers last longest in a hanging basket?
The flowers that will bloom all summer long are: petunias, portulacas, million bells, and sunpatiens.
How many plants do you put in a hanging basket?
A key rule of thumb to consider when planting a hanging basket is to use one plant per inch of basket diameter.
How do you make a hanging basket look fuller?
To make your basket look fuller, aim to use trailing plants. These will spill over the edge, hiding the basket, and giving a full aesthetic.
When should you start hanging baskets?
After your last frost.
What month do you plant hanging baskets?
Start the inside 10-12 weeks prior to your last frost. Then hang them outside.
Hanging Flower Basket: ConclusionAs you can see, this DIY tutorial to create a flower basket hanger is simple, fun, and totally customizable. While you can of course always go out and buy artificial hanging flower baskets, this option gives you something to be proud about and show off as it grows! We hope you found this helpful, and have a blast making your very own hanging flower basket.
TOP-160 photos of ways to make planters at home. Do-it-yourself step-by-step instructions for beginners
Decorating an interior where there are a lot of home flowers and plants, the owners always use flower pots. There are many options for these items. With them, the rooms look cozy and stylish. They can always be updated without harming your favorite plants.
Review content:
The concept of a planter
A flower pot dressed in beautiful new clothes, that's what a planter is. Translated from French, a cache-pot is a "hidden pot." Such a name, as well as possible, reflects the essence of the subject.
It often happens that housewives are afraid to transplant plants or flowers, so as not to damage the root system, and the pot has an unpresentable appearance. Then he will correct the position of the cache-pot, the plant will look in a new way in the elegant “clothes” of the pot.
Types of pots
Flowers are bred in almost every home. This creates a beautiful, aesthetic interior, comfort, unity with nature. In addition, home plants enrich rooms with oxygen, which is of great importance, especially in a metropolis.
Planters have different target orientation according to the method of placement:
- floor planters are placed on special stands, sometimes multi-tiered;
- table planters decorate shelves, window sills, tables and cabinets;
- hanging planters, with the help of ropes or wires, are attached to special hooks and suspended from ceilings, upper beams;
- wall planters are located in special holders attached to the wall.
Planter selection
If you set out to update your interior, you can't ignore the new look of flower pots. The lack of your own imagination is not a reason to abandon the idea of decorating pots.
It is worth visiting the sites of flower growers, design sites and catalogs with photo planters will amaze you with their diversity.
Even from improvised materials: plastic bottles, wood, rope and much more, lovers of applied arts create truly masterpieces.
Pictures of pots
Home plant lovers don't have to worry about choosing a unique flower pot. Its appearance can always be corrected or updated with the help of planters.
Pictures of flower pots, given on the sites "Deposit photo" or "Landscape design" will introduce you to the variety of options for shells for pots.
-
How to level the area - instructions on how to do it yourself. Photos of finished works, reviews, secrets + review of simple and complex options
-
Alpine hill (rock garden) ☘️ - 150 photos of ideas, novelties, design, instructions, diagrams, how to do it yourself
-
Veranda attached to the house: an overview of the best projects (140 photo ideas). Instructions on how to build with your own hands
Having chosen one of them as the basis for the design, you can always develop the proposed decor idea, add the necessary elements, in your opinion.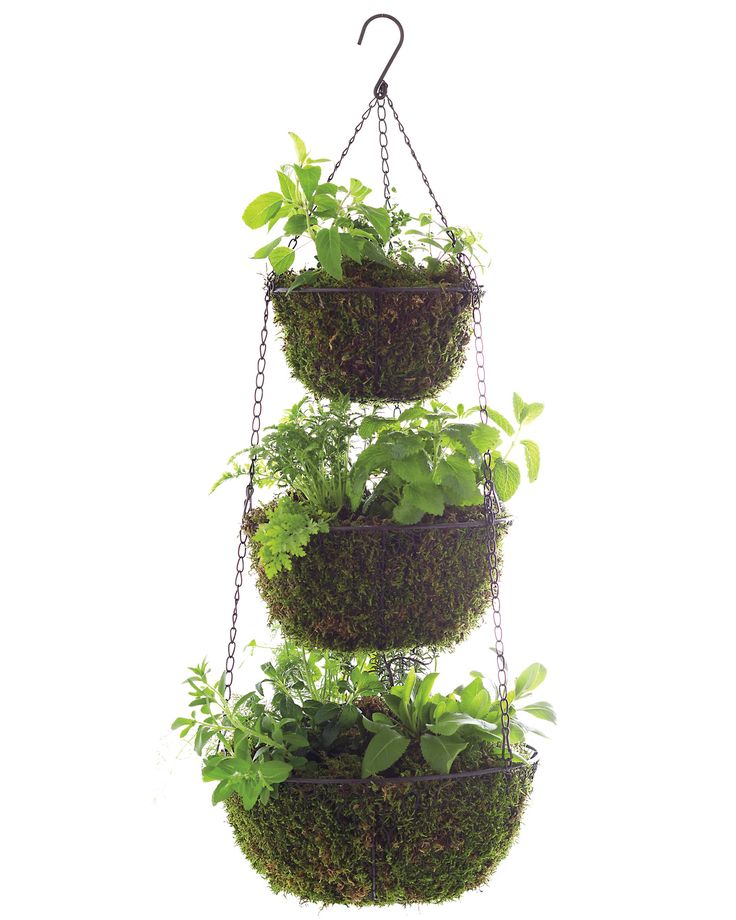 Fantasy will tell you how best to decorate your home so that it looks fashionable and stylish.
Hanging planter
Fanciers of flower growers can't be denied the fantasy of decorating planters for greenhouses or open flower beds. Sometimes, a do-it-yourself hanging planter made in the garden strikes with an unusual invention.
All kitchen utensils are used: pots, old bowls that are no longer needed in everyday life. You can please yourself and your household with weaving flowers in original potted shells, using unnecessary plastic utensils and bottles.
Such compositions should be hung as high as possible. Plants will not interfere with walking, they will not be injured by touching when passing under them. In addition, this beauty will be visible to everyone from afar.
Planter for the garden
The main difference between a planter and a flower pot is the lack of drainage.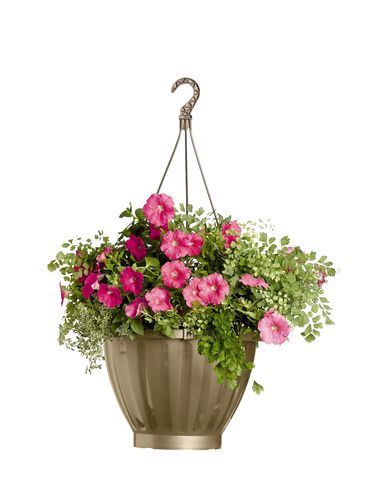 Therefore, you need to select such options in order to freely remove pots with plants from them without damaging them. Making a planter with your own hands for the garden, you can take into account all the nuances of watering and removing plants from the planter.
Decorate the garden with hanging planters located on the arches, or build a multi-tiered version in the form of a staircase exhibition, even those gardeners who are not particularly friendly with applied arts can do it.
DIY flower pot
True connoisseurs of individuality do not ask themselves the question: “What and how to make a flower pot with your own hands?” They try to create their masterpieces by trial and error.
Before you start creating, you need to think about the functioning of the pots.
Pots for gardens, arbors or outdoor areas are made mainly from improvised materials. In the course are old low fences. They make the original frame of large ground pots.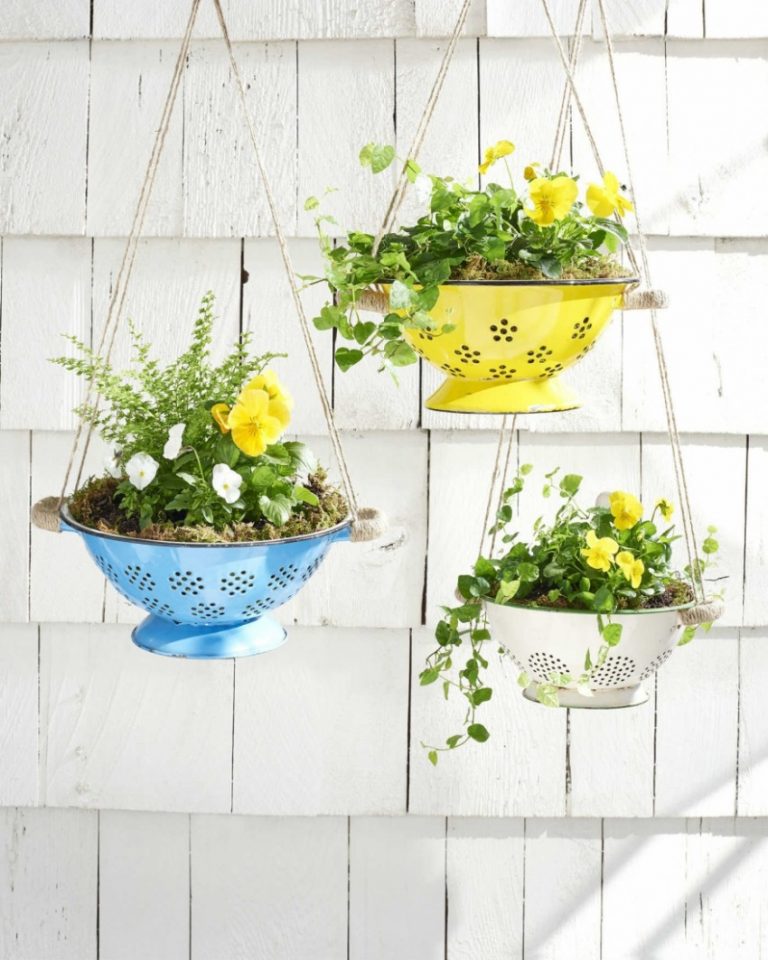
A thick block of wood looks fabulous, the middle of which was freed to fit the size of the pot. This is such an unusual unity with wildlife that causes genuine admiration.
Rope planter
To create the simplest design, you will need 3 pieces of thick cord, each 2.5 m long. A planter made of rope with your own hands requires some skill.
Taking a ring of small diameter (2-3 cm), thread each cord into it so that the ring is in the middle of the cord. It is necessary to tie all 6 segments into a knot at the ring itself.
Hang the ring somewhere to free your hands for work. In pairs, we tie the ropes into knots at a distance of 40 cm from the ring.
Next, we knit knots from adjacent pairs of ropes at a distance of 10 cm below the previous ones.
This weave is suitable for oversized pots.
Macrame planter
Knotted weaving technique from thin rope, twine, yarn, this is macrame.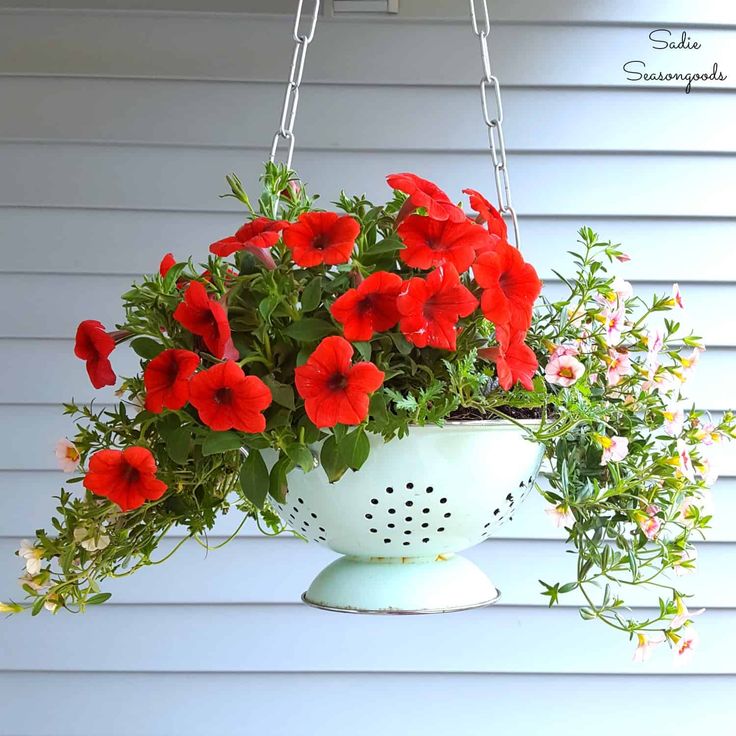 Do-it-yourself macrame planter, this is a decoration of the garden, by dressing flower pots in such a shell, we will truly create the gardens of Babylon. Everyone who gets into them will admire such beauty.
This type of weaving was invented by men. Do not be surprised if you see the owner of the house who makes such crafts.
This planter is light and elegant. Improving the technique of nodular weaving, you will create multi-tiered pots of unprecedented beauty.
These pot covers look great with both large and small pots. They are attached with carabiners to hooks that can be placed on a hedge, arch, or wall.
Macrame planters look stylish and original wherever they are attached. This is truly a versatile item.
Pots for flowers
Indoor flowers in beautiful pots, this is a unique opportunity to decorate and diversify the interior of the house. Flowers, in addition to beauty, also ozonize the air in the room.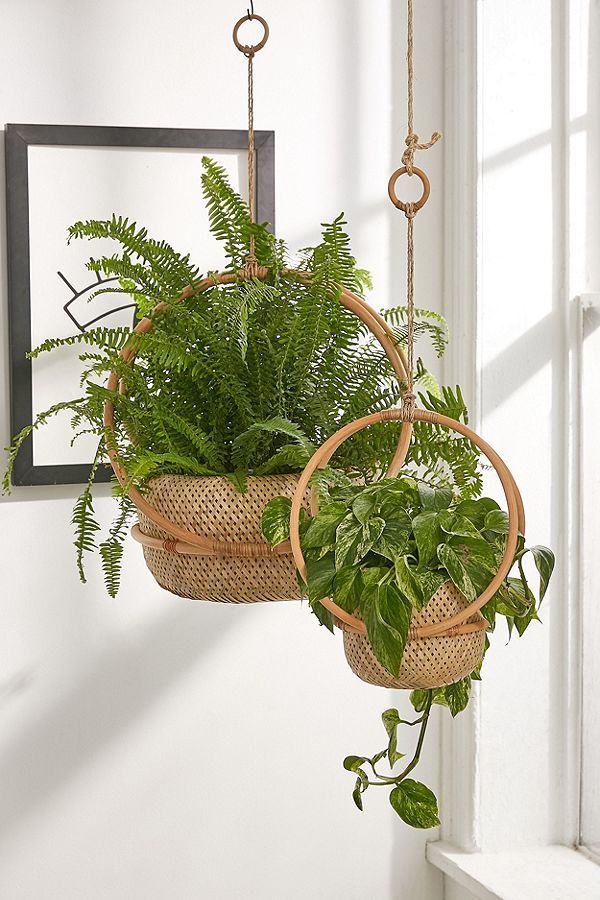 Many gardeners know how to make flower pots. After all, it is their prerogative to decorate their favorite flowers with beautiful flowerpots.
For such products, both special material and waste material are suitable. You should not strive to throw away the waste of building materials left after the repair as quickly as possible. They can always be put to work. Great idea: make flower pots.
Verandas and balconies become winter gardens if heating is installed on them. All year round, any flowers, even the most exotic ones, will delight with their fragrance and bright colors.
Flower pots are made from leather, fabric, string and yarn. Plastic utensils also come into play. And how unusual cement planters look. They can be painted in any color, or you can leave them gray. In combination with bright colors of flowers, they will also look great.
Plastic planters
Plastic bottles, excellent material for making garden planters.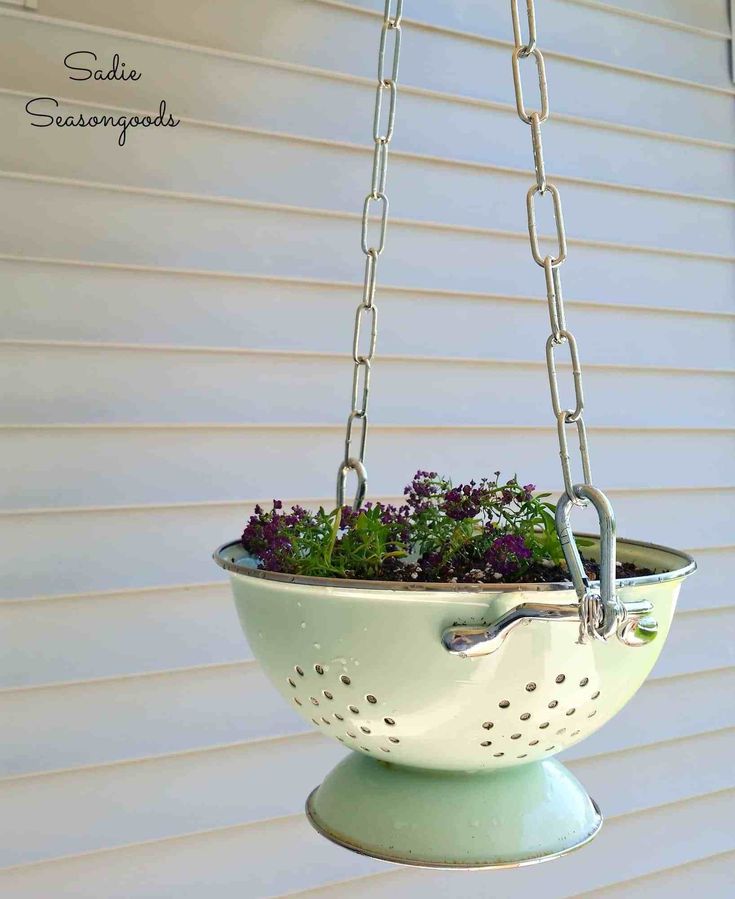 It is quite simple to make plastic planters with your own hands. Such decoration of gardens and flower beds practically does not require financial costs, but it creates an unusually attractive image of a garden or flower garden.
The 5 liter bottles left over after using water are best suited for these crafts.
To create a planter, you need to take a bottle, cut a vertical, wide strip in it, into which you will later install the pots. The spout and neck of the bottle will become the muzzle of any animal.
By painting the bottle in the color of baked milk, you can make a pig. Leaving the ears when cutting out the strips (from the side of the neck), bending them, we get the finished muzzle.
The lid is a real pig's snout if two holes are made in it. Draw only eyes, and you can set small pots in the cut out strip.
Such a pig will delight households and guests of the garden.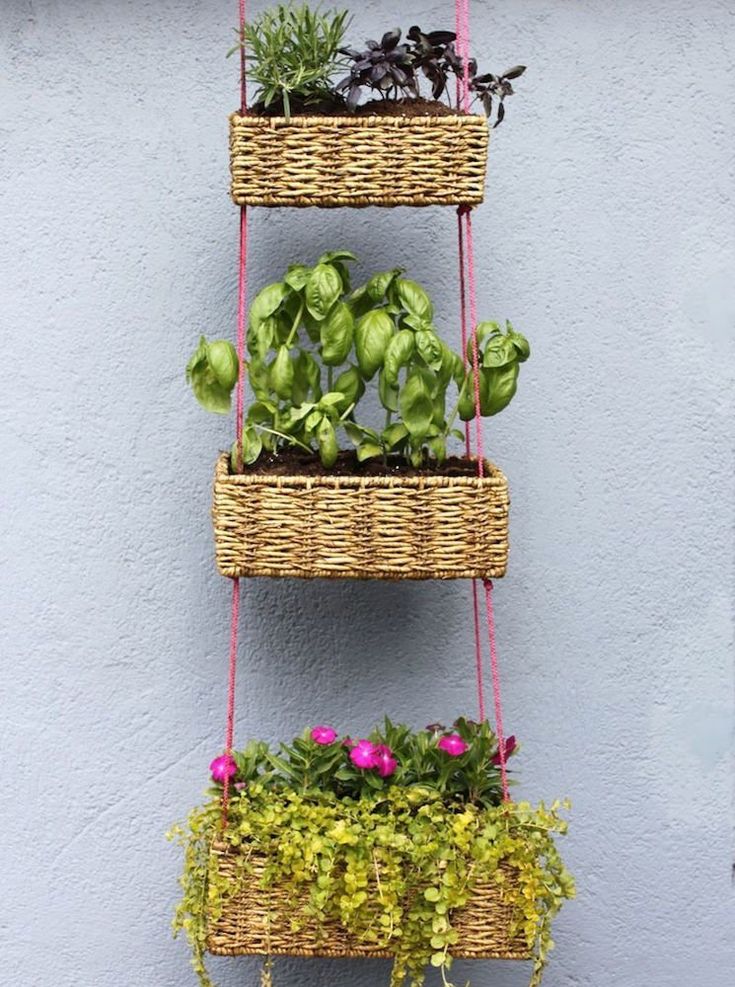
Using the same scheme, you can make a planter in the form of a hedgehog, cat, dog or some other beast or animal.
Outdoor planters
To decorate the local area, the owners tend to arrange color compositions. They should be interesting and attractive not only by the flowers themselves, but also by the containers in which they are placed.
Outdoor planters, depending on the location, make floor, hanging and wall structures. Each of them has its own purpose. If you need to decorate the arch, then, of course, you need hanging planters.
For decorating fences, wall-mounted planters are best suited. Ground compositions decorate the entrance to the house, cafe, and are located directly on the ground.
Ground planters are made massive and durable, they contain voluminous pots with a large number of flowers. You can make them in the form of fences, you can create a stone composition by gluing a material imitating stone to the base of the pots.
Outdoor wall pots are made from plastic bowls and bottles. They are fastened with carabiners to hooks. The chains or ropes that hold the pots are firmly attached to the carabiners.
When making outdoor planters with your own hands, you need to remember that they must be strong and durable items. Being constantly on the street, they are exposed to wind, rain, dust. The sun is mercilessly scorching and can ruin the pots. A cracked planter is not only not aesthetically pleasing, but it can also crumble, ruining the plant.
Creating beauty with your own hands is both exciting and very profitable financially. Using improvised material, people passionate about creativity create unusual flower arrangements, located in incredibly original planters.
One has only to apply imagination and desire, and your garden and flower garden will become special, unlike the standard design options, a place of rest for the whole family.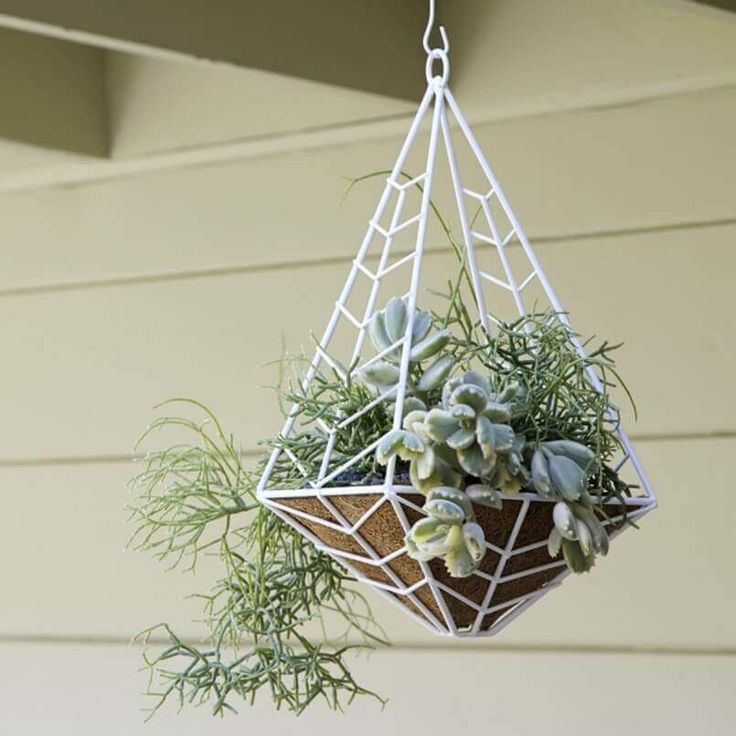
DIY photo planter
How to make a hanging pot. Beautiful do-it-yourself flower pots - ideas, photos, step-by-step master class. Photo gallery: tree planter
No more room on the windowsill? This method will be of interest to those who cannot attach their favorite flowerpots even on the floor!
I really like the idea of vertical gardening .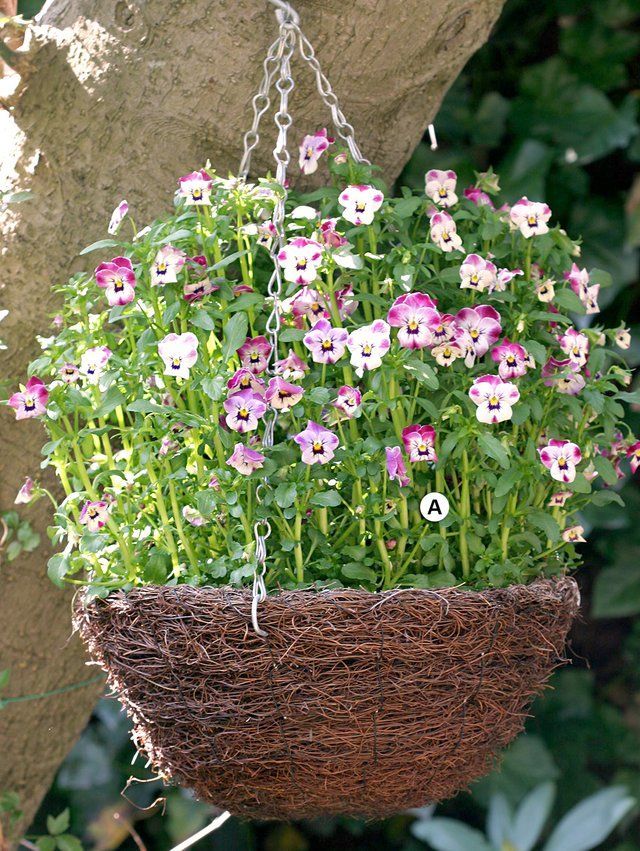 And all because this method helps to save space with a lack of space and frees window sills and other horizontal surfaces from green spaces, and it also looks unusual, stylish and very beautiful.
And today edition "So Easy!" invites you to learn interesting ideas on how to make beautiful hanging flower pots using simple and affordable improvised materials. Now this is not a balcony, but a real garden of Babylon!
Hanging planter with own hands
- Let's start with macrame technique , which, in my opinion, is most suitable for creating hanging planters.
Flowerpots in this technique can be either very simple, which can be done literally in 10-15 minutes with your own hands, or complex - the result of many hours of work.
Therefore, I propose to practice first on the easier ones, honing your skills, and then move on to more difficult ones.
- Hanging pots made of metal baskets can be immediately filled with substrate, but in order to keep moisture out, coconut fiber should be laid on the bottom, and this will only improve the appearance of the pots.
- Great idea for crochet lovers!
- Hanging planter made of straws will suit the interior with innovative touches. Just grab a pack of neon cocktail straws, some strong string, and get started. And even 15 minutes will be enough for this!
- An old hoop, good glue, an unnecessary bowl - and in 20 minutes you are the owner of such an unusual and very stylish planter.
To do this, place half of the hoop vertically, place a bowl horizontally inside and mark the points of contact on the hoop. Glue is applied to them, a bowl is placed and kept until the glue hardens.
- For hanging planters you can use a variety of materials at hand available in the house: baskets, buckets, bottles and even old balls!
- Here are some simple macrame weaving tutorials.
I love these options! - The tree also gives a fairly wide range of activities, a variety of shapes and colors.
 Just choose what you like best and create!
And this is not even a planter, but a real shelf for flowers! Arm yourself with an old cutting board and strong threads, and so that the flowerpots do not fall and the board does not slip out, make small grooves along the edges of the board or secure the threads with a drop of glue.I think this is an incredibly simple and yet quite elegant idea!
This hanging planter will wonderfully complement your home interior. It is done quickly and simply, the materials also will not take a lot of money.
To see the process of weaving planters in macrame technique, I suggest watching this video.
This is a great hanging planter idea for orchids! A decent result, while everything is quite simple and easy, isn't it?
I also suggest that you familiarize yourself with 6 wonderful ideas
( 18 ratings, average: 4.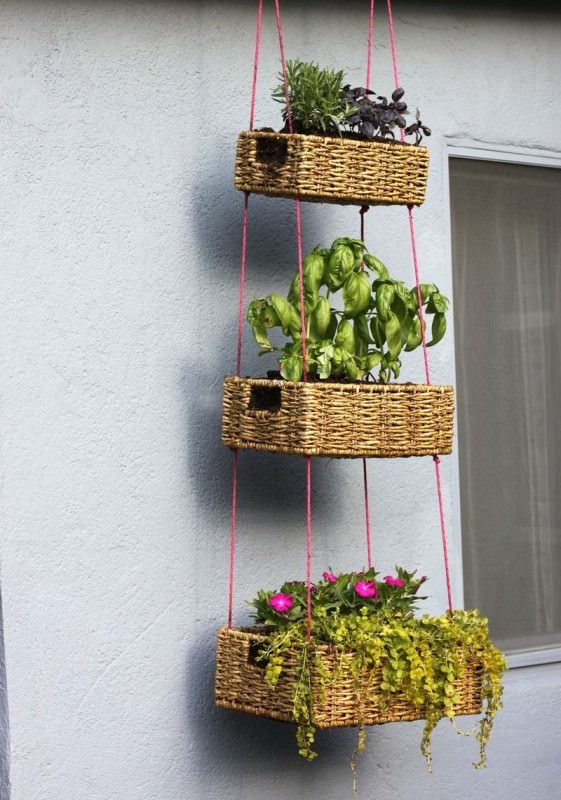 08 of 5)
Unusual pots can add originality to the interior of the house and emphasize the beauty of the flower planted in it. Making beautiful decorative planters for the garden with your own hands is not difficult at all. Any object, be it an old shoe or a leaky car tire, can be given new life by turning it into a vessel for a flower. The choice of materials is not limited by anything but the master's own imagination, and the result will make your home garden unusual and bright.
Materials
- Plastic is an inexpensive and readily available material from which both flower pots and planters are made. For greater safety and overheating in the sun, it is recommended to choose light colors for plastic flowerpots. Plastic products are good because they are easy to decorate with any decorative elements.
- Clay is a traditional material from which pots and planters have been made for many thousands of years, and the plasticity of the material allows you to create a wide variety of options and shapes.
 The inconvenience of clay is that it is difficult to make additional holes for drainage, and not always such a capacity allows the plant to develop naturally.
 - The stone is most suitable for outdoor design options. This material is environmentally friendly and durable.
- Wooden planter is a very unusual and attractive choice. In such containers, the roots do not dry out and perfectly retain heat. However, natural material has a very limited lifespan, over time, pests start up in it, the tree rots and decomposes.
- Metal planters are suitable for austere interiors. This is a very dense material that has high thermal conductivity, so it is recommended to use metal in combination with other materials with insulating properties.
- Nylon thread is used to weave hanging planters in the macramé style. Such planters are cheap, exclusive, perfectly harmonize with any interior style and do not take up much space.
- For plants that need constant control of the liquid level, glass containers are well suited.
It must be remembered that the pots do not have special holes in the bottom from which water must pour out, as in flower pots. In order for the roots of the plant not to rot, must be regularly drained of water. .
Whichever material is chosen for the product, first of all, they must be resistant to high humidity and sudden changes in temperature.
The tutorials below show some ideas on how to make a planter with your own hands.
Cement pot
A decorative planter made of cement is not only original, but also very durable. You can make a planter with your own hands in different ways .
Option 1
Materials:
- Cement;
- An old curtain, tablecloth or any fabric of suitable size;
- Mold making vessel;
- Water;
- Bucket;
- Hammer drill or drill attachment in the form of a “mixer”;
- Paint in desired color.
Making cement planters is easy .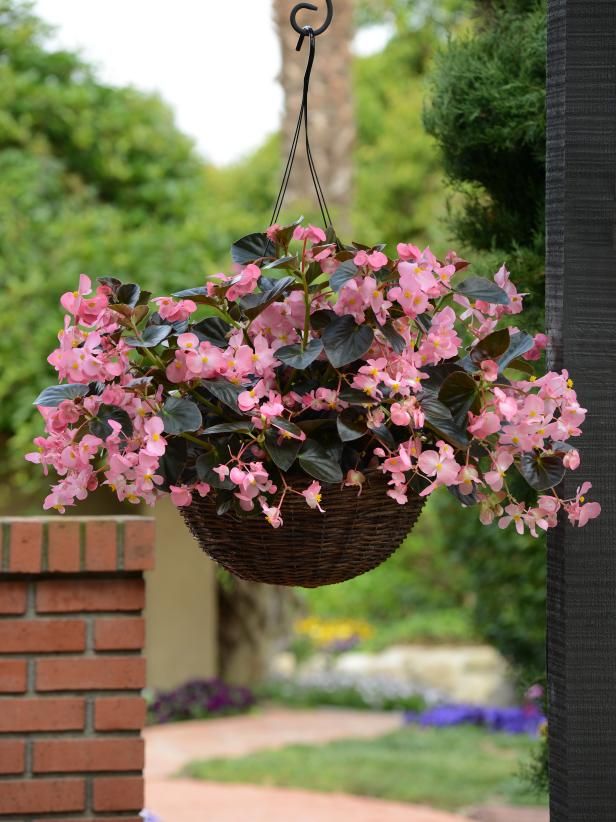 First of all, you need to make a cement mixture. To determine the amount of mix needed, place the fabric in an empty bucket and mark the wall with how much space it takes up. Along the edges of the mark, you need to pour water for the future solution, and then gradually add cement to the water, mixing it with a “mixer”. The result should be a mixture that resembles liquid sour cream in consistency.
Place the entire fabric in the prepared mixture and leave for a few minutes until it is completely impregnated. After you pull the fabric out, you need to make sure that there are no dry spots on it.
Hang a cloth soaked in cement mortar on the container chosen for the form, straighten the material and leave to dry until the mortar has completely set. Then the product can be removed from the mold and given the desired color. Special paints for concrete will be more durable.
Option 2
Materials:
- Bricks;
- Cement;
- Sand;
- Two plastic containers of different sizes;
- Mixer drill bit or mixing hammer;
- Mixing container (bucket, bowl or saucepan).
For less sticking of the cement mix, grease plastic containers with vegetable oil . The smaller one on the outside, the larger one on the inside.
Then you need to make a cement mortar. Gradually adding cement and sand to the water, stir the future mixture until the consistency looks like watery sour cream. Pour the finished mixture into a large plastic container, and place a smaller one inside. The thickness of the walls of the future planter or pot depends on the difference between the volumes of containers.
Place a load inside the smaller container: bricks, gravel or any other weighting object, and then leave the product to dry. Depending on the volume, the cement mortar will dry out from two or more days.
After complete curing, cut the plastic and remove it from the product.
It will look very good do-it-yourself cement planter for the garden , as such products look good in large sizes. However, small pots, despite their bulkiness, look very original in the home interior.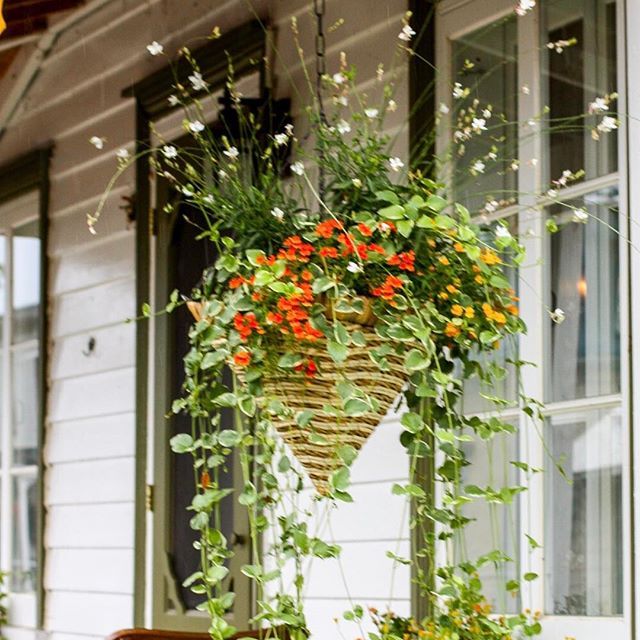
If you wish, you can paint the finished work with acrylic paints, paints for concrete or decorate with other decorative elements.
Gallery: unusual planters for flowers (25 photos)
Plaster pot
Materials:
- Water;
- Gypsum;
- Two plastic containers of different sizes.
Gypsum planter technology is similar to making a planter out of cement . A gypsum mixture, mixed in a ratio of 2: 1, is poured into a large container lubricated with oil. A smaller one is placed inside the solution, the desired level is set with the load, and then the product must be left until completely dry.
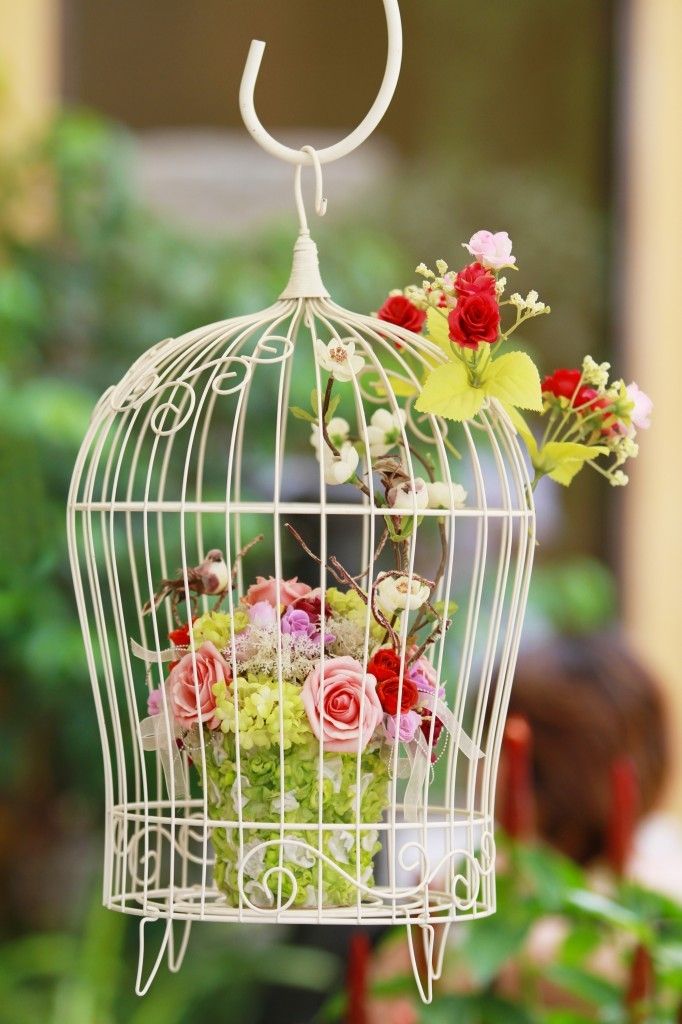
Birdcage planter
An old birdcage is a very beautiful and original option for planters. The plants decorated in it look very unusual. The advantages of using a cage are that it can be placed on the windowsill and hung in any convenient place.
Materials:
- Birdcage;
- Acrylic paints;
- Gloves;
- Brush.
Making this planter is extremely easy . The washed and dried cage must be covered with paint. In order not to get very dirty with paints, you must first paint the cage from the inside, and then from the outside. The shade of paint should be in harmony with the colors of the interior.
After the paint has completely dried, several flower pots can be placed inside. Climbing plants that can wrap around the rods are best suited for birdcage planters.
Hanging tiered planter made of wood
The best option for a decorative planter for an apartment is hanging wooden planter . Due to the fact that the product has several tiers, flower pots will not take up much space. Making a wooden hanging planter with your own hands does not require much time and money, and the result will fit perfectly into any interior.
Materials:
Cut out as many squares from a wooden plate as you plan to arrange in tiers in a future product .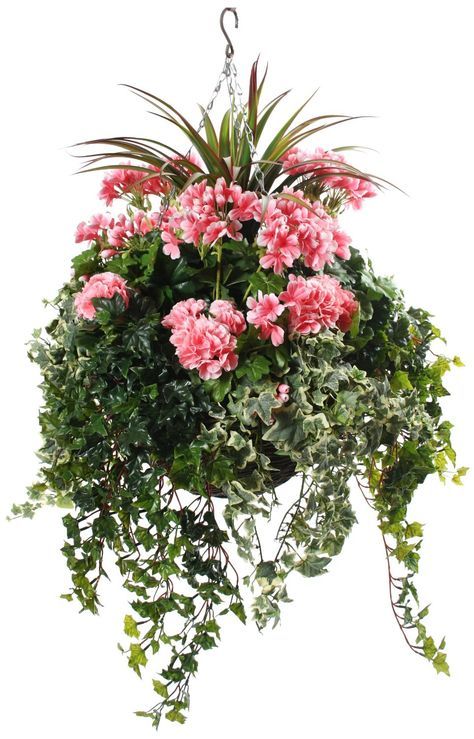 To determine the size , need:
- Turn the pot upside down and place it on a wooden plate.
- Circle the handicap of the pot. Using a ruler, retreating five centimeters from the edges of the circle, draw a square.
- Cut out the squares along the outline.
Then you need to cut holes in the finished squares for pots . To do this,
Use a drill with a diameter not exceeding one centimeter to drill holes for the rope in the corners of the squares.
Using sandpaper, sand the wood, smoothing out all internal and external bumps and protrusions. Then paint the plates with wood varnish or paint . If desired, the pots can also be painted so that they are all in the same color scheme.
To assemble wooden squares, you need to cut 4 ropes of 180 centimeters.
- The ropes must be fastened with a strong knot in the corner holes of one of the squares. This will be the bottom of the pot.
- After measuring about 25-30 centimeters from the beginning of the stand, you need to tie one more knot on each of the ropes, and then string the second tier on them.
 It is important to ensure that all nodes are even, and the second square is strictly horizontally above the first.
 - Repeat these steps for the rest of the plates.
The wooden flower pot is ready and the plants can be planted. The advantage of this design is that when watering, water will drain from the upper plant to the lower one, so the stand is required only for the lower pot. To prevent the pot from falling if someone accidentally hooks it, you can glue it to the stand with superglue.
If you put absorbent filters on the bottom of the pots, then the earth will not spill out of them , which, however, will not interfere with watering the plants.
Twig garden planter
A beautiful planter, decorated with sticks or branches, will give a natural and harmonious look to the garden in the country house. Such a planter will hide a faceless plastic pot, creating an atmosphere of natural nature in the garden.
Materials:
Planter technology
- The sticks must be cut into pieces of the same size.
 The length of the blanks depends on the height of the plastic pot, and their number depends on its diameter.
 - The branches must be tied together from above and below. To do this, on each branch you need to knit two knots, continuing until you get a single canvas.
- Burlap wraps around and inside the pot. You can fix it with superglue or sew it firmly.
- Wrap a piece of wood around the plant pot, tie the edges of the ropes together, fix with glue and cut off the excess.
Garden planter
You can show your imagination in the design of garden planters. You can make flower pots with your own hands literally from any subject , which has already outlived its useful life. Garden flowers in a bucket and a multi-tiered planter from an old chest of drawers with drawers will also look good. DIY hanging flower pots for the garden can be made from an old hat, broken dishes, unnecessary shoes or a garden watering can.
Hanging flower pots are extremely popular in our country and are widely used both in interior decoration and in the design of garden areas and courtyards. Making very beautiful and spectacular hanging flower beds in the country house or balcony and loggia with your own hands is completely easy. Hanging flower arrangements for the street are created from the most unpretentious decorative crops.
The most practical and popular today are plastic outdoor flower pots. Such pots compare favorably with their low weight, as well as sufficient strength and unpretentiousness in care. Impenetrable walls allow you to retain moisture well and protect the soil from drying out. Hinged decorative pots can be plastic, metal, ceramic or wood, but wicker, lightweight pots are especially popular.
- traditional clay pots are attractive, but it can be difficult to provide plants with good drainage;
- for the outdoor version, natural stone is often used, which is durable and highly decorative, but has too high weight;
- wooden hanging pots perfectly retain the heat of the soil, but after a certain period of time pests can start in them, and besides, the wood is prone to decay;
- metal hanging containers are characterized by high strength, but must be used in combination with heat-insulating materials.

If financial possibilities do not allow you to purchase a ready-made hanging pot for growing ornamental plants, then you can easily make such a pot with your own hands. Recently, macrame weaving has been increasingly used to create a hanging planter. Such an exclusive option will be a great addition to any design, and the knitting pattern can be standard.
The value of hanging planters
Despite the fact that domestic gardeners most often use traditional flower beds in modern landscape design, hanging planting containers have a number of advantages:
- decorative hanging planter can be moved freely;
- the possibility of forming landscape groups or stationary flower arrangements;
- saving time and efficient use of a small footprint;
- the best option for growing ampelous flowering plants;
- the ability to carry out the most effective regulation of indicators of illumination, humidity and temperature conditions.
How to make a planter with your own hands (video)
Common species
Today, various types of hanging planters can be used for vertical gardening:
- hanging structures with plastic tripod mounts included;
- designs with small metal chains firmly attached to the rim of the flower pot;
- ornamental planting containers, fitted with twine or sufficiently strong rope;
- models equipped with a special suspension located strictly in the middle.
A real work of art are forged planters, in which the stand is most often represented by openwork highly decorative elements.
Outdoor macrame planter
Among the variety of hanging planters stand out very interesting hanging flowerpots made using macrame technique , according to the following recommendations:
- cut a dense and sufficiently strong rope into an even number of equal lengths;
- connect all segments, align in length and tie on one side into one large knot;
- divide the knotted ropes in pairs, and also tie the pairs with knots;
- combine two pieces from different pairs in pairs and tie them also in a knot.
Weave along the entire length in a similar way. This method is the simplest and does not require special knowledge. At the remaining long ends, a loop is formed for hanging, after which a flower pot with a plant is placed inside the weave.
Plant selection rules
To get the most decorative flower arrangement, you need to know what types of indoor and garden crops look most impressive in hanging containers. As a rule, amateur flower growers tend to plant ampelous and bushy varieties in such planters and pots, which are perfect for decorating an opening, arch or niche, balcony and veranda, as well as outdoor gazebos and terraces. In such containers, the most unpretentious and decorative crops are most often planted:
- shade tolerant begonias can be placed in low light areas and a large selection of cultivars and hybrid forms are used to create multicolored and variegated, flowering plant ensembles;
- Densely branched petunias are distinguished by extremely abundant and variegated flowering, which lasts from the first decade of summer until a strong cold snap.
 The plant is unpretentious, therefore it is one of the most popular in landscape design;
 - heat-loving balsams are placed in well-lit areas, where they are able to form a large number of elegant flowers and neat, densely arranged foliage;
- Hanging pots can be decorated inexpensively with the help of light-loving achimenes, which is distinguished by long and thin branches, as well as funnel-shaped flowers of fairly large sizes. Having planted several bushes of this plant, there is a great opportunity to get a lush bouquet with long flowering.
How to weave a planter (video)
Hanging flower pots and decorative hanging pots can also be decorated with attractive chlorophytum, asparagus, pelargonium, marigolds or pansies.
Basic rules for maintaining vertical gardening
When growing garden ornamental plants in hanging containers, the grower needs to ensure that the flowering crop is properly cared for, due to the limited size of the flower pot.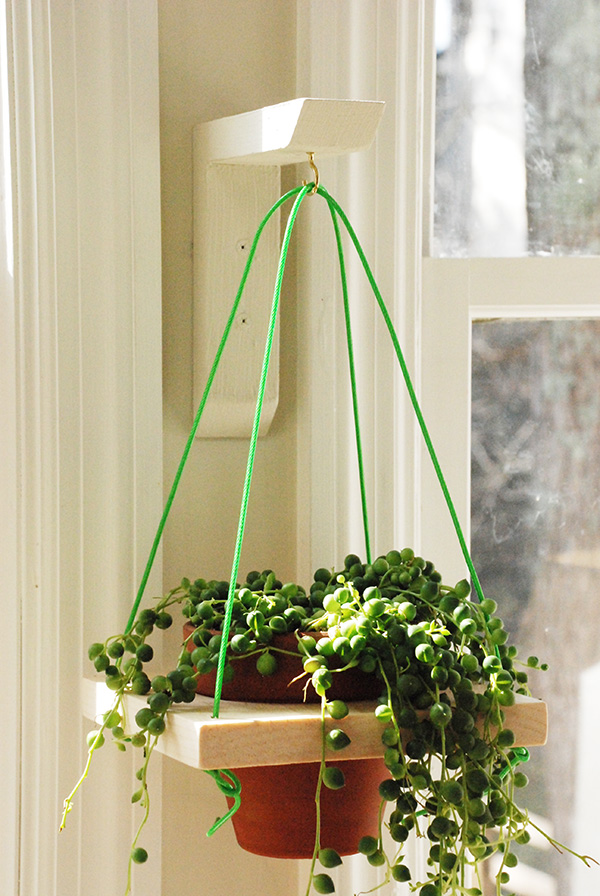
Features of the soil substrate
Heavy and clayey soil substrates, which are prone to rapid compaction and are characterized by low looseness, are not at all suitable for filling hanging planting containers. Such soil can greatly complicate the cultivation of ornamental crops. It is possible to optimize air permeability and culvert mode by adding expanded clay and vermiculite.
Irrigation and top dressing
The soil, subject to vertical gardening, can dry out much faster, so for the cultivation of an ornamental flowering plant, it will be necessary to balance the irrigation regime. To minimize the risk of rotting of the root system, it is imperative to remove the water accumulating in the pan. Irrigation activities should be sufficiently frequent and plentiful , and for irrigation you need to use well-settled or boiled, warm water. Nutrients intensively washed out of the soil must be replenished by additional application of complex fertilizers.
It is possible to make an original hanging planter for garden flowers with your own hands from almost any available materials. Most often, such outdoor flowerpots are made from plastic containers:
- clean empty plastic bottles from labels and adhesive residues, then rinse the container under running water;
- Use sharp scissors or a knife to cut off the bottom, flat part of a clean plastic bottle;
- make several symmetrically located holes for hanging along the edge and thread into the holes a sufficiently strong rope of the length necessary for hanging the structure;
- place the flower pot with the plant into the resulting plastic pot.
Planter in home decor (video)
Finished outdoor plastic flowerpots are most often painted or decorated with a variety of elements at the last stage of creation, including pieces of ceramic tiles, beads, small stones or shells.
Even the brightest flower beds need a frame - "dresses" that will further emphasize their beauty.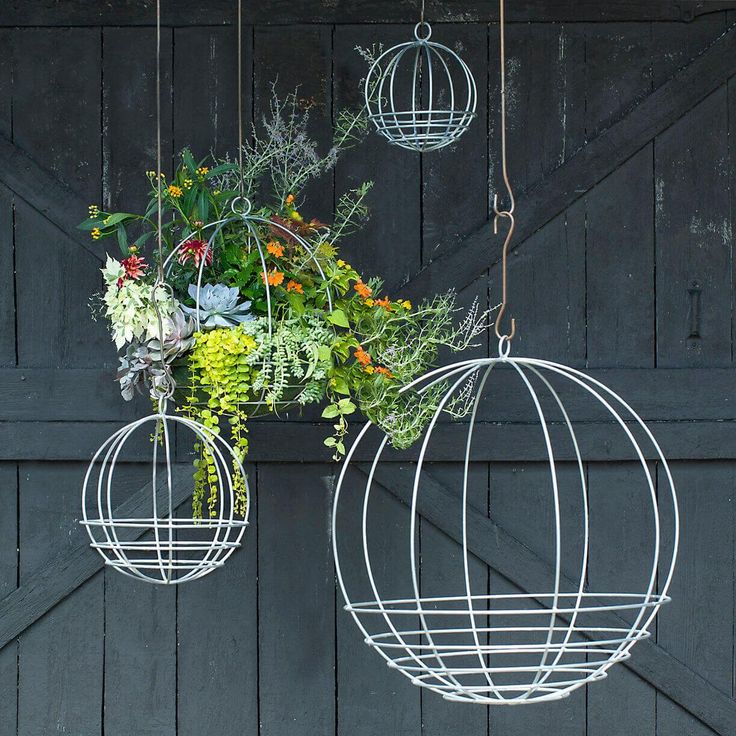 The most spectacular and at the same time simple “outfits” are considered to be street planters. Making them with your own hands will not be difficult. Do you want hanging planters from bottles, wicker from a vine or ground from a tree stump? No problem! Read the instructions on how to make a planter from these and other materials, as well as watch educational photos and videos - they will help you transform your garden beyond recognition.
How to make a planter out of rags and cement
To make this planter you will need:
- cement;
- old tablecloth;
- vase, pot or other vessel for molding;
- water;
- bucket;
- "mixer" - nozzle for a drill;
- paint.
The process of making a planter is very simple. First you need to prepare a cement mixture. To accurately determine its volume, take a tablecloth, place it in a bucket and mark on the walls how much space it takes - follow this mark and pour water for the solution.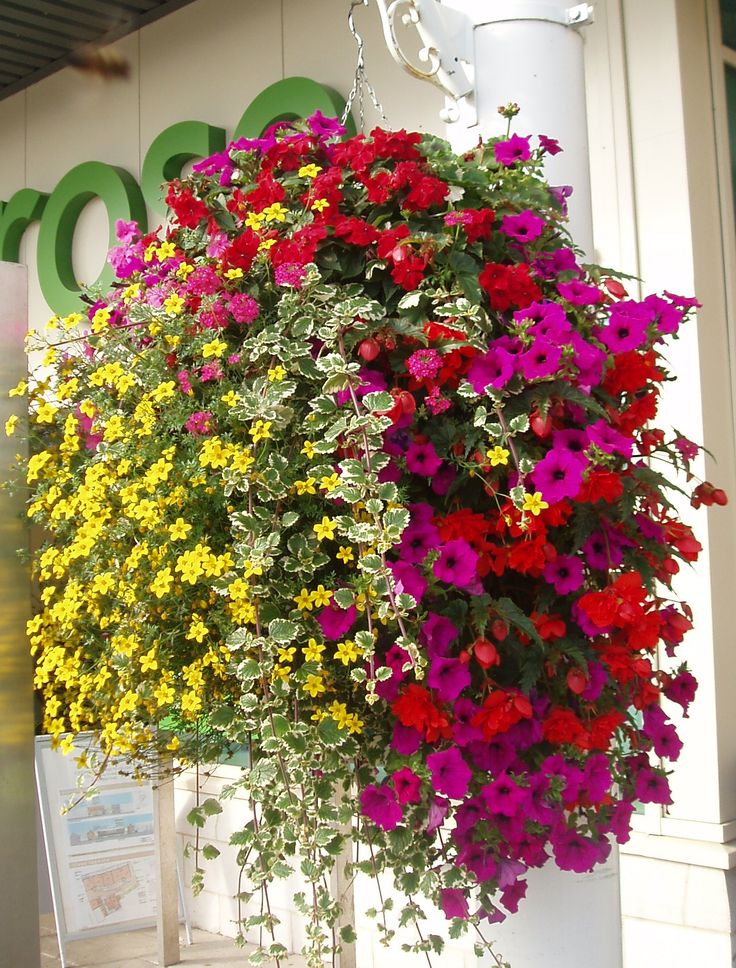 Add cement to the water and mix them with a “mixer”. The result should be cement milk, reminiscent of the consistency of slightly watery sour cream.
Then, when the mixture is ready, place a tablecloth in it and let it soak for a couple of minutes. After that, remove the material and make sure that there are no dry spots left on it.
Next, take the prepared pan and hang the wet tablecloth on it. Gently spread the material and leave to dry. When the cement mortar has completely hardened, remove the product from the container-mould and paint. Use special paints for concrete - they are stronger and more durable. Once the paint has dried, you can use the planter for its intended purpose.
Making flower pots out of plastic bottles with your own hands
Plastic container is a versatile material for flower pots, since it can be used to make several models of “outfits” at once.
The first version is a classic planter. Take a plastic bottle, two CDs, sandpaper, scissors, glue and paint.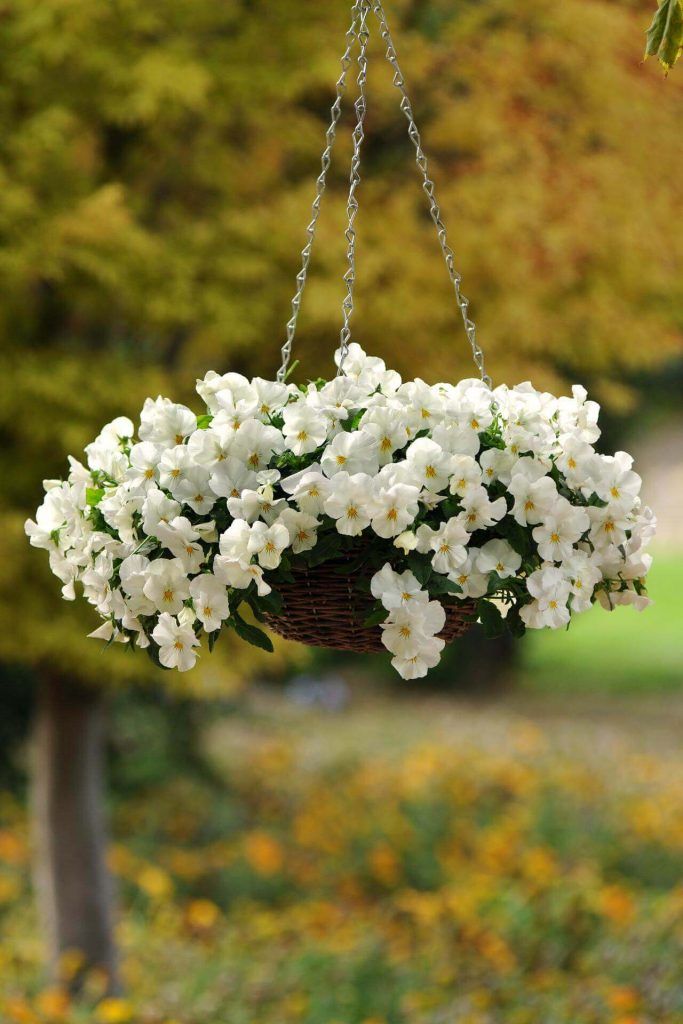 Cut the bottle with a wavy line into two equal parts. Sand both discs with sandpaper. Take the bottom of the bottle and glue it to the stripped first disk. Then take the top part: first unscrew the cap and glue it on the second disk, and once the glue has dried, screw the plastic part of the bottle back onto the cap. When finished, cover the blanks with paint.
The second option is a hanging planter. Here you will need: bottle, rope, paints, scissors. First, cut off the neck of the bottle - only the straight bottom of the container will be used in the work. Then cut small holes on the sides for the rope. Then decorate the design: paint, cut out patterns, draw an animal, cut off the top edge - everything you can do neatly. And then thread a rope into the holes, put a flower pot in a flower pot and hang the structure on strong nails.
Making wooden flower pots
The easiest way to make flower pots is from a stump or log. Take:
- wood;
- drill: drill length min.
 25 cm, diameter min. 20 cm;
 - chisel;
- protective impregnation for wood.
- Select a log or stump of the required diameter. Measure a part to the height of the flower pot or flowerpot and cut it off - this is again a planter.
- Drill a series of holes in the top plane of the wood to break the core.
- Remove the wood with a chisel - you should end up with an empty container. The edges need to be aligned.
- Treat the inside of the planter with protective compound and place the flower pot in it.
The wooden planter itself can also act as a pot, but for this you need to put durable polyethylene in the container and fill it with drainage from above. And only after that you can put the soil mixture with a flower.
A more complex option is a planter made of boards and timber. You will need:
- bars with a section of 25x25 mm;
- boards 15 m thick;
- self-tapping screws;
- wood glue;
- drill;
- protective impregnation for wood.
The planter manufacturing algorithm is as follows:
- Assemble a cube-shaped frame from the beams.
- Cut the boards for the bottom and sides. Sand the panels on all sides.
- Drill some holes in the bottom for drainage.
- Assemble the planter structure together: attach the side and bottom panels to the cubic frame using self-tapping screws. In order to give the product even greater reliability, carefully glue all the joints.
- Coat the surface of the finished structure with a protective compound.
Weaving a planter from a vine
Another simple but interesting variant of a flower “outfit” is a planter from a vine. Prepare for work:
- flexible vine - it can be either fresh or dried;
- plywood sheet;
- waterproof impregnation;
- drill;
- awl;
First, soak the vine in water to give it the extra flexibility needed for easy weaving. Cut out an oval or round bottom blank from a plywood sheet. Drill the same holes along the edge of the resulting bottom with a diameter slightly smaller than the diameter of the vine. All holes must be at the same distance from the edge of the bottom. Then insert a strong twig into each hole - this will be a blank for the planter frame.
The next step is direct weaving: lay the vine between the rods, gently pressing each new row with an awl. Wrap around the twigs until the product reaches the height you need. Laying methods can and even need to be changed through the row - this way you will achieve a different textured surface of the pots.
At the end of the weave, either cut the rods or weave them into the main rows of the vine. Then let the structure dry a little and get stronger. The last stage is the treatment of the cache-pot with moisture-proof impregnation and varnishing.
How to make a planter out of plaster
To make this planter, prepare:
- plaster;
- wire;
- textile strips, not more than 10 cm wide;
- paint;
- bucket;
- protective varnish.
The first step is to prepare the framework. Turn the bucket upside down and braid its surface with wire. Turn the edges over and hide. Carefully remove the finished frame from the bucket.
The second step is the dilution of the gypsum mortar. Take gypsum and mix it with water until the composition begins to resemble sour cream.
The third step is the construction of the "body" of the planter. Dip all textile strips into the gypsum solution and soak for 3 minutes. Then, one at a time, take out the tapes and put them on the frame layer by layer. The wall thickness should be at least 2 cm. Then carefully treat the walls of the structure with the remaining gypsum mortar. After this, the planter should dry completely - set it aside for 10-12 hours.
The fourth step is the design of the structure. Cache-pot can not only be painted, but also decorated with a variety of glass, beads, pebbles - any small details that you like.
Tip. After drying, the walls of the pots will not be completely even, so the paint will fall poorly. To avoid this, carefully clean the surface with sandpaper and treat the structure with a white water-based emulsion, and then apply the paint of the desired color to the pots in the second layer.
Now you know that you can make a beautiful flower pot from almost any material without spending much time or money. The main thing is to turn on your imagination and be smart. So if you want to effectively decorate your garden, do not rush for store pots - take the initiative in your own hands and do not be afraid to experiment.
How to make a pot: video
Kashpo for the garden: photo
For DIY flowers. Almost all families grow indoor plants or flowers in the garden. It looks very interesting if standard flower pots are placed in an unusual planter. Of course, there are a lot of bright and original flower pot models on the market, but any person wants to bring individuality and some zest to their home or garden.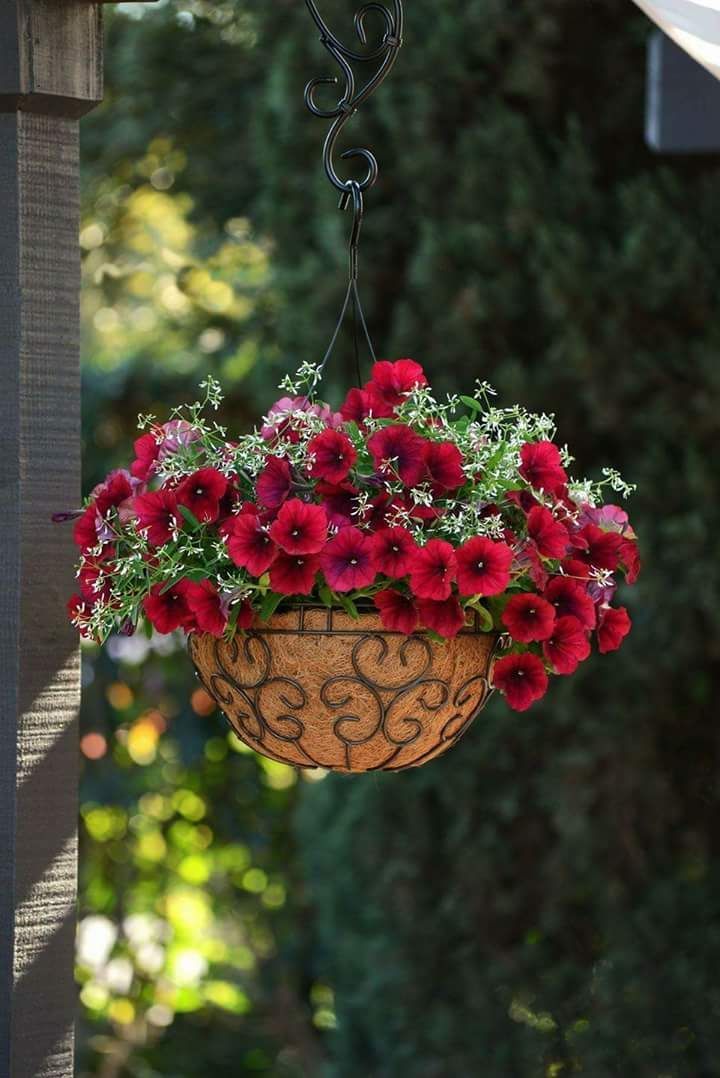 There are a lot of options on how to make a planter with your own hands, it remains only to choose the material that will look most appropriate in your home or yours
Tip! It is worth remembering that, unlike a flower pot, a planter does not have special holes in the bottom from which water could pour out after watering. Do not forget to drain it from the pots so that the roots of the plants do not rot. Free space between planter and flower pot or another container in which flowers grow, usually lined with moss or gravel so that the pot does not “dangle” inside.
DIY flower pot: building material
Surely, after the repair, any housewife has some unused materials that can be adapted to create flower pots:
- If slats, beams or other boards are available, you can create a wooden planter . First you have to cut out equal parts for the walls, and then connect them with nails or glue.
 The walls and bottom of the pots can be designed in the form of a lattice, or they can be solid. For oblong bowls with flowers, a planter box in the form of a small fence is suitable . This design is appropriate in an apartment or.
- Quite easy to make DIY garden planters from leftover logs However, it is better to entrust this business to a man. A log about 1-2 meters long can be rested on two small logs to make a kind of bench, or simply laid horizontally on the ground. Then the inner part is cut out in a large log, only the walls and the bottom remain. Inside you can put small bowls with petunias or others.
- Remnants of ceramic tiles can be used to make a colorful planter . To do this, you need only 5 parts, one of which will become the bottom, and the rest - the walls. The easiest way to connect the parts with glue. Spectacular interior items are obtained from mirror tiles , they are easy to fit into a modern minimalist interior or style.
- When burlap or other heavy fabric remains from construction and gardening, you can make planter pockets for small plants . To do this, you need to cut out two identical square or semicircular parts and sew them on three sides. For a more complex pattern, you will have to choose a base in the form of a wire that will shape the product. These pockets look great on the fence of a country house or on the balcony.
Planters made of natural materials
What could be easier than using materials that nature gives us to create flowerpots and pots ? In the nearest forest or by the river you can find something that will subsequently significantly transform your interior:
- A beautiful planter will be made from pebbles - small streamlined stones. They are glued together, giving the future product an unusual shape. Similarly, you can use nut shells, tree cuts, small twigs, cones, etc.
- You can make flower pots for giving with your own hands from a stump .