Gardening growing potatoes
Growing Potatoes: Planting, Growing, and Harvesting Potatoes
The taste and texture of homegrown potatoes are far superior to those of store-bought spuds! Garden “taters” also provide a bounty of nutrients. Our Potato Growing Guide covers planting, growing, and harvesting one of our favorite vegetables—whether grown in the ground or a container.
About Potatoes
The potato (Solanum tuberosum) is a member of the nightshade family, which includes tomato, pepper, and eggplant. This cool-weather vegetable typically yields bigger crops in the northern portion of the U.S., however, they can be grown as a winter crop in warmer climates.
The edible part of the potato is the underground “tuber” which is an enlarged underground storage portion of the potato plant. The tuber develops from underground stems called stolons once the plants are 6 to 8 inches tall, or around 5 to 7 weeks after planting.
Potatoes are an ancient vegetable that was first documented by the Incas in Peru. According to the Maine Potato Board, this vegetable arrived in the American Colonies in 1621 when the Governor of Bermuda sent potatoes to the Governor of Virginia at Jamestown.
Now America’s #1 vegetable, potatoes are a fat-free, cholesterol-free source of carbohydrates (energy). But it’s the skin that you should not discard; the skin provides 45% of your daily vitamin C and 18% of potassium, as well as thiamin, riboflavin, folate, niacin, magnesium, phosphorus, iron, and zinc.
Learn more about planting potatoes below.
Planting
Plant potatoes in a sunny place with at least 6 hours of directly sunlight each day. The tubers need to grow in fertile, loose, well-drained soil; hard or compacted soil leads to misshapen tubers. Ideally, soil is slightly acid (pH 5.8 to 6.5) and the soil temperature is at least 45º to 55ºF (7° to 13°C). Before planting (preferably in the fall), mix compost or organic matter into the soil. Learn more about compost, soil amendments, and preparing soil for planting.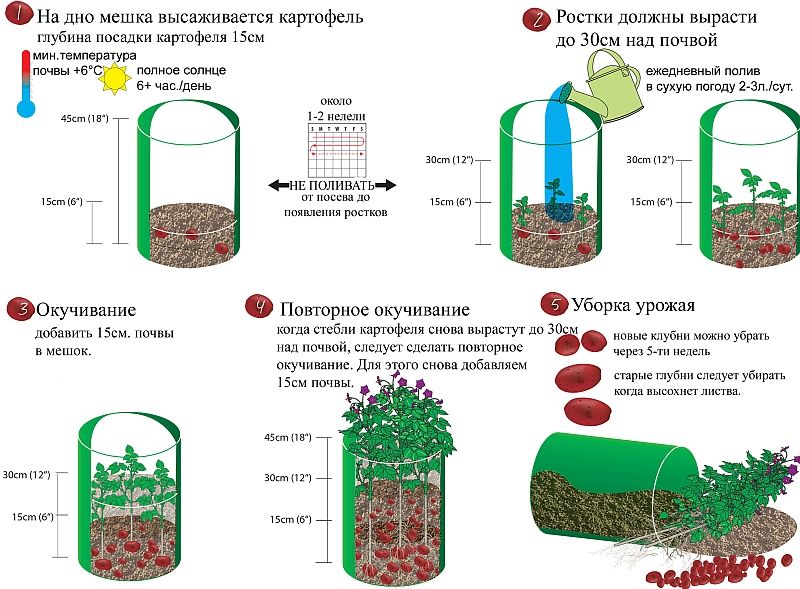 )
)
When to Plant Potatoes
Garden potatoes can be planted as soon as the soil can be worked. For many gardeners, this is about 2 weeks after the last spring frost. But aware that early crops may be ruined by soil that’s too wet as the potato seeds will rot. Pay more attention to the soil than the calendar to determine planting time. The soil should not be so wet that it sticks together and is hard to work. Let it dry out a bit first. If you have a late and wet spring, you can plant later—through April (depending on location) or even June, especially in containers.
In cooler regions, some gardeners will plant the first crop of “early-maturing” potatoes in early to mid-April, 6 to 8 weeks before the average last frost date. These varieties can withstand frost.
In warmer regions, potatoes can be grown as a winter crop and planting times range from September to February. Where winters are relatively mild, you can plant a fall crop in September. For example, in central Florida, gardeners plant potatoes in January, and in Georgia they plant in February.
See our Planting Guide for the best dates to plant by zip code or postal code.
How to Plant Potatoes
Note: Potatoes are usually planted in the ground, but they also can be grown in large containers or baskets. The same planting information applies.
Use certified (disease-resistant) seed potatoes from which eyes (buds) protrude. (Do not confuse seed potatoes with potato seeds or grocery produce.
- One to 2 days ahead of planting, use a clean, sharp paring knife to cut large potatoes into golf ball-size pieces, with 1 to 2 eyes each. This time allows the pieces to heal, or form a protective layer over the cut surface, improving both moisture retention and rot resistance. Do not cut up seed potatoes that are smaller than a hen’s egg; plant them whole.
Preparing seed potatoes for planting. Photo by tanyss/Getty Images.
- Potatoes grow best in rows about 3 feet apart. With a hoe or round-point shovel, dig a trench row about 6 inches wide and 8 inches deep.
 Taper the bottom to about 3 inches wide. Spread and mix in aged manure, compost, and/or leaves.
 - In each trench, place a seed potato piece cut side down every 12 to 14 inches and cover with 3 to 4 inches of soil.
- In 12 to 16 days after planting, when sprouts appear, use a hoe to gently fill in the trench with another 3 to 4 inches of soil, leaving a few inches of the plants exposed. Repeat as they grow (in several weeks), until the trench is at ground level.
- Mulch between rows to conserve moisture, control weeds, and cool the soil.
Growing Potatoes: How to Plant & Harvest Potatoes
7 steps for planting, harvesting and storing potatoes at home By Kevin Lee Jacobs
Photo by: Kevin Lee Jacobs.
Potatoes are generous plants. They are easy to grow and produce abundant harvests. Give them the following and they will accept almost any planting situation:
- Full sun
- Loose, fertile soil
- 1” of water per week
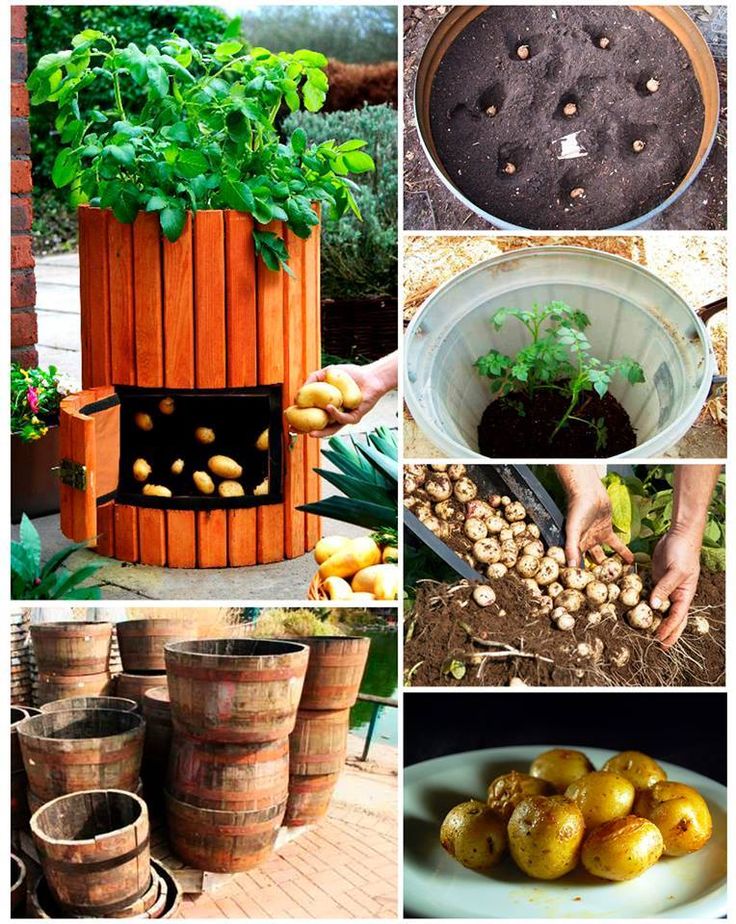
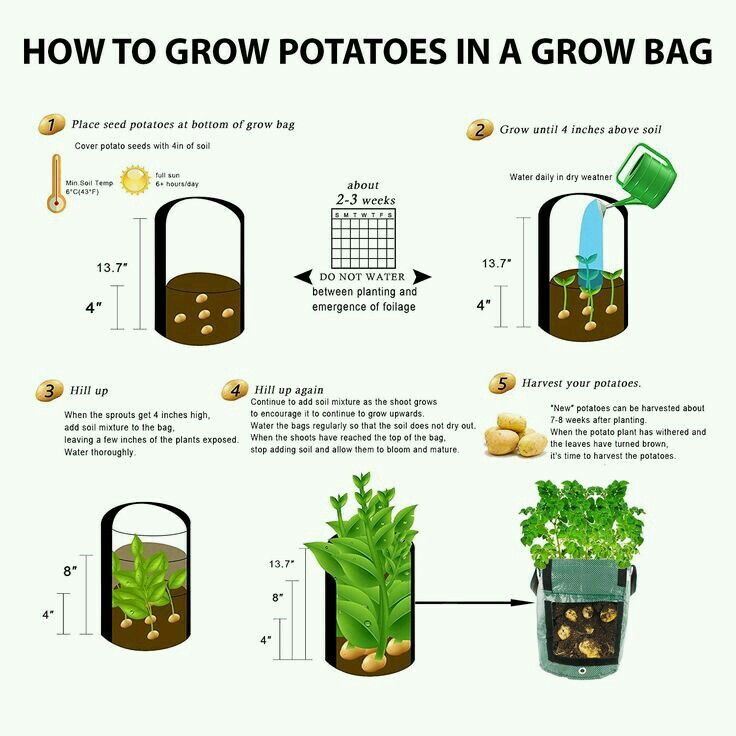
You can grow potatoes in containers, pots, or a special “grow bag”. But in my experience, containers like these require constant attention to watering, and yield smaller harvests than growing in a raised bed.
RELATED: Raised Bed Gardening
I achieve an enormous harvest—enough to feed two for nearly a year—by planting potatoes in two 4'-x-8' raised beds. The tubers are wildly productive in the well-draining, rock-free soil the beds provide, and the vines require deep watering only once each week.
Of all the root vegetables I grow, it is the potatoes that give me the biggest thrill at harvest time. I love to stick my hands in the soil and retrieve the buried bounty, with a yield of eight to ten potatoes for every one that I plant.
However you decide to grow your potatoes, the planting directions are the same.
Photo by: Kevin Lee Jacobs.
Step 1: Choose Seed Potatoes
Start with organic, certified disease-free seed potatoes obtained from a catalog or farm store. (Grocery store potatoes that have been treated with a sprout-retardant are not suitable for planting.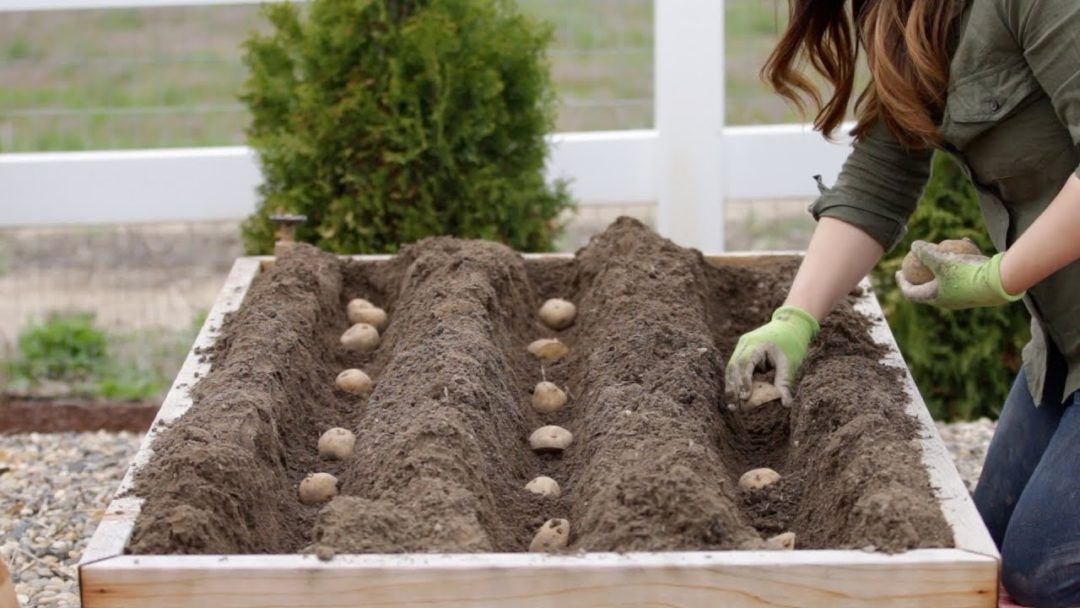 ) If you buy from a farm store, as I do, try to select tubers which have already sprouted. Otherwise, pre-sprout them by simply laying them out on your kitchen counter. Pre-sprouted potatoes can be harvested a few weeks earlier than their non-sprouted kin.
Photo by: Kevin Lee Jacobs.
Step 2: Separate the Eyes
Only small, golf ball-sized potatoes should be planted whole.
Cut large tubers into pieces. I cut mine so that each segment has two or three "eyes" (the little bumps from which sprouts emerge, as shown in the photo). The reason for cutting the potatoes is because the many eyes on a large potato will create a crowded, multi-stemmed plant, with each stem competing for food and moisture, and in the end, bearing only small potatoes.
Photo by: Kevin Lee Jacobs.
Step 3: Cure the Cut Pieces
Next, "cure" the cut pieces. Either set them out in the sun, or place them on a table or counter in a warm (about 70°F), moderately lit room for three to five days.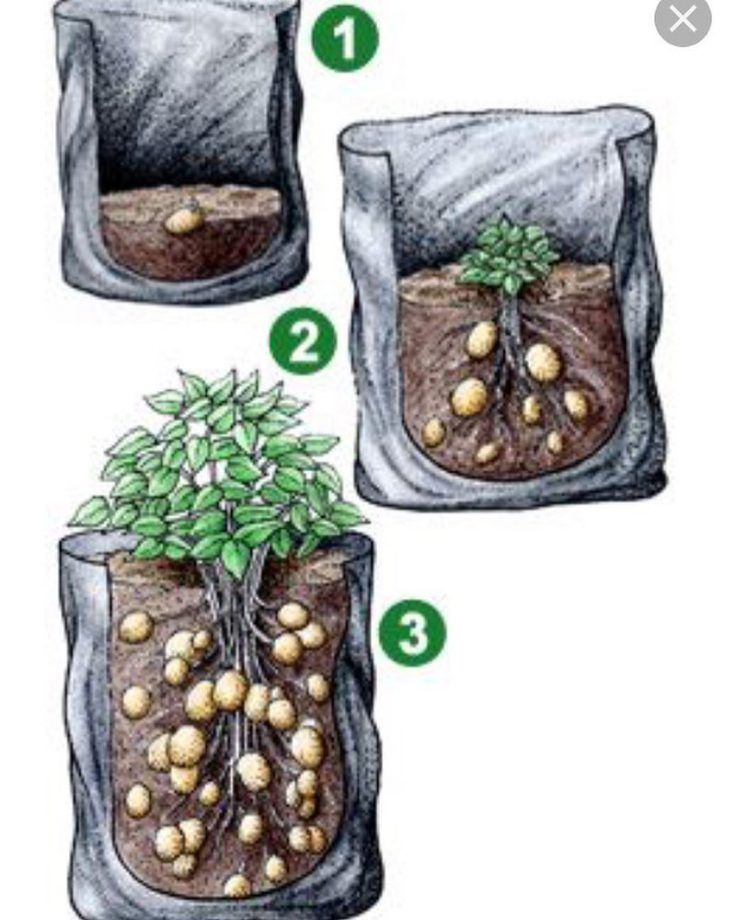 This step permits the cuts to become calloused. Calloused seed potatoes will help prevent rot.
Photo by: Kevin Lee Jacobs.
Step 4: How & When to Plant Potatoes
Plant seed potato segments cut-side down (eyes up) in a 6-inch-deep hole or trench. Space each segment 12-inches apart on all sides.
Between each segment, sprinkle 2 tablespoons of a low-nitrogen, high-phosphorous fertilizer. Then cover both potatoes and fertilizer with 2-inches of soil, and water the soil well.
When do you plant potatoes?
This will vary depending on where you live. Gardeners in warm climates often plant around Valentine’s Day, while those in cooler areas may get them into the ground near Easter, or early spring. A good rule of thumb is to aim for 3-4 weeks prior to your last frost date.
Photo by: Kevin Lee Jacobs.
Step 5: Hill Around the Stems
Because new potatoes form on lateral stems, or "stolons" above the seed potato, it’s necessary to "hill" the vines. When the green sprouts achieve 8 inches in height, bury all but their top 4 inches with soil, chopped straw, or shredded leaves. Hill again when potato plants grow another 8 inches. The more you hill, the more prolific your harvest is likely to be. I usually hill mine to a height of 18 inches. Stop hilling when the vines flower.
Potato tubers, like vampires, need to live in darkness. In fact, they will turn green if exposed to light. And a green potato can cause sickness if consumed. Therefore it is absolutely essential to keep the tubers covered with soil or mulch.
Photo by: Kevin Lee Jacobs.
Step 6: How & When to Harvest Potatoes
Two weeks after the vines have flowered, you can, if you wish, reach into the soil or mulch and retrieve a few baby potatoes. Otherwise, wait until the vines die back. Dead vines signal that the tubers have reached maturity. Now reach into the soil with your hands and pull the tubers up.
How long do potatoes take to grow? Small new potatoes can be ready as early as ten weeks.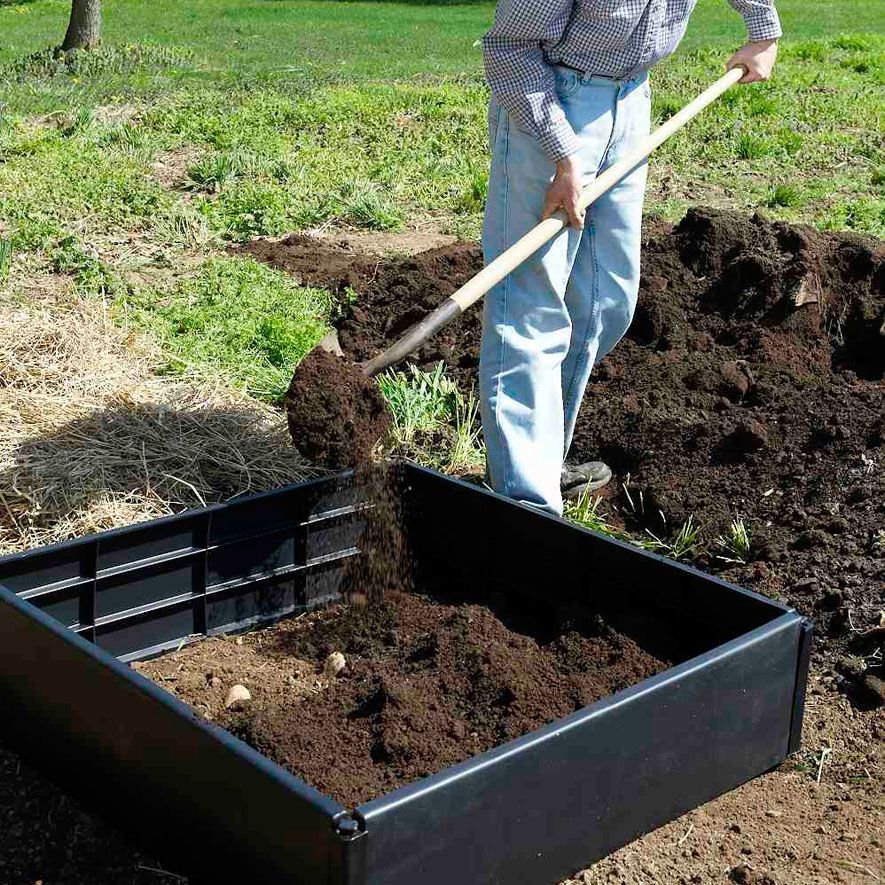 However, full sized potatoes take about 80-100 days to reach maturity.
Photo by: Kevin Lee Jacobs.
Step 7: Store Your Potatoes
Since my potatoes are grown for storage, I leave them in the ground until cool weather arrives. Why? Because potatoes will only store well if they are placed somewhere cold, but not freezing. The closet in my mudroom doesn’t cool off until the outside temperatures plunges to 45° at night. So harvest time for me is usually a sunny day in late October.
After digging the tubers, I let them sit on top of the raised beds for a few hours to dry, as illustrated. This brief drying-period toughens their skin, and prepares them for storage. Then I gently brush off any loose soil from the tubers, and place them in double thicknesses of paper bags.
More potato growing tips:
- If you don’t want to bother with hilling, plant your potatoes 8-9 inches deep. The downsides are: the potatoes take longer to sprout and your harvest might be smaller.
- Potatoes like slightly acidic soil (5.8-6.5 pH). Add fertilizer or composted manure for best results.
- When growing potatoes in containers, a good soil recipe is 1 part peat moss, 1 part organic potting soil and 1 part cow manure.
- If you want to make the task of weeding easier (and you have the space), plant your potatoes at least two feet apart so that you can weed around them easily.
Preventing Potato Blight
The dreaded fungal disease known as the "potato blight” (Phytophthora infestans) was responsible for the Irish potato famine and can destroy your entire crop, too. To reduce the chance of infection, never plant potatoes (or tomatoes and other members of the nightshade family, such as eggplants or chili peppers) in the same patch of land without leaving an interval of at least three years. Also, promptly remove any volunteer potatoes that emerge in your garden. The disease overwinters in tubers left behind during the previous year’s harvest.
RELATED READING
How to Start a Vegetable Garden
How to Grow Tomato Plants
Growing Peppers
Proper planting of potatoes (from A to Z): methods, timing, schemes for a good harvest
In recent years, amateur gardeners have increasingly begun to grow potatoes in their backyards.
As a rule, the planting of this wonderful root crop, which is not for nothing called the "second bread", is carried out before May 20 (the period depends on the climate of your region). To get a high yield, there are several ways to plant potato tubers.
In this article, we will tell you how to properly plant potatoes, depending on the planting method you choose.
HOW TO PLANT POTATOES CORRECTLY
To get a good potato harvest, you need to choose the right time for this operation and the best place for planting. Of great importance is the method of planting potatoes, which will be different for different regions of the country.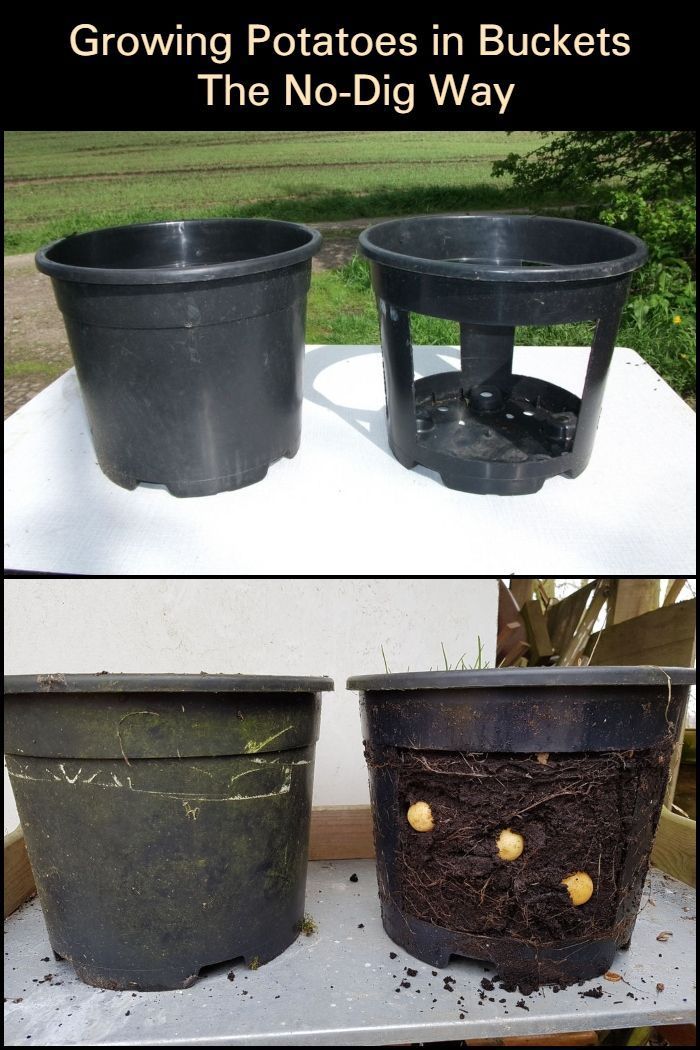
Plant each variety separately. In the northern regions of the country, use only early varieties of potatoes so that the tubers have time to ripen before the onset of cold weather.
Best time to plant potatoes. Potatoes can be planted only after the soil in the area at a depth of 12 cm has warmed up to a temperature of + 9 ... + 11 degrees. As a rule, the air temperature in this case is + 12 ... + 15 degrees.
The fact is that roots on potato tubers begin to form only at a temperature of +8 degrees. If the ground is colder, then the tubers will simply begin to rot.
In the central regions, it is recommended to plant potatoes on May 7-12; in the north of the country - May 12 - 20.
Moreover, in the northern regions we advise you to plant only early varieties of potatoes.
Site selection and bed preparation. To get a good harvest of potatoes, we recommend planting tubers in an open, well-lit area. In the shade of trees or some buildings, potato bushes will develop more slowly, and the yield will be low.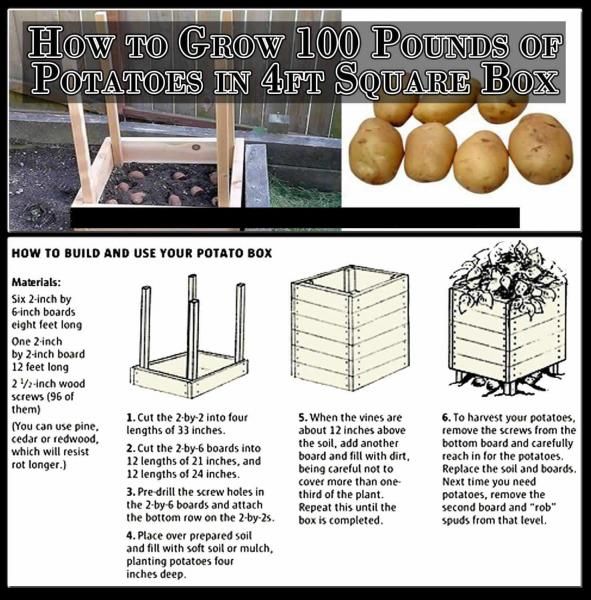 Moreover, the tubers themselves will be small.
The more sun - the higher the harvest! Under the influence of direct sunlight, the bushes themselves will be strong and healthy. And the pain will be less.
Do not plant potatoes in lowlands and flooded areas. Without access to oxygen, potato tubers will simply rot. Under such conditions, potatoes can only be grown on ridges.
Therefore, the formation of beds will depend on the method of planting potatoes.
Soils . Potatoes love fertile, organic-rich, loose, light and neutral soils.
When preparing a potato field for planting for digging, add (per 1 sq. m.): two buckets of compost and sand, a bucket of leafy soil, half a bucket of wood ash, 2 tbsp. spoons of superphosphate and 1.5 tbsp. spoons of potassium sulfate.
Acid soil must first be neutralized with dolomite flour (2 kg per 6 sq. m of field).
Preparing tubers for planting. If you buy potatoes from us, then its tubers are already completely ready for planting. They have been pre-treated with biogrowth stimulants and biologically active antiseptics (no chemicals!).
Dip tubers bought at garden markets for 30 minutes before planting in a raspberry solution of potassium permanganate. And then for another 30 minutes, place in a solution of "Zircon" and "Cytovit" (5 drops per 1 liter of water).
After that, put them in a dry, warm room, well lit by the sun, to warm up for 5 to 7 days. After that, you can start landing.
METHODS, SCHEMES AND RULES FOR PLANTING POTATOES
Any gardener tries to save space on his plot, especially if he has a garden plot of six hundred. But at the same time everyone wants to get the maximum yield. Therefore, he chooses the most effective landing method.
There are more than a dozen ways to plant potatoes. Let's look at the most popular of them.
Spade fit. This is the most popular way. Potatoes are recommended to be planted together.
Tie a rope corresponding to the length of the row in the field to two pegs.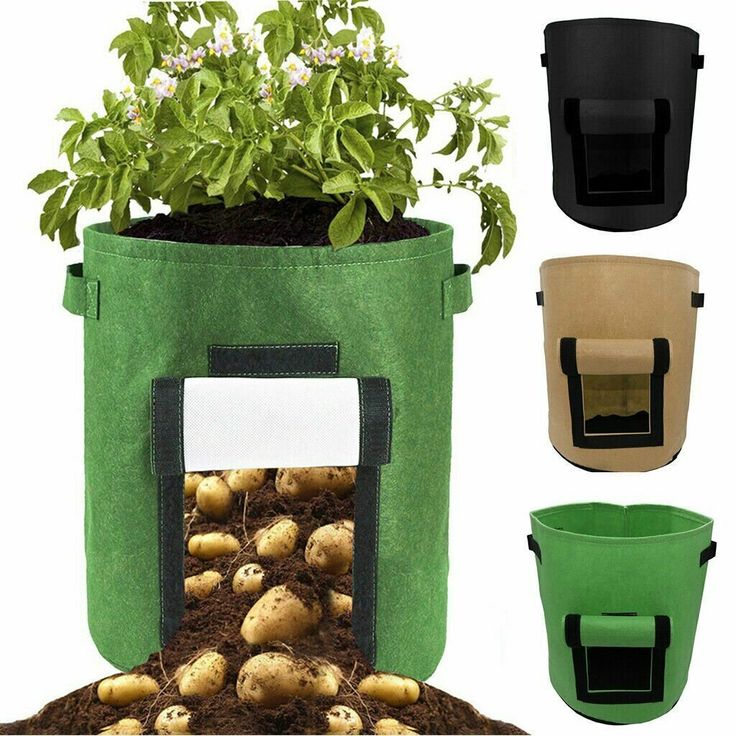 Starting from the side of the field, using a stretched rope, place the edge row. The first person digs a hole 8-10 cm deep, the second person puts a tuber in it with sprouts up.
Then the first one digs the next hole at a distance of 25 - 30 cm and fills the first tuber with the excavated earth. And so on.
Having completed the landing of the first row, two people, holding on to the pegs, carry the stretched rope to a distance of 70 cm - to the next row. And repeat the same operations. And so - until the entire field is planted.
This is the easiest way to plant potatoes. It can be used on a site of any configuration. But it will not work only if your field is in a lowland, or if the groundwater level is closer than 1.5 m from the surface of the earth.
Ridge planting (Dutch method). We recommend this method to those gardeners who have heavy clay soil or close groundwater.
It is best to use a walk-behind tractor to form ridges.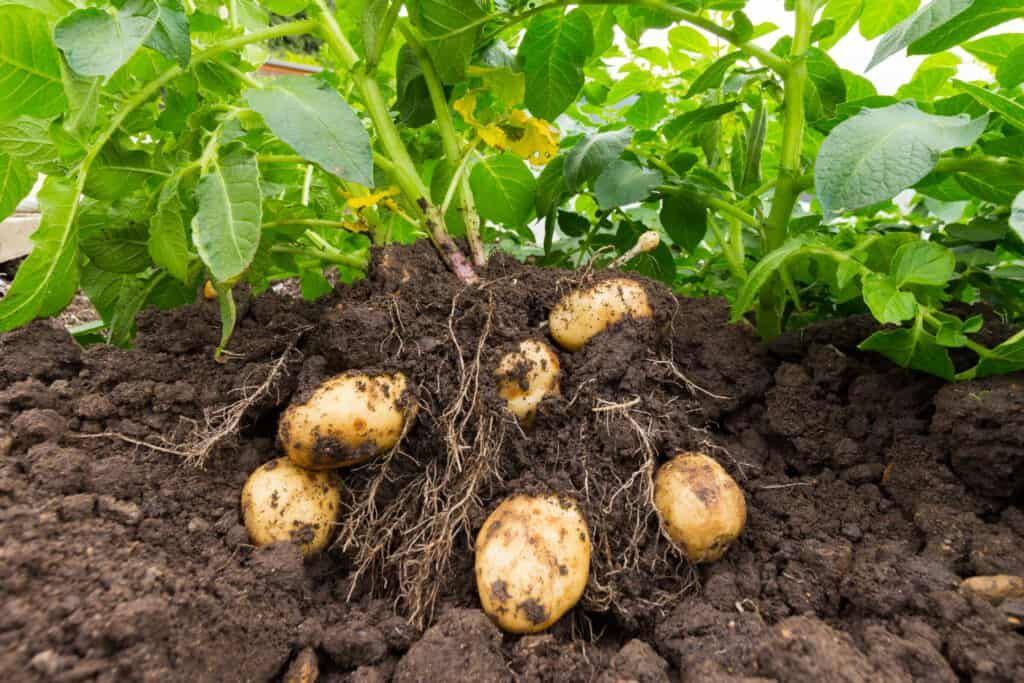 First, fertilize the entire field well (we talked about how to prepare the soil above). Then, using a walk-behind tractor, form ridges 25–30 cm high at a distance of 75–80 cm from one another.
In the ridges, dig holes 10 cm deep, 30 cm apart. Plant potato tubers and sprinkle them with earth.
Combs can also be shaped by hand with an ordinary shovel. When choosing soil from row spacing, pour it into ridges.
Planting in trenches. We recommend that you use this method of planting potatoes on light sandy, sandy and peaty soils, where irrigation water does not linger, but quickly goes into the lower layers of the soil.
Dig trenches in a potato field 20 cm wide and 25-30 cm deep, 80-85 cm apart.
At the bottom of each trench, lay a 15 cm layer of compost or humus mixed with fertile soil and the addition of superphosphate and potassium sulfate (2 tablespoons per 1 running meter).
Arrange potato tubers on top, 30 cm apart. Fill the trench with fertile soil mixed with compost in a ratio of 1:2.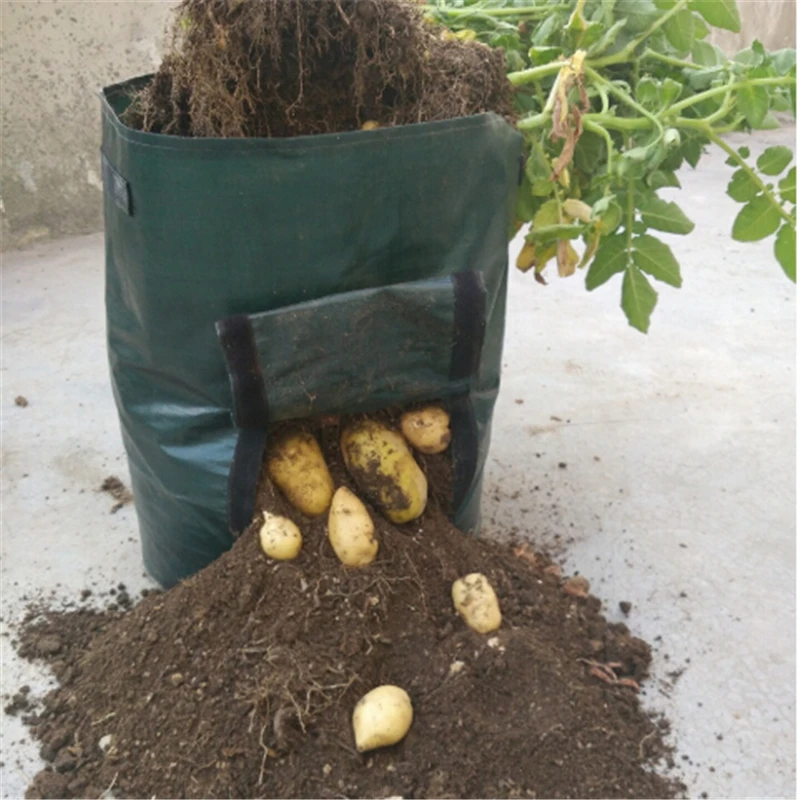
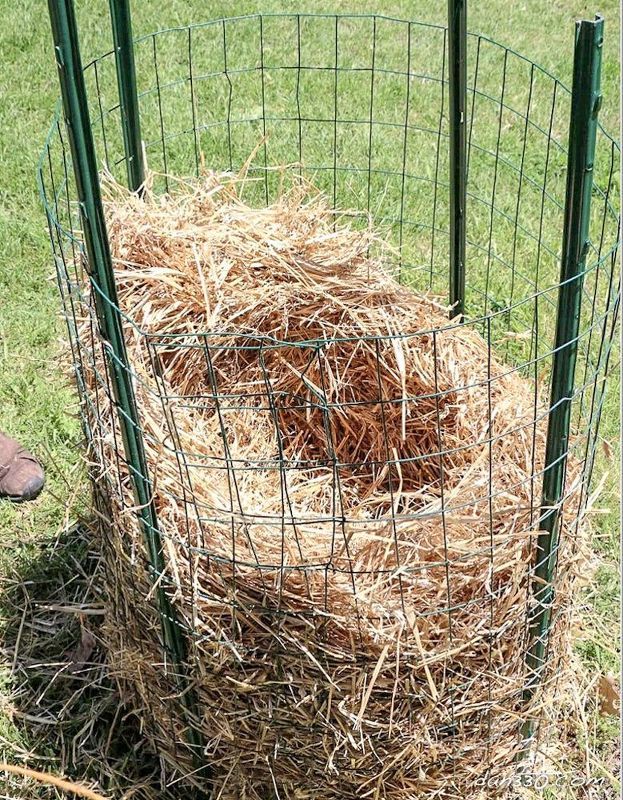
Planting in straw. This ancient method has been used in villages for centuries. Usually straw bedding is prepared in autumn. Straw and hay are laid out in a thick layer (45 - 55 cm) on the potato planting site. Over the winter, the litter will pereprete and turn into humus.
In the spring, potato tubers are placed on this rotted bedding in a checkerboard pattern at a distance of 30 cm from one another. From above they fall asleep with a thick layer of straw (25 cm).
With this method of cultivation, it is important to water the potato plantings very well, soaking the straw to a depth of 50 - 60 cm. Sprinkle hay and straw on top after each watering.
Cleaning with this method is a pleasure. Gently pull the bush towards you (it pulls out of the straw very easily), and collect clean tubers!
You can try this method of growing potatoes this year as well. Lay compost or leafy soil on the bed, as described above. Spread the tubers on it and cover with straw on top. And grow it the same way.
Film fit . This method allows you to speed up the ripening of potatoes. Prepare the potato field by applying all the fertilizer. Then spread a black film or thick black non-woven covering over it. Make cross-shaped cuts in it, placing them in a checkerboard pattern.
In the cuts, dig holes 10-15 cm deep, add 2 tbsp. spoons of wood ash. Fill the holes and water each one very well (1 watering can for 2 holes).
Black film or agrofibre will keep the root layer warm all the time, and the potatoes will grow faster and the tubers will form larger.
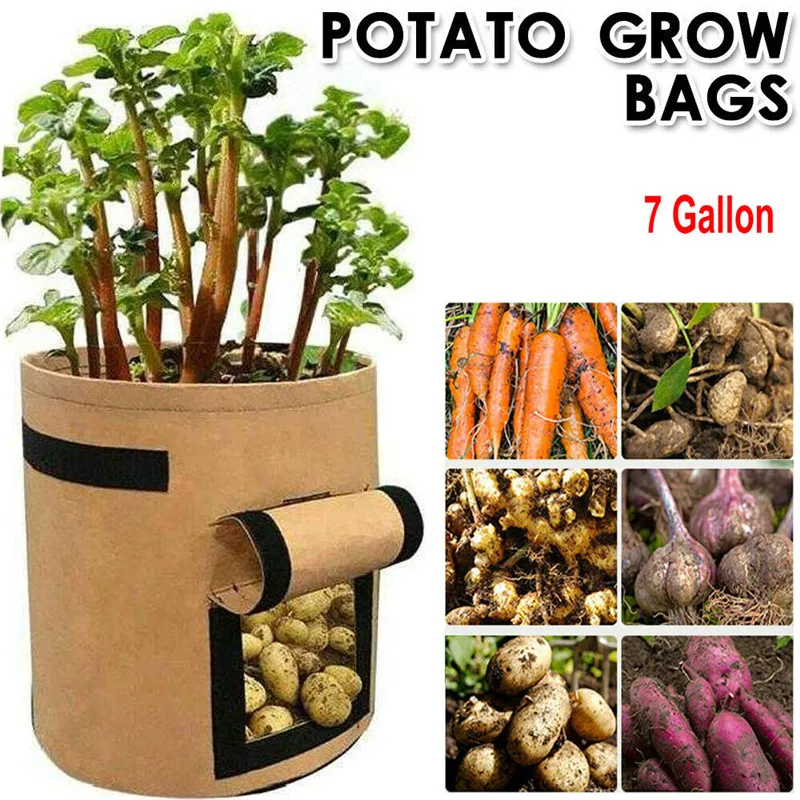
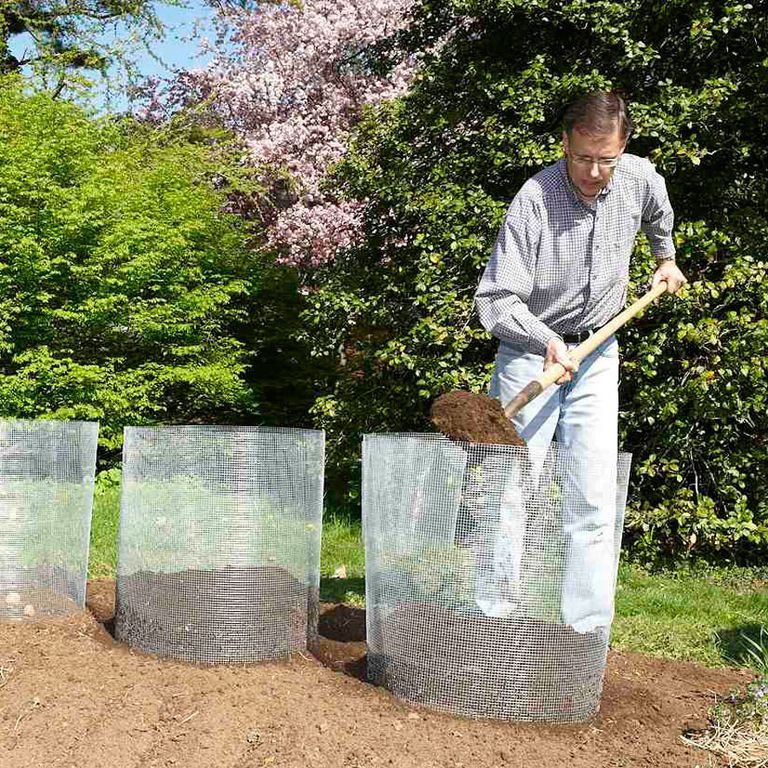
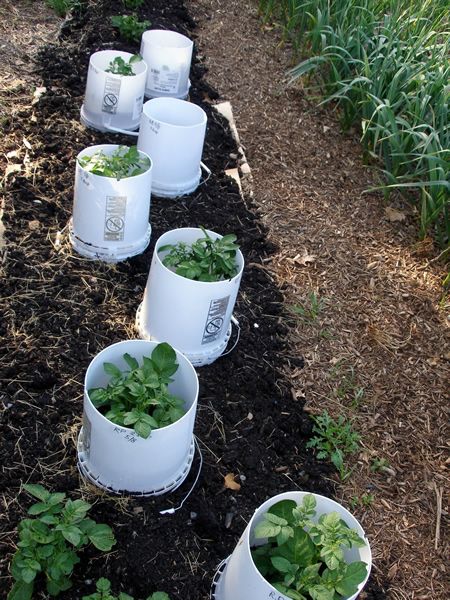
Bag fit . This method of growing potatoes is well suited for owners of small plots, as it does not require a lot of space. And yields in bags are very high.
Bags must necessarily pass oxygen to the roots. It is best to use such from under sugar or flour. Unscrew the edges and fill the bag with fertile soil (30 cm layer), consisting of the top fertile layer, compost and leafy soil in a ratio of 1:2:2.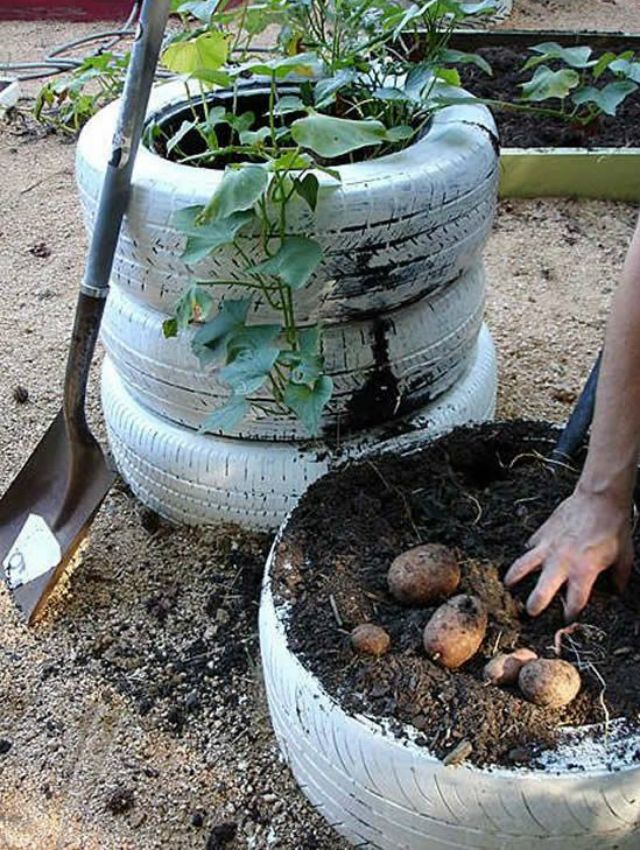
Place 3 - 4 tubers on top and top with the same potting soil to a depth of 20 cm. Spill the plant well with water until it reaches the bottom of the bag.
Place the potato planting bags in a sunny position near a wall or fence.
As the bushes grow, fill the bag with fertile soil and unfold the edges of the bag.
It is very important to water your plantings regularly so that the soil in the bags is always moist and loose!
Use only early varieties for growing in bags!
PLANTING MAINTENANCE
How and when to plant potatoes. Hilling is one of the most important operations in the cultivation of potatoes.
Experts recommend no more than three hillings during the entire growing season of potatoes. Spud your plantings for the first time when the height of the potato tops reaches 15 cm. In most of Russia, return frosts are very likely at this time. And additional land will reliably protect the sprouts from freezing.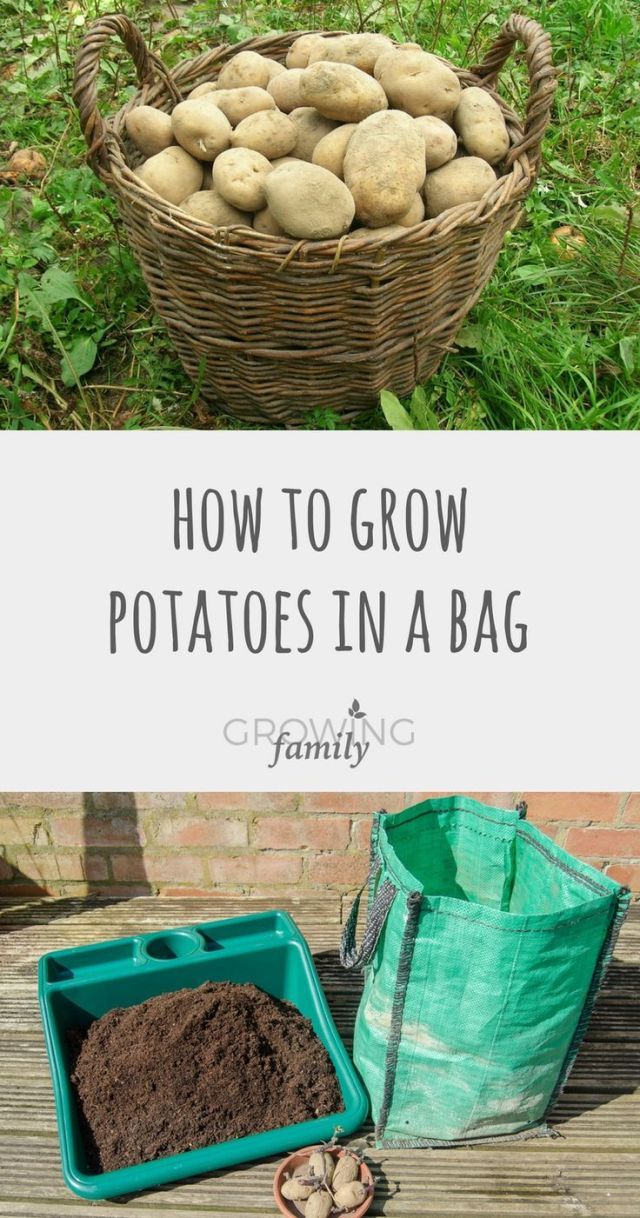
Hill up potato bushes so that only the tips of the young tops (1.5 - 2 cm) remain above the ground.
Cultivate a second time when the buds begin to appear on the potato bushes. You can spud a third time during the period of active flowering.
When you hill up, you increase the volume of soil in which tubers are formed, which contributes to their rapid growth and development, as well as the formation of new stolons. In addition, hilling improves the access of oxygen to the root layer.
Pay attention to the fact that after each hilling, the bushes begin to grow rapidly, they become stronger and, as it were, more cheerful.
Hilling is not carried out when growing potatoes under a film.
Some advanced gardeners use unhilling instead of hilling.
Unlocking. With this method, the tops are laid out on the ground, and fertile soil is poured on top, leaving only the tops of the shoots on the surface. By the way, loosening is used when growing potatoes in bags and in straw.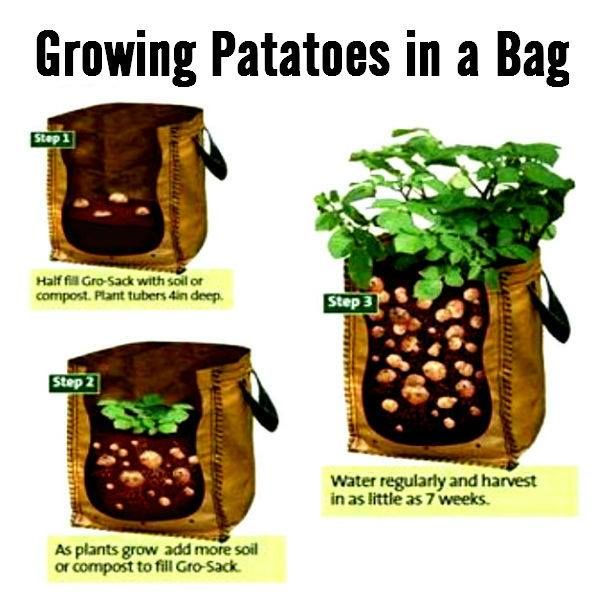
Hill up only in the early morning or in the evening after 18:00, because under the bright sun the bushes can begin to wilt!
How to properly water potatoes. Water potatoes once a week in dry weather and twice a week in hot weather.
Water slowly, gradually wetting the soil. It should get wet well to a depth of 50 - 60 cm. Approximately 10 liters of water should be spent on each potato bush.
You can water with cold water directly from the well. But be sure to put on a rain nozzle on the hose so as not to wash away the ground around the bushes.
After flowering, double watering to allow the plants to form large, juicy tubers.
Stop watering two weeks before harvest.
How to fertilize potatoes . Since the potato crop is a root crop, in no case do not use chemical fertilizers to feed this crop! After all, all the chemistry will be deposited in the tubers, which you will then eat.
You gave the potatoes good nutrition when planting, so it will be enough to feed the bushes twice - in June and July, with slurry at a concentration of 1:10 (at the rate of 5 liters per bush).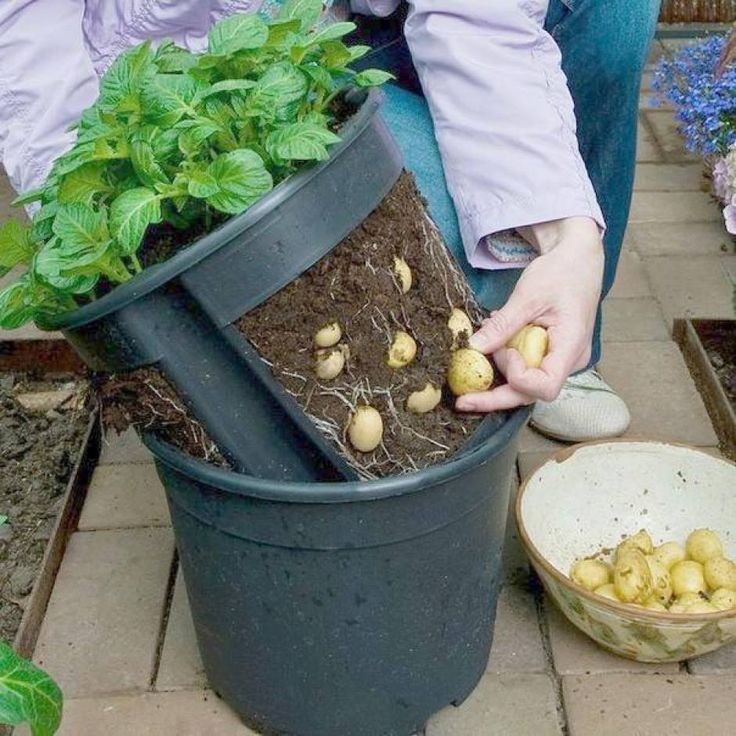
You can apply slurry only after abundant watering with clean water, otherwise you risk burning the plants!
When to harvest potatoes. Potato harvesting time depends on varietal characteristics. Harvest early potatoes at the end of August. And for fresh consumption, you can start digging bushes at the end of July.
Harvest mid-season varieties at the beginning of September, later - after 15 - 20 September.
Potatoes intended for storage must not be dug up too early, as the tubers are still too thin-skinned and have not yet reached their maximum mass.
But don't delay harvesting, because bad weather can cause fungal diseases in plants.
The entire crop must be harvested before the first frost!
The main sign signaling that potato plants are ready for harvesting is drying and lodging of tops.
THE MOST DELICIOUS POTATO VARIETIES
A variety not damaged by the Colorado potato beetle:
Kamensky.
Early maturing varieties:
La Strada, Lux, Gala, Miner, Otrada, Kalinka, Zhukovsky early, Banker, Carmen, Luck, Nevsky, Prime.
Mid-season varieties:
Chudesnik, Irbitsky, Hostess, Kingsman.
Belarusian varieties:
Palace, Breeze, Uladar, Manifesto, Treasury.
You can read more about these varieties on our website.
And you can buy them from us today!
Read also our published articles:
“How to plant potatoes?”;
"The best varieties of potatoes for spring planting";
Potato pests and how to deal with them.
Methods of growing potatoes - 12 methods with descriptions
Despite the fact that the methods of growing potatoes are familiar to all gardeners, often the results are low.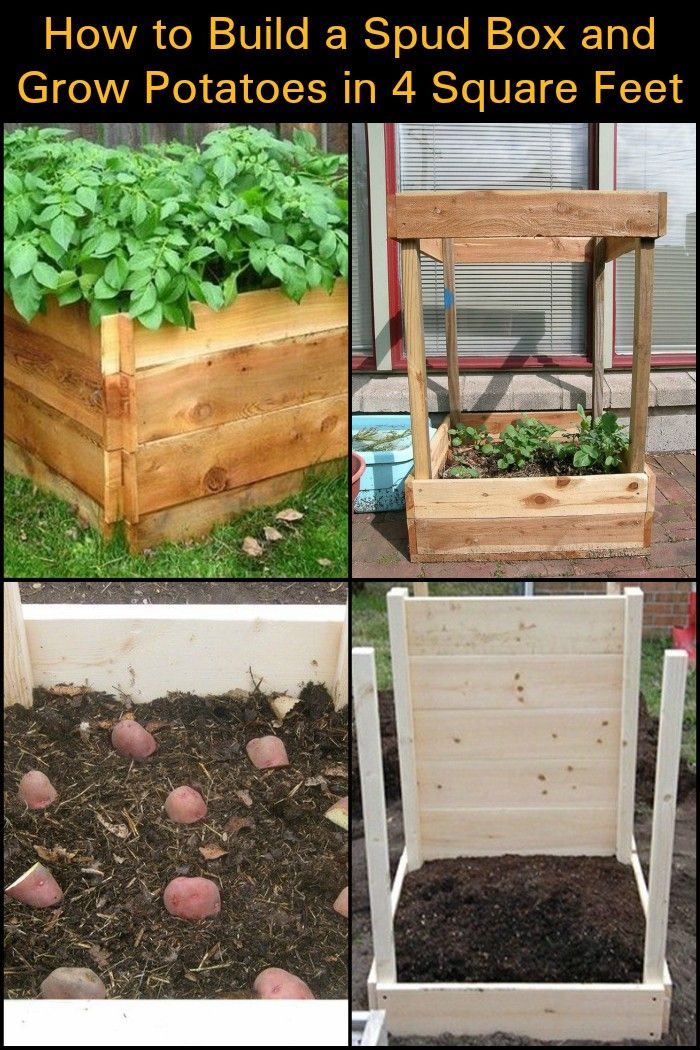 The fruits are small, and the plants get sick and are attacked by pests. Today, there is a wide variety of growing methods for growing potatoes, which give greater yields. In addition, they allow you to diversify the taste and nutritional qualities of the root crop.
But many gardeners believe that the usual option has been worked out and brings a good harvest. However, this method has two significant drawbacks:
- When hilling between rows, part of the rhizomes breaks and is cut down.
- Sunlight does not penetrate the aisles. Therefore, diseases develop, the bushes are weak, the fruits are small, pests appear.
Therefore, for the quality cultivation of potatoes, it is better to resort to new scientific approaches to the cultivation of this vegetable.
Growing potatoes from seeds
Despite the selection of planting material, tubers degenerate, viruses, bacteria, fungi and diseases accumulate in them. They also deteriorate in taste.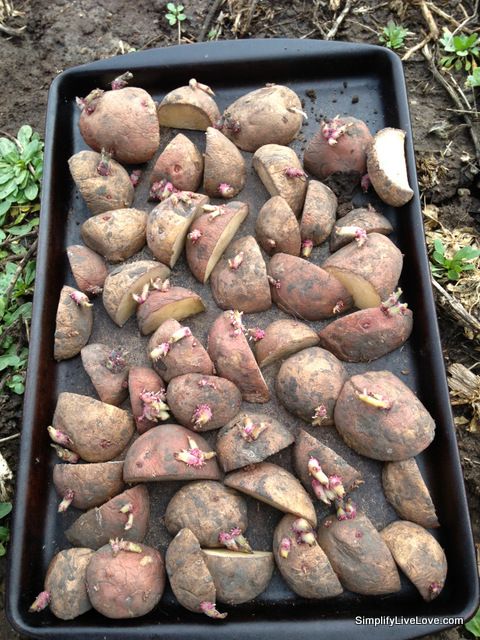 You can correct the situation if you plant the plant with seeds. This approach has a number of advantages:
- is more economical and reliable than tubers, as they can “slip” simple, low-quality material.
- Easy and simple to store seeds as seed bags take up little space.
- Potatoes grown in this way are free from diseases and fungi . It better tolerates adverse environmental conditions.
- High Yield .
When planting potatoes with seeds, it is important to consider the following nuances:
Cultivate potatoes with seeds in the following way:
- Potato seeds can be bought ready-made or prepared independently from the formed berries in the fall.
- Grow seedlings in a greenhouse.
- Pre-soak the seeds for a couple of days. Sowing begins at the end of March. It is better to plant more seeds, as germination is low.
- Shoots appear a couple of weeks after sowing. Seedling boxes should be in a warm, dark place.
- After the appearance of a pair of leaves, the seedlings are transplanted into separate pots with peat.
- Can be planted outdoors in late May or early June when the weather is warm. It is desirable to supplement each well with fertilizer. Plant plants at a distance of 10-15 cm from each other.
As a result of the cultivation of the root crop, up to 1 kg of crop can be harvested from one bush.
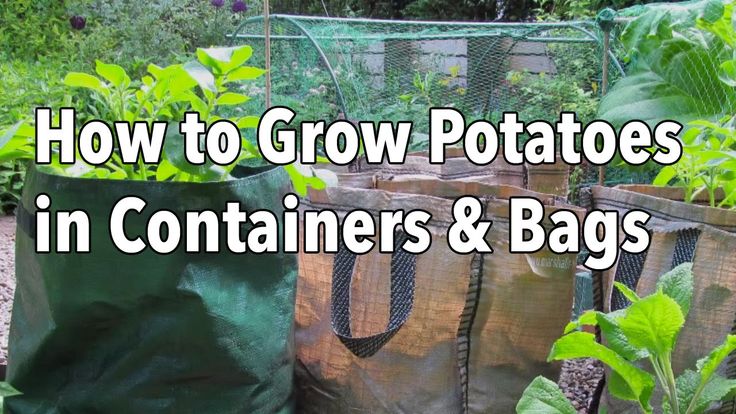
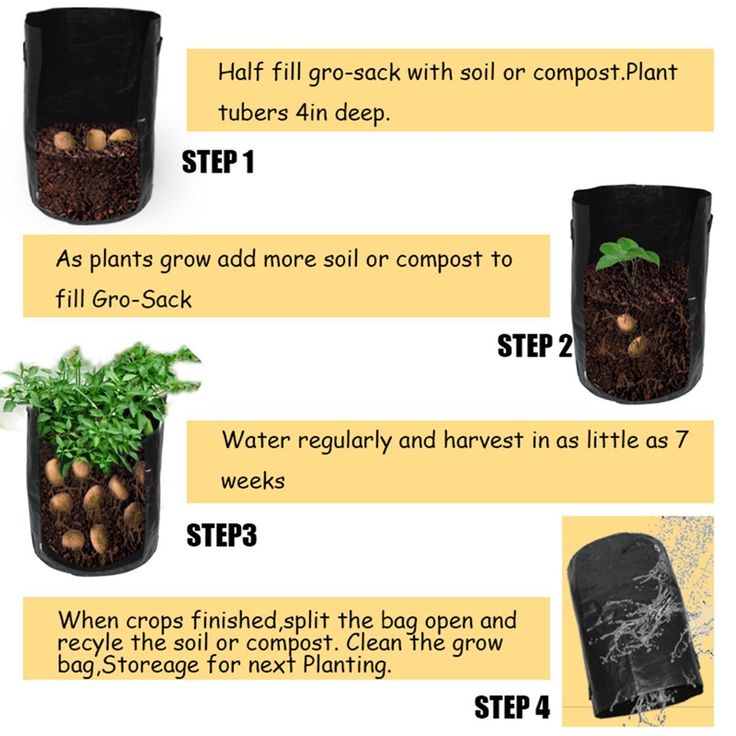
Growing potatoes in bags
This technology of growing potatoes is suitable for those gardeners who have a small plot and no place to plant a vegetable. The method is very simple. The nutrient mixture is poured into large plastic bags: humus, earth, manure and compost.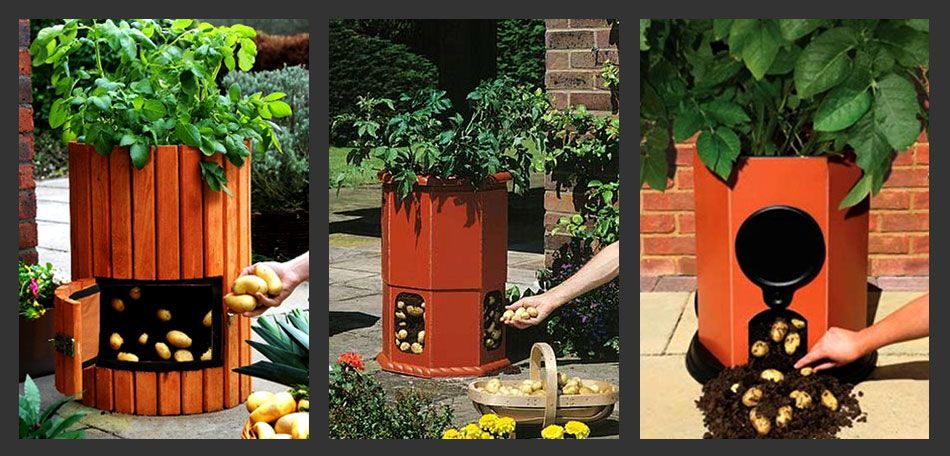 They are hung in a warm, ventilated place. Then, cuts are made along the perimeter of the entire bag, into which sprouted root crops are planted. Harvest is easy to harvest - just shake out the tubers.
Today you can buy ready-made bags for growing potatoes, here are a few options:
Planting potatoes according to the Mitlider
US agronomist, Mitlider, has been developing his planting system for many years. He tried to take into account all the nuances: if you place a vegetable too close, due to the lack of sun, small tubers are obtained. If rare, then very large.
He calculated the ideal parameters: make beds 45 cm wide and 9 m long. Row spacing should be from 0.9up to 1 m. The pits are dug in a checkerboard pattern at a distance of 30 cm. It is important to water and fertilize only the holes, and nothing should fall into the aisle paths.
The advantages of this technology include:
- high yield and product quality;
- do not have to spud;
- absence of weeds in the paths between the rows;
- is convenient to take care of the bushes, sitting between the beds.
But if the site is in the shade or lowland, then this technology will not work.
Video on how to plant potatoes using the Mitlider method
Method of growing potatoes under straw
Potato planting under straw was developed by agronomist Rytov. The whole concept is that the tubers are not buried in the ground, but placed in a dug hole and covered with straw. The depth of the hole should be 20 cm. It is advisable to use slightly damp straw, this will promote rapid growth. This method requires less effort when planting plants. Straw is sprinkled on top with earth. This method is similar to growing potatoes using the Kartelev method, we will talk about it a little later.
The result is a large and clean harvest. The technology has its advantages:
- Easy to clean.
- If planted on heavy soil, it is not necessary to dig the soil first.
- Embedded straw after harvest improves the structure of the earth, loosens it.
- Prevents weeds.
Growing potatoes according to the Kizima method
Agrotechnologist Galina Kizima suggests planting the root crop not in the holes, but leaving it in the garden, covering it simply with straw and weeds plucked in summer. In this case, you should not touch the sprouts. Watering is also not necessary.
An important feature is the preparation of tubers. They should be washed in potassium permanganate or Fitosporin, dried and germinated in a cardboard box in a warm place. To protect the tubers from mice and other pests, they need to be kept in the light for a couple of weeks until a greenish color appears.
The vegetable is planted as follows:
- Tubers with shoots of 4-5 cm are considered ready for planting.
- First prepare the soil. To do this, weeds and straw are laid, holes are made in it and blackout for future plants.
- The distance between rows should be half a meter. The gap between the holes is 25-30 cm. The width of the beds will be up to 1 m.
- Small tubers are lowered in several pieces to get a bountiful harvest. And the big ones are cut. Treat the cut with ash to prevent infection by bacteria and fungus.
Beds should be hilled with weeds and fallen leaves, that is, they should be laid instead of loosening the soil. You can insulate the crops of the rake with newspapers, hay or plain paper.
We leave it in the garden, covering it with straw and weedsVideo: Galina Kizima - Planting under straw
Chinese method of planting potatoes
According to the Chinese method, you need to dig holes 0.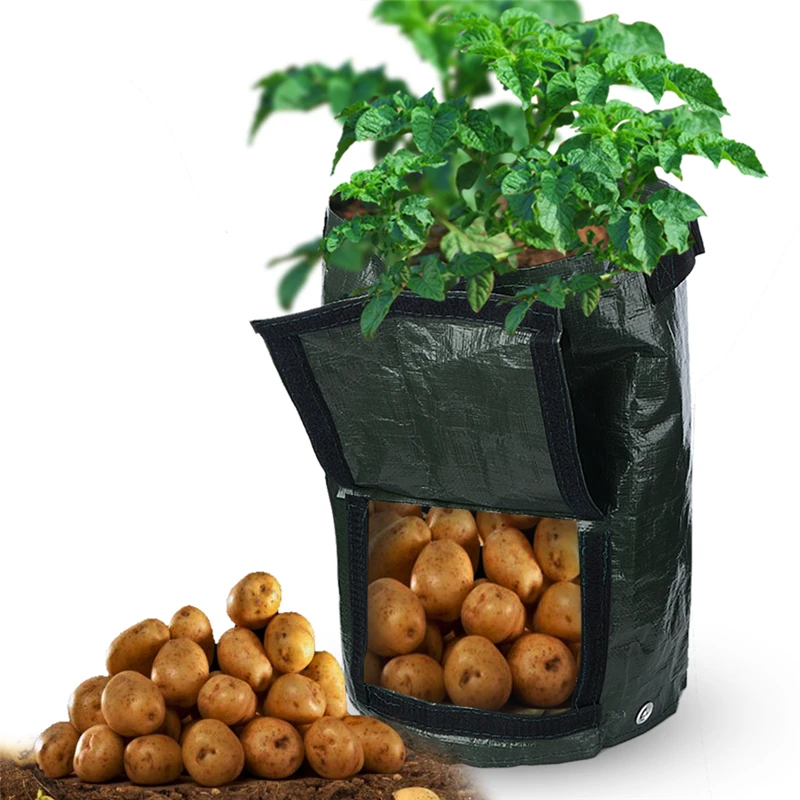 5 m deep and about 0.7 m in diameter. manure 5 cm, then the same amount of dug earth, mixed with humus, is covered. Only after that, three germinated tubers are planted in one hole. As soon as sprouts appear, they are sprinkled with earth and watered abundantly. As the plant grows, the soil is still filled up, this is done 3-4 times.
As a result, it turns out that the roots are formed along the entire length of the sprinkled stem.
The Dutch method of growing potatoes
Many well-known varieties of potatoes are grown in Holland. They developed their own method of cultivating vegetables. It consists in the following nuances:
- For planting, choose only high-quality and healthy tubers.
- Root crops can be planted in the same place only once every three years. At other times, cereals are grown there.
- The earth must be fertilized.
- Control weeds and pests with special chemicals.
The land is being prepared at the end of autumn.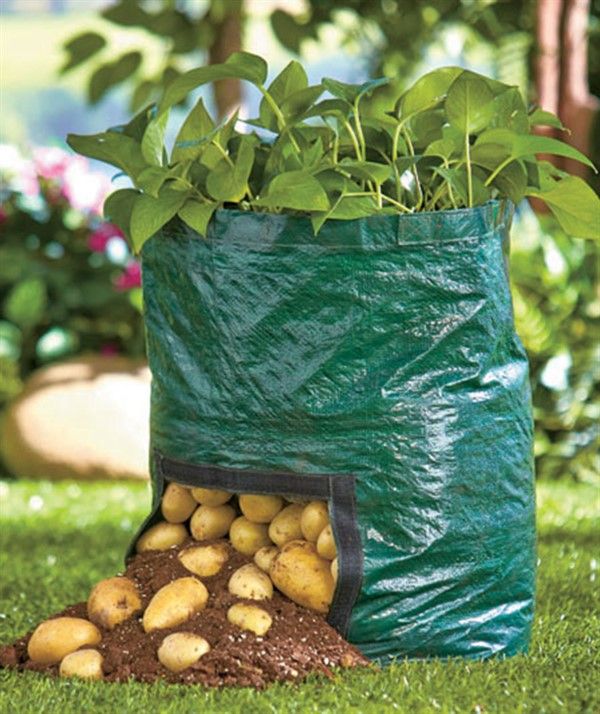 During plowing, manure, potassium salts, superphosphates are added to it, and phosphate fertilizers are also added to the heavy one. And in the spring, urea is additionally added.
The landing is planned in such a way that the ridges are in a straight north-south direction. So there will be uniform illumination of the potato throughout the daylight hours.
- A furrow 5-7 cm deep is formed on the cultivated land.
- Potatoes are laid out in the recess with an interval of about 30 cm.
- After that, the surface of the soil is leveled, the potatoes are covered with earth.
- Leave the distance between rows at 50-70 cm.
- 10-15 days after the appearance of the first shoots, spud. In this case, a comb is formed in the form of a trapezoid (a triangle with a cropped top). The upper base of the trapezoid should be 15-20 cm, and the lower one from 50 to 70.
- Throughout the growth of potatoes, weeds are removed.
Plants are watered three times per season: before flowering, during and 10 days after flowering.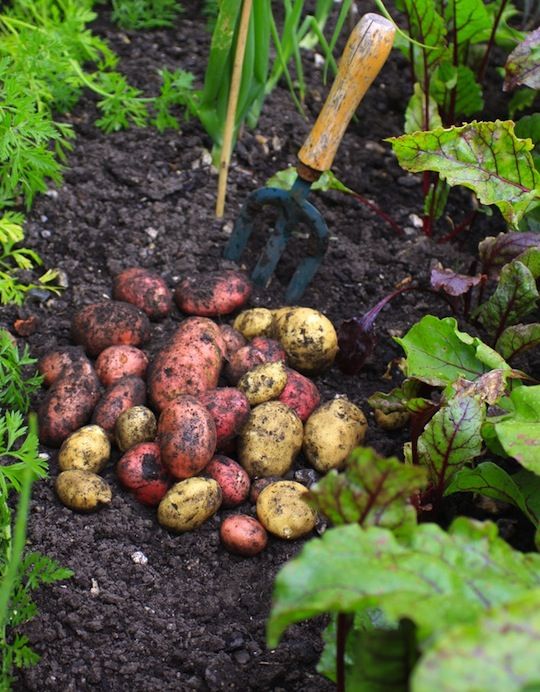 It is also important to spray against weeds and the Colorado potato beetle. Before harvesting, the tops are mowed, the tubers are left in the ground for a couple of weeks. So the potato peel coarsens and is less damaged when dug up.
Agrofibre potatoes
In this case, it will be possible to harvest earlier than usual.
The essence of the method is that plantings, potatoes are covered with white agrofibre. By this, the germinated sprouts are protected from frost, the soil retains heat longer and all this leads to a faster development of the bush. So that the agrofibre does not blow away, the edges of the fiber are either added dropwise. or pressed down with rocks or water bottles.
The second version uses a black, non-woven material. It is spread on fertilized and plowed soil, cuts and small indentations are made. Tubers are planted in them and sprinkled with soil.
The advantages of planting potatoes under agrofibre are as follows:
- The crop will not freeze.
- Reduces weeds.
- Potato grows a month earlier than usual.
Planting potatoes using the Kartelev method
The main feature of the method is fertilization, mulching and soil protection, which allows increasing the yield.
In late autumn, mowed grass is poured onto the ground and allowed to rest for a couple of days, then collected in haystacks and left to winter in a dark and dry place. This will be a great fertilizer for next year. Mowed grass is replaced with straw, hay, fallen leaves. The organic fertilizer may contain dandelions, sedge, clover and others.
One of the types of mulch is straw The agronomist claims that there is no need to take care of the crops, since they take moisture from rainwater, and the use of Baikal E1 growth agent protects plants from diseases.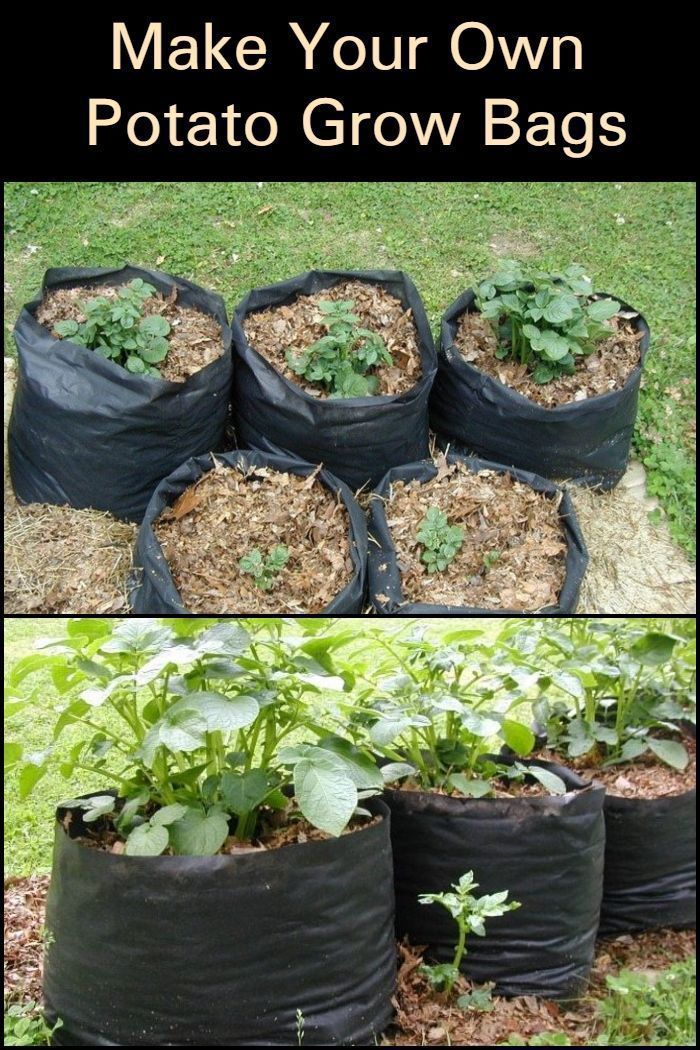
The technology involves several options:
- Zero. There is no need to fertilize, mulch or dig. The beds are marked with a stretched rope. Just make a small indentation with a chopper and lay the planting material. Then the earth is leveled with a rake, and then regular hilling is carried out.
- With manure and trenches. Also in the previous version, a rope is pulled, along the length of which holes are dug. Before planting, manure is poured into them.
- With mulch. The site is mulched and divided into even beds. Potatoes are planted in this layer, and manure is sprinkled on top.
- Fertilized. During the preparation of the pits, fertilizers are added to them.
- With mulch and trenches. When preparing the site, the soil is formed from layers of soil, mulch and manure.
Video: Theory of the garden according to the Kartelev method
Growing potatoes according to the Zamyatkin method
Planting material is germinated in bags in which sugar was stored.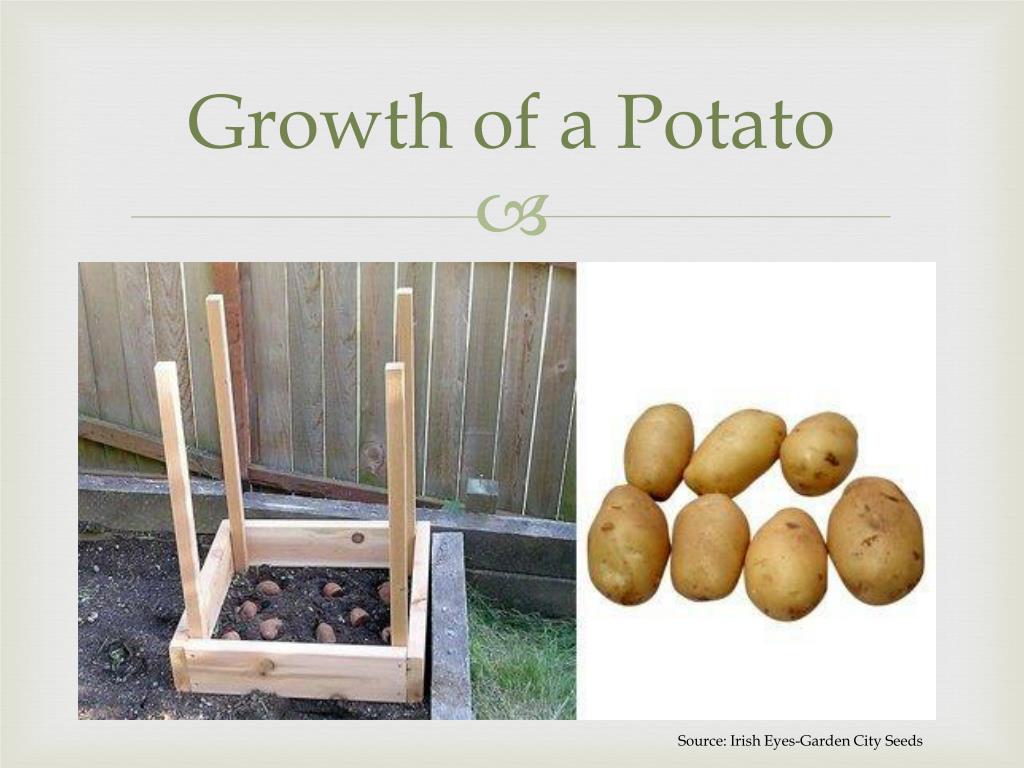 Under these conditions, the sprouts are strong, and the tubers retain moisture.
Planting is carried out in the spring, as soon as it becomes stable warm. The beds are made wide with a distance between them of up to 1.5 m. You need to plant tubers in a checkerboard pattern.
After the sprouts sprout, soil with manure is poured into the middle of the bush. The bush turns out to be voluminous and closes the entire garden. Plus, during flowering, all the buds break off, which allows you to increase the yield by a quarter.
Potato planting according to Gordeev
According to the Gordeev method, the land should be prepared in late autumn - dig it up with manure or compost. You can also leave hay and grass since the summer, and plow everything before winter. And in the spring, nitroammofoska is added to the soil and loosened a little with a rake.
Potato planting site must be changed every year. It is desirable to grow it after cereals.
It is necessary to prepare the material from early spring, germinating sprouts on tubers. To disinfect them from diseases and fungi, you need to soak them in special preparations.
It is advisable to water the soil before planting. The beds are made with an interval of 70-80 cm. For planting, trenches are dug into which vegetables are lowered. The distance between them should be up to 40-50 cm. From above they are covered with earth mixed with ash and compost. After the first hilling, the beds are mulched with hay.
Growing potatoes using the Gülich method
This method of growing potatoes has been around for over 100 years. The main feature is a large space for each bush. But this is not very suitable for ordinary gardeners. Although one bush can give about 15-16 kg.
The cultivation order is as follows:
- The entire plot is divided into equal parts measuring 1 by 1 m.
- A small trench is made from manure in the center.
- Soil is poured inside it, in which the tuber is planted upside down.
- Sprouts are sprinkled as they grow.
Regular watering and fertilization is required for a bountiful harvest. Ash, manure, compost, or water mixed with bird droppings will do.
Basic rules for growing potatoes
Growers often do not pay attention to the cultivation of potatoes. As a result, they have a meager, cracked potato crop ( why potatoes crack in the ground, we analyzed here).
Any innovative way to grow potatoes is based on a few basic rules. These include:
- Careful selection of planting stock . It all starts with quality tubers. For planting, it is necessary to select large, healthy seeds. They should not be affected by fungi, have a strange color and smell.
- Accounting for crop rotation . Planting potatoes in the same soil is undesirable. It is necessary to change its places with cucumbers, tomatoes, carrots, peas.
- Special soil preparation for planting . The soil has been prepared since autumn by fertilizing.
 But you can feed already planted bushes with ash, manure or chicken droppings.
 - Planting practices . Do not plant tubers too often. Adult bushes will simply cling to each other. Pour tubers 5-8 cm of earth, make holes at a distance of 10-15 cm, and leave 50-70 cm between rows.
- Proper care of root crops during the growing season . It is important to water the potatoes on time, especially when they bloom. Periodically hill and loosen the earth. In order for the soil to retain moisture longer, it is desirable to mulch it with straw. And against aphids, moths and other pests, spray.
Following these simple rules will help you get a much better and more abundant harvest than usual.
Conclusion
In addition to the traditional way of growing potatoes, there is a wide variety of options. Experienced gardeners remind you that you should choose a method taking into account the conditions of the site, your capabilities and the quality of the planting material.