Forcing indoor bulbs
How to Force Garden Bulbs Indoors
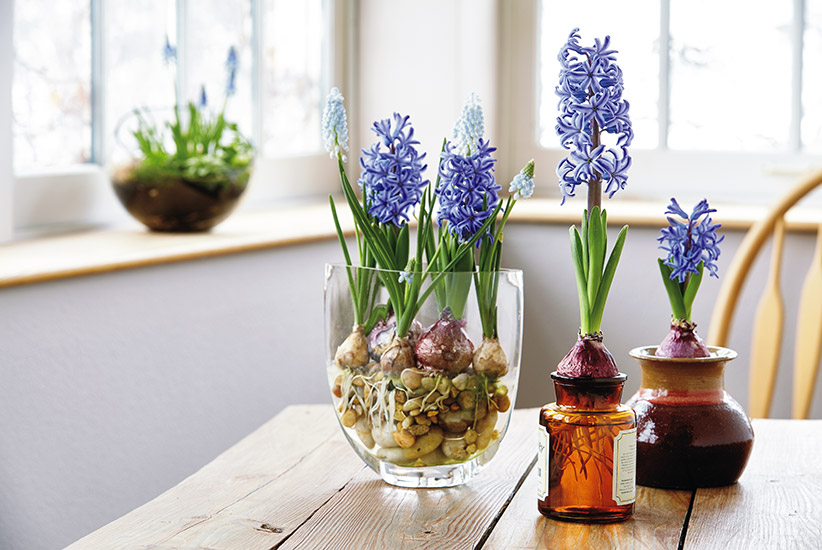
Select one of three ways to force your bulbs: Grow them over water in forcing jars, or grow in potting soil or in gravel. The container dictates the planting method. Hyacinth forcing jars, found at nursery supply stores and online, are hourglass-shaped containers that allow you to grow various bulb types. Fill the bottom part of the vase with water for the roots, and then set the bulb on top; the shape of the container prevents the bulb from falling into the water. When growing bulbs in a pot, choose a container that is twice as deep as the size of the bulb. This means using a much smaller container for crocus than amaryllis. Make sure the container has ample drainage holes.
Do you enjoy the uplifting show of spring bulbs every year? If so, get a jump on the season and "force" bulbs to light up your indoor garden this fall and winter. Forcing refers to tricking bulbs to bloom out of season indoors by providing them with favorable conditions for growing. Plant bulbs, such as paper white narcissus and amaryllis, indoors now, and you can impress your friends and family with stunning, often fragrant indoor blooms in the months ahead. If you time things right, you can even enjoy these living masterpieces during the holidays.
September and early October, when bulbs are plentiful at the nursery and via mail order, is the perfect time to select them for forcing. Follow these tips to create an indoor flower paradise this autumn and winter.
Select Bulbs Carefully
Not all bulbs bloom well indoors. Knowing the best types for forcing, and how long they take to bloom after planting, will help ensure you have a successful growing experience. Here are good indoor bulb choices, including bloom times:
Bulb Type |
Required Chilling Time (in weeks) |
Time until first bloom (in weeks) |
|---|---|---|
|
Amaryllis (Hippeastrum spp. |
None |
5-8 |
|
Bulbous iris (Iris reticulata) |
15 |
2-3 |
|
Checkered lily (Fritillaria meleagris) |
13-15 |
3-4 |
|
Daffodil (Narcissus spp.) |
12-15 |
2-3 |
|
Dutch crocus |
8-14 |
2-3 |
|
Dutch hyacinth (Hyacinthus orientalis) |
10-13 |
2-3 |
|
Grape hyacinth (Muscari armeniacum) |
8-15 |
2-3 |
|
Paper white narcissus (Narcissus tazetta) |
None |
5-6 |
|
Siberian squill (Scilla siberica) |
15 |
2-3 |
|
Snowdrop (Galanthus nivalis) |
15 |
2-3 |
|
Tulip |
10-16 |
2-3 |
 )
)Large bulbs create big blooms. So, select the largest bulbs you can find and examine each for quality prior to buying. Choose bulbs that are firm; those with soft areas are likely to rot.
If you are unable to plant bulbs immediately after buying them, store them properly until planting time. Place amaryllis and paper white bulbs in a mesh or paper bag, and then store in a cool, dry, dark location. All other bulbs should be placed in a paper bag and put in the refrigerator. Avoid storing fruit (particularly apples) in the refrigerator at the same time, as ripening fruit releases ethylene gas that can cause bulbs to deteriorate or not flower.1
Choose A Planting Method
Plant Bulbs
Place water-forced bulbs tip-end up, positioned with the bottom of the bulb 1/8 to 1/4 of an inch above the surface of the water. Roots will reach into the water.2 Hyacinth, amaryllis and narcissus respond well to this method of forcing.
For other bulb types, it is best to force using gravel or potting soil.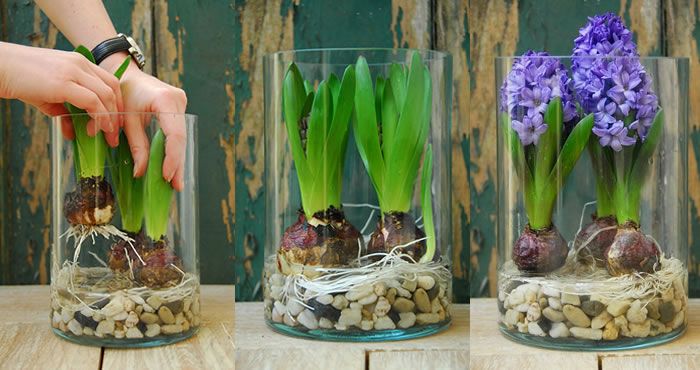 Plant bulbs about an inch apart, tip-end up, leaving 1/2 to 2/3 of the bulb exposed. If you cover the entire bulb, it may rot. After planting, water until the soil or planting medium is moist but not soggy.
Chill To Initiate Blooming
Except for amaryllis and paper white narcissus, bulbs require a period of chilling after planting in order to initiate blooming. Place the planted bulbs in a location with temperatures of 35 to 55 degrees Fahrenheit. Good locations include a root cellar, unheated garage, attic, shed or, if space allows, a refrigerator.3 If temperatures are cold enough, you can also chill the bulbs outdoors. Just make sure the soil or planting medium doesn't become overly moist.
Plant roots form and stems lengthen during this cooling period, which generally ranges from 10 to 15 weeks. If the bulbs were chilled by the bulb company prior to selling (refer to the packaging), the cooling period will be shorter. Consult the chart above for chilling time periods. Subtract any pre-chilling time, including any time spent in a refrigerator prior to planting.
During the chilling period, check on the bulbs periodically, and water when the top inch of soil or gravel becomes dry or when the water level in the jar is more than 1/2 an inch below the bottom of the bulb.
Transition Bulbs To Blooming
Remove bulbs from their cooling locations when they show a thick mass of roots in the forcing jar, or when they have 2 to 4 inches of stem growth and are well rooted in the soil.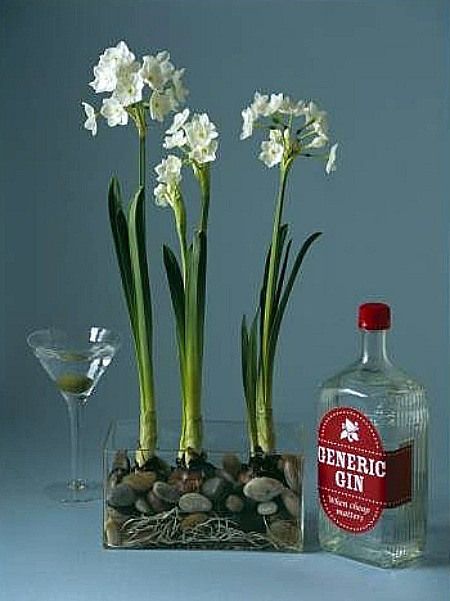 Move them to a dim, warmer (about 65 degrees Fahrenheit) inside location to initiate further growth and greening. After a week, move the bulbs to a brighter area. In two to four weeks, buds should form; soon after, the plant will flower.3
Forcing Without Chilling
Paper white narcissus and amaryllis are the easiest bulbs to force because they require no chilling. They bloom quickly inside and are great for succession planting — planting at intervals so you can enjoy indoor blooms throughout the fall and winter months. Time things just right and you will see these plants flower for Thanksgiving, Christmas, New Years and Valentine's Day.
Maintenance
To prolong blooms once they appear, keep plants out of direct sunlight and away from drafts and heating vents. For potted bulbs, continue to maintain a moist but not soggy soil environment; for water-grown bulbs, replace water to just below the bottom of the bulb every three days.
To prolong blooms once they appear, keep plants out of direct sunlight and away from drafts and heating vents. For potted bulbs, continue to maintain a moist but not soggy soil environment; for water-grown bulbs, replace water to just below the bottom of the bulb every three days.
Generally, no fertilizing is required with forced bulbs, because once the bulbs are finished blooming, they aren't likely to re-bloom the following year. It is sometimes possible to get bulbs to rebloom, however. This is easiest with those bulbs that don't require chiling, such as paperwhite narcissus and amaryllis.
If you wish to try your luck at saving the bulbs for next season, fertilize the plant after it finishes blooming and while the foliage is still green. Mix If you wish to try your luck at saving the bulbs for next season, fertilize the plant after it finishes blooming and while the foliage is still green. Mix Pennington UltraGreen All Purpose Plant Food 10-10-10 into the soil as directed. . Continue watering the plant until the foliage dies back. Once the foliage has browned, let the soil dry out, and then remove the bulb and store it in a cool, dry place until next fall when you can start the forcing process once again.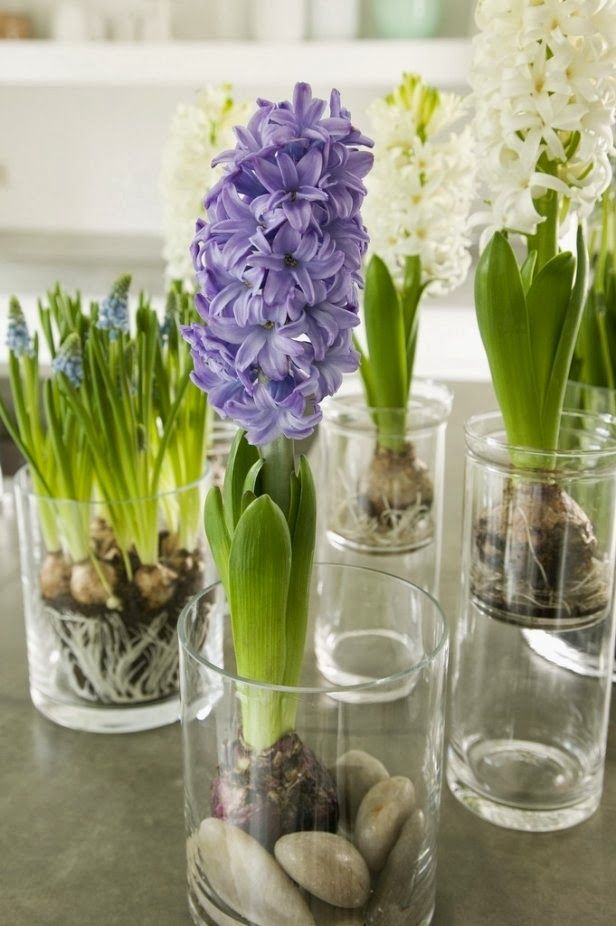 into the soil as directed, and then apply a 1/4-inch layer of earthworm castings to the surface of the soil. Continue watering the plant until the foliage dies back. Once the foliage has browned, let the soil dry out, and then remove the bulb and store it in a cool, dry place until next fall when you can start the forcing process once again.
Conclusion
Forcing bulbs indoors in fall and winter is quite easy when you follow a few simple steps. By choosing healthy bulbs, chilling them when necessary, and taking proper care of the resulting plants, you'll enjoy an early spring in your indoor garden.
Lilly Miller is a registered trademark of Central Garden & Pet Company. Pennington is a registered trademark of Pennington Seed, Inc.
Resources:
1. Ann Joy and Brian Hudelson, "Forcing Bulbs," Master Gardener, University of Wisconsin—Extension, March 9, 2012.
2. B. Rosie Lerner, "Forcing Bulbs for Indoor Bloom," Purdue University Cooperative Extension Service, July 2005.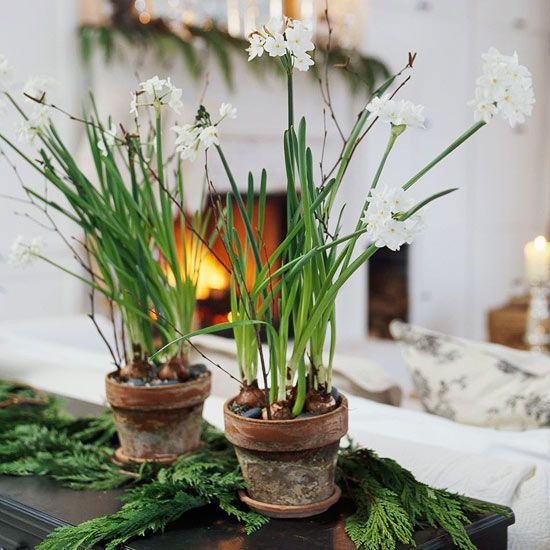
3. George Graine, "Fooling Mother Nature: Forcing Flower Bulbs for Indoor Bloom," Virginia Cooperative Extension, 2014.
How to Force Bulbs - Guide to Forcing Bulbs Indoors
Home Projects
How To
by Molly Williams
updated Jan 9, 2020
SavePin ItSee More Images
It’s finally happened: The thrills of the holidays are over and we have descended into the dark months of winter. You wake up and look out the window only to be greeted by snow or the dead-looking dormancy of January. These are the months when houseplants are especially welcome, helping to minimize the gray, gloomy view out your window. Need to up your game? Forcing bulbs indoors—including the holiday favorite paperwhites—is one of the best ways to bring colorful and cheerful winter blooms into your home.
What does it mean to force bulbs?
For more content like this follow
“Forcing” is the simple process of making a plant flower in an artificially created environment. Outdoor growth bulbs are planted in the fall in order to winter over for spring blooms; you can bypass months of waiting by urging bulbs to bloom indoors within a matter of weeks. It is a fairly easy process that will have you thinking that you’ve played a fun trick on Mother Nature herself.
See More Images
What types of bulbs can you force?
There are many different types of bulbs that you can force, depending on your personal preferences. Some blooms will have a strong scent, while others will barely have one at all. It’s best to do your research beforehand if you have a sensitivity to some smells. For example, paperwhites have a very strong scent that is off putting to many people.
Commonly forced bulbs include crocus, paperwhites, amaryllis, daffodils, hyacinth, grape hyacinth, iris, and snowdrops.
SavePin ItSee More Images
Where to source your bulbs
Honestly, this is one of the hardest parts of forcing bulbs. If you order online from an unreliable source, you could end up with product that hasn’t been transported or packed properly and therefore temperature-damaged. If you do decide to source your bulbs online, be sure to research multiple outlets and read reviews. Also keep an eye out for “pre-chilled” bulbs; they’ll save you even more time, as you won’t have to wait as long for blooms.
Another great option for sourcing bulbs is to stick to local plant nurseries. Most garden shops will have a wide selection of pre-chilled bulbs that are ready to force. You’ll even be able to find pre-planted bulbs that are already growing in beautiful arrangements, just waiting for you to take them home.
How to chill your bulbs
Most common bulbs that are used for forcing need a cool period—which mimics winter—in order to get ready to grow. While they’re chilling, the inside of the bulb is a flutter of growth. If you’re growing Amaryllis or Paperwhite bulbs you won’t have to worry about chilling them, as they’re naturally tropical plants and do not need a cold snap. You can plant those and see blooms in 3-8 weeks (Amaryllis will take the most time to bloom). Most other bulbs you will need to source pre-chilled or chill them yourself.
You can chill the bulbs in the vegetable drawer of your refrigerator or an unheated part of your home (like the basement or garage). Keep them away from moisture unless you’re planting them in soil, which we will cover later.
The chill time is something like this:
Tulips: 10-15 weeks; blooms 2-3 weeks after planting
Snowdrops: 15 weeks; blooms 2 weeks after planting
Iris: 13-15 weeks; blooms 2-3 week after planting
Crocus: 8-15 weeks; blooms 2-3 weeks after planting
Hyacinth: 12-15 weeks; blooms 2-3 weeks after planting
Grape Hyacinth: 8-14 weeks; blooms 2-3 weeks after planting
Daffodils: 2-3 weeks; blooms 2-3 weeks after planting
Chill now for May blooms—or buy pre-chilled bulbs to get flowers even sooner. Then, this fall, follow our guide:
For January blooms, chill in September. For February blooms, chill in October. For March blooms, chill in November. For April blooms, chill in December.
SavePin ItSee More Images
Forcing bulbs in water
If you’re looking for a mess-free way to force bulbs, this method is for you. All you’ll need is a pre-chilled bulbs, pebbles, and a vessel.
1. Pick your container. You can use a vase or favorite vintage vessel. Many people favor forcing vases because all you need to do is fill the bottom with water and then settled the bulb with in the vase. These take the guesswork out of the process and you’ll be able to clearly see if your bulb is sitting in the water (something that can cause the bulb to rot). If you choose to use a forcing vase, skip to number four in our directions. If you’re using a regular vase or vessel, read on to number two.
2. Layer a few inches of pebbles in the bottom of your vessel.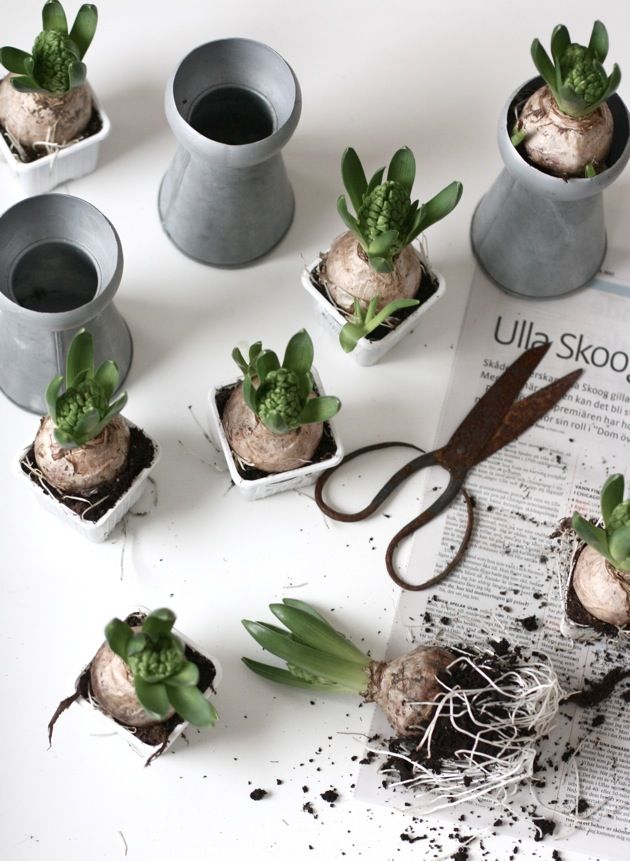
3. Nestle your pre-chilled bulb tip-up among the pebbles. Press them down gently so that the bulb is secure.
4. Pour water into the container until the water level is just under the bottom of the bulbs. Whatever you do, don’t let your bulbs sit in water. They will rot before they even get a chance to bloom. The idea is that the roots will grow down into the water.
5. Place your vessel away from direct sunlight. Leave it there until the bulbs begin to root. If you’re using an opaque container, gently pull on the bulb to see if it gives any resistance. At this point you should be at the two to three week mark. Bulbs like tulips and amaryllis will take a little longer. During this time add water when the level is at less than one inch in the vessel.
6. Once your bulbs have rooted you can move the vessel to a bright, sunny spot in your home. Still keep an eye on the water level and they will be taking in more water at this time. Once you begin to see the stem shoot up, it won’t be long (a week or two) until the bulb blooms.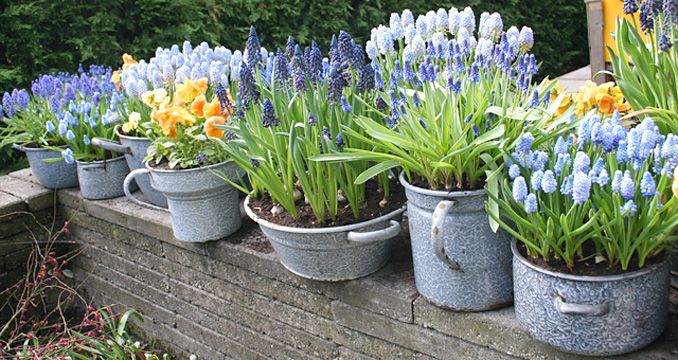
See More Images
Forcing bulbs in soil
Forcing in soil is a little more involved that forcing bulbs in just water. You’ll need a container, bulbs, potting mix and access to a place to chill the bulbs (unless you’re using pre-chilled bulbs or are planting amaryllis or paperwhites).
1. Choose a container for your bulbs.
2. Fill the container with damp potting mix until it is ½ or ¾ full, depending on your preference.
3. Place the bulbs pointy-end up on the surface of the soil. Group the bulbs close together so they are more cloistered.
4. Cover the bulbs until only the points are sticking out of the surface of the soil.
5. If you aren’t chilling your bulbs, skip this step. If you are: Place your bulbs in a cool, dark place such as a basement, unheated porch, or garage. Chill them for the required about of time. Keep the soil lightly damp during this time.
6. After the required amount of chilling time, move your bulbs into your home, out of direct sunlight. If you’ve just planted pre-chilled bulbs or bulbs that don’t require a chilling period, move them to a place that is out of the direct sunlight. Leave them there until the bulbs begin to take root. You can check by gently tugging on each bulb to see if it gives resistance. This should take two to three weeks to get to this point after chilling. Only water when the potting mix is dry to the touch. Overwatering will encourage rot.
7. Once your bulbs have rooted, move the container to a sunny spot in your home. Water when the soil becomes dry to the touch. Once the stems begin to emerge from the soil, you should see blooms in two to three weeks.
SavePin ItSee More Images
How to prolong the life of your blooms
Each type of bulb has a different bloom time, which is also dependent on the type of care they receive. You can stretch your bloom life up to roughly 20 days if you give it a solid effort. After your bulbs have begun to flower, move the container out of the direct sun to a cooler place in your home. Direct sun is very hot and will cause the blooms to decay at a more rapid pace.
Don’t leave your blooms near any type of heating element, including radiators, fireplaces, space heaters or air vents. It’s also a good rule of thumb to keep bulbs away from extreme temperature change, so avoid placing them near doors that open to the outside.
Don’t be afraid to trim off dying blooms. Dead blooms pressing against newer ones will decrease the bloom time.
Only water your bulbs when the soil is dry to the touch. Overwatering will promote bulb rot, which is something you cannot see as its happening.
You might find that some of your bulbs have bloomed while others haven’t even grown. If this happens, something probably happened before the bulbs even came to you. They were either harvested or stored incorrectly, or they have some kind of rot.
Saving your bulbs
This really varies from person to person. Some people like the process of saving their bulbs and putting them into dormancy in order to start the process all over again the following year. However, it’s worth noting that this is a complicated process, and bulbs might not perform as well the second time around. They’re also a low-cost investment, so for the time, we’d recommend composting spent bulbs and buying fresh ones for your next growing season. Happy planting!
Forcing tulips at home, when to plant bulbs
Usually everyone is interested in forcing tulips for the New Year and March 8th. After all, when there is snow and frost outside the window, and there is a holiday on the calendar, you want to pamper your loved ones with bright fresh flowers.
- When to plant tulips for forcing
- Planting tulips for forcing
- Varieties of tulips for forcing
- Forcing tulips video
nine0005 We advise beginners to purchase bulbs ready for forcing, they are sold in flower shops. These bulbs are already aged and prepared for planting.
When to plant forcing tulips
This should be done at the end of September if you want flowers for the New Year.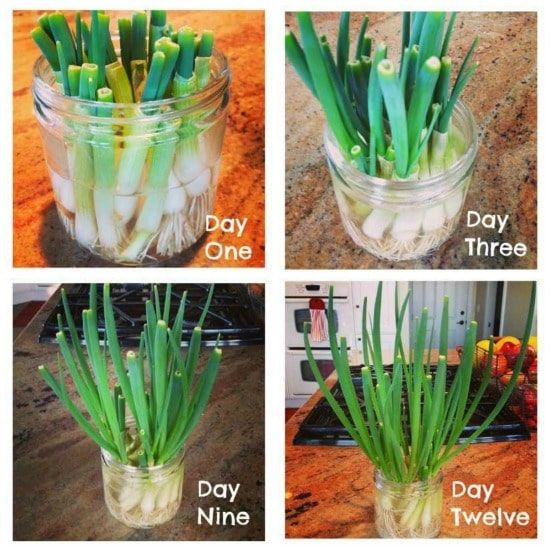
In general, the planting date is considered as follows: let's say we need to grow tulips by March 8th. First, we subtract 3 weeks (this is the time of keeping warm) - it turned out February 15th. From this date we subtract the cooling period (it usually lasts 3-4 months) and we get the period from the end of October to the end of November - during this period you need to plant tulips for forcing. nine0003
The soil for forcing tulips must be moisture-absorbing, that is, it must retain moisture well. You can, of course, take ordinary river sand (as Dutch flower growers do), or perlite, vermiculite, peat, a mixture of sand and peat. But the ideal substrate is still a mixture of 1 part river sand, 1 part humus and 2 parts soddy soil with the addition of wood ash.
During forcing, the plant feeds mainly on the substances accumulated in the bulb. The substrate is needed mainly to retain moisture, it must always be wet. nine0003
to contents ↑
Planting tulips for distillation
Prepared soil is poured into boxes or ceramic pots for 2/3 of the volume (do not forget to drain).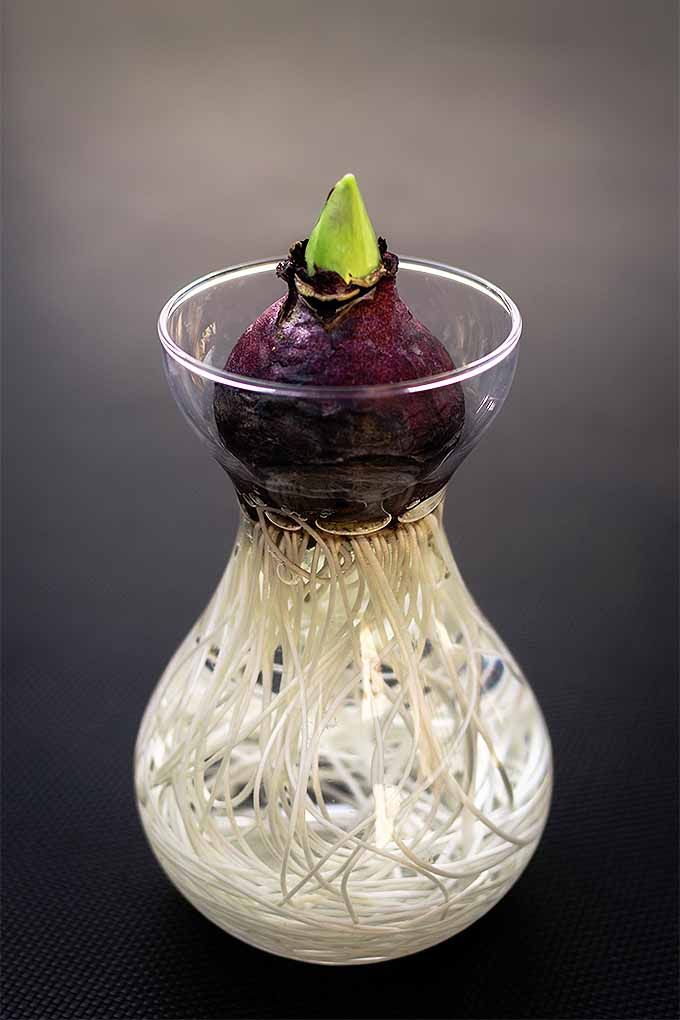 Then the tulip bulbs are laid so that they do not touch each other, you can lay them quite tightly, leaving a distance between them of up to 0.5 cm. Next, sprinkle with soil so that they are not visible. Then shed the plantings and if the bulbs are bare, add more soil.
Now plantings should be planted for at least 3 (usually 3-4 months) months in a cold place where the temperature is about 5-10 degrees and the air humidity is not less than 75%. If the forcing of tulips takes place at home, then the lower shelf of the refrigerator corresponds to these conditions. During this time, the tulip bulbs will take root and small flower stalks will come forward. The main thing for all these 3 months is to keep the soil in a slightly wet state, without closing the boxes from above with any materials. nine0003
3 weeks before the expected holiday, boxes with planted tulips must be moved to a warm place with a temperature of 18-20 degrees. It is desirable at first not on the windowsill, but in a slightly lit place.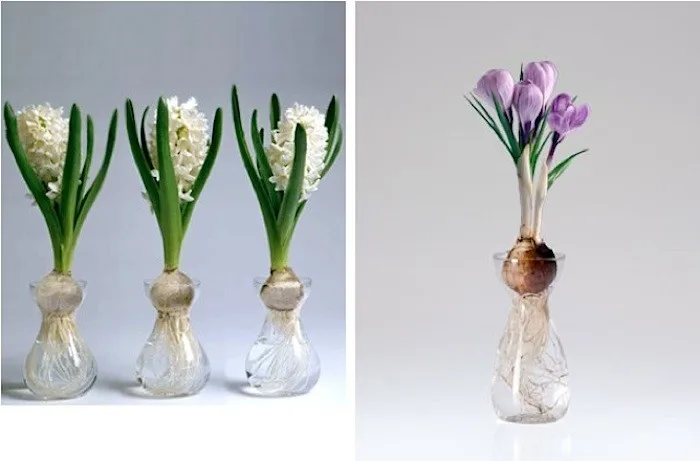 If there is still a lot of light, then for the first week put paper caps on the sprouts - just do not forget to remove them daily for a while so that the plants are ventilated.
After a week, remove the caps and organize artificial lighting in addition to natural sunlight, since the daylight hours for forcing tulips in winter should be at least 10 hours, and preferably 12. To do this, it is enough to hang the light bulb at a distance of about 25 cm from the sprouts. For 1 sq. meter landings enough light bulbs 40 watts. nine0005
Further care of tulips consists in daily watering with settled water at room temperature and weekly feeding with a solution of calcium nitrate.
to contents ↑
Varieties of tulips for forcing
For beginners, the most suitable variety of tulips Parade Record from the class of Darwin hybrids, as it is resistant to diseases and will survive if the technology of forcing tulips is slightly disturbed.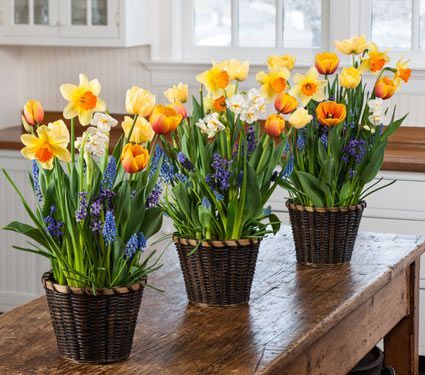
In general, for forcing tulips, experienced flower growers recommend varieties from the classes of Greig, Kaufman, Foster and some varieties from the class of Darwin hybrids. nine0003
Forcing tulips in the greenhouse is also possible. If it is a winter forcing, then the greenhouse should be heated. After all, the minimum temperature at which distillation is possible is 15-17 degrees.
to contents ↑
Forcing tulips video
which light is right for plants?
Contents
- 1. Groups of plants according to light needs
- 2. Which plants require additional lighting in winter?
- 3. How to supplement the illumination of plants? Plant lamps
- 4. How to organize additional illumination of a plant?
- 5. How to understand that the plant does not have enough light?
- 6.
 A few final tips
The most unique and amazing property of plants is the ability to create complex organic substances with the help of sunlight. No other living being on the planet possesses this property! However, different plants have different requirements for light, and they depend primarily on the origin of a particular species. So, Aloe Africanus, growing in the desert and accustomed to being under the scorching rays of the African sun, needs much more light than Aspidistra, a resident of the gloomy tropical forests of Indochina. nine0003
Plant groups according to light needs
According to the amount of light required, indoor plants can be divided into 2 main groups : light-loving and shade-tolerant , content with moderate lighting.
There is also an intermediate group - plants that prefer partial shade. This group includes only some types of light-loving or shade-tolerant genera.
A striking example is Aglaonema, whose natural species grow in forests and are therefore shade-tolerant. However, variegated ("variegated") varieties prefer diffused light, without which they can lose their original color. nine0091
ON THE PHOTO: Aglaonema variegated does not tolerate light deficiency as easily as species with monochromatic leaves
The first group includes desert plants - Sedum, cacti, Haworthia, Hoya, Gasteria, Coleus, Croton, Eucalyptus . The second group includes Ivy, Fragrant Dracaena, Saxifraga, Monstera, Aspidistra, Begonia.
You can even visually determine which group a particular plant belongs to. Just take a close look at it. So, shade-tolerant species have a dark green color, their leaves are wide, dull, sometimes quite dense. The shoots of such plants are long, most often thickened. Light-loving species, on the contrary, have light green, equilateral, narrow and shiny leaves, often hard and thin. Shoots are short, with hairs. nine0086 IN THE PHOTO: Kleinia loves to bathe in the sun
As for the so-called "shade-loving" species, not a single flowering plant likes shade. But their “younger” brothers (although evolutionarily they are more like “grandfathers and grandmothers”) - mosses, lichens and ferns prefer the shadow, because. exposure to light can cause burns. Therefore, shade-loving plants are isolated into a separate, rare group with their own specific conditions of detention. nine0091
You can determine which group of plants your flower belongs to by visiting our "Encyclopedia". The “Illumination” characteristic is indicated by the “sun” icon. Hover over it and you'll know how much light your plant needs.
Which plants require additional illumination in winter?
The easiest answer to this question is those that you want to flower and/or thrive in winter. In winter, home plants experience a shortage of natural light. Even on east-facing windows, which bathed in the sun in the summer, there is not enough light on short cloudy days. nine0003
Some species of flora adapt well to such conditions, and even bloom in winter. These are the so-called short-day plants , which need no more than 8-10 hours of light per day for normal growth and development - Kalanchoe, Poinsettia, Chrysanthemum, Begonia, Gerbera, Azalea, Astra and others. ON THE PHOTO: Some plants bloom even in low light, like this Echinopsis
read our article "How to stimulate flowering in different plants?".0003
Most species, however, require at least 10-12 hours of natural or bright artificial light. These include Campanula, Gardenia, Fuchsia, Oleander, Hibiscus, Gloxinia, Pelargonium, Viola, Delphinium, almost all orchids.
So, when and in what cases do you need to relight? The answer to this question depends on several factors:
- Placement relative to the cardinal direction .
 Absolutely all plants on the north and west sides, as well as plants located in rooms with thick curtains or blinds, require an additional source of lighting. nine0009
 - Quiet period . In winter, some plants need to rest. So they arrange holidays for themselves, something akin to our summer vacation. If your flower is at rest, it is enough to supplement it only from time to time to maintain natural growth and development. You can find out about the dormant period of your particular plant in our Encyclopedia.
- Your personal preference . Everything is simple here: if you, for example, not , want to harvest a “rich harvest” of Saintpaulia in winter, reduce the highlighting time of your flower. And vice versa, if you want to admire the flowering - increase the portion of "sun rays". nine0009
- Requirements of individual plant species . As we wrote above, “variegated” plant varieties will require additional lighting, for example, Aglaonema or Ficus Benjamin variegata.
 Also, some ornamental foliage plants without illumination lose their pattern or its shades. These "fastidious" include almost all arrowroot (Maranta, Ktenanta, Stromanta and others).
How to light up plants? Lamps for plants
When choosing a lighting device, you should consider not only the intensity, but also the spectrum of light radiation. It is known that plants do not absorb all the rays, but only those that are in the blue and red spectrum. Optimum are orange-red and blue-violet rays. nine0086 Orange-red light promotes seed germination and growth of shoots, and blue-violet stimulates the development of green mass. IN THE PHOTO: Plants and people "see" light differently. The human eye distinguishes yellow-green shades in sunlight and does not see blue and red at all. Plants, on the contrary, are sensitive to the blue and red regions of the spectrum and, to a lesser extent, to yellow-green
As an artificial source of illumination, fluorescent, gas-discharge, LED lamps, as well as incandescent lamps are used.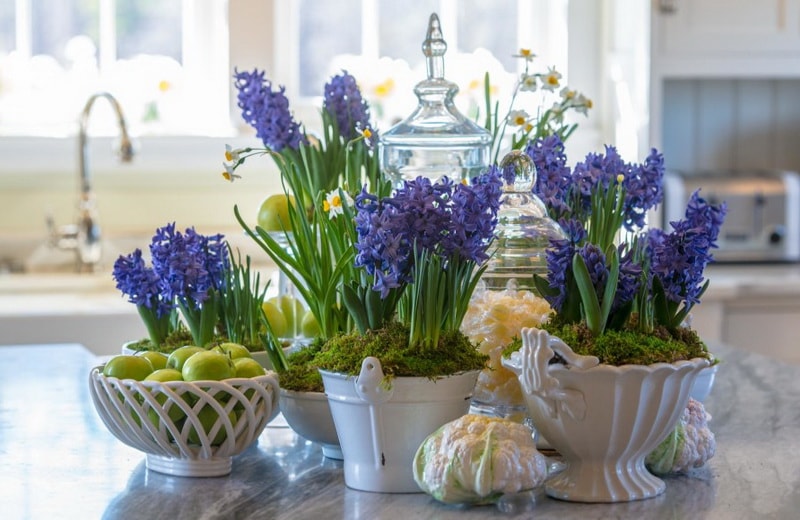 In this review article, we will recommend the simplest and most affordable options: special T8 type phytolamps (regular tubular) Osram Fluora or its analogue Sylvania GroLux. Despite the low power (maximum these lamps are 58 watts with a length of more than 1.2 m), they perfectly illuminate even tropical plants. In particular, Gardenia blooms profusely in winter under the pink light of these lamps. If it is not possible to purchase them, then we recommend the brightest Philips or Osram fluorescent lamps. Often they are of type T5 - these are thinner tubular lamps for compact fixtures. They shine better than regular T8s. nine0003
Ask salespeople to show you lamps with a color temperature of 5500-6500 Kelvin. Typically, on packages, this color temperature corresponds to the phrase Cool white (“cold white”). Fluorescent lamps marked Warm white (“warm white”) have more orange-red rays in their spectrum, which are also important for plants.
Ideally, if you combine one lamp of "cold white" light and one "warm white" in one lamp.
But it is better not to use ordinary incandescent bulbs with a tungsten filament for supplementary illumination. The light intensity of such devices is low, but at the same time they emit such an amount of heat that they simply burn the plants. ON THE PHOTO: Osram Fluora is a good alternative to natural lighting
Reflectors play an important role in plant illumination. Thanks to the reflective surface, they collect the scattered light and direct it back to the plant, which greatly increases the efficiency of the lamps. Many modern lighting fixtures have built-in reflectors, but you can buy them separately or make your own from improvised materials. Metallized and white matte surfaces reflect rays best of all, for example, food foil (but not glossy, but matte side), white cloth or white opaque polyethylene. But an ordinary mirror reflects only 40% of the rays needed by the plant, so it is better not to use ordinary mirrors.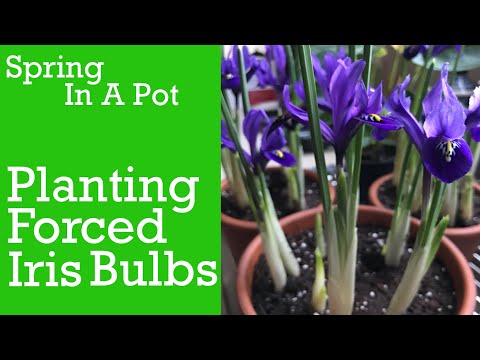 nine0003
How to organize additional lighting of a plant?
It is very important to place the lights correctly. The optimal position is when the light from the lamp falls on the plant at a right angle. Beginning gardeners often make the same mistake: they hang the illuminators too high, trying to cover as many plants as possible with light. As a result, none of them receives enough light.
The main illuminator is placed 20–25 cm from the upper leaves of the plant if it is light-loving, and 55–60 cm if it is shade-tolerant. When installing the lamp, remember that soon your flower will begin to grow, and it is better to foresee options for adjusting the height of the lighting fixture. nine0086 PICTURED: Ready-made lighting solution for a kitchen or small garden with adjustable lamp height
If your green pets "live" on a shelf or in a plant cabinet, you can use fluorescent tubes installed along the width of the shelf to add lighting. As a reflector, a self-adhesive mirror glued on the sides is suitable.
To increase the intensity of natural light for window plants, mirrors on the side slopes of the window frame will help. Firstly, this little trick will allow you to slightly extend the daylight hours. And secondly, such a technique will create the illusion that there are “more” plants on the window, which is very beautiful in itself (but do not forget that mirrors reflect less light that plants need than ordinary white surfaces). nine0086 IN THE PHOTO: Organization of lighting in a room without windows. In the background reflective film to increase light output
Window and reflective surfaces should be regularly cleaned of dust and dirt, even if they appear clean on the outside. During the day, a thin layer of dust, often invisible to the eye, settles on them, which significantly reduces the intensity of natural light.
How to understand that the plant does not have enough light?
It will not be difficult for an experienced grower to determine that the plant is not getting enough light. But what about someone who is just taking the first steps in growing flowers? nine0003
Insufficient or low-quality lighting has a detrimental effect on the appearance of the plant. First of all, the natural color of the leaves changes: they become pale and small. Variegated plants lose the brightness of the pattern and become just green. The lower leaves turn yellow and eventually fall off.
Plant growth slows down significantly, new shoots and leaves appear less and less. In many species, the distance between shoots increases. The sprouts are looking for a light source and are drawn to it, which leads to their stretching and curvature. nine0086 IN THE PHOTO: Shoots stretch out due to lack of light. This is especially noticeable in plants that prefer bright, intense light, such as Gardenia
Flowering plants produce fewer buds, the buds themselves are pale and sluggish. Often they fall off, never having time to develop. It also happens that the plant does not bloom at all.