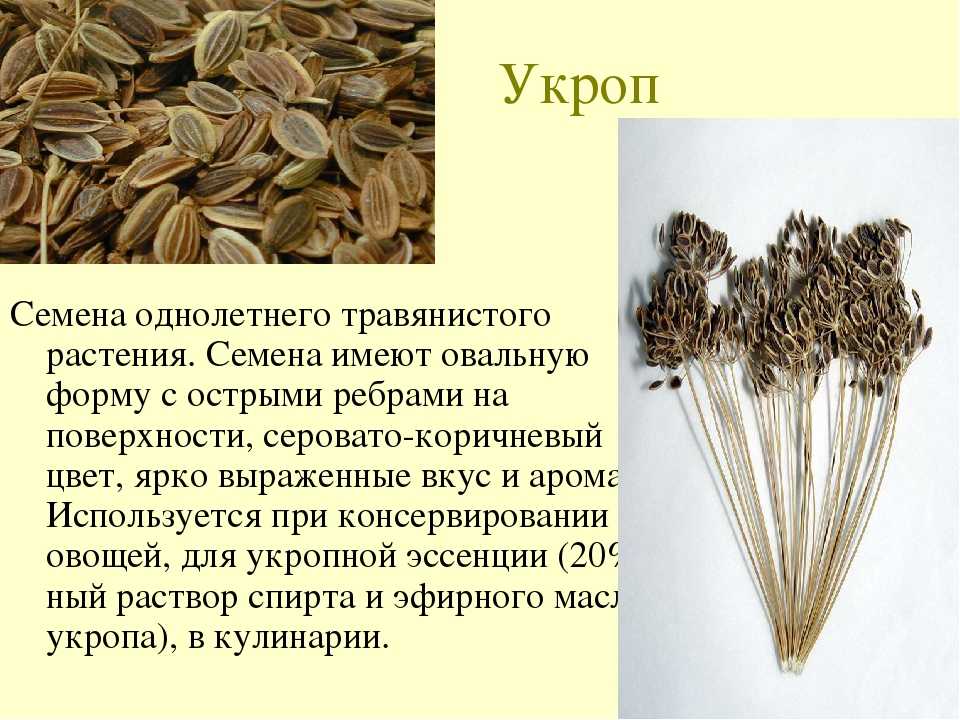
Plant dill from seed
Growing dill in home gardens
- Home
- Yard and garden
- Find plants
- Vegetables
- Growing dill
A quick guide to dill
- Dill grows best in a well drained, slightly acidic soil, rich in organic matter.
- Dill does not transplant easily.
Sow seeds directly into the ground where the plants are to grow.
- Growing dill indoors is possible, as long as you provide enough light.
- Harvest green dill foliage anytime during the growing season until the umbrella-like flower clusters open.
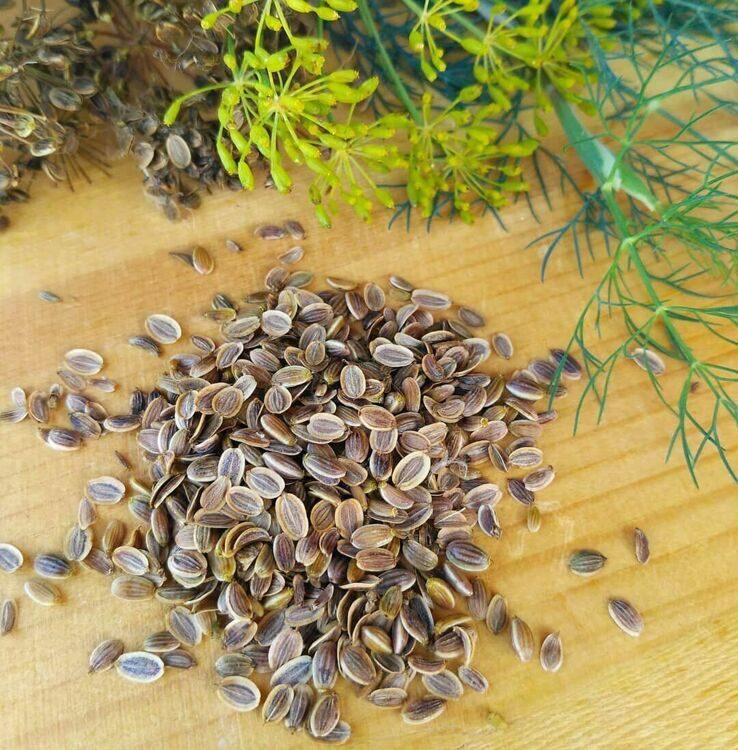
- To harvest the seeds, cut the flower stalks just before seeds begin to ripen and turn a tan color.
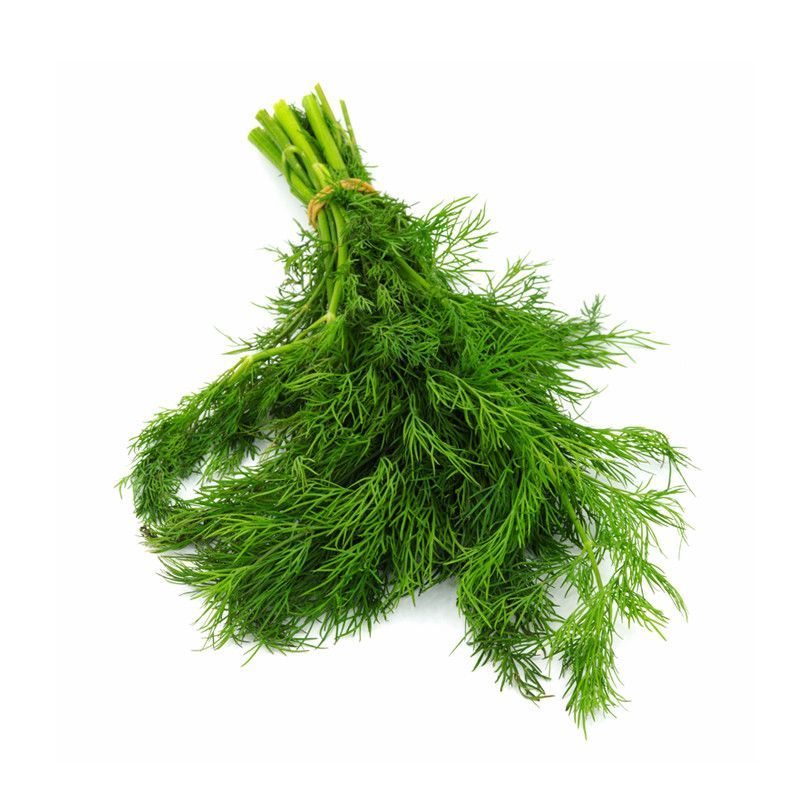
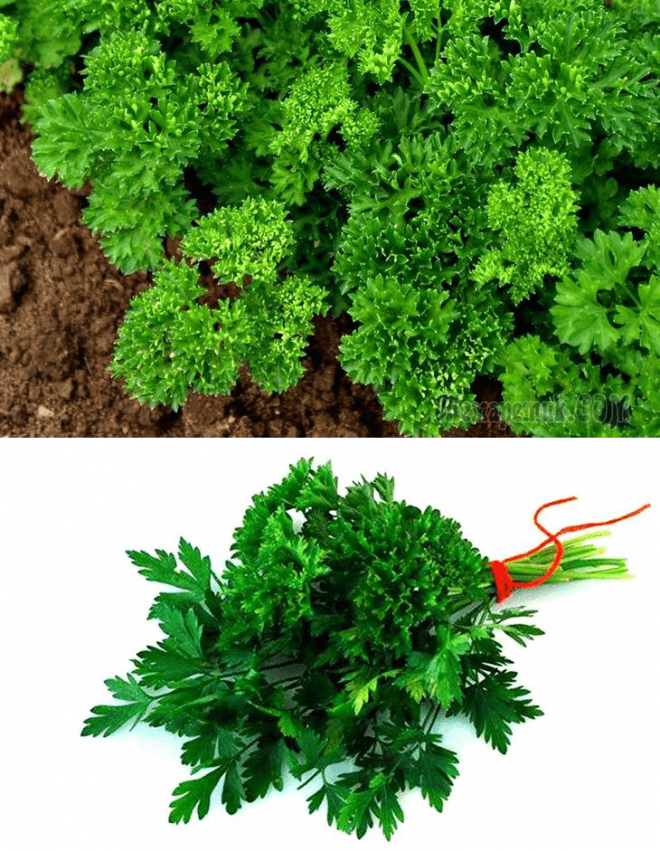
Dill, Anethum graveolens, is a tender annual in the carrot family (Apiaceae). It is native to Asia Minor and the Mediterranean region. The tall, leggy plant is popular for pickling, but you may also use the foliage and seeds in soups, salads, breads, party dips and fish dishes. In cut flower arrangements, floral designers value dill as a feathery green filler.
Soil pH and fertility
|
Planting
|
Harvesting
|
Jill MacKenzie and Shirley Mah Kooyman
Reviewed in 2018
Share this page:
Page survey
How to Plant and Grow Dill
Anethum graveolensThe smell of dill takes me straight to my happy place: Mediterranean-style meals, warm spring days, and soft feathery plants.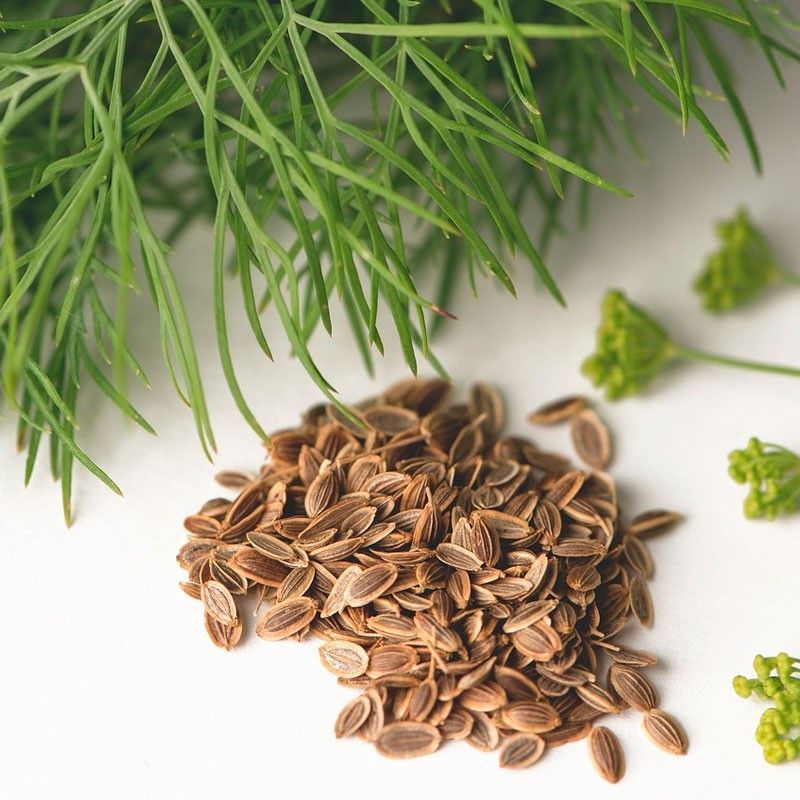
Life doesn’t get much better than that does it?
Luckily, those of us who love this aromatic herb don’t have to rely on the market for a fresh supply, as we can easily grow our own.
We link to vendors to help you find relevant products. If you buy from one of our links, we may earn a commission.
I’ll take you through every step in the process of growing this wonderfully ornamental and tasty plant.
And so you know what lies ahead, here’s what I’ll cover:
What You’ll Learn
- Cultivation and History
- Propagation
- How to Grow
- Growing Tips
- Cultivars to Select
- Managing Pests and Disease
- Harvesting
- Preserving
- Recipes and Cooking Ideas
- Quick Reference Growing Guide
Cultivation and History
If dill makes you think of tasty Mediterranean dishes like it does for me, there’s a reason for that.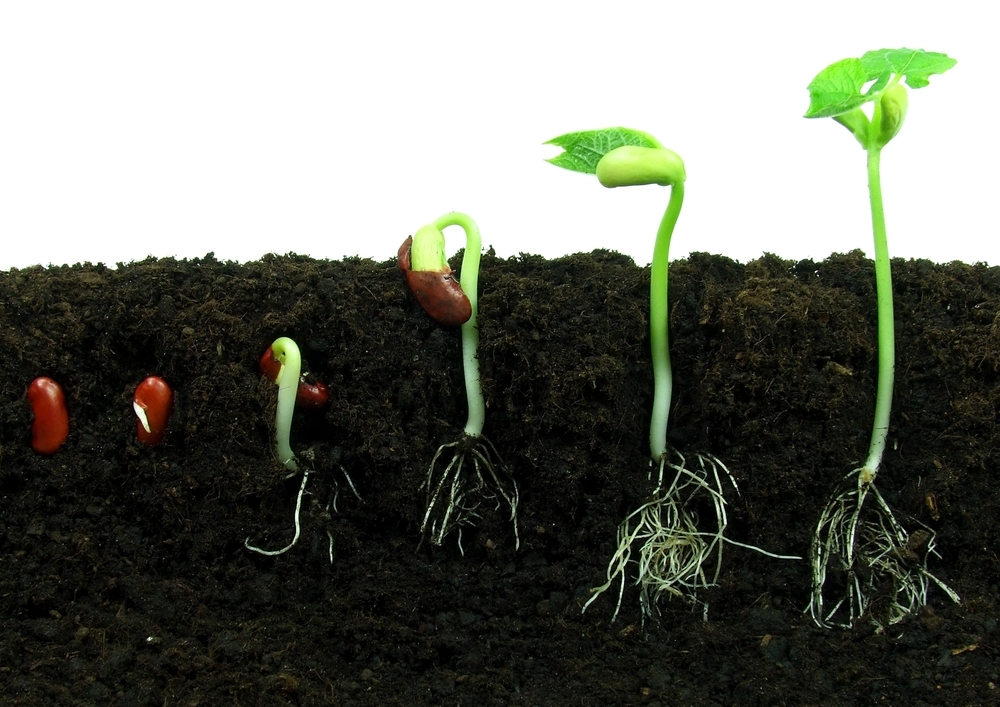
While its exact origin is not entirely certain, this herb is likely native to the Mediterranean region and western Asia – places where it is widely used in the local cuisine.
These days, it easily naturalizes in other locations with Mediterranean-type climates, such as California.
But it also escapes cultivation and grows like a weed in places with decidedly non-Mediterranean climates, such as the northeastern US.
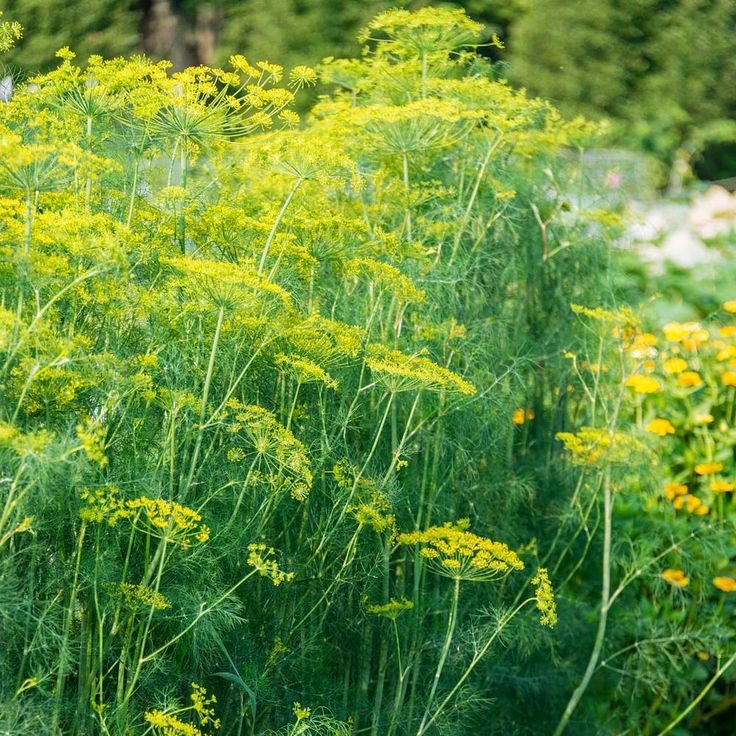
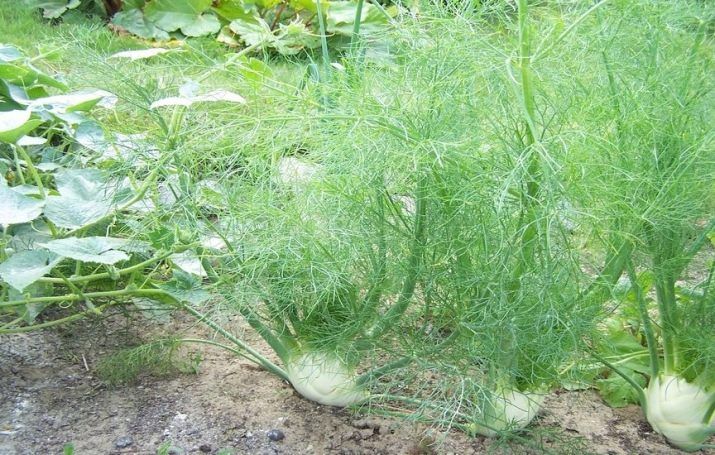
Growing to a mature height of 3-4 feet tall on average, this annual plant has branching, hollow stems graced with soft, fern-like leaves.
These feathery leaves are a cool toned, bluish-green hue.
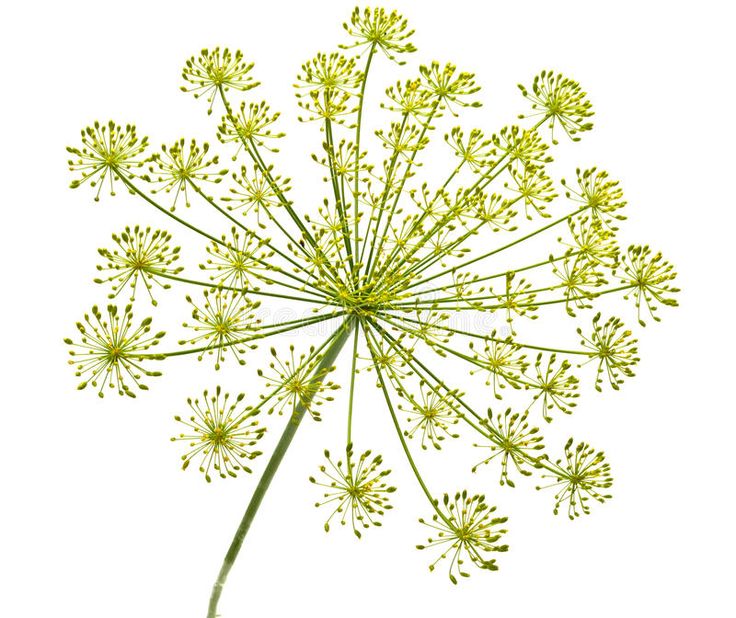
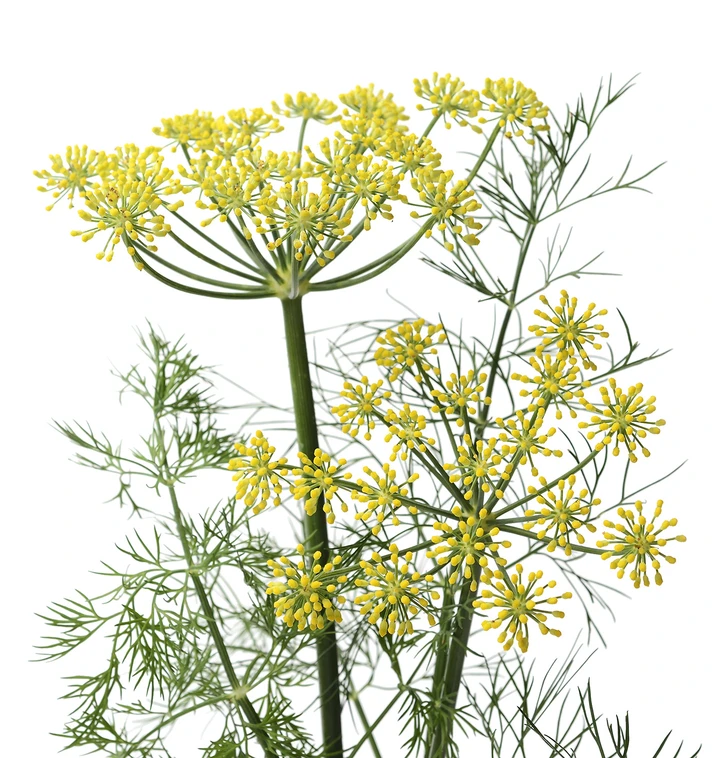
This herb holds its tiny yellow flowers up in a flattened cluster called an umbel, which is about six inches wide.
Although dill looks a lot like fennel, these two aromatic plants are in the same family, but are not as closely related as you might think.
In addition to fennel, dill has many other tasty and fragrant relatives, including caraway, parsley, anise, and cilantro.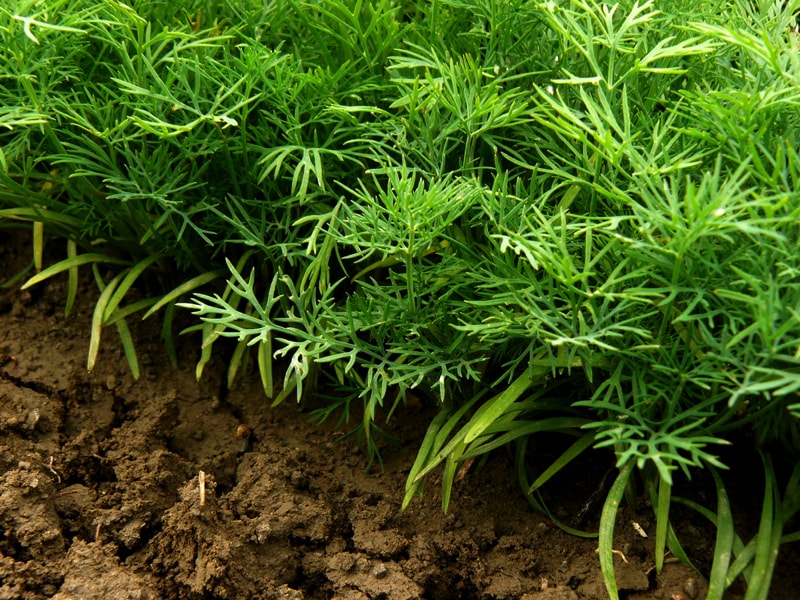
These herbs and spices are all members of the Umbellifer (Apiaceae) family, so called because of their umbrella-shaped flower heads.
Dill’s genus name Anethum comes from the Greek word for this plant, which means “strong smelling.”
The English name refers not to its smell, but to its medicinal use.
The word “dill” is thought to have Norse origins, coming from a word that meant to lull or to soothe, referring to its reputation as a stomach soother.
But dill goes back even further in time than the Vikings, having been used as food and medicine for thousands of years.
The name anethum is mentioned in the Bible, and it was used as a flavoring in ancient Egypt, tracing its culinary use at least as far back as 5,000 years ago.
Like its cousin cilantro, both the foliage and the seeds of this plant are used culinarily.
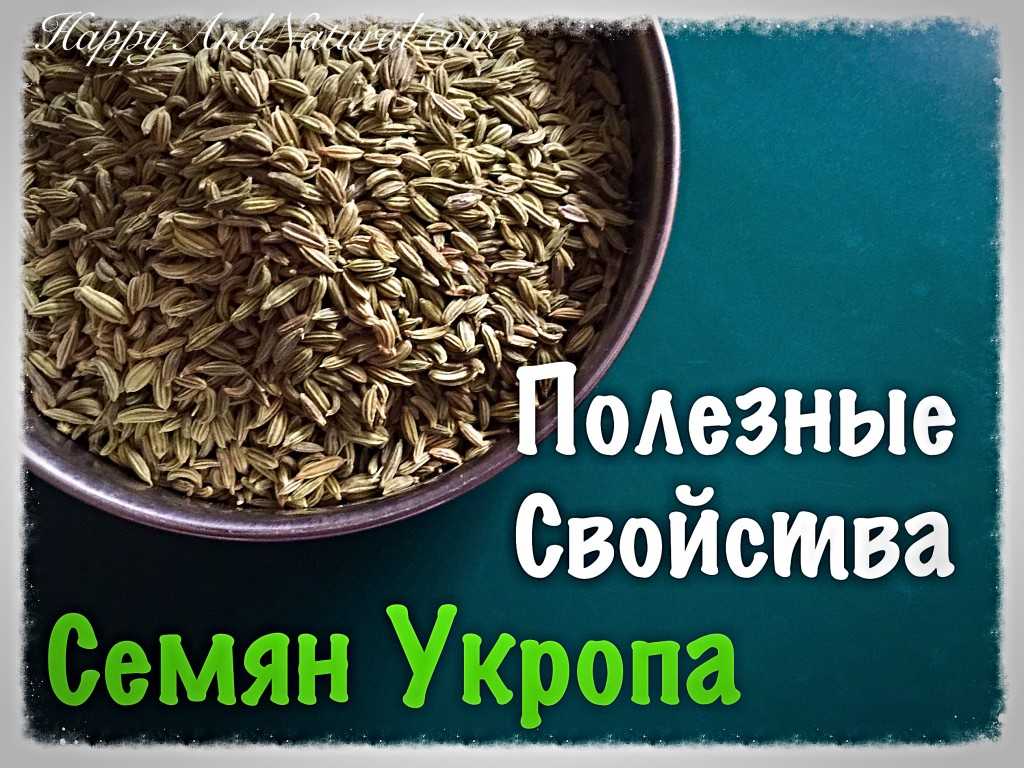
The leaves are used as an herb referred to as dill weed, distinguishing it from its dried fruits, which you’ll find on spice racks labeled as dill seed.
Essential oils are extracted from both the seeds and the leaves, and are used by herbalists for medicinal purposes.
Remember the soothing origins of the English word for this plant?
Its medicinal use has been widespread, to treat gastrointestinal issues in Asian, European, and Native American traditional medicine, and the medicinal properties of various parts of this plant are still being studied today.
Modern research backs up its traditional use as a carminative, to reduce or prevent flatulence.
The essential oil from this herb has antimicrobial, antifungal, and antioxidant properties, and it is even used to help preserve food in industrial food manufacturing.
In addition to culinary and medicinal uses, this plant also has a well-deserved place in ornamental gardens.
Its feathery foliage provides a soft backdrop for garden plants with contrasting textures, and its bright yellow flower heads add a wispy layer of color – both of which are useful in designing one’s own charming little cottage garden.
Propagation
With all those wonderful uses, you’re probably ready to start your own patch of homegrown dill!
There are a couple of things you should know before you get started.
The first is that it is a cool season herb that is hardy to 25°F, and can be grown in USDA Hardiness Zones 2-11.
That means it is accessible to most of us North American gardeners, but is best grown in springtime – whenever spring happens to occur in your area!
You can sow seeds as soon as you can work your soil in the spring, provided temperatures don’t fall below 25°F.
The other thing you need to know before you plant this herb in your garden is that although it is an annual, it has a tendency to self-sow.
When seeds from mature plants fall on your garden soil, they are happy to grow into full sized plants next year without any help from you.
So if you plant this herb once, you may not need to plant it again.
This is even the case in my garden in northeast Utah where plants have to contend with extremely dry conditions, harsh wind, sub-zero winter temperatures, and short summers.
Since starting seeds a few years ago, I find volunteer dill plants scattered throughout my garden every year.
I consider this a boon instead of a problem since dill is one of my favorite herbs, and it seems I never have too much.
However, if free dill in future growing seasons doesn’t sound like something you want, I’ll make some recommendations on how to prevent these weedy volunteers a little later.
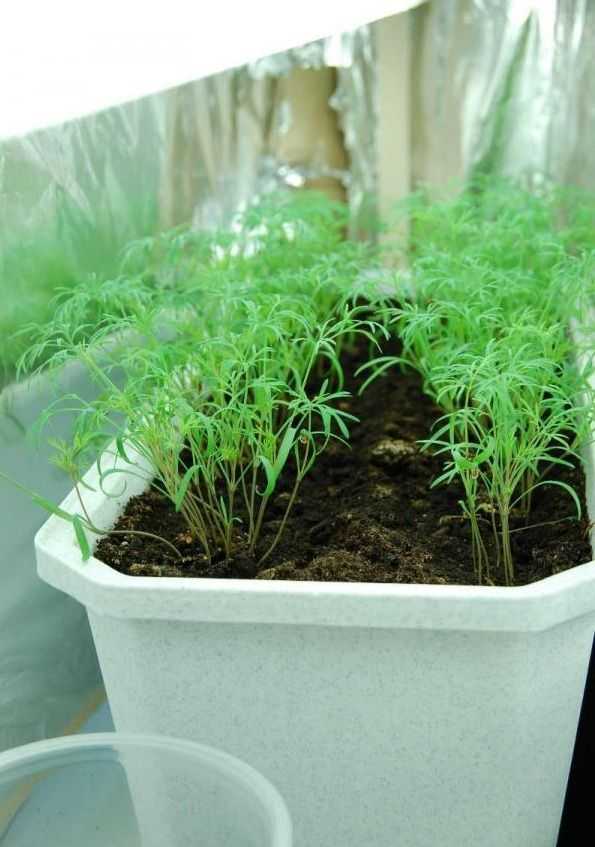
From Seed
The best way to plant this herb in your garden is to grow it from seed instead of setting out transplants.
This is because it has a long, sensitive taproot, joining a few other garden staples, like carrots and beets, that do not appreciate transplanting.
When dill is transplanted, it tends to immediately bolt – that is, if it doesn’t simply die. So do yourself a favor and go the best route by planting this herb from seed.
When you’re ready to sow your seeds, here’s how to do it:
- Plan to sow your seeds 2-3 weeks before your last spring frost.

- Prepare your soil by mixing in some compost, even out the surface of the soil, and then wet it down lightly.
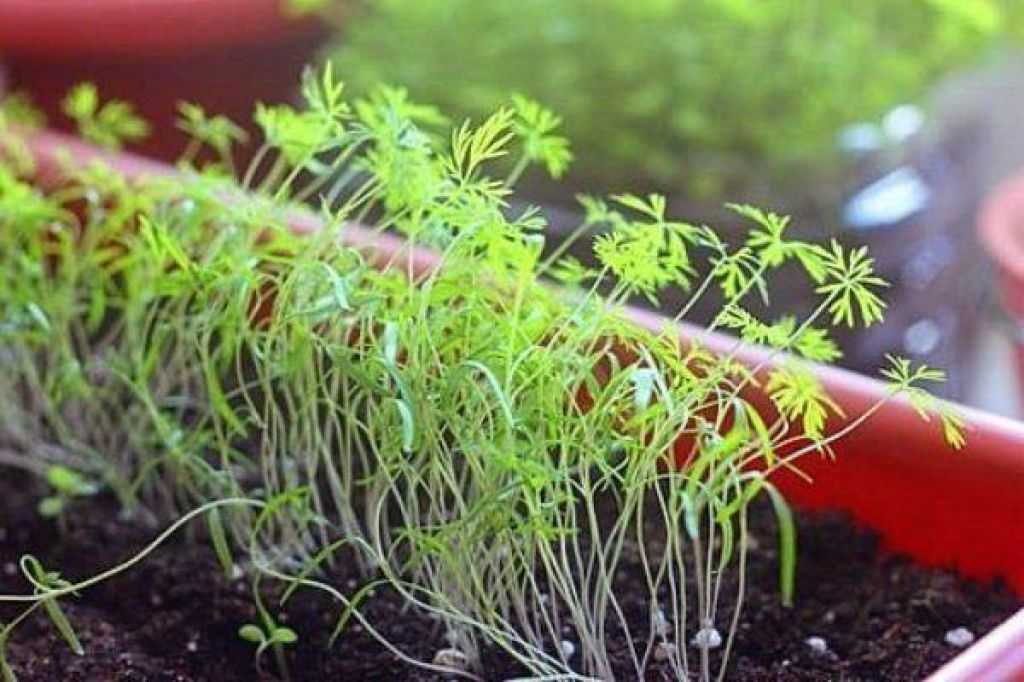
- Press the seeds gently into the surface of the soil. Dill seeds need light to germinate, so they should either remain bare on the surface or cover very lightly with soil, about 1/8 of an inch.
- Plant a group of 3 seeds every 4-6 inches, in rows spaced 12 inches apart.
- Provide a gentle daily watering until seedlings emerge.
Just so you know, germination can take 10-14 days, or sometimes longer.
When the seedlings are a few inches tall, thin out the weaker ones so that there is one plant spaced every 4 inches.
And don’t forget to eat the thinned seedlings!
If you live in a dry climate like I do, growing your dill plants 4 inches apart will work great.
However, if you live in a more humid climate, leave 6 inches between each plant instead.
Providing plants with a little extra room will allow for better air circulation and help prevent disease, while still allowing you to maximize your harvest.
And despite its reputation, this herb is not an aggressive grower, so make sure to remove any weeds around your young seedlings.
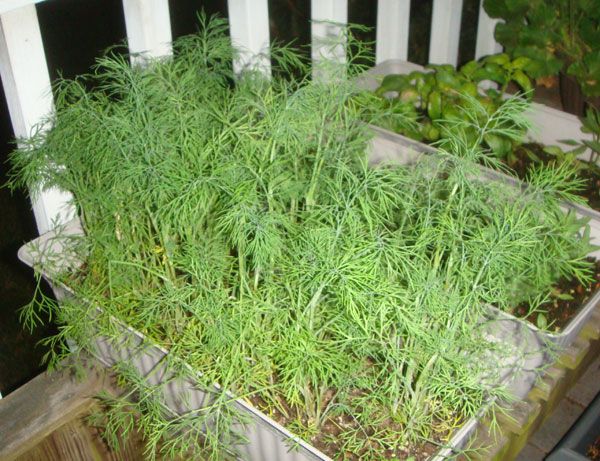
How to Grow
Dill is pretty low maintenance as far as herbs go. It gives and gives, and it really doesn’t ask for too much in return.
But if you want it to give you all it’s got, do it a favor and provide it with the best possible growing conditions.
Sun
This herb grows best in a full sun location, with 6-8 hours of sunlight per day.
You can still grow dill if you’re working with part shade, but its stems will not be as sturdy, so you may need to stake it.
Another situation where staking can be helpful is if your area is prone to high winds.
In my garden, we frequently receive strong afternoon winds, and so far my dill plants – grown in full sun – have managed to remain upright without staking.
I think since they are trained from a young age to withstand these winds, they develop stronger stems as a result.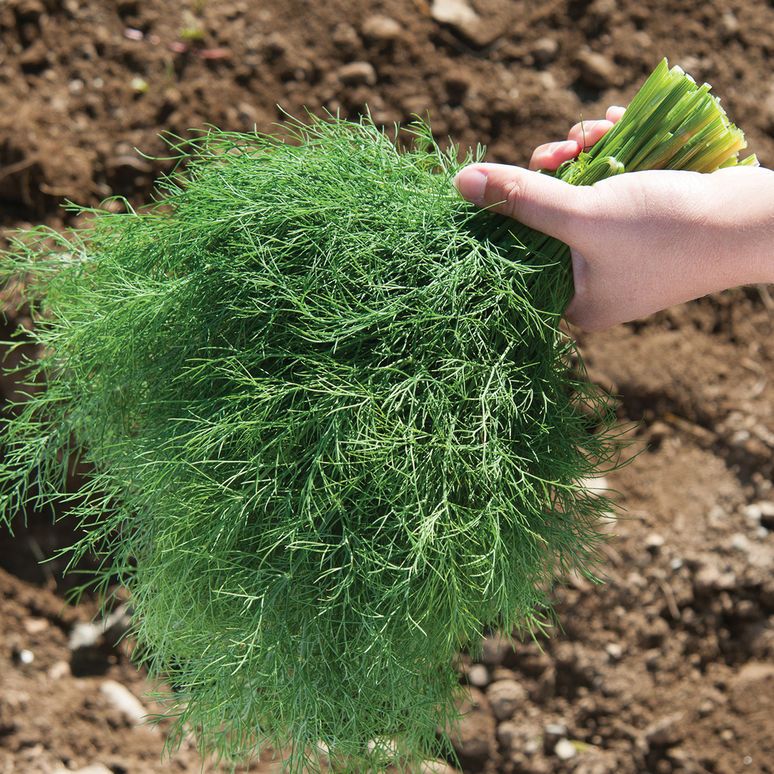
So consider your growing conditions and decide whether staking is prudent for your situation or not.
Soil
This herb’s main requirement is well-draining soil, with a slightly acidic pH of 5.6-6.5.
If you are starting with clay soil, work some compost into it, or consider growing in a raised bed or in containers.
Apart from requiring good drainage, dill is not very picky and can grow in poor soils, which is why it has such an easy time establishing itself without help from the gardener.
If you aren’t sure what type of soil you have, consider conducting a soil test through your local extension office to find out.
Water
Once established, this herb is fairly drought tolerant. Just make sure established plants receive about an inch of water per week.
And when watering, try to water at the soil level with a watering wand or drip irrigation lines.
Overhead watering, such as with sprinklers, can put your herb at a higher risk of infection since many fungal diseases thrive in wet conditions.
Fertilizer
As mentioned above, this herb will happily make itself at home in poor soil.
However, working an organic fertilizer such as well-composted manure or vermicompost into your soil will give you greater yields of both foliage and seeds – as well as more fragrant, tastier dill, thanks to an increase in essential oil content.
In my garden, I work well-composted sheep manure into my rows before sowing seeds. If you have a supply of comfrey in your garden, you can also fertilize with comfrey tea.
If neither of those options are available to you, you can feed your crop lightly with an all-purpose organic fertilizer.
Dr. Earth Home Grown Organic and Natural Tomato Vegetable and Herb Fertilizer
I recommend Dr. Earth Home Grown Organic and Natural Tomato, Vegetable and Herb Fertilizer, available at Nature Hills Nursery.
Growing Tips
This herb is pretty easy to grow – any plant that can self-seed so easily must be fairly flexible by nature.
But to help ensure a successful dill crop, here are a few more tips:
- This herb grows best when the soil temperature is about 70°F. Hot summer temps will cause it to bolt.
- Sow seeds every 2-3 weeks for a steady harvest.
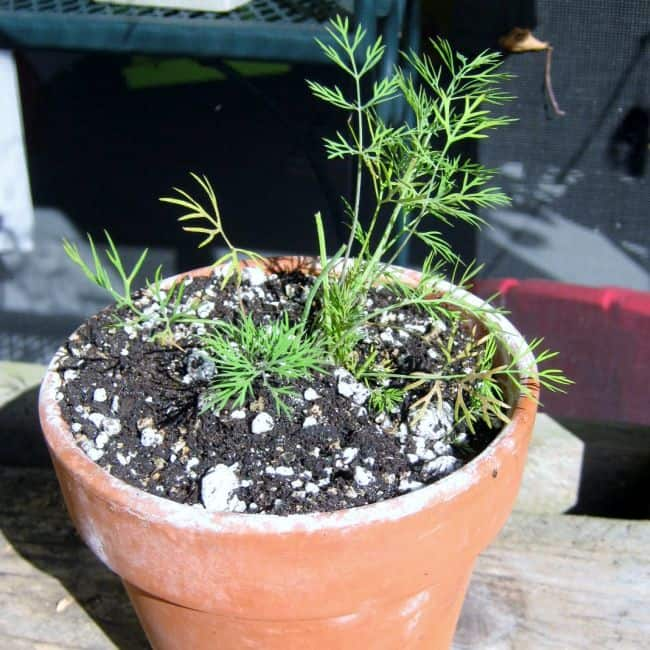
- If growing in containers, make sure your pots are at least 12 inches deep to allow room for their taproots to develop.
- Remove flower heads as they appear, to encourage foliage production; let them grow if you want seeds.
- Avoid growing this herb next to other members of the carrot family, to discourage pests and keep disease from spreading.
- Grow with companion plants such as soybeans, garlic, leeks, and onions.
I mentioned earlier that dill self-seeds from one year to the next quite easily.
If you want to let this herb perpetuate itself, but not wherever it wants to, try sowing it into a dedicated bed and remove any seedlings that pop up elsewhere in your garden.
On the other hand, if you want to prevent self-seeding altogether, cut back flower heads while they are still yellow, to prevent mature seed from forming and potentially escaping into your garden.
These flower heads are extremely fragrant and can be used in cooking or in flower arrangements.
Cultivars to Select
Remember, this plant offers a variety of different uses – you can grow it for the foliage, for its seeds, or just for garden beautification.
Some cultivars are best suited to particular uses.
Some are slower to bolt, meaning you get a longer harvest of leaves. Others go to seed earlier, providing you with seed heads for cucumber pickling at an earlier date. And there are height variations as well.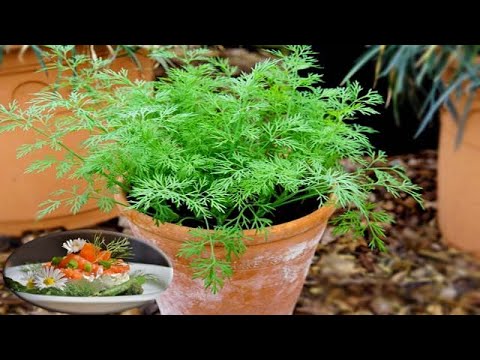
Think about your preferred uses for this herb and choose your cultivars accordingly. Here are a few options:
Bouquet
‘Bouquet’ flowers early and produces an abundance of seeds. This is a great choice if you want a lot of fresh cut flowers or seeds to use in the kitchen.
This cultivar can grow to 24-36 inches tall at maturity and has a 4- to 8-inch spread.
‘Bouquet’
‘Bouquet’ is ready to harvest in 40-60 days.
Organic ‘Bouquet’ seeds are available for purchase in an assortment of packet sizes at Eden Brothers.
Elephant
‘Elephant’ is a late-flowering variety, which means you’ll have delicious fresh dill weed throughout more of the growing season.
This cultivar reaches 30-48 inches in height, and has a 16- to 24-inch spread.
‘Elephant’
‘Elephant’ comes to maturity in 60-90 days.
‘Elephant’ seeds are available in a variety of packet sizes at Eden Brothers.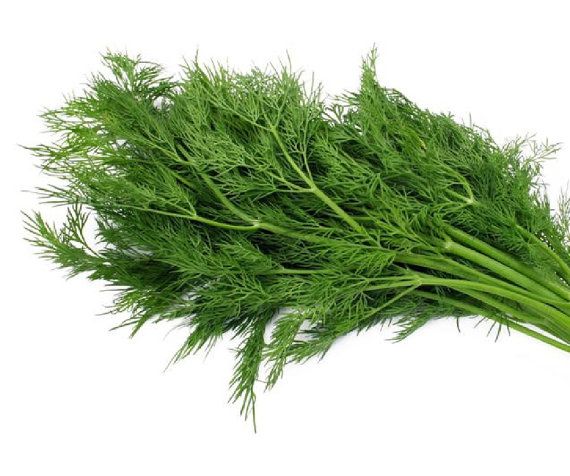
Hera
‘Hera’ is considered a bunching dill, producing lots of fragrant foliage. It is slower to bolt than many varieties.
This cultivar is also on the smaller side, reaching 18-24 inches in height with a spread of 8-12 inches.
‘Hera’
‘Hera’ reaches maturity in 40-60 days.
Organic ‘Hera’ seeds are available for purchase in packs of 400 seeds from Burpee.
Want more options? Get even more of our favorite cultivar suggestions here.
Managing Pests and Disease
Luckily for lovers of this herb, dill tends to attract more friends than foes in the garden.
Deer don’t care for it, and most of the insects that are attracted to it are interested in feeding on the nectar from its flowers, not munching on its leaves.
However, this herb is prone to the same diseases and pests as its close relative caraway – you can learn more about these in our in-depth article on caraway diseases and pests.
There are a few insects you’ll want to look out for as well.
Insects
Generally, dill is more attractive to beneficial insects such as pollinators than problematic ones, making it a good companion to have in the garden.
Since some insects can spread disease, make sure you inspect your plants for the following unwanted pests:
Aphids
Aphids sometimes colonize this herb, and if they do, they can transmit viruses.
Your first defense in keeping an aphid problem in check is to inspect plants regularly.
Aphids on dill plant.If you spot aphids on the foliage, wash them off with a strong jet of water from the hose to remove them.
To prevent aphids from setting up camp in your dill patch, work on attracting beneficial insects such as parasitic wasps, green lacewings, hoverflies, and ladybugs, all of which will prey on aphids and help keep populations in check.
Luckily, this herb attracts all of these beneficial insects.
But you’ll want them around before your dill blooms, so make sure you have other pollinator-friendly plants around to provide them with food and shelter throughout the gardening season.
Another way to prevent aphid problems is to use companion plants to repel them.
There are many research studies showing that alliums such as garlic and onions are effective at repelling various types of aphids to protect a wide variety of main crops – ranging from cereal crops in China to tomato crops in Zambia.
If aphids are a concern, try growing alliums with your dill.
Black Swallowtail Caterpillars
This herb is a host plant for black swallowtail caterpillars – which turn into black swallowtail butterflies.
Although it will nibble on your dill, many gardeners do not consider this caterpillar to be a pest.
Black swallowtail caterpillarThe caterpillar form has a few different stages – so before you squish any caterpillars you find on this plant, make sure you identify it properly.
Black swallowtails are also attracted to other members of the carrot family. The adult butterflies lay eggs on these plants, and when the eggs hatch, the caterpillars use them as food.
Most gardeners are willing to sacrifice a little dill to these guys if they show up, in exchange for the chance to view them flitting around in their beautiful mature form.
Black swallowtail butterfly and flowering dillHowever, if needed, the caterpillars can be relocated. A stand of Queen Anne’s lace, another member of the carrot family, would be a good alternative, providing them appropriate food and shelter.
Root-Knot Nematodes
Root-knot nematodes – not to be confused with beneficial nematodes – also affect carrots, kale, and many other broadleaf plants you may be growing in your garden.
Above-ground signs of these pests can be difficult to recognize – plants may appear stunted, or may wilt for no apparent reason.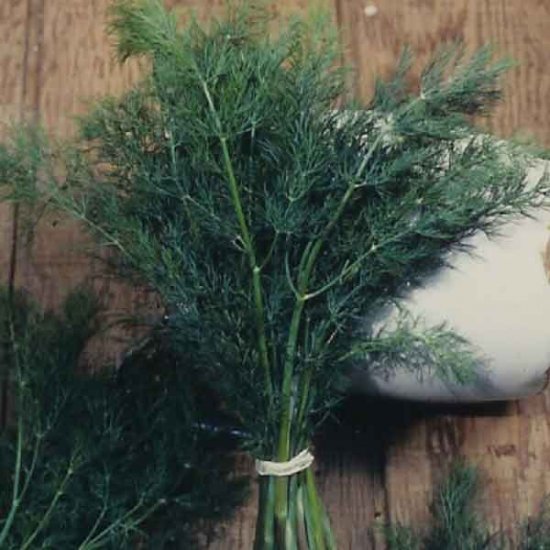
Pulling up the plant will reveal knots on the roots, thus the name of this pest.
To manage an existing problem, try solarizing your soil to kill the pests, or giving the problem area a break from veggie growing and instead grow a cover crop of marigolds in the infested area.
You can learn more about dill pests and how to treat them in our dedicated article – coming soon!
Disease
In keeping with its easygoing nature, this herb isn’t particularly prone to disease.
Most diseases can be prevented by making sure you don’t grow these plants in overly wet or humid conditions. Don’t overwater, provide well-drained soil, and allow adequate spacing between plants to encourage airflow.
Dill affected by powdery mildewGenerally, gardeners in humid climates are more likely to have problems with disease than those in arid climates.
Here are some of the diseases that can affect this plant:
- Carrot motley dwarf
- Carrot redleaf virus
- Carrot mottle virus
- Cercospora leaf blight
- Damping off
- Downy mildew
- Powdery mildew
- Root rot
To learn more about managing diseases in dill plants, make sure to consult our article on this topic – coming soon!
Harvesting
Hopefully, your dill-growing adventure will take you straight to harvest time with no pest or disease issues. This is usually the case.
When your plants reach maturity, you will have the choice of harvesting either the foliage or the seeds from this aromatic plant – or both!
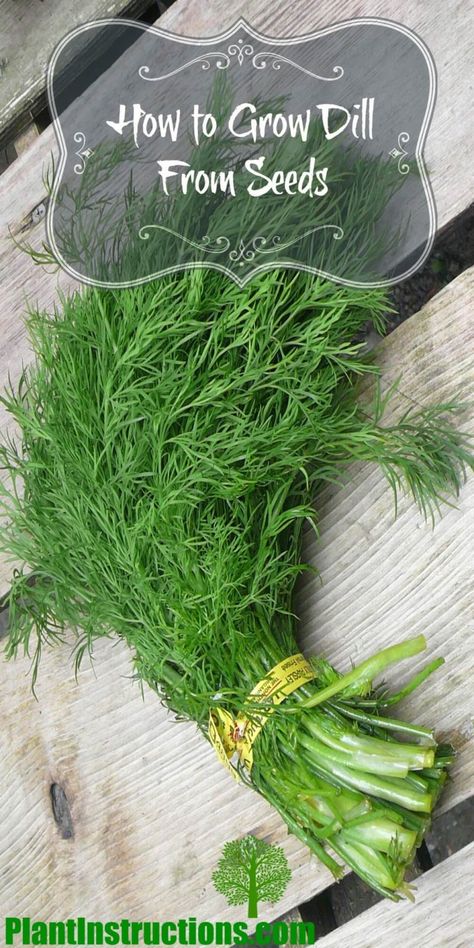
Dill Weed
Your dill weed harvest can begin as soon as your seedlings are a few inches tall.
Harvesting leaves will encourage the plants to grow bushier and will help to delay flowering – this is important if you’re more interested in leaves than seeds.
Young leaves contain the most aromatic oils and are therefore the tastiest. So don’t wait for them to get bigger, go ahead and harvest the leaves regularly as it grows.
To harvest the leaves, simply pinch the stems off with your fingers – or use a pair of garden scissors.
Just make sure not to defoliate the plant – take no more than 1/4 to 1/3 of the leaves from each plant at harvest time.
This herb needs to keep some of its leaves so that it will be able to photosynthesize and continue to grow.
And keep in mind that leaves taste best when they are freshly picked.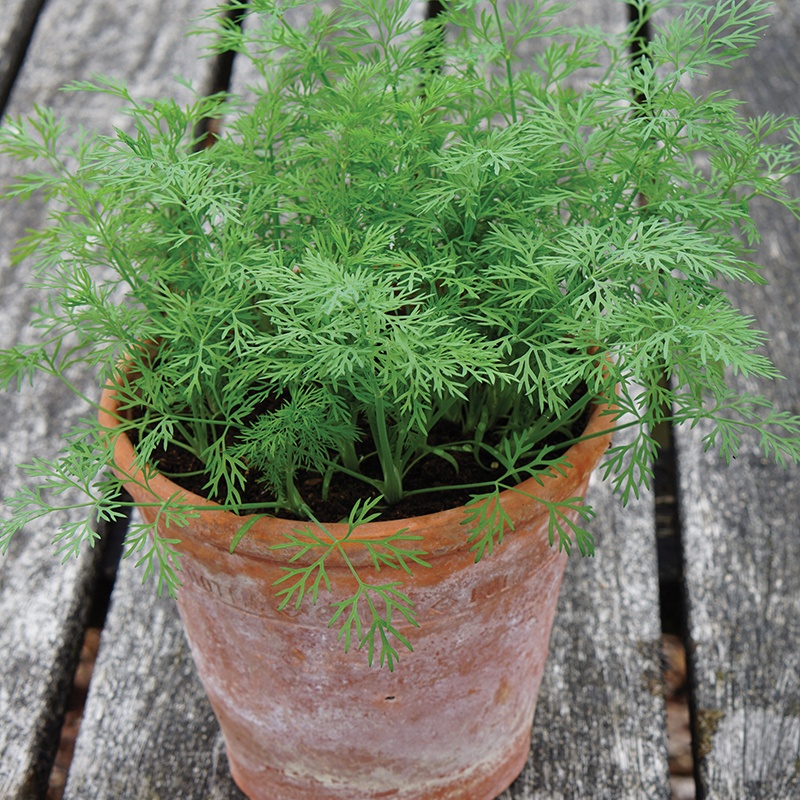
So, during the growing season, harvest your herb just before you’re going to use it rather than picking lots at once and storing it in the fridge.
Another good time to harvest is right after flower buds form – that’s when new leaves will be the most aromatic.
At this point you can also cut the flower heads back to encourage your plant to keep producing foliage.
Or, you can let your plant go to seed, in which case it will direct its energy away from foliage production to seed production.
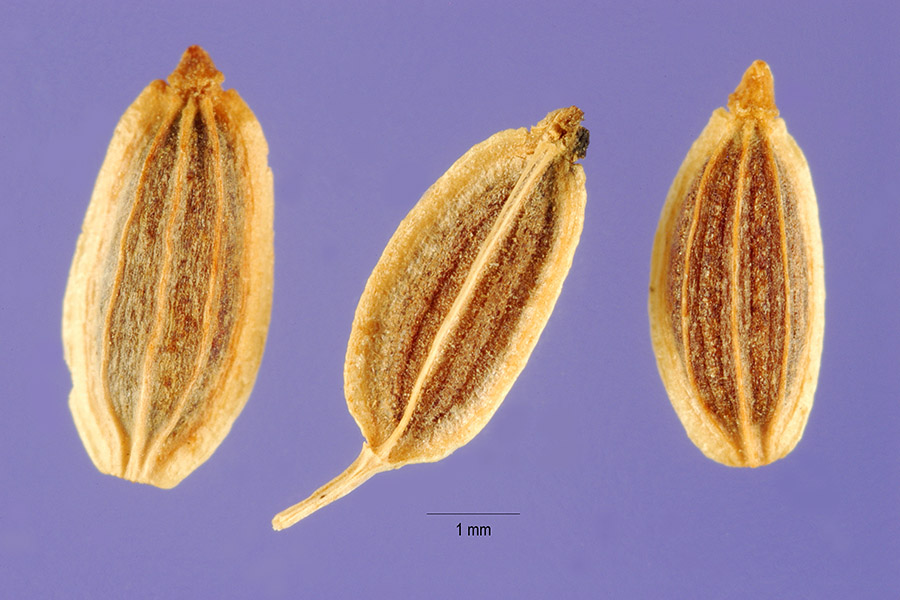
Dill Seeds
If you want to expand your homegrown spice collection, planting dill is an easy way to get started.
Let your plants flower and go to seed, but keep your eye on the flower heads as the seeds develop – when they turn tan colored, it’s time for action.
Cut off the umbel and place it in a paper bag.
As they dry, the seed heads will shatter and drop their seeds. By collecting them in a paper bag, you can maximize the number of seeds collected.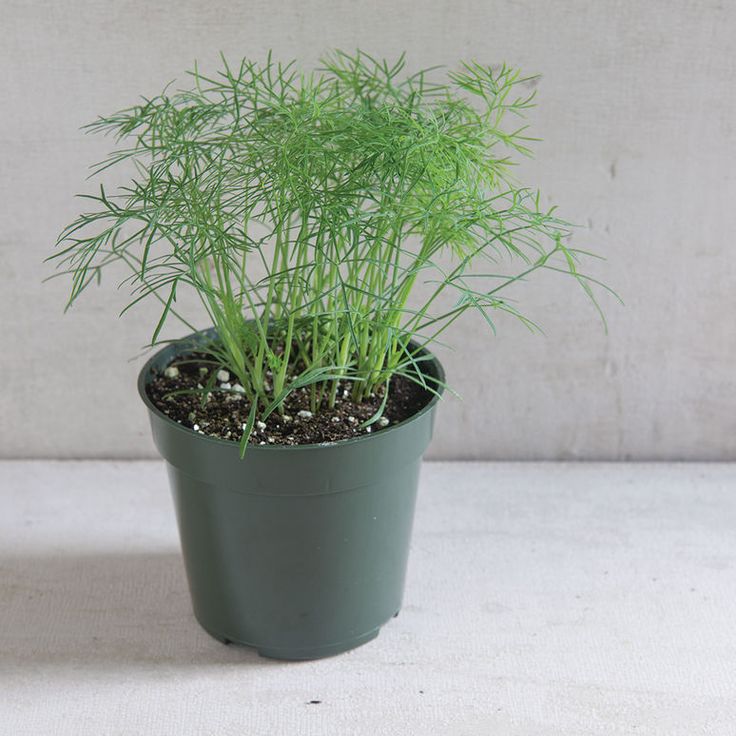 If you allow them to dry on the plant, the seeds will drop off and fall onto your garden soil.
Set the paper bag aside in a warm, well-ventilated spot to let the seed head continue drying out.
Alternatively, you can also spread seed heads on a window screen to let them finish drying.
To test if your seeds are dry, try pressing your fingernail into a few of them. If the seeds bend, they are not ready yet. If they break or shatter, that is a sign that they are nice and dry.
When seeds are thoroughly dry, store them in a small spice jar and place it – with pride – on your spice rack.
And you may want to package some to add to your seed collection for sowing next year too!
Preserving
Don’t wash the herbs until you are ready to use them.
You can store fresh leaves in the fridge. Place them in a plastic bag at 32-41°F and you can expect your harvest to keep for 1-3 weeks.
Like basil, dill is at its best when fresh. However, if you want to preserve some for later, drying and freezing are great ways to create a stash for yourself for the cold months when your garden is at rest.
My preferred way to preserve this herb is to mince it, place it in a small ramekin, cover with oil, put the lid on the ramekin, and then store it in the freezer.
I find that dill preserved in this way is nearly as good as when it is enjoyed fresh from the garden – and what a nice surprise it makes when I’m digging through the freezer looking for meal ideas. It can be used in a similar way to pesto, if you want to add some minced garlic and chopped toasted nuts.
You can read more about freezing fresh herbs here.
To dehydrate this herb, wash it first , and use a paper towel to pat the foliage dry. If you have a dehydrator, follow the manufacturer’s instructions for drying herbs.
You can also dry this herb at room temperature or in the oven. Store the dried herb in a cool, dry location in a jar with a lid.
Learn more about drying and storing herbs in our full guide.
Recipes and Cooking Ideas
Although pickles may be the first thing that comes to mind when you start mulling over your options, why not return to its Mediterranean origins for the most enticing cooking ideas?
Dill is one of the star ingredients in the traditional Greek cucumber and yogurt dish, tzatziki. You can find the recipe for a deliciously creamy tzatziki over at our sister site, Foodal.
And to go with your tzatziki, how about pan-fried potatoes sprinkled with dill and minced garlic? That’s another dish that will have you feeling as though you are steps away from turquoise Mediterranean waters.
Or if your culinary daydreams take a wintery turn, you might consider sprinkling it on top of a warming bowl of borscht.
But don’t just stick to the tried and true – this herb is also a welcome ingredient with unexpected pairings.
Fresh dill brightens up the earthier ingredients in this scrumptious recipe on our sister site Foodal for brussels sprouts with bacon and fennel seed.
You can also try using this herb to make a chicken soup feel light and fresh.
And of course, I would be remiss if I didn’t bring this conversation back around to our beloved pickles.
Photo by Fanny Slater.Have you ever made fermented dill pickles from scratch? If not, now’s the time to give it a try. You’ll find a recipe for lacto-fermented garlic dill pickles also on Foodal.
If that sounds great, but a bit too complicated for you at your current energy level, why not enjoy it as a simple herbal tea?
Just boil some hot water, place some fresh dill leaf or a flower head in your mug, and you’ll have your own homemade tummy-soothing infusion to enjoy.
Quick Reference Growing Guide
| Plant Type: | Annual, self-sowing | Water Needs: | Moderate |
| Native to: | Mediterranean, western Asia | Maintenance: | Low |
| Hardiness (USDA Zone): | 2-11 | Soil Type: | Average to poor |
| Season: | Summer-fall | Soil pH: | 5.6-6.5 |
| Exposure: | Full sun | Soil Drainage: | Well-draining |
| Time to Maturity: | 40-90 days | Companion Planting: | Garlic, onions, leeks, soybeans |
| Spacing: | 4-6 inches | Avoid Planting With: | Carrots, fennel, caraway, cumin |
| Planting Depth: | 1/8 inch, surface | Attracts: | Bees, parasitic wasps, green lacewings, hoverflies, ladybugs, black swallowtail butterflies |
| Height: | 8-48 inches | Family: | Apiaceae |
| Spread: | 4-24 inches | Genus: | Anethum |
| Tolerance: | Light frost | Species:: | graveolens |
| Common Pests: | Aphids, armyworms, chalcid flies, cutworms, root knot nematodes | Common Disease: | Carrot motley dwarf, carrot redleaf virus, carrot mottle virus, cercospora leaf blight, damping off, downy mildew, powdery mildew, root rot |
A Soothing Seasoning
Well, gardener, now that you have completed your education in all things dill, you could probably use a mug of that soothing and refreshing dill tea right about now.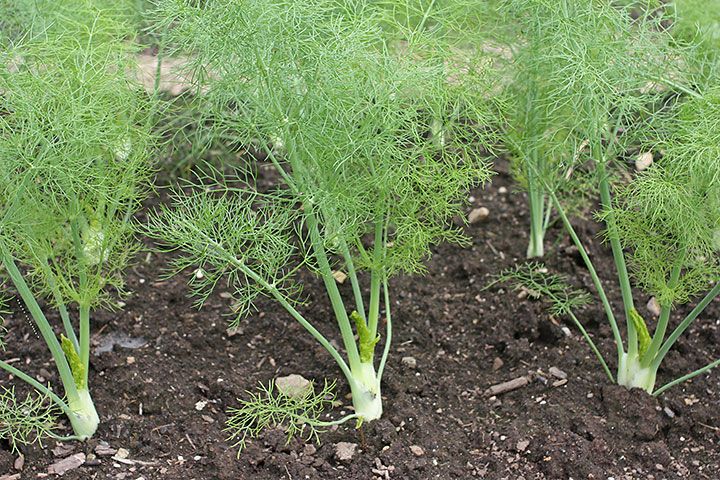 I know I’m ready for one!
Do you have any of your own dill-growing tips or recipes to share? If so, please let us know in the comments below!
And for more information about growing your own herbs and spices, check out some of dill’s fragrant relatives next:
- How To Grow and Care for Cumin in Your Garden
- How to Grow and Care for Angelica
- Growing Lovage: An Uncommon Herb with Many Uses
Photos by Lorna Kring and Fanny Slater © Ask the Experts, LLC. ALL RIGHTS RESERVED. See our TOS for more details. Product photos via Burpee, Eden Brothers, and Nature Hills Nursery. Uncredited photos: Shutterstock.
in spring, summer and autumn before winter
Thanks to its spicy aroma, dill has become a regular fixture in any garden. Indeed, dill is one of the most useful vegetable crops. However, despite the general unpretentiousness, sowing the seeds of this umbrella crop often ends in failure.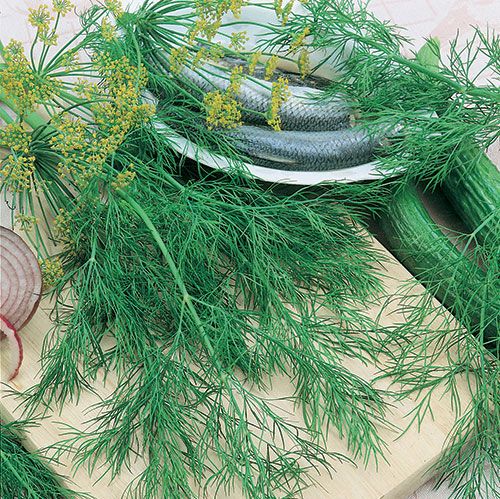 What is the reason for this phenomenon, and what do you need to know in order to successfully grow dill on your site?
Next, we will analyze the main questions regarding when and how to sow dill with seeds in spring, summer and autumn (before winter). nine0003
Content
- 2.3 How to choose a planting site and prepare the bed
- 2.4 Best predecessors and neighbors
- 2.5 Preparing the bed
- 2.6 Direct planting in open ground
- 2.7 specifics of dill sowing under winter
- 3.1 Humidity and irrigation
- 3.2 Feeding
- 3.3 Pinking
- 3 optimal time for sowing seeds
Dill is cold-resistant: its seedlings appear already at a positive temperature of +3..+4 degrees, and the plant is also able to tolerate frosts down to -5..-6 degrees. Accordingly, you can sow dill early - almost immediately after the snow melts. nine0003
In other words, the approximate dates for sowing dill in different regions are as follows:
- In the South - in March-early April.
- In the Middle lane (Moscow region) dill is sown in the second half of April.
- In Siberia and the Urals - in late April-early May.
Tip! If you sow dill in batches, i.e. with an interval of 1-2 weeks, you can constantly have and collect fresh herbs.
In general, dill can be planted all year round - in spring, summer and autumn (before winter). At the same time, planting time depends on the purpose for which you grow a vegetable. So, in spring and autumn, dill is planted to obtain greenery, and in summer - umbrellas. nine0003
There are even special varieties that drive greens better, while others are umbrellas.
By the way! Dill can be successfully grown all year round at home on the windowsill .
According to the lunar calendar in 2022The lunar calendar can help you choose the best date for sowing crops.

Auspicious days, according to the lunar calendar, for planting dill in 2022 are:
- in February - 3-4, 7-14, 22-23;
- in March - 3, 6-8, 10-13, 15-17, 21-23, 29-30;
- in April - 3-9, 12-15, 26-27;
- in May - 1-6, 10-15, 19, 24, 31;
- in June - 1-3, 7-13, 16, 19, 20, 24-30.
But you should also take into account the days of New Moon and Full Moon, since when sowing at this time, seedlings are weak and elongated, as well as the period when the Moon is in Aquarius, because. it is a barren and dry sign - italicized . So, unfavorable days , according to the lunar calendar, for planting dill in 2022 are the following dates:
- in February - 1 , 16, 28 (Aquarius) ;
- in March - 1 (Aquarius ), 2 , 18, 27-28 (Aquarius) ;
- in April - 1 , 16, 23-24 (Aquarius) , 30 ;
- in May - 16, 20-22 (Aquarius) , 30 ;
- in June - 14, 17-18 (Aquarius) , 29 .
How to sow dill in open ground
Choosing a good varietyTip! The site already has a separate review material about the best varieties of dill for herbs and umbrellas (spices) .
Pre-sowing treatment of seedsDill belongs to umbrella crops, in other words, its seeds are very hard to germinate. The fact is that they contain essential oils, which prevent their rapid germination. Therefore, in order to speed up their germination, dill seeds must be soaked (washed with essential oils). nine0003
Tip! The site contains detailed material on how to carry out pre-sowing preparation of carrot seeds ( for dill everything is the same as ).
How to choose a place for planting and prepare a bedDill is a rather light-loving crop, so you need to choose a very sunny place for a bed, as a maximum, in light partial shade .
Shady places are completely unsuitable for growing dill: the greens turn pale in them, the stems themselves grow thin and weak, as a result, less essential oils accumulate in the vegetable than if it grew in suitable sunny conditions. nine0003
Important! It is believed that due to excessive shading, dill can gain more nitrates.
As a rule, dill is grown in the open field, and not in the greenhouse , where it grows less fragrant.
Best predecessors and neighborsDill can be successfully grown after the following crops:
- cucumbers, pumpkins.
- cabbages;
- onion, garlic:
- tomatoes, peppers, eggplants, potatoes. nine0014
And also after any green manure .
As for after which you cannot plant dill , then everything is simple: you cannot sow dill after umbrella crops , namely carrots, parsley, celery and, of course, dill itself.
As for the neighborhood, dill can be sown between rows of garden strawberries (strawberries), onions, cabbage.
Preparing the garden bedSuccessful cultivation of dill requires a fairly highly fertile and cultivated soil, naturally, not acidic and not saline (there are lovers of watering their plants with salt solutions!). nine0003
It will be just fine if you prepare a bed for planting dill in advance, namely, in the fall, add 2-4 kg (half a bucket) of compost or humus for digging, as well as wood ash and bone meal - 100-200 grams each (everything per 1 square meter of beds).
You also allow the use of mineral fertilizers, then it would be optimal to add superphosphate - 15-20 grams (1 tablespoon) per 1 sq. meter beds, as well as potassium sulfate (potassium sulfate) - in the same amount.
In the autumn - phosphorus and potash fertilizers are applied, and in the spring - nitrogen .
Of course, nitrogen is also necessary for the development of dill greens, but it is usually applied for digging in the spring: 15-20 grams urea (urea) or ammonium nitrate .
However, you should always be careful with nitrogen fertilizers, as dill is characterized by a high tendency to accumulate nitrates. nine0003
Also in the spring you will need to thoroughly loosen your dill garden.
Direct planting in open groundSowing dill seeds is as easy as possible:
- Naturally, first you need to prepare the bed, loosen the soil.
- Then you can alternatively sow in rows , i.e. first cut shallow grooves (about 0.5 cm, maximum 1-2 cm), spill them with water, sow seeds and sprinkle with earth. nine0014
Tip! The main thing is to try to spread the seeds as evenly as possible over the bed.
Why not sow too thickly?
The dill will rise like a brush, and then it will begin to stretch out (it will be frail) from crowding and, in order to survive, it will quickly throw out an arrow - it will give umbrellas. As a result, you will not get greenery, sensible seeds either.
Therefore, if you want to get powerful bushes with juicy greenery, then it is preferable to sow less frequently.
- Or sow with dense carpet on the surface of the soil, lightly cover with soil and after that make abundant watering.
Worth knowing! Dill seeds germinate better in the light than underground. How and when to sow dill
Thanks to the winter sowing of dill, the seeds will undergo natural stratification in winter and germinate earlier. As a result, you will be able to harvest the first greens 10-14 days earlier than with spring sowing. nine0003
Winter sowing has several nuances:
- Naturally, the beds are prepared in advance.
 Also, the ground is prepared in advance, which will fill the grooves.
 - As for the timing of sowing dill in the fall, the crop is sown after stable frosts begin, i.e. not before October.
- However, the seeds themselves are sown when the soil is not yet frozen.
- Before winter sow in deeper furrows (3-4 cm) than in spring sowing (1-2 cm). nine0014
- The sown rows are covered with dry soil.
- Do not irrigate before or after sowing.
- Because The germination rate of dill is already not high; in autumn, the seeding rate of planting material is increased by 50%.
By the way! The site also has separate articles on how to plant before winter carrots , beets , of course, winter garlic and onions , as well as parsley and sorrel .
How to care for dill after plantingIn order for the plant to sprout and begin to grow greens, dill must be provided with comfortable conditions.
 Which? Let's talk about this further.
 By the way! The optimum temperature for the germination of dill seeds is +15..20 degrees, and for the growth of greenery - already +18..+22 degrees.
Moisture and wateringIt is very important that the soil after sowing is constantly moist, but not waterlogged. Therefore, after sowing, the bed can be covered with spunbond or film, then pressed from the sides with bricks or boards. Under cover, moisture and heat will be better preserved, which will stimulate faster and more successful germination of seeds. It will also help protect the seeds from birds. nine0003
Important! Naturally, when warm and sunny weather sets in, the film will need to be removed promptly, otherwise the seedlings may simply burn out. But under the spanbond, nothing terrible will happen.
Already after germination, watering of greenery is carried out regularly after drying of the top layer of soil, while avoiding both overflow and overdrying of the soil.
On the hottest days, dill is irrigated by sprinkling, i.e. sprayed.
Top dressingNo fertilizers are applied to dill during its growing season, since the greens have enough nutrients that were introduced during the preparation of the beds.
PinchingIf you want to increase the amount of greenery, then you should pinch its umbrella in time, pinching off to the bosom of the leaf when it just starts to appear. Thanks to such a pinch, after a while a new stem with leaves (greens) will grow from the leaf axil. nine0003
Pests and diseases of dillVery often, aphids attack dill, which causes it to curl (also called “dill curly”), it can also get sick with powdery mildew.
Naturally, you cannot spray dill with any chemicals, so biological agents come to your aid. So, against pests (aphids), you can use the drug Fitoverm , tobacco dust, and against diseases - Fitosporin .
Thus, now you know that planting dill in open ground is one of the simplest garden manipulations. You just need to clearly follow all the recommendations and rules for sowing and growing this fragrant greenery.
Interesting! For some summer residents, dill does not grow at all, for others the situation is the opposite: they cannot get rid of it in any way - it grows like a weed all over the plot.
Video: how to grow good dill
How to plant dill and earn a million or more on it
Dill is planted with seeds, in open ground, in greenhouses, by crossing rows of cucumbers, on heavy soils in beds, and even on a windowsill.
 This herb, popular in cooking and medicine, is quite unpretentious and in the southern regions can produce a large harvest almost all year round.
 In our article we will show some features of how to properly plant and cultivate dill for maximum yield, and therefore income from dill seeds from the Gavrish Professional Seeds line, which you can always buy in our online store "Gavrish Shop". In the same place, you can now quickly pick up seeds to replace foreign vegetables in one or two clicks. But first things first.
The world production of dill is mainly directed to the cultivation of seeds as a spice and a component of herbal medicines, as well as for the production of essential oil. Dill for greens (fresh, dried and frozen) is cultivated in Russia, Belarus, Uzbekistan, Kazakhstan, Germany, Scandinavian countries, Poland, Bulgaria, Czech Republic, Transcaucasia. According to farmers from the already mentioned Uzbekistan, greenery producers are increasing their exports to the Baltic countries: Lithuania and Latvia, sending dill and other greens there in literally tons.
 nine0089
 Peculiarities of outdoor cultivation:
- Loose, well aerated soils are better suited for growing dill;
- On heavy soils, dill is sown on ridges;
- The growing area must be free from weeds, well developed, groundwater must not lie close to the soil surface;
- The optimal acidity of the soil solution for dill is close to neutral pH 6.5-7.0. On acidic soils, the germination energy is significantly reduced. nine0050
Any row crops, except for plants of the Celery family, are suitable as a predecessor for dill, but the highest yields are obtained when it is placed after the predecessors (cucumbers, cabbage), under which manure was applied. After crops of the Celery family, dill is sown no earlier than 4 years later.
In order to fully provide such an early-ripening crop as dill with nutrients, it is necessary that they be in a form accessible to the plant.
 nine0003
 Therefore, 60 t/ha of organic fertilizers, 2.5-3 centners/ha of superphosphate, 1.5-2 centners/ha of potassium chloride are applied for winter plowing. Under cultivation in the spring - 2.5 c / ha of ammonium nitrate. According to the experience of foreign manufacturers, 100 quintals of fresh dill in the budding stage endure N - 22 kg, P2O5 - 8 kg, K2O - 67 kg, MgO - 3 kg, CaO - 28 kg.
Therefore, to obtain a green yield of 300 c/ha, it is necessary to apply N - 65 kg of AI, P2O5 - 25 kg, K2O - 200 kg, MgO - 10 kg, CaO - 85 kg per 1 ha. Phosphorus and potassium are applied before sowing, and nitrogen in 2 doses 2 weeks after sowing. The yield of greens is increased by 20% by foliar top dressing - four times spraying of dill seedlings with an interval of 1 week with a solution of urea (18 kg per 600 l of water per 1 ha). nine0003
For the conveyor supply of greens during the season, dill begins to be sown in early spring, as soon as the soil is ready.
 Crops are repeated with an interval of 10-15 days. The last sowing date in the Central region falls on the third decade of July (40-60 days before the onset of severe frosts). To obtain earlier production, dill seeds are sown before winter, when cold weather sets in (the average daily temperature is not higher than 5 ° C).
 If you sow dill before winter, the greens are ready for harvesting 2-3 weeks earlier than with early spring sowing
Sow with vegetable seeders or manually in row (45 cm between rows) and band (distance between bands 45 and 60 cm, between rows 15-20 cm) methods.
When growing dill on spices, the row spacing should be 45-60 cm. 8-12 kg/ha.
Features of sowing dill
Seeds are sown to a depth of 1-2 cm. Before emergence (8-10 days after sowing), harrowing is carried out across the rows. For this, a mesh (BSO-4.0) or light (ZOR-0.7) harrow is used with a unit speed of up to 4 km / h.
 Winter crops are also harrowed in early spring with light or mesh harrows across the rows and at the same time 60 kg / ha of nitrogen fertilizers are applied. When a crust appears, it can be destroyed by sprinkling or rolling with ring-spur rollers, but the first is preferable, since the lack of moisture pushes back the time of receipt of marketable greens and reduces yield. nine0003
 To obtain early production and increase the yield of green mass, crops are covered with non-woven material or slit-like film. This is a film with longitudinal cuts 20 mm long, staggered at a distance of 8 mm. The greatest effect from the use of such shelter is achieved in years with low temperatures and lack of moisture, when the yield is 3 times higher compared to crops without shelter. We regularly receive feedback from our customers about the results they get from Gavrish dill seeds. Even with minimal care, the effectiveness of dill is very high. nine0003
Dill care
Further care of crops consists of inter-row cultivation and weed control. The first loosening of row spacing is carried out to a depth of 4-5 cm, the last - to 8-10 cm. Herbicides when grown on greens are not recommended. When growing dill to obtain spices in heavily weedy areas, prometrin is added at the rate of 1.5 kg of a.i. per 1 ha. It is also possible to apply continuous herbicides before the emergence of dill shoots and during the germination of weeds. nine0003
Harvesting dill
Harvesting dill for greens starts when the plants reach a height of at least 20 cm, since the yield and taste of the product largely depend on its term.
The highest yield of greenery and its aromaticity occur at the time of inflorescence formation, when the height of the plants reaches 25-30 cm. As the age of the plants increases, the aromaticity increases. Greens are harvested in dry weather, when there is no dew on the dill.
 Plants are either uprooted or cut off the leaves. nine0003
 When harvesting dill, it is very important to cool the product quickly to avoid spontaneous combustion of green mass
Greengrowers cut early in the morning or in the evening, tie the greens into bunches and lay them in a low layer on the ground, lightly cover. In this way, the products are naturally cooled before being sold. Dill greens quickly wither and lose their presentation. So, at a temperature of 12-18°C and an air humidity of 85-90%, the shelf life is no more than 36 hours, at a temperature of 1-3°C and an air humidity of 90-95% - no more than 5 days.
Harvesting of dill on spice is carried out in the full flowering phase, cut plants are tied into sheaves of 5-6 kg and stored until processing in a clean, well-ventilated room at a temperature of 0-12 ° C and air humidity not higher than 85% up to 2 days.
The best way to store herbs is in airtight containers (packed in plastic bags in bundles of 200 g, the bags are sealed) at a temperature of 0-3 °C.
 In this form, the crop can be stored for up to 30 days. nine0003
 The traditional, world-wide varieties Dukat, Dill are better suited for one-time harvesting of leaves, umbrellas and seeds, as the plants quickly move to stalking and flowering.
For the conveyor receipt of greens, their repeated crops are required. Therefore, when growing dill for greens, it is necessary to use varieties that do not go to stalking for a long time, have a long economic shelf life and do not require frequent crops - Alligator, Almaz, Amazon. nine0003
Dill was also grown in Ancient Greece and Ancient Rome. This plant was believed to provide protection from witchcraft, probably due to its strong fragrance. Dill was used to make protective amulets. It was added to the food of the Gladiators in the hope that it would add courage and valor to them. Brides in Germany and Belgium believed that a sprig of dill would make their marriage happy, and so they added graceful leaves and inflorescences to bouquets or attached them to a wedding dress.
- In the South - in March-early April.