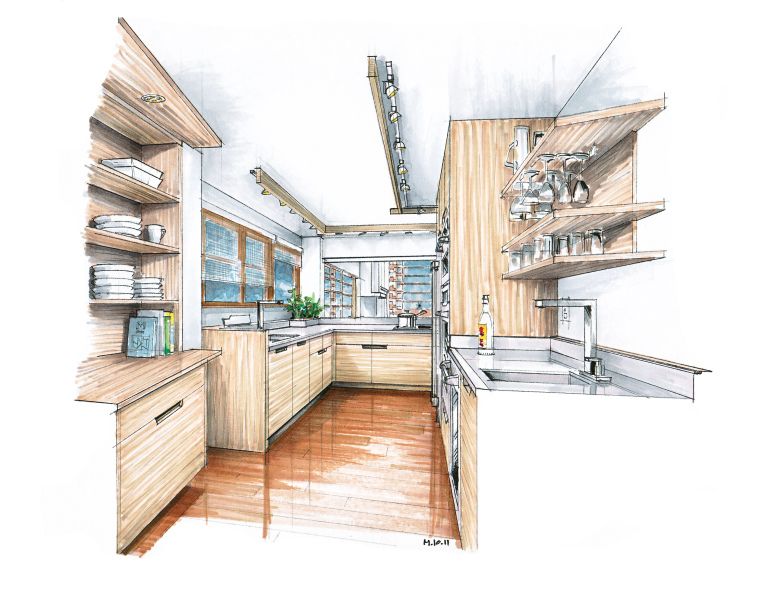
Drawing a kitchen design
Kitchen Planner Software - Plan Your Kitchen Online
The RoomSketcher App is an easy-to-use kitchen planner. Design a layout of your dream kitchen and visualize in stunning 3D.
Get Started
“RoomSketcher is a great, easy-to-use tool for interior design.”
Antonella Nuredini
Interior Designer, USA
Kitchen Planning Made Easy
Create your kitchen design using the RoomSketcher App on your computer or tablet. Get started on your kitchen today with our easy-to-use kitchen planner. Draw your floor plan, choose your furnishings, and see your kitchen design in 3D – it’s that easy!
Step 1 - Draw Your Floor Plan
Draw a floor plan of your kitchen in minutes, using simple drag and drop drawing tools. Simply click and drag your cursor to draw or move walls. Select windows and doors from the product library and just drag them into place. Built-in measurement tools make it easy to create an accurate floor plan.
Step 2 - Furnish Your Kitchen
Select kitchen cabinets, appliances, fixtures, and more, and simply drag them into place. Resize items easily, experiment with different finishes, and save your favorite design options to review and compare.
Step 3 - See Your Kitchen in 3D
Use the camera to take instant Snapshots of your kitchen design in 3D. Experience a 3D walkthrough of your kitchen design with our Live 3D feature. When your design is ready, create high-quality 3D Floor Plans, 3D Photos, and 360 Views to show your ideas.
Why RoomSketcher is the Best Kitchen Planner Software:
RoomSketcher makes it easy to create kitchen layouts and 3D images of your kitchen remodel or new design – like a pro! Here are just a few examples of the types of floor plans and images you can create:
2D Kitchen Floor Plans
2D Floor Plans are essential for kitchen planning. They help you layout your kitchen correctly, to know what will fit, and get more accurate estimates. Show measurements, the room size in square meters and feet, the locations of kitchen fixtures, and more.
3D Kitchen Floor Plans
With RoomSketcher, you can create a 3D Floor Plan of your kitchen at the click of a button! 3D Floor Plans are ideal for kitchen planning because they help you to visualize your whole room including cabinets, appliances, materials and more.
3D Photos
Create high-quality 3D Photos of your kitchen design from your camera Snapshots. See how your kitchen design will look including colors, textures, and materials. They are the perfect way to see and share your design ideas!
360 Views
Create stunning 360 Views of your kitchen design instantly. View the entire room as if you are standing right there!
Kitchen Plans and Ideas From RoomSketcher
Turn your kitchen dreams into reality. Start with a kitchen layout template that you find in our Floor Plan Gallery.
Kitchen Plans
Island Kitchens
L-Shaped Kitchens
U-Shaped Kitchens
Peninsula Kitchens
Single Wall Kitchens
Frequently Asked Questions (FAQ):
Recommended Reads
7 Kitchen Layout Ideas That Work
Planning a kitchen? These 7 essential kitchen layout ideas will make your new kitchen design a success.
Plan Your Kitchen With RoomSketcher
Need help planning a kitchen design? RoomSketcher shows you how to plan your kitchen with an online kitchen planner.
4 Expert Kitchen Design Tips
Think like a kitchen designer with these 4 expert kitchen design tips.
What are you waiting for?
Get Started
Privacy Policy | Terms of Use | Cookies
Copyright © 2022 RoomSketcher AS.
RoomSketcher®, Live 3D Floor Plans™ and 3D Storefront™ are trademarks of RoomSketcher AS in Norway and other countries.
By continuing to use this website, you consent to the use of cookies in accordance with our Cookie Policy.
How to Draw a Kitchen Layout?
Update the style of your home interior
Instantly test different designs and layouts
View your home in 3D before making purchases
Try for free
Create a kitchen layout that satisfies all your needs and wants using our free HomeByMe design planner. Our easy and intuitive software lets you design a smart, stylish, and ergonomic space all by yourself.
The kitchen is the central hub at home – it’s where family and friendly get-togethers congregate much of the time. Being such a focal and dynamic space means it should look great and be practical to serve multiple purposes. Traditionally, designing the kitchen would require a professional, but today, simple online tech gives everyone – from DIYers to budding designers – the opportunity to customize floor plans without being tech-savvy or specially trained. Our free HomeByMe planner is an intuitive platform that offers many different features that you can use and have fun with to solve all your design needs.
Choose a template to start with or use built-in scales to add walls, doors, and other architectural elements. Change the size and layout by dragging items around, add furniture, flooring, try out different paint colors, and adjust or delete anything on the fly. With our advanced software, you get all the tools you need to construct a kitchen that is beautiful, comfortable, and convenient. Learn how to jump into the design mode and create the ultimate kitchen with these tips on how to draw a layout.
Layout drawing may seem a bit intimidating, but once you get started, you’ll realize how easy and fun it actually is. For this process, it’s beneficial to have measurements and dimensions of your home and planned kitchen. These will let you truly customize your layout and develop a virtual rendering that is accurate, which will make your renovation process run as smoothly as possible. Alternatively, if you don’t have measurements, you can start with room templates. We’ll show you how to access these below. If you want to achieve a certain style such as contemporary or traditional, we’ll show you how to access menus based on specific styles to make it easier for you to customize your space.
How to Draw a House Plan
If you’re planning a major kitchen overhaul or an expansion that might require knocking down a few walls, we highly recommend building out the layout of your home first. This will help to ensure that your kitchen design not only looks great, but makes sense and flows with the rest of your interior. Don’t worry – there are no special skills required for this either. All you need are your measurements or templates to start. Follow these three steps below to draw a house plan:
Create the Outline
Get started on the layout of your house by navigating to the toolbar on the top left corner. Click the very first icon. This is where you can draw in the walls or utilize the room templates. To browse different templates, go to the Room button in the dropdown menu. Then choose the desired shape, room type, and surface measurements to begin mapping out your layout.
Insert Basic Elements
After drawing the layout, you can add other basic elements into the outline like windows, doors and any permanent, structural features by clicking the second icon in your toolbar. Then select Build to explore options to add features for a tailored mock-up of your home.
Make Any Adjustments As You Go
If you want to resize or rearrange anything, just click, drag and move items around to relocate them or to make adjustments as needed. It’s really that simple.
Create Your Ideal Kitchen Drawing Layout
With your home and kitchen templates in place, the next steps are all about getting creative with your kitchen design. Using the HomeByMe planner, you have many possibilities available at your fingertips. But keep in mind that the furnishings you select will impact the entire look and function of your kitchen and home. Luckily, you can try as many items as you wish in your online planner until you land on your dream concept.
Get started on your kitchen drawing layout by heading to the second icon in your toolbar and select Furnish. This is where you’ll find all sorts of features to develop your design.
Under the Kitchen menu, you can build out your kitchen cabinets manually, piece-by-piece, or choose pre-built sets. From stoves to dishwashers to refrigerators and even coffee makers – insert the specific items you need under the Appliance menu. You can also select different tables, chairs, bar stools and more under the Furniture tab. There’s so much you can choose from, it’s just a matter of finding what looks best to you.
Use the View Mode on the bottom center of your planner when you want to see how your new design appears in 2D or 3D. When you want to take a virtual tour, click on the two footprints to navigate directly inside and explore your new kitchen.
Use Filters Based on Your Style
Are you interested in a mid-century style kitchen? Or maybe you prefer more of a retro vibe? You can make your design process faster and easier using the filter options. Once you click Furnish or Decorate, you’ll find the filters located on the left-hand side to tailor your options as needed. Use these often to get inspiration for your kitchen layout.
You don’t need to be tech-savvy or even artistic to create your ultimate dream kitchen. In a matter of minutes, you can draw a layout, add furnishings, decorate, and bring it all to life in 3D format with our simple, online HomeByMe planner. Our innovative solution eliminates the burden of complex floor plans by simplifying the process and combining all of the necessary tools at your disposal. Start planning your dream kitchen today!
Draw your Kitchen Layout
Are you launching a kitchen remodeling project? Plan your home design from start to finish using our simple online software.
Update the style of your home interior
Instantly test different designs and layouts
View your home in 3D before making purchases
Try for free
How to draw a kitchen project online
The constructor was created specifically for those who want to plan their kitchen in detail, even before going to a furniture showroom.
Go to "Kitchen Builder"
In our article, we will tell you about the design stages in the designer. The interface is quite simple, anyone can figure it out and create a kitchen project on their computer without leaving home.
For the correct operation of the program, it is better to use the browser Google Chrome , Firefox, or Opera on a laptop or PC (not mobile devices).
In this video, we have demonstrated the entire design process. Duration 5 minutes.
Staged project creation
- all elements are dragged into the room by holding down the left mouse button
- to control the camera (left-right, closer-farther), use the arrows in the bottom menu, or hold down the right mouse button in Chrome or the right key + Alt in Mozilla, Opera, Yandex
- when, when dragging, the module crosses the border of another element (wall, cabinet, etc.), it will feel like it is hooked or stuck. This happens exactly on the border of the elements, and is made so that everything is placed exactly
- To undo the last action, press Ctrl+Z at the same time (the standard combination for undoing in most programs)
In the constructor in December 2018, the autosave function appeared (every minute). Those. even if you exit and re-enter the page, the program will prompt you to load an autosaved copy of the project. But just in case, I recommend periodically saving the project file to your computer: in the top menu. Save after all significant changes in the project so as not to accidentally lose them. nine0003
1. Room parameters
1. Room dimensions. Select the default dimensions, press Delete and write the actual dimensions in centimeters (wall 1, wall 2, height).
2. Doors, Windows - when clicked, options for windows, doors and ventilation shafts / columns / beams will appear. Select the desired element and, holding down the left mouse button, drag it to the desired part of the room. When you click on an element, and then on the ruler icon, a menu will pop up on the right, where you can specify your width, height, and depth. You can delete an unnecessary module by pressing the Delete button on the keyboard, or by the trash can icon when an element is selected. nine0003
3. Walls and Floors. Here you can choose suitable materials and colors. Click on the color you like and the floor/wall will automatically change color.
2. Kitchen settings
Here you can change the default set parameters: worktop thickness 40 mm, plinth height 120 mm, backsplash height 560 mm.
3. Modules: cabinets and appliances
1. Click Modules and the menu will open.
2. Lower - we form the lower tier of the kitchen. Drag the desired cabinet by holding down the left button of the computer mouse. Dimensions are set by default, but you can change them for yourself (click on Module and Ruler). There are many cabinets, and to view everything, scroll with the mouse. nine0003
To install a sink or hob, select a cabinet with a width of 60 cm (600 mm) or more, in the menu that appears, click on the Appliances icon and select what needs to be built in.
In the Module menu, you can specify the parameters of the facade: solid, framed, showcase (with glass), material and color*.
*It is better to specify these parameters in general for the entire headset, in the Materials section (more about it below).
3. Upper, Pencil cases - all by analogy with the Lower cabinets. Drag to the right place and specify the dimensions. To make a cabinet or other module turn to another wall - just move it close, it will turn itself. When moving the upper cabinets, you will notice the height line of the backsplash, and the cabinet will "stick" to it, for ease of placement. The default is 560 mm, but you can change it in the Kitchen Options section. nine0003
All cabinets are divided according to height. The largest selection with a standard height of 720 mm.
4. Appliances - a standard refrigerator in two colors, an extractor hood (modern and classic), a gas stove and a washing machine. The dimensions of any type of equipment can be changed in the same way as a cabinet (the Ruler icon). Thus, knowing the dimensions of the model, you will see how it will "become" in the headset.
Let me remind you that the built-in oven, hob and sink are indicated in the parameters of the lower cabinets. nine0003
5, 6. Shelves and Bar counters.
Similarly, you can specify any size.
4. Materials: facades, countertop, backsplash
1, 2. The most pleasant moment is the choice of material and color of the facades. Here you can and should play around a little longer and choose the right color and texture.
By default, the upper and lower cabinets are set to the same material and color. But you can click on the button "Separate fronts (or colors)" and specify separately for the lower cabinets. nine0003
MDF, Plastic, Particleboard, Solid wood - four collapsed submenus. Click, the submenu will expand and select the one you need.
The colors are the same.
3. The default case is white, but you can install any.
4, 5. Tabletop, plinth - click and choose a color.
6. Apron - by default, the checkbox "Without an apron" is checked. Remove it if you want to try on a wall panel.
For example, I chose Skinali.
5, 6. Fittings and Lighting
Choice of handles, hinges, availability of closers.
Turn off/on the light to view the illuminated kitchen.
7. Kitchens (project catalog)
A very useful tool where you can select a finished project and continue drawing your kitchen based on it.
Here we collect the best projects of different sizes, layouts and styles.
Save/Load Project
To save your kitchen and continue designing later, click Save Project - Floppy Down Arrow on the top menu. A file with a project with a name of this type "project_20.6.2018_12_37.dbs" will be saved to your computer. The file will be saved to the download folder specified in your browser settings. You can send this file by mail, or download it to a USB flash drive to open it on another computer. nine0003
To continue designing, load the saved file - to do this, click on the folder button on the top menu and select the backup. dbs file.
Video on how to use it from the developers of the program:
Export textures, you just have to adjust the exposure (light) and display angle
To save the project file in .glb format, click the "3D" button and select "Export to .glb (with textures).
Drop everything and design your own kitchen in 15 minutes
How to embed the designer on your website? Terms and instructions here
Kitchen Designer Online - Draw a project conveniently and clearly
How to work with a 3D planner
We tried to organize the service so that it would be convenient for all of you to design future furniture. Even if you have never dealt with the arrangement of furniture, everything will certainly work out.0003
Open the kitchen designer in full screen using the icon
This is what needs to be done to start the creation of the kitchen layout.
Open the Kitchen Builder link. (On mobile, rotate the screen horizontally and zoom in)
Switch on the desired operating mode: "modular kitchens" or "custom kitchens".
Next, either choose a popular model of the headset (if you chose "modular kitchens"), or create a project yourself, specifying the necessary parameters: with dimensions. When choosing the first one, the prices will be calculated automatically (only the body and facades), the second - the cost will be calculated by our employee. In any case, prices will be affordable. We value our good name and therefore maintain a friendly approach to customers. nine0003
You can change the operating mode at any time by clicking on the gear on the left in the top menu.
Once the mode is selected, you can start planning the room. It is not only easy, but also very interesting. Set the parameters of the room in the constructor, indicate all the important dimensions, place window and door openings in the appropriate zones. So you will create the basis for the future design project.
Next, sequentially click on the buttons in the menu on the left, drag and drop appliances, furniture modules, and other details into the planner field. Explore all the tabs so as not to miss anything interesting. The buttons in the constructor window are signed in Russian, and after spending a little time, you can easily create a dream design project. Do not forget about the layout of the lighting system, communications, important structural units. This is how you avoid mistakes. nine0003
After registering in the constructor, you will be able to save the finished design project. Copy the link or save the picture of your future kitchen to show it to family members, friends. Perhaps they will advise you to change something, add or remove modules to make the interior even better.
When the project in the constructor is completely ready, click the "order calculation" button, indicate the model, color of the required furniture, write contact details so that the company's managers can call after the price is approved. After that, it remains only to wait for the end of the calculations! nine0003
Wardrobe constructor
In addition to the kitchen planner, a similar wardrobe constructor is available on our website. The principle of operation in it is the same as in the previous case. When saving, be sure to specify the exact parameters of the selected cabinet models so that employees perform an accurate calculation for the project.
Choosing furniture from Domashnaya Dolina, you get attractive, very practical products. We are pleased to offer our customers functional wardrobes, kitchen sets, furniture sets for bedrooms, living rooms, children's rooms. On this page you can use a convenient electronic designer. With its help, it is easy to develop a design project on your own with your own hands. nine0003
Free online kitchen designer to help you get the perfect furniture. It often happens that ready-made headsets do not fit well into the room, they look bulky, ugly. Therefore, we offer the best option - to draw a kitchen yourself!
Our advantages
Beautiful furniture is what we are happy to offer to all customers. In addition to kitchen sets, we produce wardrobes, bedrooms, hallways, sets for children's rooms, and much more. nine0003
The main advantage of the work is an accurate knowledge of the architectural features of buildings, the manufacture and installation of furniture, taking into account all the features of the apartment layout. Even if you have a living space with a non-standard form of rooms, a small kitchen, "broken" walls - our craftsmen will do the job at an excellent level.
If necessary, we deliver to any address in Moscow, the Moscow region and Russia. It doesn't matter how many modules or components you need to translate. In addition to delivery, an order is available for lifting cargo to any floor, assembling cabinet furniture at the customer's site (private house, apartment, office).