How to paint high stairwell ceilings
How to Paint a Stairwell Without Hiring Help
*Affiliate links provided for your convenience. For more info, see my full disclosure here.
Note: This is NOT a sponsored post! Also, please excuse the horrible pictures. The upstairs hall has zero natural light and is dark and shadowy. Most of the pictures in this post were taken by my phone or worse…at night with my phone. Ugg! 😉
Guess what? I painted the stairwell all by myself! Without hiring a painter! I’ll admit that I’m ridiculously proud of myself for accomplishing this. I have droned on and on to my husband about it multiple times. Basically, I geek out about it every time I go up or down the stairs. You’d think I just landed a rocket on the moon. 🙂
In our old house, we took one look at the high stairwell and called our painter. He was reasonably priced and did a fabulous job! No regrets there. However, this time around, I knew that the money to hire a painter would not be in the budget for a long, long time. My options were either wait another year or two or figure out how to paint the stairwell myself.
I’ve been working on a gallery wall for my upstairs hall and didn’t want to hang it on dingy, old paint, so the gears in my brain started turning. I remembered a little edger gadget* I picked up on a whim a few years ago that I enjoyed using. I had recently noticed the new models were improved and could accommodate an extension pole. That was my light bulb moment! Behold… the $5 gadget* that allowed me to paint my stairwell by myself without hiring a pro or needing to buy a special ladder for the stairs!
Image Source: Lowe’s
Not only can the new model attach to an extension pole, it swivels all around and now it has two little guards at the top that keep the paint from smearing on the ceiling, so there is no need for painters tape! My biggest holdup with painting the stairs was that it was too high (we don’t have a stair ladder) and I wouldn’t be able to tape off or cut in. But, with this little gadget, I was able to cut in without needing a ladder or tape!
I taped off the baseboards and door frames then cut in the bottom portion of the walls with my paintbrush. Then, I used the edger to cut in the top edge of the walls, as well as along the sides of each wall. When I did the sides, I turned the edger backward so that the guards were out of the way and I could get paint as close to the corners as possible. Like so…
A couple quick edging tips:
-Practice a few times first to get a feel for the amount of pressure to apply to the edger and how much paint to use. I edged the walls in my hallway first, then edged the stairwell once I was plenty comfortable with the edger. It’s very easy to use, but it was helpful to get really comfortable with it before using it while standing on the stairs with it extended 8 feet above my head. 😉
-The guards flip up so they are out of the way when you dip the edger in the paint. Occasionally, if I got too much paint on my edger, when I’d flip the guards back down, they would get a bit of paint on them that I’d need to wipe off. No biggie, but something to be aware of.
-I found that after I dipped my edger, it was helpful if I ever so lightly ran it across the edge of my paint pan to get off any excess paint.
After the cutting in was done, I stood on the stairs or on the landing and rolled using an extension pole. You know you’re insanely jealous of my painting attire. 😉
For the corners, I got really high tech. I duct taped my paintbrush to my extension pole. I told you it was high tech! Haha!
If this method is a little too, um, “rustic” for you, look what I found! It’s a corner painter* made by Shur Line in the same line as the edger! And, it can attach right to your extension pole! It was $5, so I passed and just did my duct taped paintbrush thing. I know, I’m cheap. But, either way will work!
I won’t lie, it was labor intensive and a bit tedious, but it saved me a bunch of money and allowed me to check the stairwell off of my list!
I used the same Benjamin Moore Gray Owl paint color I used in the living room, but I had it lightened by 25% because the hallway is so dark.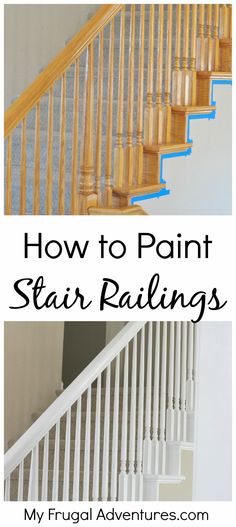 I didn’t want it to look really dark with all the shadows. Lightening it by 25% was the perfect amount–it appears to be the same color as the living room, even with all the shadows.
Ready for a little before and after action?
Before…
After!
I’m giving that light and those gold doorknobs a major stink eye! They’re on the to-do list!
Next item on the stairwell/hallway agenda? Hang a gallery wall! I already gathered all the frames and have the layout figured out, but I’m still working on gathering photos and artwork. I’m hoping to have it ready to show you next week!
Linking up to Southern Savvy Style and many more awesome blogs!
expert advice for painting your home’s tallest space |
When you purchase through links on our site, we may earn an affiliate commission. Here’s how it works.
(Image credit: Getty Images / Catherine Falls Commercial)
Stairwells are essentially the area directly above and around your home’s staircase.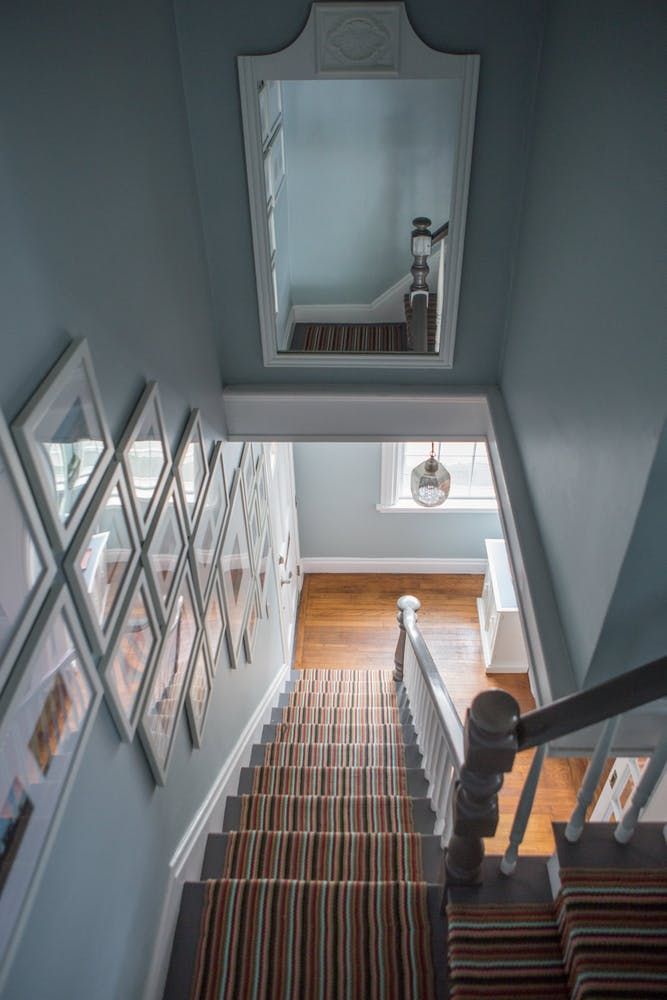 Usually at the main entrance to your home, they’re the first area guests step into, so making a good impression is paramount. A beautifully decorated stairwell with a smart runner up the stairs, will make it a pleasure to come home.
Painting a stairwell is not as simple as painting a room. Your staircase ideas and stairwells are often double height – or rather the full height of a property excluding the loft. If you have the budget for a professional decorator to do just one project for you, we recommend you invest it here!
Properties with particularly complex or high stairwells, and any spanning more than two storeys, should have professionally installed scaffolding before you, or your decorator, begins painting.
How to paint a stairwell
Decorating a stairwell entails painting walls that are the tallest, and a painting a ceiling that’s the highest you’ll ever need to paint inside your home. Determined to tackle a stairwell project yourself? We have outlined the main ways to get into every corner of a stairwell in a regular two-storey home, without breaking your neck, and gathered expert advice to ensure you get the best results possible in difficult conditions.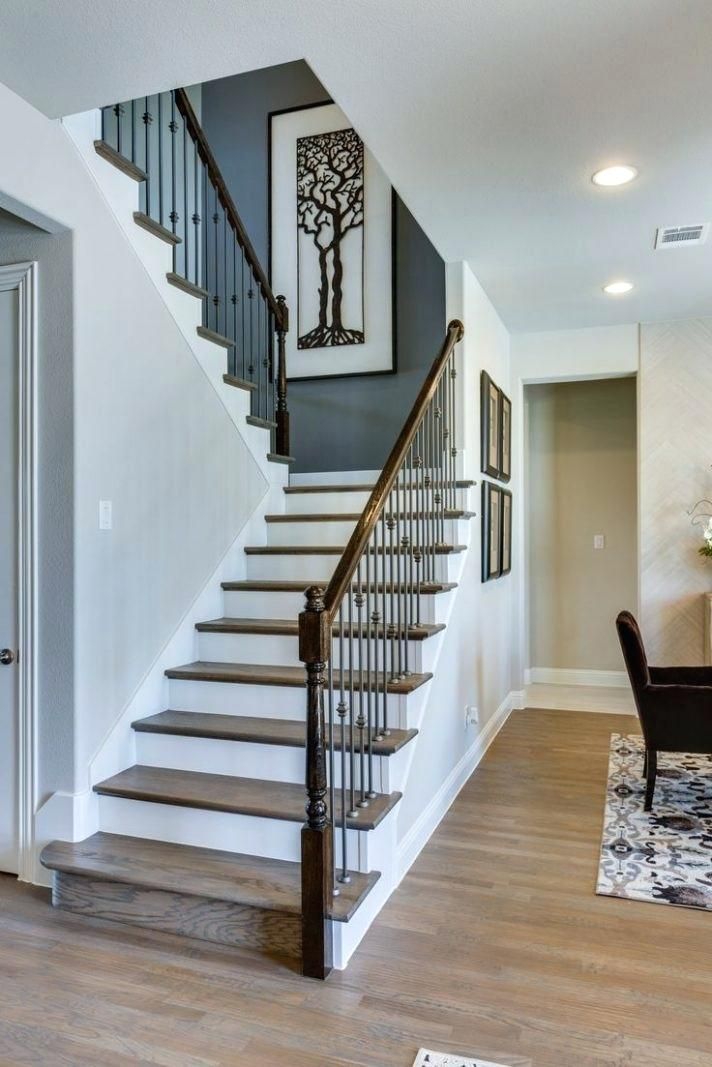
Painting a stairwell using extension ladders
Another method favored by professional decorators is the use of telescopic/extendable ladders, which can be lengthened individually on two sides. They position the shorter rungs on a higher step and the longer rungs three or four steps down. We would caution DIYers against this method but if you do use it, you will need somebody to hold the ladder at all times while you paint and you'll also need a good head for heights.
A very long ladder can be fully extended from the bottom of the stairs to the top of the stairwell, but again it’s wise to have a support buddy on hand. Consider hiring ladders or even better scaffolding for safety, rather than buying if they're only required for this one project.
The safest way to reach a stairwell
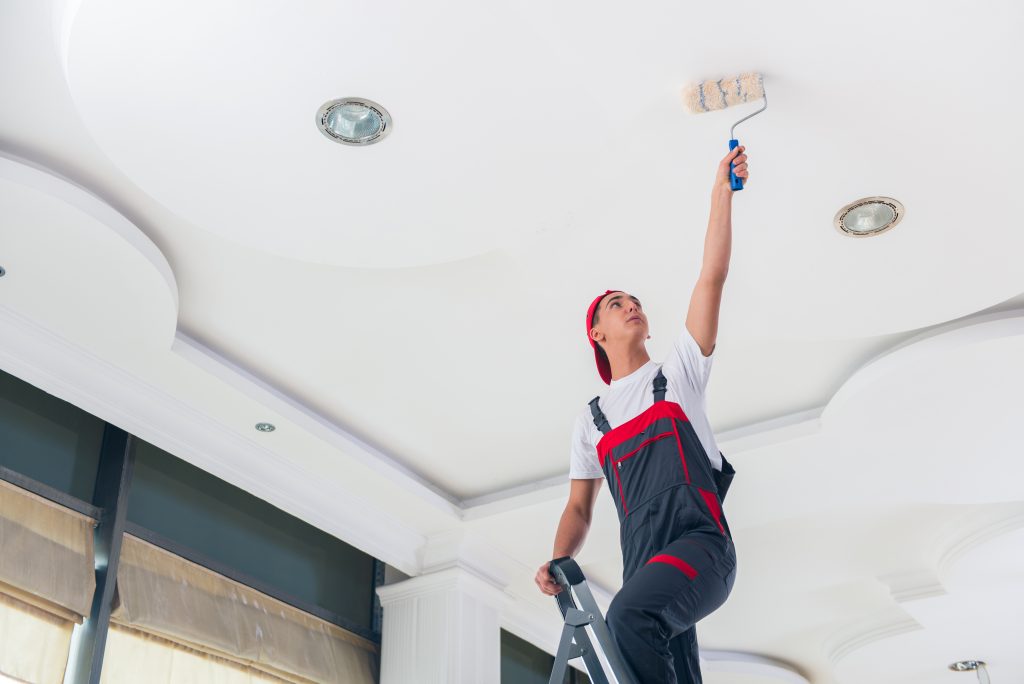
The safest way to paint the highest points of your stairwell is using a paint roller and extension poles. We’re not saying it’s the easiest way, your arms and neck will suffer for days afterwards, but it’s definitely less risky than balancing on planks or ladders. You can use a small step ladder or platform on the upstairs landing, like you would to reach any ceiling, but take care to keep it well away from the head of the stairs.
Using extension poles can limit precision, especially when it comes to achieving a neat line between walls and ceiling. For cutting in, we recommend the use of a Paint Edger (try Shur-Line), which is a special pad that creates a sharp line at the top of walls without getting paint on the ceiling above. Look for a Paint Edger that’s designed for use with extension poles rather than one with a fixed handle. You can also buy Corner Pads, which are triangular and will get into any corners that a paint roller can’t reach.
(Image credit: Benjamin Moore)
How to start when painting a stairwell
No matter which method you use to reach the walls and ceiling of a stairwell, you should always begin by masking off any areas that don’t need painting. ‘Protect the floor and the staircase with drop cloths. Remove electrical cover plates and protect ceiling lighting fixtures with tape or plastic,’ says Helen Shaw, director, Benjamin Moore .
When covering the treads of a staircase, be sure to push the cloth deep into each tread to prevent a slip hazard on the stairs. Use low tack tape to protect any woodwork and architraves, too. As well as coveralls, it’s worth popping a cap on to keep paint splatters out of your hair and eyes. A disposable shower cap works well.
‘In most cases it will work better to start from the top of the stairwell and work down, so you aren’t leaning your ladder or pole on any wet paint. Working from top to bottom will also ensure you can control any paint drips,’ adds James Greenwood, Paint & Wallpaper Expert at Graham & Brown .
What paint to use when painting a stairwell
When painting a stairwell you need to choose the paint color and finish wisely to avoid having to repaint any time soon! In stairwells where natural light is restricted, consider opting for a pale paint colour, about 20 per cent lighter than you would use in a room with plenty of windows.
If you’re seeking color, introduce it on the staircase rather than the walls. ‘Don’t be afraid to go bold in your choice of staircase color. Hallways can be a tricky space to decorate, but a ‘statement’ staircase is a simple way to add impact here,’ says Lick’ s colour specialist Sam Bramley. ‘I love a color block staircase, set against a neutral backdrop, highlighting and leading your eyes upwards to explore other rooms.’
‘When it comes to the best type of paint for stairwell ceilings, look for a specialist ceiling paint that is “dead flat”, applies smoothly, hides most ceiling imperfections and is specially formulated to minimize both lap marks and splatter,’ advises Helen Shaw from Benjamin Moore.
On the walls of a stairwell, it pays to think practically. If the paint carries right down to the staircase, you should opt for a washable or scrubbable formula that can handle sticky finger marks and shoe scuffs. In a busy household, it’s worth considering panelling up the staircase to protect the walls.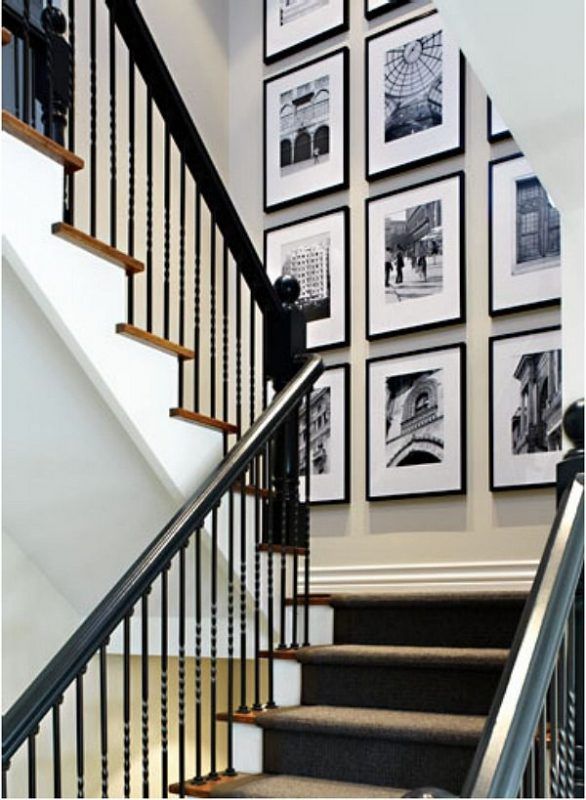
Techniques for painting a stairwell
Access issues notwithstanding, painting a stairwell isn’t too dissimilar from painting any wall. Holes and fine cracks should be filled before you start. Prepare the walls for painting by lightly sanding (not necessary on new plaster) and then cleaning with sugar soap.
If you’re painting over a darker color, use a primer first. Open the paint can and then apply the paint with a roller or foam pads to cover large areas quickly, using a W formation and taking care to overlap a little to avoid gaps. Use a paint skuttle or tray with grooves designed to help prevent overloading the roller or pad with paint and practice your technique before you begin.
Stairwells tend to lack natural light, creating shadowy surfaces and making it hard to see where you have been with your paint. In this situation, set up lamps or work lights before you start. We recommend portable work lights with an adjustable beam.
(Image credit: Roger Oates)
How do you paint a high staircase without a ladder?
‘We tend to use telescopic ladders for standard size staircases as they are safely supported by each step, and we would recommend this for a DIYer too. They are also easy to store as they fold into a small case. Slightly larger staircases may require an adjustable self-supporting A frame but for health and safety reasons we would usually organise for scaffold supports,’ says Alex Glover, professional decorator for Lick .
Painting the ceiling the same color as the walls will relieve the pressure to achieve neat cutting in lines between wall and ceiling. We recommend using a foam roller on an extension pole and seeking out specialist low-sheen ceiling paint to help disguise any unevenness. ‘In addition to sourcing specialist ceiling paint, make sure your roller sleeve is high quality and the appropriate nap for your ceiling texture. Ask your local decorating centre for help determining the best tools,’ advises Helen Shaw, director, Benjamin Moore.
Linda graduated from university with a First in Journalism, Film and Broadcasting. Her career began on a trade title for the kitchen and bathroom industry, and she has worked for Homes & Gardens, and sister-brands Livingetc, Country Homes & Interiors and Ideal Home, since 2006, covering interiors topics, though kitchens and bathrooms are her specialism.
How to safely paint the walls and ceiling on this high ceiling staircase?
- Hobby
- security
- stairs
- painting
James
I need to paint the walls and ceiling on this staircase. The ceiling is flat and does not go down with the stairs. This means that the ceiling at the bottom of the stairs is very high.
The walls and ceiling will be a different color, so I need to be able to use the brush to "cut" under the ceiling. nine0015
How to dye it safely?
I'm based in the UK (in case anyone wants to recommend a tool rental company).
PS The test colors on the wall are not the colors I use.
Gbronner
There are three ways:
1) Lean a ladder against the lower wall, put boards connecting it to the upper ladder, and put the ladder on top.
2) Use scaffolding. Baker scaffolding can be installed with supports of various heights.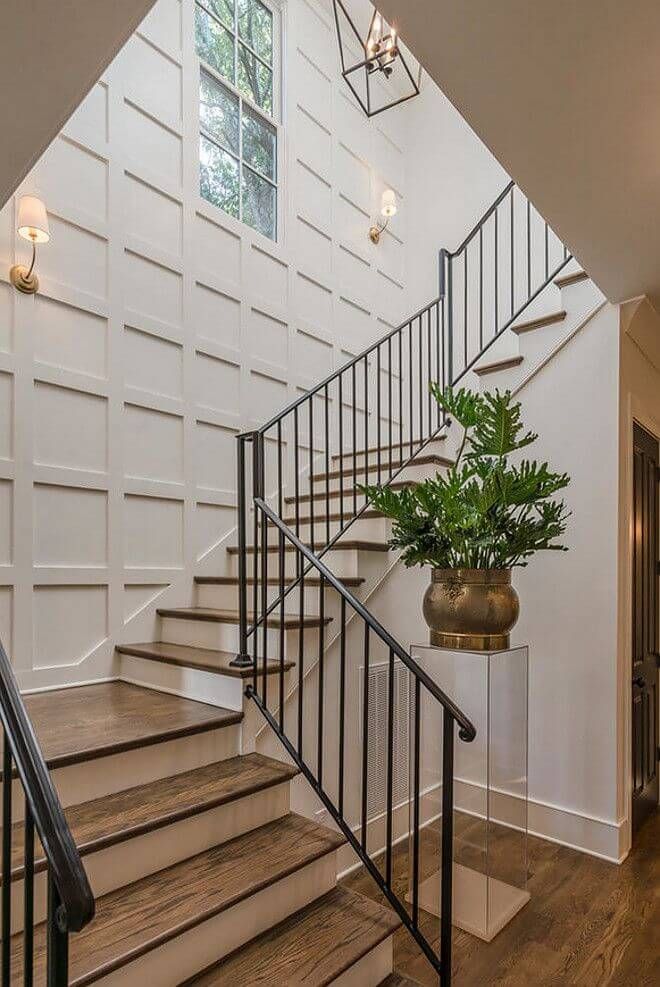 Then place the ladder on the baker's platform. This is my recommended solution. 3) Use a two-wheel edge paint mat that will allow you to crash with a pole. http://www.decoratingdirect.co.uk/viewprod/f/FDDEDGPD/
If you're really careful, it might even look normal.
Jack
This can be a little embarrassing and not for the faint of heart, but I would use an extension ladder of the right height, placed on the ladder so that the angle is good for climbing, one of these for either end of the long path. stairs and place a 2X10 or 2X12 (US) walking board that is the main work surface. It will be accessed by another item assembled together from a short ladder and plank on the upper level. nine0015
I actually did it several times and survived
Mazura
Easy to draw; The scaffold is for when you really need to get up and do something like plaster or wiring. These tiny diameter paint rollers work wonders in corners (bend/tilt the roller handle slightly). Also, the same can be said for tassels taped to a pole: (polesandmore.com, note that some of them are triple in length)
security ideal
I hate it when people pass off their products/services as answers to forum questions... But I'll do it anyway.
Take a look at Ladder-Aide (www.ladder-aide.com). It allows you to install a normal sliding ladder on the stairs so that you can paint the walls:
We created it to meet this need, so I don't mind posting it here. We read a lot of artist blogs and browsed a lot of forums. There have been some really great DIY solutions that have cropped up frequently (improvised scaffolding with 2 ladders and a walking board, and a custom made ladder platform). But we realized that we needed a simple, adjustable product. I hope this helps someone out there. nine0015
Victor
I have used many different ladders and equipment to work on stairs, but I have to say one thing: nothing works better than an adjustable ladder. Yes, you can use a leveler, but that too has its limitations and you cannot fully adjust the legs of the ladder on the ladder. I always felt some kind of instability when using the level.
I recently used a Little Giant adjustable ladder to paint and decorate my ladder and it worked out great. I am satisfied with the adjustability and performance of this ladder. There are many adjustable ladders on the market. Here is a great list of adjustable ladders that I found with a simple Google search. nine0015
But take into account your requirements for the height of the stairs. Not all stairs are the same and you need to know what you need before buying your own ladder.
Painting and whitewashing of entrances
| from 100 rub/m2 Submit an application for the service. | Order service |
 We will contact you as soon as possible and answer all your questions.
 Painting and whitewashing of entrances (495) 767-23-95
Isn't it true how pleasant it is to enter the entrance of an apartment building if order and cleanliness reigns in it, and the walls sparkle with fresh colors! So why, day after day, do tenants contemplate in their front door a dirty ceiling and peeling paint on the grounds? After all, it is possible together and for little money with the help of whitewashing and painting walls and ceilings to freshen up lobbies, corridors, stairwells, vestibules and other common areas! nine0015
The IF+ company offers its services for the implementation of such types of painting work at the entrances of multi-storey residential buildings in Moscow and the Moscow Region. Our masters know the technology and strictly observe it, which ensures the impeccable quality of work, durability and aesthetic appearance of the premises.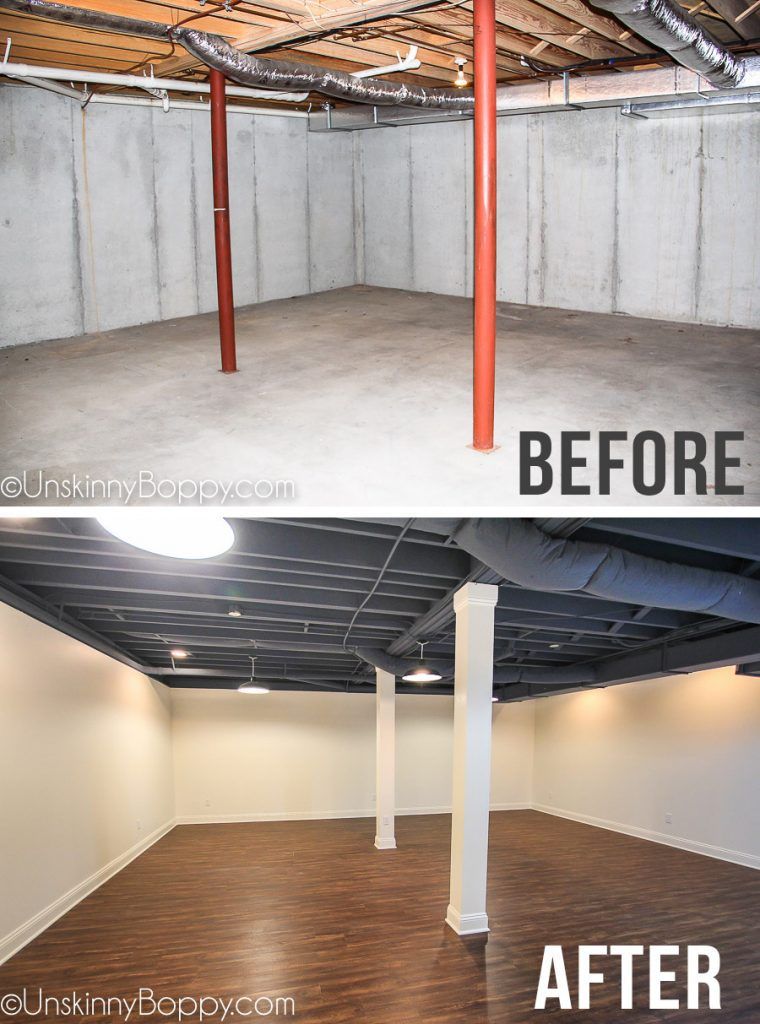
A team of skilled workers preliminarily performs high-quality surface preparation and only after that proceeds to the main work.
Video of our work process: nine0015
List of work performed in the process of whitewashing:
- Cleaning the old layer of chalk or lime;
- Whitewashing of the ceiling and walls.
Service rates:
| Painting walls, ceiling | - from 100 rub/m2 |
| Redecorating | - from 1450 rub/m2 by floor nine0095 |
| Overhaul | - about 1950 rub/m2 by floor |
| Separate type of work | - on request |
List of works to be performed during painting:
- Removal of the old paint layer;
- Wall surface cleaning;
- Repairing cracks and other defects; nine0004
- Applying a primer coat to concrete, foam blocks, bricks or plaster;
- Water-based wall painting in 1 or 2 coats.
Learn more