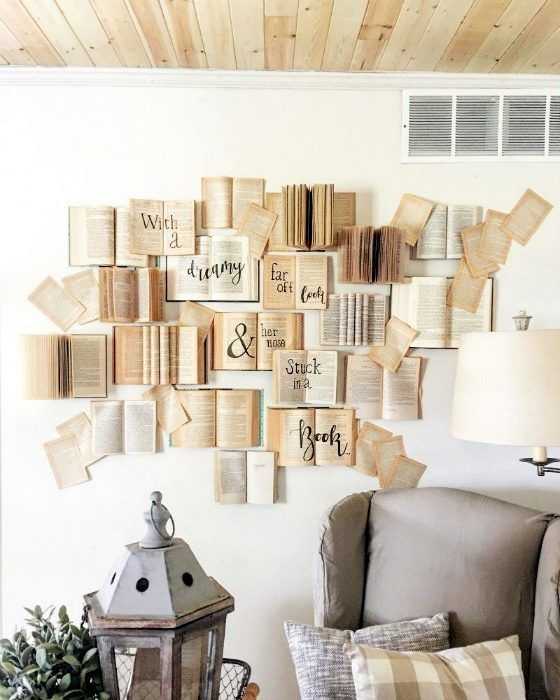
Diy wall murals ideas
Easy DIY Wall Mural Ideas • One Brick At A Time
This post today is a little self indulgent. I started my research for easy DIY wall mural ideas for myself, because I decided to paint a wall in my home. But let me start from the beginning.
It all started with this pic by Nathalie Lete that a friend shared with me on Instagram. Apparently, Nathalie has been spending her lockdown days painting the walls of her home.
Source
This is just SO pretty, I couldn’t stop staring.
It also reminded me of my college days, when I would paint anything I could lay my hands on, including my bedroom wall. Now I am no artist, but I do manage to get basic shapes and proportions right. I dug out these pics of my bedroom from 25 years back. Both these murals were done on the wall behind my bed so are about five feet in length.
And I remembered how happy it made me to paint these.
I had no idea which wall I was going to paint, or what I was going to paint on it. But just for the heck of it, I started looking for easy DIY wall mural ideas. (Like I said, I’m no artist. I can make easy things look good, while a difficult piece of art would expose me!)
Easy DIY Wall Mural Ideas
As I was going through the different images, an idea began to form in my head, and by the end I had made a rough plan of what I was going to do. So let me take you through all the easy ideas, and what I’m finally planning to do.
(1) Pen and Ink
The absolute simplest mural idea I found was using a black marker to draw basic geometric patterns on the wall. The ones below are wall stickers. But the way I see it, this can be done just as easily with a pen.
Source
Depending on your level of skill, you could pick a pattern that is slightly more complicated.
Source
Emily here has cut out a leaf into an eraser and then used it like a stamp, and what a pretty pattern this makes.
Source
If you are a little more courageous, a pattern like this can be easily done too, and looks beautiful, me thinks.
Source
(2) Intricate Pen Work
Would you ever believe that the dining walls below have been hand painted? Kelly picked this design off a wallpaper and hand painted it on her walls with the help of a friend. She’s given a step by step tutorial you can see by clicking here.
Source
And then this. A fashion designer who used her extra sketches to make murals on her bathroom walls. Isn’t this exquisite?
Source
You can use your pen to make all kinds of intricate patterns. I especially love the mandalas..
Source
And these pretty patterns that remind me of ‘mehendi‘.
Source
(3) Wall Stenciling
While I was looking at all the patterns, I remembered how Preethi Prabhu cut a simple wall stencil and used it to make this stunning wall. In fact, the idea is so pretty and so easy, that she inspired a whole lot of her readers to follow suit and do the same.
Source
If you aren’t too sure of being able to make your own stencil, you can even buy one.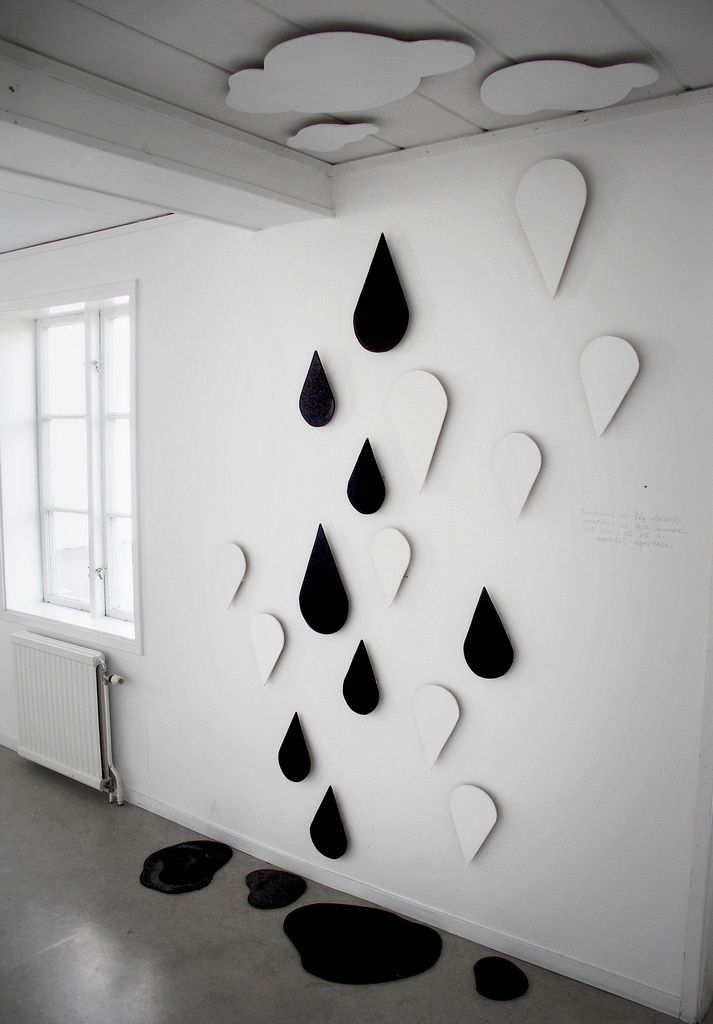 From simpler geometrics..
Source
… to extremely intricate and detailed designs, you can find them all online.
Source
(4) Tape It Up
Another super easy way to get some stunning designs on your wall, is to use tape. You randomly put tape across your walls and paint over the tape. You can paint the entire wall in a single colour, or put different colours in the different shapes formed.
Before
After
Source
When you remove the tape from the walls, you’re left with a pretty mural all over. Kaelah shows you here how she made this wall above, step by step. I also love how she has also used glitter in some of her shapes to make the whole wall sparkle.
Alicia used tape to make this pretty herringbone pattern on her wall.
Before
After
Source
There are so many different patterns you could try out by taping.
Source
The pretty shades of colour used here in a gradient make this wall absolutely stunning.
Source
You can use this technique to make pretty much any straight lined shapes and patterns you like.
Source
If you have patience, and time, and a LOT of courage, you can make your mural bold and vibrant like this one.
Source
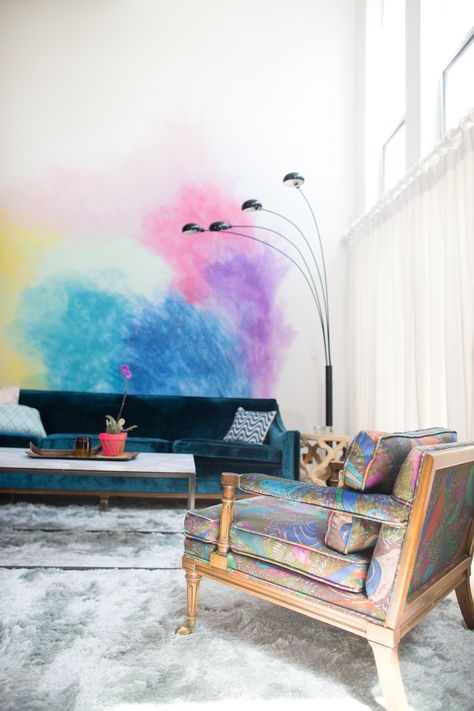
(5) Rainbows
Once I started looking at colour, I realised the easiest shape to paint was the rainbow. For one, it need not be very accurately drawn. Lines can cross and overlap, and because it’s a thing of nature. Imperfections only make it look more natural and more beautiful.
Source
You’ll find a step by step DIY for this rainbow below right here.
Source
Rainbows don’t necessarily mean kids spaces. This mural would make a striking accent wall in any living room.
Source (I could only trace this pic to Pinterest. Any help to credit the rightful owner will be welcome)
I love the muted colours of this piece of art.
Source (I could only trace this pic to Pinterest.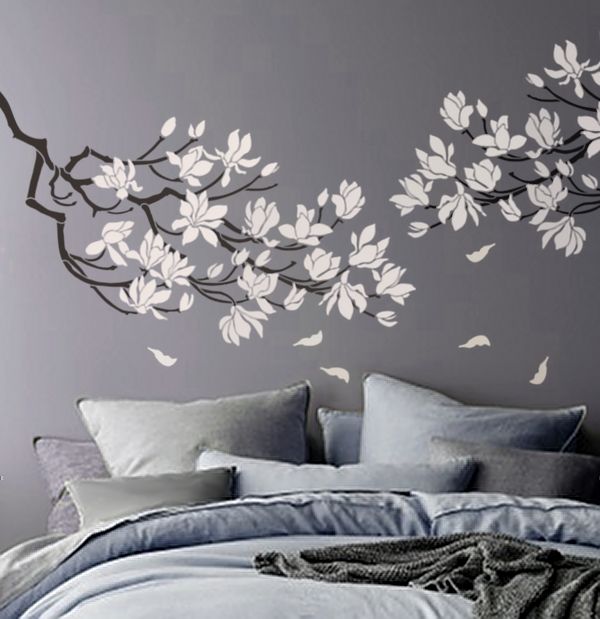 Any help to credit the rightful owner will be welcome)
While this Art Deco style mural is simply stunning.
Source
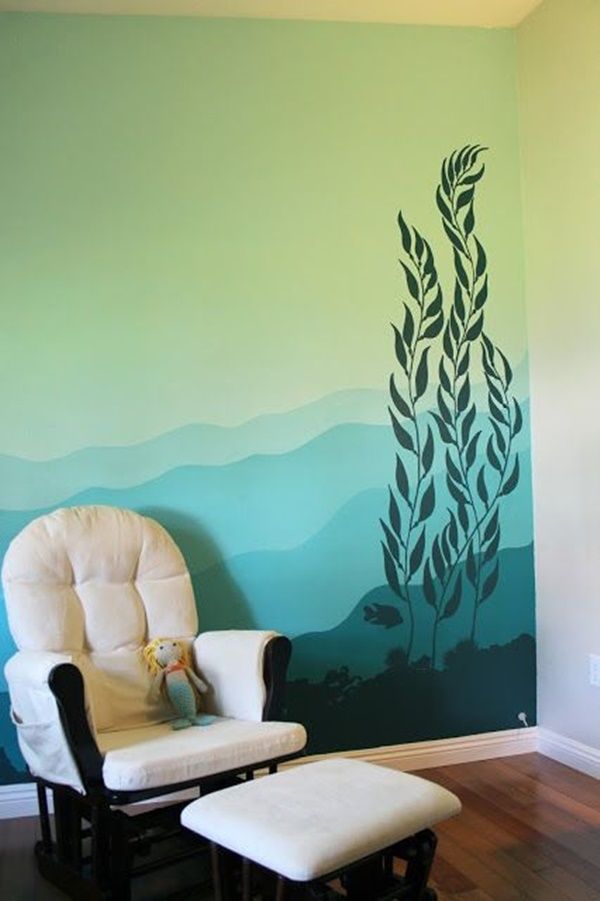
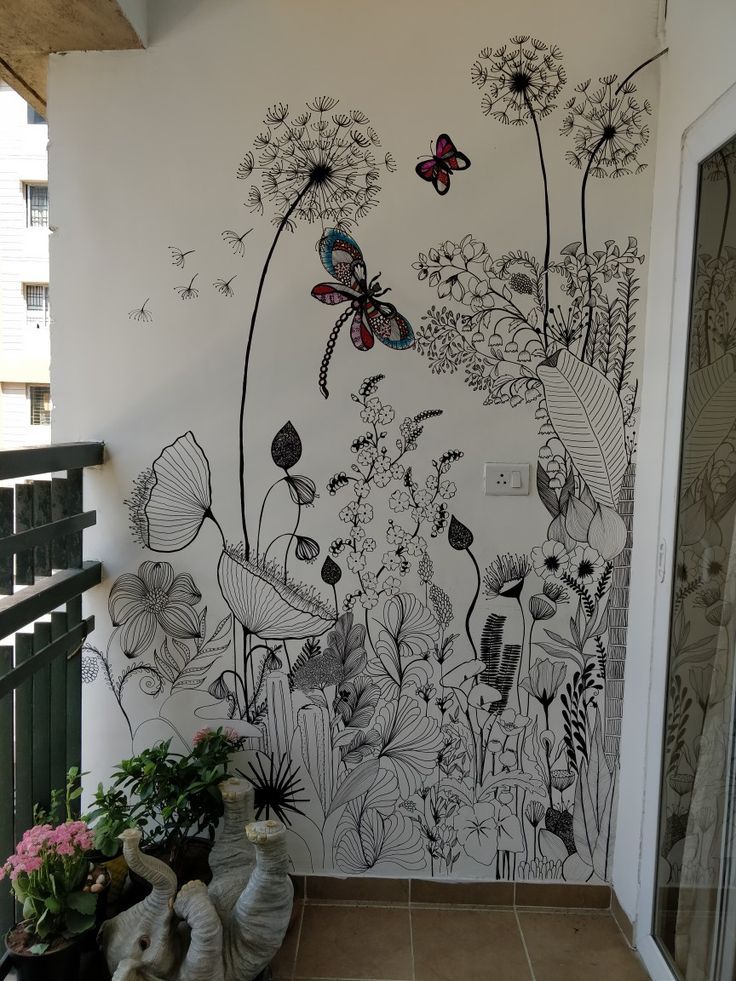
(6) Tropical Art
Finally, I stopped scrolling at this. These tropical leaves had my heart instantly.
Source
I started searching for tropical wall mural ideas and found these simple, beautiful sketches done by so many artists on their walls.
Source
I remembered this pretty wall hand sketched by Laya.
Source
I liked the idea that since I would be drawing nature, I wouldn’t have to be perfect all the time. I could make mistakes and since we’re talking about leaves and flowers, it would all be ok.
Also, I loved that I could decide to leave it with just the outline, or colour it in and it would look great both ways.
Source
And I suddenly knew exactly which wall of my home I would be painting.
I have been complaining about the wallpaper in my dining niche for a while now.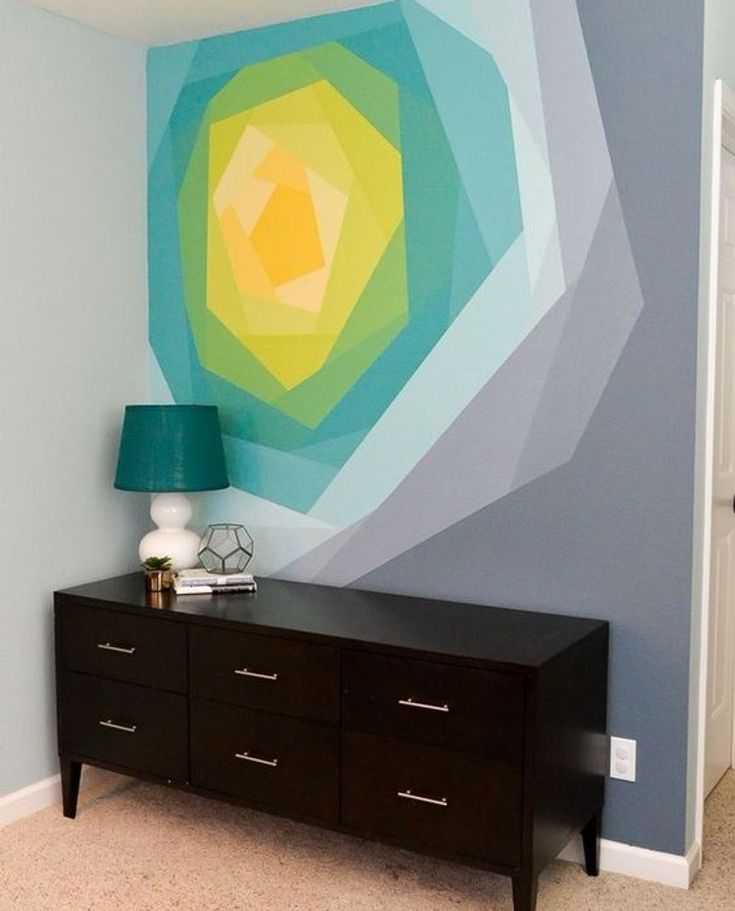 I even declared to all of you at the beginning of this year, that come what may, I would make a change here before the year ends.
And now I have a plan.
The Plan
I think what I really don’t like about this space is the lack of greens here. But since it’s the furthermost corner away from our balcony with no natural light, it isn’t easy to keep plants there for any length of time.
I think a burst of green on that wall is just what the doctor ordered.
So the plan is to leave the wallpaper as is, and paint some large tropical leaves on top of it. I might add a few bright flowers to it too, but I’m not too sure about that.
What I’ve done, is started looking for easy to draw and paint tropical leaves… something like these.
Source: Left | Right
These simple line drawings should be easy enough to make myself and I already can’t wait to see how this wall turns out.
My search for more wall mural ideas ended with these leaves, because I had found exactly what I was looking for. (I told you I was indulging myself here!) But there are quite a few good ideas for everyone here. Do let me know your favourites, and if any of them inspired you to some action.
Also, remember to sign up for updates, because whenever that wall is done, I promise you’ll see it here first!
Until then,
Tagged on: DIY Paint Wall Decor
Wall Mural Ideas for the DIY Artist
We’ve said it once and we’ll say it again: ANYONE can paint a mural. We truly believe this! No matter your level of artistic ability, you have the skills and the power to turn your ‘blah’ wall into something beautiful.
Though we have all the confidence in you, some of the most common hang ups about painting a mural that we hear from our audience is that they are afraid to mess up, they don’t want to ruin their wall, or that they’ve never painted a mural before.
Listen - you might mess up when you paint your first mural. We’ve painted 200+ murals and sometimes we still mess up. But the beauty of paint? You start over… again, and again, and again. Nothing is permanent. So if you paint your last brush stroke, take a step back, and are horrified by what you see- just grab your roller and cover it up!
We know it can be nerve wracking (especially if you consider yourself a perfectionist), but we believe in you. So much so that we dedicated our how-to guidebook, Wonder Walls, to everyone who has ever wanted to paint a mural but has never had the courage (seriously, we say these exact words on the first page).
In this guidebook, you can expect to be walked through everything: from the supply list , to how to choose the right colors, to what type of mural to paint based on the size of the room you’re working in. Best of all though? It’s chock-full of inspiration for you to draw from. You don’t need to reinvent the wheel with your mural for it to be awesome…. just copy one of ours to get started!
Is your copy of Wonder Walls still on the way? ;) We’ve got you covered.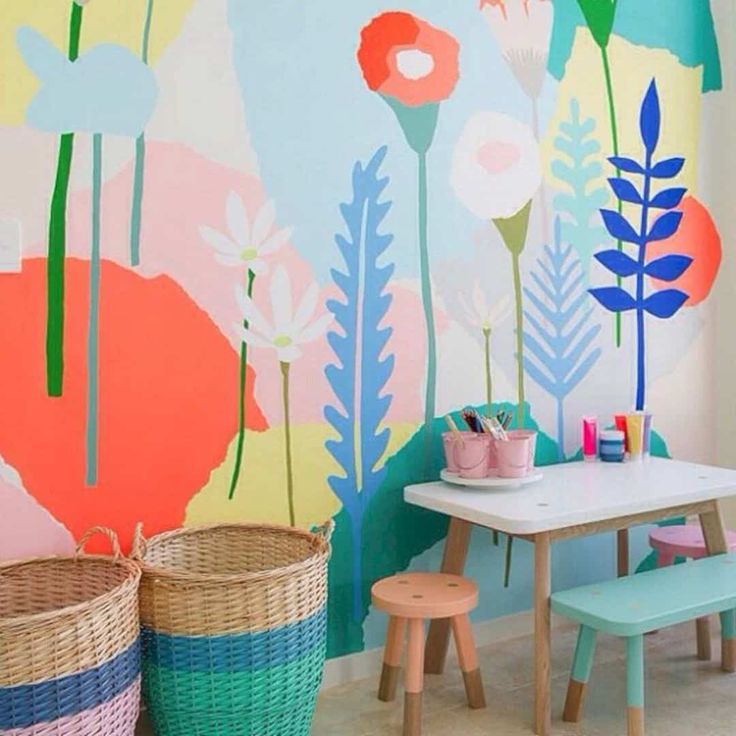 Below you’ll find three mural ideas in varying levels of difficulty pulled straight from our book- instructions, photos, and all. All that’s missing is your liquid courage of choice.
Color Blocking
Skill Level: Easy
Time: 1-2 hours (not including drying time)
Supplies: 1 quart paint in the color of your choosing, 1 sample size paint in a different color, pencil, 1 roll painters tape, drop cloth, 3-4 brushes in varying sizes, roller and tray, level
Have a small space that needs a little bit of love? Color blocking is a super-easy way to add color to any room without going overboard. If you’re worried about getting the lines super straight, you can double check them with a level before you get started!
How to Paint:
Measure from the floor up to where you want the first color block to end, and then make a pencil mark.
Repeat this mark every few inches or feet (depending on size of wall) to indicate the top of this color section.
Apply tape to connect each of the marks you made in Step 1 so it forms a straight line. Use a level to ensure that the tape is parallel to the floor.
Smooth out the tape with a credit card or gift card so that it’s as close to the wall as possible to prevent paint seeping under the tape and ruining that clean line of negative space you’re going for!
Decide how tall you want the second block of color to be. Measure from the top of the tape and then repeat Steps 2-4.
Paint the top block with your first color and a medium sized brush (don’t worry if the brush is slightly wider than your finished stripe - the tape will protect it!) If you come across any tight areas (i.e. around a sink or a toilet if you’re painting in a bathroom) use a smaller brush to get the paint in there.
Repeat Step 6 with your second color on the bottom block.
Take a step back to see if you missed any patches or see-through spots.
Look good? Carefully pull off the tape, let dry 1.5-2 hours, and enjoy your new color block mural!
Transparent Shapes
Skill Level: Medium
Time: 5-7 Hours
Supplies: 3 samples size or quarts of different color paints, chalk, 1 roll of painter’s tape, 4-6 brushes in various sizes, 1-3 black Bosca paint pens (optional), drop cloth, and solo cups to use for paint!
This one’s for all of our soul brothers and sisters who hate using rulers! If you’re comfortable free handing blobby shapes, give our Transparent Shapes mural a try. We love this design because it can be customized to whatever space you like. Corners, onto the ceiling, in the one awkward area of your house you don’t know what to do with… this is your mural!
How to Paint:
You wanna keep things looking fresh! Tape off the floor, ceiling, and trim with painter’s tape and lay down your drop cloth to protect it from any paint spills.
Grab your pencil, and get creative. Start sketching out some blobs in various sizes, overlapping some of them to make a nice layering effect. Don’t worry about sketching the black lines yet - you’ll get to that later.
Start painting your blobs in solid colors, ignoring the overlapping sections for the time being. Working with one color at a time, fill in the shapes with paint until all the shapes are completed.
To create the layering effect that gives the illusion of transparency, mix together the two overlapping paint colors.
Use this new, blended paint color to fill in the sections where the shapes overlap. Wait for the paint to dry, and add a second coat if necessary.
If you like the look of this mural as is…. you’re done! Take a step back and admire your work, pro.
Want to add black lines for contrast, like we did? Now’s the time to get that pencil back out and draw some more blobs over the painted shapes.
Trace the pencil with a black pen, making them as thick or thin as you like (ours are 1/2 inch thick, but it’s your wall so do whatever you want!).
Voilà! Your work is done here. We hope you’re proud of your blobby creation!
Sunset Ombré
Skill Level: Medium
Time: 2-3 Hours
Supplies: 1 quart coral paint, 1 quart bright pink paint, 1 quart golden yellow paint, 1 quart white paint, 2-5 medium/large brushes, pencil, solo cups for mixing paint, step stool, drop cloth, 1 roll painters tape
An ombré mural in your favorite colors creates a show stopping moment wherever you paint it, while still being relatively “minimal” and understated. We chose to paint our ombré on a fireplace to give it a pop of color, but you can use this same technique on any wall, or even furniture. We used “sunset” colors for ours, but you can switch these out for whatever color mood you’re going for!
How To Paint:
Make a pencil mark to show where you want each color to fade into the next one.
Paint each section in the color that you want to fade into the next section, mixing a small amount of white paint into your colors to create lighter tints, if desired. Don’t worry about blending yet - just create solid blocks, and add a few coats (waiting for each one to dry fully) if necessary!
Once your color blocks are down, it’s time to blend. Paint a solid line at the top of the first color you want to blend (make sure to use a good amount of paint), and a solid line at the bottom of the color you are blending it with. Make sure that these lines just touch, but don’t overlap yet.
With a dry brush, make long, back and forth strokes where the two colors meet. Continue blending until you get the look you want.
Repeat step 3 and 4 where each color meets the next, continually pausing and stepping back to look at the mural as a whole. It’s easy to get caught up in details when you’re working up close, but taking a moment to take in the mural from farther away allows you to see that the wall probably looks great!
Once you’re satisfied, remove the tape, let dry about 2 hours, and clean up.
 Now you’ve got a sunset to enjoy no matter the weather!
Murals, DIYSan Diego LettersPandr Design Co.wall murals, DIY, residential murals, artComment
0 LikesDIY wall decor ideas, 65 photos. Beautiful interiors and design
If you want to change something in the design of your rooms, decorating the walls is a good chance to give the interior a personality and show your creativity. Today, in any store you can find various finishing materials, such as photo wallpapers, paint, decorative plaster, wall panels and much more. You can also decorate the walls by hand.
Below we present a selection of ideas to help you inspire your creations.
Horizontal stripes on the walls will visually expand the room and emphasize the overall style.
Before you start painting the walls, arm yourself with chalk or a simple pencil, a construction tape measure and a level. Choose two different shades, one of which will be the base. It should be lighter than the other color. If you are going to paint a wall with stripes of the same color, but with different textures (glossy and matte), matte should be used as the base paint. An alternative to stripes can be stencils with which you can create an original composition.
DIY patterns on the wall
You can also use a cloth, napkin, sponge or putty to create unique textures. One has only to turn on the fantasy, and you can create a real masterpiece!
Original DIY wall decor ideas
The use of a stencil is considered the most convenient for applying an image. It can be made of plastic, cardboard, plywood or paper. The main thing is to skillfully choose a pattern and style. Before you start painting, prepare the wall. It must be perfectly clean, free of dust and dirt. Then attach the template as tightly as possible. This is very important, because if the stencil does not fit snugly against the wall, paint can flow under it. At the end, leave the filled template to dry completely and remove the stencil.
SEE ALSO: 8 DIY Wall Decor Ideas
Unusual Living Room Wall Decor
Due to its simplicity, the use of blanks has become the most common. Often, wallpaper is purchased for this purpose. Now it will not be difficult to find wallpaper with a ready-made applied ornament. Recently, photo wallpapers are in demand. In this case, you will get real paintings, landscapes and create a panorama of your favorite city in the room.
Original wall decor ideas
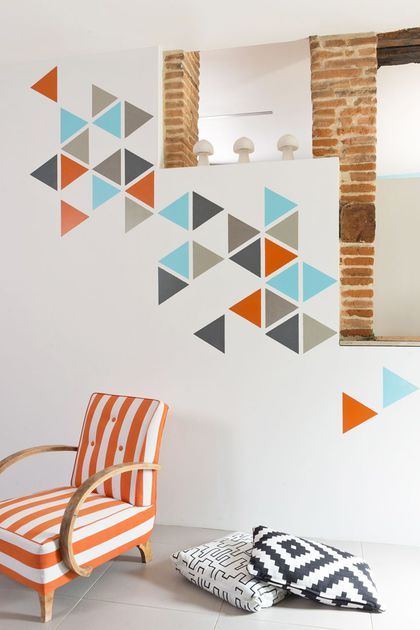
Triangles are a modern art trend. When choosing this wall design, use soft pastel colors, limiting yourself to a small number of colors. It is best to use a geometric pattern on one wall. From geometric shapes, you can create whole ornaments. Just pick up just two brighter and more saturated colors and start painting.
Wall decor with wallpaper in the children's room
One of the affordable ways to add variety to the interior is decorating the walls with wallpaper. Quite often, an unusual and original design of the walls is achieved by combining different textures and colors.
Stickers can be used to decorate a child's room. They can always be removed without damaging the wall covering, and replaced with new ones. Children are very fond of bright stickers with characters from fairy tales, cartoons or TV shows. Graceful butterflies on the wall for decoration will also look great.
Wall decor is a great way to show creativity, good taste and create a truly unique home interior.
A geometric pattern on the wall made in turquoise, gray and coral colors
A successful combination of orange and purple in the interior
Wall decor in the living room
9000Harmonious white and blue color in the interior of the nursery
Photo: DIY wall decor
SEE ALSO: Liquid wallpaper in the interior, 15 photos
Photo: DIY bathroom wall decor ideas
6 Bright stripes can be used in almost any interior
Comfortable and harmonious interior with the right combination of colors
Wall decor in the bedroom
Photo: wall decoration with stripes
Read also: color scotch tape Washi Tape for decoration: 125 photos with bewitching ideas
9000 9000 9000
SEE ALSO: DIY Wall Decor: 30 Painting Ideas with Photos0003
Pictures - a universal type of decor that fits into any interior
Bright wall decor in the children's room
Read also: drawings on the walls of the children's room
Exotic flowers on the wall - original bedroom decor
White and coral create a romantic atmosphere in the room
Abstract patterns are suitable for decorating medium to large rooms
stencils for walls - excellent alternative to traditional methods of wall decor
Read also: Great pictures luminous in ultraviolet
9000 9000 9000
2 kitchen
DIY wall painting
Photo: Deavita. com
com
We have:
90,000 how to glue various types of productsShare
Facebookgoogle+Pinterstvk 9000 9000 9000 9000 9000 9000 and apartments. It is possible to make a dream come true in the modern world with the help of extraordinary wall decoration. Stylish wall murals can seriously compete with decorative plaster and exquisite panels: how to glue them correctly and efficiently so as not to spoil the material and appearance of the room will be prompted by the recommendations contained in this article.
It is possible to achieve good results when sticking photo wallpapers by attracting experienced professionals, but it is quite possible to do the work yourself
Wall murals: features of the material and its advantages
interior. Good quality material is quite expensive, and therefore requires a special approach to gluing and care. Making a choice in favor of photo wallpaper, the owners take a decisive step towards revitalizing the interior. This unusual type of wall decoration can turn a children's room into a fabulous space, give a dynamic touch to a noisy city in the living room or, conversely, the tranquility of a spring forest, and create a romantic atmosphere in the bedroom.
Stylish wall murals can seriously compete with decorative plaster and exquisite panels. and films. Each consumer can choose the desired product, taking into account the financial capabilities of the family and the practicality of the material.
Interior with photo wallpaper looks very elegant. Canvases have a unique advantage, as they can fit into any style. It all depends on which image is chosen to create a particular design. It is quite possible to glue this material with your own hands, for this it is enough to study all the technological subtleties and select the appropriate material for the base.
The attractiveness of this type of coating is due to the brightness and realism of the images, so you need to start choosing wallpaper from your preferred picture, which should match the overall design of the room.
The exclusivity of the design of rooms with photo wallpapers: choosing the theme
Important! The theme of photo wallpaper should fit into the style of the interior. For example, images of architectural monuments are hardly suitable for modern design, and abstract scenes will not look good in country or Provence styles.
Wall murals have a unique advantage, as they can fit into any style
Taking into account the stylistic orientation and genre themes, murals are conventionally divided into the following groups:
- Nature motifs. This is the most extensive group in terms of subject matter, which includes panoramas of forests, steppes and mountains at different times of the year. This option is ideal if the goal is to fill the room with bright colors.
- Photowall-themed water calms and sets you up for relaxation. These can be landscapes of coastal sea and river zones, waterfalls, imitation of rainy weather outside the window.
- Animals on photo wallpapers. Images of representatives of the fauna will appeal to children. Stylists do not advise posting photos of aggressive wild animals that adversely affect the psyche. It will be much better if pets are watching from the wall.
- Photo of car and city. Wallpapers on the wall of this type will appeal to fans of progress, as they provide an opportunity to plunge into the modern environment and the dynamics of life.
- Art and sports themes will fit perfectly into the design of the bedroom - this is the choice for creative people.
Separately, it is worth mentioning the types of canvases containing illustrations of flowers. Wall murals of this theme look best in bedrooms. Images of white buds will fill the room with tenderness and lightness. Tulips, roses and orchids are especially popular in interiors. Flowers can be red, pink or yellow. They look beautiful both against a background of greenery and against a black and white background. For example, a room with tulips wallpaper, made in the same color scheme as the overall design, will indicate the taste of the owners.
The theme of the photo wallpaper must correspond to the purpose of the room
Styling features of the room and the design of the photo wallpaper
The chosen theme must necessarily correspond to the style of the rooms, since the overall design should not be contradictory. Stylists identify types of photo wallpapers that are suitable for certain interior styles:
- for oriental style, wallpapers with the image of sakura branches at different times of the year, hieroglyphs and mysterious buildings are recommended;
- photos of ponds, natural landscapes, cozy courtyards and various flowers will ideally fit into Provence;
- Snow-white winter landscapes and panoramas best match the Scandinavian style;
- for a loft, abstract drawings and graffiti should be selected, as well as textured brick-like wallpapers;
- Art Nouveau welcomes the image of cars, architecture and macro photography.
A wide variety of finishes can be used in contemporary styles. Almost any picture will fit here, the main thing is that it is combined with other interior items. These can be both reproductions of the classics and images of the city at night. Wall mural with an abstract pattern is suitable for almost any interior. The main thing is the matching of colors and shapes.
Photos of ponds, natural landscapes, cozy courtyards and various flowers will perfectly fit into the Provence style
Useful advice! Fans of experiments should pay attention to 3D wallpapers. Thanks to their property to visually expand the space, you can hide the flaws on the walls.
How to choose wallpapers for photo wallpapers: a play of shapes and colors
Photo wallpapers are placed on one wall, otherwise the interior will put too much pressure on the psyche. Therefore, it is necessary to choose the right companion wallpaper for photo canvases.
Panoramas or scenes with a perspective effect look especially beautiful when the wallpaper serves as a continuation of the photographic image. For example, a photo of an old street stretching into the distance, with old brick buildings, will perfectly complement the textured brick-like wallpaper.
When choosing products, special attention must be paid to the color palette. For example, for small rooms it is worth choosing canvases in light and pastel colors. For spacious rooms, such as a living room or a hall, darker specimens are also suitable. In the children's room it is better to glue bright options. Wall mural "World Map", framed by cheerful wallpaper in bright colors, will look great on the wall. Such a design will perform, in addition to decorative, also a cognitive function and will certainly appeal to the little owners of the room.
Wall murals are placed on only one wall, so you need to choose the right companion wallpaper
Be sure to familiarize yourself with a number of alternative options before buying photo wallpapers and choose the most suitable one. At the same time, the factor of psychological perception is also important. For example, photo wallpapers and accompanying canvases of bright flashy colors are unlikely to fit into the bedroom, but they will look quite harmoniously in a spacious living room or dining room. An excellent assistant in making the right decision will be a catalog of photo wallpapers.
Old wallpapering
This decor should look perfect on the wall. Among other things, there are many nuances related to this process. First of all, it is recommended to comply with certain requirements and rules. Only in this way can you expect to achieve the desired result.
Sufficient time should be given to such a moment as the treatment of the wall surface immediately before sticking the photo wallpaper. It is worth noting that if there are old wallpapers on the walls, then it is advisable to tear them off. This happens in different ways: in some cases with difficulty, and sometimes the wallpaper neatly and completely lags behind the wall. If the removal of the wallpaper occurs with some difficulties, then it is recommended to rip it off in small pieces.
Types of photo wallpapers: classification of materials
When choosing wallpaper for your home or apartment, you first need to decide on the image that will best fit into a particular interior. To better understand the species diversity of products, you should view the photo of the wallpaper. A coating is chosen for the wall not only taking into account visual and aesthetic characteristics - it is necessary to pay attention to their other characteristics. Photo wallpapers are divided into groups based on the following criteria:
- base material;
- texture features;
- presence of additional decorative effects;
- matches a specific style.
The base material plays a key role in ensuring the correct wallpapering technology, because the base material determines the reliability of fixing the paintings on the wall. This classification category is the widest and includes the following types:0003
- paper based wallpaper;
- sheets with a vinyl layer;
- non-woven photo wallpaper;
- wallpaper with a textile backing.
Good advice! In order to figure out how photo wallpapers are glued in a particular case, you need to study all the specific characteristics of the product, select the right adhesive and follow certain instructions.
Paper and vinyl wall murals: photo examples of wall designs
In the past, wall murals were produced exclusively on paper. In modern hardware stores, you can find products that are devoid of the main disadvantages of paper, characterized by easy sticking and a long service life. Still, paper wallpapers still find their consumer. The advantages of the material are environmental friendliness and affordable price. Paper-coated walls "breathe" easily, and any adhesive can be used. The disadvantages of photo wallpapers made of paper are in the properties of the material itself:
- quick wear;
- low strength;
- lack of moisture resistance, which contributes to the appearance of fungus and mold;
- sunburn;
- do not hide the flaws on the walls.
Thus, taking into account the above disadvantages, before gluing paper photo wallpapers, you need to make sure that the room is fairly dry and protected from excessive exposure to ultraviolet rays.
Walls with paper murals "breathe" easily, and any adhesive can be used.
Vinyl murals are opaque dense canvases with a soft two-layer base consisting of paper and PVC. Such a base has heat and moisture resistant properties, so the photo wallpaper can be washed and cleaned using various means. The surface also involves the application of any embossing. The material does not emit toxins, does not rot, mold and fungus do not multiply on it.
When glued, the material is able to stretch, making it easier to fix it in uneven corners and in places where the walls have a complex structure.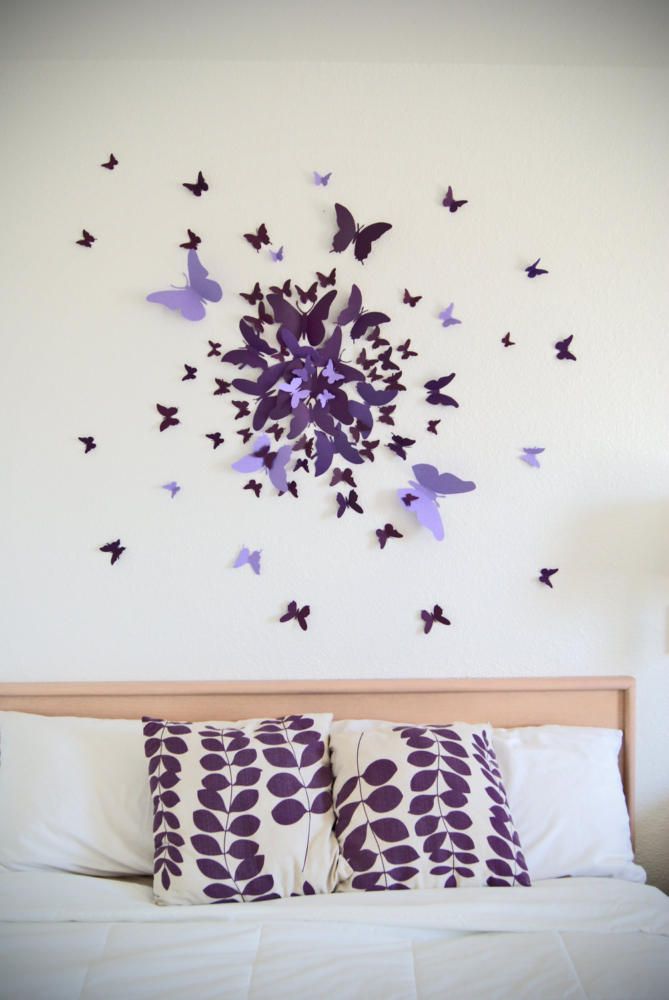 It is characterized by durability and strength. Texture helps to hide defects and joints. Cons - airtightness and high cost, for gluing a special composition is used, which is applied to the wall.
Textile and non-woven wall murals: features and characteristics
The non-woven base is a combined fibrous fabric that does not stretch even when wet and does not shrink when dried, thereby ensuring ease of gluing. The coating is easy to clean, so it is acceptable for decorating bathrooms and kitchens. At the same time, non-woven fabric is easily abraded and amenable to other mechanical influences.
Before gluing non-woven photo wallpapers, you need to purchase a special adhesive. It is applied exclusively to the walls, which eliminates the appearance of air bubbles and helps to hide irregularities, and the joints become invisible. Non-woven wallpapers are breathable, they do not pose a threat to human health, therefore they are suitable for decorating bedrooms, living rooms and rooms for children.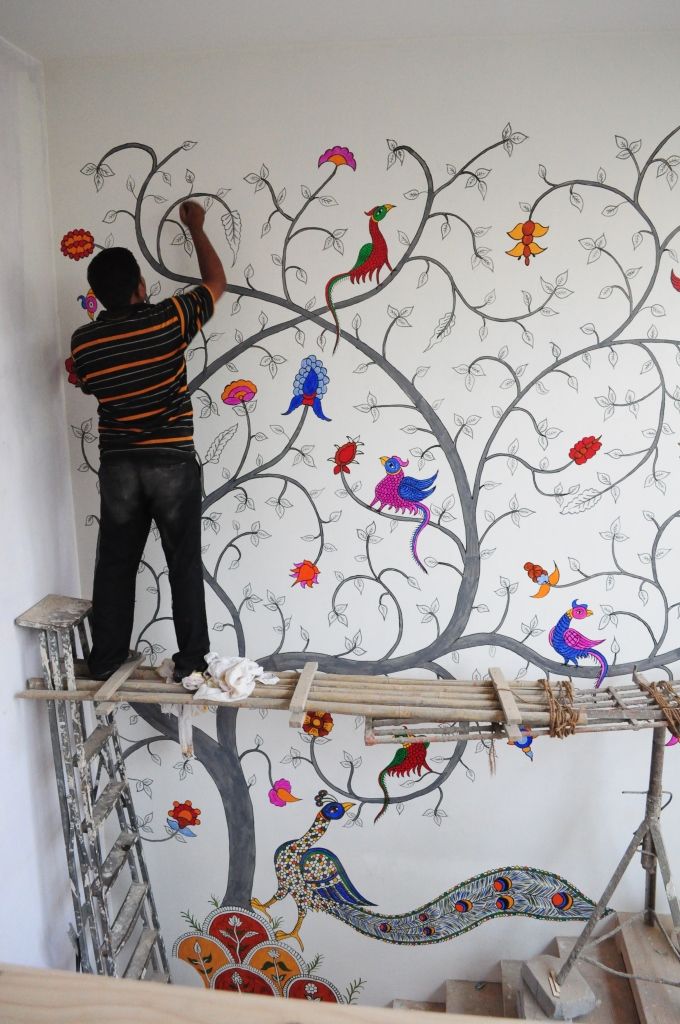
Before gluing photo wallpapers on non-woven base, you need to purchase a special glue
Good advice! Paper wallpapers can be made moisture resistant using lamination technology.
Textile wallpapers appeared a long time ago and have not lost their popularity. Their structure is a bottom non-woven-paper base layer and a natural fabric coating. Any image and photo on this type of wallpaper is easy to apply and hold perfectly. Cotton, linen, silk and even velor are used for their production.
Textile wallpapers do not fade when exposed to UV light. It is the textile coating that is best suited for creating images for high-resolution photo wallpapers and models with a self-adhesive coating, so this is the most expensive type of wallpaper. When gluing textile wallpapers, the wall is carefully leveled and primed, and the glue is applied to the canvas and aged for a certain time.
Ways of gluing
Let's look at the main recommendations and tips on how to properly glue paper-based photo wallpapers on the wall.
There are two ways to glue photo wallpapers:
- Overlap, when the edge of one fragment is pasted over the edge of the previous piece. This is possible due to the presence of a technological strip on the edges of the fragments, which is available on all types of wallpaper.
- Butt to butt, when this strip is simply cut off.
Types of photo wallpapers by texture: structure and application
The combination of materials in the production of wallpaper allows you to get a variety of textured surfaces, which makes it possible to reproduce the texture of the canvas, traces of strokes, plaster or a combination of them. The texture is obtained by embossing a vinyl or non-woven base. On paper wallpaper, you can get a glossy and matte surface. Fabric fabrics have their own unique texture.
Photowall-paper having a deep texture (up to 3 mm) perfectly hides small defects on the walls. The texture can be glossy or matte, without much relief, which does not allow you to hide flaws on the surface of the base.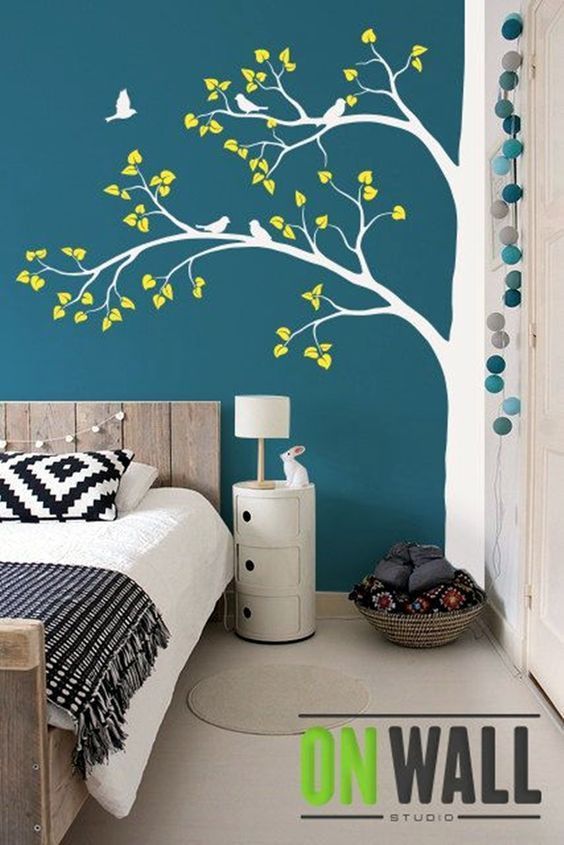 Walls must be leveled before wallpapering, and during operation they require constant maintenance. This texture is suitable for depicting landscapes and still lifes. For example, tulips look great.
A deeper texture (up to 3 mm) is used for painting-like wallpapers that hide small defects on the walls. Imitated strokes help to recreate the paintings of classical artists and the beauty of the world around them.
Article on the topic:
Wall murals for the kitchen: how to beat the interior in a capricious room to advantage
Color solutions for kitchen photo murals. Variety of cover designs. Options for expanding space.
The sandy texture consists of varying degrees of matt finish, allowing the light to diffuse without glare. Suitable for decorating various interiors. The disadvantage of the picturesque and sandy textures is the ability to quickly accumulate dust, so the wallpaper will often have to be washed or cleaned.
Plaster-like texture allows frescoes to be figured by combining smooth and embossed surfaces, repeating the contours of the picture. Wallpaper for walls of this type is used in the creation of Venetian plaster, as the surface becomes vintage.
Texture is obtained by embossing a vinyl or non-woven backing
Useful advice! Canvases depicting nature look great on the wall. Wall mural with a picturesque theme will help you relax after a working day. Before pasting such products, the walls must be thoroughly primed.
How to hide a joint contaminated with glue?
The simplest case is an excess of glue. If detected early, this problem is easier to fix. If the wallpaper is vinyl or non-woven, it is enough to wipe it with a clean, dry cloth. On a paper coating, the excess must be blotted without rubbing over the canvas. When they dry, you need to check the joints again.
Glue spots may turn yellow over time and appear in the drawing, later it will be difficult to hide them. If the wallpaper is dark, you can hide the remaining glue at the joints using a retouching pencil. Beforehand, the traces must be wiped with the stationery eraser .
3D wall murals: innovations in interior design
Innovative 3D wall murals constitute a special category of wall murals. This is the latest fashion in the photo wallpaper industry. Illusoryly, such products on the walls create an expanded space and help not only to convey the beauty of photographs with animals and plants that were taken using macro photography, but also to create a sense of presence in the image. With the help of such modern technology, it is possible to betray the infinity of outer space and the mystery of underwater objects, landscapes of nature and the night city.
3D wall murals will help you create a truly unique and exclusive design in any room. Such images look most realistic in combination with properly thought-out lighting and in the case of a floor-to-ceiling picture. Applying 3D photo wallpaper on the wall allows you to visually enlarge the space, which is ideal for small spaces.
Interior design with 3D effect wallpaper should be approached with particular care. It is necessary to take care of the lighting and the correct arrangement of furniture. Door versions of three-dimensional photo wallpapers look original, which can turn a doorway into a bookcase, a fireplace, a fairy-tale arch or visually continue the room with an image of a flower valley or a forest path.
A special category of murals are innovative canvases with 3D images
Wall murals: how to glue different types of products correctly
The main goal when gluing photo wallpapers is to get a whole picture. Wallpaper on the walls should not have bubbles, and the joints should not be noticeable. In addition, it is necessary that the adhesive has a reliable adhesion to the surface. You can achieve good results by attracting experienced professionals, but it is quite possible to do the work yourself, following clear instructions. Such savings will allow you to buy material of higher quality.
Even before the start of work, it is necessary to prepare inventory and materials:
- plaster mortar;
- putty;
- spatula;
- plaster primer;
- wallpaper primer;
- plastic container for mixing glue;
- appropriate type of adhesive;
- warm water;
- margin scissors;
- utility knife for double trimming of overlapped joints;
- building level;
- plumb line for vertical marking;
- pencil;
- brush and roller for applying glue;
- narrow rubber roller for ironing joints,
- ruler;
- square for marking sheets and walls;
- tape measure;
- clean cloth;
- sponge;
- ladder;
- stool.
The main goal when sticking photo wallpapers is to get a whole picture
Useful advice! Before gluing wallpaper on the wall, you need to prepare the surface and the adhesive solution.
The packaging of any glue contains detailed instructions.
The preparation of glue requires a certain sequence of actions. First, warm water is poured into a container, and then the dry composition is gradually poured until the desired consistency is obtained. After a few minutes, the solution is stirred, eliminating lumps, and brought to homogeneity.
Features of the choice of adhesive for different types of photo wallpapers
Particular attention should be paid to the choice of adhesive, which determines the reliability of fixation and durability of wallpaper. In this case, it is necessary to take into account the following points:
Particular attention should be paid to the choice of glue, which determines the reliability of fixation and durability of the wallpaper
- For wallpaper made of paper, which are light and thin, you can take any adhesive solution. It is important here not to let the paper get wet. If you delay, the wallpaper will get wet and stretch, and when dried, it will shrink, which can lead to the formation of defects.
- Wallpaper adhesive must have a transparent and thin consistency with an admixture of antiseptics.
- During the preparation of the adhesive solution, the appropriate thickness must be observed for each type of wallpaper base. The denser the texture of the canvas, the thicker the glue should be.
- The adhesive mixture must not emit a strong odor.
- The adhesive package must be intact and dry.
- The quality of the wallpaper must be checked before applying the adhesive. The product that has been in contact with the solution cannot be replaced in the store.
If you are going to decorate the room with photo wallpaper or decoration with a three-dimensional effect, then it is better to refuse such an idea. The fact is that on the newly glued wallpaper, the relief and imperfections of the wall surfaces will be visible.
The same applies to gluing single-coloured smooth rolls onto embossed cladding. There is a very high probability that in this case all the bumps and bulges will necessarily appear on the fresh wall finish.
Which types of wallpaper can be re-coated?
So, let's take a closer look at whether it is possible to glue new wallpapers on old ones, depending on their types. So, we have already found out that gluing photo wallpapers on paper is not a good idea. However, there are such types of wallpapers that cope with this task:
- From paper. It is possible to paste over a wall over an old paper coating without the slightest fear. Suffice it to recall the old days: often a whole “layer cake” was hidden under a layer of wallpaper. Now such rolled materials have become much denser. Therefore, gluing paper trim in several layers will be a difficult idea. However, one or two layers on top of the old one are quite acceptable. The advantage of paper wallpaper over others is that such a base copes well with all the roughness. The canvases will fit snugly against the wall, and the second layer will be waterproof, easy to stick and will last long enough. It is important to ensure that the new sheets are darker than the previous ones.
Otherwise, the coloring may show through the fresh cladding.
- Fiberglass. Gluing canvases on fiberglass is quite acceptable. It becomes a good base that can hold any type of wallpaper rolls. However, it is recommended to apply a primer to the fiberglass beforehand, which will make the adhesion even better. The only important thing is that thin paper sheets should not be glued to fiberglass with a relief surface, since all these veins are guaranteed to appear in all their glory.
- Liquid wallpaper. They are also well suited to serve as a base for pasting paper sheets. So, their main advantage is that they leave behind an absolutely smooth pattern.
How to hang photo wallpapers: how to prepare the surface
One of the conditions for good wallpapering is the preparation of the walls. The surface must be smooth and clean, which will ensure a snug fit of individual elements and masking of joints. First you need to carefully inspect the walls for bumps, dents and depressions.
If the wall is very curved, then care should be taken to level it with plaster or drywall. If there are only some defects, then it is recommended to carry out the following stages of wall preparation:
- remove old coating and loose plaster;
- remove the plinth;
- remove electrical switches and sockets;
- remove nails, screws;
- level the walls;
- primer.
To make it easier to remove old wallpaper, it is recommended to moisten the wall with water and wait 5 minutes until the adhesive dissolves and the wallpaper leaves the surface. After that, apply a layer of penetrating primer and wait for it to dry. The primer must be applied to a completely dry surface.
Important! You can not glue products on old canvases, because after drying, the old image will show through the beautiful photos on the wallpaper, which will ruin the whole look.
One of the conditions for high-quality wallpapering is the preparation of the walls.
Their presence can be determined using a level or a plumb line. After the plaster has dried, the irregularities are rubbed with putty. Two thin layers of a special primer are applied to the walls. It is advisable to treat corners and places near windows with a fungicidal solution to prevent the appearance of mold or fungus.
Things to consider
- The depth of the textured pattern, which should not exceed 0.2-0.3 mm, otherwise the previous ornament will be noticeable on the new surface;
- The gluing process should be as easy as possible;
- It is important that the surface of the old coating is moisture resistant.
To prevent the bright pattern or pronounced figures of old wallpaper from being visible on the new surface, you need to choose an image with dense vegetation, a pattern of a forest grove, as well as numerous city lights. Even if there are minor errors, they will not be noticeable.
When it is planned to stick on vinyl wallpaper, the base should be paper, and glue should be chosen only of high quality.
If all the above points are not taken into account, it is better to remove the old ones and stick the new ones on a clean surface.
How to hang wallpaper seamlessly on a wall: workflow
Wallpaper is usually 53 or 100 cm wide, so it's fairly easy to hang it on walls in vertical stripes. A seamless canvas 2.5 or 3 m wide is often used as photo wallpaper. Moreover, their length can reach 5 m. The most common option is wall murals 3 by 3 m. wall planes.
The basis of seamless webs is usually made of interlining. There may also be a paper or fabric base. Photo wallpapers are glued using a special technology. In the process of preparing the wall, it is required to ensure that the external and internal corners are strictly perpendicular to the floor and ceiling, and the wall itself does not have protrusions. It is necessary to use exclusively adhesive composition for heavy wallpaper, which should have a thick consistency. The glue is applied gradually to small areas of the surface and this part of the canvas is immediately glued.
It is best to start work from a place that is least exposed to the view, for example, from the corner where the curtains will hang. Wallpaper from above and below is fixed with special slats, and then leveled with a rubber spatula or roller. Having pasted approximately half of the canvas, you should check the perpendicularity of the image using a level.
The basis of seamless sheets is usually made of non-woven fabric
If necessary, cut openings for windows and doors, holes for switches and sockets in the wallpaper. When the entire surface is pasted over, you should carefully and evenly cut off the excess wallpaper. It is better to remove the slats after at least 24 hours - after the canvas has completely dried. It is better to glue seamless ready-made photo wallpapers on the wall together: one holds and unwinds the roll, and the other spreads and glues. Even an experienced master cannot do this on his own.
How to glue murals on the wall, consisting of 4, 8, 12 parts
Pictures, consisting of several fragments, you need to start gluing from the center of the room or from the edge of the future image.
To do this, you need to first lay out the composition on the floor and make appropriate markings on the wall. The white stripes that are on the edges of each piece must be carefully trimmed using a utility knife or scissors.
Good advice! It is recommended to start gluing photo wallpapers consisting of 4 fragments from the center, and from 12 parts - from the edge of the picture. It is important to ensure that the whole image is obtained.
The pasting process itself is the following sequence of work:
You need to start gluing photo wallpapers from left to right from the first to the last strip
- Drawing a clear vertical line on the wall, from which the wallpapering begins. This can be done using a laser or conventional building level. A homemade plumb line will do.
- Measuring the dimensions of photo wallpaper and its fragments in order to determine the place for each part. At this stage, the proportionality of the corners is also checked and the location of doors, windows, switches, sockets, niches and recesses on the walls is taken into account.
- The sheets are folded face down in such a way that the first (in the order of gluing) sheet lies on top.
- Application of a layer of adhesive and direct bonding of the sheet to the marked spot on the wall. This must be done slowly and carefully. It is necessary to once again check the coincidence of the markup with the edges and only then level the surface.
If the wallpaper has special stock strips that are much thinner than the main canvas, then overlapping wallpaper is required. The overlap strip is cut exactly in the middle, the edges are once again smeared with glue and the junction of the canvases is carefully rolled with a rubber roller.
Marking, numbering, preparation
Correct marking is especially important for multi-part photo wallpapers. You need to do the following:
- Lay out on a flat, clean surface - on the floor or a large table - all parts of the photo wallpaper to get an idea on which wall they will look best, which parts and in what places can be cut off without damage to the image, and for measurements of each panel for wall marking.
- Label each item with a serial number on the reverse side and stack face down for easy access.
Important! It is recommended to start gluing from the window, from above. This should be taken into account when numbering.
- Mark the wall with a long ruler, a simple pencil, a spirit level, drawing a vertical line a few centimeters from the corner from ceiling to floor.
- Draw a grid along the first vertical line, the height and width of each cell of which should match the size of the panel.
USEFUL INFO: How to hang ceiling wallpaper
Depending on the size of the drawing, eight fragments can be placed in a vertical or horizontal two-lane grid with four cells in each row. Wall murals can be pasted vertically and horizontally - it all depends on the preferences of the master. Before starting work, it is necessary to check each panel for pattern compatibility.
Wall mural fragments usually have white borders.
For convenience, some of them need to be cut off before gluing.
- The field of each fragment is cut off from the side of light incidence (window location).
- If gluing will be done from top to bottom, the top margin is cut off; if from bottom to top, the bottom margin is cut off.
How to glue photo wallpapers with different bases on the wall: general recommendations
When sticking photo wallpapers with your own hands, you should carefully study the instructions that come with glue and wallpaper with different bases and textures. It is also useful to study more detailed step-by-step instructions for gluing different types of canvases and watch the thematic video “How to glue photo wallpapers on a wall”.
The surface of the walls should be marked according to the pattern laid out on the floor.
The average drying time of wallpaper is approximately 2-3 days. During this period, it is strictly forbidden to open windows so as not to provoke a draft, and it is also impossible to deliberately increase the temperature in the room in order to speed up the drying of the wallpaper.
Temperature fluctuations can cause the canvas to peel off, and high humidity will contribute to the appearance of bubbles.
If bubbles appear, proceed as follows. Take a medical syringe with a thin needle, draw some glue into it, pierce the bubble and squeeze some glue inside. Next, the area is glued and smoothed, and the excess glue that appears is removed with a dry cloth. Sometimes a construction knife and a thin brush are used to get rid of bubbles, but, according to experts, the trick with a syringe is more convenient and practical.
How to glue paper photo wallpapers: step by step instructions
General recommendations for wall pasting apply to all types of wallpaper, but each of them (due to the features described above) requires an individual approach to gluing.
Important! The wall under paper wallpaper must have a perfectly flat surface!
Instructions for working with paper-based photo wallpapers:
When sticking paper photo wallpapers, glue is applied both to the wallpaper itself and to the wall
- Before sticking paper-based wallpaper, it is necessary to carefully level the wall and cover it with a primer.
- Mark the wall surface according to the pattern laid out on the floor.
- Next, trim the white margins (if any).
- Dissolve the adhesive in a clean plastic container.
- Turn the piece of photo wallpaper face down and smear the inside with adhesive.
- Apply adhesive to the area of the wall where the prepared fragment is to be pasted.
- Glue the sheet without delay, while the paper is still wet. It is best to glue the canvas from top to bottom.
- Smooth out the wallpaper section with a soft cloth.
The remaining parts of the photo wallpaper are glued in the same way, but it is necessary to immediately remove the adhesive residue with a dry rag. Then you should carefully inspect the joints and, if necessary, additionally lubricate them.
How to glue non-woven and vinyl wallpaper
Beautiful vinyl wallpaper is glued according to the same instructions, which includes the following steps:
Vinyl-based wall murals are glued using the same technology as paper murals
- Preparation of the wall surface, which is impregnation with a primer with two layers applied.
- Marking according to the dimensions of the wall murals.
- Prepare a thick adhesive solution according to the instructions for the adhesive.
- Spreading the first sheet, which is then folded in half and held for a certain time indicated on the package.
- Plastering the wall in the area where part of the photo wallpaper is supposed to be pasted.
- Gluing the canvas on the intended area.
- Thorough smoothing of the sheet.
The remaining parts are glued using the same technology, after which the seams are smoothed and recesses for switches and sockets are cut out.
The technology for pasting walls with non-woven photo wallpapers is slightly different from the instructions described above, although in general it involves the same cycle of work:
- From paper. It is possible to paste over a wall over an old paper coating without the slightest fear. Suffice it to recall the old days: often a whole “layer cake” was hidden under a layer of wallpaper. Now such rolled materials have become much denser. Therefore, gluing paper trim in several layers will be a difficult idea. However, one or two layers on top of the old one are quite acceptable. The advantage of paper wallpaper over others is that such a base copes well with all the roughness. The canvases will fit snugly against the wall, and the second layer will be waterproof, easy to stick and will last long enough. It is important to ensure that the new sheets are darker than the previous ones.
- Preparing the adhesive, which should be fairly thick. To do this, you must strictly follow the instructions on the package.
- Thorough application of the wall section where the fragment is supposed to be glued, but no glue needs to be applied to the canvas itself.
- The dry sheet is glued and leveled.
- All subsequent fragments are glued in the same way according to the applied markings.
- Cutting and taping seams for maximum adhesion and seam masking.
The technology of pasting walls with non-woven photo wallpapers involves carefully spreading glue on a section of the wall, and not on the canvas itself
Good advice! If the dismantling is carried out carefully, it is quite possible to re-stick photo wallpapers on a non-woven base. This makes it possible to eliminate errors if the sheet was pasted incorrectly.
How to glue 3D photo wallpapers on the wall: video instruction
Almost all 3D photo wallpapers are made on a non-woven base, so the technology described above is used for gluing. It is necessary to take into account the fact that the parts are produced without a stock, so 3D photo wallpapers on the wall are glued end-to-end. Three-dimensional canvases must be treated with special care, since the slightest damage to the picture can distort the overall perception of the picture. To avoid the consequences, self-adhesive wallpapers were invented. The process of gluing them is significantly different from the method of gluing walls with other types of wallpaper.
It is better to work with self-adhesive wallpapers in two people: one person carefully removes the backing, and the second one gradually glues the sheet, smoothing the surface with a rubber spatula. The protective layer is removed carefully: tear off approximately 5 cm and immediately glue the upper part exactly along the marked lines. In no case should adhesive surfaces be allowed to join, since it will no longer be possible to separate them. As a result, the wallpaper will be damaged.
The parts must be immediately glued exactly according to the marking, as they immediately stick and it will not be possible to move them from their place. In addition, you should work as quickly as possible, because the adhesive base without a substrate quickly loses its properties and dries out in a few minutes. Smoothing the surface must be done with a rubber spatula to avoid the appearance of air bubbles. If the bubble still appears, then it must be pierced with a needle, expel the air and carefully iron the surface.
Thus, working with self-adhesive wallpapers requires certain skills. The slightest oversights will entail at least the loss of the 3D effect, and at the most they will spoil the expensive material.
A well-chosen theme of photo wallpaper, corresponding to the style of the room, will provide an opportunity to create an original interior design. Properly selected glue and strict adherence to the technology of gluing a particular type of product will ensure high-quality fixation of photo wallpapers on the wall. The photos and tips given in the article will help you avoid mistakes and get an excellent result, which will allow you to admire the picturesque landscapes, beautiful sunsets or the mysterious underwater world for a long time.
Textile
Such photo wallpapers are made from cotton, linen, silk and other natural materials, therefore they are considered elite, they are very expensive.
The gluing technology depends on the type of basis for textile photo wallpapers, which can be:
- paper;
- non-woven;
- PVC.
The method of gluing depends on the type of backing and the density of the wallpaper:
- Fabric options are easy to attach to the wall, they have a light and soft backing.
- Paper wallpapers are mounted with ordinary glue intended for plain paper wallpapers.
- Self-adhesive fixed without glue, already sold with a sticky layer, it is enough to remove the protective film.
- Textile wallpapers can mask uneven wall surfaces. There are their single-layer options, which are considered classics. They are attached with an adhesive applied to the wall. An adhesive designed for vinyl wallpaper, or Bustilat, is used.