Diy install patio door
Installing sliding patio doors: a step-by-step guide
When you purchase through links on our site, we may earn an affiliate commission. Here’s how it works.
(Image credit: Kate Sandhu)
Join our newsletter
Thank you for signing up to Realhomes. You will receive a verification email shortly.
There was a problem. Please refresh the page and try again.
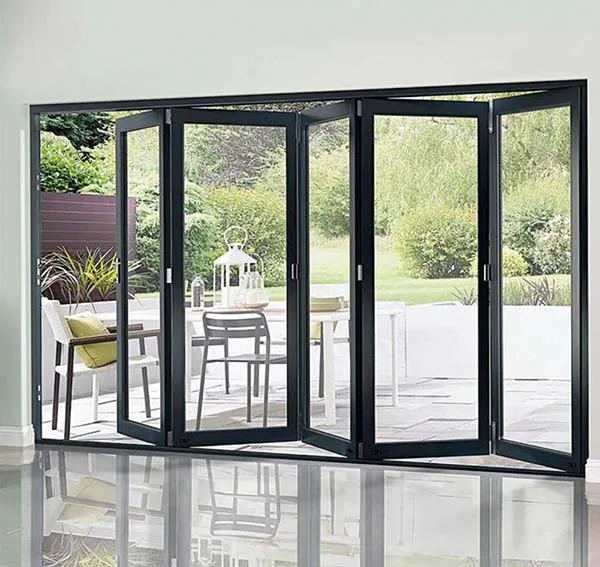
By submitting your information you agree to the Terms & Conditions and Privacy Policy and are aged 16 or over.Installing a sliding patio door in your home is an amazing way to fill your house or outdoor office with sunlight and help bring the outside in.
Though it can be a fiddly job, it’s definitely achievable, especially if you’re already a handy person and confident at DIY – perhaps you have hung a door before. If you’re installing internal sliding doors, you have a little more room for error; even if something doesn’t hang quite straight, whilst it will be annoying it won’t impact home security.
External doors are another story though and you need to get everything right to avoid damp, draughts, and the risk of break-ins. Do consider where you’re installing the doors too – it’s advisable not to install them at the front of the house as it may make you more susceptible to burglaries. They are however a great addition to space for that seamless outdoor-indoor living vibe.
Follow these steps below to install your sliding doors and let the light flood in!
Difficulty: Medium, fiddly and you’ll need two of you so rope in a patient buddy
Approximate cost: Varies based on the material (wood, aluminum, uPVC) and whether they’re prehung. Here we’ve used a pre-hung uPVC door which you can expect to pay anything from $1,000 upwards for (or from around £700 in the UK). They’re the easiest to install because they go in as a single unit. You won’t need to assemble the frame before installing it on your wall.
Time: Leave aside an afternoon
Before
(Image credit: Kate Sandhu)
We have an outbuilding that has been converted into a garden office.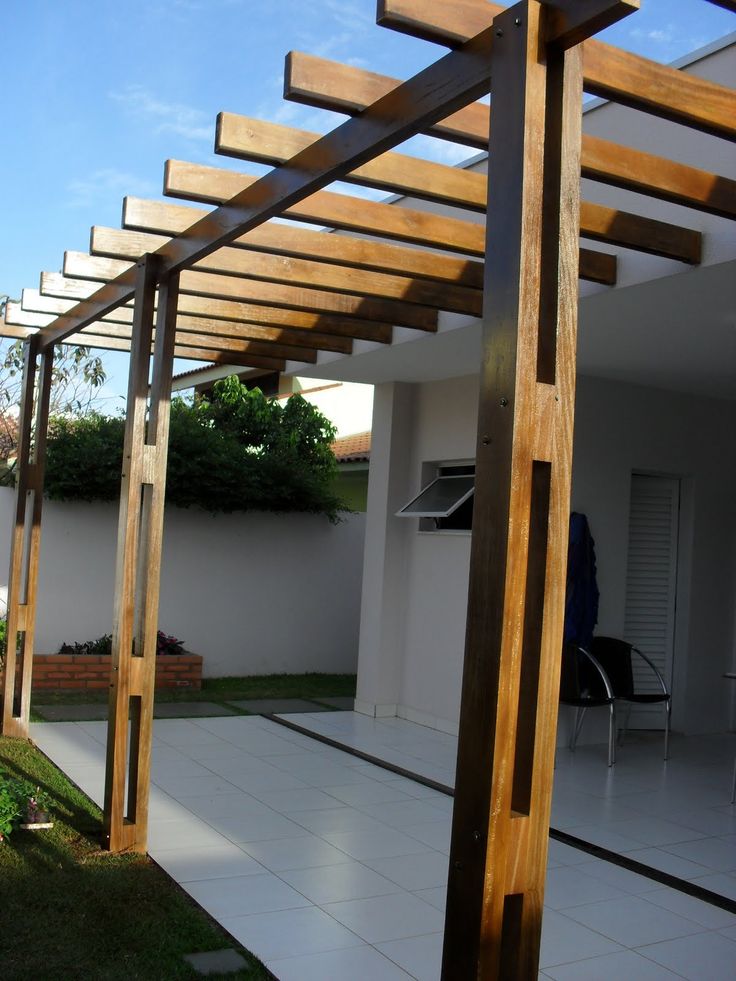 We wanted to make the space more enjoyable, by increasing natural light.
Preparing to install the doors
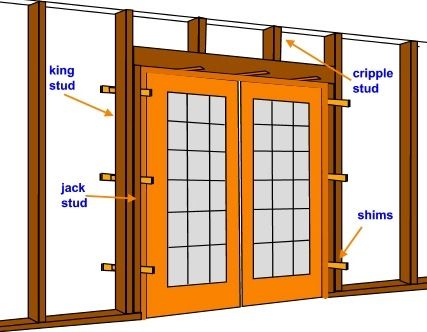
When shopping for the doors you need to know the exact size of the opening that the door needs to fill. If you’re creating this opening (per step 1, below) then you have more flexibility in choosing the doors, if there is already an opening then use a tape measure to measure the full width of the hole. Measure from stud to stud.
- Measure both the width and height of the opening. Write down these measurements so you can refer to them when shopping for a door.
- Before you measure, make sure to remove any boards or shims that may have been added to make the old door fit.
How to install a sliding door
You can purchase a sliding glass door either online (check the reviews) or from a home-supply store such as Home Depot , if you go to the store then be sure to bring your tape measure with you.
Shopping list:
1. Sliding doors: (we suggest buying those that come prebuilt with the frame and doors as one, they are easiest to install)
2. Tape measure
3. A pencil
4. A sledgehammer (if removing any wall for the door to be installed)
5. A crowbar (if removing an existing door)
6. A screwdriver
7. A spirit level
8. A dustpan and brush
9. 1 x 3 centimeter plywood as needed to infill the space for the doors
10. Nails
11. Flashing tape
12. Screws (per the manufacturer's instructions)
13. Fiberglass installation : (optional if there are gaps from fitting the door)
14. Waterproof sealant
1. Prepare the space for the door
(Image credit: Kate Sandhu)
Make the space for the door in the wall or remove the old door. If you’re creating a space from a wall then you will need to remove bricks or breeze blocks using a drill and sledgehammer and then infill any brickwork as needed, ensuring the hole is as near as possible to the size of the desired doors (we will cover any minor adjustments needed in further steps).
If you’re removing an old door, remove the adjustment screws on the bottom of the door, raise the door rollers and ease the door out by tilting it forward and slipping it out. Once it’s out, take out the frame, using a crowbar to prise it from the hole.
2. Clear up the space and ensure the gap is accurate
(Image credit: Kate Sandhu)
You’re likely to have a bunch of nails, screws, and dirt in the space if you’ve removed a door or created a new space for one so you need to clean up and adjust the opening. That means getting rid of any leftover nails or torn material. You may also need to adjust the opening if it’s not quite the right size.
Use a spirit level to make sure that the top, bottom, and side frames of the opening area are all level. If any aren’t level, you can use a shim (a thin piece of wood) to even out the door frame. If the frame is slightly too large for the sliding door you purchased, nail in one or more strips of 1 x 3 centimeter plywood to adjust the size of the opening to the correct size.
3. Make watertight and install the door
(Image credit: Kate Sandhu)
Add flashing to protect from water damage before installing the door. Flashing is a type of adhesive, waterproof tape that will protect the door frame and lower edges of the sliding glass door from water damage and stop water seeping through the edges of the door.
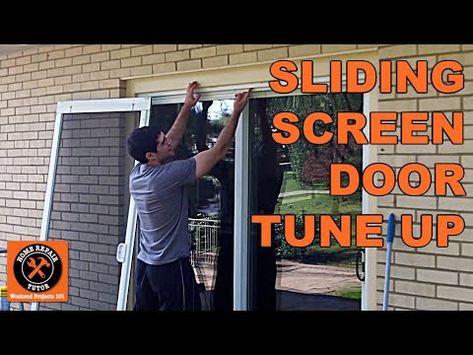
Apply a layer along the bottom sill of the door frame, letting the tape hang over the outer edge of the frame so you can bend the tape over and press it down on the external side then apply around 40 centimeters up each side from the floor up. Installing the door is a two person job; get a buddy to help you lift and carry the door inside the house and push it into position in the large opening.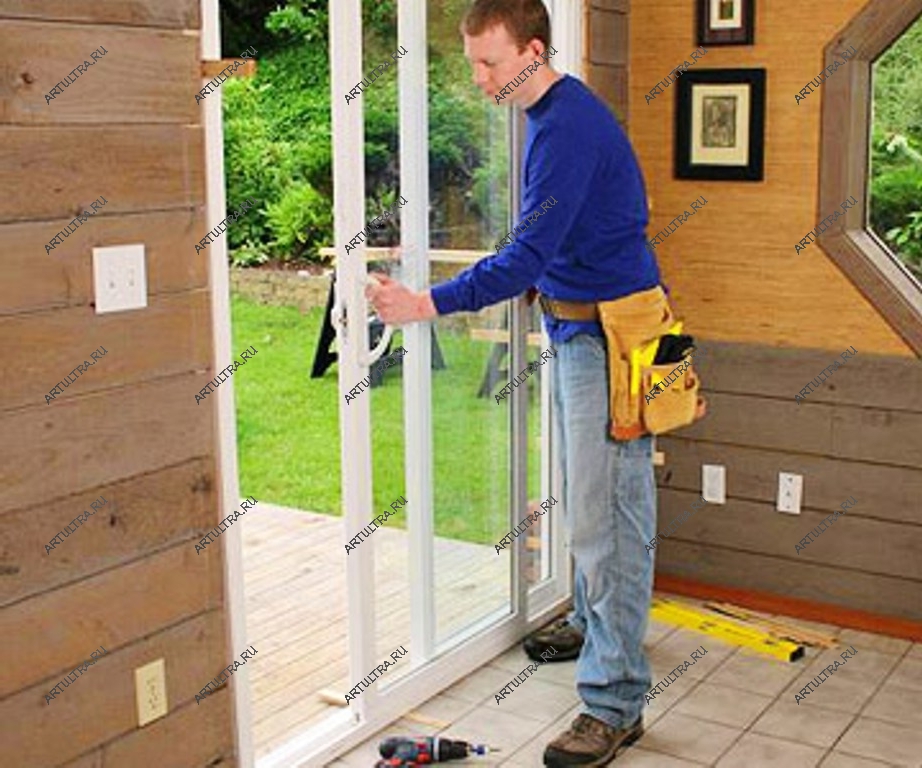 Make sure you position it the right way around so you don’t install it backwards, check that the lock is on the correct side.
Use a spirit level to check it is perfectly straight, this is the most important step in the process! Once you’re sure everything is level then screw the frame in place as per the manufacturer’s instructions, ensuring that you check where the screws need to be before fixing everything down. If you do have any gaps you’re worried about, you can put some fiberglass insulation into these spaces. This will prevent your house from losing heat around the frame.
4. Seal the door and remove protective covering
(Image credit: Kate Sandhu)
Use a waterproof sealant around the sides to ward off any water that might sneak in around the door frame. Double-check for holes, cracks, or gaps and make sure it is totally draught, and waterproof. Once this is dry you should be good to go! Remove any protective tape or coverings and dress the area with curtains, blinds or any door furniture then sit back and enjoy!
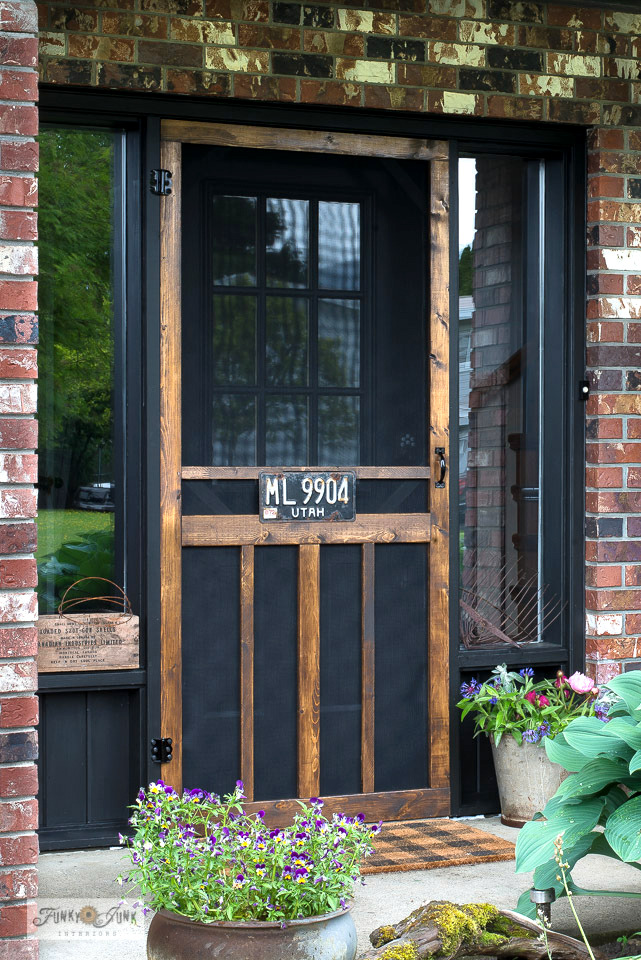
After
(Image credit: Kate Sandhu)
We chose black door frames to match the black brick of our outbuilding.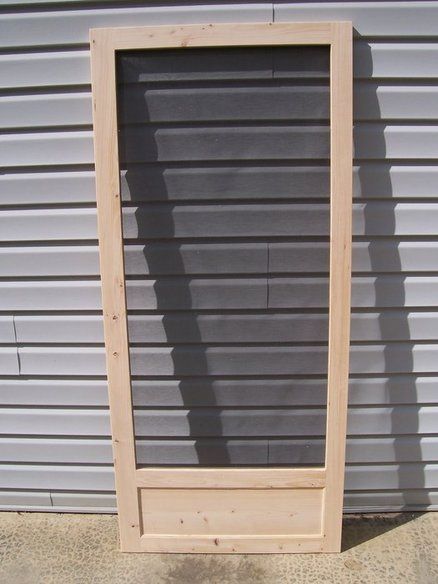 We now get plenty of light in the space and can open it to the outside on warm days for a cool breeze.
Do sliding patio doors slide inside or outside
This type of patio door should always be fitted so that the door slides to the inside of the fixed frame. The doors are designed this way so they are more secure.
When you have finished installing your doors, take this sliding element into account before placing furniture. The doors won't protrude far into the room, but you can't put any furniture too close to the mechanisms or you won't be able to open them. Still, they are a good option where space is tight, as you don't have to allow for them opening.
I’m a DIY and renovation expert from a family of renovators; it's in my blood! Renovation is my passion and I love sharing my knowledge, either through my Instagram renovation tips or my renovation course. I love seeing how it helps others build the confidence to create their dream home without it costing the earth!
How to Replace a Sliding Glass Door Yourself
DifficultyChallenging
Only DIY if you know what you're doing.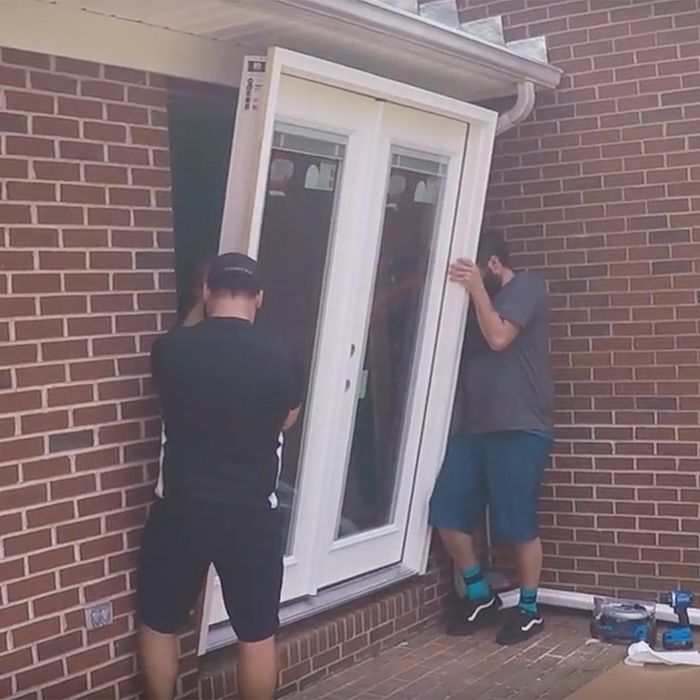
3 hours
$500–$1,000
You’ll spend a lot on supplies, but you may still save money by DIYing.
Need professional help with your project?
Get quotes from top-rated pros.
What you'll need:
TOOLS
- Screwdriver
- Hammer
- Mallet
- Tape measure
- Four-foot level
- Power drill
- Nail gun
- Pry bar
- Reciprocating saw (optional)
- Table saw
- Work shoes
- Safety gloves
- Safety goggles
SUPPLIES
- New sliding door kit
- Flexible flashing tape
- Waterproof silicone caulk
- Expanding foam
- Wood shims
- Trim (optional)
- Plastic tarps
- Painter’s tape
Upgrading your sliding glass door does more than freshen up your patio—it can also provide better insulation and welcome more natural light indoors. Home DIYers with construction experience under their belts will feel the most comfortable with this complex project.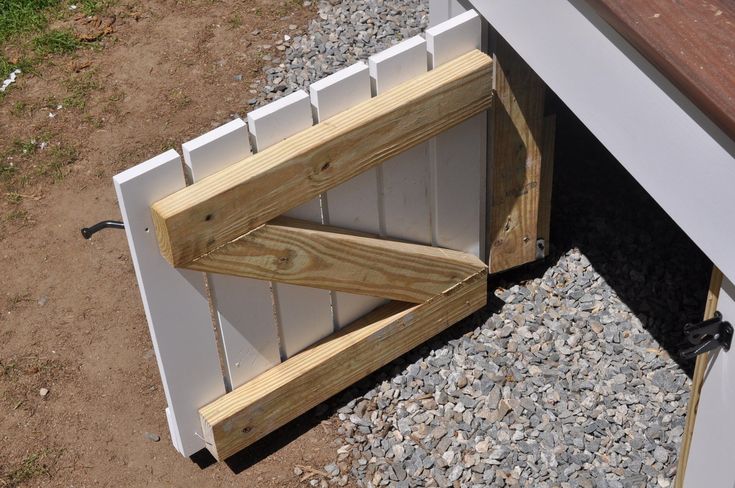 If you're removing a sliding glass door and replacing it with a new one of the same size, here's how to take on the project.
Prepping to Replace a Sliding Glass Door
It's important to feel comfortable working with saws and power drills and handling potentially old nails and framing for this DIY. For this reason, don't skimp on the personal protective equipment (PPE) and follow all instruction manuals to a T.
Removing the door panels and lifting the new frame requires at least two people, so call on a helper for an extra hand.
One last caveat: if you're replacing a sliding glass door in an older home or into a visibly rotting wooden frame, it's important to call a professional door installer.
Purchase a Replacement Door
Begin by identifying your current sliding door. Find the model or serial number on the lower corner of the glass or inside one of the door panels along the frame.
If you can't find the model number, note the brand of the door and break out the measuring tape.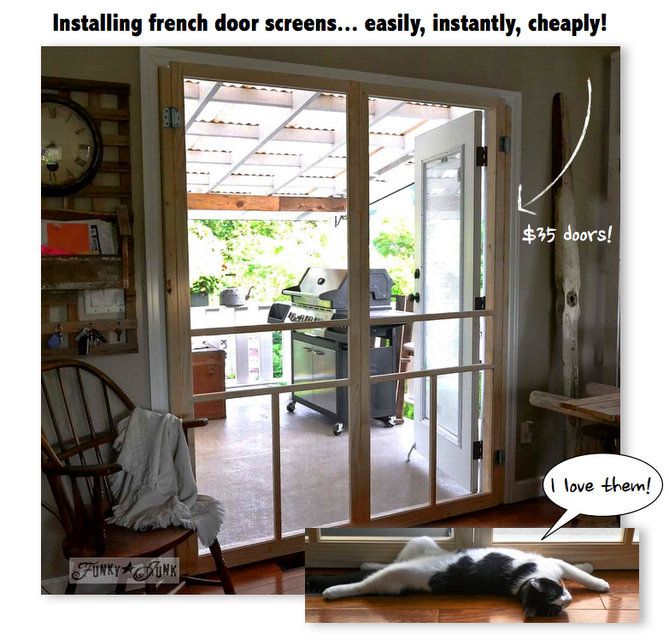 Measure the width of the door from frame to frame, staying inside the exterior trim. Measure the height all the way to the bottom of the threshold and to the upper trim.
Your sliding door will likely come in a standard size, such as 60 by 80 inches. If your current door is a custom size, call in a contractor for assistance with choosing and installing a sliding door.
Once you have the new door of your dreams, read the instruction manual from cover to cover. There will be specific instructions regarding the hardware included in the packet.
Remove the Stationary Panel
Start by removing the fixed stationary panel of your old sliding door. Use a screwdriver to remove the stationary panel brackets, typically found at the top and bottom of the inside of the door. Tilt the door inwards—it may need a bit of a shake—and delicately remove the door with the help of a friend.
Remove the Sliding Panel
Photo: Toa55 / iStock / Getty Images Plus / Getty Images
The sliding panel should be a bit easier to remove.
 Use a screwdriver in the roller adjuster hole at the base of both sides of your door. Lower your door as close to the track as possible by turning the screws counterclockwise. This will provide extra wiggle room between the two tracks. Just like you did before, tilt the door off its track with a lift and a push and remove it with a friend.
Disconnect Exterior Trim
The exterior trim encircles the interior and exterior door frame. Delicately pry it off, taking care not to damage your home's siding or interior wall. If the trim is in good shape, save it for later in the project.
Loosen the Frame
Depending on the age of the frame, you should be able to loosen it from your home with a pry bar or a reciprocating saw. Remove any visible and easy-to-access nails from the frame as well. Note that this process does take a bit of strength and trial and error—as you will be cutting through sealant, nails, and shims.
Loosen the Threshold
Unscrew the threshold and place your pry bar under the sill plate to loosen the caulk.
 The threshold was likely heavily caulked to the base of your door, so you may need to tilt it back and forth to loosen it further.
Remove the Old Frame
Using two sets of hands, tilt the frame toward the exterior of the house and disconnect it from the top, sides, and threshold. The whole frame should come out in one piece.
“When replacing an exterior door, whether a single door or a large sliding glass door, we plan for the worst,” says Bob Tschudi, Angi Expert Review Board member and general contractor in Raleigh, NC. “Once you remove a sliding glass door, you have a huge hole in the side of a house that needs to be protected. At a minimum, use a plastic tarp and painter’s tape to close off the opening. If the opening is going to be there overnight, you need to close it with a solid barrier, such as OSB plywood.”
Check for Damages
Take this moment to reassess the rough opening of your door for wood rot. You may need to call a local contractor to replace or reseal the wood surrounding the frame during this phase.
 Also, double-check that the threshold and sides are level so you can prepare shims during installation if necessary.
Install Waterproof Flashing
Hardware stores sell rolls of waterproof flashing tape for windows and doors. Begin by covering the floor sill with tape and folding the tape over the edges to cover the whole sill. You may need flexible tape to get into the corners of the doorsill. Place the tape all the way around the rough opening, including the sides and top where the door frame will sit.
“If you’re a DIYer, this is a critical step, and doing it right will save you a lot of time and money down the road,” says Tschudi. “Take the time to research how to install waterproof flashing tape correctly.”
Caulk the Frame and Sill
Choose a waterproof silicone caulk for interior and exterior use. Make sure to follow your instructional manual closely here. Add a line—known as a bead—of caulk to the inside of the new door's flange. The flange surrounds the door frame, so it mounts onto your wall.
 Next, add two lines of caulk to the sill itself.
Attach the Frame Along the Nail Flange
Photo: Jodi Jacobson / iStock / Getty Images Plus / Getty Images
With the help of your buddy, line up the door outside your home and tilt it into place so the base of the frame adheres to the caulk on the sill. The caulk of the flange should press into the sides and top of the rough opening as well.
Ask your helper to hold the door in place as you ensure your door is level and evenly upright—known as being "plumb." Use your level to test the top of the door and the surface of the door itself to ensure it’s both upright and leveled out. If not, you'll need to add shims under the sill or along the side of the frame before you secure the final screw.
Keep the shims and level in place as you screw into the precut holes on your frame. Trim the shims with your reciprocating saw so they're flush with the house.
Install the Panel
Check your instruction manual for how to install the sliding and stationary door in the track.
 In most cases, this simply involves tipping each panel into place and screwing in the brackets and interior headstop—a strip of wood at the top of the frame that keeps the door from tipping out of its track.
Test the Door and Adjust
Test your door by sliding it back and forth and making sure it lines up with the locking mechanism. You’ll find a small, adjustable screw at the base of your door that heightens or lowers the roller adjusters.
Seal the Interior and Exterior
Photo: LSOphoto / iStock / Getty Images Plus / Getty Images
Seal up the interior and exterior seams between your door frame and the rough opening with a line of expanding foam insulation or a strip of foam insulation cut to the size of the opening. Close up the area with silicone caulk.
Attach the old trim—or cut new pieces with your circular saw—to the interior and exterior of your door frame. Use a nail gun to secure the trim in place.
DIY Sliding Glass Door Replacement vs.
 Hiring a Pro
Sliding glass doors cost between $400 and $10,000, depending on the size, style, and brand. Labor to install the door will cost an extra $400 to $1,400, not including having a pro haul away the old door or finish additional repairs to your home.
While you can save money by installing a sliding door yourself, it’s not always the safest or most cost-effective option. An incorrect installation could leave you with an unlevel door, a door that lets in cool breezes, or even a sliding door that leaks.
Frequently Asked Questions
If the manufacturer still makes your sliding glass door panel, it’s easy to switch the sliding or stationary side with a new one. Otherwise, work with your manufacturer to find a corresponding model.
Replacing the glass on your sliding door is a great way to save money if you're trying to improve insulation or simply enhance the look of your doors. Keep in mind that this is only a viable option if the rest of the panel and the door frame are in good shape.
Lower your door as much as possible by turning the roller adjuster screws counterclockwise—located at the base of your door in a covered hole. With more space between the track and door, lifting it off its track should be easier.
Do-it-yourself front door installation: step by step guide (15 photos)
05/24/2020
Read in 10 minutes.
Listen to article
90
189130
Installing a door affects safety, sound and heat insulation. Installing a front door is a complex process, so it is better to entrust it to professionals. Any violation can degrade the properties of the door. For example, the door will no longer hold cold and loud sounds, drafts will appear in the apartment. Poor installation sometimes leads to damage to the door structure, and this is already unsafe. nine0003
It is possible to install the front door yourself if you strictly follow the rules. How to install the door - we tell in the article.
Content
- Door installation tools
- Do-it-yourself front door dismantling
- Preparing the doorway for installation
- Removing the door leaf
- Door handle installation
- Apply masking tape nine0019 Filling with mineral slab
- Installing the frame in the doorway
- Installing the door leaf in the doorway
- Foam filling
- Removing the protective film
Door installation tools
The fittings of the front door must meet 3 main requirements:
- Hammer drill / drill / screwdriver
- Pencil
- Screwdrivers
- Hammer
- Level
- Nail puller
- Roulette
- Knife
- Household sprayer
Are all the tools ready? We proceed to the installation of the door.
1. Do-it-yourself front door dismantling
1) Remove the plaster if it closes the door frame
2) Remove the door leaf from the hinges. Please note that welded loops must be cut with a grinder. If the hinges are collapsible, lift the door up (by placing a tool under it), so it will come out of the hinges. nine0003
Dismantling of the door leaf by a specialized Torex team
3) Remove the door frame. The metal box is mounted firmly. To remove, remove the anchor bolts or self-tapping screws with a perforator. If slopes are installed, first remove them with a puncher.
Dismantling of the old box by a specialized Torex team
If there are welded elements or self-tapping screws are not removed with a screwdriver and a puncher, arm yourself with a Bulgarian saw with a disc tip. You can cut down all the elements with it. The main thing is to strictly observe the sequence of actions. Start sawing from the bottom of the door (near the threshold) and go in a circle without breaking the line. nine0003
Be careful. When dismantling an old door, you can damage the doorway so much that it will have to be restored. And this is additional financial and time costs.
When the door is dismantled, we proceed to the next step.
2. Preparing the doorway for installation
Clean the doorway of all debris. If the opening was damaged during dismantling (for example, plaster fell off, brickwork crumbled), seal the cavities with mounting foam. Otherwise, these cavities will let in drafts and noises from the entrance. nine0003
Preparing the doorway for installation
The doorway is ready - we begin the installation of a new door.
The door should be 20-30 mm smaller than the opening. On each side there is a space of 10-15 mm. Such gaps are necessary for filling with mounting foam.
3. Remove the door leaf
To do this, lift the open door vertically up and remove from the hinges. Temporarily remove the door leaf to the side by placing its mat. nine0003
4. Install handle
Different manufacturers have different fittings, but the general principle remains the same. We will write about your kit, and you will be able to navigate:
Included with our door Torex is a package with accessories, which includes:
- 2 handles with decorative caps
- Square rod or just a square - 1 pc.
- Screws - 6 pcs. for attaching the handle to the door
- Hexagon for attaching the handle to the square.
Also, some models of door blocks may include a turn signal, 2 M4 screws.
Installing the door handle
1) Unscrew the decorative trim counterclockwise
2) Insert the square with the stem with the recess down into the hole
3) Lock with a locking screw using a hexagon nine0003
4) Insert and firmly press the handle with a square into the hole on the outside of the door
5) Fix the handle with three screws
6) Install the handle on the inside of the door and press firmly against the canvas
7) Fasten with three screws and fix the handle with a hexagon to the square
8) Install the decorative trims on the handle on both sides. nine0003
Ready! Go ahead.
5. Apply masking tape
Stick masking tape on the door frame from the front and inside. So you protect the box from mounting foam and cement-sand mortar.
Sticking masking tape on the door frame before installation
6. Fill the frame with mineral slab
Mineral slab is a high-quality insulation that prevents cold and noise from entering the apartment. We supply a mineral plate complete with a door. nine0003
Insert strips of mineral board under the metal plates around the perimeter of the box.
Fill the entire box around the perimeter completely. Do not leave areas unfilled with mineral slab.
Before installing the door frame, you need to install a piece of plastic pipe or a special cloth to bring wires into the house.
7. Insert the box into the doorway
nine0002 1) Insert the box evenly vertically and horizontallyInstalling the box in the opening
2) Use the mounting pads (wedges) to adjust the horizontal level. The mounting gap between the threshold and the floor must be at least 10 mm.
3) Adjust the box vertically using a building level and secure with mounting pads from the inside.
Installing the box in the opening nine0003
4) Do not change the position of the box and drill holes in the wall through the mounting holes on the box. Use anchor bolts or frame dowels and a puncher for this.
Start from the side of the loops, from above. Drill holes with a depth of 10-15 cm at the attachment points using a drill (drill). It is important not to move the box relative to the opening. After installing each of the anchors, be sure to check its position horizontally and vertically. nine0003
For walls of foam, gas, expanded clay concrete, use a hammer drill only in drilling mode (unstressed).
5) Check again if the box is level using a level
6) Fix the door frame with fasteners from the side of the hinges
Checking the installation of the box using a level
The door frame stands exactly in its place - it's time to take on the door leaf.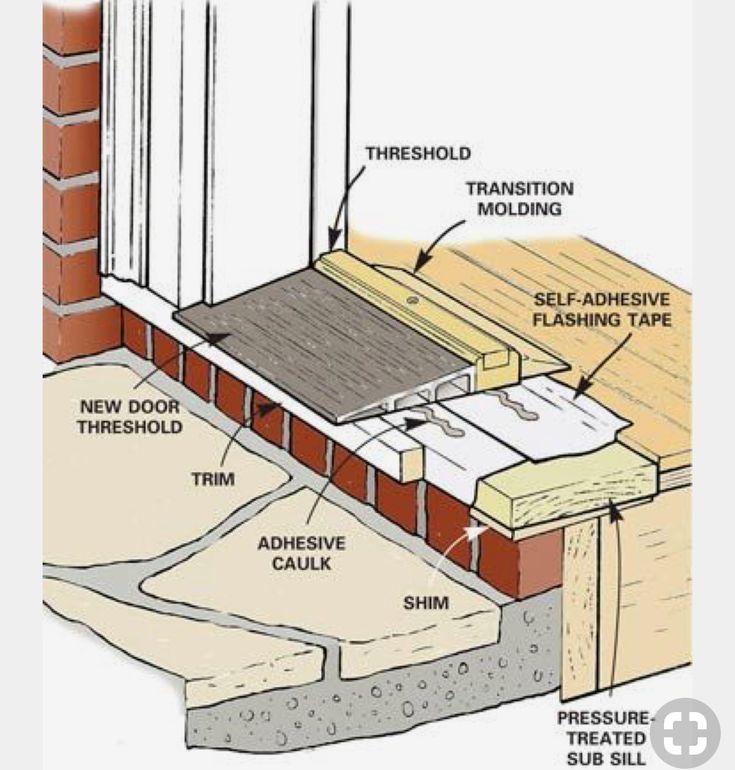 nine0003
8. Insert the door leaf into the frame
1) Hang the door leaf on the frame by inserting it into the hinges
Hanging door leaf
2) Close the door and check the operation of the locks and handles. If problems arise, you must immediately adjust the lock post of the box in relation to the bolts of the locks or handles using pads
3) Drill holes in the wall through the remaining holes nine0003
4) Fasten the anchors, but do not fully tighten
5) Close the door, check the vertical and horizontal, whether the door leaf is level with respect to the frame.
In the open middle (30-150°) position, the canvas must remain stationary.
Checking the operation of the front door locks after installation
9. Fill with mounting foam
1) Blow out the filling points from dust and brick chips. Wet the wall surface with a spray bottle. nine0003
2) Fill the mounting gap with mounting foam.
Filling the gap with mounting foam
3) Foam especially carefully at the bottom in the threshold area. So you avoid blowing and drafts.
Filling the threshold zone with mounting foam
4) Fill the holes from the bolts with mounting foam and insert plugs from above (we also provide them in the kit). nine0003
Entrance door Ultimatum Next from Torex after installation
10. Remove protective films
Torex front door protection with cling film
Remove protective films from the door leaf after finishing work, if you are doing repairs. And after installing the slopes.
How to install door slopes (additions) we described in detail in the article.
nine0002 Once again, we draw your attention to the fact that installing an entrance door is a technically complex process. We advise you to entrust it to professionals. So you will avoid problems with the operation of the front door. If you damage the door during installation, then repairing or buying a new door will cost a lot.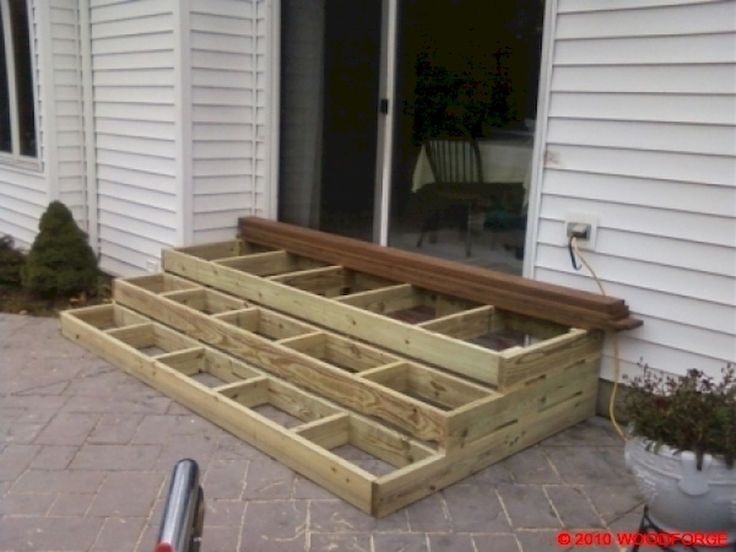 Torex certified installation teams will install your door quickly and professionally.
If for some reason the door is damaged during the installation process, Togeh factory specialists will repair or replace it free of charge. You can find out detailed information and the cost of installing a door in the "Customer Support" section at the link. nine0003
Like the material? Like
90
Share:
Have questions?
Fill out the form and our specialist will contact you.
By clicking on the button, you consent to the processing of your personal data User Agreement
Do-it-yourself front door installation: photo + video
A properly installed front door not only ensures the safety of property, but also reduces heat loss (due to frame insulation) and reduces the audibility of what is happening outside the house or apartment. First of all, you should know that installing the front door with your own hands is possible. Moreover, you can do everything alone, but if the canvas is heavy, it is easier to work together. There is nothing complicated in the technology itself, but there are several features that you need to know before starting the installation yourself. nineOl000 hole
Preparing for installation
The old door must be removed before installation. This must be done carefully, trying not to damage the opening too much. Then the installation of the front door will be quick.
Some types of steel entrance doorsRemoving the old door
First remove the door leaf. If the model is with removable hinges, the doors are opened, a crowbar is placed under the lower edge of the canvas, and lifting the doors, they are removed from the hinges. If the hinges are non-separable, you will have to unscrew them. It's better to start from the bottom. nine0003
After that, the slopes are dismantled, the wallpaper is removed, the plaster or putty is beaten off. The task is to determine how the box was attached, to find attachment points. If the door frame is metal, usually these are anchors, pieces of reinforcement. At the junction, they are cut off with a grinder. When all fasteners are cut off, the old box is squeezed out or knocked out. But with this procedure, excessive efforts are not necessary: you can destroy the box so much that it needs to be repaired.
When dismantling, it is necessary to cut off the old fastenersIf the frame of the old front door is wooden, everything is simpler. Side racks can be cut approximately in the middle, and then, prying with a crowbar, break out of the opening. After the sidewalls are removed, the lintel can be removed easily. Also, the threshold is removed without problems.
Preparing the opening
After the old door has been removed, the doorway is prepared for installation. First, all pieces of putty, brick fragments, etc. are removed. Get rid of everything that can fall off. Then evaluate the opening, which is the result. If there are large voids, they are filled with bricks planted on cement mortar. Small potholes can be ignored. If there are gaps, it is better to cover them with a solution too. nine0003 This is what happens when the door is removed.
Existing significant protrusions that may interfere with installation must be removed. You can use a hammer and chisel or a grinder with a cutting disc.
Carefully inspect the condition of the floor under the door frame. In old buildings, a wooden beam is installed in this place. Often it is already rotten, crumbled. If so, delete it.
If the bar still looks intact, check the condition of the wood with an awl. With a solid effort, stick a few into the wood, shaking a few times, take it out. So you check in different parts of the beam. If it enters with difficulty, to a shallow depth, the hole remains small, then everything is fine.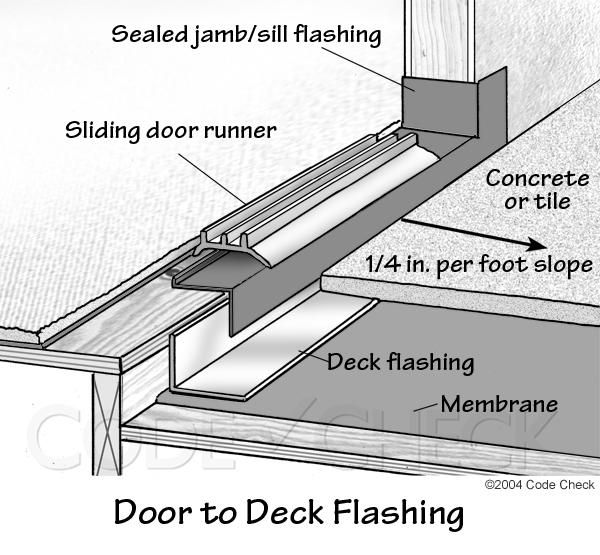 If not, it enters easily, it is crushed and / or crumbled from rocking, the wood has become unusable. It also needs to be removed. nine0003 Beat off everything superfluous
The vacant place is filled with the same beam (treated with impregnation from rotting), brick is laid. The gaps are filled with mortar.
As a result of all these actions, the doorway should be more or less even. So that you can install a new front door without interference.
Installation of metal doors
Steel (metal) doors are most often installed as entrance doors. The door frame, door frame and the outer surface of the door leaf are made of metal. To ensure the required degree of heat and sound insulation, the canvas is laid with soundproofing material. From the side of the room, the entrance doors can also be sewn up with metal, or they can be with sheet material (budget option). nine0003 The structure of the metal door
Rubber insulation is laid on the frame along the perimeter of the porch (sometimes on the door leaf).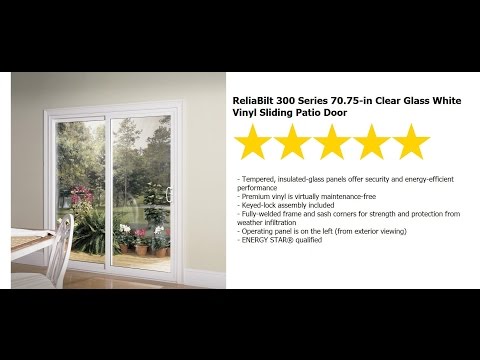 It performs two functions: it serves to seal and reduces the strength of the sound that occurs when the door slams shut. It turns out a reliable, warm and "quiet" front door.
Preparing the door
Since it is problematic to insert a lock into a metal door, the doors are ordered immediately with a lock. You receive a kit that includes an already installed lock. Pens come separately. Here they need to be installed in place, screwed with screws. Before installation, you need to check the operation of locks and latches. Everything should work smoothly, without effort and problems. If everything is fine, you can proceed with the installation of the entrance metal door. nine0003 Preparing a steel door for installation: checking the operation of the lock, insulating the frame with mineral wool
If the doors are installed with access directly to the street (in a private house, for example), the door frame is laid outside with insulation. You can use stone wool cut into strips.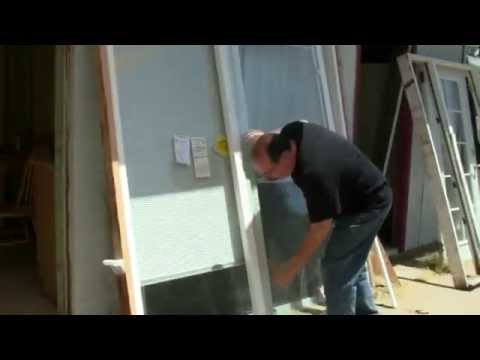 It is inserted into the frame and held by the force of elasticity. It has a significant disadvantage: it is hygroscopic, which is why the doors can rust from the inside (if they stand as an exit to the street and are not sealed tightly). In multi-storey buildings, this is not critical: there is no precipitation at the entrance. Another way out is to put foam or fill the frame with foam. They are not afraid of moisture, and the thermal insulation is normal. nine0003
To ensure that the paint and varnish coating of the box is not damaged during installation and subsequent finishing work, it is pasted around the perimeter with masking tape. It is removed after the slopes on the door are made. If some wires come through the door frame, it's time to install mortgages - a piece of plastic pipe or corrugated sleeve through which these wires will get inside.
Installation of interior doors is described here. Read more about sliding doors here.
Masonry and concrete wall mounting
It is more convenient to install doors in which the leaf can be removed. Before installation, it is removed from the hinges. The door frame is inserted into the prepared opening. Below it is placed on mounting pads 20 mm high. She should become free in the opening.
By changing the thickness of the pads, we achieve that the lower frame is strictly level. This is checked using the building level. Having set it horizontally, we set it vertically: so that the racks do not deviate either forward or backward, but stand strictly vertically. This is also checked using a level, only the bubble device is located on the short part of the tool. Another option is to check with a plumb line. nine0003 Checking if the door frame is level vertically
After the frame is level, it is wedged with prepared wedges. They can be carved from wood, or you can buy plastic ones. Wedges are inserted on long racks rub pieces, at the top - two. They should be placed near the fasteners, but not overlapping them.
Example of installing a wedge After installing the wedges, it is checked once again whether it stands correctly: in the horizontal and vertical planes. There should be no deviations. nine0003
Next, the installation of the metal door frame in the opening begins. There are two types of mounting holes: steel eyes welded to the box and a through mounting hole (there are actually two of them: in the outer plate of a slightly larger diameter and in the inner one of a smaller one).
Two types of mounting holesThere is no difference in mounting method. Just frames with holes in the body of the box can be installed on thinner walls. This may be important if the installation of the front door is in a panel house: it is far from always possible to put doors with eyelets in them. nine0003
Fastening through a through hole
Fasten iron entrance doors to anchors or pieces of steel reinforcement, 10-12 mm in diameter. The diameter of the fastener is selected for the existing holes. If anchors are to be used, their head must fit into the outer hole and "get stuck" in the inner one. The diameter of the reinforcement must match the diameter of the holes. In any case, holes are pre-drilled under them.
We take a puncher, drill and anchors. The drill is taken of the same diameter as the fasteners. Its length should be at least 30 cm. To more accurately determine how deep you need to drill, masking tape is attached to the drill. It marks a distance that is slightly more than the required depth. nine0003 We mark the drill along the length of the anchor
The installation of fasteners from the side of the hinges begins. When drilling, it is important not to move the installed box. Drill from above first.
We drill holes from above, from the side of the hingesInstall the anchor, finishing it with a hammer. To sink it to the inner edge of the box, insert a screwdriver into the slots, and tap the handle of the screwdriver with a hammer. Then, when the anchor is driven in, it is still tightened a few turns with a screwdriver. We check if the box has been moved during operation - we take the level and check everything. nine0003 We drive the anchor deeper
Install the fasteners at the bottom in the same way. We also check verticals and horizontals. If the door leaf is not heavy, you can already at this stage check how correctly the box is set. To do this, they hang the doors and check how evenly they “sat down”, whether there are distortions, cracks and other troubles, how much the locks and latches match and work normally.
If the blade is made of thick sheet steel, weighs about a hundred kilograms, two fasteners are clearly not enough. Then install all the fasteners from the side of the hinges, as well as one from the side of the lock. After installing each fastener, the verticality and horizontality of the box is checked. Then they carefully hang the canvas and check how it “walks”. If everything is fine, continue mounting the fasteners. No - you will have to remove the already installed mounts and set the frame in a new way. nine0003 We put the anchor in the door frame of the entrance door from below, checking the verticality of the post
After checking, the canvas is removed again, the already installed anchors are finally tightened.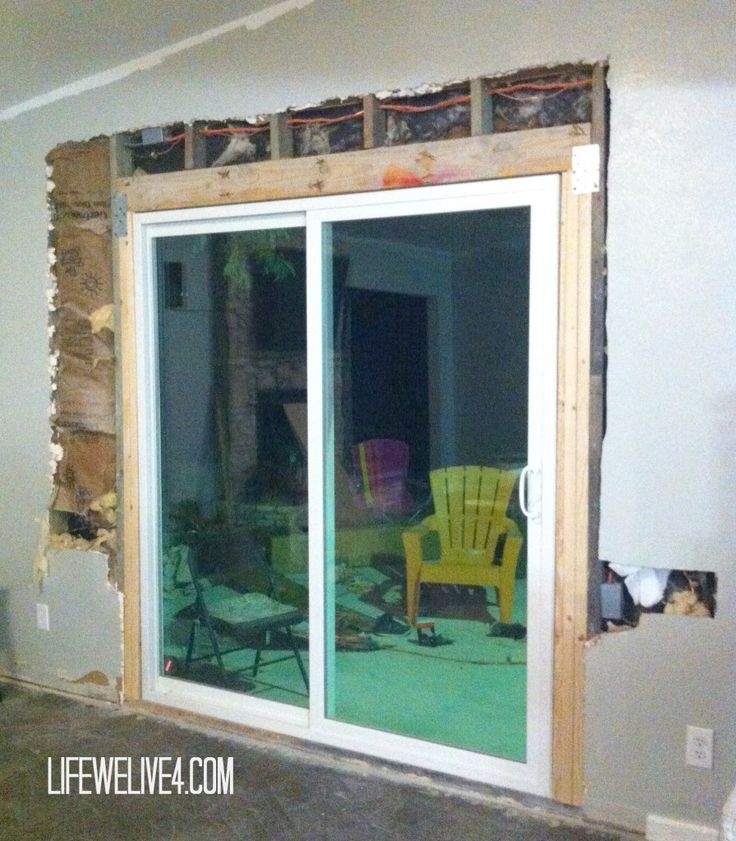 Then they put everything that is needed on the side of the loops, then on the side of the castle. When everything is finally installed, hang the door leaf in place again.
The assembly gaps must now be filled with foam. To install the front door with your own hands, it is better to take it with a small expansion coefficient: it is easier to work with it. In order for the polymerization of the foam to proceed normally, the cavities that will be filled are wetted with water from a spray bottle (ordinary household). Then everything is slowly filled with foam. nine0003
It is necessary to blow out the entire width of the door frame: then there will be no blowing and the sound insulation will be better. When installing a door with iron, you don’t have to worry about opening the box: the rigidity of the metal is such that the expansion force of the foam is far from enough. Therefore, you can lather generously.
Blow out mounting gaps with foam Only if foam gets on the door leaf, it must be removed immediately with a damp cloth.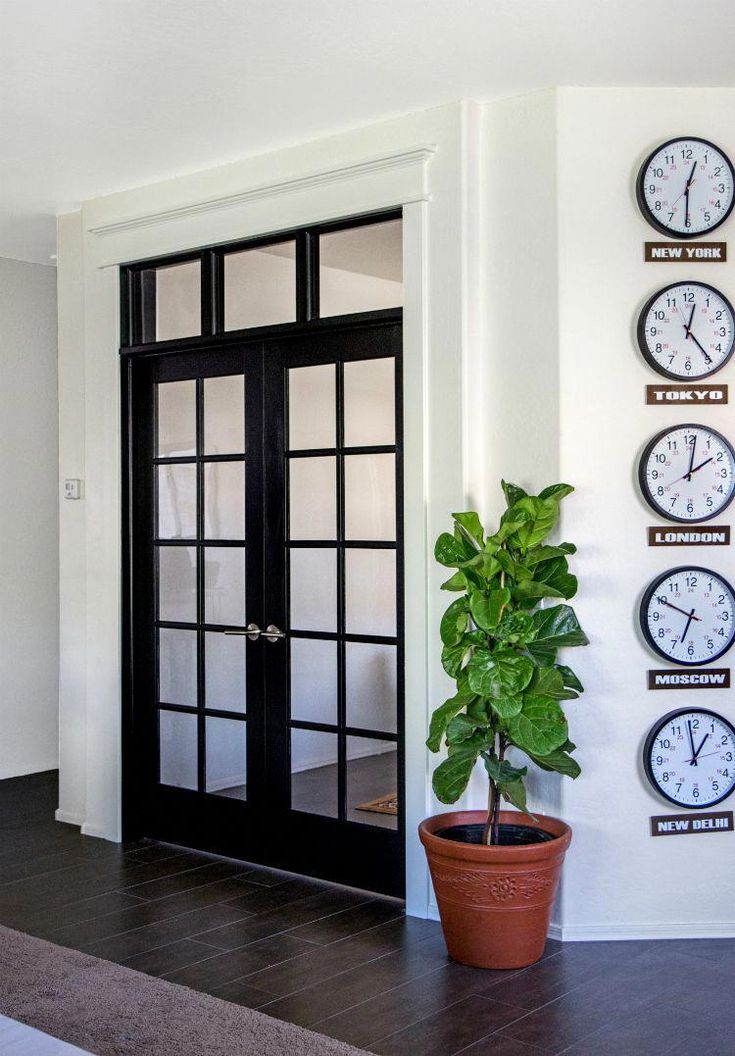 After 5 minutes, you just won't wipe it off. As long as it's wet, it comes off without a trace. Then you have to scrape, but this does not go away painlessly: traces will remain. The polymerization of the foam will end after 24 hours. Then we can assume that the installation of the front door with your own hands is hung. It remains to make slopes on the door. nine0003
Mounting the box with lugs
If there are welded plates on the box - lugs - the box is set up in the same way: on linings. Then it flattens out and wedged. Then there are two options:
Read here how to adjust the front door made of metal and plastic.
Installing an entrance door in a wooden house
In a wooden house, any windows and doors are mounted not directly to the wall, but through a casing or a shackle.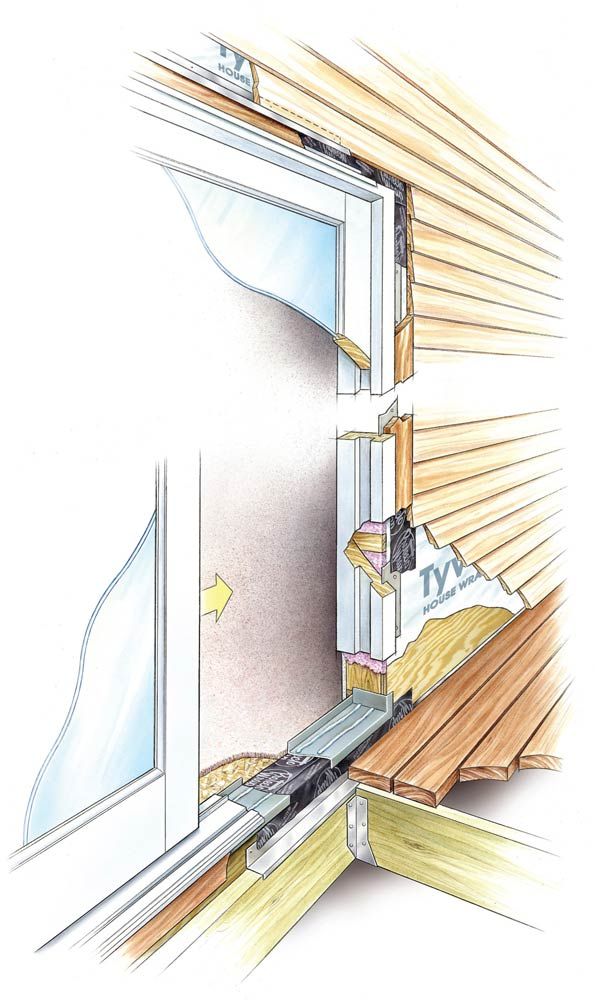 An okosyachka is a wooden beam that is movably attached to a log house (from a log or a beam - it doesn’t matter). It is connected by a tongue/groove connection and held by the force of elasticity. A door frame is already attached to this beam. nine0003 Installing a door in a wooden house: first make a casing
This is a necessary measure. After all, a wooden house is constantly changing height. For the first five years, he sits down - due to shrinkage and compaction of the landing seams. The first year, doors and windows are not installed at all: too big a change. In the second year, the movements become less pronounced, but are always present. Therefore, it is impossible to rigidly fix the doors: they can jam or bend, or they will interfere with the normal shrinkage of the log house.
To do this, cut a groove in the doorway. They make a casing from a bar in the form of the letter "T". The width of the groove should be slightly less than the thickness of the spike: to keep well. They insert it into a spike, hammering it with a sledgehammer. That's all. No other fastener. nine0003
Please note: the height of the posts is much less than the height of the opening: after installing the lintel, there must be at least 3 cm left for the expansion gap. It is covered with mineral wool. This is also necessary so that the doors do not warp during shrinkage.
Installation of the front door in a wooden house in the sectionAfter the installation of the casing, a box is attached to it. Anchors are useless here. Powerful self-tapping screws or screws are needed. Under them, it is also necessary to drill holes, but take a drill slightly smaller than the diameter. Please note: the fasteners should not reach the wall in length (this can be seen in the photo above). nine0003
This video shows how to make a casing by forming a groove in the opening.
This video shows another type of pigtail manufacturing: a spike is formed in the opening. With a chainsaw, everything turns out quickly, but this level of ownership is available to few.
Installation of the front door in aerated concrete
Another building material with special features is aerated concrete. It does not hold shock loads well, therefore it will not work to fix the entrance doors like a brick wall: they will simply fall out. The solution is this: to make a frame out of a metal corner, which will be held on the wall due to the stop. nine0003 Frame for mounting a metal door in a house made of aerated concrete
At the same time, jumpers that tighten two corners are made in those places where fasteners will be located - lugs or mounting holes. And it is on these jumpers that the door will hold.
Features of the installation and design of metal doors - in the video.