Daylily bulb planting
Daylily Planting Instructions | Amador Flower Farm
Planting Instructions
Where to plant Daylilies
Daylilies should be planted in full sun or partial shade that receives 4-6 hours of sun per day. Despite the preference of full sun, occasionally colorful daylily blooms can be found under the shade of tall trees. Wherever some shade is present, the daylily flowers will face away from it toward open sky. Avoid low wet spots where water collects in rainy spells, and high dry spots over ledges where the soil is shallow.
When to Plant
Daylilies can be planted very successfully at any time the ground can be worked — spring, summer or fall. Fall planted Daylilies should be mulched to prevent winter frost heaving. We recommend that you plant your daylilies right away when you receive them. However, if they are held for several days, set the roots in water for one hour before planting.
Potted Plants
Dig a hole a little larger than the pot. Remove daylily from pot, loosen the roots, and place into the hole, packing dirt firmly around it.
Bare-Root Plants
Keep in a cool place until you can plant. If held for several days, soak roots in water one hour before planting. Prepare a hole with a cone of soil in the middle. Spread the roots over cone with the crown a little below ground level. Press soil firmly around the plant, covering the crown with one inch of soil. Water newly planted daylilies well.
Soil
Loose loamy soil is preferred. Sand, gravel and clay are very poor. Mediocre soils will be improved by adding compost, rotted leaves or wood chips, old manure, or almost any other organic material.
Spacing
In a mixed perennial flower border allow a circle of 16-18 inches in diameter if the daylily will be divided and replanted in 3-5 years. If you expect to leave the daylily clump intact for 10-15 years, it will need a 24-30 inch space. The same applies to a daylily flower border.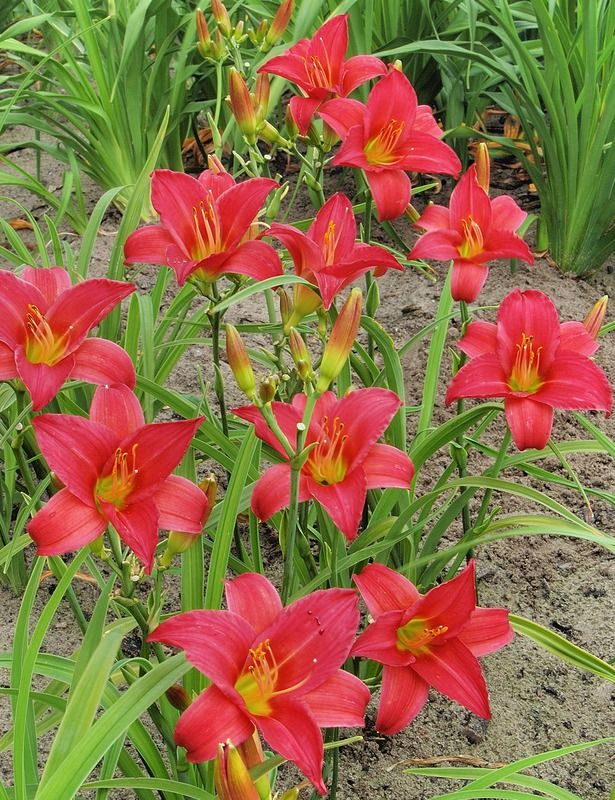 In a landscape setting, such as a bank to be covered with Daylilies, space the daylily plants in a triangular pattern with each plant 24 inches from its neighbors. 100 square feet of bank will then require 30 daylily plants. (Multiply square footage by 0.304.) As an edging along a walk, space the daylily plants 12-18 inches apart in a single line.
Mulch
One to four inches of mulch will retain soil moisture and inhibit weed growth among the daylily plants. Leaves, hay, wood chips and grass clippings are suitable, but they withdraw some of the soil nitrogen during their own slow decomposition. You may wish to add some fertilizer, especially with freshly cut wood chips. Where the ground normally freezes in winter, fall-planted daylilies should be mulched heavily the first year to prevent them from being heaved out of the ground.
Fertilizer
An organic compost soil is seldom deficient in plant nutrients. To maintain excellent daylily growth, add any slow release, composted organic matter such as horse, sheep, or cow manure, or your own compost, in either spring or fall.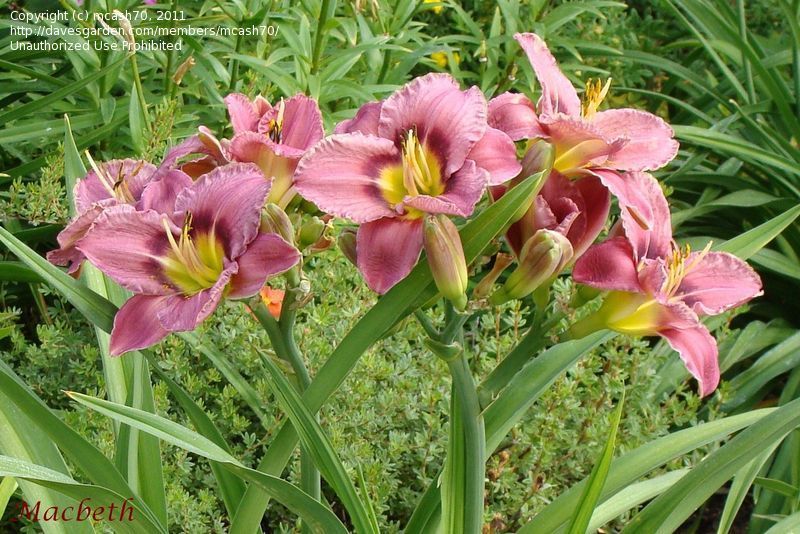
Planting Daylilies - How & When to Plant Daylily Bulbs
The dainty
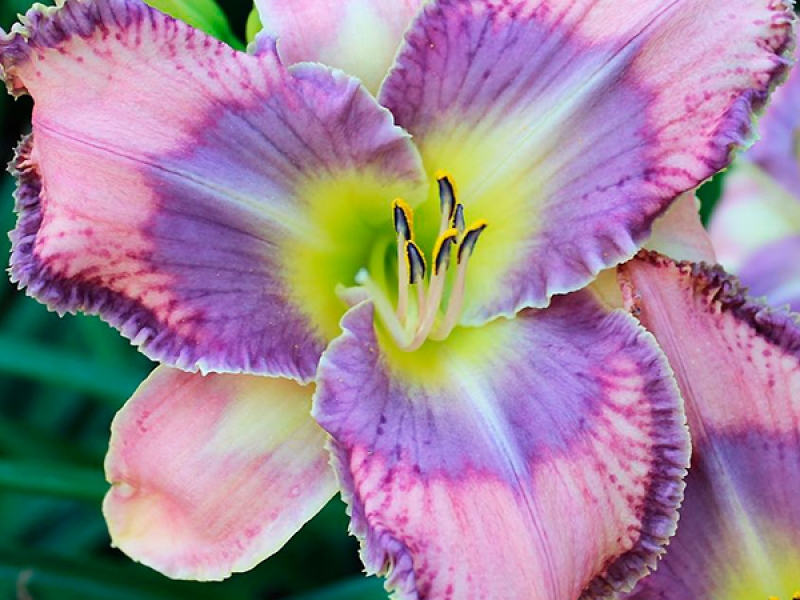
Daylilieshave been delighting gardeners with their abundant charm and agreeability for centuries. Daylily comes from the genus Hemerocallis in the Asphodelaceae family. Its botanical name translates to "beauty for a day", an obvious allusion to the day-long lifespan of daylily flowers, most of which tend to wither away within about 24 hours of blooming, often replaced by another from the same stalk the following day. Daylilies are native to parts of eastern Asia, including China, Japan and Korea. Daylily flowers come in a wide array of forms and sizes and a breathtaking spectrum of colors that includes orange, pink, purple, red and yellow.
When you receive your field-grown daylily roots:
Your daylilies are shipped bareroot. The plants are field grown and have been harvested recently.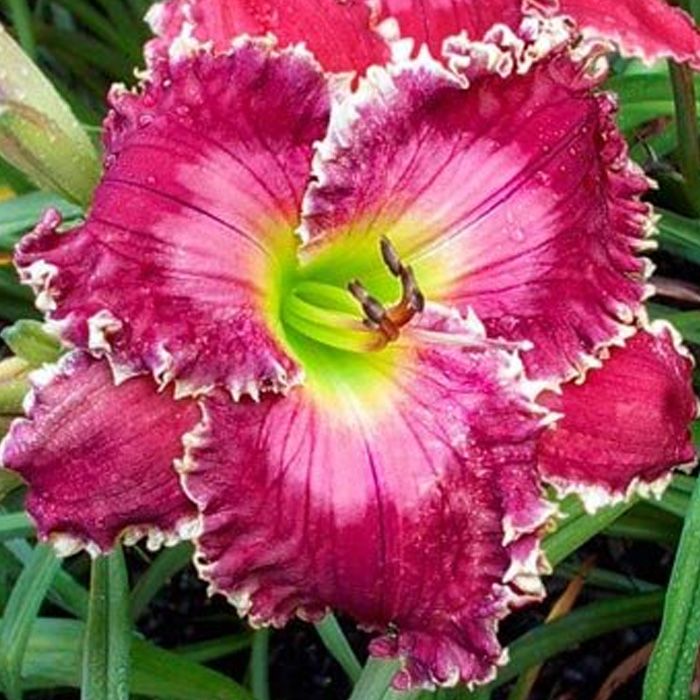
If you don't have time to plant immediately, keep the daylily roots in their original bags at about 40°F [5°C] for no longer than three weeks. The vegetable drawer of a refrigerator is ideal for this purpose.
Quick planting, however, will give the best results. Daylilies harvested in late summer for fall planting are best planted before the first frost of fall. Daylilies for spring planting are best planted in early to mid spring.
It's possible that the daylilies will have sprouted during shipment. This is quite normal and will not affect the growth of your plants. If this has occurred, we suggest that you trim the shoots back to approximately 1-2" immediately after unpacking.
Don't worry if the roots appear to be dry when they arrive. We suggest you soak the roots in cold to lukewarm water for about 30 minutes prior to planting. Fall-planted daylilies will form additional new roots this fall, immediately after planting.
Where To Plant Daylilies:
Choose a site with the following characteristics:
- Full sun to partial shade (for instance, morning sun and afternoon shade, or dappled sun throughout the day).
 Daylilies
need at least 6 hours of direct sunlight per day to bloom.
Daylilies
need at least 6 hours of direct sunlight per day to bloom. - Neutral to slightly alkaline soil. Daylilies tolerate a wide range of pH, but soil with a pH of 6.5-7 is ideal. Adjusting the pH is normally not necessary.
- Moist, well-drained soil of any type, from clay to sand. Daylilies tolerate a wide variety of soils but perform best in those that are moist and well drained.
Preparing the site/working the soil:
It's worth taking the time to dig a proper hole and amend the soil. You'll get bigger, healthier plants with more flowers.
- Spade or rototill the soil to a depth of 12-15".
- Mix in a generous 2-4" layer of dehydrated manure, garden compost and Breck's Food for Bulbs and Perennials.
If your soil is already rich garden loam and well drained, the addition of Breck's Food for Bulbs and Perennials will
provide the ideal conditions
recommended by Breck's Dutch bulb experts for superior growth and blooming.
If you have a clay soil, you may need to amend for drainage. A good solution is to mix compost and rock dust or crushed stone into your soil.
If you have sandy soil, amend with compost and possibly clay to increase the retention of nutrients. This will also help to better retain moisture.
How To Plant Daylilies:
Soak the roots in cold to lukewarm water for about 30 minutes prior to planting. Spread the roots of the plant out and cover with soil so that no more than 1" (2.5 cm) of soil covers the crown (the point where the root meets the stem). Firm the soil and water thoroughly.
Mulching/Winter protection:
A year-round mulch of compost, leaf mold, leaves or commercial types of mulch has a positive effect on your daylilies by
keeping the soil from drying out, maintaining a more even soil temperature, providing organic matter for an optimal structure
of the soil and reducing weed growth. It also prevents soil from splashing onto the flowers and foliage.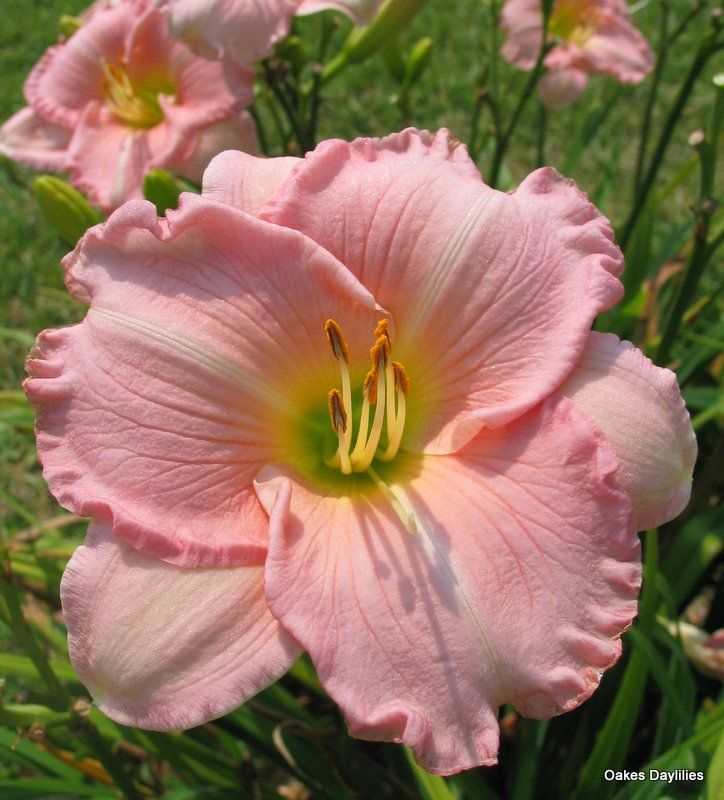
For the first winter, we advise you to put a thick, 4-6" layer of mulch over your freshly planted daylilies to prevent roots from being heaved out of the ground by alternate freezing and thawing weather.
Evergreen daylilies are in general less hardy than semi-evergreen and dormant varieties. Remove most of the winter mulch in spring, being careful not to damage young growth.
Continuing care:
A surface application of Breck's Food for Bulbs and Perennials is recommended each spring. In poor soils, plants may benefit from a second application in late spring or early summer. If natural rainfall is less than 1" (2.5 cm) per week, additional watering is recommended.
We suggest you remove spent flowers on a regular basis, for instance, once a week. Deadheading is the practice of removing
old flowers before they have a chance to produce seeds. It encourages your daylilies to put their energies into producing more
flowers, thereby promoting an extended display of form and colour in the garden.
After the first frosts of fall blacken the foliage, you may cut it back to just above ground level and discard, but this is not necessary.
Once your dormant daylilies are established, annual winter mulching is not necessary as winter protection for the dormant types, but it's beneficial for the evergreen and semi-evergreen varieties.
Once planted, your daylilies can be left to grow undisturbed for at least 4 to 6 years. Don't be disappointed, however, if your daylilies fail to bloom the first year. It usually takes one year for a daylily to settle.
How To Grow Daylilies In Pots:
Daylilies do well in containers as long as they have enough room to grow. The smaller the variety, the better it will grow
in a pot. As a rule, you
shouldn't plant full-sized daylilies in anything smaller than a gallon container. The bigger the pot the better. Be sure your
pots have drainage holes so that the pots do not fill with water as this will cause daylilies to rot.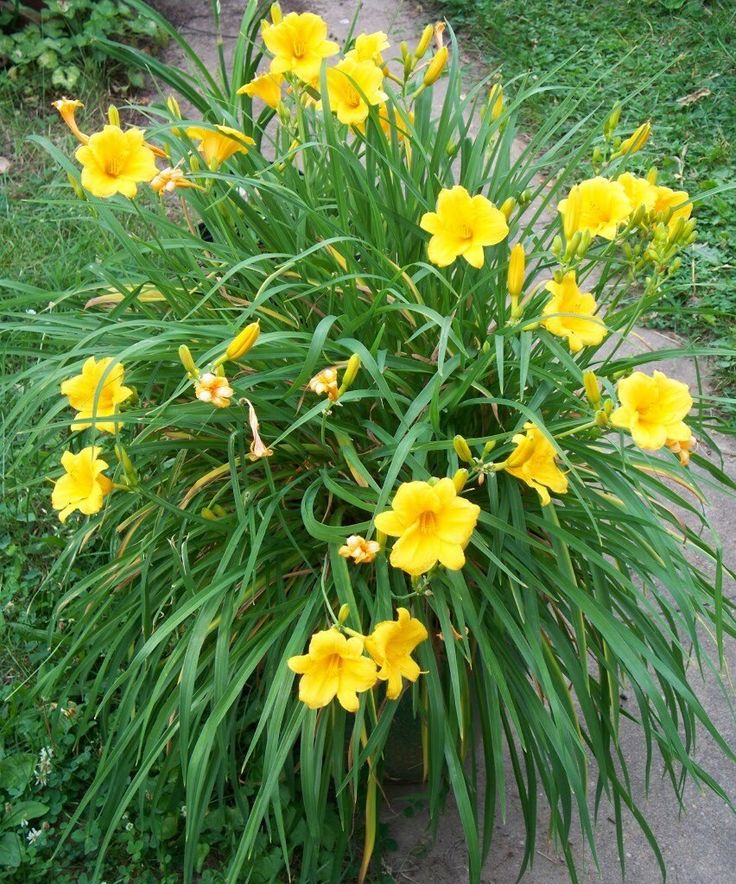 If using a commercial
potting mix, choose one with extra porosity. Containers can be moved indoors during the winter in areas with frost,
particularly severe frost. This is advisable in the case of evergreen and semi-evergreen varieties. Frost can of course also
damage the containers. You do not need to worry so much about the temperature of a room or basement as daylilies do not need a
certain period of colder temperatures (vernalization). If weather permits, move the container outside, which is always best for
the plants.
If using a commercial
potting mix, choose one with extra porosity. Containers can be moved indoors during the winter in areas with frost,
particularly severe frost. This is advisable in the case of evergreen and semi-evergreen varieties. Frost can of course also
damage the containers. You do not need to worry so much about the temperature of a room or basement as daylilies do not need a
certain period of colder temperatures (vernalization). If weather permits, move the container outside, which is always best for
the plants.
Dividing:
The easiest and most successful way of creating more daylilies is to divide them. Every 4-6 years you can divide your
daylilies and replant them to make more beds or to share with friends. Spring or early fall is the best time to divide and
replant. Dig up the plant and divide it into pieces by carefully cutting through the crown with a spade or sharp knife. Each
piece should have at least one fan or eye (sprout).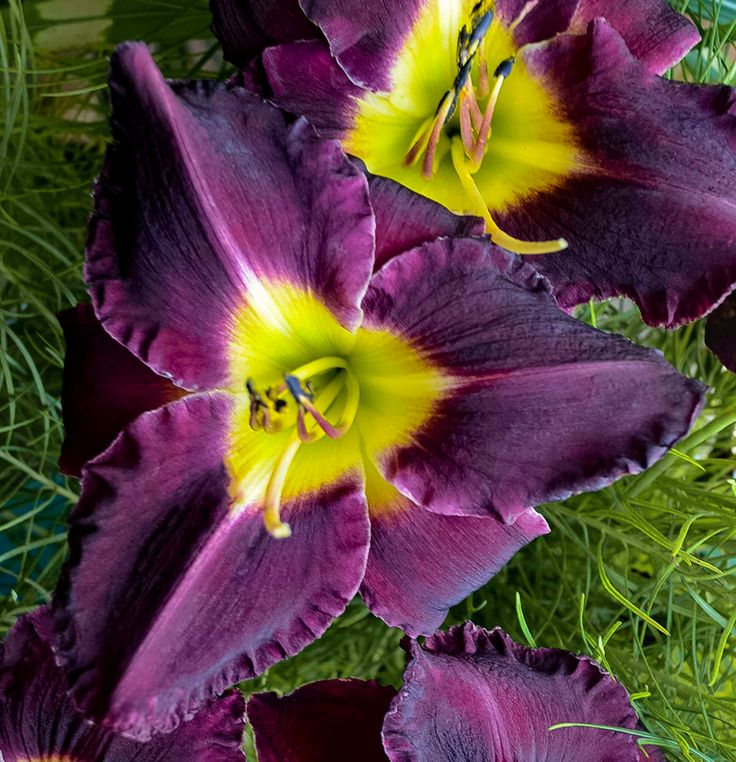
Transplanting:
Transplanting a daylily is best done in the fall or early spring. To lift an established daylily, loosen the plant from the soil with a large garden fork or spade, work your way around the plant, and gently pry it from the ground. Replant as soon as possible. If you cannot replant immediately, prevent the roots from drying out.
Diseases and Pests:
Daylilies are among the toughest perennials and exhibit excellent disease resistance. However, the leaves of a daylily could
turn brown after blooming in the summer. This is called 'streak disease.' Streak is a fungus that causes plants, especially the
leaves, to turn brown and ugly after blooming, but it doesn't do permanent damage to the plants. Oftentimes leaf streak is a
cosmetic problem, causing little damage. The pathogen is a fungus called Aureobasidium microstictum. If streak affects your
daylilies, remove infected leaves as they appear and fertilize and water your plants properly to promote growth of new leaves.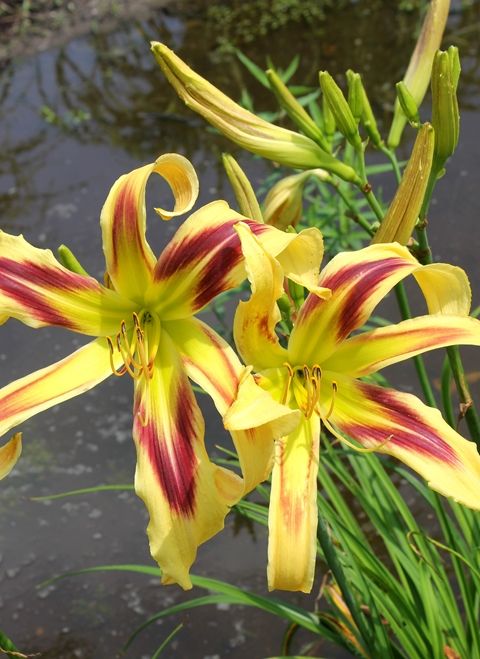 Remove dead leaves from your daylilies each fall to eliminate a source of leaf streak fungus. If a plant suffers from severe
leaf streak, every year you can apply fungicides containing chlorothalonil, mancozeb or thiophanate-methyl to prevent the
disease.
Remove dead leaves from your daylilies each fall to eliminate a source of leaf streak fungus. If a plant suffers from severe
leaf streak, every year you can apply fungicides containing chlorothalonil, mancozeb or thiophanate-methyl to prevent the
disease.
Lilies Daylily - planting | care |
Lily is a slender perennial bulbous herbaceous beauty with a marvelous aroma and variety of colors. Which can become a magnificent decoration for your garden.
Currently, there are more than 3,500 varieties of lilies, and if earlier few people tried to grow them, considering them a “capricious flower”, now, thanks to a large number of new hybrid varieties bred, it has become less “capricious” and resistant to diseases and frosts. Height, depending on the variety, ranges from 40 cm. up to 150 and above. It begins to bloom in late May - early June, the aroma of some lilies is subtle and delicate, others with an aroma reminiscent of vanilla, then an orange, then a violet, or with a strong, stupefying, although there are species specimens with a sharp, unpleasant, such as l.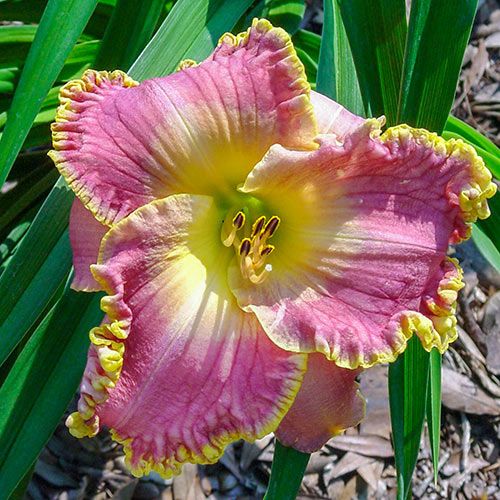 Shovntsa L. Kessel-piinid. nine0005
Planting and propagation.
For lilies, it is worth choosing sunny places or with light shading, this will allow the lilies to show all their splendor of color and play of shades. But if you don’t have such places, then don’t worry, it can grow well in the shade. The soil for cultivation should be fertile without stagnant water, well permeable. Lilies grow well in acidic soils. Planting or transplanting can be done in spring or autumn, but it is best in the fall of September and October, because of the regrown new perennial roots and their best further development. nine0005
You can choose and buy lily bulbs from my assortment of varieties on the page - "Lily Bulbs".
Bulb planting depth depends on variety, bulb size and soil conditions. Plants should be planted, following the rule, the minimum depth of the hole is three times the diameter of the bulb. Tubular lilies and l. martagon is better to plant deeper.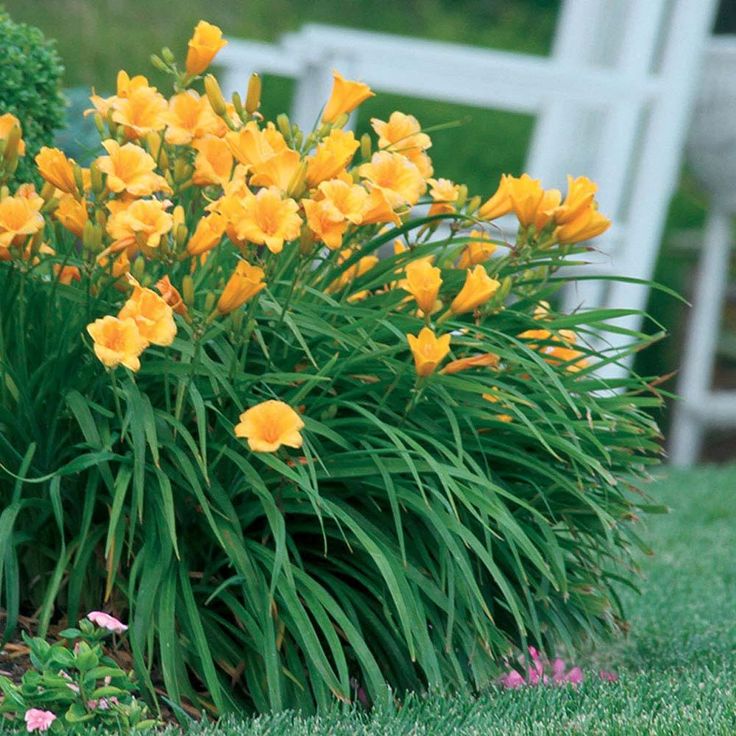 In a hole 10-15 cm deep, lay the bulb bottom down. In clay soil, pour sand under the bulb. Lightly sprinkle the bulb with earth, pour it well with water and wait for it to be absorbed. Then we completely fill the hole and do not water it anymore. nine0005
Lilies can be propagated by scales or seeds. From scales faster, and an exact copy of the parent will grow. And from the seeds you can get a new variety, but more time and effort will be needed. Reproduction of lilies is not so difficult. The bulb itself also gives children, but not enough, and the scales do it right away, and even several pieces. In the spring, when planting lily bulbs, separate the extreme 3-4 scales from them, and immediately plant them nearby, laying them in a “boat” on the ground and covering them with earth, water a little. And make sure the soil doesn't dry out. In August, the results are already visible. If you plant lilies in the fall, then it is better to plant the scales at home until spring. So you can propagate any lilies.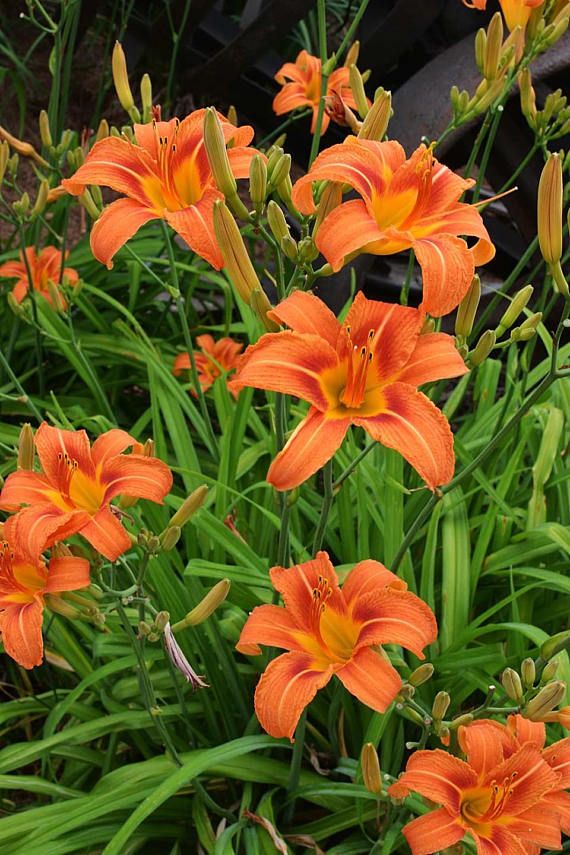 nine0005
Reproduction of lilies by seeds is more troublesome and time-consuming task, but if you manage to collect hybrid seeds, you can get a new variety. And for this, lilies must be artificially pollinated. Ripe seeds are sown all at once, without leaving the next year in reserve.
Don't forget to fertilize as well. It is necessary to start top dressing as soon as a real leaf appears: in the spring - with Kemira, and in the fall with - potassium monophosphate.
Daylily is a flower similar to lilies in appearance and flowering time. nine0028
It begins to bloom in mid-July, and is classified into fragrant and odorless. Many have a slight fragrant smell, and the aroma has a rich variety and sometimes unexpected combination.
The genus Hemerocallis has about 20 herbaceous perennial cultivated and wild species, distinguished by straight band-shaped leaves connected in bunches and funnel-shaped flowers, similar to lily flowers, but not so long-flowering, only one day. And there are day and night phases of flowering. nine0005
Cultivation
Daylilies are grown both outdoors and in containers, taking them outdoors. Potted specimens of the daylily, as a rule, are smaller in size compared to flowers grown in the open field. Plants are suitable for chernozem and fairly light soil. In early spring, a sufficient amount of organic fertilizers is applied to it (they are also added in mid-spring and late summer).
Location
These plants are photophilous, but can also grow in partial shade. Daylilies can be planted at the base of other, taller plants so that they receive diffused light. nine0005
Temperature
Daylilies tolerate both negative and elevated temperatures well. However, they will be especially comfortable at 14-20C.
Watering
Regular watering of potted plants is not necessary - it is enough to keep the soil slightly moist at all times (only young plants need more moisture). Daylilies growing outdoors are watered only during periods of drought.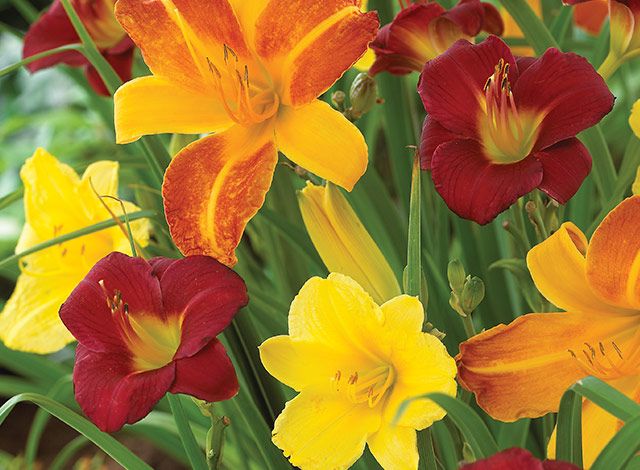
Transplanting
Potted plants are transplanted in spring using slightly larger containers than before. nine0005
Maintenance
Wilted flowers must be removed. After flowering, the flower stalks are cut to ground level.
Propagation
Daylily is propagated by dividing bushes in early spring. Large plants should be divided so that the resulting parts are large enough for young plants to bloom in the same or next year after breeding.
planting and care in the open field, photo after flowering
Author: Elena N. https://floristics.info/en/index.php?option=com_contact&view=contact&id=19Category: Garden Plants Retrained: Last amendments:
Content
- Listen to Article
- Planting and Care for Lileniki
- Botanical Botanical Description
- Conditions for growing in garden Soil
- What colors go with daylilies
- When to plant
- How to plant
- Useful Links
- Comments
The daylily is called the lazy lily.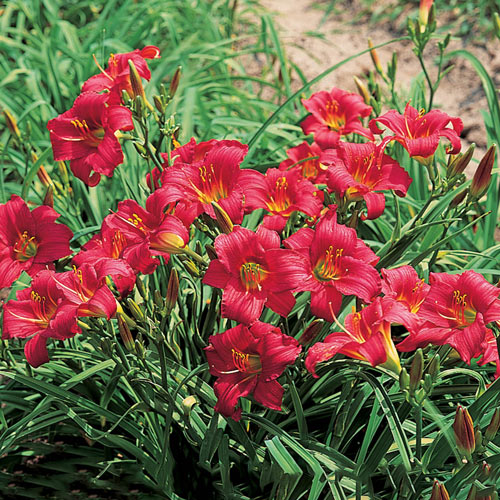 And the Czech writer Karel Capek, in love with gardening, dubbed daylilies "the flowers of an intelligent lazybones." Probably, the poet of gardening dealt with natural types of daylily, they are really very unpretentious.
But if you want to see in your garden something more intricate than the red and yellow daylilies we are used to, you will have to get to know the character of this plant better!
- Why does the daylily suddenly stop blooming?
- How to prepare for the awakening of dormant daylilies in spring?
- Which varieties of daylilies are the most fragrant?
- Which daylilies can be grown in a pot?
- Is it true that white daylilies are just a publicity stunt for breeders?
Read our article.
Listen to article
Planting and caring for daylilies
- Planting: sowing seeds in open ground before winter or in spring after stratification of the seed.
 Divide and transplant in the spring, in late April or early May.
 - Flowering: depending on species and variety from May to August.
- Light: bright sun, partial shade or shade.
- Soil: any garden soil other than sandy. The optimum soil is a rich, well-drained loam that is neutral to slightly acidic. nine0068
- Watering: infrequent but plentiful. Water is poured under the root.
- Top dressing: with a full mineral fertilizer in the spring, when the leaves are growing, and a month after the peak of flowering.
- Propagation: varietal plants - by division followed by transplantation in August or separation of the daughter rosette without digging up the plant. Species plants can be propagated by seed.
- Pests: thrips, water voles, lily flies, slugs. nine0068
- Diseases: root rot, Fusarium, rust.

Read more about the cultivation of daylilies below
Daylily (lat. Hemerocallis) , or krasodnev is a herbaceous rhizomatous perennial of the subfamily Daylily family Asphodelaceae. Homeland - East Asia. The daylily has been familiar to mankind since ancient times, but for the first time science started talking about it in 1753, when Carl Linnaeus gave it the name "hemerokallis", which consists of two Greek words: "hemera", which means "day, day", and "callos" which means "beauty". In Russian, the plant is called krasodnev, that is, beauty that lives only one day. nine0005
Not only cultural species and varieties of daylily are beautiful, but also “savages” growing in nature. In addition, daylily flowers are so unpretentious that flower growers call them the lazy gardener's plant, but this is true only for older varieties. In recent years, the daylily, thanks to American and Australian breeders, has been at the height of fashion: new varieties, although more capricious than the previous ones, are so incredibly beautiful that it is not at all a pity for the time or effort spent on them.
Botanical description
The adventitious roots of the daylily are thread-like, usually fleshy, thick, and this helps the plants survive in drought. The leaves are basal, broadly linear, two-row, arcuately curved or straight. Daylily flowers are six-parted, large, most often funnel-shaped, orange, yellow, red-brown or yellow, collected several in inflorescences. Up to three flowers bloom at the same time, and the total duration of flowering of the daylily bush is more than three weeks. One or more peduncles are leafy, depending on the species and variety, from 30 cm to 1 m, sometimes even higher. Daylily fruit is a trihedral box with seeds. In horticulture, both natural plant species and numerous cultivars and forms are used. nine0005
Growing daylilies in the garden
Growing conditions
In nature, in their natural habitat, daylilies grow among shrubs on the edges of forests, so logically it is best to grow it in partial shade, and this will be correct if the penumbra is in Australia , Africa or the south of France.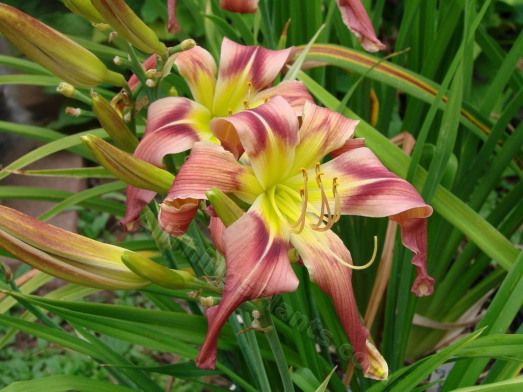 In our gardens, daylilies planted in partial shade may not have enough light and heat set for them to fully bloom, especially when it comes to hybrid varieties. Only bright sunlight will make the daylily bloom unique. nine0005
In the photo: Growing daylilies in a flower bed
Soil
As for the soil for the daylily, although the plant is unpretentious and any garden soil will suit it, but if you want to get the most out of the daylily, it is better to bring the soil into which you submerge daylily root, in accordance with its tastes: add sand and compost to clay soil, clay to sandy soil, enrich sod-podzolic soil with compost.
The ideal soil composition is rich loam with good drainage. In terms of acidity, the soil should be neutral or slightly acidic. nine0005
- Pennisetum: growing from seeds in the garden
If creating good drainage for an area is a problem, make raised beds for the daylilies. Otherwise, daylilies require attention, but do not cause trouble.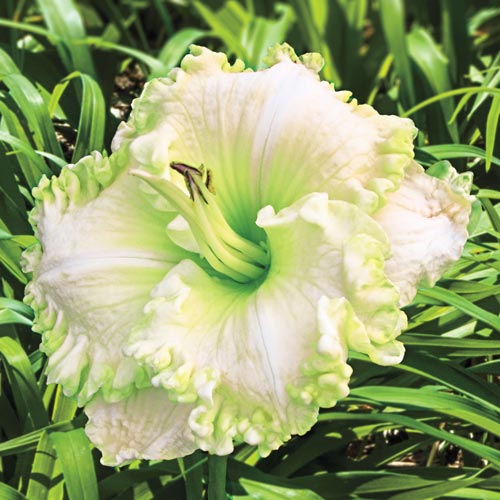
What colors go with daylilies
Daylilies are used in garden design both as single plants and as groups. They look great against the background of trees and shrubs (viburnum, panicled hydrangea, bamboo). Very beautiful borders are obtained from dense-bush varieties of daylily, and undersized, small-flowered species and varieties are very good near stone hills, on the banks of a reservoir or river. Daylilies are also used as a decoration for winter gardens, they stand for a long time in the cut in bouquets. nine0005
In the photo: Orange daylilies in the garden
Since many daylilies lose their decorative effect by the end of summer, think over in advance what plants to plant them in combination with so that yellowed, dying daylily leaves are not visible.
Designers recommend using ornamental grasses, physostegia, yarrows of different shades or spotted loosestrife.
Planting a daylily
When to plant
Plant from spring to autumn - planting time depends on your climate.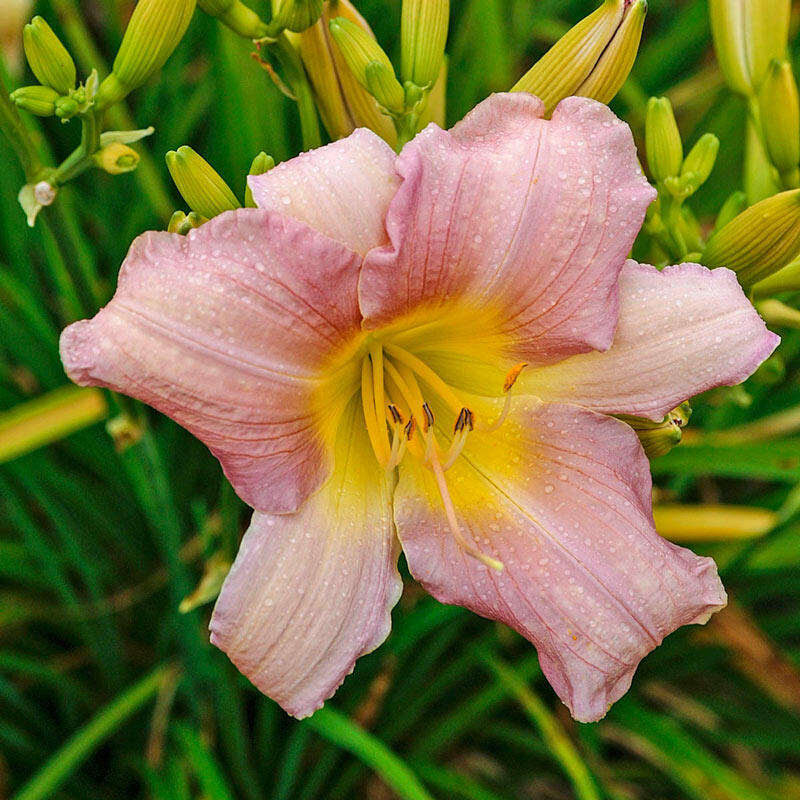 If winter comes early and quickly in your area, then a daylily planted in autumn may not have time to take root before frost and die, because on average a plant needs a month to root. But if you choose garden forms with an early or medium flowering period, then even in latitudes far from the south, your daylilies can have time to prepare for wintering in the garden. In addition, mulching beds with overwintering daylilies can protect them from cold and frost.
In the photo: How daylilies grow in a flower bed
From these considerations, proceed when deciding when to plant flowers. Flower growers believe that the best time for planting a daylily in the middle lane is May or August. It is also better to divide and transplant daylilies in spring or August.
How to plant
Before planting a daylily, pre-purchased planting material should be soaked in water or highly diluted mineral fertilizer a few hours before planting in the ground so that the roots swell and come to life, and then you will immediately see which of the roots should be carefully delete.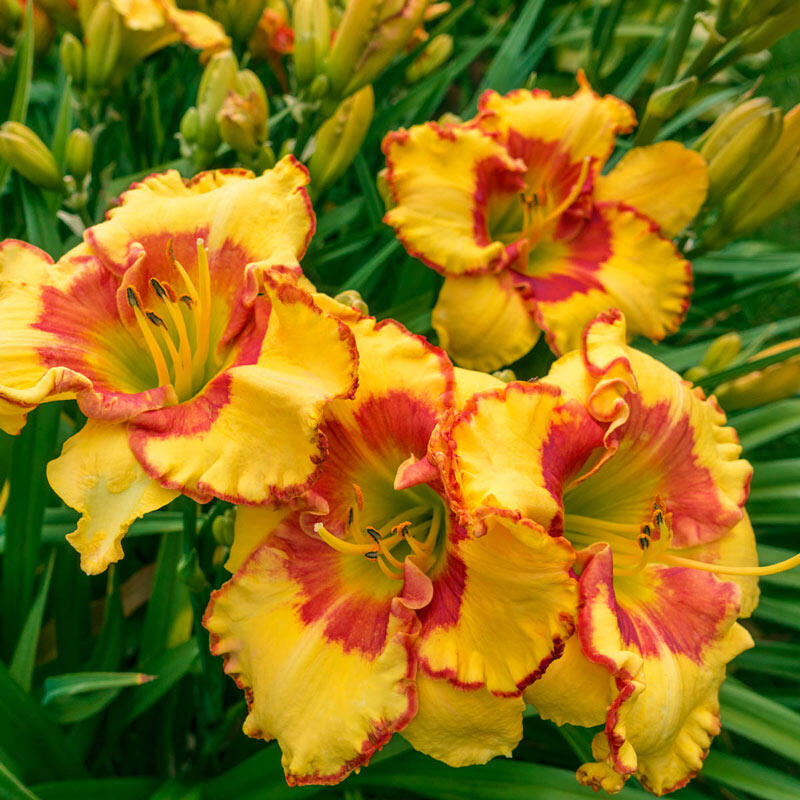 Cut the rest of the roots to 20-30 cm in length. nine0005
- Zamaniha
In the photo: Young daylily
Dig a separate hole up to 30 cm deep for each bush or division, and do not forget that you are planting a daylily for a long time, and a bush that has grown over time to 50-70 cm in diameter should not be crowded. Pour a mixture of sand, peat and humus into each hole, add ash with superphosphate or potassium-phosphorus fertilizer, lower the roots into the hole, spread them over the mound so that there are no voids under the roots, fill the hole with soil, but not completely. nine0005
Plant a geyhera - it will look great next to it
Then, holding the plant with one hand, squeeze the soil around it well, water it abundantly, filling the hole to the brim with water (if the water was quickly absorbed, then you did not compact the soil well, so sprinkle it on top of the dry earth and compact it again), and only now fill the soil to the edges of the hole. It is very important, , that the root neck of the daylily be at a depth of no more than 2-3 cm, otherwise growth retardation and the risk of plant rotting are likely. If you did everything correctly, then the moisture received during planting should be enough for the plant to take root. nine0005
Transplantation of daylilies
Daylilies grow in one place up to 15 years, but age affects the quality of flowering. As soon as you noticed that your already middle-aged luxurious daylily began to lose its former beauty, there were fewer flowers on its peduncle, and they themselves are smaller, which means it's time to plant a bush. Dig the bush along its outer border and carefully remove it along with a clod of earth, being careful not to damage the roots. Place the roots under a strong stream of water to wash away the soil, then carefully separate into individual fans. nine0005
With a certain skill, you can do without knives or secateurs, but if you still had to cut the roots somewhere, treat the wounded areas with a fungicide.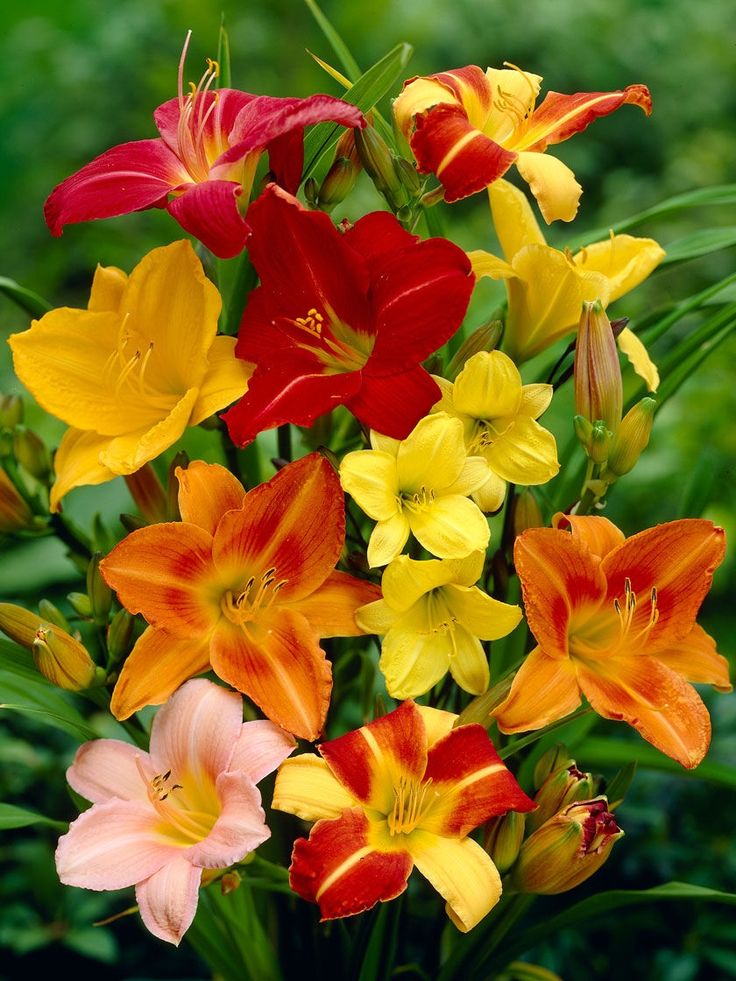
It is best to plant and transplant plants in cloudy weather, and if you had to wait for it, dig the divisions and daylily bushes in the sand so that new roots do not immediately begin to grow, and you can not think about them for two weeks. Before planting, shorten the roots by removing rotten and dead ones, cut the leaves to 15-20 cm in the shape of an inverted "V" and plant the division in the place that you have determined for it in the manner described above. nine0005
Pictured: Crowded planting of daylilies
Caring for daylilies
How to care for your garden
Daylilies are a lot of fun but require very little attention. For example, they do not need to be watered often. Watering is necessary for daylilies only during a long drought, but then it is necessary to pour water abundantly under the root in order to deeply saturate the soil with water, watering time is in the evening.
- Annual flowers for the garden nine0081
- The first top dressing with complex mineral fertilizers is carried out in the spring, when the leaves begin to grow: dry granules are scattered between the bushes, then they are “closed up” with a rake, and the ground is well watered. nine0068
- The second mandatory top dressing is carried out in August, a month after the peak of daylily flowering, during a short dormant period, to ensure the quality and quantity of next year's buds, which are laid during this period. The best fertilizer is Kemira-plus.
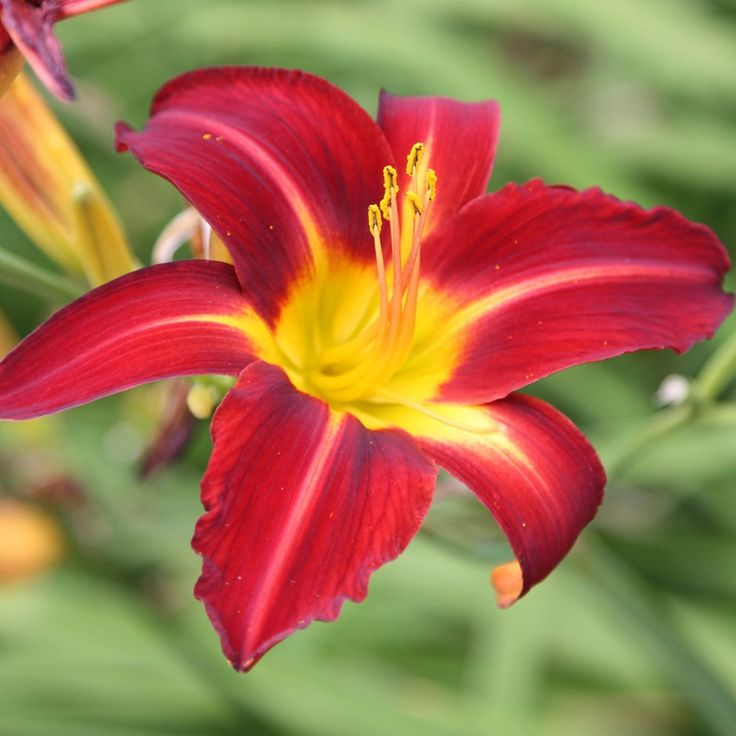
- orange daylily - leaves are rigid, dark green, up to 3 cm wide, sharply curved, peduncles branched above, up to a meter high, asymmetrical flowers, up to 12 cm in diameter, orange in the middle with a red-brown tint, blooms in July, does not smell. In culture since 1890;
- Lemon yellow daylily is found only in the regions of Central China, the shape of the flower resembles a white lily, it has a nocturnal type of flowering.
 Forms a bush 80-90 cm in height, peduncles are high, branched at the top, flower length - up to 14 cm, width - 12 cm, the aroma is pleasant and very strong. Blooms up to forty days in the second half of summer; nine0068
 - Dumortier daylily or wolf grass grows in Northeast China, Japan, Korea and the Far East. Compact shrub up to 70 cm tall, bright green leaves 2-2.5 cm wide, peduncles at leaf level, 2-4 yellow-orange wide-open flowers 5 cm in diameter make up a dense inflorescence. Breeders favorite. In culture since 1830.
- Daylily Double Cutie - flower diameter - 10 cm, chartreuse petals, green throat, medium-early flowering;
- Daylily Double Dream – apricot petals with a dark orange throat 12 cm in diameter, bush height 60 cm, basal leaves; nine0067 Daylily Double Red Royal - large, dark red flowers, petals reminiscent of royal velvet.
The amount of top dressings of depends on the quality of the soil in the garden, so decide for yourself how many times you have to fertilize the soil around daylilies, which are better under fed than over fertilized, but two top dressings are mandatory.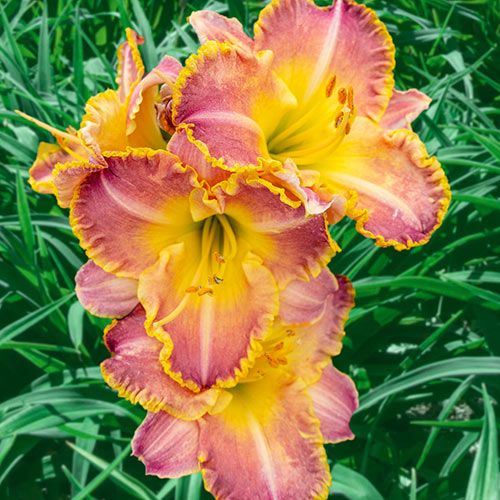
And remember: after fertilizing, water the plants well.
Soil mulching is of particular importance. This is done so that the earth does not compact over the root collars. The center of the bush is mulched with coarse river sand up to 3 cm. The soil between the bushes is mulched with peat or compost, if the soil is poor, but if the planting is located on rich soils, then it is better to mulch with needles or tree bark. They do this in order to protect plants from temperature fluctuations, preserve moisture in the soil and prevent the emergence of weeds.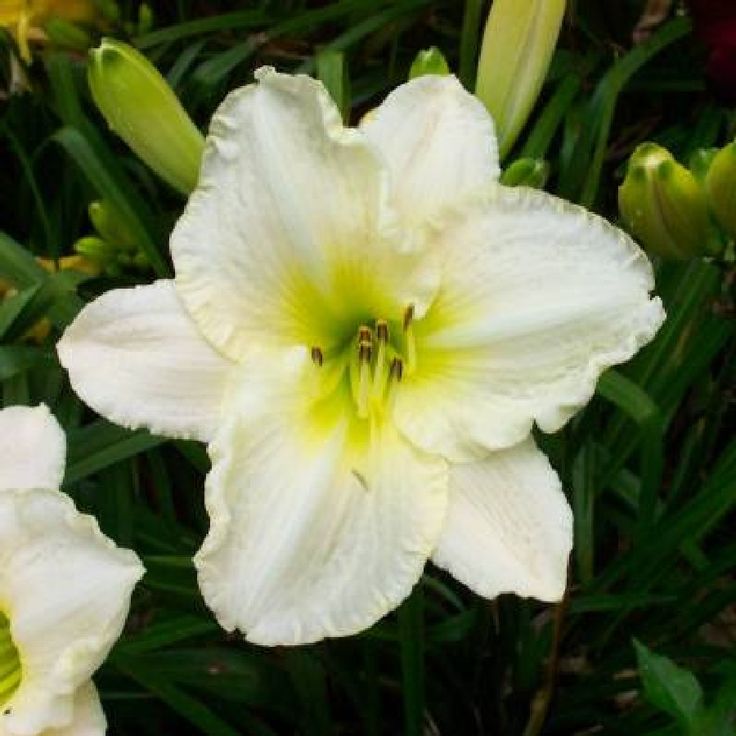 The layer of mulch should be 6-7 cm.
If for some reason you don't want to mulch the area with daylilies, don't forget to loosen the soil after watering, kill weeds and remove wilted flowers.
Daylily propagation
In August it is time to transplant daylilies, at the same time dividing the bushes. This is a vegetative method of propagation of daylilies, which we have already discussed in detail. In addition to dividing the bush, daylilies are propagated by seeds, but this species does not retain varietal characteristics, therefore it is used only by breeders to breed new varieties. There is another way to propagate a daylily - without digging up the main bush, but it is only suitable for varieties that form loose bushes. nine0005
Planting and caring for dahlias - detailed information
At 3-4 years of life of a daylily, the daughter rosette formed by it, which has already formed roots, is separated: a sharp shovel is placed vertically in the place of the intended cut and a part of the bush is separated by sharp pressure of the foot, then cut off from of the mother bush, the delenka is cut from below, taken out of the ground and transferred for transplantation to another place.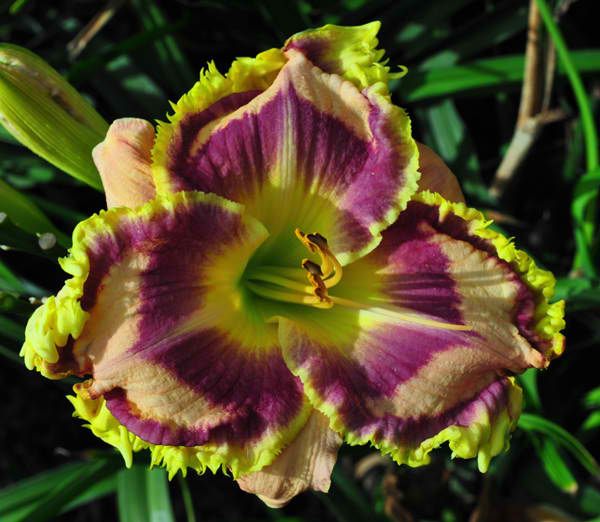 Cuts and damaged roots are treated with ash or crushed coal. This should be done in the spring when the leaves are just beginning to grow, or in the fall after the leaves have been cut from the daylilies. nine0005
Pests and Diseases
Daylilies rarely get sick and are attacked by pests, but problems do occur. Of the pests, thrips, lily mosquitoes, water voles and slugs are the most dangerous for daylilies.
Thrips penetrate plants from the ground at a temperature of 10-12 ºC and begin their destructive life activity for plants: they suck the juice from leaves, stems and petals, from which the flowers are deformed even in buds. If you find thrips, dig up the plant and destroy it along with them - burn it. As a preventive measure, treat the ground around the daylilies with insecticides in spring and autumn and do not leave plant residues that may contain pests in the beds for the winter. nine0005
Lily mosquito lays larvae in plant buds, and larvae, growing up, feed on flowers and deform them. But this is not a mass phenomenon, so it is enough to simply remove the damaged flowers.
In the photo: Large white daylily
Water voles like to eat not only daylily roots. The trouble is that once every three or four years there is a peak in the increase in the number of rodents, and then they eat the roots of young apple trees, lily and tulip bulbs, and daylily roots. You can’t get rid of them, but you need to fight with the usual methods of fighting rodents. nine0005
Slugs will have to be collected by hand or use the Thunderstorm preparation.
As for diseases, the daylily suffers most often from fusarium, rust and root rot.
Root rot manifests itself in spring, when young leaves that have already grown out suddenly stop growing, turn yellow and are easily pulled out of the ground. It is necessary to dig up the plant, cut out all the areas affected by rot, wash the rhizome in a pink solution of potassium permanganate, treat the wounds with a fungicide, dry the rhizome for two days and transplant it to another place.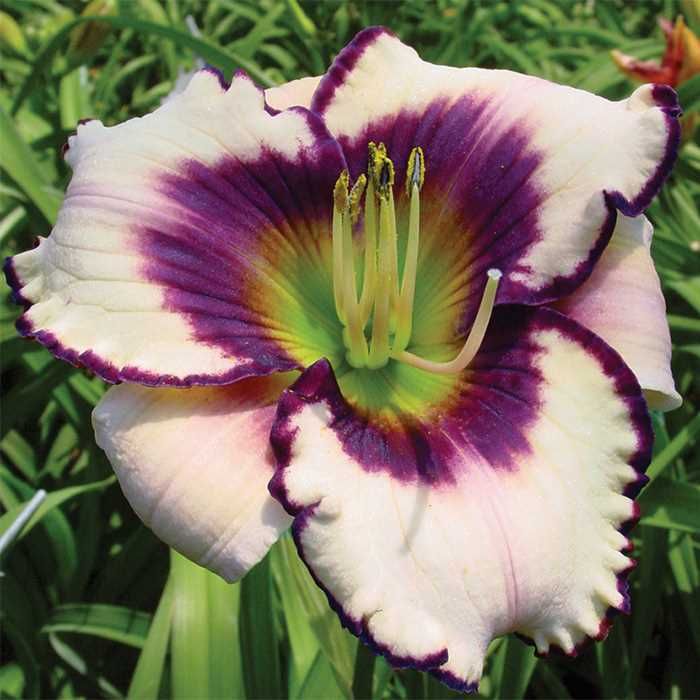 Don't expect it to bloom for two years. In the area where the diseased plant grew, do not plant daylilies for at least a year. nine0005
In the photo: Daylily after rain
Rust only shows up in daylilies if patrinia grows somewhere nearby - don't put them in the neighborhood and you won't have trouble. For prevention, carefully treat daylilies with fungicides.
Fusarium is a known problem. Affected plants have a depressed appearance, the leaves turn yellow and die prematurely, the roots look like dust. The disease is fungal, destroyed at an early stage by fungicides. If the infection has entered into full force, the plant will have to be burned, the soil where it grew, and neighboring plants must be sprayed with Fundazol. As a preventive measure, sterilize garden tools, add Fitosporin-M to irrigation water, loosen the topsoil after watering. nine0005
In the photo: Cultivation of daylilies in the garden
Daylilies after flowering
According to one of the classifications, daylilies are divided into deciduous or dormant, semi-evergreen and evergreen. Dormant daylilies differ in that in autumn their leaves wither, die off, the plant goes dormant until spring. Evergreens (Evergreen) in our latitudes have only two to three weeks of dormancy. Semievergreen occupy an intermediate position: in warmer climates they behave like evergreens, in cooler climates like deciduous: the leaves turn yellow, but growth does not completely stop. nine0005
How to plant and care for irises - details
In deciduous or dormant daylilies, it is better to cut off the aerial part for the winter, but not too low, leaving 15-20 cm above the surface. They do not need to be covered as dormant daylilies are winter-hardy plants. However, in the eastern and northern regions of the country, in the event of a snowless winter, evergreen and semi-evergreen daylilies can freeze to death, especially if frosts are -20 ºC or lower. Therefore, it is better to cover them for the winter, like newly transplanted bushes, with dry leaves, spruce branches, straw or sawdust, but in early spring, do not forget to remove the shelter, as daylilies wake up very early.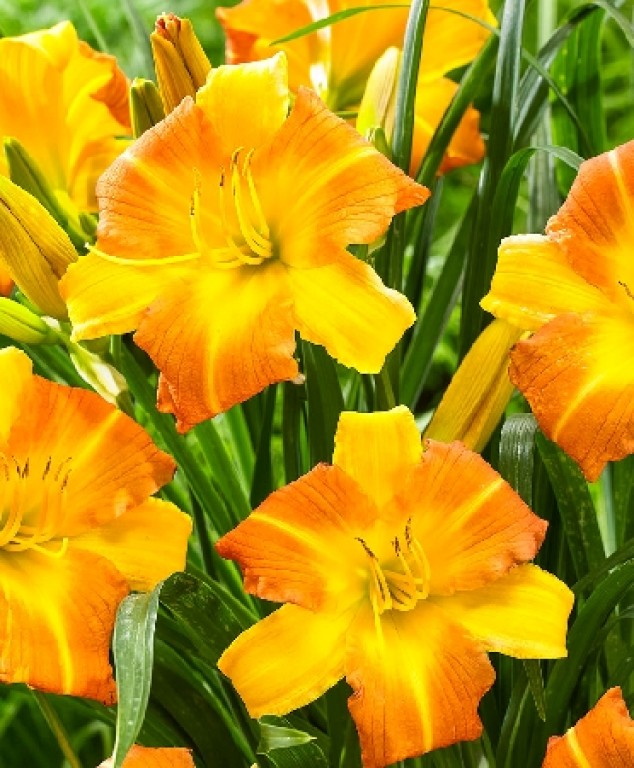
Types and varieties of daylilies
Natural types
All natural types of daylilies are beautiful, so they are readily used in floriculture, especially since they are very easy to care for and undemanding to growing conditions. In addition, they are resistant to diseases and pests, tolerate drought and waterlogging, they are durable, finally. Popular species are yellow daylily, red daylily, Dumorier daylily, lemon yellow daylily, Middendorf daylily. Let's talk a little about some:
Photo: Lemon yellow daylily
Photo: Orange daylily
Hybrid daylily
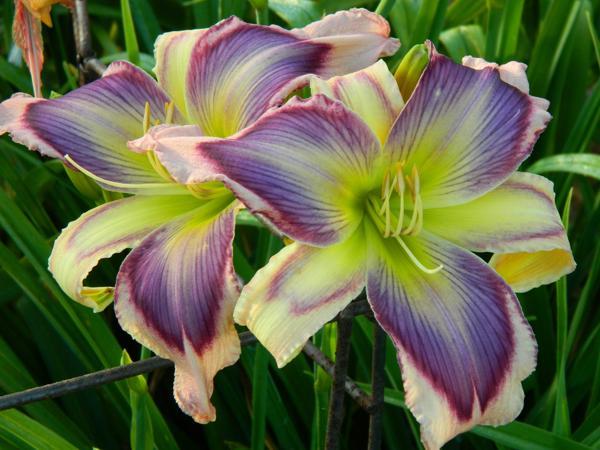
Or garden daylily is the common name for numerous varieties of hybrid origin, of which there are currently more than 60,000. , in terms of flowering, height and such a wide range of colors that it is difficult to say what color of daylily is not in the culture.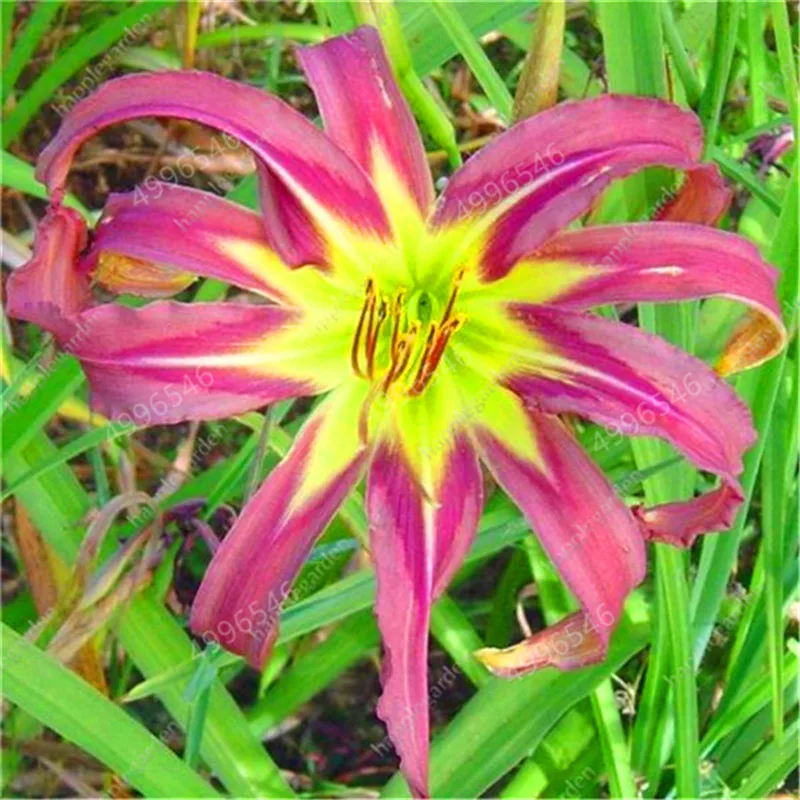 The hybrid daylily is a subject of a voluminous and structurally complex classification, in which plants are divided according to the length of the peduncle, the shape and size of the flower, the timing of flowering, color, type of vegetation, and many more features, and we will not delve into the presentation of this scientific work, created to a greater extent for academic professionals. We will introduce you to some interesting types and varieties of daylilies that will help you get an impression of this amazing and beautiful flower. nine0005
Daylilies of the double group
This is, simply speaking, a double type of daylilies with additional perianth petals. All varieties are incredibly beautiful. For example:
 The shape of the flower is unusual: the outer petals are large, inside them there is an openwork rosette of smaller petals. The plant produces up to 30 peduncles, each with 10-20 flowers. Daylily re-blooming.
 On the photo: Double Dream Daylily
On the photo: Double Yellow Daylily
On the photo: Double Cutie Daylily
Spider Daylilies
Varieties with flowers with segments much longer than wide and reminiscent of spiders:
- Helix daylily - a huge spider with a throat of green, gradually turning into yellow petals, the ends of which are dark crimson - very beautiful;
- Arms to Heaven - a giant with a yellow-green throat and lilac-red long petals, blooms profusely, height 90 cm, 16-20 flowers on a peduncle;
- Free Healing - a very large cream-yellow spider with a red throat, thin petals are strongly elongated, up to 45 buds on one peduncle.

Fragrant daylilies
Available in all colors, shapes and sizes. Daylilies are so beautiful that they could not smell at all, but growing a flower in your garden that combines beauty and wonderful aroma is the dream of any grower:
- Apple Spring - soft pink petals with a strongly corrugated greenish-yellow border on the edge. Flower diameter - 15 cm, on each peduncle 65 cm high up to 28 fragrant flowers; nine0068
- Ode to Faith - deep yellow with a pink sheen along the middle stripe of the petal, golden pleated border, green throat. The height of the peduncle is 84 cm, the diameter of the flower is 15 cm, a delicate aroma;
- deciduous day lily Stella do Oro – delicate, fragrant, corrugated dark yellow funnel-shaped flowers 7 cm in diameter bloom profusely all summer long. This variety is the winner of many awards from the American Society of Daylilies, it is beautiful not only in the garden, not only as a border plant, but also as a houseplant.
 nine0068
In the photo: Daylily Ode to Faith
In the photo: Daylily Stella do Oro
White daylilies
It must be said that among the varieties and forms of daylilies there are many that can be conditionally called white. Here are some of them:
- Apple Blossom White is a white daylily with a yellow, strongly rippled border. Height - 83 cm, on peduncles 2 branches with 25 flowers;
- Ruffled Parchment - ruffled white daylily with a smooth transition from creamy white to yellow in the throat area, very fragrant, flower diameter - 13 cm, peduncle height - 5 cm; nine0068
- Granny Smith - almost white petals with a green ruffled border.
In the photo: White daylily
In the photo: White daylily
The fact is that absolutely white daylilies do not exist either in nature or in culture, so breeders introduced the expression “near white”, which means almost white.