Cutting plants to grow
how to root plant cuttings in water for propagation
Hello! Thanks for being here! Today I’m going to show you how to root plant cuttings in water. This is a great way of multiplying the plants you have and sharing the plant love with friends. I will say, it’s kind of hard to give away a plant that you’ve been nursing from its beginning. But, it’s so rewarding and so cool to get results! I just gave two Chain of Hearts cuttings away today to super awesome homes. I can’t wait to check in on their progress.
In the beginning
When I was in my early 20s I worked at a golf course that had a 30 foot Monstera deliciosa. You read that right…30 FEET! That’s where my love of plants began. It’s actually my favorite plant of all time (if you didn’t already know). Anyway, some of the leaves were 2 feet wide and absolutely beautiful!
One day I saw this tiny leaf pop out of soil. It was so tiny and cute! Once it got a little bigger, I asked my supervisor if I could pluck it out and take it home, of course he said yes. I wrapped it in a wet cloth, and home I went.
I took it home, put it in a glass container of water, it rooted, and it made me so happy! I was so in love with this amazing method of reproduction. So let’s talk about How to Root Plant Cuttings in Water.
Most common house plants can be propagated by water method. Right now my new subject is a tiny little stem from my big Fiddle Leaf Fig. So far no roots but there is a tiny green leaf!! If you’re not sure, just try it!
Let’s get startedSTEPS
- Identify the location where you will snip your cutting from the main plant. Not all cutting that will root in water have root nodes, but most of them do so find the root node on your plant.
- Carefully cut just below the node with a clean sharp knife or scissors. About 1/4″ below the node.
- Place the cutting in a clean glass. Poor enough room temperature water to cover the nodes of the cutting.
- Change out the water every 3-5 days with fresh room temperature water.
- Wait and watch as your roots grow! This can take weeks to months depending on the plant.
- Once your roots reach approximately 3″-5″ then it’s time to put the cutting in soil!
Need a visual? Watch my propagation tips on AM Northwest.
Place your rooting plants in an area with bright indirect light if possible. You’ll also need patience…serious patience! If you are trying a new cutting and two weeks go by with no roots, it’s not always bad news. I know someone who stuck a fiddle leaf fig leaf in water and 3 months later she started to see roots.
When you change out the water, be sure to give the roots a little rinse and a little rub with your fingers. The roots can get a mucky film (that’s the technical term) and you want to wipe that away before placing them in the new water.
That’s all you have to do! It’s so simple. Now you can make your own plants and trade with your friends. It’s one of my most favorite things to do. Once you are ready to pot your rooted plant, check out my How to Repot a Houseplant post. There are some good potting tips there!
Lastly, take a look here for my favorite propagation stations! Have a great day and thank you for being here 🙂
Check out my Instagram for daily plant love and inspiration!
This post has affiliate links for your convenience
How to Grow Plants From Cuttings
Grow New Plants at Home With This Easy Propagation Method
By
Marie Iannotti
Marie Iannotti
Marie Iannotti is a life-long gardener and a veteran Master Gardener with nearly three decades of experience. She's also an author of three gardening books, a plant photographer, public speaker, and a former Cornell Cooperative Extension Horticulture Educator. Marie's garden writing has been featured in newspapers and magazines nationwide and she has been interviewed for Martha Stewart Radio, National Public Radio, and numerous articles.
Learn more about The Spruce's Editorial Process
Updated on 10/25/22
Reviewed by
Kathleen Miller
Reviewed by Kathleen Miller
Kathleen Miller is a highly-regarded Master Gardener and Horticulturist who shares her knowledge of sustainable living, organic gardening, farming, and landscape design. She founded Gaia's Farm and Gardens, a working sustainable permaculture farm, and writes for Gaia Grows, a local newspaper column. She has over 30 years of experience in gardening and sustainable farming.
Learn more about The Spruce's Review Board
The Spruce / Jiaqi Zhou
Project Overview
Garden plants can be propagated in many ways, but one of the easiest methods is taking stem cuttings. How to grow plants from cuttings is simple: Trim off a healthy portion of stem, place it in water or a growing medium until it develops roots, and then plant it in a pot or the ground.
Growing plants from cuttings is a common way to create new houseplants, but it can also work for many garden plants. In cold-weather zones, some gardeners take clippings of tender annuals and root them indoors to prepare a supply of new plants for garden planting in the spring.
Here's what to know about how you grow a plant from a stem cutting.
Watch Now: How to Propagate Dipladenia
When to Take Stem Cuttings
Stem cuttings can be taken and rooted at almost any time during the parent plant's active growth period. You also can take cuttings from many woody plants (plants with hard stems) during their dormancy. In cold climates, you can take cuttings in the fall before frost arrives, root them indoors, and then transfer them to pots. By springtime, you will have vigorous potted plants that can go back into the garden.
Types of Plants to Grow From Cuttings
Soft-stemmed herbaceous plants are the easiest to grow from cuttings, but many woody plants can also be propagated with this method.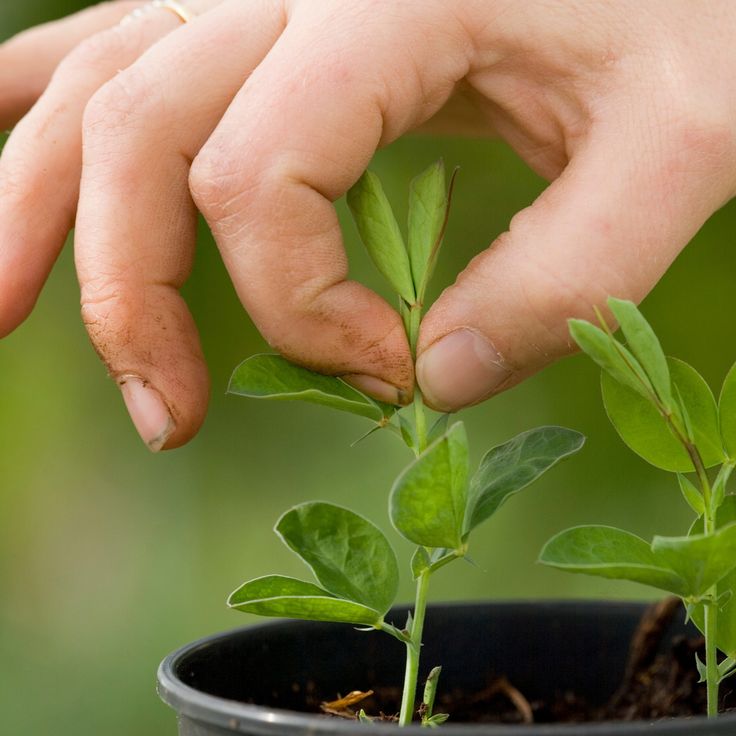 The following list includes examples of plants that grow from cuttings.
- Semi-hardwood cuttings are woody around their base but have softer stems up top. Examples of plants that can be propagated via semi-hardwood cuttings include holly, hydrangeas, and azaleas.
- Hardwood cuttings have woody stems throughout. Examples of plants that can be propagated via hardwood cuttings include crepe myrtle, forsythia, and rose species.
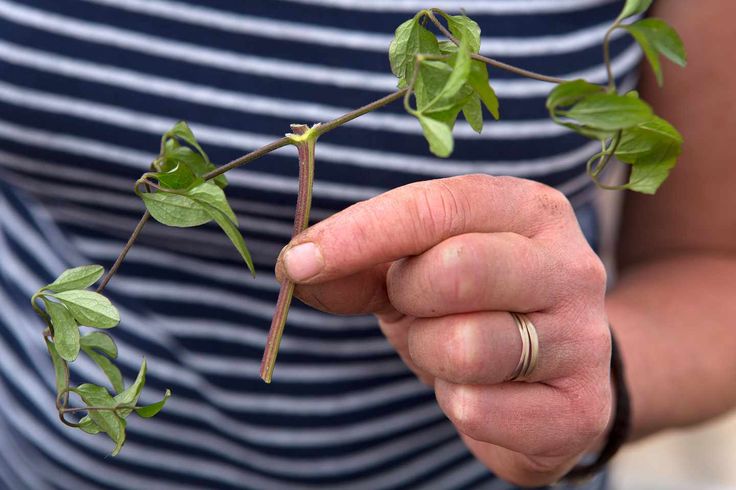
- Softwood cuttings have flexible soft stems. Examples of plants that can be propagated via softwood cuttings include clematis, asters, and chrysanthemums.
- Greenwood cuttings are very similar to softwood cuttings, except that their base is slightly harder and they take a bit longer to grow. Examples of plants that can be propagated via greenwood cuttings include boxwoods, dahlias, and gardenias.
Before You Begin
The key to successful rooting of stem clippings is to find the moisture and temperature level appropriate for each type of plant.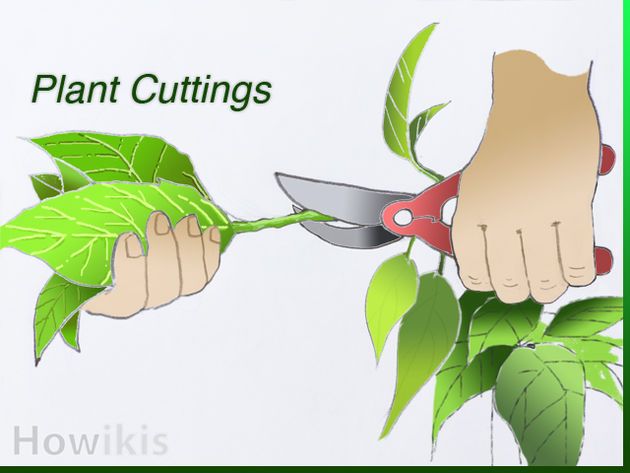 Do some research on the species you are trying to propagate to learn the conditions it likes best. You can make your plant cuttings grow faster not only by providing the conditions they like but also by applying rooting hormone to the cut end, which helps to encourage root production. It's also best to take several clippings to maximize your chances of success.
How long plant cuttings take to root varies widely depending on the type of plant. Many herbaceous annuals will quickly grow to maturity. But cuttings from perennials and woody plants, such as shrubs, can be harder to root and take longer to reach maturity.
Tip
It is possible to grow a plant from a cutting in water. Simply place the cut end down in a container partially filled with plain water, and refresh the water every few days until a substantial root system has formed. However, transferring a water-rooted seedling to soil is not always successful, so it's generally better to plant cuttings straight into soil.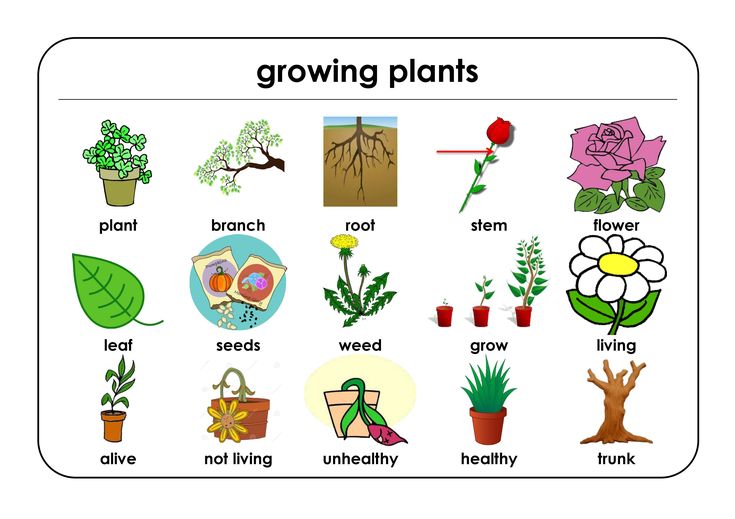
Equipment / Tools
- Razor blade or scissors
- Small container for rooting hormone (optional)
- Pencil or stick
Materials
- 6-inch containers for planting
- Soilless potting mix
- Existing plant (parent plant)
- Alcohol
- Rooting hormone (optional)
- Plastic bag
The Spruce / Loren Probish
How to Grow Plants From Cuttings
-
Prepare a Container
Fill a clean 6-inch-deep container with soilless potting mix to hold cuttings for rooting. A soilless mix drains well and provides suitably moist conditions that encourage the cutting to root. Don't use ordinary garden soil, as it might contain pathogens that can kill the cutting before it ever takes root.
The Spruce / Loren Probish
-
Choose a Parent Plant
Select a healthy parent plant from which to take cuttings. Avoid plants with diseases or lots of drooping or dying foliage.
 The best specimens for cuttings will have plenty of new growth and be large enough that taking cuttings will not harm them.
 Tip
Good green growth is more important in a parent plant than plentiful flower buds. Too many flowers can actually hinder the ability of a cutting to grow roots.
The Spruce / Loren Probish
-
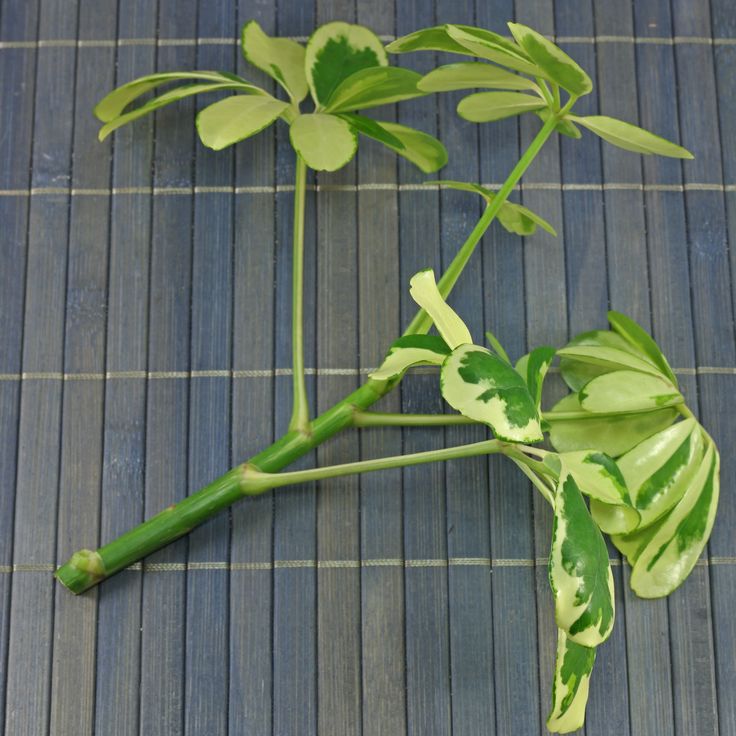
Find the Best Stems for Cutting
Choose green, soft (non-woody) stems for cuttings. Newer growth is easier to root than woody, older stems. Look for a stem with a node—a bump along the stem where a leaf or flower bud attaches. This point is where new roots will emerge.
The Spruce / Loren Probish
-
Take the Plant Cutting
Use a pair of scissors or a razor blade that has been sterilized in alcohol to make a clean cut just below a node. The cutting doesn’t need to be long, but it should contain at least two leaves and one node. A cutting that is 4 to 6 inches long is usually sufficient.
 Longer cuttings sometimes dry out when placed in their growing medium.
 The Spruce / Loren Probish
-
Prepare the Cutting
Place the cutting on a flat, hard surface, and make a clean, partial slice through the middle of the node with a sterilized razor blade. Scarring the node will increase the chances of roots emerging from this spot.
Then, remove all but one or two leaves on the cutting. The cutting needs some leaf growth to continue photosynthesis, but too many leaves will consume energy that would otherwise go to root creation. If the leaves are very large in proportion to the stem, cut off the top halves of the leaves.
The Spruce / Loren Probish
-
Apply Rooting Hormone (Optional)
Wet the node end of the cutting, and then dip it in a small container of rooting hormone. Tap off any excess hormone; too much actually hinders chances for success. This step is optional. Some plants root easily on their own, but rooting hormone can help others by stimulating the cutting into sending out new roots.

The Spruce / Candace Madonna
-
Bore a Planting Hole
Use a pencil or similar pointed object to poke a planting hole into the potting mix, rather than planting the cutting straight into the soil. Make the hole slightly larger than the stem diameter. Doing so will prevent rooting hormone from being wiped away when you embed the stem in the pot, and it's also gentler on the stem.
The Spruce / Loren Probish
-
Plant the Cutting in the Soil
Carefully plant the cutting in the hole you made in the potting mix, and gently tamp the soil around it. You can fit several cuttings into one container, but space them so the leaves do not touch one another.
The Spruce / Loren Probish
-
Cover the Pot With Plastic
Place the container with the cutting into a plastic bag. The bag will keep the humidity high and hold in heat. But don’t seal the bag completely because some airflow is necessary to prevent fungal rot.
Keep the container in a warm spot in the house, ideally in an area that has indirect bright light. Don’t put the cutting in full sunlight until new leaves begin appearing along the stem.
The Spruce / Loren Probish
-
Monitor the Cutting
Until roots form, keep the soil slightly moist but not so wet that condensation forms on the inside of the plastic bag. Check regularly for signs of rot, and remove any suspect cuttings as soon as you spot trouble.
After two to three weeks, begin checking for roots by tugging gently on the cutting. When you begin to feel resistance, it means roots have developed. At this point, you can transplant the cutting into its own pot or the ground.
The Spruce / Loren Probish
30 Plants That Grow From Cuttings in Soil
Watch Now: 19 Timelapses Perfect for Plant Lovers
Article Sources
The Spruce uses only high-quality sources, including peer-reviewed studies, to support the facts within our articles. Read our editorial process to learn more about how we fact-check and keep our content accurate, reliable, and trustworthy.
Plant Propagation. University of Maine Extension.
Pruning in spring
Garden preparation starts in early spring. In addition to fertilization and spraying, the complex of mandatory measures includes planned pruning of plants. For trees, this procedure is carried out at a temperature of +5 0 C.
Pruning in spring
Garden preparation begins in early spring. In addition to fertilization and spraying, the complex of mandatory measures includes planned pruning of plants. For trees, this procedure is carried out at a temperature of +5 0 C.
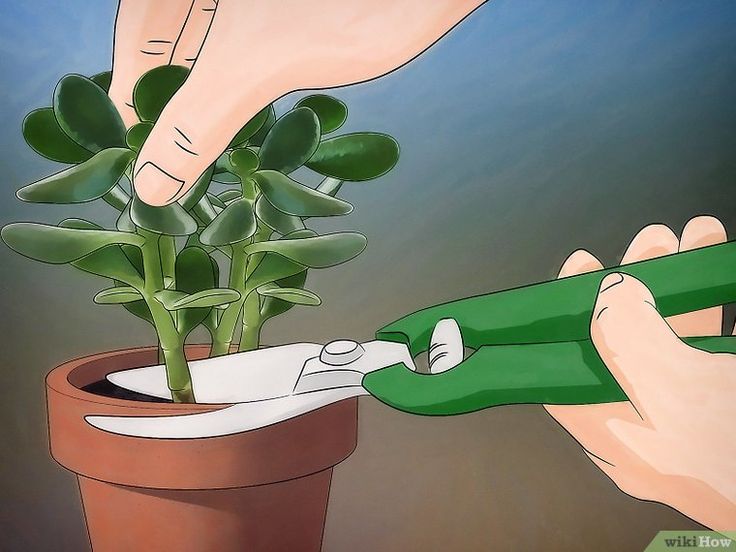
The end of March is considered the optimal period for pruning shrubs. Before bud set begins, the plants will receive minimal damage. To implement the tasks set, the gardener should acquire convenient tools - pruning shears, a copulation knife and a serpet.
Fruit trees
Planned pruning of plants begins with fruit trees. Old apple trees are processed first, then pears, cherries and plums. This procedure is carried out in the morning, when the snow is still dense, or postponed until complete melting. During pruning, diseased branches are removed and a crown is formed. You can cut healthy shoots for grafting. They are recommended to be stored under snow or in wet sand.
Ornamental shrubs
Among the key tasks is pruning plants belonging to the category of ornamental. The purpose of this procedure:
-
form the crown and skeleton of shrubs;
-
remove dead shoots;
-
stimulate flowering.
When pruning ornamental plants, it is necessary to focus on their specific features. There are 2 large groups of shrubs - flowering and decorative deciduous. The purpose of growing the former is to obtain beautiful flowers throughout a certain season. Deciduous ornamental plants are valued for their dense greenery, which delights gardeners for most of the year.
Planned pruning of plants may vary depending on which group the ornamental shrubs belong to:
-
Not forming shoots from the base. With the help of pruning, carried out in the first years of development of plantations, the skeleton of the plant is formed. During the procedure, weak shoots are removed. Adult shrubs are freed from dry branches and trim the crown.
-
Flowering on last year's shoots. For this group, pruning of plants consists in removing faded branches. It is important to cut off weak shoots, leaving the strongest ones.
-
Blooming on this year's shoots. They are pruned in early spring to form strong shoots. This will help avoid over-thickening.
For ornamental deciduous shrubs, pruning is carried out very intensively. This will activate the growth of young shoots and help achieve the maximum decorative effect.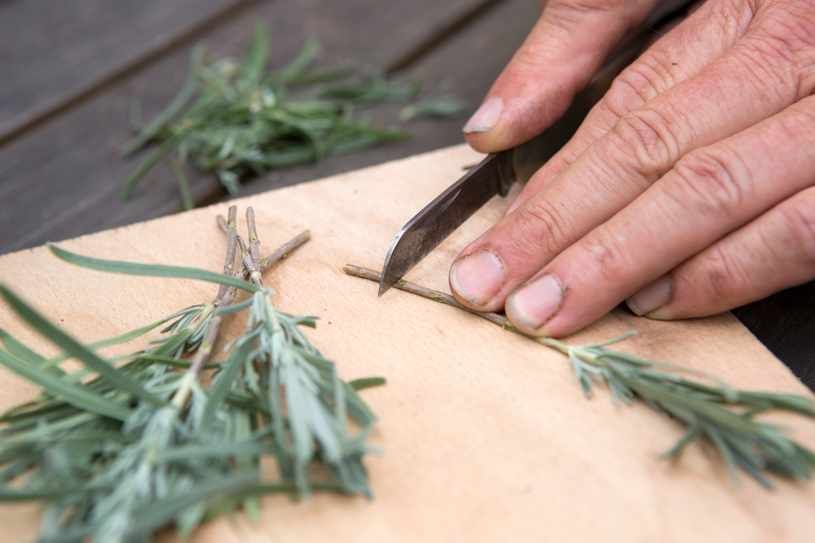
View other related articles
New articles
Should I overpay for a landscape project? Lawn restoration procedure, how to do it Planting from OASIS groups Country Landscape Design IdeasPlant pruning - why should plants be pruned, should they be pruned
Author: Elena N. https://floristics.info/en/index.php?option=com_contact&view=contact&id=19 Category: Houseplants Reissued: Last edits:
Contents
- Should flowers be trimmed?
- Why prune flowers
- Comments
Should flowers be prune?
Some people are so happy with the growth of their pets and every new leaf that they do not want to cut even unnecessary, deformed or diseased shoots. This can be compared to how a woman does not want to cut a braid that she has grown since childhood, even if this braid has already begun to look like a “mouse tail”.
Some people, on the other hand, start cutting off overgrown or bad looking shoots, get carried away and chick everything. They motivate their actions by the fact that radical pruning rejuvenates the plant. But as a result, the flower, left with a small number of leaves and shoots, cannot receive nutrients from the air. Yes, and the process of photosynthesis, necessary for the plant, becomes difficult.
Fortunately, many flower growers still adhere to the golden mean. They cut only the necessary parts of the plant, while forming a flower, intelligently rejuvenating it and maintaining its healthy appearance. I am sure that the readers of our site belong to this group. But we all often come across new plants that we have not dealt with before. And we do not always know about the features of their pruning. Therefore, I propose to talk about which plants to prune and how to do it correctly.
Why prune flowers
When it comes to pruning plants, you should always look for the answer to the question - why? Because it is wrong to prune a plant simply because you have heard that it is necessary to do so. There are some really good reasons to prune a flower.
So, pruning is carried out:
1. If the plant has deformed shoots. It happens that when changing the “place of residence”, the shoots of the flower are bent, become knotty, irregular in shape, short. Also for this reason, the plant can drop almost all the leaves (for example, ficus). To give the plant a beautiful appearance in this case, sanitary-forming pruning is carried out. Then, instead of deformed or overgrown shoots, new and healthy ones grow.
2. Some plants lose their shape as they grow. Laurel, citrus, hibiscus, roses, ficus without pruning look like an overgrown bush. It is the shaping pruning that is carried out to give the plant the desired shape. For example, you want to get a lush rose bush, and the flower constantly pulls the old shoots up, but does not kick out the new, lateral ones. For the correct formation of the crown of the plant, the apical shoots are cut or pinched so that the side shoots grow. Pruning can be carried out until the moment when the flower acquires a beautiful appearance. But keep in mind that during pruning, the plant weakens, because it throws all its strength into the growth of new shoots. Therefore, during this period it does not bloom or blooms weakly. If you want your green pet to bloom, stop pruning. Formative pruning also includes the process of creating a bonsai.
3. E Another reason to do a formative pruning is if your flower has become an overgrown plant. Ficuses or lemons sometimes push out thin inclined shoots, and the crown becomes asymmetric. Begonias and balsams shed their lower leaves, and the trunk below looks bald. To prevent this from happening, you need to remove shoots that are too stretched in time. Sometimes, after pruning or even pinching the top, the lower part of the trunk is again overgrown with new shoots or tufts of leaves. But sometimes only rejuvenation can fix the situation.
4. Rejuvenation is of two types. In the first case, this is pruning old dried shoots so that new ones grow. Such a procedure should be carried out, for example, to remove the dried shoots of asparagus or cyperus. But if the structure of the plant is such that over time the trunk has become bare below and does not overgrow with new leaves, then you need to cut it radically. You can cut off the top and root it to get a new plant. This is the rejuvenation of the flower. And the remaining trunk with 2-3 buds (growth points) can give new shoots.
5. Root pruning . This procedure is not required for all plants. Some of them may die afterwards. But if the flower has grown very much, its roots occupy the entire space of the pot, then a plant transplant is required and sometimes it is necessary to cut off the extra roots. This should be done if parts of the root are weak or diseased. All rotten, dried, broken roots are also cut off.