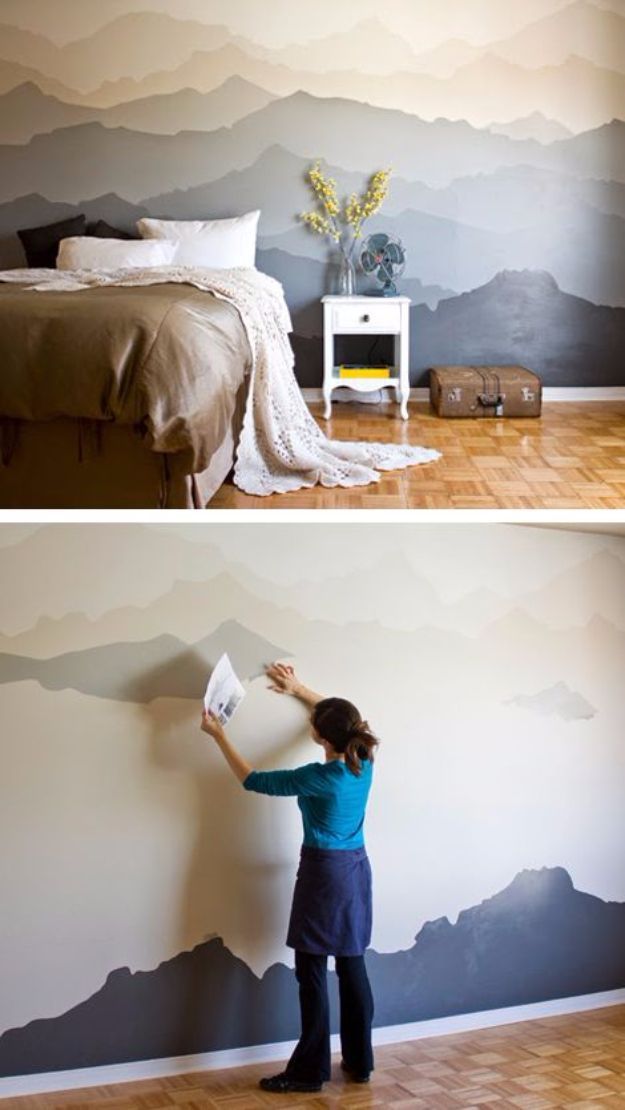
Process of painting walls
How to paint a wall: 15 steps for painting walls for beginners
Painting a wall is one of the easiest and most affordable ways of updating any room. And you don't have to get professionals in to do an aesthetically pleasing job of it.
But, before you start to paint a room, it is a good idea to learn a few tips from top experts on how to paint a wall like a pro before you start.
After all, you're going to be looking at those walls for a long while to come. We've consulted experts from the likes of Benjamin Moore, Lick and Dulux for their insight into how to paint a wall to perfection – so that you can bring your paint ideas to life yourself.
How to paint a wall
Here, we tackle the basics of painting a wall – using the expert tips we've added will ensure you get a professional finish.
1. Measure your room and determine how much paint you need
If you've been browsing living room paint ideas and are wondering whether you could work the transformation yourself – and how much it costs to paint a room – the first thing to get to grips with is paint quantities.
'There is no "average room", so it’s important to roughly work out how much paint you will need to avoid buying too much,' says Helen Shaw, Director at Benjamin Moore . 'As a guide, it’s key to bear in mind that most paints will cover about 10-12sq m per litre. '
She continues: 'Firstly, we recommend starting by measuring or estimating the length of the room. A loose and easy guide for this is step it out – one step for an adult is about 1m, so start by standing against one wall and pacing out to the opposite wall. You can then do the same to estimate the width. Then add two times the length and two times the width together to get the perimeter.
'Most rooms have a standard 2.5m high ceiling, so if you simply multiply the perimeter by 2.5, you will have the total in meters squared. Although we would recommend that if you have particularly tall ceilings, it’s best to measure this rather than use the 2.5m estimate. If you have large windows or many doors or built-in cabinets, you can deduct this from the total to avoid buying too much. Finally, double the overall meter square total to account for doing two coats.'
2. Choose your color and get the right finish
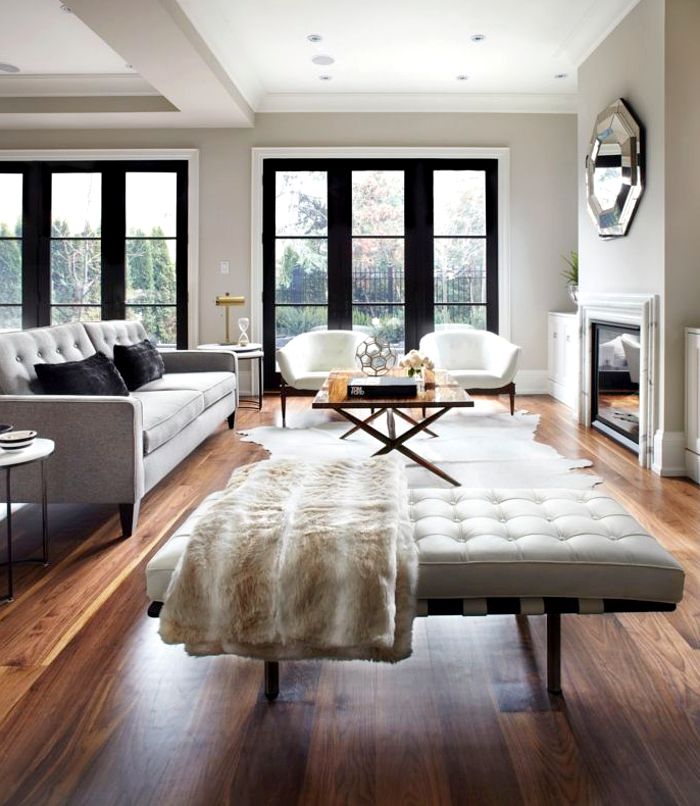
Whether you're looking for organic, neutral or bold, statement living room color schemes, picking up a selection of sample pots is always a good idea to see how the hue reacts to the light in your space.
And don't forget the finish. 'The right paint finish for different surfaces and specific results is the key to a perfect result,' say the experts at Dulux . 'For example, mid-sheen and gloss finishes reflect light, while kitchen and bathrooms require moisture and stain-resistant qualities.'
3. Buy the right tools
When painting a wall, there's nothing worse than realizing too late that you haven't got all the tools and materials you'll need to do the job properly. You will need: a pot of paint; a paint brush and paint roller; primer; soap and water for cleaning; a painting tray; a dust sheet; painter's masking tape; and, if you have high ceilings, a roller extension pole is a good idea.
Benjamin Moore's Helen Shaw says: 'When it comes to the must-have tools, a firm favorite amongst consumers is to use a roller for painting walls and a 2in brush for cutting in around the edges. To ensure a smooth finish, a microfiber roller sleeve is best.'
4. Paint in natural light
For best results, always paint in natural, not artificial or low, light.
A Dulux expert advises: 'Whether you're rushing to get the job done just as the sun goes down or it’s dark and stormy outside, it’s always better to wait for bright, natural light to paint your rooms. Painting in dim or harsh artificial lighting can easily result in patches and imperfections that only show up in glaring natural light.'
5. Clear the area
Now you've got the right amount of paint in the correct finish and color of choice, you're ready to take the next step in painting a wall.
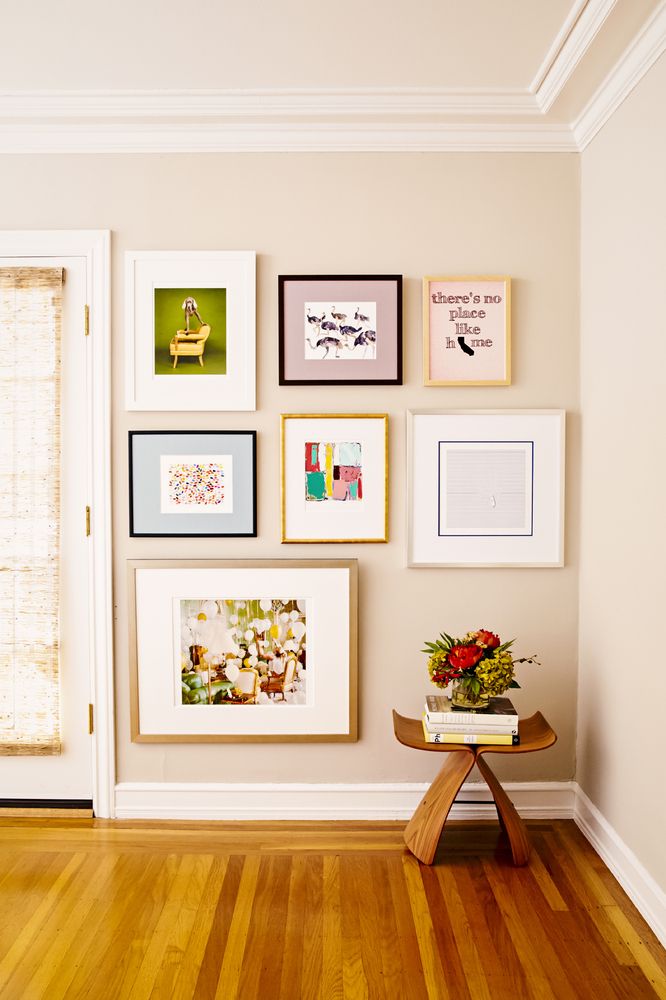
'Start by clearing your working area to give yourself ample painting space,' says Lick’ s Interior Design and Colour Psychologist, Natasha Bradley. 'Put away your favorite furniture items and anything you don’t want to get splatters or splodges on.
'Put a protective dust sheet down to save your flooring and any furniture that’s too heavy to move. Newspapers and bedsheets won’t be sufficient here, but either a canvas or a plastic drop sheet should work equally well.'
Helen Shaw, UK Director of Benjamin Moore adds: 'Before you jump in with your paint brush, make sure the space around you is prepped and cleared – you don’t want to be spilling paint over your new sofa! If there’s not enough space to clear the room entirely, push everything to the centre of the room and cover, don’t forget to also cover the flooring.'
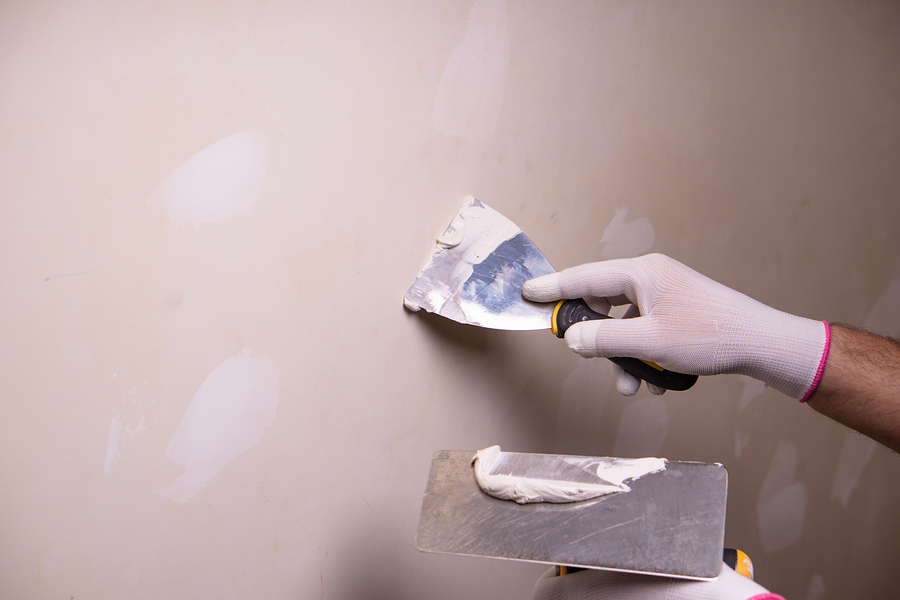
6. Prep your walls
'Once everything is cleared and covered, you can then make a start on preparing the walls for painting,' says Helen Shaw. 'A key factor in ensuring you have a smooth finish is having a clean surface to paint on, dust, cobwebs or grime can stop your paint adhering and having the perfect finish. Most walls can be washed with a soft sponge and warm water, but if you’re painting in the kitchen then you’ll need something to help cut through the grease before rinsing with warm water.'
Speaking to H&G, a Dulux expert says: 'It’s very tempting to skip this crucial first step, whether it’s to save time or because you think your walls look fine to paint over. But, it’s often hard to see dirt, dust, scratches and cracks, until they rear their ugly heads through your new paint. Before you do anything, give your walls a good clean with warm, soapy water, fix any cracks or holes with filler and wait until the surface is totally dry before painting.'
Be ultra-vigilant about this step, says Lick's Natasha Bradley. 'Examine your wall for any flakey areas or little bumps. Use filler and sealant to fill up any cracks or holes or a scraper to even bumps and flaking paint. Don’t skip this step if you want to achieve a smooth and professional finish.
'Next, get your painting surface ready. Clean your walls thoroughly but gently using a soap and water mixture. Wipe clean and leave to dry.'
7. Apply your painter's tape
Once the surfaces are dry, use painter’s masking tape or good, old-fashioned masking tape to cover any sockets, switches and skirting boards in the area.
Helen Shaw says: 'You’ll need a roll or two of painter’s tape to protect any mouldings or switches from any drips and ensure a neat finish. Make sure you apply the tape carefully to get a good seal to avoid paint getting underneath and running.'
8. Time to prime
Using a primer will ensure a more professional finish and help you get the most from your paint color. 'Apply a smooth and even base coat of primer using a roller,' says Lick's Natasha Bradley. 'Work into smaller crevices using the tip of your paintbrush. Leave to dry for a few hours before starting to paint.'
She adds: 'Avoid the temptation to skip the priming stage if you want a vivid and consistent finish, especially if you’re painting over a darker color. '
'
9. Stir and decant your paint
After opening a paint can, stir the paint thoroughly for an even texture, before pouring some into your painting tray.
A Dulux expert says: 'As colors can vary slightly from can to can, it pays to decant paint into a smaller container or tray to mix it before you start painting. In terms of how to decorate while making the least amount of mess, this tip might just save your sanity. Imagine accidentally knocking over a 10 liter can of paint?'
Kathryn Lloyd, of Crown Studio , offers her top tip: 'Pour the paint into the roller tray and, for ease, you can use some aluminium foil within the tray to save you cleaning it out afterwards. Once you’ve finished with the paint you need, pour the residual paint back into the can and you can dispose of the foil without using tons of water.'
10. Cut in the edges
Before you start painting the walls, cut in the edges with a one or two-inch brush. This means first painting the areas that are too tight for rollers, like the ceiling line, corners and trim.
Benjamin Moore's Helen Shaw advises: 'To cut in with ease, a low-tack tape around the ceiling edges or skirting will help to get a sharp line and a clean finish. Gently remove the tape when the paint is still wet to ensure there is no bleed through or peeling.'
Kathryn Lloyd's top tips on cutting in while painting a wall? 'Apply some paint onto the brush, providing any excess has been removed to guarantee you have control when using the brush and keep the paint looking neat along the edges.
'With your paint brush in hand, start a little bit away from the edge of the wall, so that you have the right amount left on the brush to create a very sharp edge so that it’s nice and neat. Repeat this for the top, bottom and sides of the wall.'
From preparation to painting, work from the top of your room down, for best results. Start with the ceiling and the architrave. Then, paint your walls from the top down with your roller. Finish the job with woodwork and skirting.
12.
 Use this painting technique for best coverage
'If you’re flinging your roller around, you might not achieve the best coverage,' say the experts at Dulux. 'Instead, apply your paint in a W shape on the wall. Go over the W with an M shape to fill in the gaps, then reload your roller and move onto the next section in the same way.'
Lick's Natasha Bradley agrees this is a good technique for painting a wall, saying: 'Dip your roller into the paint tray and start to paint your wall in W or M motions for even distribution.'
13. Apply another coat of paint
Leave the first coat to dry for a couple of hours before you apply another coat.
'Most walls shouldn’t require more than two coats of paint,' says Natasha Bradley. 'Remove the painter's tape from the wall whilst the second coat is still drying.'
14. Don't forget ventilation
To make the experience more pleasant for you, open the windows and let some air in.
Natasha Bradley advises this will also quicken up the wait: 'Keep your work area well-ventilated to minimize drying time. '
'
15. Clean up ready for the big reveal
Leave to dry for at least 24 hours and remove your dust sheets to reveal your brand new wall. Keep your brushes in good condition by cleaning them before you put them away. If you've used a water-based paint, a clean with soap and water will suffice.
Keep the colors you’ve used so you can touch up paint on walls as necessary and make sure to dispose of paint safely when you do finally come to changing to a different wall color.
Now it's time to step back, admire your own handiwork, and give yourself a well-deserved pat on the back.
10 Easy Steps - How To Paint A Wall
Painting walls is one of the easiest and least expensive ways to change the appearance of a room. Whether the change will be positive or negative depends on how well you understand what you need to do to get professional results. Below is a simple 10-step guide that explains how to paint a wall the right way.
- Tape the trim.
 After preparing walls for painting, using specialized masking tape, such as Shurtape’s Frog Tape, according to label instructions to cover the trim can help paint clean, sharp lines.
- Determine the type of paint you have on your walls. Since using the wrong type of primer or paint can lead to early paint failure, figuring out the type of paint you have on your walls is very important. Rub a small area with denatured alcohol. If the paint loses glossiness or comes off on the rag, it’s latex paint; if it doesn’t, it’s oil-based paint.
- Choose the right primer. For new drywall, use a drywall primer-sealer product to level surface texture and prevent flashing. Applying a stain-blocking primer over water stains, ink or crayon will prevent bleed-through along with blistering and peeling paint. For engineered wood products, such as medium-density fiberboard, use shellac or an oil-based primer to prevent swelling. You can also find primers that allow you to switch from oil-based paint to latex paint, or vice versa, as long as the surface has been properly prepared.
- Apply the primer. Start by pouring the primer into a paint tray or five gallon bucket with a roller grid, then dip the roller into the primer, removing excess primer to prevent drips. Place the roller half way up the wall, and roll upward, close to the ceiling, and downward toward the floor, slightly overlapping each stroke. Make sure that you also prime the ceiling and all corners properly using a brush. Let the primer dry completely before painting
- Paint the ceiling. Dip the roller into the paint tray and remove excess paint. Start in one corner and proceed diagonally across the ceiling in a “W” pattern, overlapping each stroke. Make sure that you cover the ceiling line previously painted?
- Cut in corners. With a 2 to 3 inch brush, paint each corner of the wall, brushing along the corner, outward a few inches. To smooth out brushstrokes, run the brush lightly over previous strokes. Paint the rest of the wall right away to smooth out any remaining strokes.
- Paint walls along the trim. Dip a 2 to 3-inch brush into the paint and run it against the taped trim and along the ceiling line. Work it along the tape line or ceiling outward about three inches from the tape/ceiling line.
- Apply the paint. Still wondering how to paint a wall the right way? Using a 12-inch roller, roll the paint in the same “W” pattern, overlapping strokes and cut-in corners and edges. For a uniform appearance, make sure there are no missed spots. Let the paint dry properly and apply a second coat if necessary.
- Remove the tape. Allow the paint to dry for at least 30 minutes. Remove the tape, peeling it off slowly and evenly to prevent paint damage.
- Finish off the trim. After removing the tape, one more thing you need to do is to paint the trim. Start as close to the wall as possible and work your way along the trim covering from top to bottom. Use a narrow, angled brush to paint thinner areas of trim and a wide, straight-edge brush for broader areas.
For more information on how to paint a wall correctly in order to end up with a professional-looking paint job, visit our blog or contact our staff at Performance Painting.
Topics: Commercial Painting, Miscellaneous
Painting walls in an apartment: the whole process from A to Z
In this article we will consider:
Painting walls in an apartment: choosing tools
Painting technology for walls: preparing the base
How to paint walls with your own hands: the subtleties and nuances of work
The one who visited Europe and saw what kind of houses and apartments ordinary people live in, he was probably amazed at the simplicity of the situation. They don't mess around, like we do, with stretch ceilings, decorative plasters and other types of finishes. They even prefer ordinary wall painting, and pastel shades, to wallpaper.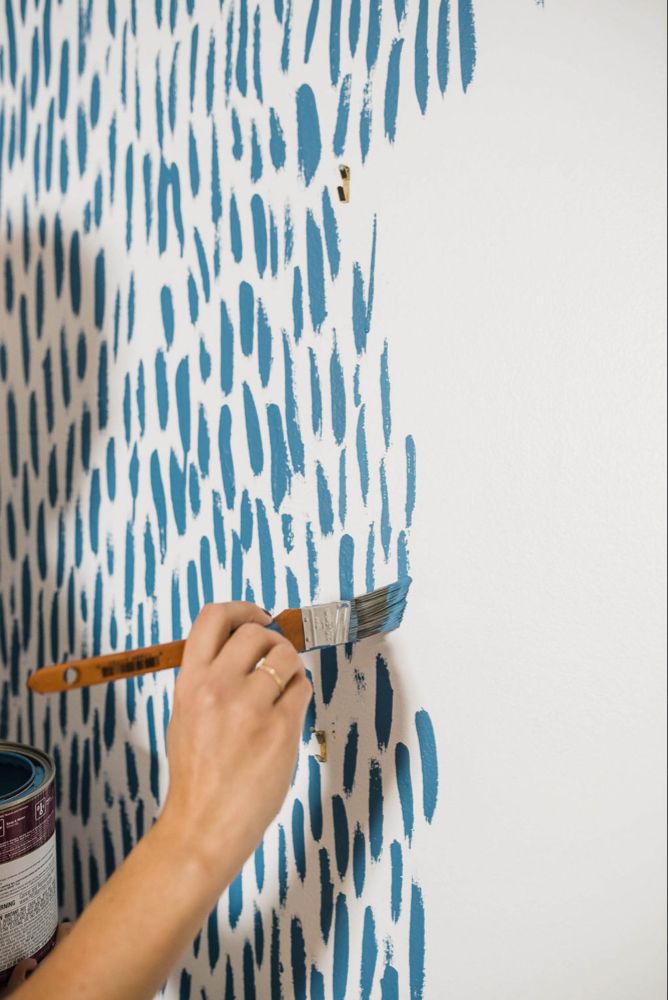 It looks quite attractive, and the lack of luxury is complemented by furniture and other similar interior elements. In this article, together with the site stroisovety.org, we will study in detail the question of how walls are painted in an apartment, and learn how to properly prepare the base, what tools to use and how to use them to paint the walls with high quality with your own hands.
How to paint the walls with your own hands photo
Painting walls in an apartment: choosing tools
The arsenal of tools for a modern painter is much more than many people think. In addition to all kinds of rollers and brushes, other tools can be used, without which you cannot do without work. Let's take a look at them.
- Wall paint roller. It happens fur and foam rubber. The first is used for structural painting, and the second for smooth.
- Brushes - except for the width and quality, they are no different. To choose a good brush, you need to pull it by the pile - if it crawls out, then it is better not to take such a brush.
- Cuvette. A trough with a corrugated bottom, which is used to roll out the roller. The thing is excellent, without it it is quite difficult to evenly impregnate the roller with paint.
- Plastic spatulas. Used to fill the pores of structural surfaces. Also, with their help, it is quite convenient and economical to apply varnish in large volumes.
- Masking tape. It is used to protect unpainted surfaces or individual elements. When it comes to how to paint the walls in different colors, then you can not do without it.
- Mixer for mixing and tinting paint. It is mounted on a drill and allows you to quickly prepare paint of any color and consistency.
Essential tools for wall painting
This is the minimum set you may need to paint your own walls. Here you can still mention the spray gun, but it does not make sense to purchase it for a one-time repair. In addition, it can only be used to apply paint in a smooth way, and it will not work to give the wall structure.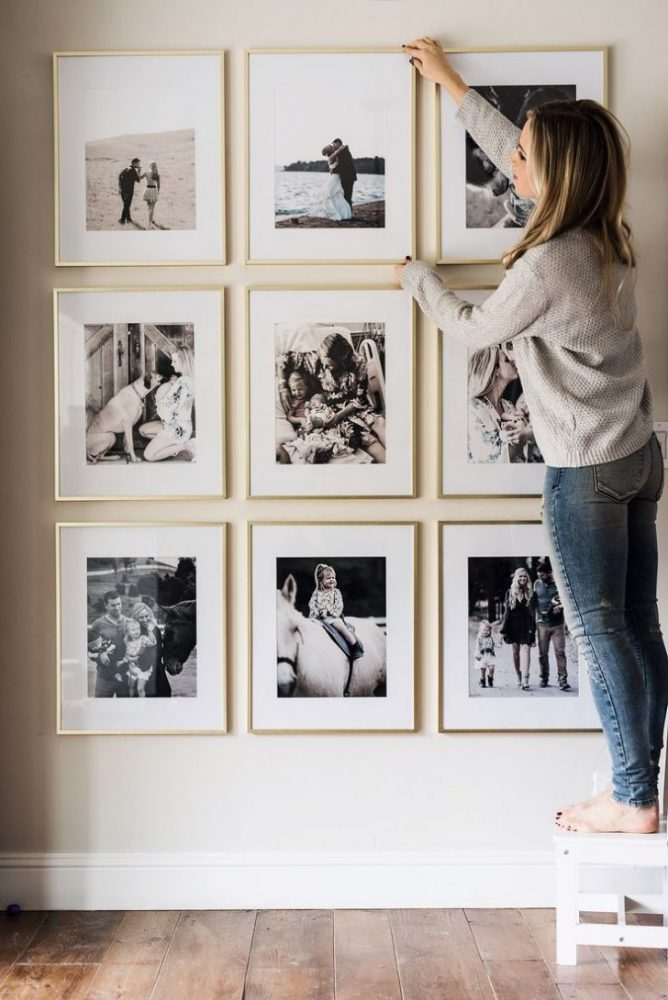 It is good for painting wallpaper and nothing more.
Roller for wall painting photo
Wall painting technology: preparation of the base
Perhaps this is the most difficult stage of work that will have to go through on the way to deciding how to paint the walls? I will say right away, if you do not know how to putty, then it is better not to undertake this work. Paint is such a tricky thing, and it doesn't hide wall imperfections at all. We can say that she even emphasizes them, while everything, even the smallest flaws, appear. Preparing the walls for painting should be done in the most careful way.
Moreover, after puttying, the surfaces to be painted must be carefully cleaned with an abrasive mesh mounted on a manual machine or an electric grinder. It is useless to clean the walls with your hands - without resorting to the help of a grinder or a hand grater, you cannot achieve a perfectly flat surface. It's all about the presence of a flat and fairly wide area of processing.
How to prepare the walls for painting
After the surfaces have been cleaned, the solution to the question of how to prepare the walls for painting involves the application of a primer. The direct purpose of priming walls before painting is to remove dust and fasten the surface layer of putty, in this way surface adhesion increases. In addition, after priming, some flaws appear on the walls - for example, small scratches that are not painted over, as well as all kinds of pits and tubercles.
After priming, such defects should be eliminated and a control painting of the walls should be performed - its essence is to apply liquid paint diluted with color with a roller to the surface. The tone should be chosen as close as possible to the original, but its saturation should be very weak. After such a kind of painting, all the remaining surface flaws will come out - shallow and extensive depressions or bumps, which are eliminated only with putty.
After the final leveling of the walls with putty, they are cleaned and primed again.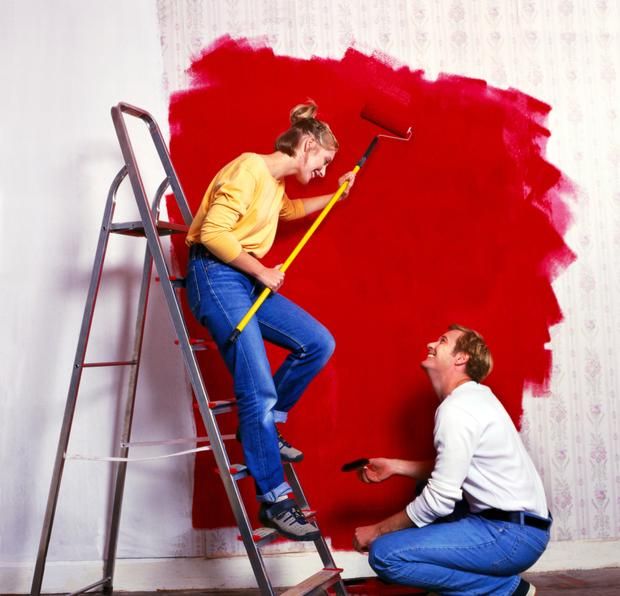 And when the primer dries, you can proceed to the direct painting of the walls.
Painting walls in an apartment with your own hands photo
How to paint walls with your own hands: subtleties and nuances of work
Painting walls with water-based paint is a simple matter, even if you have never done such work before, learning its subtleties is quite simple. The most important thing in this business is the uniformity of paint application. You just need to see the moment when there is not enough paint - it is worth driving the roller in one place, and you will easily understand the whole principle of the work. From myself I will add a few nuances that will help you avoid the most common mistakes.
- The paint itself is very important, and a lot depends on its quality. If you purchased paint without consulting any of the knowledgeable people, and for no reason at all it began to bubble right during the application process, you can safely throw it away. As a rule, all these bubbles remain after drying, no matter how you try to remove them.
 If there is a familiar master, it is better to consult with him. Personally, I can recommend Snezhka Max from inexpensive water-based products, since I have been using it for a long time. The paint is washable and perfectly lays on the surface, and most importantly, it does not take stains during local staining.
 - Most manufacturers (and the so-called masters) recommend thinning the paint a little with water. I tried it once and didn't like it. In my opinion, the best solution would be to simply mix the paint well with a mixer right in the bucket. In this case, you need to use the “correct” whisk - the one that is designed to stir the paint has two rows of blades twisted in the opposite direction. It simultaneously lifts the paint from the bottom and lowers it down without trapping air.
- Pay special attention to rolling out the roller - before you start applying paint, it must be thoroughly soaked. There should be no air between the villi.
DIY wall painting photo
- Don't try to paint walls or ceilings in one go - it won't work with water-based paint anyway.
 At a minimum, two coats will have to be applied, because. after the first stains remain. And it's not about the quality of the painting. The surface itself absorbs paint somewhere more, and somewhere less.
 - If you paint a wall in two colors, then do it like this. Let the paint dry well before sticking masking tape on the painted surface. Well - this means she needs to be allowed to dry for 2-3 days. If you stick it earlier, then when you remove the tape, the paint will also break.
- Paint tinting. This process is complicated in terms of the fact that it is quite difficult to choose exactly the color that you need - almost all colored water-based paints change shade after drying. If you want to choose the right color, it is better to use the service of computer tinting paint.
Wall painting technology photo
This is how things stand with the solution of the question of how the walls in the apartment are painted. Once again I want to remind you that high-quality surface preparation is of paramount importance in this matter.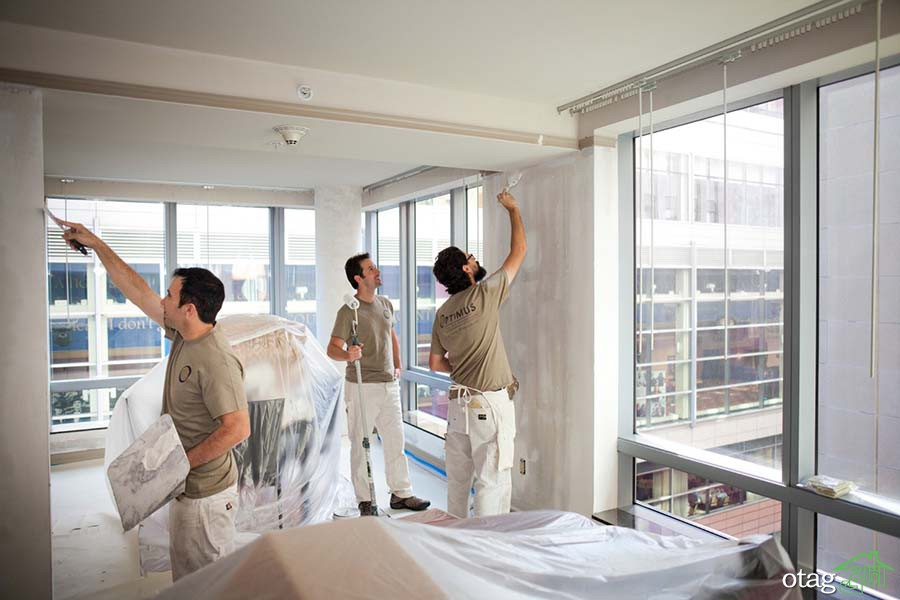
Author of the article Alexander Kulikov
10 mistakes you should know about - INMYROOM
If you think that painting takes a maximum of half an hour, and the walls become like new, we have to disappoint you. Surface painting is a job that is not without nuances: the process can be delayed due to the wrong paint, roller or not on time applied layer. Also important is the time of day at which you pick up the instrument. Workout, of course, the best way to achieve success, but we recommend avoiding other people's mistakes - we tell you how.
Error #1: painting unprepared walls
Small defects, dust, grains of sand, bristles from the brush during the previous staining may be under the paint and adversely affect the result. Under a layer of paint, all the shortcomings will be visible - it remains either to accept or clean the wall and repaint. And possible greasy spots will appear, no matter how many layers you cover the surface. Defects will be especially noticeable if you use glossy paint.
What to do: To avoid double work and unpleasant surprises, prepare the wall in advance. Take sandpaper or a special plaster sanding tool and go over the bumps and defects. After - brush off the dust with a brush or broom. Stains can be removed by wiping the wall with a damp cloth and soap.
Error #2: Ignoring primers
Do not use primer before painting walls? Don't be surprised if the result is uneven painted wall or paint overrun. The thing is that the primer provides a lower surface hygroscopicity, which allows you to save money for dyeing. And also the base gives the "adhesion" of the surface to the paint, which improves wall painting.
What to do: select the appropriate primer for walls. Apply vertically with a brush in small stripes, and then horizontally - perpendicular to the first layer. After Once the base has dried, you can cover the surface with the first coat of paint.
Error #3: Wrongly diluted paint
Paint can be too thick consistency or becomes such in the process of work. Then it is necessary dilute is an intuitive action. But what to dilute is already a question that can spoil both the material and the whole work. For example, if dilute water-dispersion paint with white spirit, it will cause adhesion of polymers. If you paint a wall with such a composition, the result will be of poor quality - disappointment is inevitable: the paint will lie unevenly, maybe even lumps. If, on the contrary, oil paint is diluted with water, it simply does not mixed with the bulk.
What to do: read on the bank with paint the composition and select, accordingly, the means that you will dilute the product. Do not pour in too much water or solvent - it is better to add little by little, thoroughly mixing the paint.
Error No. 4: painting without a test
Color selection is quite a complex process, especially if the shade has to be combined with another tone or drawing. The unfortunate masterpiece will have to be repainted, and so the process can be repeated indefinitely.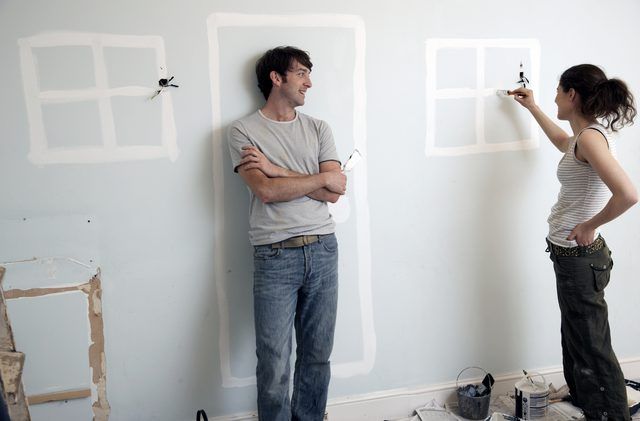 The same goes for the shade that you have to "extract" with your own hands with the help of color.
What to do: add coloring concentrate into the paint little by little, thoroughly mixing the contents. For start pouring a small amount of paint into a small container and add a couple of drops colors - see what color you get. Get the tone you want, and then do the same in a larger bank if you like the result. To make sure the color is compatible with the overall decor of the room, try to paint - apply paint in an inconspicuous corner and wait for it to dry. If the total will suit you - for business.
Error #5: incorrect tool selection
Using the right brush or roller is just as important as choosing the right paint. And the point here is not in a matter of taste. In order to evenly paint over the wall, you need buy a couple of rollers and a brush. First you will "roll up" the surface, and brush - paint corners and hard-to-reach places.
What to do: for For the first coat of paint, it is better to choose a roller with a long pile - 1–1.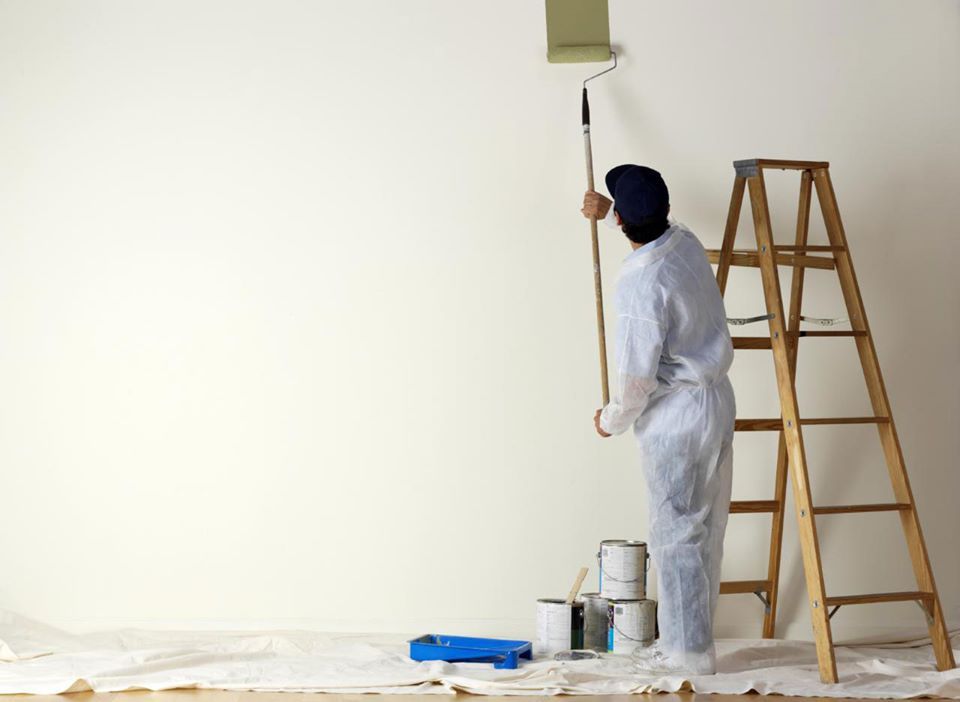 5 cm. It will pick up more paint, which will make it faster and easier to get a uniform color. For re-painting more suitable roller with a short pile - 6-7 mm: it will help to use the paint more economically, and definitely won't leave streaks. Bet on a brush with natural bristles - it does not will leave lint on the surface.
Error No. 6: applying paint "in different side"
If you apply paint vertically, then horizontally, and then completely, as you have to, in the hope that when it dries, the wall will have a decent look - you you are making a serious mistake. All strokes can show up, especially if you're wielding brush.
What to do: choose one painting option - vertical or horizontal - the paint will lie evenly, and the coloring will not look ridiculous because of the chaotic strokes. When painting in several layers, you can alternate methods, for example, paint the first layer vertically, the second horizontally.
Error No. 7: applying paint in one layer
When applying paint in one layer of coloring may be uneven, and if you want change the color of the surface drastically - you definitely won’t be able to finish the job quickly. Even if you change from a light shade to a darker one, the first color will show through.
What to do: for an intense shade, apply two, preferably three coats. The first will allow you to distribute the paint over the surface; the second and third - it is better to shade it, even out the color and fill small irregularities.
Error #8: over wet paint
Of course I want to finish painting faster and enjoy the result. Therefore, we often do not think about the consequences of painting on a “raw” wall. IN as a result, the wet layer begins to come off, stick to the brush or roller. Oil paint, in turn, can go bubbles - all work will have to be started again. True, after waiting for the paint to dry, and sanding places with defects.
What to do: be patient. While the paint dries, do something else. Pay attention to the instructions on the can, which indicate how long the paint takes to dry completely. If this emulsion on one base, it will take a little time - and you will be able to get to work again.
Error #9: lack of paint
This can be a serious problem. First, because in time a trip to the store, an already applied layer may dry out (after drying, the joint between fresh and already applied paint will be noticeable). Secondly, it is difficult to find the right shade if you added color to the paint. on one's own.
What to do: the easiest option is to take more. In extreme cases, an unopened jar can be return to the store or leave "just in case" - tint the places, where the paint will peel off over time. On paint cans they always write which area calculated volume - pay attention to the numbers. Keep in mind that if you paint the surface in two layers, the area will double.
Error #10: incorrect timing for painting
Application paint in bright sunlight is fraught with the fact that the composition will dry too quickly - before you spread it evenly. Also paint may start to foam or peel off. And if you paint in the light light bulb, all errors will be barely distinguishable.