Can you paint wicker furniture
How To Paint Wicker Furniture Quickly and Easily
Today, I’ll show you how to paint wicker furniture. You can easily update wicker, rattan or woven furniture with a fresh coat of paint so it looks new again.
Follow these same steps for painting outdoor woven furniture too! I’ll cover what paint to use on wicker furniture and how to get a perfect paint job on wicker and woven furniture and cover a few furniture painting tips too.
This post was sponsored by HomeRight. Those of you who follow my blog know how much I love HomeRight products and how often I use them. Click here to see more HomeRight paint projects I’ve done!
What is the best way to paint wicker furniture?
You can paint wood wicker and woven resin furniture one of three ways:
- Use a paintbrush – The least expensive method but not recommended! Getting paint into all the nooks and crannies of wicker furniture takes forever, it’s hard to get an even coat and almost impossible to get deep inside the wicker strands of wood.
Plus, you’ll ruin your good paintbrush by pouncing it into the woven wicker while trying to work in the paint.
- Spray Paint – This will work on small projects. The downside is that a good quality spray paint is expensive. Spray paint is usually thin, can be hard to apply evenly, has limited colors, and well…looks like spray paint. All of those items affect the quality of how your painted furniture looks in the end.
- Paint Sprayer – By far the best choice for painting any kind of wood or resin woven, indoor or outdoor wicker furniture. A paint sprayer gives the most consistent smooth overall finish by far, can be used with a wide variety of paints, and is the fastest for large projects.
Bottom line is, why go to all of the trouble and expense of a DIY wicker furniture paint job if it won’t look amazing in the end?
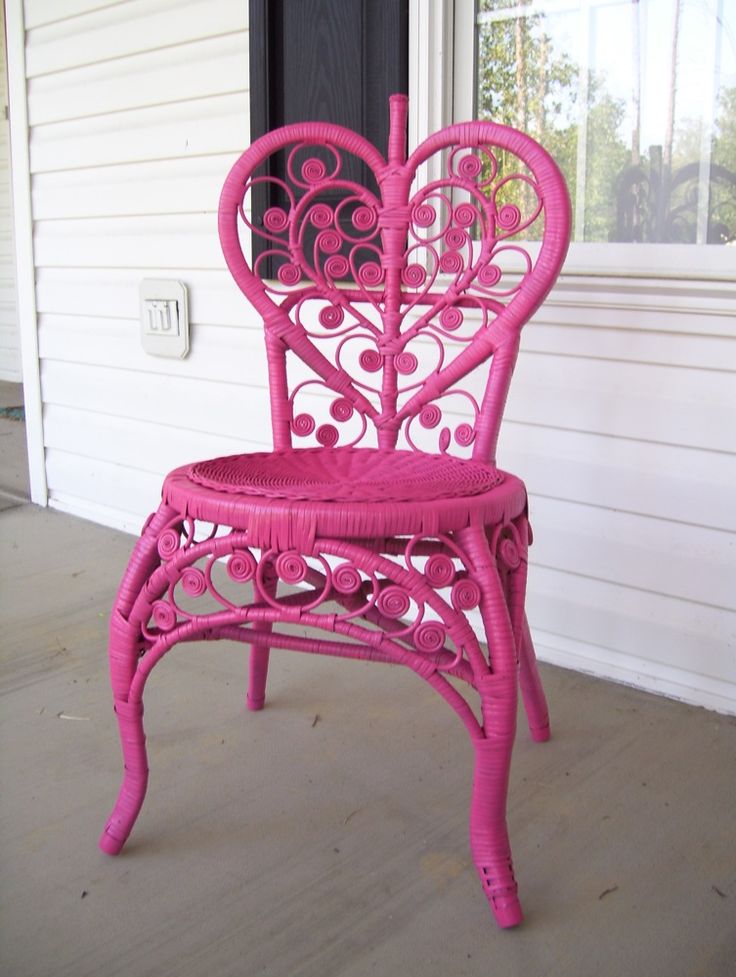
I used about 3 cups of paint when I painted this wicker chair. Using the paint sprayer I was able to get a factory-quality finish with no dark wood showing through anywhere.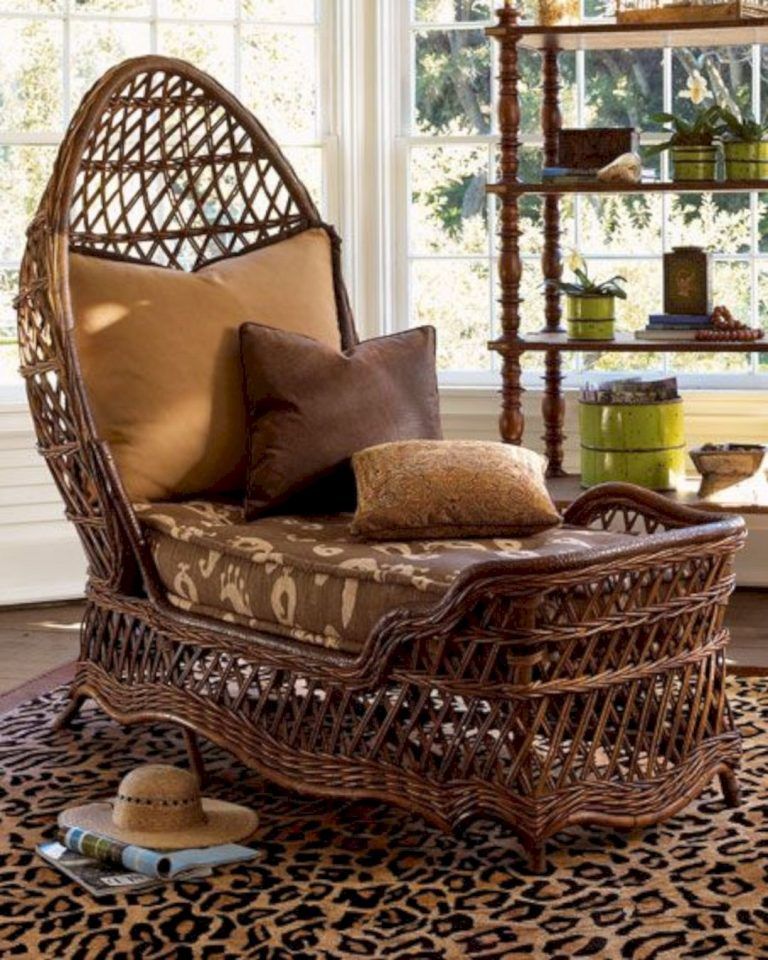 Oh! It’s a smooth finish as well, there isn’t one drip or brush mark!
Update: Would I paint my wicker chair again? In a heartbeat! It’s been about 3-4 years since I finished this DIY project and it still looks as good as the day I painted it!
This post contains affiliate links, as an Amazon affiliate I earn a fee from qualifying purchases at no additional cost to you. Thank you for supporting h3OBungalow!
How To Paint Wicker Furniture
Supplies needed to paint wicker furniture, rattan or woven furniture:
- HomeRight Finish Max Extra Paint Sprayer
- HomeRight Large Paint Shelter – optional but protects furniture when painting outside
- Drop cloths
- Paint – this is what I used in Cartouche Green
- White paint
- Clean painters rags
- Add optional detail over paint – old paintbrush or chip brush – These are a great deal
- Painters tape
- Simple Green cleaner
- Safety goggles
- Respirator breathing mask
I made a quick 3 minute video that shows how to paint wicker furniture.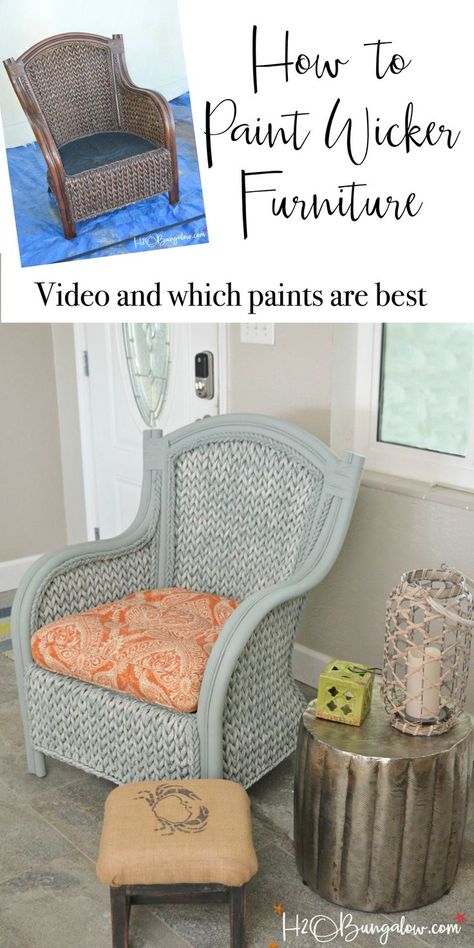 I think seeing the steps shows how easy it was to use the Finish Max Extra paint sprayer. It was almost 95 degrees the day I did this so if look hot, I was! It’s the challenge of having due dates and being a DIY blogger.
Step 1. Repair and clean the wicker furniture before painting.
If you need to make any repairs to your woven or rattan furniture do it before moving on to the next step.
You can prepare your furniture for painting, clean and degloss it all at the same time. Remove loose dust and dirt by vacuuming if needed first. You may need to use a brush and a hose to rinse if there’s a lot of dust build-up inside of the woven wood.
Next, wipe your chair or item well with Simple Green and a clean cloth. Simple Green will clean and degloss your surface at the same time. Deglossing is a must when painting and gives the new paint a better surface to adhere to and prevent flaking.
Allow your furniture to dry thoroughly before moving on to the next step.
Step 2. Tape-off areas that you don’t want to be painted.
Use painter’s tape and plastic drop cloths to protect any areas that you don’t want to be painted. Garbage bags cut down to size work great for chairs and small furniture pieces!
Tape Tip: To get precise taped areas, tape the edges of your furniture item first, pressing down on the outside edge of the tape. Next, tape the plastic drop cloth to the first layer of tape with another layer of tape. The first layer gives precise edges and the second layer attaches the drop cloth. Works like a charm!
Step 3. Mix paint and prepare the paint sprayer
Now you’re ready to paint.
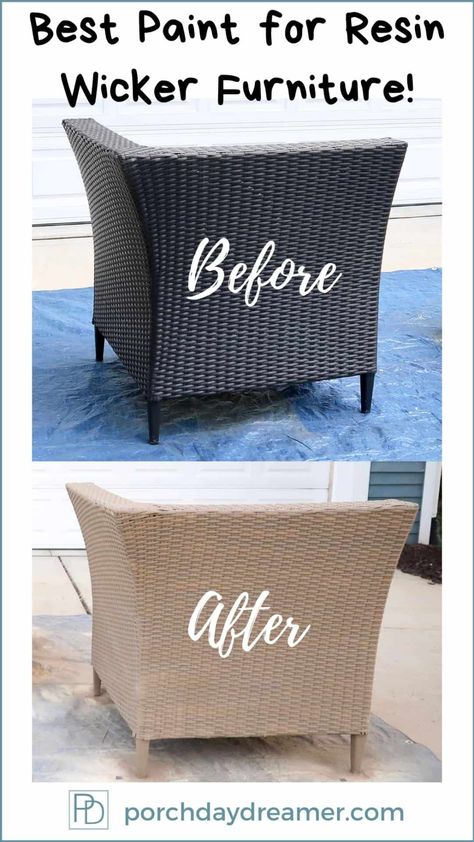
Which paints are best for painting wicker furniture?
You can use chalk paint, mineral paint, milk paint, urethane, or even oil-based paint on wicker, rattan and woven furniture.
If you’re using chalk, mineral, or milk paint, it needs to be self-sealing! Self-sealing paint means it does not need a wax or another type of clear top coat to seal it to your furniture item. It should list that it is self-sealing on the label. If you’re not sure ask before investing in your paint.
I promise you…you don’t want to try to wax wicker furniture by hand!
You can use a urethane which is a newer paint to the market. Sherwin Williams has an excellent one. It’s pricey but worth it and it dries very hard and is durable. I used it on my Kitchen Island makeover.
The one paint I would not recommend is latex. The latex base does not dry as hard as other paints so it’s not as long lasting.
If you are painting outdoor woven furniture use high-quality outdoor paint. It will last longer, has UV blocking built-in, and be fade resistant.
How to prepare the paint for the paint sprayer.
First, you’ll need to mix the paint to the proper consistency. I slowly added water until my paint was the consistency of thin pancake batter. I used about three cups of paint to paint my wicker armchair.
Tip: Add some water to the bottom of the paint container first before adding paint and the paint will mix better and quicker.
My HomerRight Super Finish Max comes with four tips for spraying different types of paint. I used the green tip for this project. Use a piece of cardboard to test the paint flow and spray pattern. It’s easy to adjust the spray flow on the Finish Max Extra with the little dial that’s located on the handle.
Step 4. Begin Painting from the underside or back.
I like to start at the bottom/underside of my furniture when painting so I can see how the paint sprayer is coating my piece before moving on to the more visible areas. Paint with a slow and even back and forth motion. Apply paint from different angles to get an even coat of paint into the nooks and crannies on your woven furniture.
You’ll need to apply at least two coats of paint.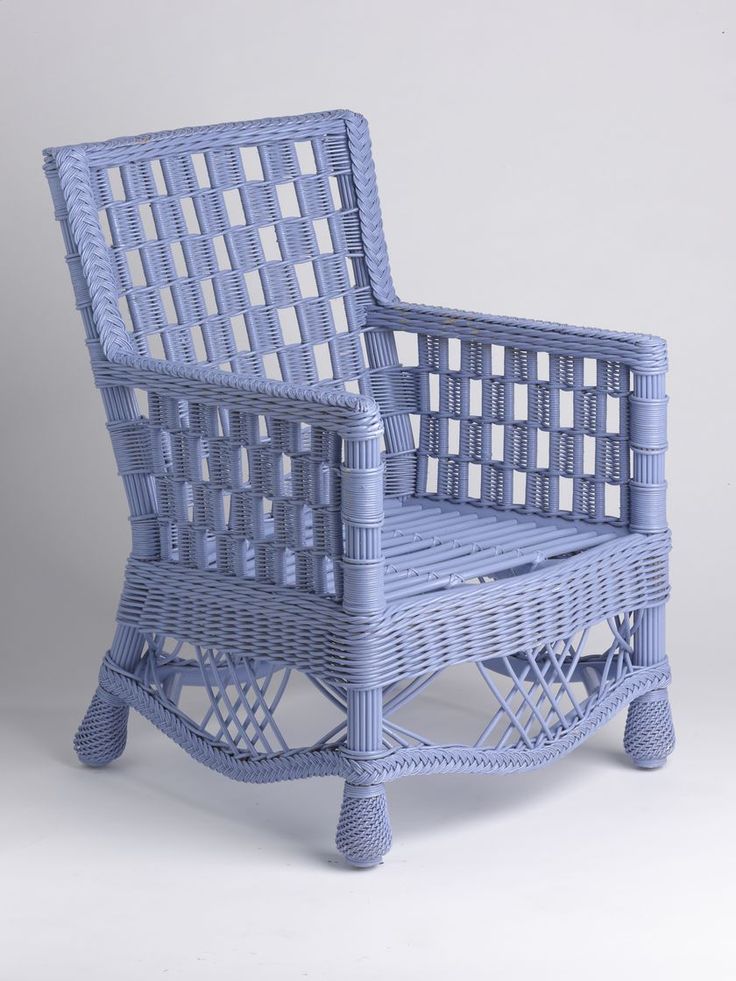 Wait for the first coat of paint to dry before applying another layer of paint. Flush your paint sprayer with clear water in between coats so the paint doesn’t dry in the sprayer while you wait.
Step 5. Allow it to completely dry.
Allow the paint to dry to the touch before taking off painter’s tape and protective plastic. Then as hard as it may be, wait and let the paint cure before using your freshly painted wicker furniture!
I usually wait for about 2 weeks to allow the paint to harden and cure. Waiting makes a huge difference when it comes to how well the paint holds up.
Add optional finishing detail.
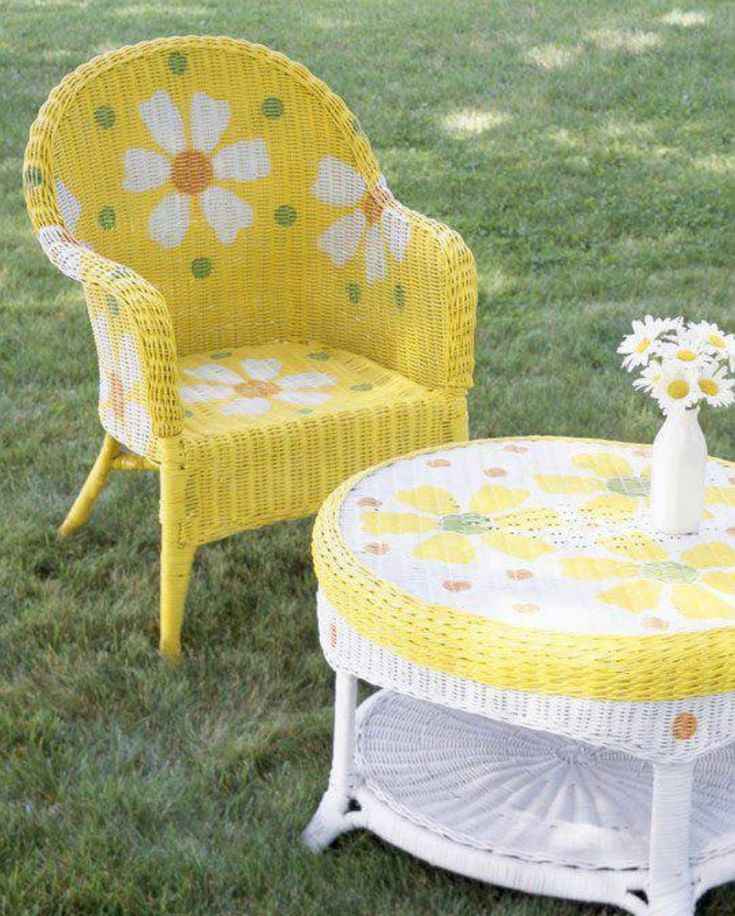
This step is optional. Dry brushing paint in a contrasting color on the wicker chair adds dimension.
I share a good example of a dry brushing technique in my Bakers Rack makeover tutorial. Use a clean painter’s rag to wipe off excess paint. Dry-brushing paint on wicker furniture looks best when the layer of paint you’re adding is not perfectly even.
This step always adds a nice depth to a paint project.
What I love about using the Finish Max Extra was that it comes with different spray tips for different types of paint. In other words, it’s versatile for many types of projects. I’ve used them for years and they last a long time when you take care of them.
Clean-up is easy with water based paint like I used. I just ran water through the sprayer and rinsed the individual sprayer pieces. I would have spent the same amount of time washing out a paintbrush.
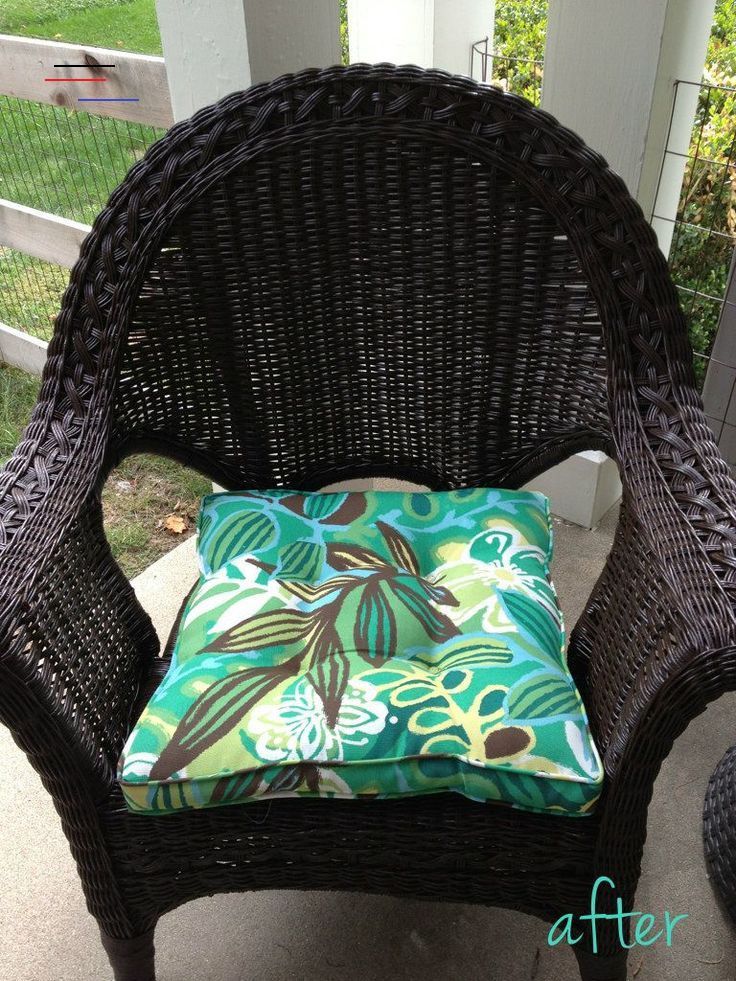
My painted wicker looks great next to my wall-mounted TV cabinet. I changed out the orange cushion for the neutral off-white and like it much better.
All in all, I think it’s a big improvement. I’m loving this color so much better than the original dark wood!
Pin this project for later and share with your friends on Facebook!
Do you have a piece of furniture that really needs a makeover? Learn How To Prepare Furniture For Painting and how to Paint Over Dark Colors.
How to Painti Wicker Furniture
Give Your Patio a Facelift by Painting Wicker Furniture
By
Debbie Wolfe
Debbie Wolfe
Debbie Wolfe is a lifestyle expert and writer with over two decades of hands-on experience with gardening, houseplants, and DIY decor. She is the author of the book, "Do-It-Yourself Garden Projects and Crafts." Debbie has also written for HGTV, DIYNetwork, and House Method.
Learn more about The Spruce's Editorial Process
Updated on 09/09/22
Reviewed by
Deane Biermeier
Reviewed by Deane Biermeier
Deane Biermeier is an expert contractor with nearly 30 years of experience in all types of home repair, maintenance, and remodeling. He is a certified lead carpenter and also holds a certification from the EPA. Deane is a member of The Spruce's Home Improvement Review Board.
Learn more about The Spruce's Review Board
Fact checked by
Emily Estep
Fact checked by Emily Estep
Emily Estep is a plant biologist and fact-checker focused on environmental sciences.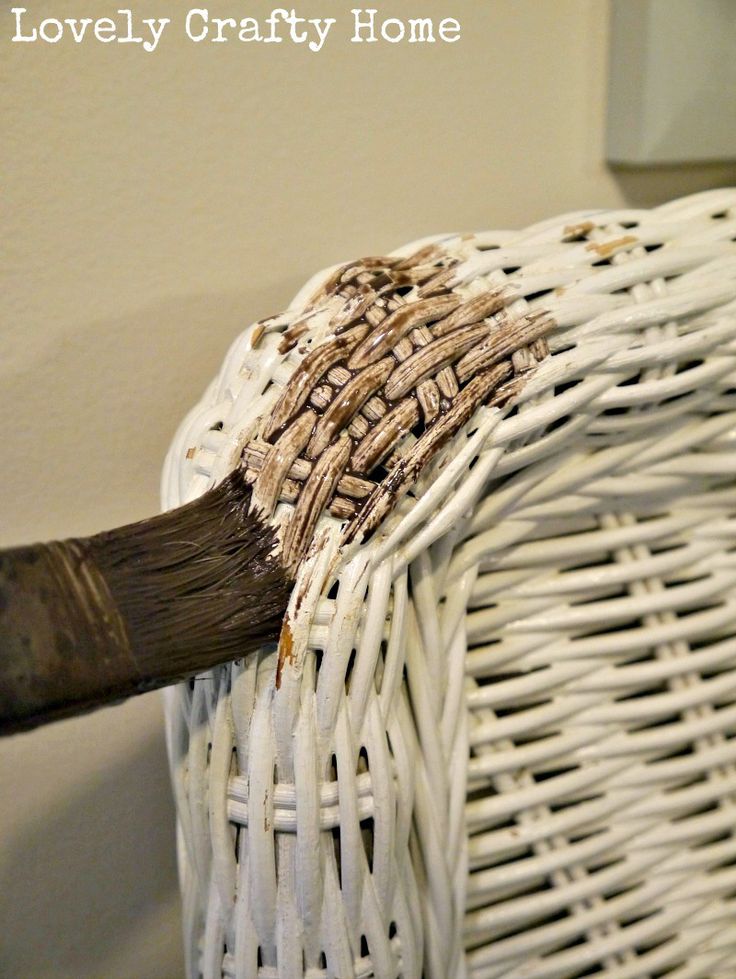 She received a Bachelor of Arts in Journalism and a Master of Science in Plant Biology from Ohio University. Emily has been a proofreader and editor at a variety of online media outlets over the past decade.
Learn more about The Spruce's Editorial Process
The Spruce / Meg MacDonald
Project Overview
Wicker is a timeless and popular style for outdoor furniture, and it's newly popular again indoors, too. Wicker is a generic term that refers to when various vines, grasses, and plants are woven together to create furniture or baskets. The most widespread material used in wicker furniture is rattan, which comes from palm species.
Wicker has a light and airy feel, making it ideal for warm climates. It has a natural, organic quality that complements other natural and eco-friendly decor. It's also easy to maintain and durable enough to last for many years. The best part of all is that it's easy to paint or stain, allowing you to refresh the look of wicker furniture time and time again.
Tip
Wicker furniture can also be made from synthetic or artificial fibers. These fibers can also be painted, but you will need to use paint designed to cover plastic materials.
Equipment / Tools
- 1 handheld or shop vacuum
- 1 stiff brush
- 1 5-gallon bucket
- 1 sponge
- 1 pair dishwashing gloves
- 1 set hot glue gun and glue (or carpenter's glue)
Materials
- 1 cup bleach
- 1 bottle mild liquid detergent
- 1 sheet drop cloth or cardboard
- 1 pair disposable gloves
- 1 dust mask
- 1 can spray primer (optional)
- 1 can spray paint (total amount depends on size of furniture)
- 1 can spray sealer
The Spruce / Meg MacDonald
-
Prepare a Work Area
The outdoors is the best place to do this DIY. However, if you do not have an outdoor space, consider doing this project in a garage, unfinished basement, or any area with good air circulation and waterproof floors.
 Remove from the area, or cover with plastic sheeting, any items that need protection from paint overspray.
 The Spruce / Meg MacDonald
-
Brush and Vaccuum
Before you apply new paint, you will need to give the wicker a thorough cleaning. This step will remove dust and debris as well as mold or mildew from the surface. This step is critical for the paint to adhere correctly. First, put on a dust mask to prevent inhaling fine dirt or mold spores. Next, use the stiff brush to remove the debris from all the nicks and crannies of the wicker. Finally, use a handheld or shop vacuum cleaner to remove any loose debris in the wicker.
The Spruce / Meg MacDonald
-
Wash and Dry
This step is essential if your wicker has been outdoors all season or if you purchased it secondhand. Fill the 5-gallon bucket with warm water and add a few drops of liquid detergent. Put on the dish gloves. Dip the sponge into the water, wring it out, then use it to wipe down the wicker.
 If the wicker has mildew or mold, add one cup of bleach to your wash water. Dip the sponge into the bleach water and wash down the wicker again. Allow it to dry completely before moving onto inspection and repair.
 The Spruce / Meg MacDonald
-
Repair
Now that the piece of furniture has been cleaned, it is time to inspect it for any damage or loose wicker parts. If you see any, you can glue it back in place with hot glue or carpenter's glue. Allow any repaired area to dry thoroughly before painting.
The Spruce / Meg MacDonald
-
Protect the Area
Once the wicker is ready to be painted, lay a drop cloth under it. Make sure the drop cloth extends several feet beyond the size of the furniture to protect the area from accidental sprays of paint.
The Spruce / Meg MacDonald
-
Paint the Top
Painting wicker is different than painting flat or smooth surfaces. Wicker has many woven layers, and it needs to be approached from several angles.
 Begin by putting on a pair of disposable gloves and a dust mask. Spray lightly with long even strokes for the first coat of spray. Walk around the piece of furniture to make sure you didn't miss any spots. Allow the first coat to dry.
 Tip
If you are applying a lighter color paint onto a dark piece of furniture, it's best to use a prime coat of paint first.
The Spruce / Meg MacDonald
-
Apply Second Coat
After the first paint coat has dried, repeat the process. Be sure to spray paint from several angles to ensure coverage. Let it dry and apply a third coat, if needed.The Spruce / Meg MacDonald
-
Paint the Underside
Once the top of the piece of wicker furniture is dry and has the desired coverage, it's time to paint underneath. Flip the piece upside down and repeat the painting process described above. Apply additional coats if necessary. Allow the piece to completely dry before applying a sealer.
 This may take overnight, depending on how many coats of paint you applied.
 The Spruce / Meg MacDonald
-
Apply Sealer
Once all the paint is dry and you are satisfied with the coverage, it's time to protect the finish with a sealer. Don't skip the sealer step. Even if your wicker furniture is in a protected area or indoors, it still needs to be sealed. A protective sealer layer protects the furniture from the sun, rain, and other outdoor elements. It will also keep it looking good for years to come.
The Spruce / Meg MacDonald
HOW TO CLEAN AND COLOR A WICKER ARMCHAIR » WICKY USEFUL INSTRUCTIONS | DIY
Follow these steps to make your wicker chair look like new again.
Costs
$
Mastery level
from beginning to end to the end of
Two Day
Tools
- GUK
- rubber gloves
- vacuum cleaner
- Metal brush
show all
0003
Materials
- liquid detergent
- hot glue
- spray paint
Show all
How is it? Here's more:
Cleaning Painting Furniture Chairs Furniture Restoration
Step 1
Clean the chair
Start by vacuuming and brushing off loose dirt and cobwebs. To get into grooves and small crevices, cut the bristles with an old brush, leaving about 1 inch of bristles. The bristles will still be soft, but hard enough to dust furniture. An air compressor is also well suited for dust blowing.
Use a wire brush with a scraper to remove old paint and rust from hard parts of wicker furniture.
After removing loose dirt, wash the furniture with a sponge and liquid detergent. Keep the sponge damp, not wet, and use as much lather as possible. For moldy areas, add 1 cup of bleach to the water. Wear latex gloves to protect your hands from splinters when washing furniture. When finished, rinse the furniture with a spray bottle filled with clean water. Avoid getting the wicker vine wet: if you do, you will have to wait a while for it to dry before you can fix it.
When the furniture is dry, check for areas that need to be repaired. Most loose weaves can be repaired with hot glue or wood glue.
Step 2
Spray on chair
Now that the furniture is ready, start painting with spray paint or spray paint. It is desirable to paint in a room where no dust and insects will spoil the finish. But paint the outside if there isn't enough ventilation inside. Use a good enamel paint suitable for wicker furniture (most paint labels indicate the surfaces the product is suitable for). Hold spray can 8-10 feet away from furniture and spray back and forth for the most even coverage.
If you are spray painting indoors, use a respiratory mask: the fumes can be quite strong.
After painting, do not let anyone sit on the chair for 48 hours. This will give the paint time to set and prevent it from stretching.
Next
How to Repair Wicker Furniture
Wicker furniture can become brittle and damaged with age, but can be easily repaired with materials available at most craft shops.
How to remove paint from metal and wicker
To remove paint from wicker and metal, you will need to use different paint removal methods than those used to remove paint from wood.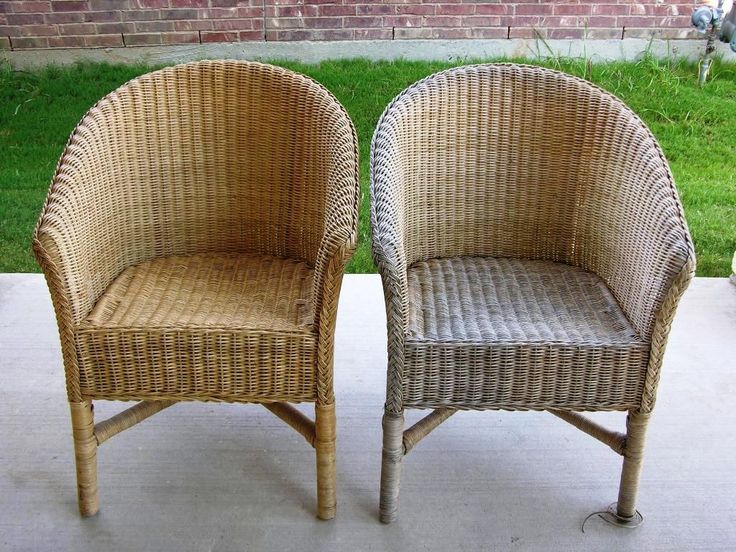
How to Paint Metal Chairs
Learn how to repair rusty metal furniture with a little elbow grease and spray paint.
How to restore dull furniture finishes
Any of these three methods can be used to freshen up a dull finish.
How to refinish wood furniture
Learn how to sand, sand and paint wood furniture.
How to Clean Concrete
Learn how to remove oil stains from garage concrete floors, especially car or lawnmower stains.
How to Clean Porcelain and Crystal
Never put porcelain - especially antique, hand-painted or metal-set - or crystal in the dishwasher, as they are easily damaged and shattered. Follow these instructions for washing small dishes by hand.
How to clean grout on your kitchen floor
Make your kitchen floor look like new again with these easy steps.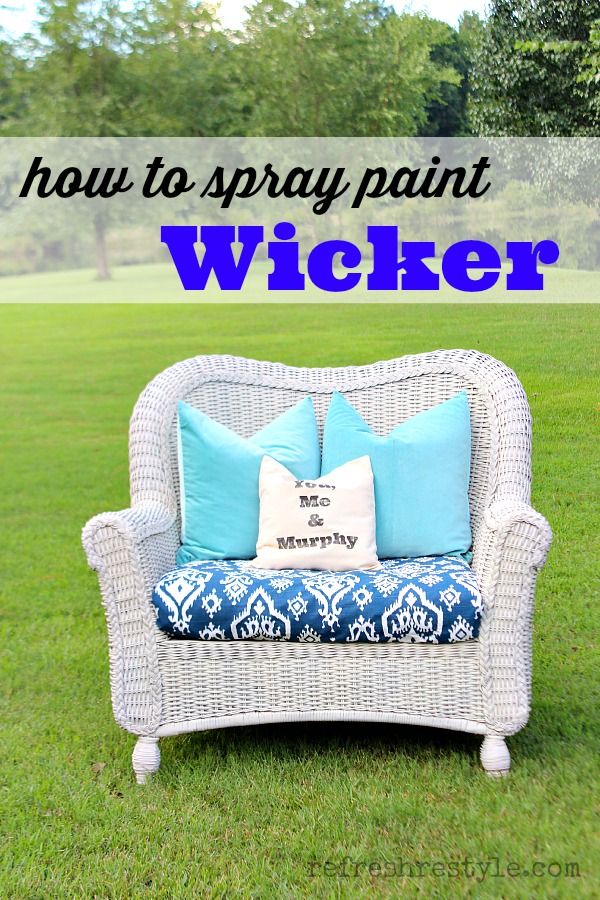
How to restore cracked plaster
Restoration of an old city house is addressed to cracked and damaged plaster.
How to paint a roll table
This paint and glaze roll table gives a neat look to a modern office.
How to care for rattan furniture
The conditions under which we operate garden and country furniture are close to extreme! Therefore, rattan furniture requires special care. Especially if you want it to keep an attractive appearance and serve you for many years. Let's figure out how to properly care for wicker furniture, what means to wash and clean it, and what is the difference between caring for furniture made of artificial and natural rattan.
How to care for artificial rattan furniture?
Let's just say it's very easy to do! After all, the main advantages of artificial rattan over natural:
- Synthetic rattan tapes do not stain, are not susceptible to fungus or mold infestation.
- Artificial rattan can be cleaned with any chemical cleaner.
- Synthetic rattan furniture does not need to be coated or treated with special agents during operation.
- Artificial rattan can dry out on its own.
How to clean artificial rattan furniture ? Simply rinse the furniture thoroughly with a sponge or cloth and plenty of water. If the scope of work is extensive, then you can use a garden hose. After washing, wipe the furniture dry or just leave it to dry in the open air - it will be fine!
If the artificial rattan bands are dull or show greasy marks , any chemical cleaner will help. The main thing is that it contains alcohol and antistatic agents. For example, you can take a regular glass cleaner. With the help of chemical cleaners from wicker furniture made of artificial materials, you can also remove traces of markers or felt-tip pens, paint or varnish.
Well, in order to quickly put wicker furniture made of artificial rattan in order by the beginning of the new summer season, we advise you to cover it with special covers for the winter .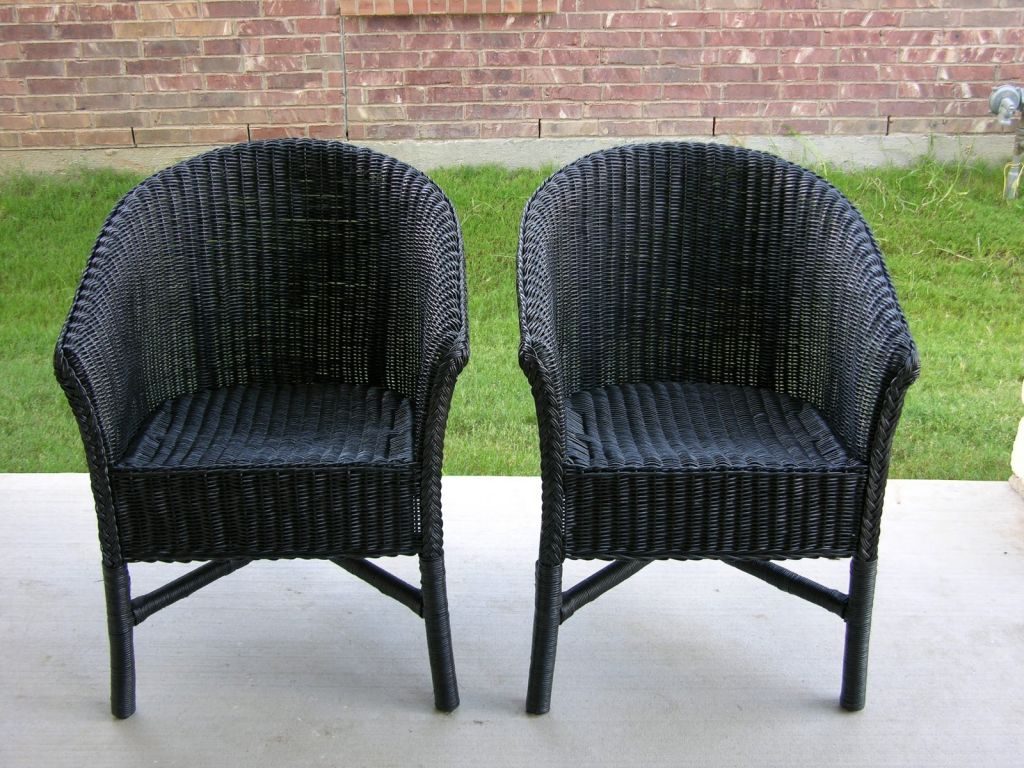 Then, with the onset of spring, you will not have to organize a general washing of furniture, it will be enough just to wipe it with a damp cloth.
How to care for natural rattan furniture?
Unlike easy-to-use synthetic rattan furniture, caring for natural rattan furniture is a real challenge! Natural rattan is a very capricious and fastidious material . A bright sunny day or light rain can ruin its appearance irrevocably. But don't get upset! With the help of our tips for caring for natural wicker furniture, you can extend its lifespan. True, we immediately warn you that this will have to sweat!
How to coat rattan furniture?
So, whenever you buy natural rattan furniture, no matter how much you use it and in whatever climate you use it, remember - times a year it needs to be varnished ! Suitable for this is the usual matte or transparent varnish for furniture. Do not forget to remove the old one before applying a new layer of varnish.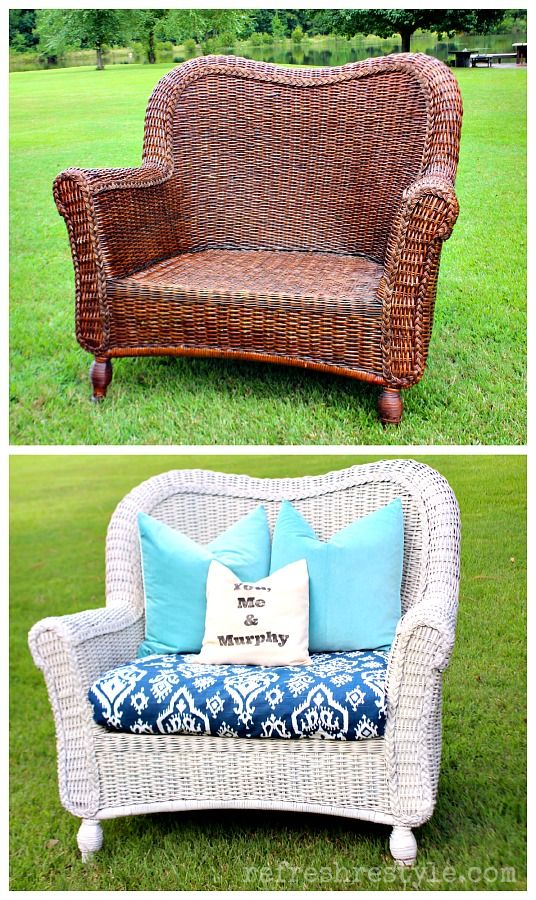 However, do not use coarse emery for this, but a grinding sponge (P400).
If you use rattan furniture in your garden or outdoor patio, it's a good idea to clean it every week. However, in order to restore its shine and freshness, it is not necessary to resort to varnishing every time. Furniture surfaces can be restored and small cracks can be filled with furniture polishes . They are wax and oil, as well as aerosol and creamy. By the way, it is more convenient and efficient to use creamy and wax polishes.
Rattan furniture can be polished once every one to two weeks without damaging the material. Before applying the polish, do not forget to wipe and clean its surface. Also make sure that the product contains antistatic agents - substances that protect furniture from dust and small particles of earth and dirt.
How to wash natural rattan?
First, remember that rattan does not tolerate chemistry ! The maximum you can use is water with lemon. But still it is better to wipe natural wicker furniture with a dry cloth. Otherwise, the rattan will happily absorb excess moisture and swell, losing its attractive appearance.
Secondly, to care for natural rattan, you need to use only soft cloths or sponges - you can damage the protective layer of varnish with rough materials. Hard-to-reach places where dirt likes to accumulate can be cleaned with a soft toothbrush. But do not overdo it, otherwise you will damage the top layer of the rattan or the weave itself.
The joints of wicker furniture can also be cleaned with a conventional vacuum cleaner . However, you need to be careful, as strong traction can break small vines and rattan rods. To avoid this, use the smallest brush attachment on your vacuum cleaner and clean furniture slowly and gently.
What to do with stains on rattan?
The main rule that all your household should know when using rattan furniture: " Spilled - take away ! Rattan is a material with a porous structure, so any liquids are absorbed into it very quickly. If you do not immediately wipe red wine or even a drop of jam from rattan furniture, such a stain will remain with you forever.
It is almost impossible to remove old stains from rattan furniture, but we will try! If you do not have an old stain in front of you, try wiping it with Natural Lemon Juice . If the lemon juice does not stain, you will have to take drastic measures! Take sanding sponge and try to remove the stain with it. But don't overdo it! The porous layer of rattan vines is quite thin. If you remove too much, you can permanently ruin the vine, and, accordingly, the furniture.
What to do about mold and mildew on rattan?
Unfortunately, will not be able to get rid of mold and mildew on natural rattan without damaging the material. Therefore, it is better to initially follow the rules for storing furniture and not leave it for the winter in a cold and damp room. Well, it is necessary to start the fight against mold and fungus immediately after their discovery, without waiting for the spread of this scourge.
Bleach is the main tool for fighting mold and mildew on rattan. Yes, this is chemistry, which during the cleaning process will destroy the material itself, but nothing else has yet been invented. So, to remove mold and fungus from rattan:
- Get a mild bleach.
- Dissolve a tablespoon of bleach in a bucket of water (4 liters).
- Wipe the affected area with a soft sponge dipped in the resulting solution.
- If the fungus and mold are wound up in places where the sponge cannot be reached, spray them with a spray bottle. When the liquid is absorbed, clean these areas with a soft toothbrush.
- And don't forget to wear rubber gloves!
What to do with damaged rattan furniture?
If nothing can save the look of wicker furniture, it's time to change it! For example, natural wicker furniture can be painted with opaque oil or spray paints. In this case, you can easily close all the old spots and cracks on the furniture and restore its attractive appearance.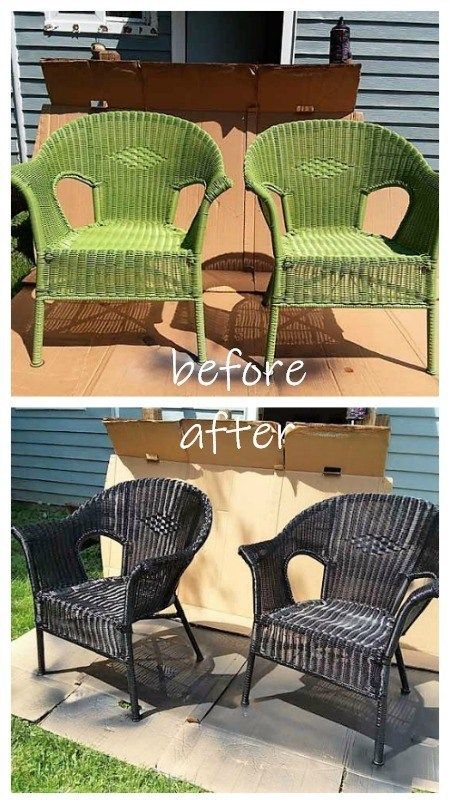
Learn more
- Boutique style beds

- Are accent walls still in
- Home decorating wall paper

- Sow sunflower seeds

- Interior paint ideas for living rooms

- Ideas for oak kitchen cabinets

- Space savers for small homes

- Best rabbit repellent garden

- Movie theater in houses

- Front door styles pictures

- Decorative outdoor tile designs
