Cabinet hardware install
How to Install Cabinet Hardware
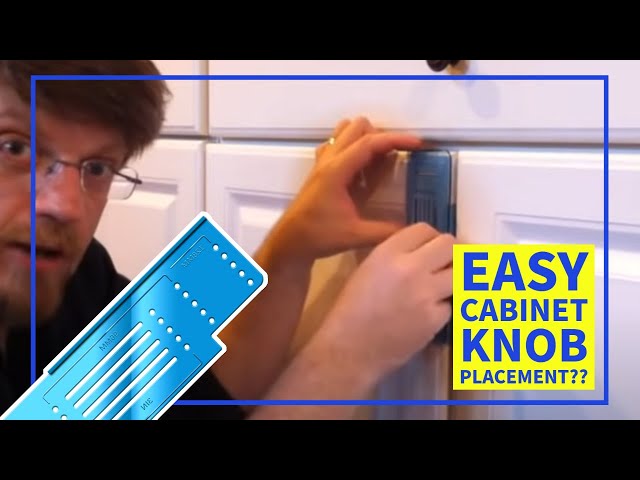
Get knobs and pulls right the first time.
1 / 13
Family Handyman
Use the Door Rail as a Guide
The location of knobs and pulls isn't written in stone, but there are some standard practices. One good rule of thumb is to line up a knob with the top of the bottom door rail. If you're installing door pulls, line up the bottom of the pull with the top of the door rail. Always center them on the door stile.
2 / 13
Family Handyman
Temporarily Attach the Hardware
If you're not sure about where the knobs and pulls are to be installed, stick a piece of reusable putty adhesive to the hardware and try out different spots. Mark the one you like with a pencil and install the rest of the hardware accordingly. Reusable adhesive is available at hardware and art supply stores.
3 / 13
Family Handyman
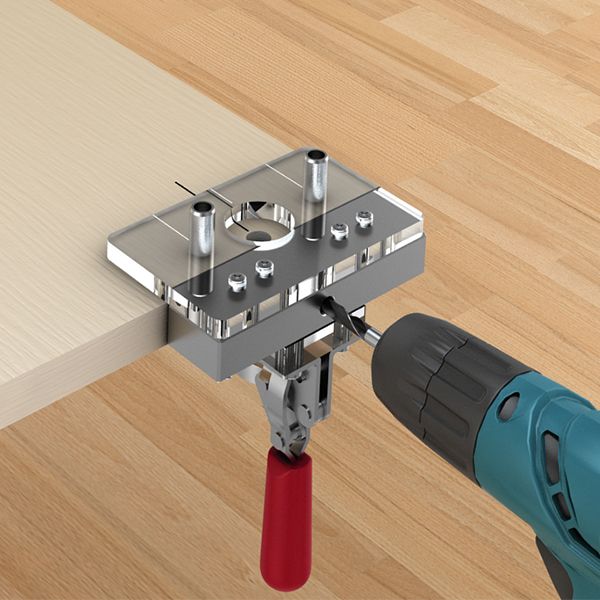
Templates Make the Job Easier
If you have more than a few knobs or pulls to install, use a template when you install cabinet hardware. A template makes the job go faster, increases uniformity and reduces the chance for mistakes across the cabinet set. The template shown here costs under $5 at on Amazon. They are also available at any home center.
4 / 13
Family Handyman
Cover Unused Holes With Tape
Store-bought templates and well-used homemade templates have a bunch of holes you won't use on every job. Avoid using the wrong hole by sticking masking tape over the template and poking through only the holes you need. Instead of using a pencil to mark the location of the hole on the cabinet, use an awl. That way your drill bit won't skate off in the wrong direction when you drill the hole. Buy this wood awl from Amazon that will last 10+ years.
5 / 13
Family Handyman
Hide Old Holes With Back Plates
If you're switching from a pull to a knob or you'd prefer to select pulls with a different hole pattern for your cabinets, you can cover the old holes or hide damaged surfaces with back plates. Home centers don't have a huge selection, so consider buying from an online source. You'll find hundreds to choose from.
6 / 13
Family Handyman
Superglue the Knob
Oblong and rectangular knobs that fasten with a single screw are notorious for twisting over time. Thread sealant will keep a screw from coming loose from the knob, but it won't necessarily stop the knob from twisting. To solve the problem, add a drop of superglue to the back of these types of knobs before you install them.
7 / 13
Family Handyman
Make a Simple Drawer Template
If you don't have a template, make one. This simple template consists of two pieces of wood and takes only a few minutes to make. This same template can be used for almost any size door and most hardware sizes.
8 / 13
Family Handyman
Two-Sided Templates Prevent Tear-Out
If you're having problems with the wood on the back of the cabinet doors tearing out every time you drill a hole, make a two-sided template. Make sure the spacer wood is close to the same size as the cabinet doors. The tighter the fit, the less chance of tear-out.
9 / 13
Family Handyman
Use Thread Sealant to Keep the Screws Tight
Every time the screw in a knob works itself loose, the owners of those cabinets are going to think unflattering thoughts about whoever put them in. Avoid the problem by adding a dab of thread sealant to every screw you install. Loctite is one brand. Buy it from Amazon here.
10 / 13
Family Handyman
Mix Putty to Match
If back plates won't cover the old holes, use putty to fill them. The wood grain on cabinet doors and fronts usually varies in color, so take one of the doors to a hardware store or home center, and buy three different colors of putty. Buy one that matches the darkest grain, one that matches the lightest grain and one halfway between. Use the three to mix a custom color to fill the holes.
11 / 13
Family Handyman
Install Hardware Higher on the Lowest Drawer
Most drawer pulls are centered on the drawer fronts, but if the cabinet you're working on has two or three drawers the same size and one larger one at the bottom, install the bottom knob (or pull) higher than the center of that drawer front. Install it so all the knobs on the cabinet are spaced evenly. This configuration is pleasing to the eye, and you won't have to bend over as far to open the bottom drawer.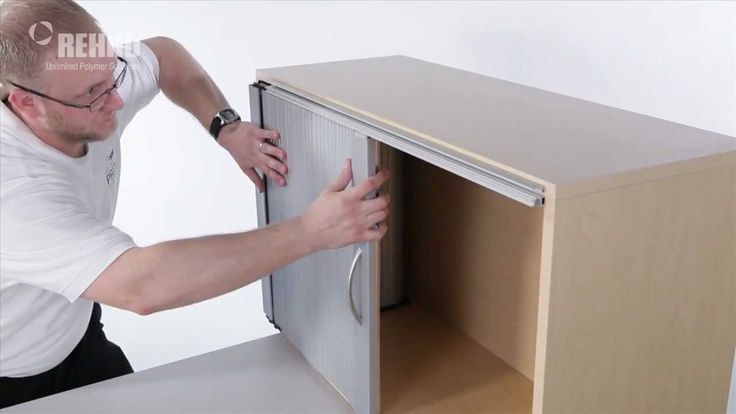
12 / 13
Family Handyman
Perfect Finish Touch-Ups
After you finish installing cabinet knobs, set aside a small container of the paint or finish used on the cabinets for future touch-ups. If the cabinet manufacturer didn't include one with the cabinets, you can make one by cleaning out an old bottle of nail polish with nail polish remover and filling it with your paint or finish.
13 / 13
Family Handyman
Adjust Hinges on Misaligned Doors
If your cabinet doors are out of whack and you have European-style hinges, you're in luck. Euro hinges are designed for easy adjustment. Don't let their complex look scare you; all you have to do is turn a few screws, and any mistakes you make are easy to correct. The Euro hinge shown here adjusts in three directions. Others adjust in two directions. Either way, it's a trial-and-error process: You make adjustments, close the door to check the fit, then adjust again until it's right. First, if the door isn't flush with the doors next to it, adjust the depth screw. This screw moves the door in or out. Some depth screws move the door as you turn them. But with most, you have to loosen the screw, nudge the door in or out and then tighten the screw. If your hinges don't have depth screws, start with the side screws.
Second, if the door is crooked—not standing parallel to adjacent doors or square with the cabinet—adjust the side screw. This moves the door from side to side. In some cases, you have to loosen the depth screw slightly to adjust the side screw.
Third, if the door is flush and parallel with other doors but too high or low, use the mounting screws to raise or lower the mounting plates. Loosen the screws at both hinges, slide the door up or down and tighten the screws. Some mounting plates adjust by turning a single screw.
First, if the door isn't flush with the doors next to it, adjust the depth screw. This screw moves the door in or out. Some depth screws move the door as you turn them. But with most, you have to loosen the screw, nudge the door in or out and then tighten the screw. If your hinges don't have depth screws, start with the side screws.
Second, if the door is crooked—not standing parallel to adjacent doors or square with the cabinet—adjust the side screw. This moves the door from side to side. In some cases, you have to loosen the depth screw slightly to adjust the side screw.
Third, if the door is flush and parallel with other doors but too high or low, use the mounting screws to raise or lower the mounting plates. Loosen the screws at both hinges, slide the door up or down and tighten the screws. Some mounting plates adjust by turning a single screw.
Originally Published: April 23, 2019
How to Install Cabinet Hardware without Losing Your Mind
- Share
How to install cabinet hardware the right way so you don’t mess up the lovely finish on your new cabinets.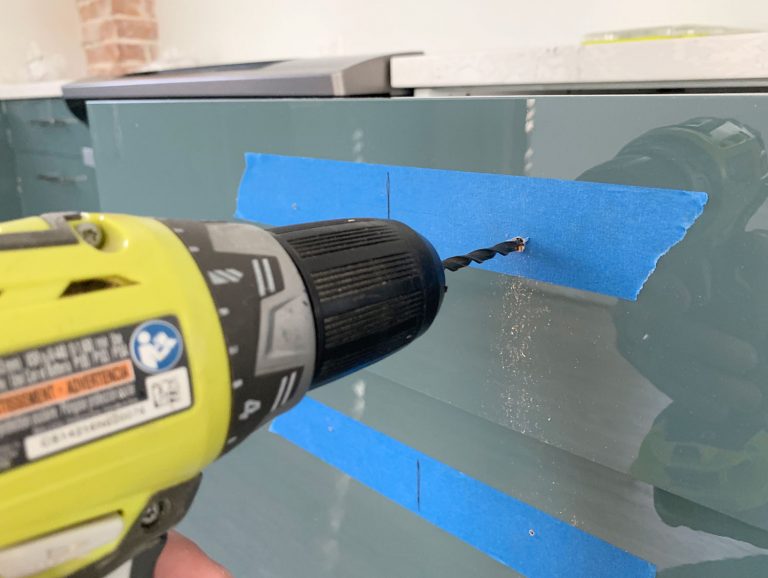
You’re standing in front of your brand new or freshly painted cabinets. You know you want gorgeous drawer pulls and cabinet knobs to complete the look, but there’s only one thing standing in the way…
Installation.
If you’re going to get those fabulous pulls onto your cabinets, you’re going to need to drill holes in them.
But they’re so pristine, so beautiful, so unblemished.
Just the thought of putting holes in that unmarred surface gives you second thoughts and you start wondering if you really need hardware at all.
But don’t let a little intimidation stand in the way of fulfilling your vision. You can drill those holes, and the cabinets will be even better for it.
You just need a few tips to get you started in the right direction and give you the confidence you need to attack this project. Only a few nerve-wracking minutes separate you from the completion of your whole project!
This post contains affiliate links. If you make a purchase, I may receive a small commission at no additional cost to you.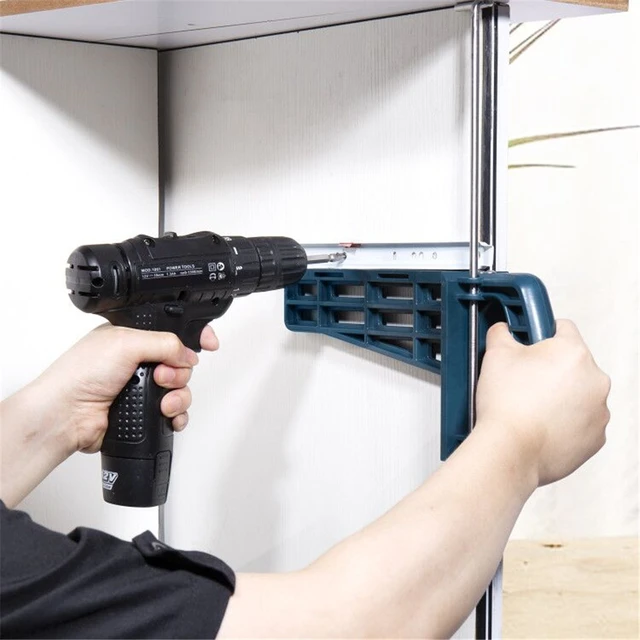
How to Install Cabinet Hardware without Wrecking your Cabinets
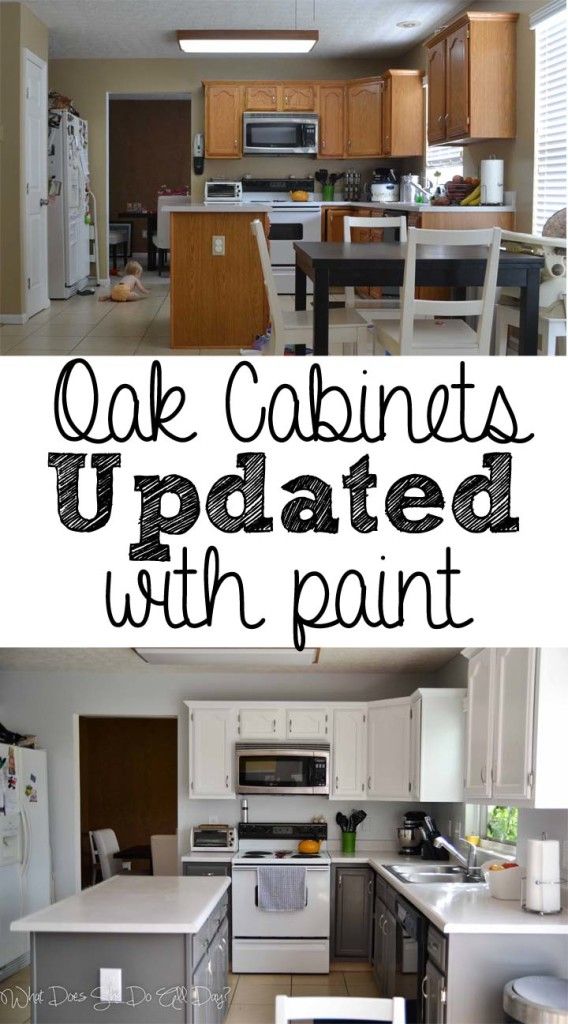
This was me last week, putting the finishing touches on our master bathroom makeover. Instead of replacing the vanity, I painted it a dark gray (Valspar Crucible) and the finish looked so smooth and pretty.
I had a drill in one hand and a package of the prettiest brass handles in the other, and it took everything I had to drill that first hole.
Why Install Cabinet Hardware?
It can be really scary drilling holes in your brand new beautiful cabinets. Whether you painted old cabinets or got brand new ones, you don’t want to do anything to disturb the untouched finish.
To Add Hardware, or not to? That is the Question.
As you stand there gazing upon your new vanity or kitchen, you’re probably asking yourself, “Do I even need hardware?”
The answer is: It depends. On style, preference, and usability. In the end it’s totally up to you, but here are a few things to consider when trying to decide.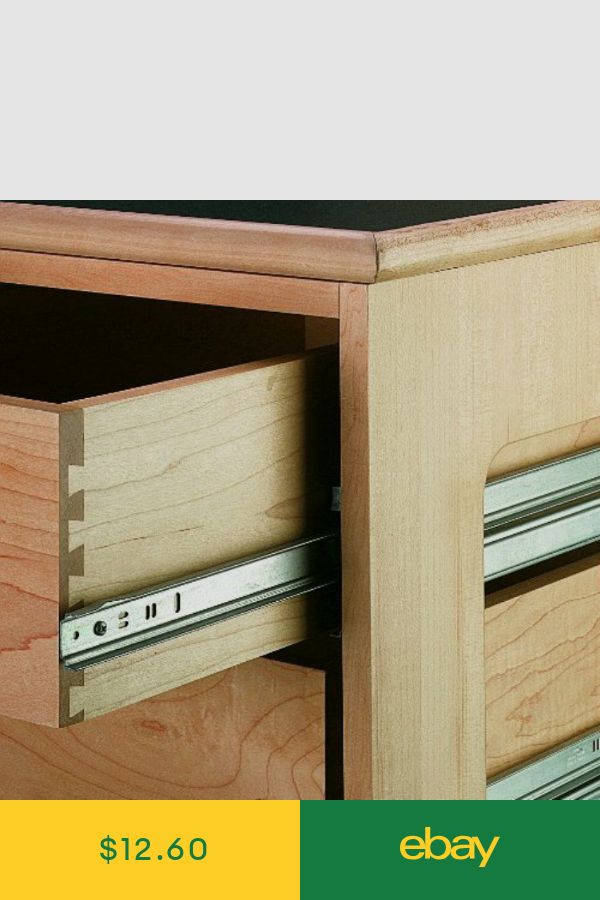
Function
Hardware keeps your finish from getting nicks and dings from frequent use. This is especially helpful for painted cabinets.
No matter how good your paint job is, it will probably pick up a few blemishes over time, especially in high traffic areas, where everyone is opening and closing that cabinet a million times a day.
In my experience, not everyone is as careful with my masterpiece, I mean my cabinets, as I am. Here’s my kitchen trash cabinet, which is due for a touch-up:
Form
Hardware also calls attention to the design of the cabinets. When you update a kitchen or bathroom, the cabinets make up a big chunk of your design style.
Once they’re installed or updated, you want the biggest bang for your design buck, so you pick something pretty to bring out the effect of the lines and curves of the cabinets.
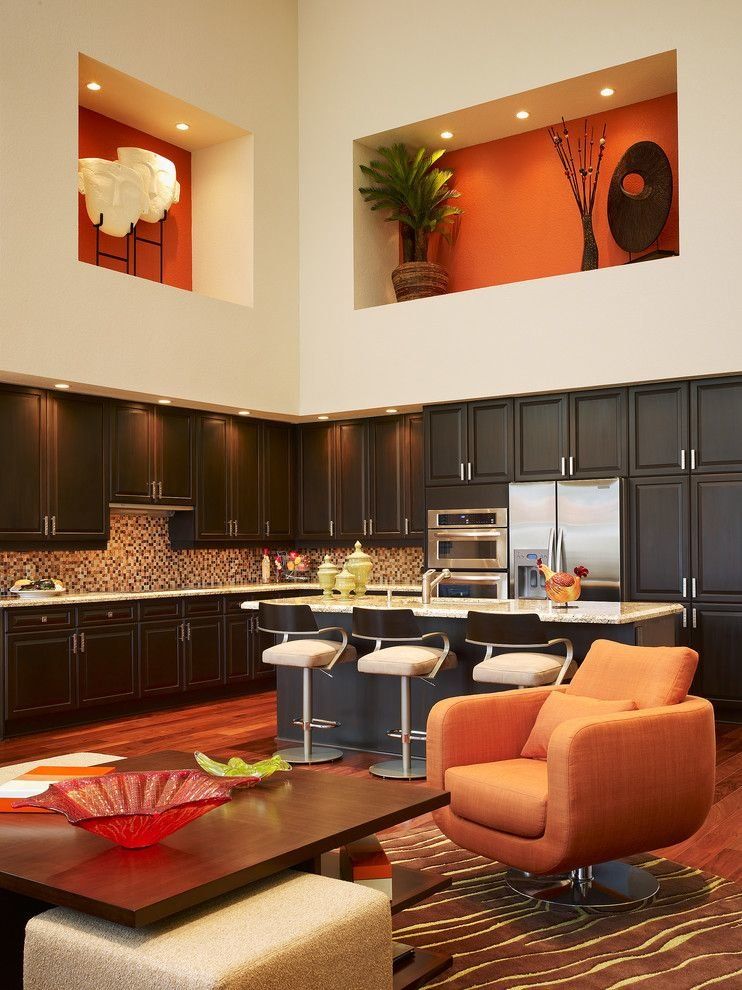
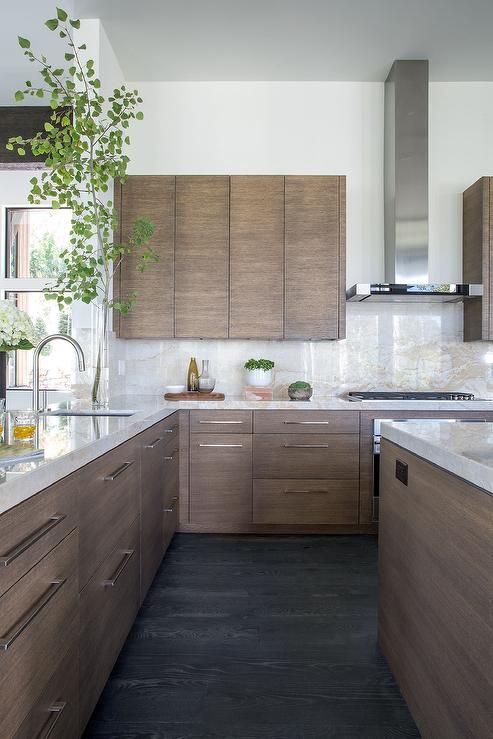
If you are NOT trying to emphasize your cabinets for some reason, or if their style doesn’t lend itself to knobs and pulls (like a super-sleek mid-mod design), you might want to skip the hardware.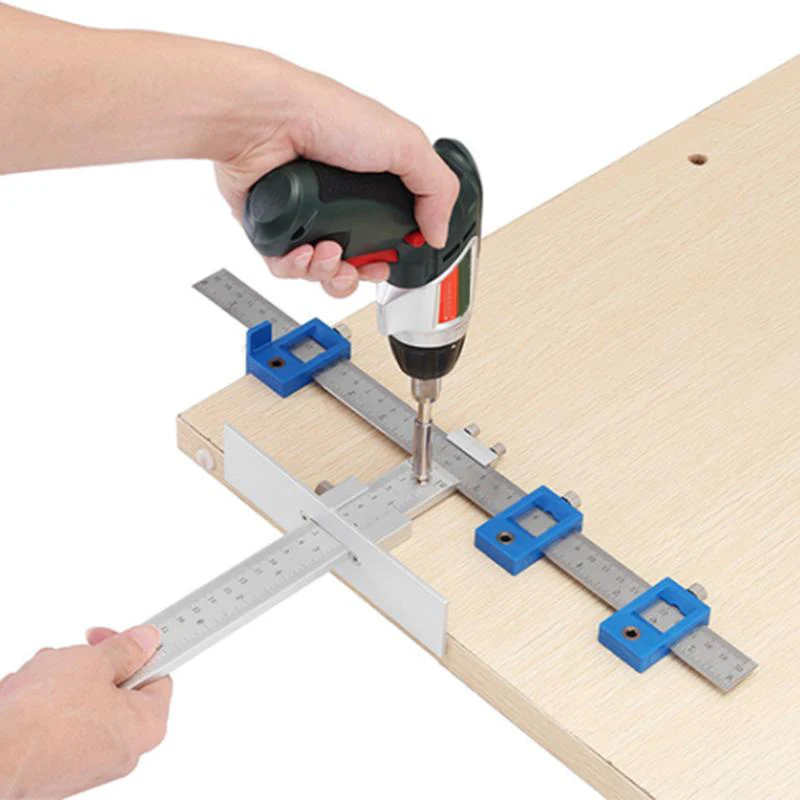
Fun
Finally, the most fun reason to use hardware is the same reason we decorate birthday cakes – to celebrate. It’s like jewelry. You can have a great outfit, but it still needs a little something before you walk out the door to that dinner party.
Like cabinet knobs.
Hmm, maybe that’s a new earring trend. No? We’ll just stick to putting them on the cabinets then.
But you get my point. Sometimes the smallest details can bring out the look of the whole room and finish it off with the perfect amount of bling.
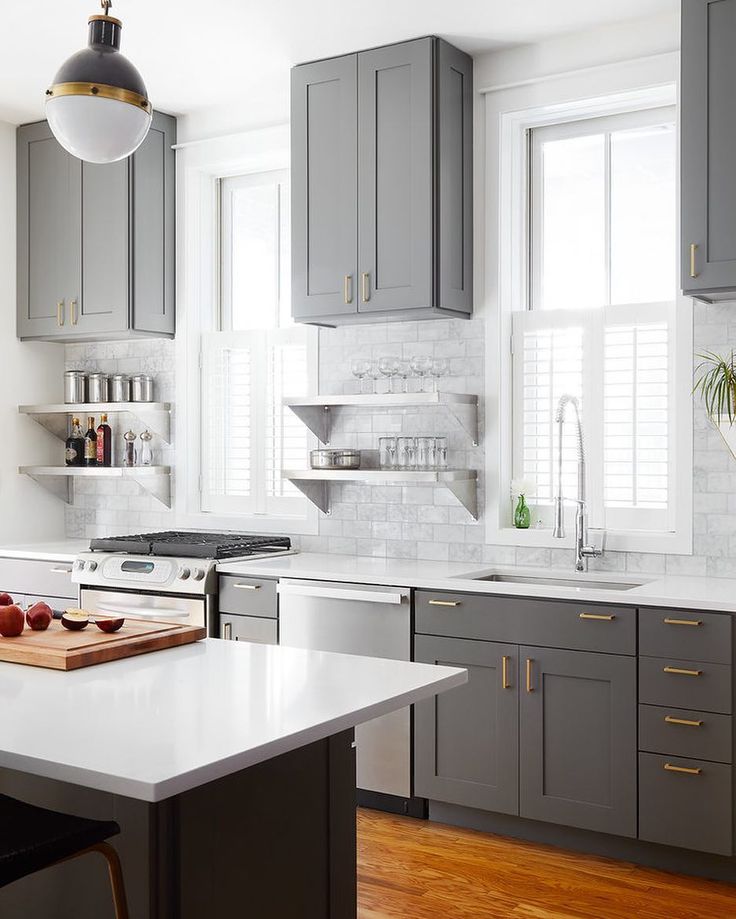
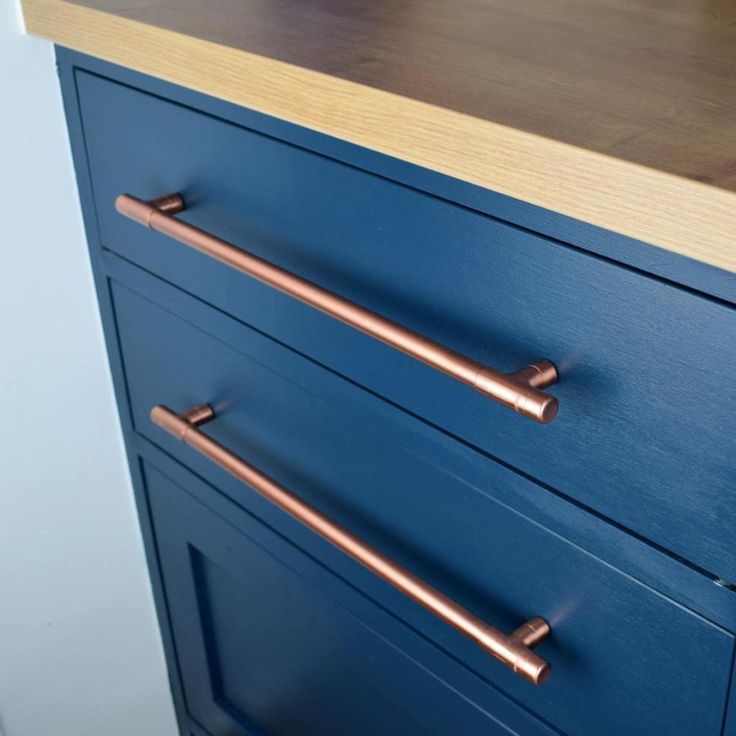
Like my brass pulls that match my new sink faucets. They make the touches of gold make sense and stand out just the right amount against the dark finish of the cabinets.
Personally, I always vote in favor of hardware. It’s the perfect meeting of form and function, providing a service while elevating the style of your space.
By the way, I got these drawer pulls and cabinet knobs on final clearance from Target, but if you’re looking for a larger selection or specialty pieces, I always recommend DL Lawless hardware. (That’s not an affiliate link, I just think they’re great.)
How to Install Cabinet Hardware
Use a Template!
To install your cabinet hardware correctly, you’ll first need a template. This can be a plastic template designed exactly for this purpose, or a simple cardboard template that you make yourself.
I do this kind of project often enough that I decided to buy one instead of making one each time. Even if you’re only doing one kitchen, the little plastic templates are so handy, and cheap enough that it’s probably worth picking one up.
If you decide to make your own, simply hold up a piece of cardboard to the location of your first knob, with the edges lined up to the edges of your cabinet and drill a hole through the cardboard. That will be where you mark all your other holes on each cabinet.
You’ll need a different template for drawer pulls. You’ll make it the same way, but with a hole for each drawer pull screw.
Measure Twice, Drill Once
Measuring for cabinet and drawer pulls can be a little intimidating.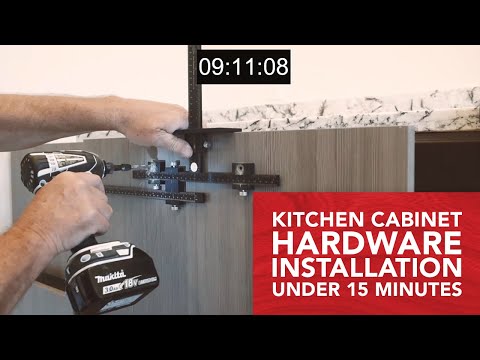 This is definitely one time you’ll want to measure twice, cut once.
First, decide where you want the hardware to go on each door and drawer. This decision is totally up to you, but I like to center everything, meaning I measure the same distance from the top of the cabinet as from the side.
Design Tip: Make sure that your door pulls look nicely balanced when a pair is lined up together. You don’t want them too close to each other, which could look crowded. So if you have larger pulls, you might want to separate them a little.
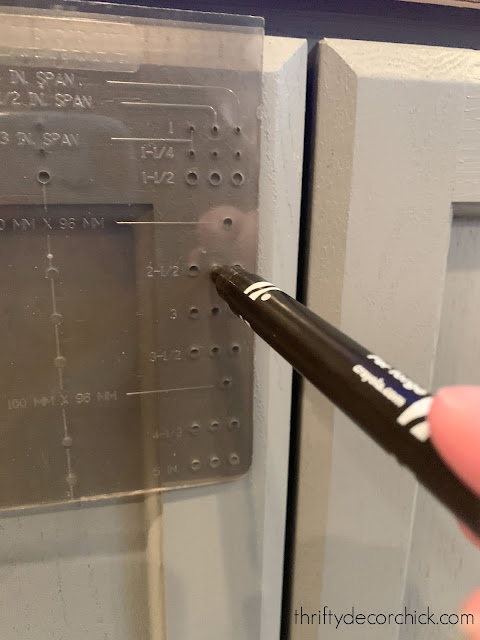
Once you’ve figured out the look you want, hold your template up to a cabinet door, and settle it along the edges of the door. Use a Sharpie to mark a circle around the hole you’ll be using.
Also use your Sharpie to mark a dot on the door, inside that hole on the template.
Flip your template over and mark a matching dot on the cabinet door that meets the first one, so you have a matched pair.
To mark the drawer pulls, line up the template in the middle of the drawer, with the edge of the template overlapping either the top or the bottom of the drawer.
To find the center of the drawer, take the total measurement of the drawer front from left to right, and divide that number in half. (My drawers are 18″ wide, so the halfway point is 9″.) Line up the center mark of the template on this halfway number.
Now stand back and eyeball the dots. Make sure they line up together and look balanced, centered, and level. If anything seems off, now’s the time to fix it!
(You can remove Sharpie marks with alcohol, but always test this first on the inside of a cabinet door, to make sure it doesn’t mess up your finish. If your cabinets are white or light colored, you could use a pencil instead of a Sharpie.)
Drill Fearlessly
Once you’ve marked where you want the hardware to go, it’s time to drill that first nerve-wracking hole. Don’t worry, you got this!
Fit the correct drill bit into your drill. This is usually a 5/16″ for standard cabinet hardware screws, but check yours first to make sure that’s the correct size.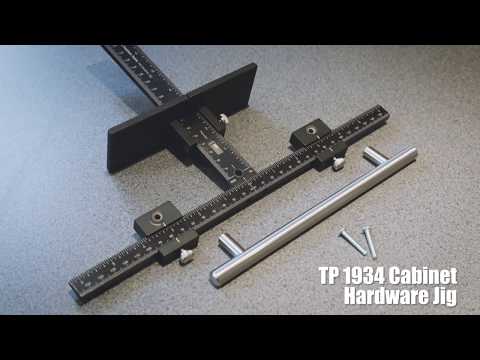
Line your drill bit up to the hole you marked on the front of the cabinet door. Holding the drill as level as possible, slowly start drilling a hole. Keep the drill level to help your hardware line up correctly.
Drilling from front to back will keep the wood from splintering on the front of the door. The back may splinter a bit as the drill comes through the back of the door, but this will mostly be covered by the head of the screw, and it won’t be visible from the front anyway.
Splintering on the back of the door where the drill exitsIf you want to be extra cautious with the finish on the front of your cabinets, use tape to keep the wood from splintering as you drill. Simply put a small piece of tape on the front of the area you’re drilling, and mark your holes on each piece of tape. Once you’ve drilled the hole, you can remove the tape before applying the hardware.
Add Hardware
Now for the fun part! Grab your cabinet knob and screw, and put the pretty on.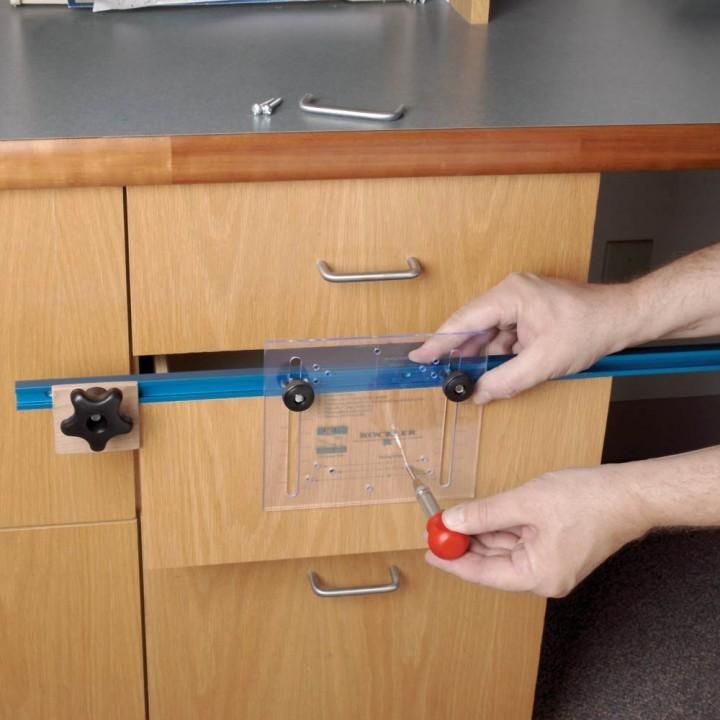
When you’re adding the hardware, it’s a good idea to hold the knob to the front of the door, and tighten the screw at the back.
If you’re like me, you’ll want to hold the back screw and twirl the front piece onto it. But as it twists onto the wood, it could mess up your new paint finish at the very end.
Not fun.
Simply hold the front with your fingers and screw from the back. You may need a screwdriver to tighten the last bit.
Problems Solved
On my custom cabinets, I found that the drawer fronts are thicker than standard drawer fronts, so the screws that came with my drawer pulls weren’t long enough.
After a moment of panic, I realized I just needed to get longer screws to fit. I found that machine screws #8 were just the right diameter to fit the standard hardware I had, and they come in several lengths. Problem solved.
If you did happen to put a hole in the wrong place, first of all you’d be in good company. Been there, done that.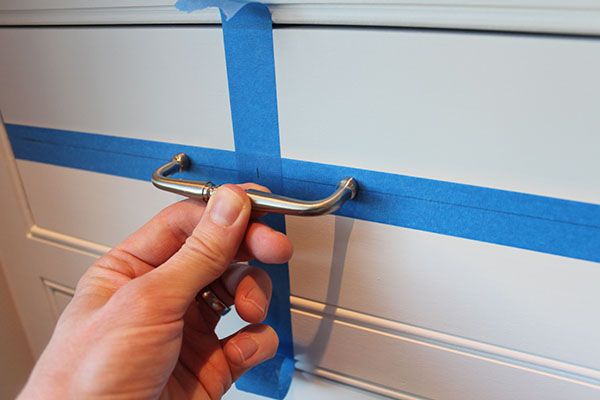 It’s not the end of the world, although it might feel like it for a minute.
Simply fill the hole with wood filler. Once it’s dry, sand lightly. Then you can repaint or re-stain the area to match your cabinet finish.
Finished Hardware Makes a Finished Project
Since hardware is usually the last step in a cabinet installation, you’re probably done now! That wasn’t so bad, was it?
You triumphed over your fear of drilling that first hole, and now your cabinets are prettier and more functional than ever before.
I love the look of fresh, clean, just-finished cabinets with pretty hardware all lined up in a row down the wall of my bathroom or kitchen. It speaks to the part of me that loves symmetry and order.
Next week I’ll share with you the process we used for drilling holes in our tile backsplash wall to hang our mirrors. It was even scarier than drilling holes in our cabinets! Sign up for the newsletter and I’ll let you know when that post comes out.
Get the newsletter!
I hope your cabinet hardware brings you as much joy as mine does. Let me know if you have any questions about the process. Also, see my posts on replacing cabinet hinges, and hanging mirrors on tile for more bathroom remodeling tips!
Tools
- Cabinet Knob Installation Template
- Drawer Pull Installation Template
- Sharpie Marker
- Drill & Drill Bits
Instructions
- Decide where you want to put your drawer pulls and cabinet knobs. I recommend centering them on the drawer fronts, and in the corner of the cabinets, but you could choose alternate placements too.
- Measure where those placements end up on the templates by holding the template up to the door/drawer and circle the corresponding hole on the template with a Sharpie.
- For cabinet doors, line up the template along the edge of the door front and mark through the correct template hole onto the door. Then, if you have two doors that meet in the center of a cabinet, such as a sink base, flip the template over as a mirror image to mark the matching door.
- For drawers, find the center of the drawer by measuring from one edge of the drawer front to the other edge and divide that number in half. Align your template with the center line on that half number measurement, and the edge of the template hanging on the top (or bottom) edge of the drawer. Mark the holes that correspond to the width of your drawer pull.
- Stand back and check that all your dots line up correctly and look balanced. If needed, remove the Sharpie marks with rubbing alcohol and re-mark the corrected spots.
- Attach a drill bit that matches the size of your hardware screws to your drill.
- Drill at the marks from the front of the cabinet to the back. (Keep drill as level as possible.)
- Hold the pulls to the front of the door and screw the bolt in from the back of the cabinet or drawer. Try to avoid spinning the knob against the front of the door, to keep your finish in pristine condition.
Notes
If you're concerned about your drill marking up the finish on the front of your cabinets, you could put a piece of painter's tape at the location you want to drill, then mark on the tape rather than on the door. Drill right through the tape, and remove it before attaching the hardware.
Recommended Products
As an Amazon Associate and member of other affiliate programs, I earn from qualifying purchases.
-
Franklin Brass Chamfered Cabinet Hardware Drawer Handle
-
Brass Knobs Marble Pattern for Cabinets
-
BLACK+DECKER 20V MAX Cordless Drill / Driver with 30-Piece Accessories (LD120VA)
-
Liberty Drawer Installation Template
-
Liberty Cabinet Installation Template
-
Sharpie Permanent Markers
Do-it-yourself doors for a sliding wardrobe
Any furniture joiner will tell you that the most difficult element in the independent manufacture of sliding storage systems is doors.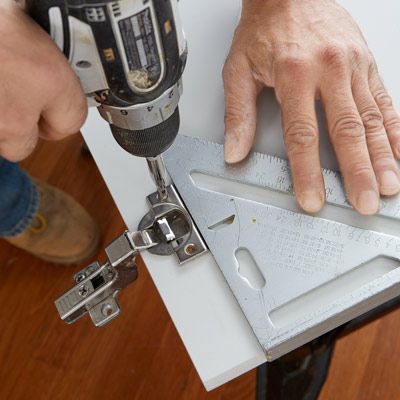 However, you should not refuse to make furniture at home. At specialized points of sale, you can always very inexpensively purchase ready-made sets of sliding systems and other fittings that will allow you to assemble doors for a wardrobe with your own hands without much effort. The most important thing is to have the desire to create, to know the theoretical basis and to clearly follow the sequence of actions.
We determine the dimensions
A characteristic feature of all compartment systems is the presence of sliding doors in the design, moving along guides along the doorway. This design combines practicality, a very good design and a solid economy of free space. At its core, any wardrobe belongs to the class of cabinet furniture. “Coupe” is incorrectly attributed to this group, because this item may not have a body at all. Sliding systems can be installed in a niche, enclose the end part of the room, forming a separate space for a dressing room, pantry or office.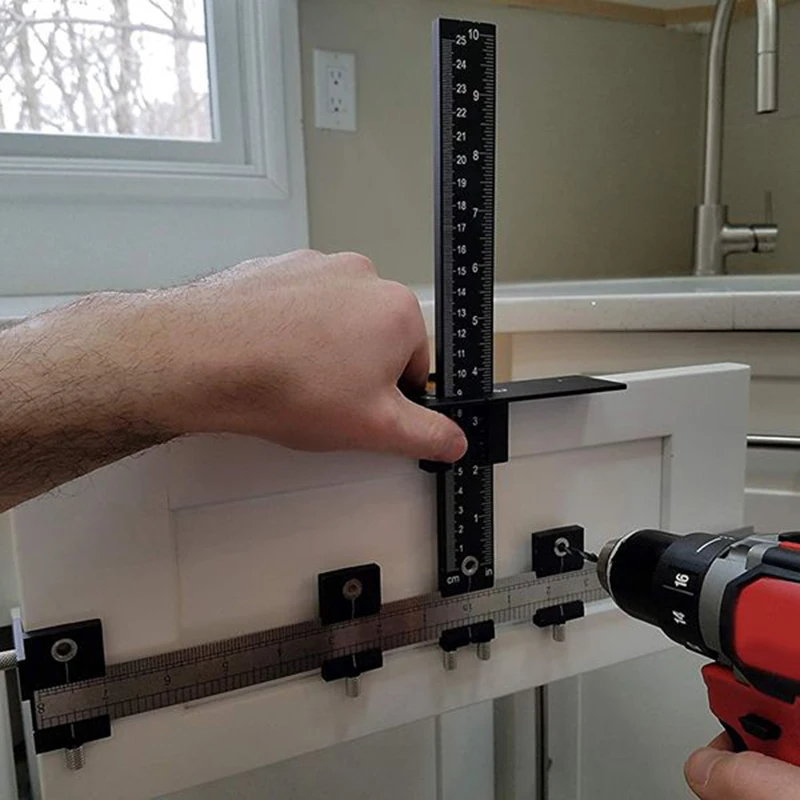
Do-it-yourself assembly of sliding wardrobe doors usually begins with determining the dimensions of the doors. This step is necessary to determine the required number of profiles. In modern furniture production, the dimensions and number of sliding doors for storage systems are not standardized.
Based on the complexity of execution and operating experience, experts recommend using the following parameters:
- The optimal door width is from 500 to 1000 mm. It is possible to make a width less than 50 cm, but you should be prepared for a possible differential swing of the door when moving. A sash with a width of more than 1 m turns out to be very heavy, which makes it inconvenient in everyday use.
- The height of the door leaf can be any. However, here one should take into account the standard profile length of 5.5 m. As practice has shown, it is not advisable to make sliding doors for a cabinet with your own hands above 2.5 m, especially in the conditions of the ceiling height of classic domestic high-rise buildings.

The last parameter that should be given a little attention is the number of sliding doors that will be equipped with a closet of the "Compartment" system. Experts recommend proceeding from the width of the opening, the selected optimal value for the width of the sashes and the filling design.
Types of sliding systems
Today, two design solutions for sliding systems are most common:
- Roller.
- Suspended.
Roller systems are equipped with a frame made of a profile that gives rigidity to the sash structure. Thanks to the lower wheels moving along the guide, the door is moved.
Depending on the number of leaves, the bottom track can have one or more tracks. The upper wheels are selected according to the type of profile. For an open type profile, asymmetric ones are needed; for closed - symmetrical rollers.
In suspended systems, sliding wardrobe doors with top rollers are fastened to the top track, which can be made in the form of a rail or a pipe.
Wheels that are fixed on the door leaf move along the track. In this design, the entire load created by the weight of the sash is assumed by the upper wheels. A guide can be installed at the bottom of the door leaf to prevent swinging of the door. Some designs do not have lower guides, while the canvas "floats" above the floor.
Fittings and accessories
Standard do-it-yourself roller kit for sliding wardrobe doors includes:
- profiles framing the sash;
- top and bottom guides;
- rollers, which are selected depending on the selected type of sliding system, profile shape, dimensions;
- fittings;
- door leaf filling.
Consider the components in more detail.
Profiles
Manufacture frame doors for sliding wardrobes from specialized profiles.
There are several main types of profiles:
- Vertical handle profile.

- Horizontal bottom.
- Horizontal top.
For the manufacture of profiles use:
- Steel. Stainless steel profiles are distinguished by affordable cost, good reliability and an impressive service life.
- Aluminium. Anodized aluminum profiles are characterized by low weight, good strength, long service life.
How to choose the right profile for self-manufacturing of a sliding wardrobe is described in detail in the video:
Guides
Guides are required for the manufacture of a sliding wardrobe. The upper one is a profile with one or more tracks along which the upper wheels of each leaf move.
The width of the top rail for a sliding wardrobe is determined by the number of tracks and design features. The standard track width is 38.5 mm. Wall thickness - 1.6 mm.
The bottom rail is a profile with tracks for moving the support wheels.
The dimensions of the sliding wardrobe rails are taken from the Aristo sliding systems specification.
When calculating, use the parameters of the profiles you use.
Castors and fittings
Top symmetrical rollers are used when vertical closed elements are used in the frame.
A set of two rollers is required for each door.
Asymmetric wheels are used to create the frame of the sliding wardrobe system from open-type standing elements.
As in the previous version, two rollers must be installed on each door leaf.
The lower support wheels are responsible for moving the door and take on most of the loads.
The roller is equipped with an adjusting screw and a pressure spring. This element is installed in the lower horizontal profile. Each door requires a set of two rollers.
What other do-it-yourself fittings are needed for a sliding wardrobe:
- A spring stopper that secures the sash in the closed state.
 Installed in the bottom rail.
- Schlegel - a strip of fleecy material that softens the impact of the sash on the body walls. It is glued into the groove of the vertical profile along the entire height of the door.
- Self-tapping hex assembly screw. The number of screws is determined by the number of subassemblies.
Upon request, furniture stores offer additional (optional) elements: door closers, profile end caps, magnetic stoppers and more.
It is important to understand that these elements significantly improve the operational properties of the structure, and significantly increase its cost.
Sash frame filling
Do-it-yourself sliding cabinet doors are made from a wide variety of materials that fit the profile thickness. The most common and inexpensive are laminated chipboard and MDF boards, 10 mm thick. This thickness of the compartment doors is due to the profile width of 12 mm, plus a silicone seal, the thickness of each wall of which is 1 mm.
It is possible to make a prefabricated structure from a combination of two materials: mirror (glass) and chipboard. In this case, it is necessary to provide for the acquisition of a docking H-shaped profile with fixation.
Docking profile will significantly increase the rigidity of the frame when using several fragments of the sash filling.
Calculation
Calculation is the most important step in the independent creation of sliding doors of any storage system. Accuracy is essential for the preparation of leaf elements. Consider the procedure for performing calculations for Aristo profiles.
Calculations are carried out in the following order:
- Carrying out measurements of the doorway, the result of which will be the receipt of height (hereinafter Hp) and width (hereinafter Lp) values.
- Calculation of the height of vertical profiles (hereinafter Hb).
 So: Hv \u003d Np-40 mm.
 - Calculation of the length of the upper and lower rails. Their parameters are equal to Lp (opening width). If you plan to install a stop, regardless of its type, the length of the guides should be reduced by 3 mm.
- Calculate the sash width (hereinafter Lc). This parameter depends on the number of leaves, the type of vertical profile, the presence of shegel. For a better understanding of the calculation procedure, we offer a table of ratios.
- Calculation of the insert width (hereinafter Lz) depends on the profile type and material thickness. To simplify the calculations, we suggest that you familiarize yourself with the table.
- The calculation of the door insert height depends on the number of pieces and the thickness of the filling material. We suggest using the formulas given in the table.
The last stage of the calculations is the calculation of horizontal profiles.
Knowing the required sash width, you can easily calculate the length of the horizontal elements using the formula:
- for a vertical open profile (C) - this is the sash width (Lc) - 52 mm;
- for closed elements (H) is the sash width minus 70 mm.
We assemble the doors for the sliding wardrobe with our own hands
First, we create a drawing (in extreme cases, a sketch with dimensions is suitable). For a better understanding of the process, we suggest that you carefully study the scheme for assembling the wardrobe sash, made on the basis of the sliding system and Aristo elements.
Consider the stages of assembling a door for a sliding wardrobe with your own hands:
- The upper and lower rails should be fixed on the cover and base of the structure using a plumb line or a laser level. The minimum distance of the rails from the shelves is 100 mm.
- We assemble the frame: using assembly screws, connect the horizontal and vertical profiles of the door leaf, placing the prepared door filling material between them.
- Install the top rollers under the head of the assembly screw on the two top assemblies.
After assembling the frame, we mount the lower rollers in their original place.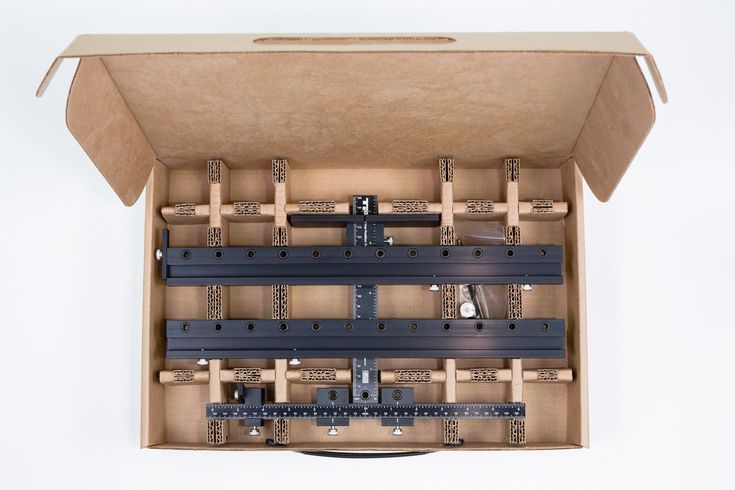 How to install rollers on a sliding wardrobe? Very simple. Insert the end of the pressure spring into the groove, press the roller to the stop and fix it with a screw. Do a similar operation on both sides of the sash. The sliding wardrobe rollers are adjusted by tightening or loosening the fixing screw. To limit the movement of the leaves, a locking spring must be inserted into each track of the lower guide. The last operation before installing the sash in its regular place is fixing the Schlegel profile in the grooves. It is very easy to do this, since the seal is made on a self-adhesive basis. To complete the picture, we recommend watching the video of assembling the doors of the sliding wardrobe with your own hands:
Step-by-step instructions for self-assembly of compartment doors for wardrobe
Contents
To assemble compartment doors with your own hands, just read the instructions below.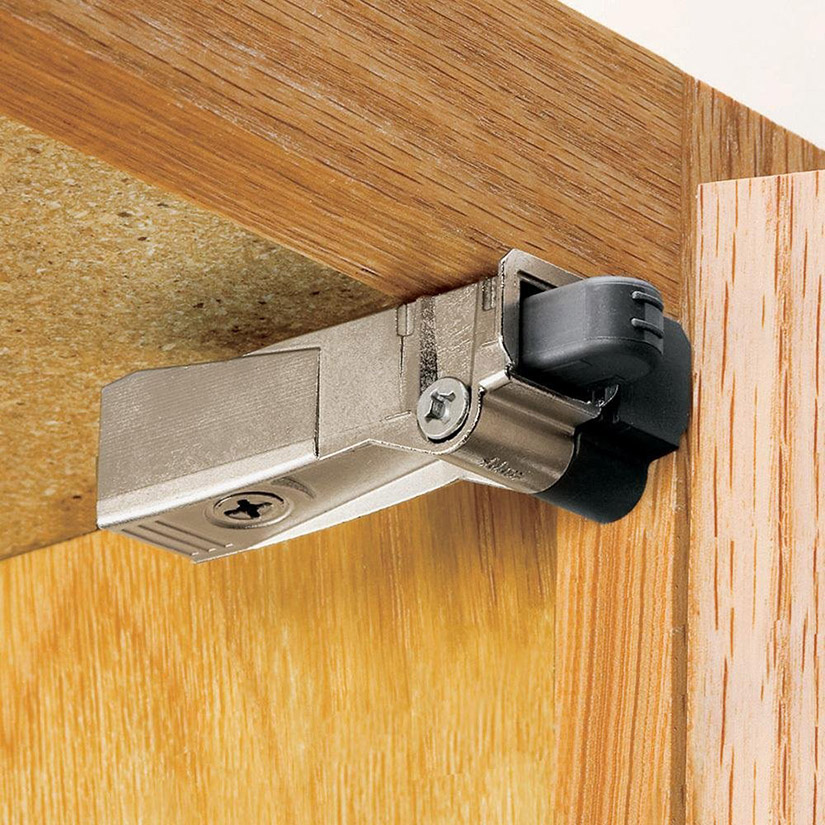 It will allow you to study the main points of this process. If all the elements and accessories for the structure have already been prepared, then you can start assembling frames from a special profile.
How to cut a metal profile?
Before assembling the doors, the instruction involves the preparation of profiles with specified dimensions. Cutting is done with a miter saw. Having made the appropriate calculations, it is necessary to start cutting finished parts from the profiles.
Each manufacturer of sliding furniture systems uses its own parameters, which you can ask in advance. They are calculated automatically based on the input data, i.e. the length and height of the opening. Many people like to do all the profile calculations manually.
A miter saw is usually used for quality cutting of material. A saw blade is pre-installed on it. The tool before working on metal must be properly sharpened. It is not recommended to use a dull blade for cutting. It is better to replace it with a hacksaw for metal.
The cut material for the manufacture of a sliding door must be:
- vertical profiles of equal dimensions;
- lower and upper horizontal profiles of the same size.
If the sliding structure is vertical-horizontal, then it has its own characteristics. The system does not provide for diagonal connecting profiles, and all the others have the same size as the horizontal ones.
How to make holes in the profile?
Before assembling the wardrobe doors, drill holes in the vertical handle profile. It is necessary to perform this type of work after cutting the profile. Here, special care must be taken so as not to miss the important nuances of this stage.
First prepare the outer end face of the vertical profile. There should be 3 holes prepared after this:
- at the top - 1;
- bottom - 2.
Each sliding system is designed with the most appropriate offset. Through holes should be drilled in a certain order through 2 profile walls. The hole on the outside must have a diameter of 10 mm. The drawings provide for an internal hole with a diameter of 5.5 mm. Under the size of the latter, adjusting screws with fixing screws should fit, freely passing through the hole on the outside of the profile.
There must be no self-tapping screws on the visible side of the wardrobe doors, as they are located under the vertical profile. First you need to make holes of a smaller diameter, and then a larger one. It is strictly not necessary to knock on the profile during the installation of sliding wardrobe doors. If the element does not bend, then its coating will be damaged in any case.
How to install horizontal profiles?
Horizontal profiles are installed first. During the installation process, you may encounter a common problem associated with the tight entry of the filling into the profile groove. Here you need a mallet, i.e. a rubber mallet.
If the kit has a mirror or glass filling, you can use a special seal based on silicone to mount it. Before installing the doors, this material is shortened. Its length should be 5 mm less than the width of the mirror itself or glass on both sides.
Since the filling usually fits tightly into the profile groove during installation, it is better to use a mallet and a wooden beam. In the absence of the latter, the remainder of the chipboard will do. On the one hand, the canvas should rest against a reliable and even groove. A profile is applied to the other side. A wooden block is fixed on top of it. You will need to knock on it with a mallet in order to fill the profile for filling the mounted compartment door.
To prevent the profile from bending, it is necessary to monitor the force of impacts. To shoot him, you should perform accented strikes. As a training, you can use the trimming of the profile, as well as filling the chipboard. This will allow you to feel the force of impacts, which is optimal for high-quality stuffing.
The profiles must only be installed on a level and clean surface. This is especially necessary to take into account when installing a mirror or glass filling. The brittleness of this material can lead to breakage if handled carelessly.
If the profile slips off the mirror during the filling process, it must be started again. If the compactor is continued, then the brittle material can be broken. Filler for wardrobe doors should not be freely located inside the horizontal and vertical profiles of the sliding system.
Installation of vertical profiles
Installation of wardrobe doors involves the following steps:
- Fix the rollers from the very corner of the door leaf or 1/6 of its width.
- Center the roller platforms making sure that the distance is the same.
- Mark the fastener locations by exposing the plate.
- Drill holes in the marked places with a drill having a diameter smaller than that of the self-tapping screw by 1 mm.
- Align the plates, screw in self-tapping screws, the length of which depends on the weight of the door leaf, but not less than 70 mm.
- Screw in the screws perpendicularly, otherwise excessive tension will occur.
- Insert the roller supports into the roller plates, securing them with a cover on the side.
- Screw the rollers onto the threaded pins.
- Determine the height of the bottom edge of the rail.
- Use a dry piece of wood with a cross section of 50×70 mm and a length equal to twice the width of the door leaf with an increase of 5 cm. with them on the door leaf with rollers.
- Drill 4 holes on the side of the beam to fix it to the wall.
You will need to prepare small wooden wedges in advance so that the canvas does not walk during installation.
Principle of operation and installation of the stopper
Before installing the stopper for wardrobe doors, you will need to study the principle of operation of this element. For proper fixation of the sliding door with a stopper, it is necessary to fix it in the desired position. The part is usually in the bottom guide rail.
Spring bent plates must rest against the top of the rail track. They form a gap in the middle of the stopper. The door roller must move along the bottom rail. When it hits the plate, the stopper falls into a special gap. As a result, it is blocked, and the door is fixed in the required place when closing.
The sliding compartment door is opened by applying a slight additional force in the required direction. At the same time, the roller leaves the gap between the stopper plates, which causes the door to roll along the lower rail. Another function of the stopper is to fix the door in the right place.
Many owners of two-door wardrobes find that this piece of furniture works perfectly without a special door lock. Installing a stopper is necessary for structures that have 3 or more doors. Without this device, it is impossible to adjust the evenness of several doors when they are closed. The assembly scheme of such sliding structures requires a mandatory fixing device. Each sash will require 1 stopper.
Installation of fittings for sliding doors
Before hanging wardrobe doors with your own hands, you can take care of installing handles and locks. It is best to purchase special mortise products. When buying a ready-made kit, all holes are provided in it by the manufacturer. If a regular canvas is fitted, you will need to trace the outline with a pencil and remove any excess with a chisel.
Fixing points for fittings should be marked after checking the compatibility of the handle or lock with the hole.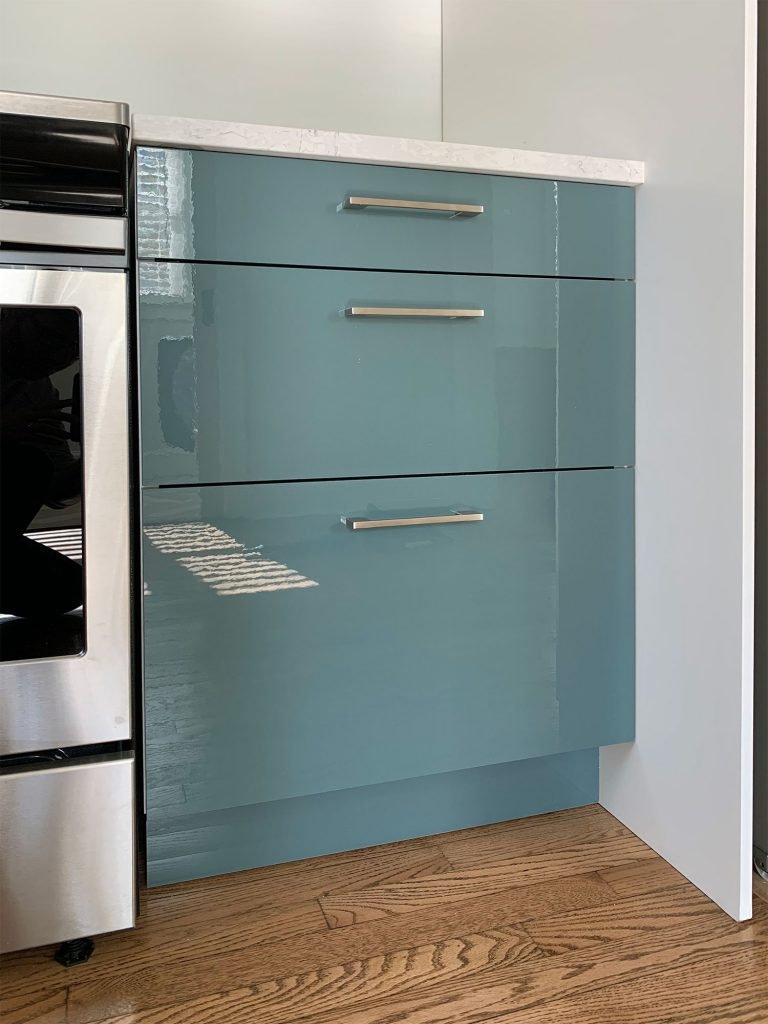 Since sliding doors should hang and not shuffle on the flooring, you will need to add 7-10 mm to the mark made. If there is no flooring on the screed, then a minimum gap of 7 mm will not be enough, since later it will be necessary to cover the floor with linoleum, laminate or carpet. Before hanging wardrobe doors, it is important to consider the thickness of these materials.
Select the fastener according to what the wall is made of. The position of a special bar, which makes it possible to simplify the installation of doors, is marked with a pencil. You can strengthen the element through, if the thickness of the wall allows. For this, self-tapping screws with a length of 120 mm or more are used, and anchor bolts are also suitable. If the houses have concrete walls, then dowels are used.
Make marks on the wall beforehand. Installation is carried out with a thin and long drill, having a diameter smaller than the hole made.