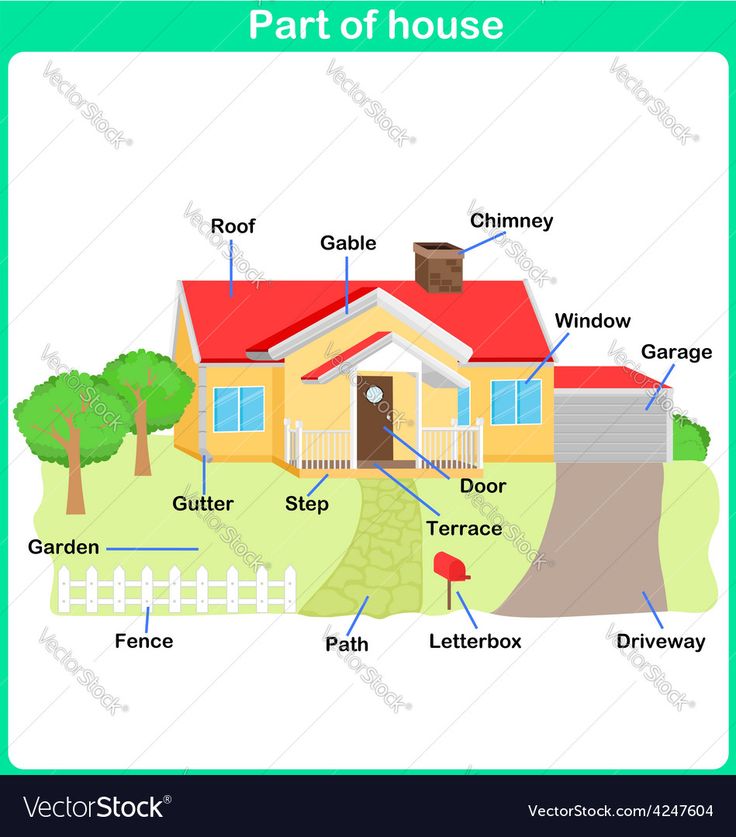
Build a garden room
How to Create Garden Rooms
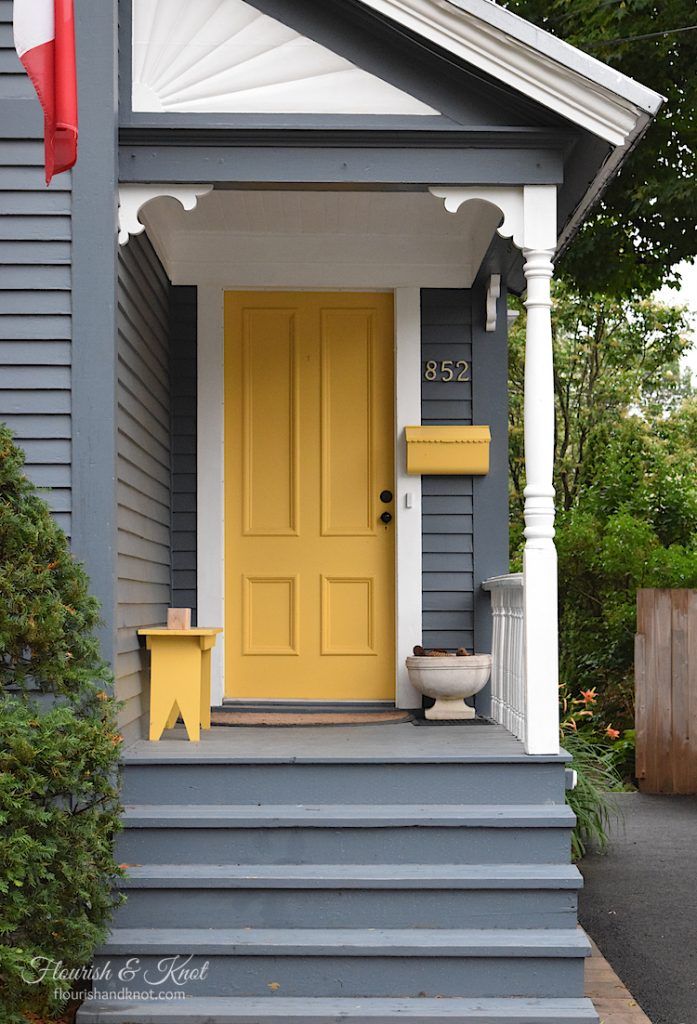
Create your new favorite "sitting spot"
By
Marie Iannotti
Marie Iannotti
Marie Iannotti is a life-long gardener and a veteran Master Gardener with nearly three decades of experience. She's also an author of three gardening books, a plant photographer, public speaker, and a former Cornell Cooperative Extension Horticulture Educator. Marie's garden writing has been featured in newspapers and magazines nationwide and she has been interviewed for Martha Stewart Radio, National Public Radio, and numerous articles.
Learn more about The Spruce's Editorial Process
Updated on 07/29/19
Eric Van Lokven/Getty Images
Creating garden “rooms”—separated areas in a garden—adds an element of surprise to your landscape, no matter what size it is. You can create distinct zones for different uses and divide them off from each other with a feature, such as a pergola, shrub, or fencing. Garden rooms also provide a way to indulge in plants that might not work well together. If you keep them in separate rooms, they will all work fine.
What Is a Garden Room?
Let’s start with what a garden room is not. It is not decorating your patio with floral-printed furniture and adding a couple of potted plants. An inviting patio makes a nice transition from the house to the garden, but it is not necessarily a garden room.
Rooms, whether in homes or in gardens, are spaces separated by some type of wall. In the garden, this can be accomplished with hedges, trees and shrubs, vines, or fences and other structures. They don't have to be 8 feet tall; they just have to give a sense of separation, to give you a defined space to design and use.
The Sissinghurst Castle Garden was influential in popularizing the concept of garden rooms. It uses a geometric hedge to create formal garden areas, but you could use this overall concept in a more casual way as well.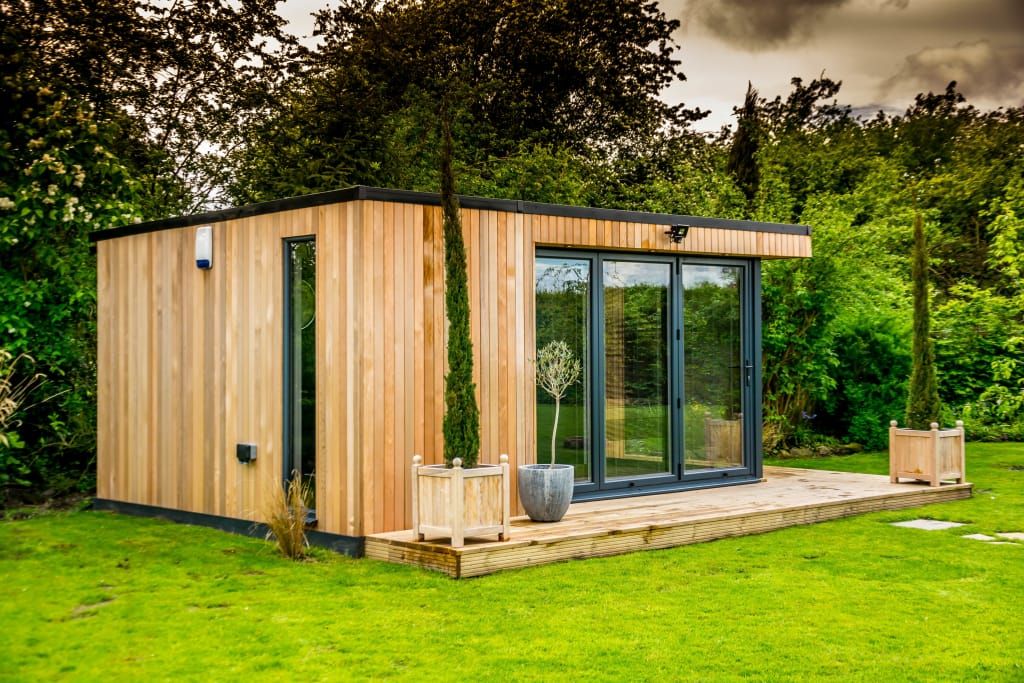 Instead of a clipped hedge, you could create your walls with a row of lilacs, tall grasses, or maybe runner beans trained on two trellises to create an entryway.
When your wall or walls block the immediate view of the room so that it is isolated from the rest of the garden, it creates both a sense of enclosure and discovery.
Why Create Garden Rooms?
Aesthetically, garden rooms can make your landscape appear larger. When the entire yard is open, your eyes take in the whole space with one sweeping glance. When the view is obstructed, your perspective becomes more focused, and you observe your garden in much smaller chunks.
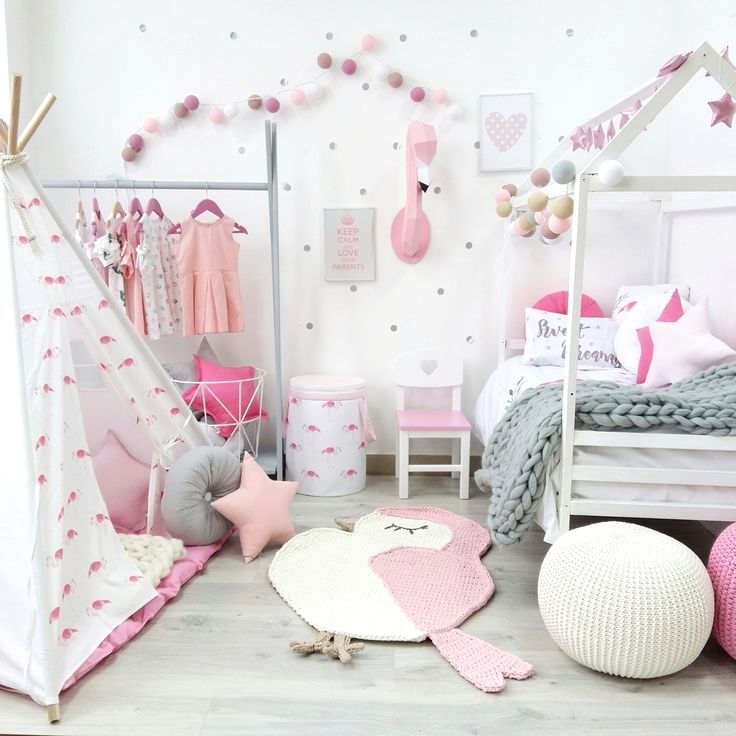
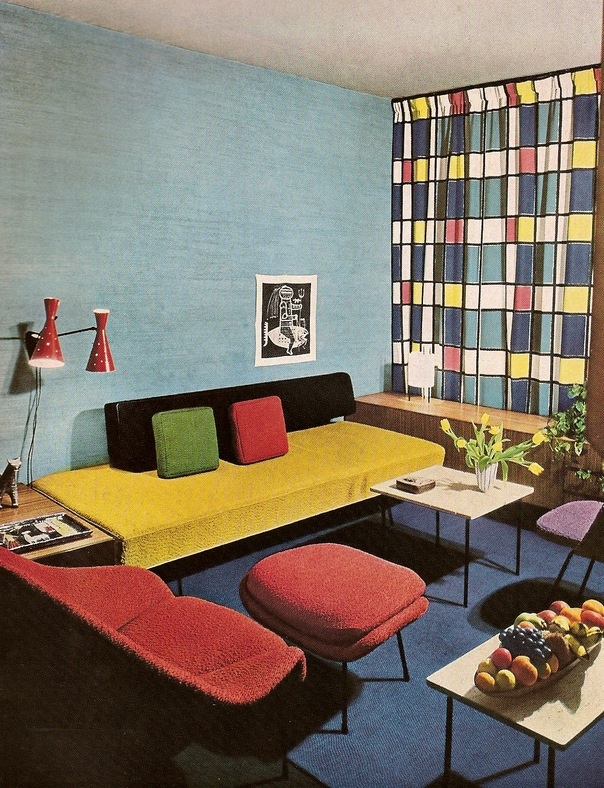
Creating separated rooms also allows gardeners to play with different color schemes or styles without creating chaos. You can have a bright, hot, tropical space and a calming pastel cottage garden without having the plants compete with each other for attention. You can always unify the disparate sections by repeating the hardscaping or a handful of plants.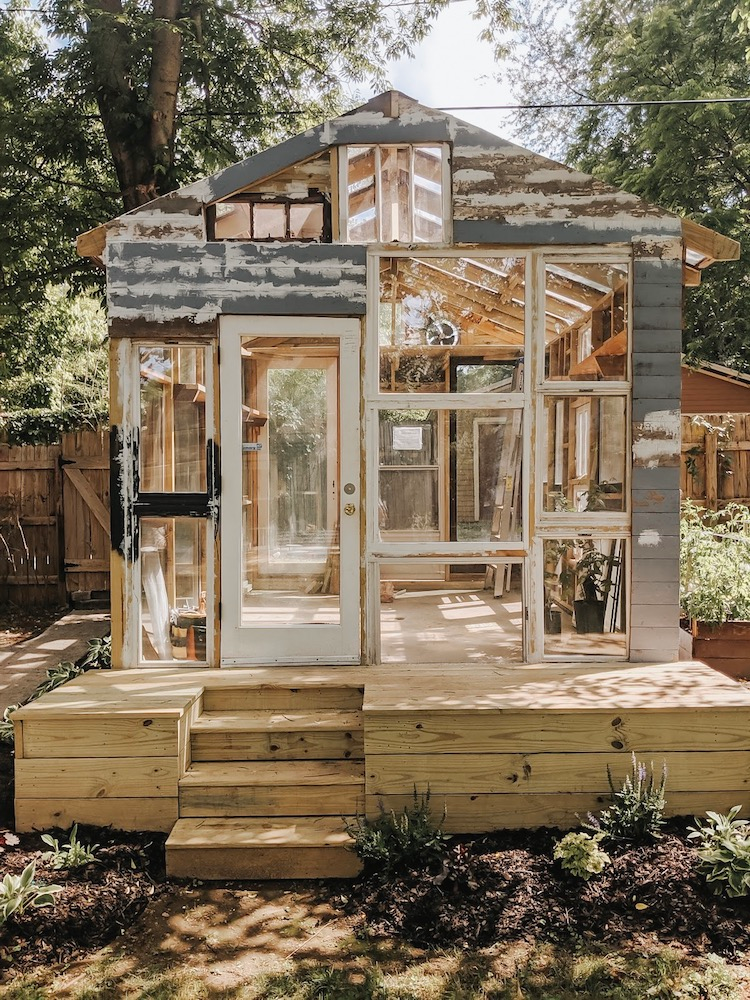
Practically speaking, garden rooms can be used to create spaces for different functions, such as a dining area, a play area, a place for contemplation, or an edible garden. One approach is to view your garden like a house. Design the layout of a kitchen, a living room, a family room, playroom, and a place to rest, but don’t let that idea confine you. You can get away with a lot more fantasy outdoors.
How to Get Started
First, decide what you want to do in the room. Whether it’s to experiment with color or to create a fort for young children, the room's creation begins with its intended purpose. Think about the paths you already take in your yard. You don’t want to obstruct the main entry, but you do want to divert travelers so that they have to go around a corner to discover the room.
Consider the views from within the room and of the room. Will placing a "wall" in a particular location block a view from in the house or create intrigue? Would placing the wall there block sunlight from getting into the room?
After you have the intent and the site, you can begin to consider what type of plant or structure will create the divider between it and other areas of the garden.
Designing the Garden Room
After the walls' locations are planned, then the real fun starts. You get to “furnish” the room. The options are limitless. Some ideas to consider:
- Do you want hardscaping, mulch, or a grass floor? Will there be a path to the room?
- Will there be any structures within the room, such as a pergola, seating area, fire pit, or water feature? How about other focal points such as bird baths, statues or other outdoor artwork that will need to be placed before the plants can go in?
- Do you need to provide electrical access for lighting, pumps, or entertainment?
When you're choosing plants, don't focus only on color, height, and the smell of the plants. You can also include sound, touch, and even taste. You might also want to take pollinator attraction into account. (Think trumpet vines on a trellis for hummingbirds or butterfly bushes within sight of the seating area or as walls.)
Most importantly, make it a space you want to discover and spend time in.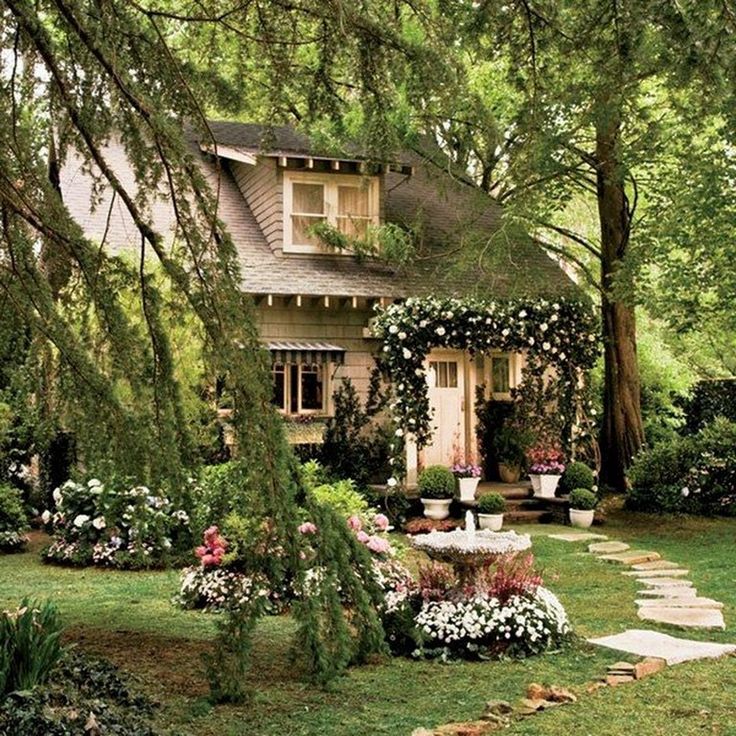 You can start with a room for dining and entertaining that creates a passage from the house and opens into the larger garden, or take an already enclosed space, such as your vegetable garden, and add a table and other sensory elements to it.
Play with creating your first secluded space, and you can easily find yourself expanding the idea further. But don't let yourself get overwhelmed with the options. The best gardens take years to mature. You can always revise things as you go, too. It's better to start small and add to it over time than to never attempt to create your new favorite "sitting spot." As a bonus, you may even find that you spend more time in the garden enjoying it after the addition of a dedicated room to spend time in.
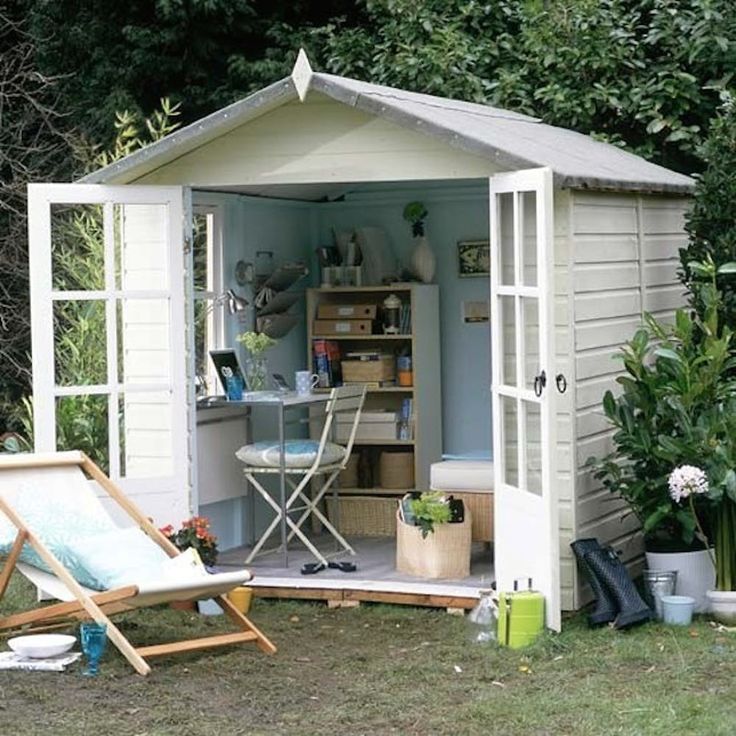
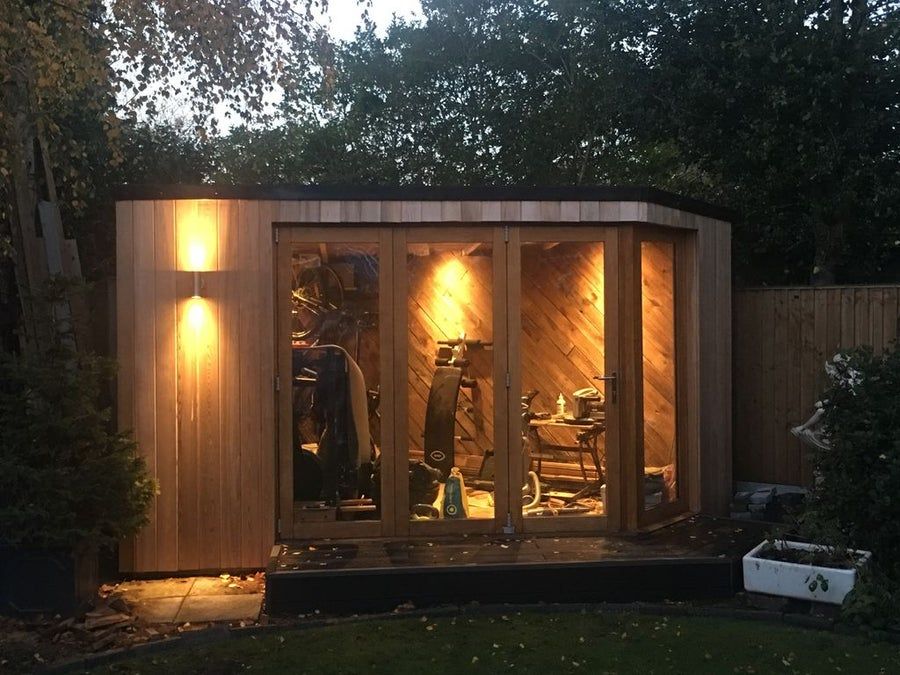
How to build a garden office from scratch - on a budget
With many of us now working from home there’s an increasing need find a suitable space in which to work away from distractions and normal family life. Making a garden office in which we can switch off from the day to day home life to focus on work is important for a number of reasons. Whether it’s a segregated space away from the home or just some much needed extra space this guide should help you decide if building your own garden room is right for you. This post is targeted at those with some basic DIY skills and a limited budget. Read on to find out how I built my own garden office from scratch.
Table of Contents
- DIY garden office intro
- Planning permission
- Location planning
- Structural planning
- The floor & foundation
- The walls
- The roof
- Materials
- Materials List
- Tools
- Step by step guide for building this garden office
- Ground works
- The floor frame for the garden building
- Insulating the floor
- The garden office walls
- The garden room roof
- The garden office interior
- Update May 2021
- Update December 2021
DIY garden office intro
You won’t need to follow my instructions step by step as your space may differ from mine. Your design ideas, for example, might resemble a garden pod or garden office log cabin, but the principles are much the same with regards to the overall construction.
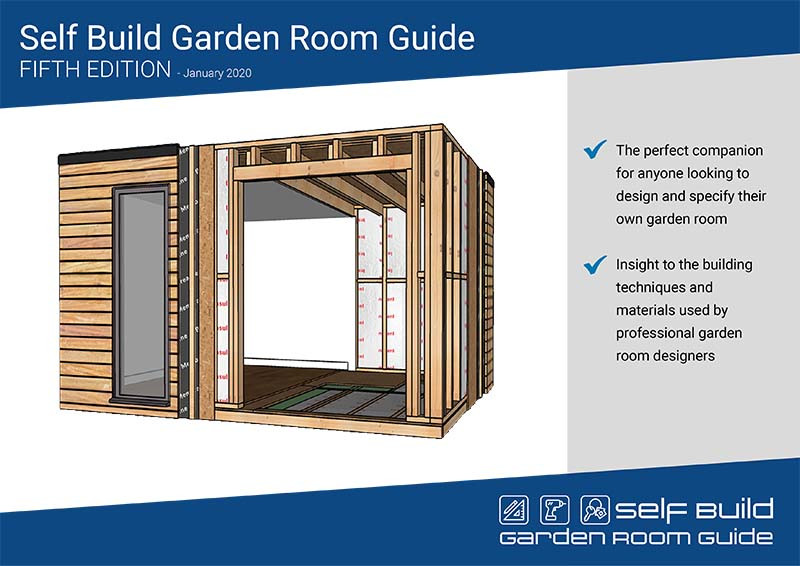
I’ve recently drawn up some 3D plans for the shed which are available to download now. They include a detailed step by step build guide, materials list and cut list. You can use this guide to easily build the pictured shed, then add the insulation later.
3D plansBelow I have created a step by step guide on how to build this with useful tips and common mistakes that can be avoided. If like me you’re on a budget then this will hopefully give you some great ideas to save money on both the construction and any tools that you might require.
Professionally installed garden offices of this sizes will cost on average £15,000 to £20,000 depending on where you live. You can get a beautiful garden office from businesses like garden rooms Essex if you have the budget available, but if not then I will show you how to achieve your own garden office by building it yourself for about £5000.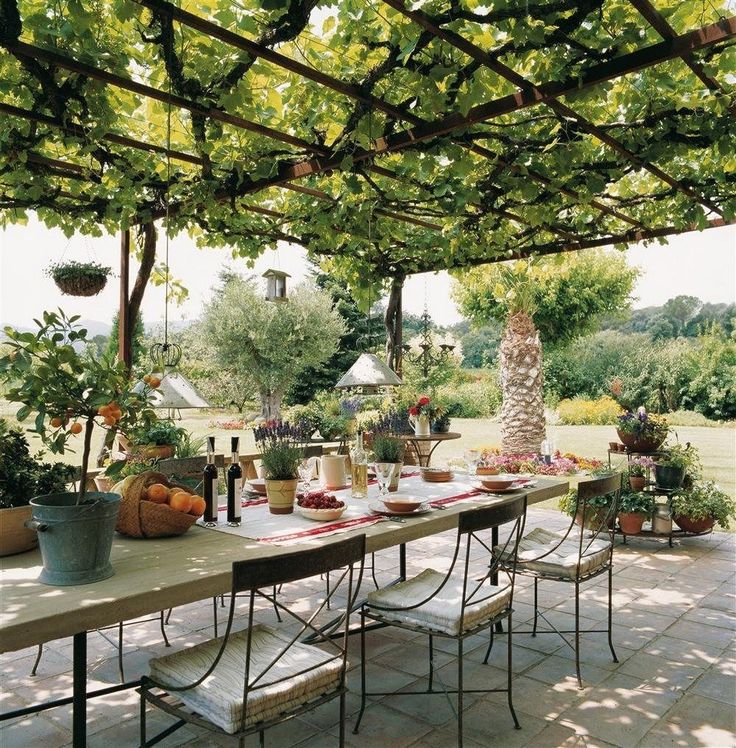 In my build I am extending from an original shed I built a couple of years back. I will be showing you how I extended this structure and insulated the whole thing. The original structure cost me about £1200.
A DIY garden office isn’t for everyone and there are certain things you probably won’t be able to complete yourself, such as the electrics, but the structure itself can be achieved relatively easily with a few select tools, a little bit of research and some time.
Time is an important factor here as you’ll need to dedicate about a full week in dry weather to complete the main structure. You’ll also probably need another two weeks to finish off the interior and aesthetic touches. I have completed my office in and around work. With this and the bad weather during winter it’s taken a little over two months so far.
If building your office from scratch isn’t quite right then you can always consider a flat-pack office.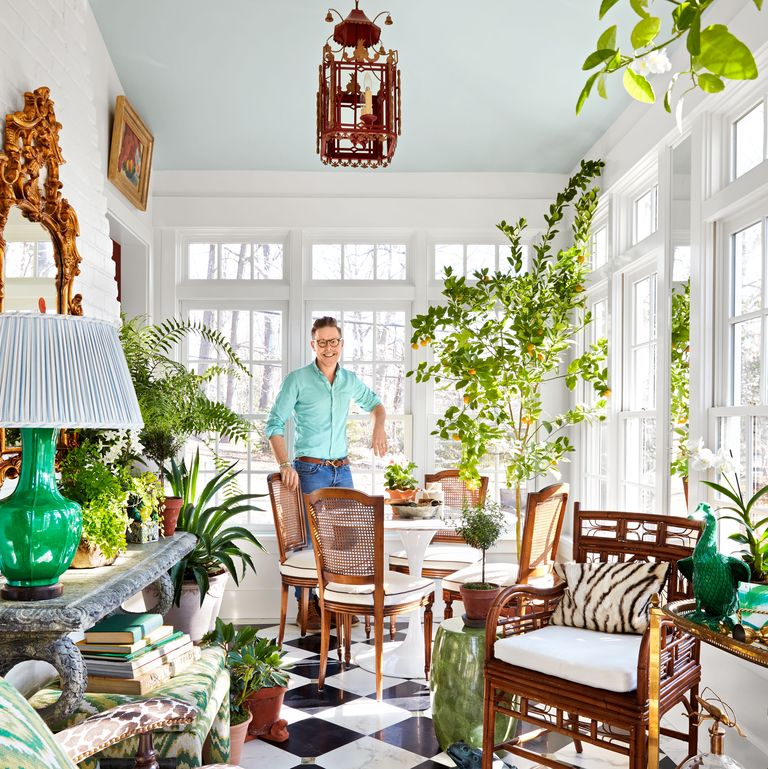 All you’ll need is a suitable base and the rest is easy. I’ve recently built another garden office using a flat pack kit from Garden Buildings Direct. This can simplify the self-build process, saving you time but will cost a little more. My office space is ideal for quiet online meetings and making use of the virtual office space our organisation uses. This DIY garden office and the virtual office mean I can work from home, whilst also feeling like I’m at the office.
Before you get started you’ll need to produce a plan and know a few basic building planning restrictions.
Planning permission
There are a few regulations in place that prevent you from building a structure that might affect your neighbours so be sure to check the UK planning portal before you get started. Failing to follow these rules could mean that your lovely garden office will need to be taken down so make sure you stick within the guidelines. It’s also important to check your property deeds as there might be a covenant that prevents building works in specific areas.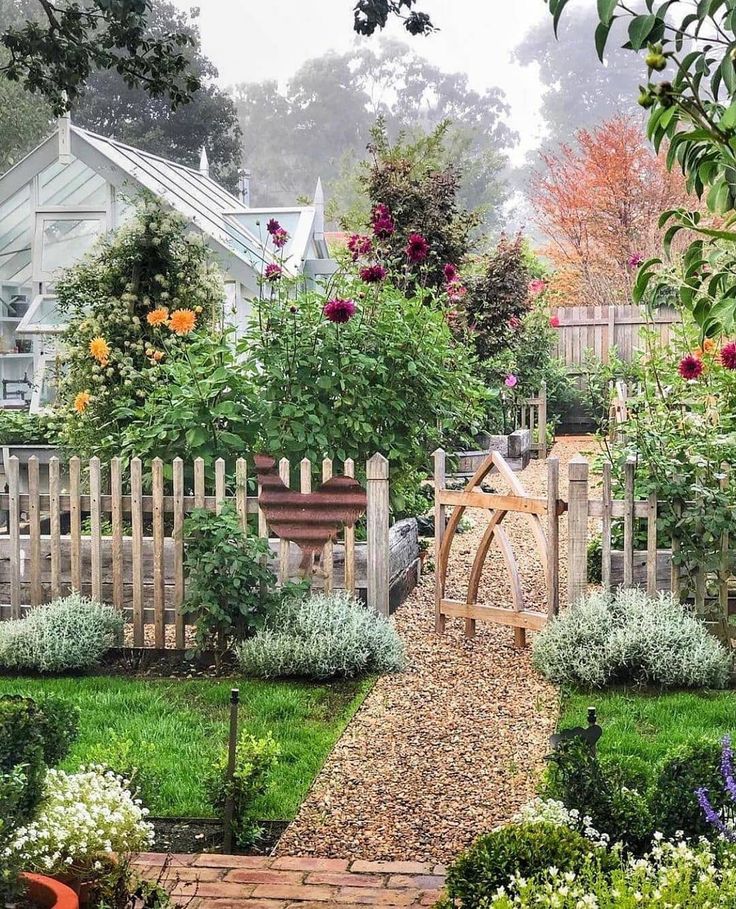
Further more you can always check with your local planning department to double check these restrictions and get relevant guidance. The following is a quick list of restrictions for outbuildings that are considered permitted developments.
- On designated land, outbuildings to the side of the house are not permitted development.
- Outbuildings are not permitted development within the grounds of a listed building.
- Outbuildings are not permitted development forward of the principal elevation of the original house.
The term original house means the house as it was first built or as it stood on 1 July 1948 (if it was built before that date). - Outbuildings and other additions must not exceed 50% of the total area of land around the original house. Sheds and all other outbuildings (see intro) and extensions to the original house must be included when calculating this 50% limit.
- To be permitted development, any new building must not itself be separate, self-contained, living accommodation and must not have a microwave antenna.
- Outbuildings must be single storey with a maximum eaves height of 2.5 metres and maximum overall height of 4 metres with a dual pitched roof, or 3 metres in any other case.
- If the outbuilding is within 2 metres of the property boundary the whole building should not exceed 2.5 metres in height.
- In national parks, the Broads, Areas of Outstanding Natural Beauty and World Heritage Sites the total area to be covered by any outbuildings more than 20 metres from ANY WALL of the house must not exceed 10 square metres to be permitted development.
Location planning
Grab a piece of paper, a tape measure and pop into the garden to start thinking about the ideal location for your new building. Consider the following factors:
- Think about how level the ground is. Do you have a suitable flat space with which to start your construction or will you need to complete some ground works or build a suitable support frame?
- Are there any obstructions such as trees, underground pipes or electrical wiring that need to be avoided or removed?
- Which way will the office entrance face?
- Where does the sun rise and set? This might affect how you select the perfect location.

- You’ll need access to all sides of the building so leaving a suitable gap between neighbouring boundaries is essential, not just for the construction but also for maintenance in the future. 50cm is roughly the minimum.
- Will you need a path to the front door? You might already have a suitable path but others might just have a lawn which isn’t ideal when going to and from the office as you’ll drag dirt and mud around, especially during the winter months.
- Are you under a tree? This might not seem that relevant but my building is. During autumn the office is always covered in leaves from the trees which need to be removed. It’s not the best job and if not cleared can start to cause issues with the felt roofing.
- Size. How big is your building going to be? Consider material sizes when planning your ideal space. Most sheet material comes in 2440x1220mm (8ft x 4ft) sizes so try and work to multiples of these sizes which will mean less cutting and less waste.
 Whilst it’s not essential to do this it will save you some time and money.
 - Electrics. How will you get power to your office. You’ll need a qualified electrician to install your electrics and costs can skyrocket the further you are away from the home. You’ll need armoured cable run between the house and your office which is expensive. It’ll need to be dug underground or fixed along a fence which can take up a lot of time.
Structural planning
Have a think about how you will construct your office including the roof, floor and wall designs. There are many different ways to achieve these so consider the following:
The floor & foundation
- Plinth supports are the cheaper option and also provide slightly better water drainage. This option will however provide a void underneath your structure which allows vermin to nest and cold air to circulate which can affect thermal efficiency. This is the option I went for on my build due to time and budget restraints.
 I will talk you through this process below in my step by step guide.
 - Solid foundations will provide the most stable and long lasting support for your office but will also be the most expensive. Constructing this using concrete will provide a level and sturdy foundation with which to build on. You can watch this video to guide you through the process.
- You may also wish to consider a patio base for your office which I built for a previous shed foundation. This is equally as effective as a concrete base but again is generally more expensive. You can read about this process in another post of mine here: Building a garden workshop
Do you want to build your garden office on a slope or uneven ground?
Take a look at my recent guide where I show you how to build a shed or garden office base on a sloped garden. This in depth guide covers everything you need to know, from levelling ground to building a wooden framed base on a steep slope.
The walls
My garden office plans drawn on SketchUpStructurally most walls will be the same but you will need to consider the type of insulation and cladding you prefer. An office without any insulation is going to be very cold in the winter months so think carefully about this stage. Consider one of the following or do your own research for the best insulation to use.
Insulation
For the insulation I decided to use Rockwool RWA45 (50mm) slabs because they offer both excellent thermal and acoustic properties. I wanted additional soundproofing as I use half of my office as a workshop for cutting and sanding my furniture. Thermal conductivity: 0.035 W/mK
For extra acoustic soundproofing consider going for the Rockwool RW3 or RW5 but this application is best suited for sound/recording studios, not general office use.
For general thermal insulation consider:
- Kingspan TP10 Insulation Board (2400x1220x50mm) – Expensive but these large boards are great thermal insulators, easy to cut and provide good coverage for larger wall cavities. ~£45 per board. Thermal conductivity: 0.022 W/mK
- Kay Metzeler General Purpose Polystyrene EPS70 – (2400x1200x50mm) – The cheapest option but not a great acoustic insulator, and it’s not fire resistant. ~£16 per board. Thermal Conductivity: 0.038 W/mK
W/mK explained (The U-value)
The U-Value is the flow of heat through the building materials used to make up the building itself. This includes bricks, flooring, roofing and windows. The value is measured in watts at the rate of heat transfer. The lower the U-Value of a material the better insulator it will be.
Cladding
For the exterior walls you will again have a choice of many different types of cladding. Most will provide adequate protection from the elements so it’s really down to your preference on aesthetics.
On my first structure I used a log lap cladding as I like the look of it and it was a reasonably thick material (at 22mm). For the second part of the structure I decided to go for a slightly cheaper shiplap cladding and now prefer the look of this.
I purchased the shiplap cladding from B&Q. It has great ratings and is easy to work with. The boards come in 3m lengths and are 119mm x 14.5mm. This is a little thinner than the loglap but also a bit cheaper at £5.27 per board.
You can find the 22mm thick loglap cladding here
Here is the 38mm loglap cladding which is great for that little bit extra thermal and acoustic insulation.
The roof
What style roof are you looking to create? They all pretty much provide the same function but some may be easier to construct and maintain. I went for a dual pitched roof purely because I like the look of it.
Flat roof – This is probably the simplest construction and you’ll benefit from only requiring one side of guttering. You’ll need to do your own research if you want to build this style but this video is a good starting point.
Apex roof or dual pitched roof – You can follow my instruction below for this style roof. It’s not overly complicated and can be built in two different ways. Either with the rafters running longways, similar to that of the flat roof or upwards to the apex like my original design.
Consider how much over hang you want on the roof. A roof with a decent size overhang will provide more protection from rain than a small overhang. My roof overhangs each edge by about 30cm which is a little more than most sheds but it protects the walls from the elements.
Materials
I’ll list all the materials I have used on my build but you may want to consider upgrading or downgrading some of these to suit your own requirements. For example, I went for a more expensive type of insulation that also acts as a sound barrier. I also selected a cheaper type of waterproof breathable membrane which you may wish to upgrade.
Why use a breathable membrane? A breathable membrane will offer weatherproofing against the elements whilst also allowing air to move freely between the barrier. This is required to prevent moisture build up within the structure, which causes damp and mould to grow, which we don’t want to happen.
Using reclaimed materials is always a good choice where possible to help bring down costs but finding the right ones can be challenging. Search Google for local reclaimed wood suppliers and visit them to see what you can get. Search Google for ‘wood recycling project’ to find your nearest recycling business. Here is the Bristol branch: https://www.bwrp.org.uk/
Materials List
These are the materials and costs for my project which was an extension of my original self built shed. I also insulated and boarded the existing shed/office so please make sure to complete your own calculations based on the size of your build. I’ve included all the links to where you can find the materials.
| Material | Size | Application | Quantity | Cost |
| 18mm OSB 3 board | 2440x1220mm | Flooring | 4 | £82 |
| 9mm OSB 3 board | 2440x1220mm | Walls and roof | 20 | £310 |
| CLS studwork 2.4m | 38x63x2400mm | Flooring, walls & roof | 40 | £100 |
| CLS studwork 3m | 38x63x3000mm | Flooring & walls | 8 | £54 |
| Upvc french doors | 1190x2090mm | Doors | 1 | £480 |
| C16 stick timber | 95x45x3600mm | Roof ridge | 1 | £9. 39 39 |
| C16 stick timber | 70x45x3600mm | Roof supports | 5 | £55.25 |
| Plasterboard screws | 3.5x35mm | Secure plasterboard | 1000 | £6.54 |
| 3m Shiplap cladding | 119×14.5mm | Cladding outer wall | 44 | £231.88 |
| 12.5mm Plasterboard | 2440x1220mm | Internal walls | 25 | £190 |
| Rockwool RWA45 insulation | 1200x600mm | Walls & roof insulation | 8 packs | £259.94 |
| 80mm screws | 5mm x 80mm | Stud walls & flooring | 300 | £12.57 |
| Water vapour barrier | 4m x 25m | Walls and roof | 1 | £15 |
| 90mm posts | 90x90mmx2.4m | Corner posts | 2 | £30.60 |
| Felt roofing (green) | 10m x 1m | Roofing | 2 | £40 |
| TOTAL (so far) | £1877. 17 17 |
The above completes the build to date but I intend on adding a window to the left hand wall and also want to extend the space further to have an L shape office. I will cover these details another time.
Save more money with Cashback
I always use a cashback site like Top Cashback when buying on line. It’s a great way to save money on builds like this and all your everyday shopping needs. My wife and I have generated over £2200 in a couple of years so it’s worth having a look at before you start buying materials and tools.
I’ve added the Top Cashback browser extension so that I don’t miss any potential cashback offers. It works on both Chrome and Firefox.
Tools
If you’re not fully tooled up yet then consider the following to make this job both quicker and easier.
- Combi drill driver and impact driver – Make quick work of screws and pilot holes with these two drills.
- Mitre saw – The 90 degree saw cut made easy with this essential tool.
- Circular saw – Ideal for cutting sheet materials.
- Jigsaw – handy for cutting complicated shapes out of sheet materials.
- Tape measure – 5m should be plenty for this job but go for 8m if your build is bigger.
- Panel saw – Cut the tops off the corner posts.
- Orbital sander – consider a sander to clean off rough edges
- Sealant gun – sealant and caulking
- General tool kit – Hammers, screwdrivers, drill bits and more. You’ll likely need a general tool kit to help you through this build.
You necessarily need all of these tools but it will help your build quality and speed. I have recommended some of my favourite tools which are Dewalt. I think this is a good quality brand along side Makita. But it’s up to you what you use.
Back to top
Step by step guide for building this garden office
Ground works
Let’s kick things off with the ground works for your garden office. I already had a reasonably flat surface with which to start the build.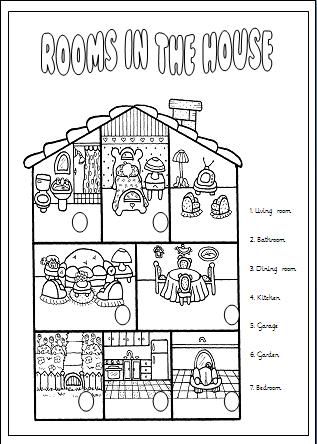 As mentioned above this office is to be an extension of my original DIY shed which I will also be insulating and boarding inside.
View my original post to see a full guide to building a base.
I used some left over type 1 MOT to provide a tough base with which to build on. I then laid out the 4 corner plinths to my required dimensions. I was a little restricted here due to an existing structure so the overall dimensions for the base were 3250mm x 3000mm.
The floor frame for the garden building
Using one of the 3m C16 timber pieces I was able to dig out the ground and level the slabs using a large 1.8m spirit level.
Screwing the frame togetherAs you can see I’ve built the frame directly off the original structure. Using 80mm screws to join the frame pieces together. Drilling pilot holes before inserting the screws. The spacing between each timber support is in intervals of 610mm which is half of the 1220mm wide 18mm MDF boards that will be fitted on top.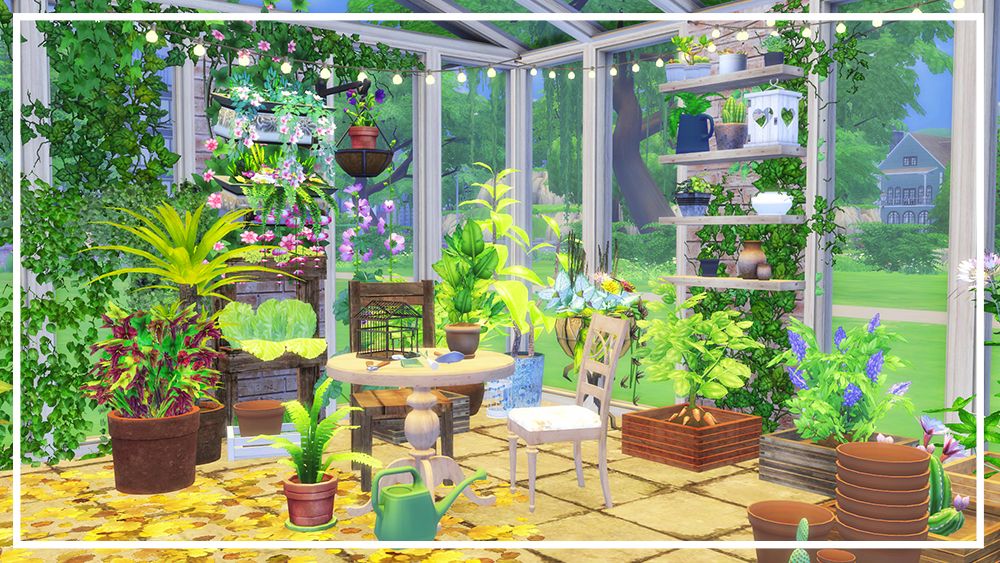
To protect the outer frame from water and possible rotting I wrapped each edge with the plastic sheeting. I simply stapled the plastic sheet to the wood with a staple gun.
It’s also at this point I made sure the frame was squared off, with each corner a right angle, by measuring diagonally (corner to opposite corner) and gently adjusting the frame until both lengths were exactly the same.
It’s now time to add some more supports to ensure there is sufficient strength for the floor. You can see I’ve added additional slabs so the floor doesn’t flex when additional weight is added. This required further digging and shifting of the MOT.
Additional support for the frameWith the correct measurements the 2440x1220mm 18mm thick MDF boards should fit neatly over this frame with suitable support. Make sure there is enough space so that the boards can be screwed into the frame alongside the other boards. Secure the boards down using 40mm (4mm wide) screws.
To finish off the base and floor I added another full board and cut the remaining two to fit using a circular saw. If you have a good square base everything should line up nicely down the edges. I made sure the boards go right up to the edge of the frame because I’ll cover the lot with some waterproof material. This will protect the flooring from being breached by water and causing it to rot.
Insulating the floor
You might want to consider insulating the floor before going any further with your garden office. I decided not to insulate at this point due to my budget but I will add insulation afterwards. There is a great video below which demonstrates insulating the floor but you will need to consider this early on in the build process.
I have decided to insulate the floor retrospectively using something like this cork acoustic and thermal insulation roll.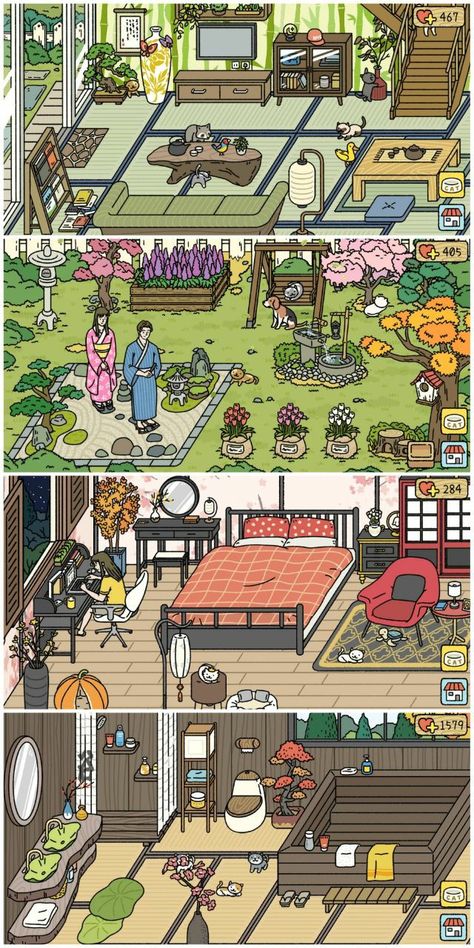 It won’t be as effective as the insulation in the above video and it will raise the floor by about 10mm but I’m happy with this.
The garden office walls
Building the wall frame is very straight forwards. I started by adding the 90mm posts to the corner and measuring the distance in-between. I then built another frame with the CLS timber measuring 2m tall and the correct length of the building. Struts were added in 600mm intervals to allow for the insulation to fit snuggly between. Nogins were added 1200mm up from the base timber. (again for the insulation to fit nicely.)
I made two of these the same. For the original structure I made the rear wall the same (to the correct width) and added the roof supports afterwards.
I haven’t added any windows to my office yet but it’s at this point you should probably think about building a suitable frame if you’d like to add one (or more). They can be added after but it’s a little more difficult. Try follow this structure if you intend to add a window.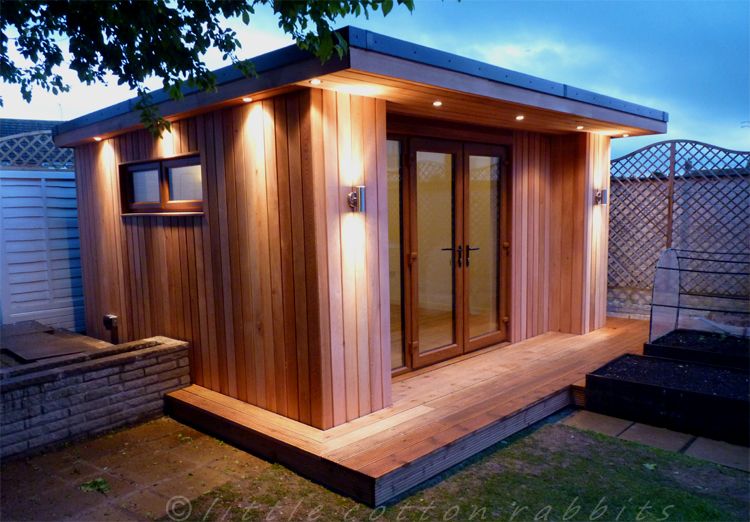
You can find cheap windows on Facebook Marketplace or Gumtree, especially if you’re not fussed with the size. If you want something a little more specific try Wickes or B&Q for windows. B&Q have matching grey windows here.
The wall frames were then screwed into the base using 80mm screws and screwed into the corner posts using 60mm screws.
To add additional strength to the structure it’s a good idea to insert diagonal supports on some of the frame. This will prevent the frame from leaning should you ever add weight to the interior walls.
I then measured out my door frame and cut the lengths of CLS to fit. The above picture demonstrates how I’ve constructed this. My door measured 1190mm x 2090mm but I made sure the frame was about 3-5mm wider than this. This allowed me enough space to slide the door into the frame easily. The door comes with packers which fill any space and allows you to square up the door. It is crucial that the door is perfectly square or it won’t open and close properly.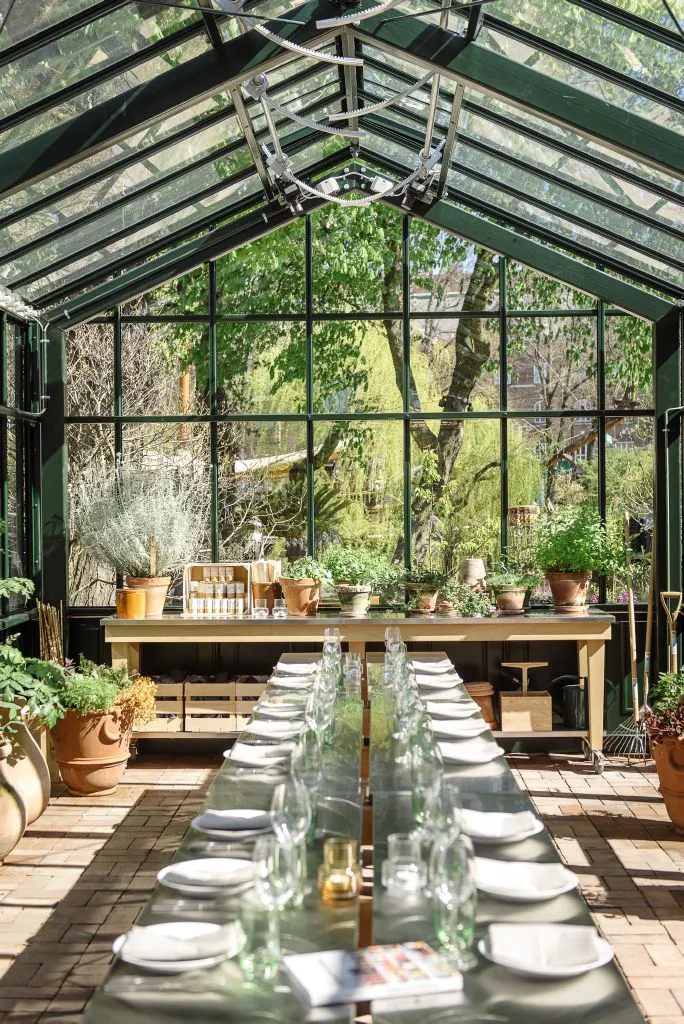 I took my time on this part to ensure the timber frame was spot on.
Here is a cross section diagram of the correct wall construction. You can also swap the 9mm OSB for 18mm OSB for a stronger more insulated wall.
Materials in order, starting from the inside:
- Plasterboard
- 9mm OSB or ply board
- CLS timber frame
- insulation
- 9mm OSB or ply board
- Breathable membrane
- Furring strips
- Cladding
To save money on my project I decided not to have the inner 9mm OSB/ply. I simply attached the plasterboard directly onto the CLS timber frame. This will save a reasonable amount of money but reduces the thermal properties of the structure.
The garden room roof
For this I opted for a dual pitched roof supported by lengthways rafters running from end to end. Different to my original structure. Move the slider below to see the differences.
Both roof structures provide enough strength to take my full body weight. This is important as I needed to get on the roof to fit the felt. Visit my original post for the construction of the right hand image.
I used the five 70x45mm C16 for the roof rafters. These were all screwed in using 80mm screws. As you can see above I used the door frame to support the mid rafters. The side walls were used to support the outer rafters and a purlin at one end was used to support the rest.
Here is a picture of the original building as I started to add the roofing OSB boards.
Original buildingBetween the two I would say the original roof was stronger. The next job was to add the roof boards to the extension. This was a simple cut to length and lift onto the roof. I cut the boards using a circular saw then used the ladders to screw each board into place using 35mm screws.
Once I had all the 9mm OSB 3 boards fixed I decided to add a waterproof barrier. This would protect the structure whilst I finished things off. I used the same plastic sheeting as before. The roof will eventually be finished off with felt.
My next job was to remove all the cladding from the original structure and add 9mm OSB 3 boards which will help strengthen and insulate the building. I cut the boards to size with my circular saw and screwed them onto the original CLS timber frame. I then covered the boards with a waterproof plastic sheet (recommended you use a breathable membrane) and then added the cladding back over this.
I skipped this stage to save a little money but ideally you should fit 23mm x 44mm battens over the membrane, that run from the top of the wall to the ground. The cladding is then secured to these battens, also known as furring strips. These would be fitted about 500mm apart and will allow air to circulate between the water barrier and the cladding.
I then continued this process around the rest of the new extension.
In the above image you can see that I’ve started to add the frame for the door.
I then returned to the original structure to complete the insulation and thicker walls.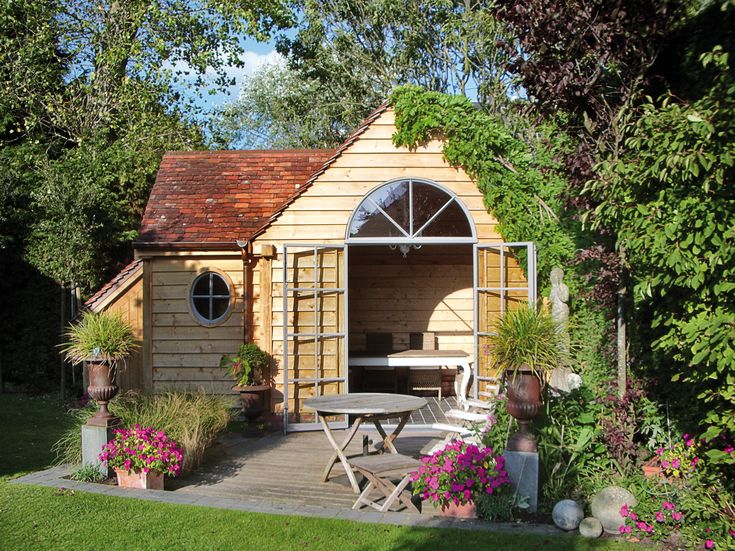 I started by removing all the cladding from one wall. I then cut and fitted the 9mm OSB 3 boards to the outer side of the wall. As you can see the space is quite busy with my hoardings so I had to work around all this.
I then sealed any gaps with silicone sealant to create a water and air tight barrier. Another layer of waterproof plastic sheeting was then added over the top of this. (on the outside). I could then add the cladding back on top of this.
Here I have returned to the original structure as sealed any gaps with silicone sealant. I wanted the structure to be as sound proof as possible and this would help. Whilst I am taking every care to seal the structure I’m also mindful that there needs to be some airflow through the building to prevent moisture build up which leads to damp and mould growth. For this reason I will be adding a window with air vents at a later date.
With the exterior wall completed I turned my attention to the interior.
Back to top
The garden office interior
I started to think about where I wanted power in the garden office.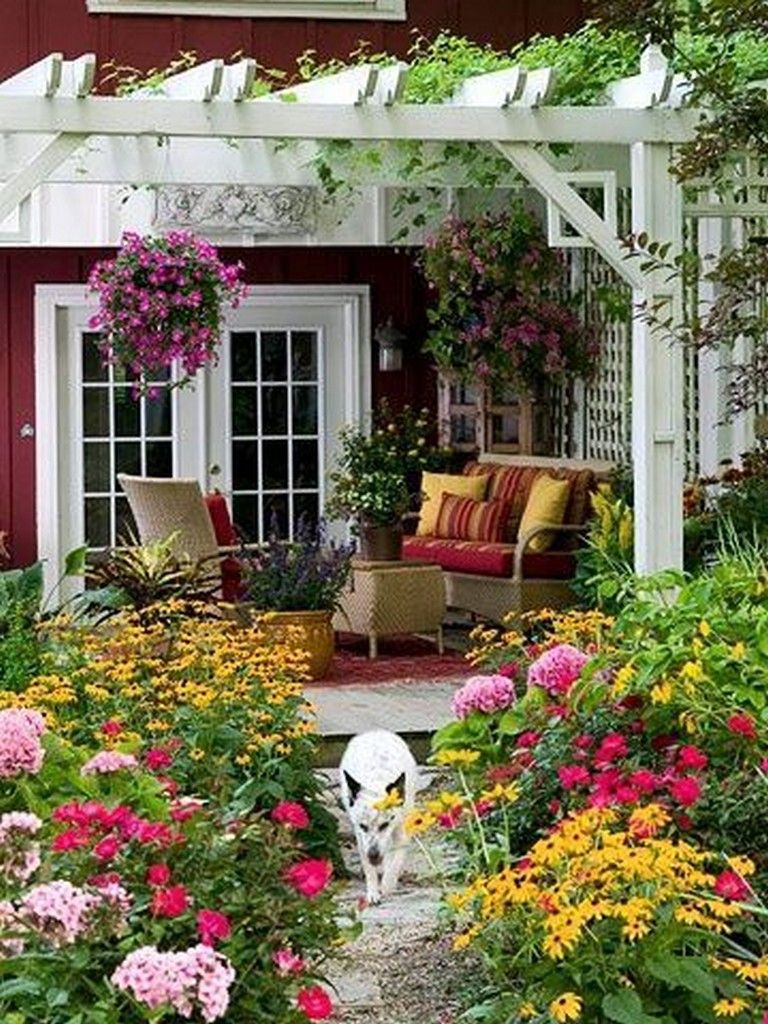 I used 2.5mm twin & earth cable for the sockets and 1.5mm twin and earth for the lighting. I also purchased a small 2 way garage consumer unit to run the power. I’m only running the cable but I will have an electrician in to wire and test everything.
Cables can be fed through the CLS timber frames. Simply drill holes and feed the cable. Try following a cable diagram like this for some help. You can wire everything up but it will all need to be signed off by a qualified electrician before you start using it.
I’ve also started adding the insulation at this point. Most of the insulation sheets fit directly into the gaps but for some, I had to cut with a knife to fit.
The wiring has been folded in the locations I intend to add sockets. Here is a shopping list for the electricals.
| Item | Size | Quantity | Cost |
3 core 2.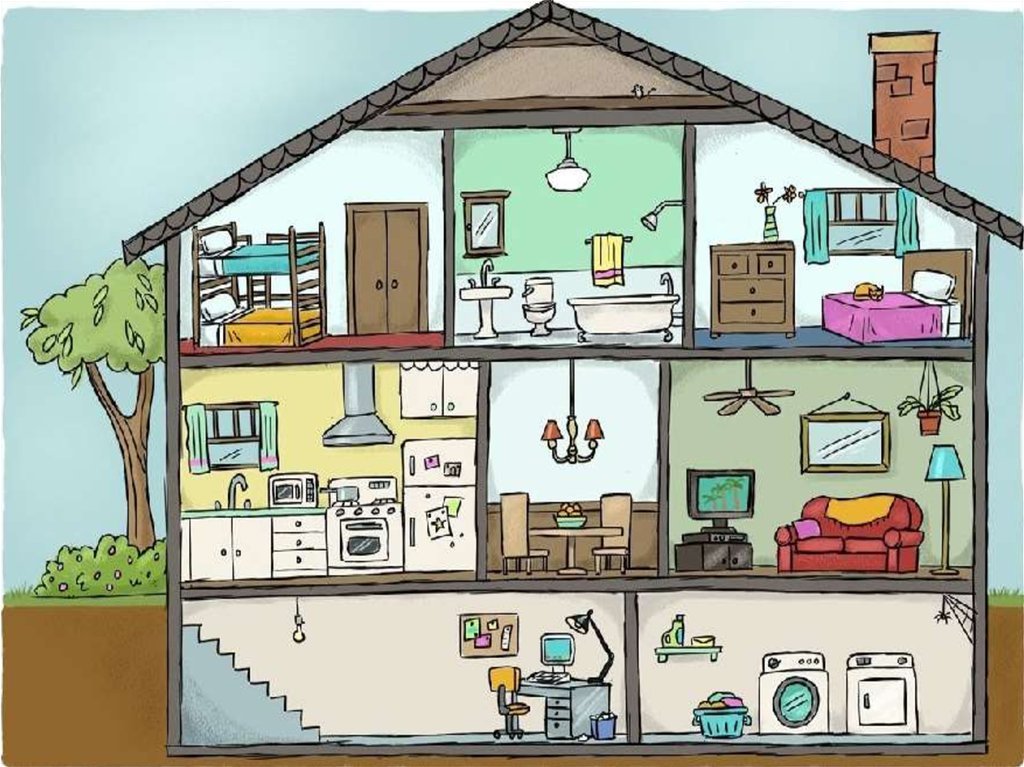 5mm (twin and earth) (sockets) 5mm (twin and earth) (sockets) | 50m | 1 | £28 |
| Sockets – double 13A switched | NA | 5 | £22 |
| 35mm Double Pattress box | 35mm | 5 | £6 |
| 63A 4 way Consumer unit | NA | 1 | £37 |
| 3 core 1.5mm² Twin & earth cable (lighting) | 25m | 1 | £12.50 |
| 10A 1 way White Single Light Switch | NA | 1 | £2 |
| White Batten strip light 43W 4400lm | 1.2m | 2 | £72 |
| TOTAL | £179.50 |
I then returned to the new part of the structure to start adding the insulation.
Again this was a simple push in to fill the gaps. Some pieces were cut to fit with a Stanley knife. The noggins are located 120cm up so that one insulation board fit nicely. The CLS timber is 63mm thick and the insulation is 50mm thick which is fine.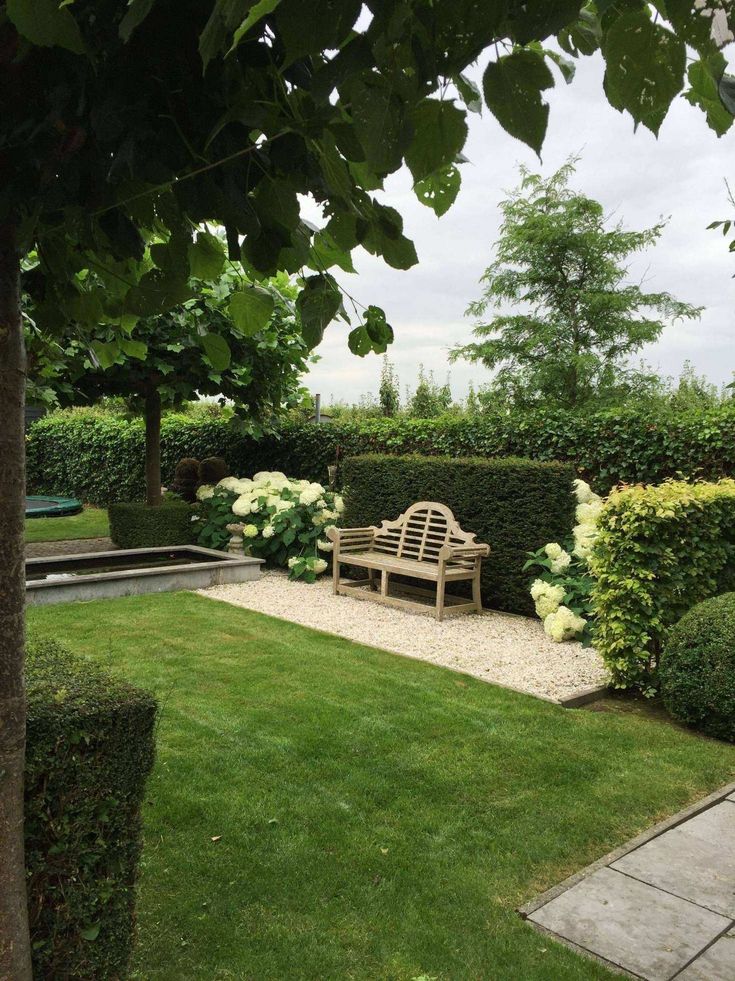 It’s good to have a small air gap in the wall as this traps warm air and limits sound movement between the layers.
I’m now adding the plasterboard directly over the timber frame. Ideally you should add another layer of 9mm oSB 3 boards before this but I am skipping this part to save money. These should be fitted using plasterboard screws only and screwed into the CLS timber. Boards can easily be cut to shape using a sharp Stanley knife on one face and then snapping the board. I used some of the CLS timber to cut long straight lines. Here is a quick video to demonstrate.
The ceiling was the tricky part. To make things easier ensure the insulation fits snuggly into the gaps and it shouldn’t fall back out. Failing this you can use some masking tape to hold them in whilst you add the plasterboard on top.
Because I worked on my garden office on my own it was very difficult lifting an entire piece of plasterboard onto the ceiling and screwing it in so I either cut the boards a bit smaller or I constructed a T shaped holding device out of the CLS timber. This allowed me to hold the plasterboard to the ceiling hands free whilst I added all the screws.
With all the plasterboards securely fixed in place I then went back and started filling all the gaps and holes. It’s a good idea to go over all the gaps with a jointing tape and fill holes with a standard wall filler.
This takes you up to my current progress on the build.
I will be continuing this garden office over the next couple of months so check in shortly for the finishing touches. Thanks for reading so far.
My next jobs will be taken on when the weather warms up a bit. I hope to have things finished off by April 2021.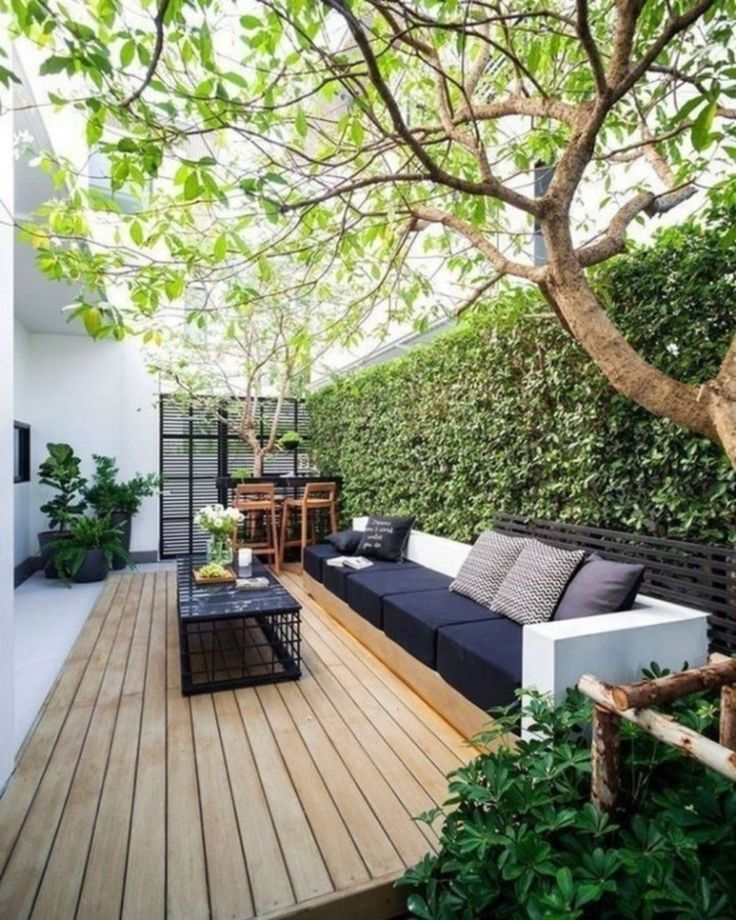 Here is the remaining job list:
- Install window or two
- Insulate the floor
- Complete the insulation and plasterboard inside
- Complete electrics and have them signed off by a qualified electrician
- Install guttering and water collection point
- Paint inside
- build furniture
Update May 2021
I’ve made a little progress but not as much as I’d like. I’ve added the felt roof, completed the cladding, added facia boards and painted the outside. Here’s a couple of pics.
Update December 2021
Sadly I’ve not had time to finish this garden office We decided to move house so the project has been handed over to the new owners. On a plus side, we have moved to a new property and I’ve started work on a whole new project. You can see progress on my new post here.
Update June 2022 – This fully insulated building is now complete. It has
I purchased the log cabin pack from Garden Buildings Direct.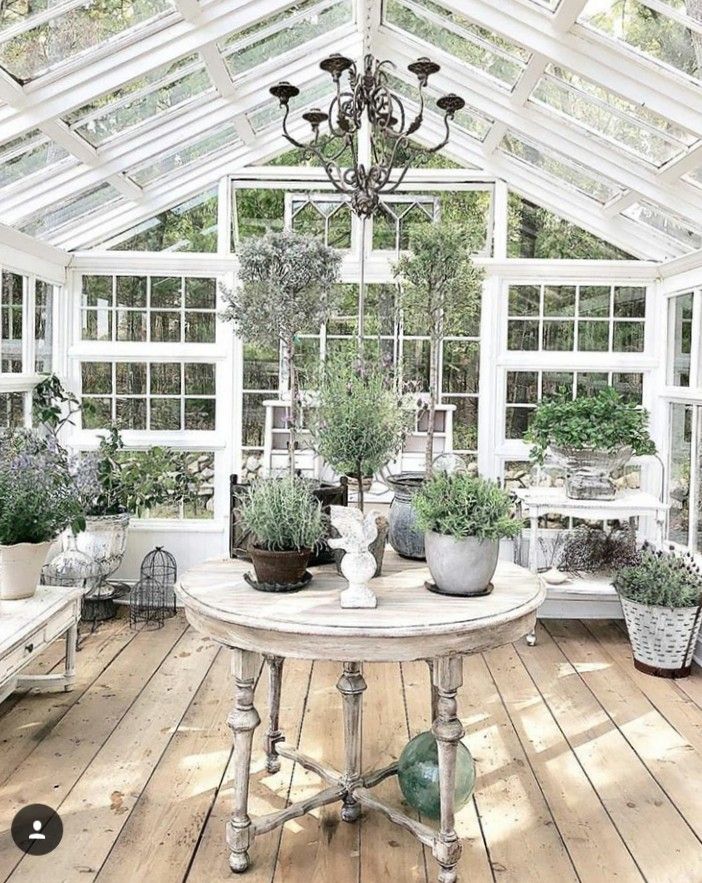 They have a great selection of garden offices and log cabins which can be modified for the perfect outdoor work space. I’m currently working on the interior of mine to make it warm and functional.
We spoke to a representative from Sheldon Bosley Knight, who are estate agents in Evesham, they said, “We recommend a log cabin for individuals who have decided to build a garden office because they are affordable and there are several log cabins you can choose from for your specific needs. Furthermore, log cabins are a stylish and efficient way to maximise space outside your home, they are cheaper, easy to construct than extending your property in order to have an office.
Did you enjoy this post about my garden office build? Have a look at some of my other home and garden DIY projects:
- How to build a shed base on uneven ground
- How to build your own decking area
- How to build a veranda
- How to lay porcelain tile patio
- Build a scaffold board walkway
- BillyOh Kent Log Cabin review and step by step build guide
Like this:
Like Loading.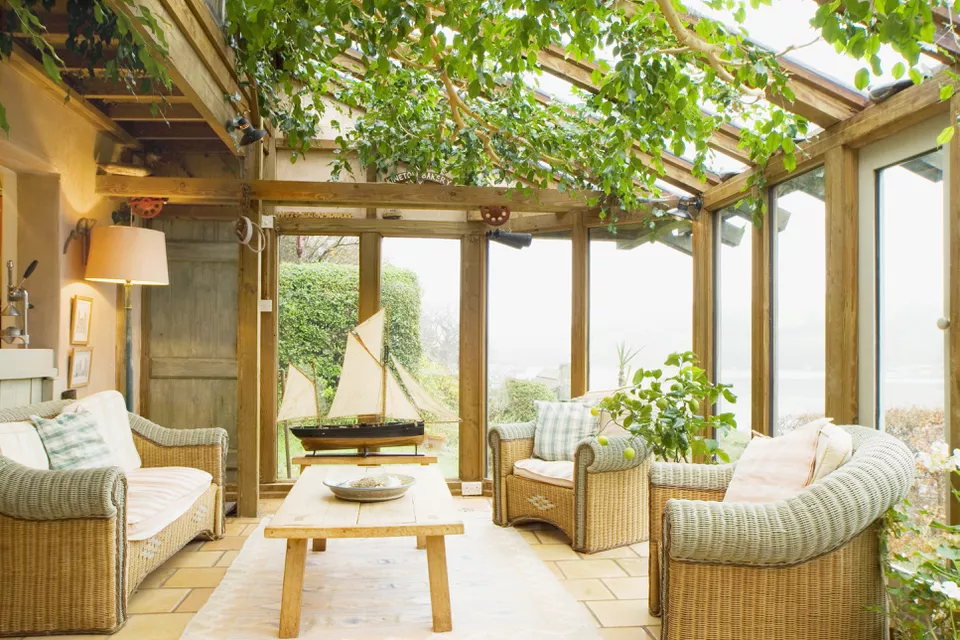 ..
..
How to plan "garden rooms": tips from a landscape designer
Garden rooms are created by analogy with the rooms in the house. In fact, that's why they got that name. Each separate zone of the site is intended for a certain type of activity and is drawn up accordingly.
It is important not only to divide the plot into zones, but also to do it correctly so that the garden remains harmonious and beautiful. Natalya Myagkova, a landscape designer and head of the New Garden online school, tells how to avoid mistakes when creating green rooms. nine0003
Natalia, what are "garden rooms"?
Photo by Oksana Aisler
- Garden rooms are separate functional areas of the site. They have no ceiling, but have at least three walls. But that's not the point. The main thing is that, like in the house, each room is designed for some specific activities. Therefore, it is necessary to create these zones not where the eye stops, but to think over the convenience of use in the future garden.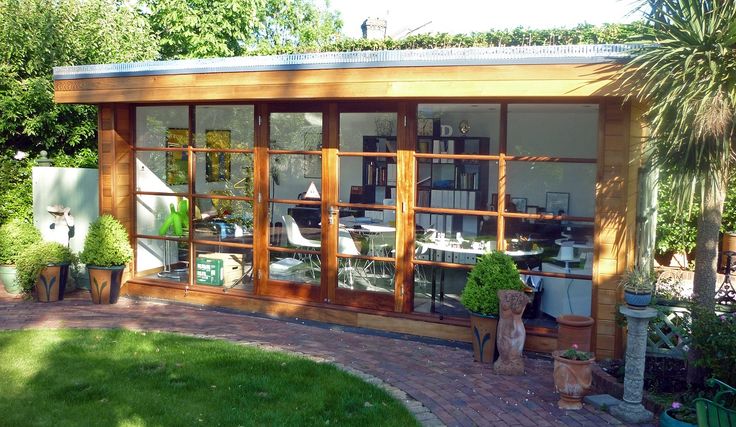
Comfort and coziness are the two main points for which we divide the plot into garden rooms. Agree, it is much more convenient when everything you need, for example, for receiving guests or working in the garden, is collected in one place. Also, a person feels more protected in a space proportionate to him. nine0003
What are garden rooms like?
- A variety of things. The main ones can be distinguished: the entrance area, the recreation area (which can be divided into an active recreation area and a quiet recreation area), a garden area, an orchard area and an economic one.
Photo by Natalia Myagkova
The entrance area, or front room, is the hallmark of your home. In the entrance area, there should be a feeling of joy from meeting with the garden. At the same time, it should be adapted for parking a car, receiving guests. nine0003
Photo by Natalia Myagkova
There are many functions at the recreation room.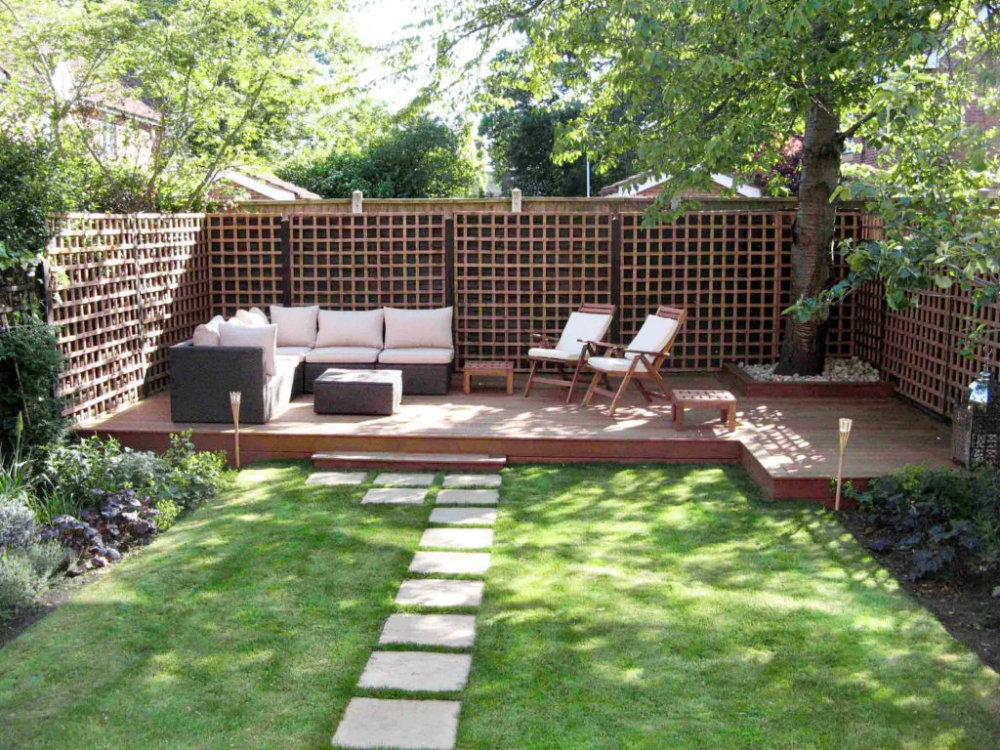 Here you can dine and receive guests, relax on a swing or sunbathe on sun loungers. You can equip a place for yoga or a hobby, arrange a children's room with a playground or a sandbox.
What should be considered when designing a particular garden room?
Photo by Oksana Karandashova
- First, you need to clearly understand what you plan to do in it. Based on this, approach its filling. Take, for example, a garden area. In addition to beds and a greenhouse, water for irrigation, a building with inventory, and a compost site are needed here. It would be nice if there was a bench. And for many, the desktop is important. And you need to arrange it so that you can move between the beds in the shortest way with or without a trolley. nine0003
Photo by Natalia Myagkova
Next, consider where to place the garden. There are two options here - near or away from home. They are located nearby if this is the most suitable place for growing vegetables - it is sunny here and there is no excess humidity.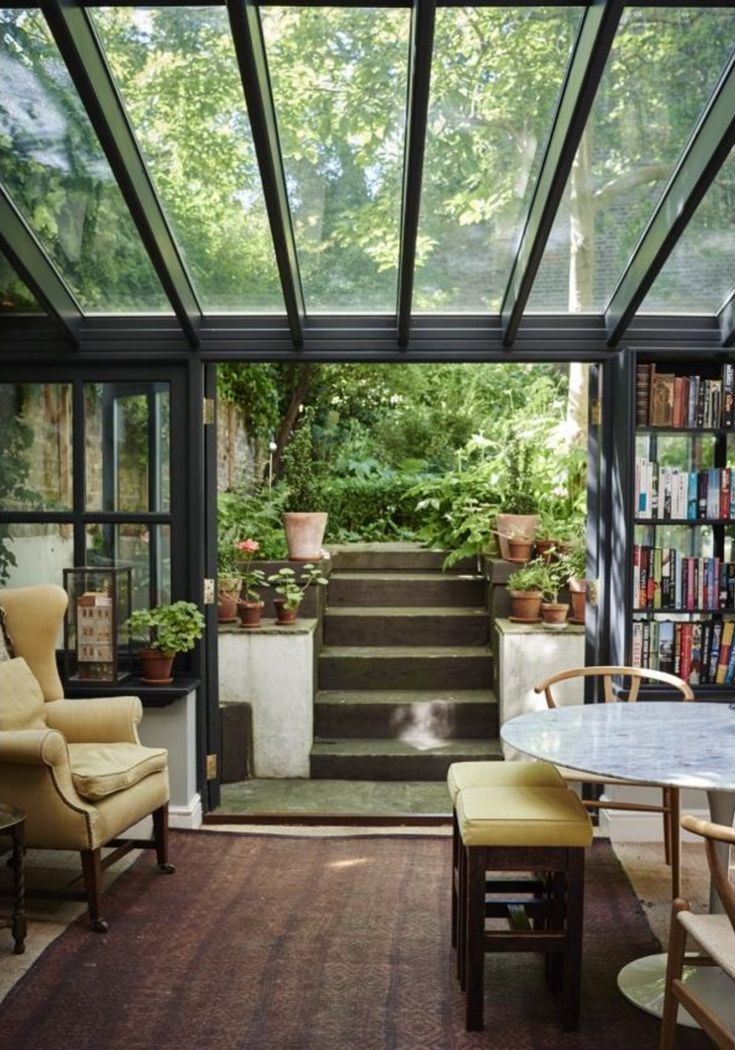 Or such is the wish of those who care for the garden. Since this is not the most attractive part of the site, make the garden beautiful or close it off with a ranch fence. Yes, a small fence along the border of the garden is a good way to separate this room from the rest, if you can not do it with the help of plants. nine0003
Photo by Natalya Myagkova
If we take the dining area, the proximity of the barbecue or hearth, sink, work surface and dining table is important here. It is also important to consider the position of the sun at certain times of the day. No matter how comfortable you arrange such a zone, if during the family dinner it is under the scorching sun, then you will not be able to use it. Or you have to build a gazebo for shade.
The more often you plan to use the garden room, the closer it should be to the house. nine0003
You mentioned that garden rooms have walls. What can act as a "wall" in the garden?
Photo by Natalia Myagkova
– Indeed, we need walls to delimit space.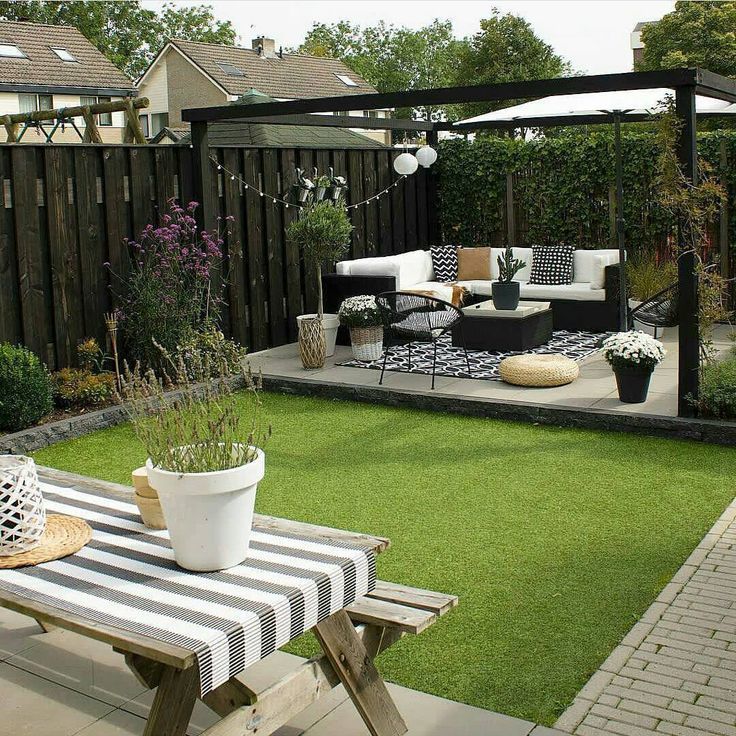 One of the walls can be a wall of an outbuilding, a house, and even a fence.
Photo by Anna Kobylkina
The most beautiful option is green walls made of plants. These include traditional clipped hedges, as well as shrub compositions, borders and row plantings of flowering shrubs - all this will either completely separate one room from another, or create a visual separation. nine0003
Photo by Yulia Kupinskaya
Garden screens are very convenient. They are used when there is little space, but you need to completely separate one zone from another. If you need a piece of land 80 cm wide for a 1.2 m high hedge, then a high screen will take up much less space. It can be entwined with creepers, such as clematis, Brown's honeysuckle, or a climbing rose. Looks nice when the arch is part of the screen.
Photo by Natalia Myagkova
Since there are only three walls in the garden rooms, it is important that you can see from the point where you are for a long time. For example, in the entrance area - this is a gate or a porch, in the rest room - a dining table or a swing, in the garden - a bench.
This point is called the viewpoint, and the most beautiful composition of plants that you want to look at for a long time is located opposite this point.
Would you like to learn more about hardy plants for your garden arrangements? Download the free book by Natalia Myagkova "How to use plants to create a beautiful garden". nine0003
From the book you will learn:
- What plants should be planted if you want to relax in the garden and not work.
- What features of plants should be taken into account when choosing a planting site.
- How to choose a landing site.
- Why plants have to be replanted and how to avoid it.
This is not a boring textbook of botany, but an exciting story for lovers of their garden. This book will change the way you think about plants in the garden. nine0003
Comfort and coziness are the perfect addition to beauty.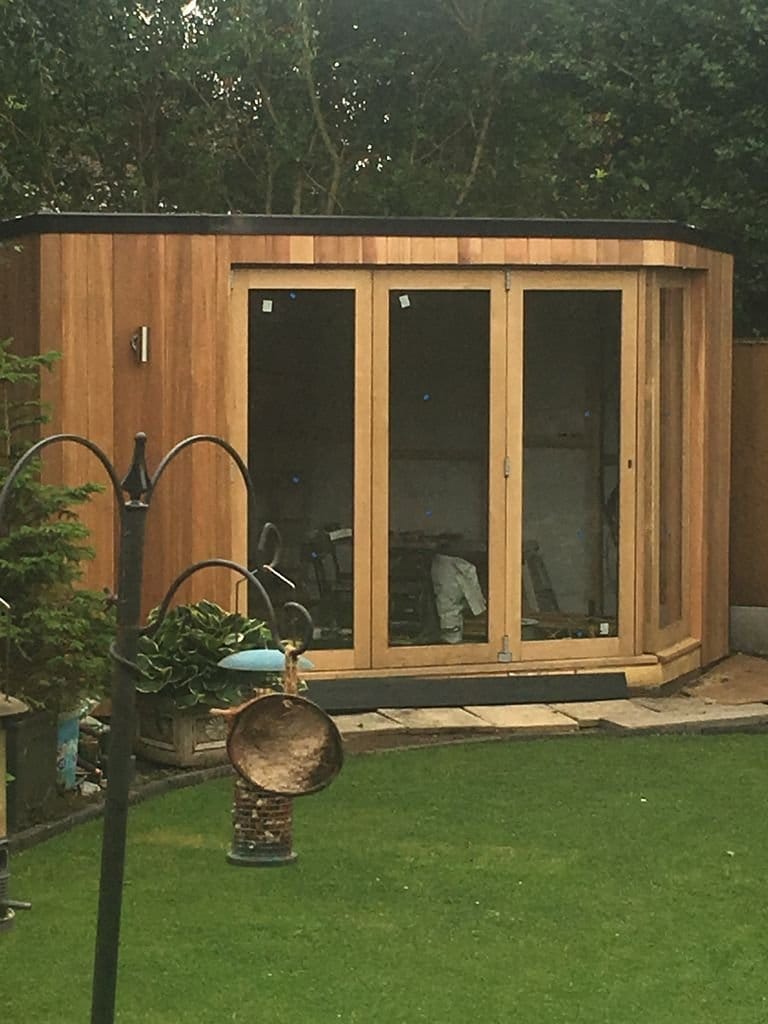 Make your garden comfortable and enjoy every moment spent outdoors.
DIY garden room - design and decoration | DIY
Contents ✓
- ✓ Garden Room Option 1 - Welcome. - an example of competent planning of a small area: the designers set themselves the task of placing all the elements of a full-fledged garden on a tiny territory - a lawn, flower beds, a tree, an additional resting place and even a fountain. And so, having decided on the idea, an emerald “carpet” was laid along the terrace, laying a walking path on it. nine0003
An original gravel island with a mini-fountain was immediately broken. It is this composition, as conceived by the authors, that should become the highlight of the garden, since in addition to a purely decorative function, the fountain should also create a relaxing atmosphere.
You can also admire this art object sitting in the far corner of the garden - an additional resting place has appeared here especially for this. The completion of the cozy story was a high wooden fence with three lattice inserts entwined with honeysuckle, which was erected on the border of the garden.
 nine0003
EVERYTHING YOU NEED FOR THIS ARTICLE IS HERE >>>
Before renewal
Near the new house there is only a terrace paved with slabs and a plot of land bordering the street with an area of only 40 m 2 - on the opposite side. There is no full-fledged fence, no vegetation yet. The owners of the site would like this area to become suitable for a good rest.
The rest of the territory is reserved for lush flowering plants, painted in noble pastel and pink colors. Most of the flower beds are occupied by a ground cover dryad, “spread out” like a dense carpet. The moat shrubs “bring out” ornaments on it, it should become the highlight of the garden, since in addition to the purely decorative function, the fountain should also create a relaxing atmosphere. nine0003
See also: Do-it-yourself garden (photo) - projects and design
You can also admire this art object while sitting in the far corner of the garden - an additional resting place has appeared here especially for this.
 The completion of the cozy story was a high wooden fence with three lattice inserts entwined with honeysuckle, which was erected on the border of the garden.
 The rest of the territory is reserved for lush flowering plants, painted in noble pastel and pink colors. Most of the flower beds are occupied by a ground cover dryad, “spread out” like a dense carpet. nine0003
Shrubs and herbaceous perennials, including bulbs, are ornamented on it.
The flower parade is led by tulips, whose buds bloom in May: the “arrows” of the lovely Lilac Wonder break through the winter-green canopy of the dryad in spring and, together with the snow-white Thunberg spirea, set the joyful atmosphere of awakening nature in the garden.
In June, trellis honeysuckle and groundcover dryad open their many flowers. The ere-murus strikes with its piquant appearance, pleasing the eye with a lush color in June (the handsome man reaches a height of 2 m). Soon, soft pink hydrangea ‘Pinky Winky’, white muzzle, gaura join it, and in July they are complemented by echinacea with white and pink flowers.
 At the end of summer, millet ‘Heavy Metal’ contributes to the magnificence of flower beds, extending the period of decorative planting until the beginning of autumn. Three-dimensionality of a miniature garden room is given by a tree - ash-leaved maple. nine0003
 Garden room: option 2 – Natural charm
The originality of this proposal lies in the fact that the garden is protected from prying eyes by a fence of apple trees formed in the form of a cordon. This is a fairly practical and decorative option: in spring, lovely flowers adorn the trees, and in autumn, the plants delight with a harvest of juicy fruits.
To make it convenient to cut apple trees - and this should be done three times a year - from the side of the garden, along the "fence", the designers laid a narrow gravel path (the same path connects the terrace with the gate). nine0003
Yellow and orange nasturtiums bloom comfortably from June to September under fruit trees.
Openwork fescue Gautiera dilutes them.
 Complementing the plant kingdom are remontant climbing roses of the ‘Use Krohn Superior’ variety, whose buds have been decorating the garden since June. Cercis, in turn, is a shaded resting place. Since the flowers appear before the leaves bloom, in the spring the tree becomes the protagonist of this garden.
 The terrace is planted with spicy herbs planted in wicker boxes. The relaxing atmosphere here is created by a softly murmuring stone-fountain on a semicircular gravel area with boulders. nine0003
In summer, the Sinus rose contributes to the flower splendor, the light apricot flowers of which become snow-white with time. It has the form of a small bush, blooms profusely and is distinguished by excellent health. For these advantages, in 2013 the thunderstorm was awarded the ADR sign.
See also: Ideas for decorating the garden - inexpensively and beautifully: mesh walls and gabions white "candles" of a spicy neighbor. In addition, sage during flowering covers fading bulbous plants, which are just going to rest.