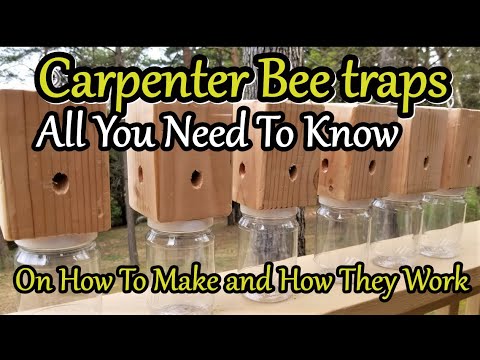
Bore bee traps
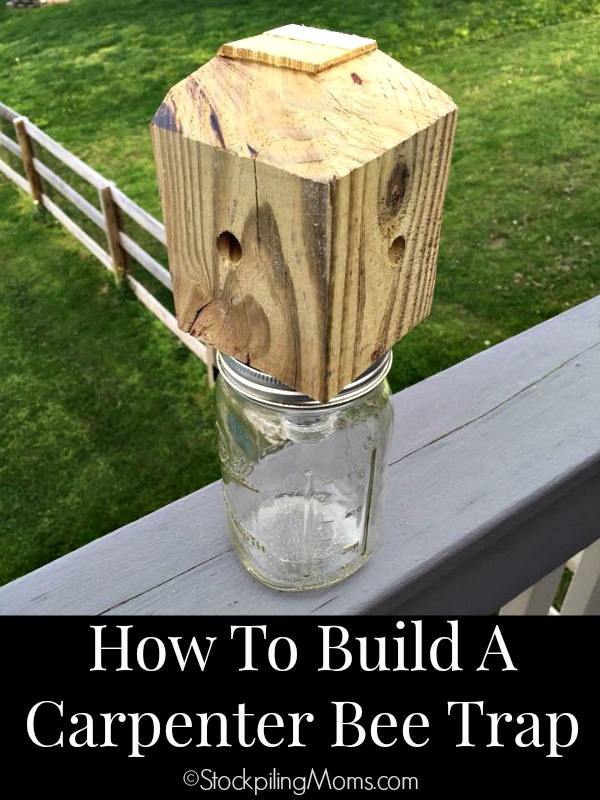
How To Make A Carpenter Bee Trap
Photo: depositphotos.com
Bees are wonderful insects that help create healthy, abundant gardens. What’s not so wonderful is when carpenter bees decide to take up residence in your deck, house, or fence. Carpenter bees are known for burrowing into soft, weathered woods like pine or cedar. Removing them as soon as their telltale half-inch holes are spotted is important to prevent a major infestation that can destroy the integrity of your wood. You can always choose to get some professional assistance removing them if bees make you nervous; otherwise, keep reading to learn how to make a carpenter bee trap to remove them yourself.
Pest problems?
Find licensed pest control experts in your area and get free, no-commitment estimates for your project.
Find Pros Now
+Time required: 30 minutes
Difficulty: Beginner
Estimated cost: $5 to $15
- 4x4 piece of untreated pine or cedar
- Measuring tape
- Circular saw or handsaw
- ½-inch drill bit
- Drill
- Nails
- See full list «
- Hammer
- 6-inch-wide plank of wood
- Mason jar with lid
- Eye hook screw
- Small chain, wire, or cable
- Honey or sugar water (optional)
Photo: istockphoto. com
“You may consider these insects intimidating because of their huge size and loud buzz, but they’re actually very gentle and important pollinators in our environment,” according to Rachael Freeman Long from the University of California Division of Agriculture and Natural Resources.
Building a carpenter bee trap can be a fun DIY project if you already own the equipment and are familiar with using power tools. As with any project, there is a risk of accidents, so safety precautions should always be taken to avoid injury.
Tips for How to Make a Carpenter Bee Trap- Purchase or collect the items on the materials list ahead of time so the project flows efficiently.
- Build the trap away from the area where the carpenter bees are to avoid agitating them.
- Consider adding a drop of honey or some sugar water to the mason jar to make the trap more alluring.
- Always use protective gear like safety glasses and gloves when using power tools or saws.
- Work on a stable surface to avoid accidents and prevent the project from tipping.
- Though male carpenter bees don’t have stingers, they can be aggressive if they feel their burrow is threatened. Consider wearing long sleeves and gloves when working around them.
Photo: depositphotos.com
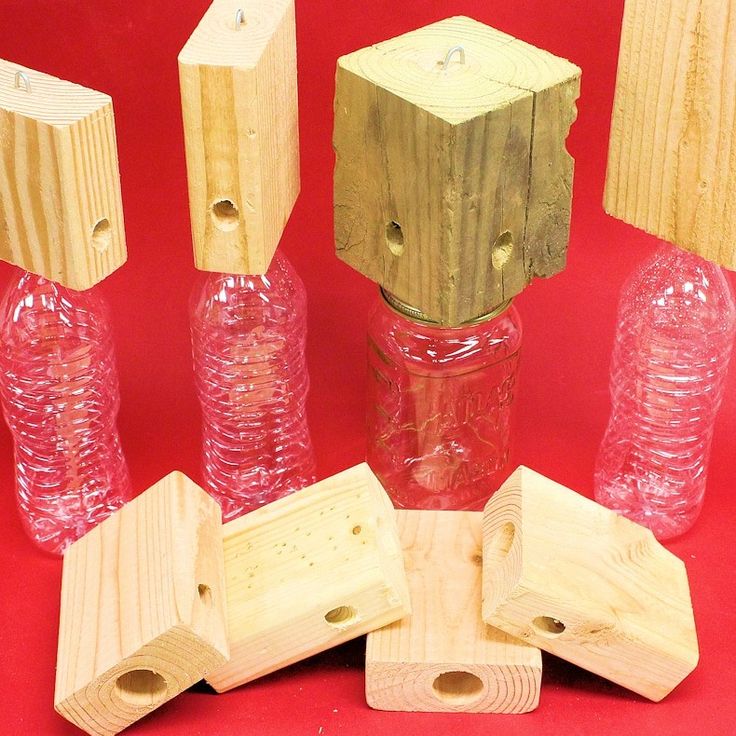
STEP 1: Cut your piece of lumber.Once you’ve selected your 4×4 piece of untreated pine or cedar, cut it down to a manageable size. Measure from one end of the block to the desired length between 5 and 8 inches. Make a cut mark, then use a circular saw or handsaw to cut the block. Any additional wood can be used to make extra traps.
STEP 2: Use a drill to create a base hole.Next, create the first tunnel for the carpenter bees. On one of the cut ends of the wood, measure and mark the midpoint. Using a power drill with a ½-inch drill bit, drill all the way through. A visible hole should run all the way through the length of the wood.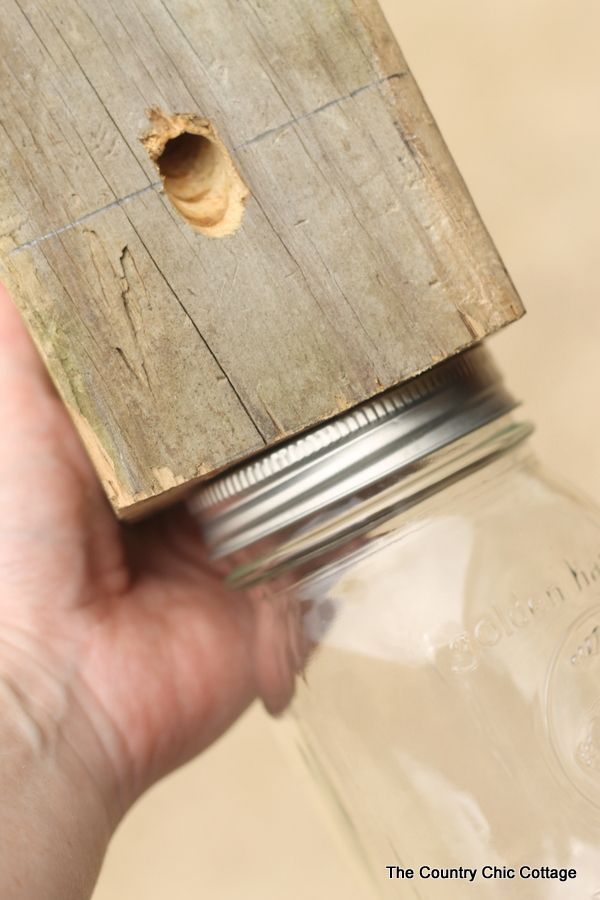
Photo: depositphotos.com
STEP 3: Drill three side holes at 45-degree angles.Once the center hole has been made, connecting side holes are needed to add multiple entry points for the carpenter bees. Choose three long sides of the block to drill holes. Using the same ½-inch drill bit, drill three separate holes at 45-degree angles that drive up toward the center hole and end there. This creates a connected tunnel system. Be sure to drill these side holes going at an upward angle so that sunlight cannot shine down into the trap.
Advertisement
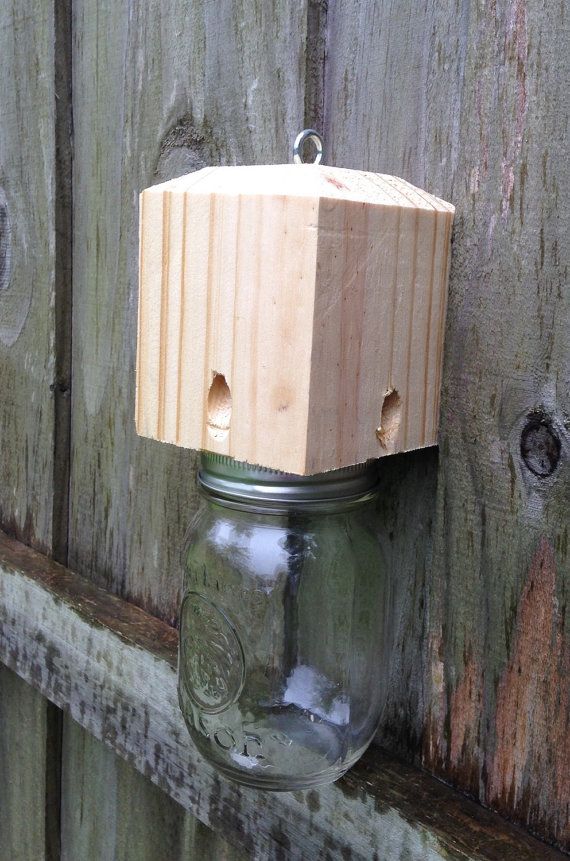
STEP 4: Create the “roof” of the trap.The 6-inch-wide plank of wood will become the roof of the carpenter bee trap. Measure and cut the length you need, ensuring that it’s long enough for 1 inch of overhang on each side. Position the roof on top of the block of wood, making sure the side holes are still angled upward, then nail it in place with a hammer.
Photo: depositphotos. com
com
Remove the lid of the mason jar and set it on a piece of scrap wood or right over the hole on the bottom of your block. Mark the center of the lid. With the ½-inch drill bit, drill a hole in the center of the lid. This lid will act as the transition point for the bees to travel from the block to the mason jar.
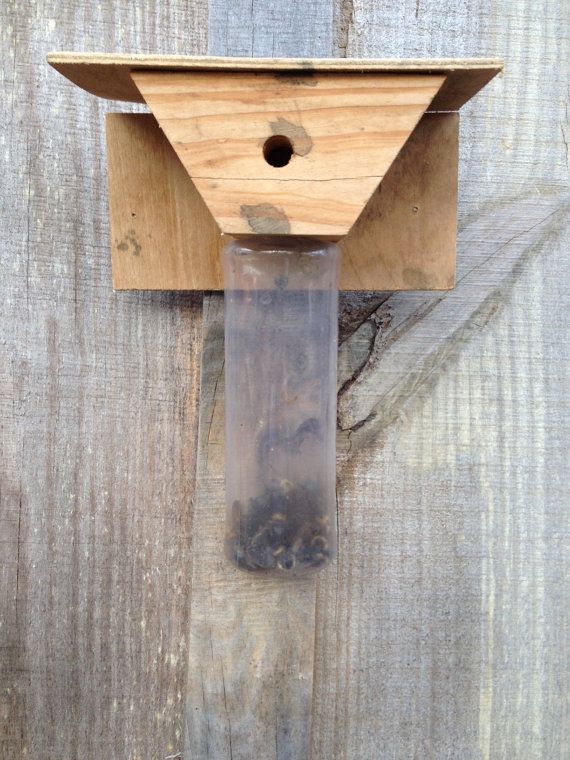
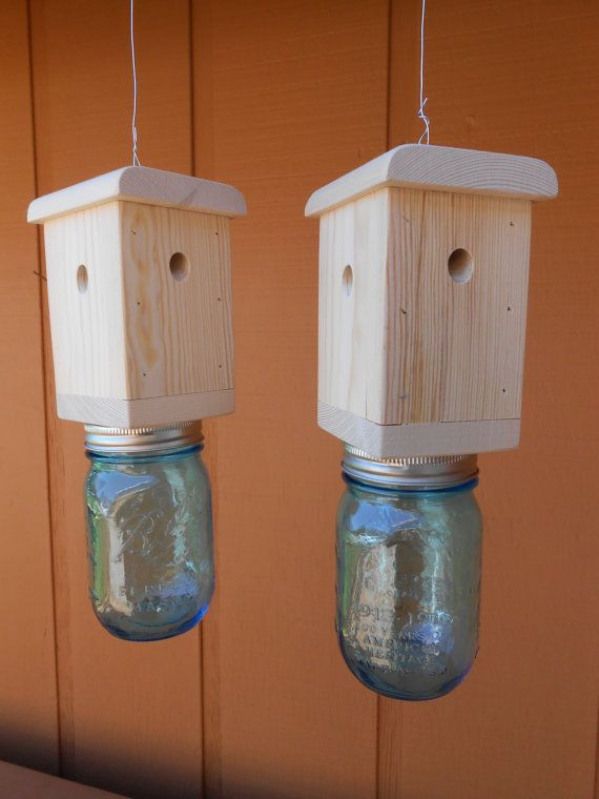
STEP 6: Attach the jar to the base.Attach the mason jar lid to the base of the tunneled-out block by nailing it in place with a hammer. Ensure that the hole in the jar and the central hole of the block line up. Make sure that the lid is flush to the block to prevent any bees from slipping out. Once the lid is secure, screw the mason jar onto the lid. If you are adding honey or sugar water, do this before you screw on the jar.
STEP 7: Hang the trap.Screw an eye hook into the roof of the bee trap. Measure to find the middle spot so the trap will hang straight. You may want to use a small drill bit to bore a pilot hole if you have a large hook. Once the eye hook is securely fastened into the roof, thread a small chain, wire, or cable through it and secure it to the roof or a post that’s closest to the infestation. The side without a hole should be against the house or post that you hang the trap from. This helps to stabilize the trap.
Advertisement
Photo: depositphotos.com
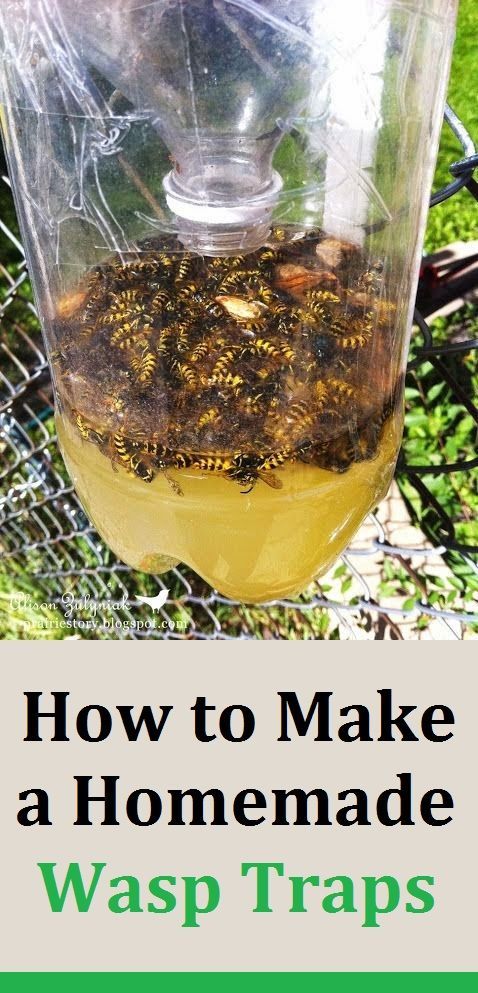
How Do Carpenter Bee Traps Work?Carpenter bees prefer to burrow into soft woods where they can chew tunnels for the female bees to lay their eggs. If an existing hole is available, they often start there and dig deeper to suit their needs. The advantage of a carpenter bee trap is that it includes premade tunnel systems for them to naturally want to explore and utilize. Using a softer, untreated wood that carpenter bees would normally choose helps encourage them to investigate the trap.
Once the bees enter the side holes, they climb up and find the main channel as they explore the best place to lay their eggs.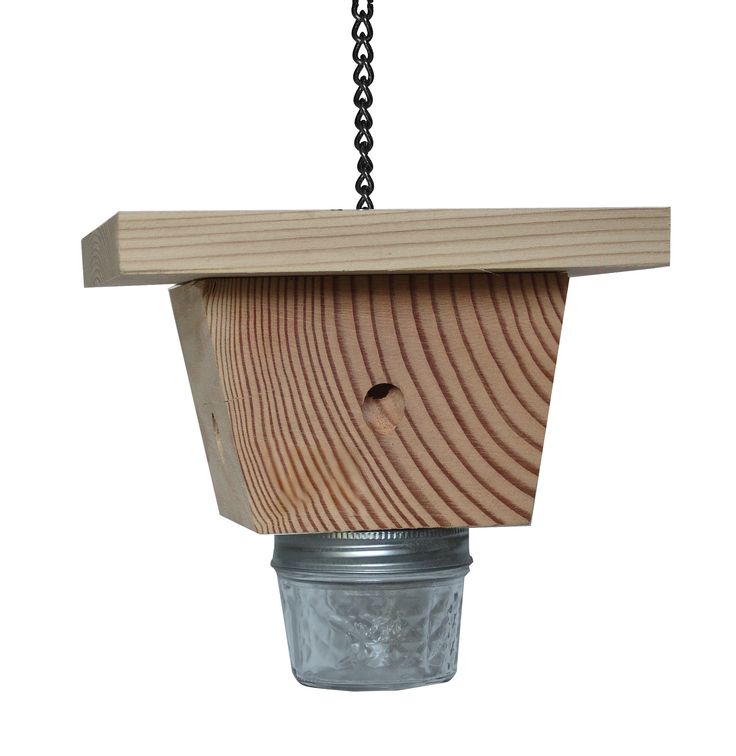 The clear mason jar at the bottom shines light up into the main hole of the block. Since the side holes are drilled at an upward angle, sunlight cannot shine down into them. Bees will think that the brighter light coming from the mason jar is their exit and make their way down toward the jar and end up trapped rather than outside as they expected.
If you’re a DIY enthusiast, these steps for how to make a carpenter bee trap will help you remove burrowing carpenter bees from your property. Carpenter bees are the likely culprit of the grinding sound near any untreated or unpainted wood surfaces. However, if you’re unsure of what pest is present, or you don’t feel comfortable handling a potential bee problem in your yard, a local beekeeper or pest management professional can always come to take a look. A professional can help to safely relocate these helpful creatures to another location.
Pest problems?
Find licensed pest control experts in your area and get free, no-commitment estimates for your project.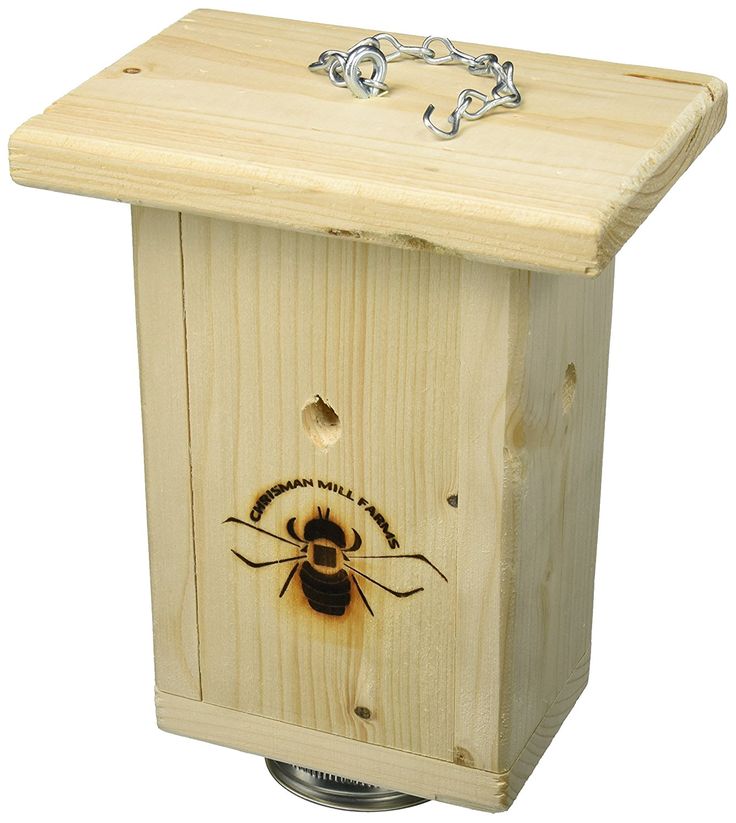
Find Pros Now
+How to Make Carpenter Bee Traps [DIY Wood Bee Trap]
If you are a hands-on kind of person, building a carpenter bee trap might be the perfect project for you! In a few steps, you can create your own DIY version of a carpenter bee trap. We have provided step-by-step carpenter bee trap plans that you can follow along with.
But first, here is a helpful video:
Make Your Own Wood Bee Trap
First, you’ll want to gather all your materials. For this homemade carpenter bee catcher you will need:
- 4x4 cedar or pine post anywhere from 5” to 8” in height. Untreated wood works best!
- Standard mason jar
- 6” wide plank of wood anywhere from ½” to 1” thick
- 1/2” Drill bit
- Drill
- Circular saw or hand saw
- 2 nails
- Hammer
- Eye hook screw
- Metal chain or wire for hanging the trap
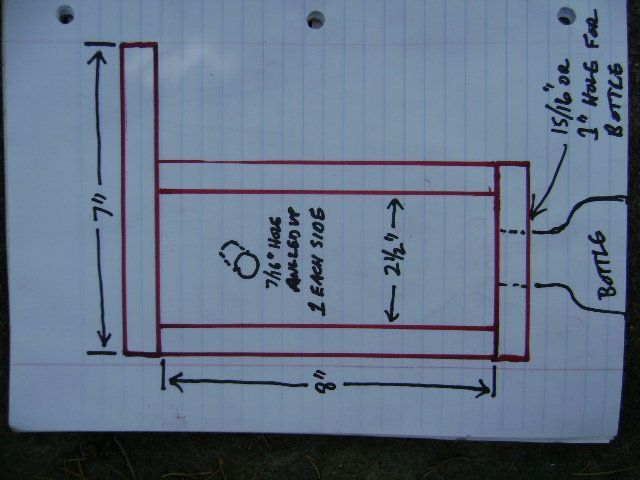
DIY Carpenter Bee Trap Directions:
- Cut the post to the desired height.
 Anywhere between 5” – 8” will work.
 - Drill a ½” hole through the center of the post length wise.
- On three sides of the post, measure out a ½” hole that is 3” from the top and centered.
- Use the ½” drill bit to drill the holes into the post at a 45 degree angle. These holes should connect with the ½” hole drilled through the center of the post. This creates a tunnel system for the carpenter bees.
- Take the soft cedar or pine plank wood and cut it so that it sits on top of the post and overhangs each side by about 1”. Nail it into place.
- Take the lid of the mason jar and remove the flat cover. This will leave you with the metal treads. Nail this lid onto the bottom of the post. Have it centered around the bottom hole drilled through the post. Now you can screw the mason jar right into those threads.
- Almost done! If you want to hang your trap you can screw the eye hook screw into the top of the trap and attach a metal or wire chain.
 If you want to mount your trap you can place brackets on the roof or the side of the post that doesn’t have a hole. But remember the trap needs to stay completely vertical for best results!
Now you’ve created your own makeshift carpenter bee trap! The whole process can take some time depending upon your skill level and tool quality. While it might not be picture-perfect, it will still catch wood bees!
What Sets Best Bee Brothers Wood Bee Traps Apart?
The main differences between DIY traps and our Best Bee Brothers traps are the receptacle containers. Our Best Bee Trap has a perfectly molded plastic funnel and container that is one piece. This whole piece acts as the bottom of the Best Bee Trap and guides the carpenter bees down into the container without the issue of clogging. Carpenter bees also can’t walk up plastic! So once in the trap, there’s no way out.
Another difference is that there are no aeration holes. This feature is seen on both the Best Bee Trap and the Pinewood Bee Box Trap.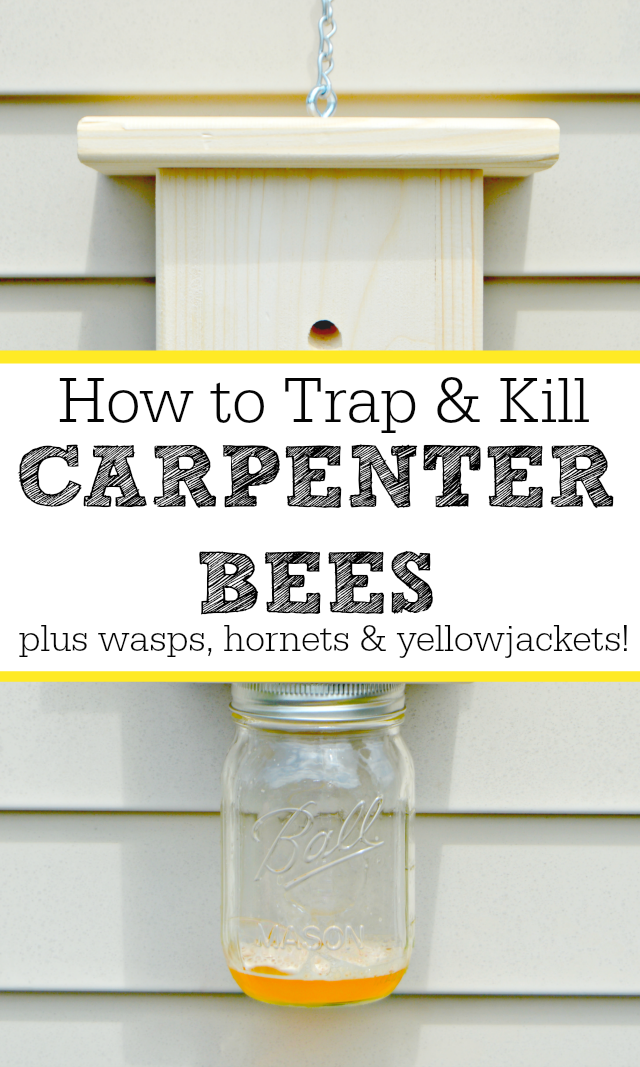 The aeration holes keep moisture out of the container and spread the pheromone smell of the dead carpenter bees (which is extremely attractive to other carpenter bees and keeps the trap active). The more potent the smell the more potent the trap.
If you love to do things yourself, give this DIY project a go! Otherwise, save yourself the time and energy and give our proven professionally-made, high-quality traps a try! Remember they have a 100% satisfaction guarantee.
Looking to try a different DIY carpenter bee trap variation? We also created a Pinewood Box Trap DIY tutorial video. The concept is similar but it can also be easier to make. Make sure to check out that video to see which carpenter bee trap plans you prefer!
Bee Trap (Trap Blueprints)
So, to catch a roaming swarm, we need a trap. Traps come in various designs, but I would like to offer you one of the best options.
- Swarm trap - for 7 frames Dadan;
- Trap for catching a swarm and obtaining marketable honey for 7 frames Dadan and a magazine extension.
. The design is simple, reliable and durable. nine0003 trap brought to the apiary Material: It is better to take a plywood grade of at least 3 (usually it is sold in stores with the designation ¾), do not try to save money by replacing it with fiberboard or 4/4 grade plywood or other material in general, it has been verified over the years that plywood is 3-4 thick mm, grades not lower than 3, the most optimal, durable and relatively environmentally friendly (not counting the glue used in its manufacture). nine0003 You can use plywood scraps, they are usually sold very cheaply in hardware stores. Ordinary spruce or pine planed on the bar. You can use galvanizing for this purpose, but it is heavier, and roofing material is less durable, a budget issue, but try to find the thinnest and lightest metal, since there is a huge selection of it in stores now. nine0003 At one time, several traps were covered with old linoleum, the covers served for several seasons (about 5 years), then the bars and plywood began to rot. It is better to do it once, so as not to redo it later. Needed to hang and carry the trap. I usually use a wide braid, fixed with screws to the bottom of the trap (it is more convenient to carry and remove than with wire, it does not cut your hands). nine0003 Based on your requests, the amount of material used also depends. I suggest the best option for 11 traps, since with this quantity, the technological waste of plywood is minimal, only 5 sheets are required. All dimensions are in mm. Shield dimensions, as follows: When cutting plywood, all dimensions can be increased by 2-3 mm, excess assembly can be trimmed on site. How to properly cut 5 sheets of plywood into 11 traps with minimal waste, see sketch: Bars per trap: Accordingly, if we have 11 traps, then we multiply the entire number of plywood and bars by 11. We assemble the entire structure, cover the roof with metal or roofing material, paint (preferably with acrylic paint with a dark green color scheme), fasten the belts and equip with old dry cloth , foundation, empty frames. On the upper bars of the frames we place an old propolised canvas, if it is not there, then a dense fabric. There is an option to use a solid ceiling made of plywood for the place of the canvas, which is placed on the upper bars of the frames, such a ceiling (if fitted well) excludes the possibility of bees passing through the roof in case of loose fit to the box (bees, if necessary, can crawl into the smallest crack ). We fasten the cover to the upper bars of the trap with self-tapping screws or nails. nine0003 Who knows how to make it to everyone's taste, just like belts. In this design, tapholes are made about 80-90 mm long and 10-11 mm high, from the end at the bottom bar. This trap is designed to be installed directly near the ground (in bushes, on stumps, low trees, etc.) , the principle is “set and forget”. Due to its impressive dimensions, it is inconvenient to lift it to a height, and when filled with honey, it can weigh up to 40 kg. All of the above materials are also used here, I will not repeat myself, I will show only the drawings of the trap parts necessary for this. The only difference from the 1st option is the size and shape of the notch. In order to take out the lower frames, the holders of the half frames are fixed to the screws outside the trap. Cut 20 sheets of plywood for 30 traps. nine0003 click to enlarge My video review of traps About the trap This trap is designed to catch wandering swarms during the swarming period. Read more articles The use of modern materials and tools allows you to make light, fairly durable and very easy to use traps. nine0003 I took the cylindrical shape of the board as a basis, but not for reasons of similarity with the natural habitat of bees: in my practice, swarms populated traps of various shapes and designs with equal success. It's just that the cylinder on the tree trunk is not so conspicuous, which means there is less chance of ruining the trap. The upper and lower bases - circles Ø 300 mm - sawed with an electric jigsaw from plywood 8–10 mm thick. By connecting them with rails 750 mm long, I got the frame of the trap. In one of the rails, I made two holes Ø 25–30 mm at a distance of 400 mm from the upper base and 10 mm from each other. Using a soldering iron, I attached a piece of an old honeycomb to the upper base, placing it on a cold skid. In the center of the upper base I drilled a hole for the mounting wire, at the end of which I made a loop. After that, the frame was sheathed with two- or three-layer packaging cardboard using a furniture stapler. Opposite the holes in the frame, I cut tapholes in cardboard and covered them with melted wax and propolis with a soldering iron. To protect against precipitation, I pulled a black plastic bag over the trap and secured it with tape. A wonderful home for bees weighing only 3 kg and a volume of more than 50,000 cm 3 . For any, even the largest swarm, this is a very attractive home (Fig. 1). There are different opinions about the placement of traps in the forest. I believe that if bees were strictly tied to a certain direction of the notch, the type of tree and its location in the forest and inhabited hollows only at a certain height, they would never have reached such a distribution on Earth. The fact that there is a swarm in the trap is immediately noticeable by the behavior of the bees in the entrances. I made rubber bushings (can be made of wood) with which I plug the entrances, waiting for the evening when the summer stops. I remove the trap from the tree, carefully place it in a canvas bag and tie it. If the "hunting grounds" are far from home, the plugs from the notches can be pulled out through the canvas so that the bees do not get tired along the way. nine0003 In the apiary, I put a trap with a swarm next to an empty hive into which I am going to transplant it, and immediately remove the bushings. In the morning of the next day, if the weather is favorable, I form a nest for the swarm. I fill it mixed with frames with foundation and honeycombs. If there are a lot of swarms and there are not enough honeycomb frames, you can put everything with foundation, swarm bees will quickly rebuild it. Trap drawing
trap assembly drawing ****** click to enlarge Do-it-yourself bee trap

How to cut plywood for bee traps
click to enlarge
 nine0003
 Large l
trap for bees 7 frames Dadan with magazine  The design is also simple, reliable and durable. The volume of the trap is equal to 7 Dadan frames + 7 half frames. nine0003
 Drawing of the trap (general view):
click to enlarge Bars for the trap:
click to enlarge Sheets of plywood:
click to enlarge Other traps
Drawing of a trap for 6 frames Dadan
 Advantages of this trap: Simplicity of design; Cheapness; Light weight. Its volume ...
More Traps for swarms - Beekeeping magazine
 It is better if it contains a little honey and bee bread. Over time, I have accumulated many traps that swarms have already visited and built honeycombs, and this is the best “invitation” for bees. nine0003
  It was adaptability that allowed them to survive as a species and flourish. Based on this, I hang traps in places accessible for approach and access by bike or car, at a height convenient for me (I use an aluminum ladder 2.5 m high). I noticed that swarms populate traps on pines, spruces, birches, and willows equally well. The orientation of the notch is also of no fundamental importance (Fig. 2). Sometimes you hang a trap in a picturesque place on a tall tree, as your great-grandfathers-beekeepers taught, so evenly and accurately that you think: "I would have settled myself." But no: a year passes, another - the bees do not like this dwelling. And sometimes, you go to hang it, a thunderstorm catches up. Attach a trap to the first tree that comes across on the outskirts of the swamp, and even tie it somehow - it's raining! And in a week you will arrive - they settled, darlings. nine0003
 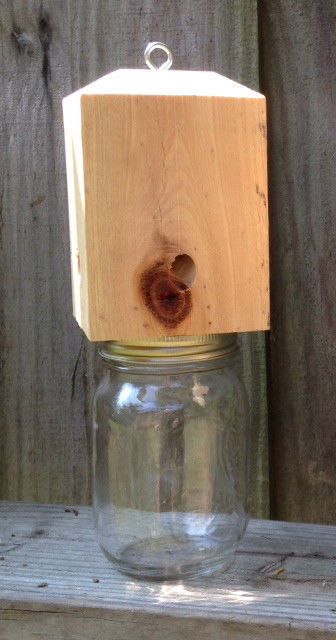 Scouts circle around them, fly in, linger for a few seconds, fly out, examine the trap, the tree on which it hangs - they look closely. Swarm bees fly out of the entrances into the field in a stream and return back with nectar and pollen.