Interior paint finish
How to Choose a Paint Finish
Choosing an Interior Paint Finish: Sheen and Gloss 101
Put the finishing statement on your paint color of choice by selecting a sheen that enhances the look of the surface. Sheen, or paint finish, is a measure of how much light reflects off a painted surface, resulting in gloss—or a lack thereof. Consider some of the common sheen uses listed below, or break from tradition and get creative with sheen. While some types of paint finishes may work better in certain areas than others, Benjamin Moore’s legacy of innovation ensures that our portfolio of products delivers premium performance across the sheen spectrum.
Explore the variety of paint finish that Benjamin Moore has to offer.
Sheen and Gloss 101
Sheens and glosses range on a scale from no shine to high shine. Different levels of sheen can affect how colors appear and add dimension to rooms. While there are many different types of sheen, you are most likely to see these seven key interior Benjamin Moore paint finishes during your painting journey:
- Flat
- Matte
- Eggshell
- Pearl
- Satin
- Semi-Gloss
- High Gloss
If you’re stuck on sheen, ask your local Benjamin Moore retailer to recommend the best finish for your project.
Common Sheen Uses
|
| Flat | Matte/Ulti-Matte | Eggshell | Low Lustre | Pearl/Satin | Semi-Gloss/Soft Gloss | Gloss/High-Gloss |
| INTERIOR | Ceilings, Walls in Low Traffic Spaces | Walls, Living Rooms, Dining Rooms, Bedrooms | High Traffic Walls, Living Rooms, Dining Rooms, Bedrooms | Doors, Trim | High Traffic Walls, Trim, Doors, Cabinets | Trim, Doors, Cabinets, Wainscotting | Trim, Doors, Cabinets, Architectural Details |
| EXTERIOR |
|
|
| Siding, Trim | Siding, Trim, Shutters, Doors | Trim, Shutters, Doors, Architectural Details | Doors, Architectural Details |
| INTERIOR |
|
| Flat | Ceilings, Walls in Low Traffic Spaces |
| Matte/Ulti-Matte | Walls, Living Rooms, Dining Rooms, Bedrooms |
| Eggshell | High Traffic Walls, Living Rooms, Dining Rooms, Bedrooms |
| Low Lustre | Doors, Trim |
| Pearl/Satin | High Traffic Walls, Trim, Doors, Cabinets |
| Semi-Gloss/Soft Gloss | Trim, Doors, Cabinets, Wainscotting |
| Gloss/High-Gloss | Trim, Doors, Cabinets, Architectural Details |
| EXTERIOR |
|
| Flat |
|
| Matte/Ulti-Matte |
|
| Eggshell |
|
| Low Lustre | Siding, Trim |
| Pearl/Satin | Siding, Trim, Shutters, Doors |
| Semi-Gloss/Soft Gloss | Trim, Shutters, Doors, Architectural Details |
| Gloss/High-Gloss | Doors, Architectural Details |
FROM MORE FORGIVING OF IMPERFECTIONS TO MORE DURABLE
Flat Paint
Flat paint is a term for a finish that does not reflect light, resulting in no sheen at all. This lack of reflection allows more paint pigment to come through, is more forgiving of flaws and allows for excellent hide, creating a uniform surface. Waterborne Ceiling Paint (508) is the flattest paint Benjamin Moore offers; with its ability to mask imperfections, it offers a flawless finish and is an ideal choice for ceilings and very low-traffic areas.
Similar sheens you may see in our portfolio are ultra flat or ulti-matte. These are close to flat in that there is very little sheen, but you may find slight differences between the three. Your local Benjamin Moore retailer can help you determine the sheen you need.
Use caution when considering flat paint in high-traffic areas that require frequent attention. Stains are harder to remove from low-sheen paint, and constant rubbing or cleaning can result in burnishing.
Matte Paint
Matte finish is nearly as shine-free as flat, again providing excellent hide and depth of color, with slightly more durability. Regal® Select Interior Matte (548) is a professional painter favorite for its ease of application and smooth feel after drying. Matte finish paint also withstands frequent washing, even when applied in busier areas like hallways and family rooms.
A matte look lends a luxurious touch to many interior spaces, including bedrooms and dining rooms. Bathrooms and areas that are exposed to more moisture can be painted in a matte finish using AURA® Bath & Spa (532), which was designed to achieve exceptional durability, color retention and mildew resistance in high-humidity environments.
Eggshell Paint
Eggshell finish, perennially popular with professional and DIY painters alike, has a low-sheen reminiscent of flat or matte, but it is infinitely more durable than its namesake.
Widely available in a variety of Benjamin Moore interior paints, eggshell (and its comparable—but not exact—sheen sibling, low lustre) provides an easy-to-clean, nearly shine-free finish, suited for most areas of a home, including family rooms and hallways.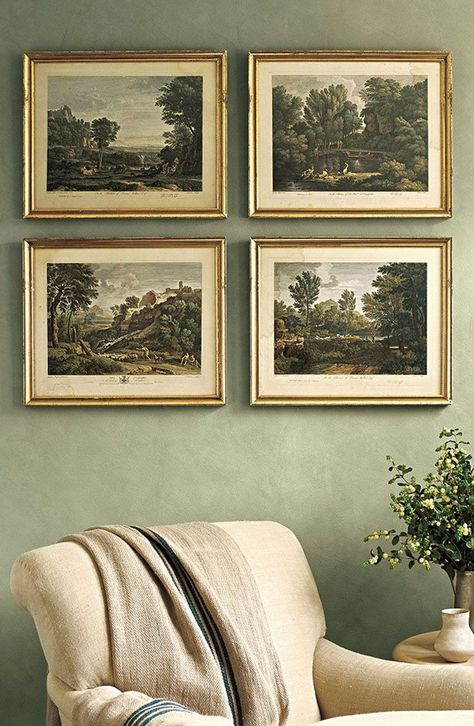 While it reflects more light than flat or matte finishes, its soft glow casts colors beautifully, especially in Aura® Interior Eggshell (N524), our most premium paint, a great choice for your most-loved spaces.
Pearl Paint
A pearl finish is a medium gloss that maintains high durability. Both beautiful and easy to clean, a pearl finish lends dimension to trim while being optimal for walls in high-traffic areas. Regal® Select Interior Pearl (550) has a finish that can be used everywhere from wainscoting to doors, and offers mildew resistance for high-humidity areas.
When choosing this finish, make sure you follow manufacturer’s application tips and paint carefully, as paint with a pearl sheen is more susceptible to showing lap marks and other painting flaws.
Satin Paint
Often confused with other finishes, the difference between eggshell and satin paint is that satin delivers a higher gloss, while offering better stain resistance and durability than lower sheens, including eggshell.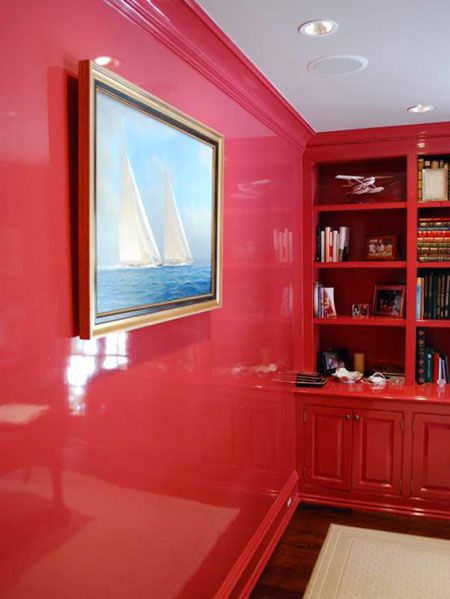
Satin paint is ideal for areas that crave definition. Use its distinctive lustre to highlight windows, shutters, trim and even interior doors. For front doors, where architectural details like beveling and paneling are customary, consider AURA Exterior paint in satin or soft gloss for a rich, lustrous look.
Also in this category is soft gloss paint, which, while not an exact match for satin paint, offers a similar higher-gloss, better-durability finish.
Semi-Gloss Paint
The luminous look of a semi-gloss paint is perfectly suited to highlight the architectural details of your home and create dimension on millwork, trim, and doors. Semi-gloss is available in most Benjamin Moore interior paints, but we especially love the look of ADVANCE® Interior Semi-Gloss (793); it cures to a smooth, furniture-like finish, and its glossy look makes it one of the best paint finishes for kitchen cabinets.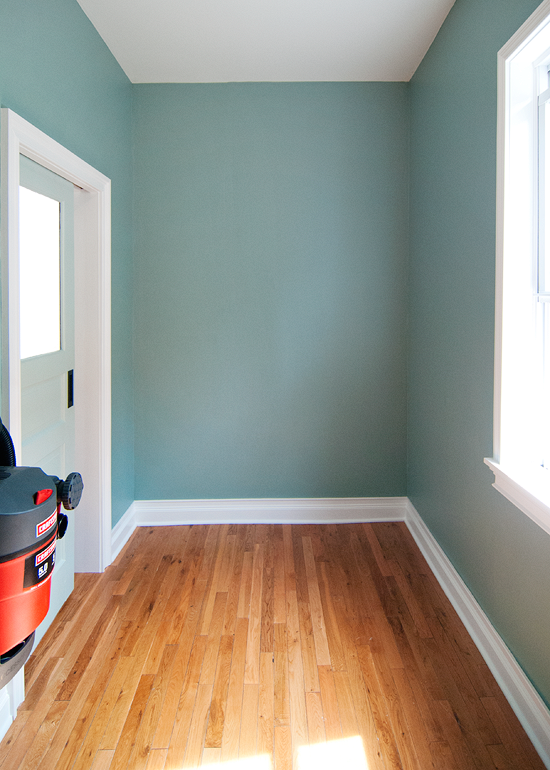
High Gloss Paint
Offering a mirror-like finish, high gloss sits on top of the sheen chart. This finish, offered in some paints such as ADVANCE® High Gloss (794), is extremely durable and offers elegant shine. It is easy to clean, stain-resistant and will add a stunning look to doors, trim, and even a high-traffic kitchen.
Many interior designers (and adventurous homeowners) like to experiment with high gloss paint in unexpected areas, such as the ceiling or an accent wall. Keep in mind, however, that high gloss paints require careful application and preparation best left to a professional painter. If you’re committed to a DIY-approach, practice your technique and prime any surfaces to ensure they are even and clean prior to paint application. Since a gloss finish reflects light and can accentuate blemishes, avoid using it on areas that are not completely smooth.
Have More Questions?
Visit your local Benjamin Moore store or contact Customer Support.
How to Choose Interior Paint Color
Learn from the experts on how to select colors you'll love.
Get Started
Step-by-Step Guides
Explore how to get your next DIY project done–and done right.
Get Started
Search by Address, City, State, Zip, Country
Types of Paint Finishes | Paint Sheen Guide
From Spotlight: Paint to Go from Blah to Ooh La La!
Choosing the wrong type of paint finish could mean a do-over that costs twice as much.
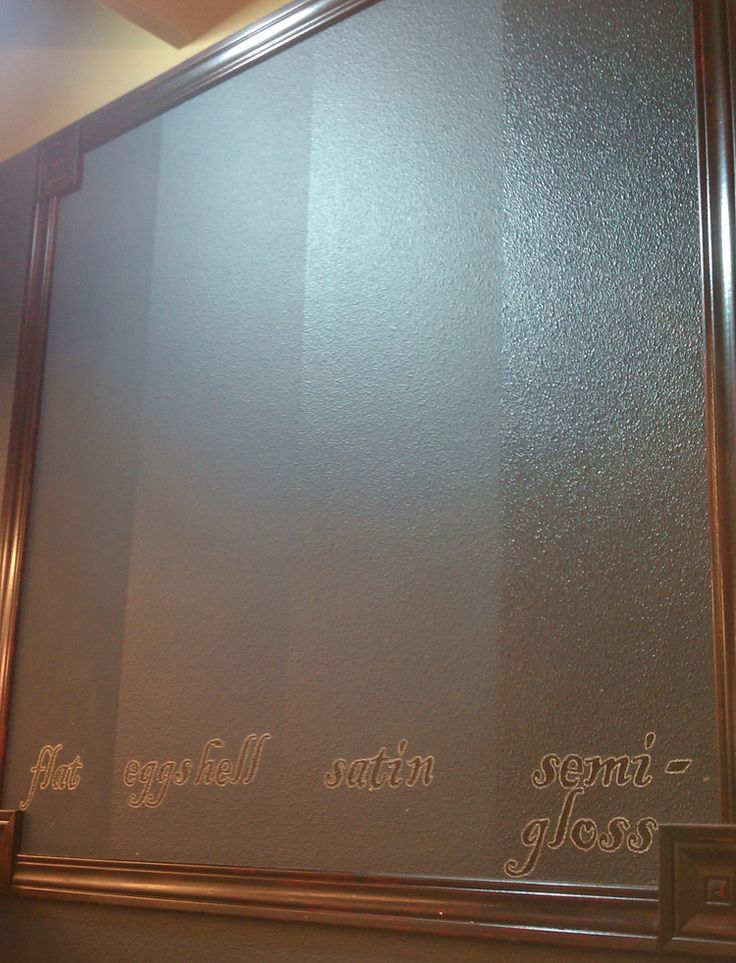
Image: boonchai wedmakawand/GettyThere’s a basic rule of thumb to follow when choosing paint sheens: The higher the sheen, the higher the shine -- and the higher the shine, the more durable it will be.
Flat paint has no shine; high-gloss is all shine. In between are eggshell, satin, and semi-gloss, each with its own practical and decorative job to do.
Here’s how to choose the right paint sheen for your painting job.
Image: HouseLogic
High Gloss
The most durable and easiest to clean of all paint sheens, high-gloss paint is hard, ultra-shiny, and light-reflecting. Think appliance-paint tough.
High gloss is a good choice for area that sticky fingers touch -- cabinets, trim, and doors. High-gloss, however, is too much shine for interior walls. And like a Spandex dress, high gloss shows every bump and roll, so don’t skimp on prep work.
- Practical application: kitchens, door, and window trim
- Durability: very high
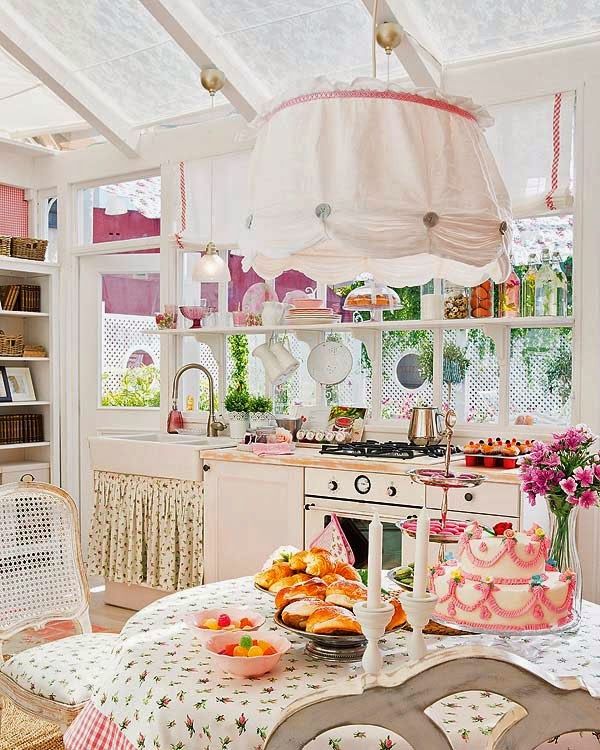
Semi-Gloss
Good for rooms where moisture, drips, and grease stains challenge walls. Also great for trim work that takes a lot of abuse.
- Practical application: kitchens, bathrooms, trim, chair rails
- Durability: high
Satin
Has a yummy luster that, despite the name, is often described as velvety. It’s easy to clean, making it excellent for high-traffic areas. Its biggest flaw is it reveals application flaws, such as roller or brush strokes. Touch-ups later can be tricky.
- Practical application: family rooms, foyers, hallways, kids' bedrooms
- Durability: high
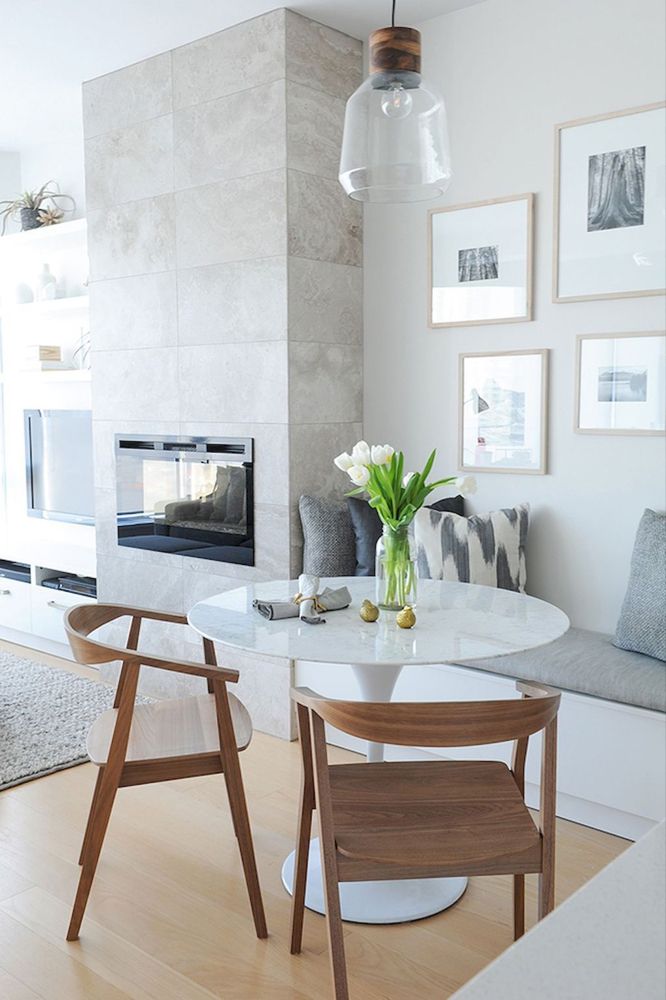
Eggshell
Between satin and flat on the sheen (and durability) scale is eggshell, so named because it’s essentially a flat (no-shine) finish with little luster, like a chicken’s egg. Eggshell covers wall imperfections well and is a great finish for gathering spaces that don’t get a lot of bumps and scuffs.
- Practical application: dining rooms, living rooms
- Durability: medium
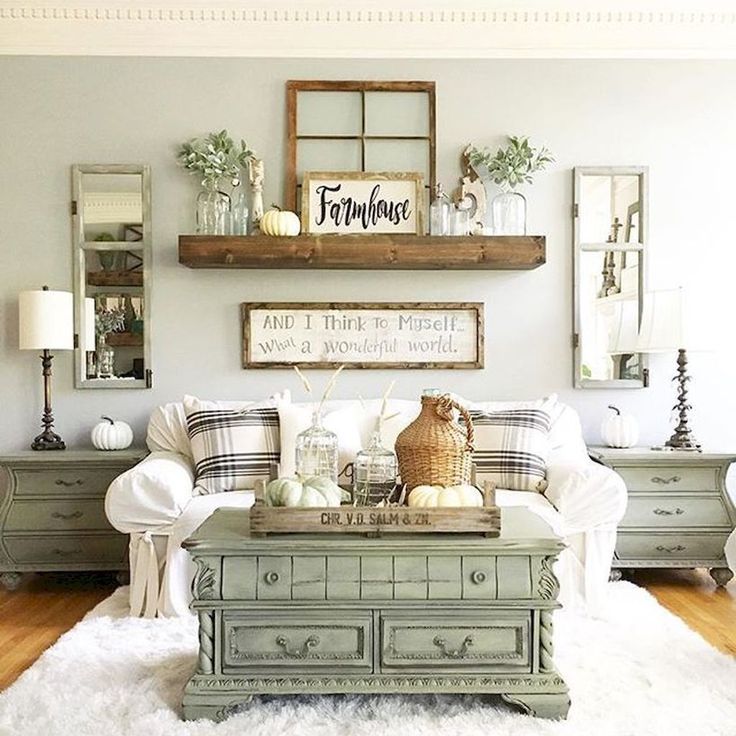
Flat or Matte
A friend to walls that have something to hide, flat/matte soaks up, rather than reflects, light. It has the most pigment and will provide the most coverage, which translates to time and money savings. However, it’s tough to clean without taking paint off with the grime.
- Practical application: adults' bedrooms and other interior rooms that won’t be roughed up by kids
- Durability: medium-low
Tips For Choosing the Right Sheen
If your paint color is dark and rich but you don’t want a super shiny effect, step down at least one level on the sheen scale. That’s because the darker and richer the paint color is, the more colorant it has, which boosts sheen. Ditto if you’re painting a large, sun-washed, or imperfect wall. The higher the sheen, the more defects will show.
Adding sheen also adds to the cost, usually an extra dollar or two per gallon as you step up on the sheen scale.
Related:
- Painting Hacks Only the Pros Know
- How to Choose Paint Colors
More in Improve
Interior painting of a wooden house - Paint House rf
Preparing a wooden house for interior painting
Painting a wooden house is not limited to the choice of paint color.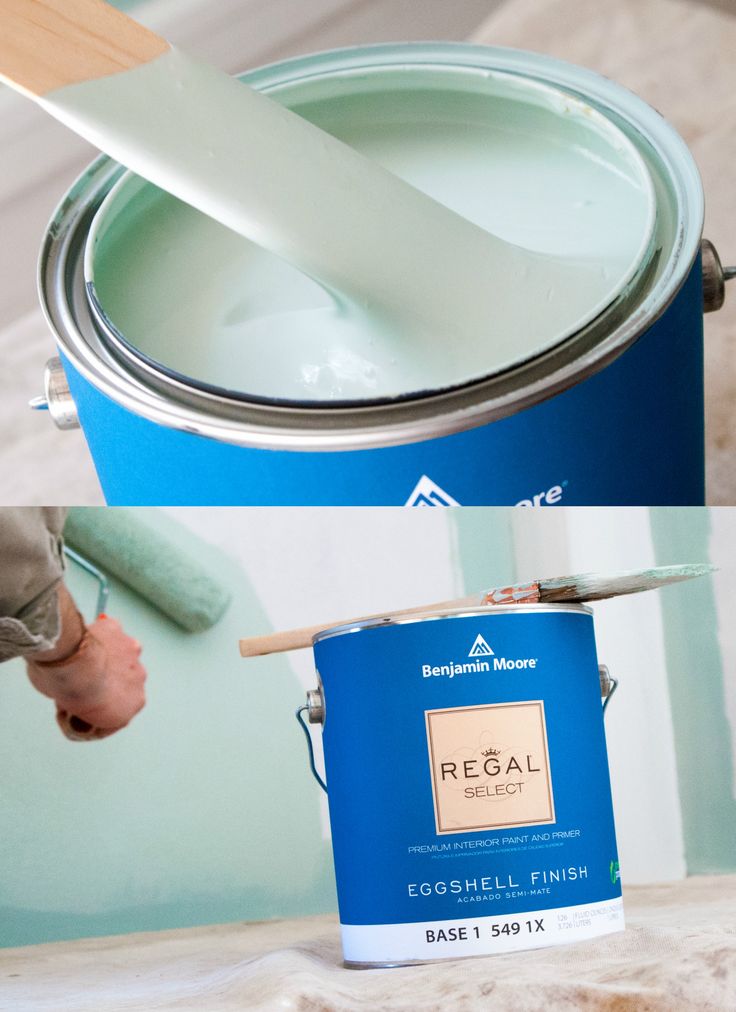 This is a rather complicated and time-consuming process, which is best left to professionals who know all the nuances of such work. The better the painting is done, the longer the color will last and the house will last, because this is the main way to protect the wood.
Before painting, make sure that the wood has dried sufficiently and shrunk (this takes about a year after construction). After that, you can proceed to finishing work. nine0005
The interior painting of a wooden house always begins with the processing of the walls, carried out in several stages:
1. Sanding. Dirt, dust, dust, and existing fungus-affected areas are removed. The process uses electrical equipment, and for hard-to-reach places - special painting tools. This stage is very important: if the grinding is carried out poorly, then the paint will not last long.
2. Antiseptic - will significantly extend the life of wooden walls and protect them from damage and decay. There are two types of antiseptic: on an organic or chemical basis. For the interior decoration of a wooden house, it is better to use a natural-based antiseptic - it is more environmentally friendly, although its protective abilities are weaker. For the interior walls of the house, this is quite enough (applied in two layers). nine0005
3. Applying a primer coat - removes minor imperfections and cracks in the wood, prepares the surface for optimal adhesion to the paint.
4. The final stage is interlayer grinding, which gives a smooth surface.
Now the walls are completely ready for painting. It is better to choose and buy paint in advance, with the expectation that it will be applied in several layers. The modern market offers the widest variety of colors. They differ in color and composition. For the interior painting of a wooden house, it is better to choose acrylic paints, water-based paints or oil-wax impregnations. nine0005
Choice of paint
For an environmentally friendly wooden house, it is better to choose paint on a safe basis (eg linseed oil or water). The choice can stop at a transparent version or a colored one (color). The structure of the shade can be glossy or semi-gloss, matte or semi-matte.
The choice of paint also depends on the purpose of the room to be painted. For example, wet rooms such as baths are best treated with wax-based paint. It is water-resistant and dirt-repellent, while not hindering the "breathing" of the tree. When painting floors and stairs, special paint or acrylic varnish is also used. nine0007 In other words, when choosing a paint or varnish for the interior painting of a wooden house, it is better to decide on the choice of color yourself, but entrust the type and type of coloring material to a specialist. Contact us and we will help you make the right choice and perform all the work qualitatively.
Why paint the inside of a wooden house
Why paint the walls of a wooden house? First of all, it is their protection from moisture, which is constantly present in the living room. Moisture accumulates in the form of steam and settles on the surface of the walls, reducing their service life and leading to wood deformation, mold, and decay. The better the processing and painting work is done, the better the interior will look and the house will last longer to please you. nine0005
The interior painting of a wooden house must meet the following basic requirements:
1. Maintain breathability. The ability of walls to breathe is one of the main features of wooden houses. This is their clear advantage that needs to be preserved.
2. Vapor permeability. This is another important property of wood, which helps to maintain the most optimal indoor climate. It's important to keep it.
3. Environmentally friendly. Processing and painting of the internal walls of the house must be carried out with the least toxic paints and solutions. nine0005
If these requirements are met and all work is carried out with high quality, then the walls will please their tenant for a long time with their appearance and the absence of signs of aging.
What kind of covering paint to paint the wood inside the house | Experts
Slavin Evgeny Iosifovich
Chief Technologist (Arkhangelsk)
The interior decoration of the house is a very special case.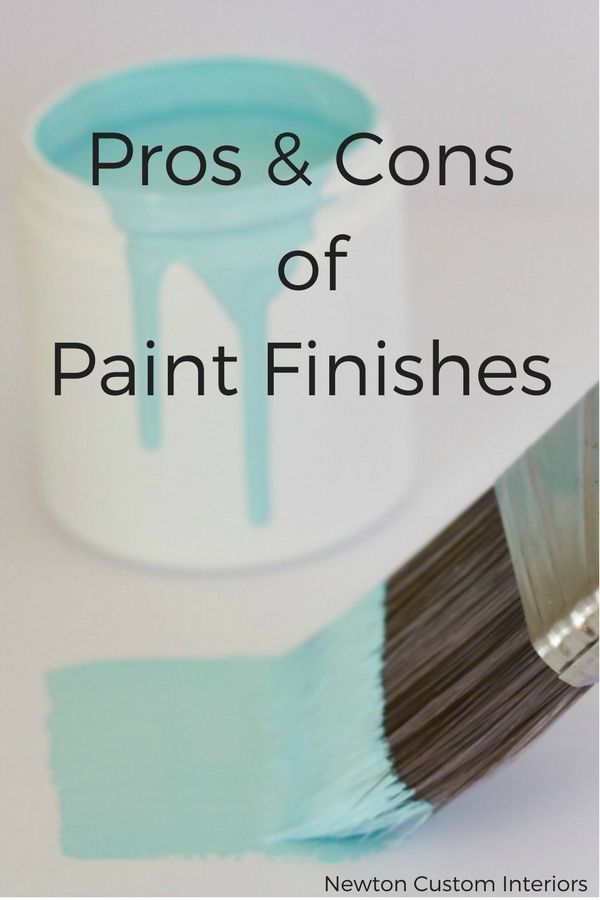 Therefore, the requirements for coloring systems are special. They are repelled from the place where the painted products will be. Here is a house. There is no hostile environment here. Rain, snow. Winds with prickly streams of dust or sand that act as an abrasive. Therefore, powerful "adhesion" is not so important. nine0005
"Adhesion" is a special term. It means the adhesion of the paint to the surface. The thickness of the "dry film" in the ink system does not play a key role. Here the emphasis is on appearance and safety for humans. Therefore, we consider systems that combine: high aesthetics, varying degrees of gloss and environmental friendliness.
What will you learn in the article?
- Interior trim. Painting lining, block house. In general, painting wood inside the house
Photo 1. Coloring pigments from the company "Teknos"All the coloring systems we use have a vapor permeable surface. This is very important for your health.
 Wood is a living, breathable material. It happens cyclically. It absorbs and releases moisture. When the house is damp in spring, the wood takes away excess moisture. When we use heating and heaters in winter, the house becomes too dry and the wood releases the accumulated excess moisture into the room. Works as a natural moisturizer. Maintains a good healthy microclimate in your home. nine0005
Photo 2. Wood is a living, breathing material that maintains a healthy microclimate in the homeInterior decoration. Painting lining, block house. In general, painting wood inside the house
All paints for interior finishing can be divided into several types according to their covering ability and composition. Today we will consider one of these systems.
Covering systems (film). nine0051 When working with them, you actually do not see the structure of the wood. The name itself suggests how they work. They are like a blanket covering the wood.
 You see purely the color of the painted surface. For example "Teknos Teknocoat Aqua 2575 - 03". "Covering" coloring system and quick-drying primer for this type of paints. "Teknos Aqua Primer 3130".
Photo 3. Coloring with the use of "Okryvny" dyeing systemTo paint the lining and the block house inside the house, you can use any water-based acrylic paints (acrylate). These formulations dry quickly and are odorless. Environmental friendliness and safety for humans are at the highest level. nine0005
Photo 4. Water-based acrylic paints "Teknos"Many professional painters ask a reasonable question. Is it possible to use "covering" coloring systems for outdoor work, inside the house. We answer, of course, we can. Systems such as Nordica Eko - 3330-03 Teknos or Vinha Tikkurila, like any other professional facade paint systems, simply have higher adhesion and a significant, thick film of dry residue. Biocides, fungicides and antiseptics, which protect the wood of the facade from an aggressive external environment and can be dangerous allergens for humans, are contained in the soil for outdoor work.
 Not in paint, but in the ground! nine0005
 Therefore, we simply change the soil for outdoor work, to the soil for interior decoration. And all will be well. If desired, you can replace the primer with an additional layer of paint. You just get a system of three layers of paint. Of course, in this case, additional intermediate grinding of the second layer will have to be carried out.
Peculiarities and nuances of acrylic paints in "opaque" schemes, which are used for painting wood inside the house
On our website there are several schemes of "covering" staining systems. Let's look at them in more detail. nine0005
- "Covering" three-layer scheme. We grind on the machine. We prime. First coat of paint. Intermediate grinding. The second, final coat of paint. More than 2000 rich and bright colors are available according to RAL and NCS catalogs. Color fastness - forever. The pigments are very durable.
- Two-layer "covering" scheme.
 Grinding on the machine. First coat of paint. intermediate grinding, in order to remove the raised pile. Second coat of paint. It differs from the usual three-layer scheme indicated above by the absence of soil. Choice of color in RAL and NCS catalogs. Gloss level gloss, semi-gloss, matte. Service life not less than 20 years. nine0058
Photo 5. Application of primer
Photo 6. RAL and NCS color chartsNow about the nuances. For dense wood species, such as larch, red-bark Angarsk pine, a two-layer "covering" scheme is more than enough. But if you decide to paint an ordinary European pine in this way, then there is a possibility of "non-painting".
The structure of ordinary pine wood is softer. It absorbs paint well. Therefore, part of the first layer can easily be absorbed. And through a layer of paint a tree will peep through. Curiously, this can be repeated on the second layer of paint. Therefore, two-layer painting, if necessary, is best used purely on hardwoods. We paint soft rocks, only with a three-layer scheme.
 nine0005
 In general, it is better to punctually follow the technology, we are always for this option. If you have chosen a opaque scheme, we recommend that you always work with a three-layer scheme. In these two versions, we showed a piece of our experience. Where, in order to save money, you can get by with a two-layer scheme.
Why, painting of lining, house block, timber imitation, must be done in the workshop, before installation
Many customers, but not experienced builders, without understanding thoroughly the specifics, do not see the difference where to paint the panels, in the workshop or directly on the site. However, there is a difference. And the difference is very significant. For professionals, this is generally an axiomatic moment. Only in the shop. In addition to the quality of staining, there is also professional ethics in relation to the customer. It is necessary that the client receives the maximum quality and pleasant impressions from a job well done.
 Real conscientious builders always protect their reputation and work on building their good name. nine0005
Photo 7. Painted panels in workshopWe delicately recommend that you paint the panels in our workshop. The golden hands of our experienced painters and decorators, together with modern equipment, will make you an excellent quality of coloring. Men without fail will paint over the docking connection "thorn - groove". They are well aware of what it is for. The fact is that after installation, there is always an acclimatization of wood in your home. Wood gradually adapts to the standard temperature and humidity of your home. As a result, there is always "microshrinkage" of the panels. In it, the account occurs literally in millimeters. From half a millimeter to two millimeters. If the panels are painted in the workshop, then nothing bad will happen. You won't even notice the "micro shrinkage". The fact that the "thorn" has become a little more or a little less.
 Visually it is not visible at all. The cladding retains its solidity and beauty. If you paint, then paint correctly. nine0005
Photo 8. Painted tongue and groove jointsBut if you painted the panels on the object, in the already assembled state, then the painting system will not get into the tongue and groove joint. This is technically impossible to do. After the inevitable "microshrinkage", along the joints of each panel, an unpainted "thorn" will glimpse with an ugly yellow stripe. Not a very pretty sight. Absolutely not aesthetically pleasing. Ruins the whole picture. To tint it later is not at all grateful and hopeless. In any case, the areas of tinting will be clearly visible. Therefore, we tactfully recommend painting before installation, in our workshop. Your panels will receive the highest "furniture quality" staining. nine0005
I would like to draw your attention, dear customers, to this aspect. Our company has just such a service.
 Repairing defects in wood. We are talking about chipped knots, resin pockets and small "pulls" from the cutter.
Photo 9. Resin pocketsWhen processing panels, when a cutter passes through a knot, tearing occurs quite often. Whatever the sharp cutter, the density of the knot is much higher than the usual density of wood. Therefore, a break occurs. nine0005
There are also tobacco knots, with dark loose wood around. As a rule, we offer this service to buyers of "AB", "BC", "SD" boards. The procedure itself is as follows. Holes from "tear-outs" on knots, resin pockets are filled with heated "thermal putty". After it cools, the surface is polished with an "abrasive". In general, after such processing, the panel begins to look much better and more aesthetically pleasing. The visual qualities of wood increase significantly.
Photo 10. Split knots on low grades of woodHowever, our esteemed customers and readers should clearly understand that a "covering" system, even if the defects of the wood are repaired in advance, will not be able to turn a board of low grades into "plastic".
 This is not technically possible.
 By the way, the presence of visible knots under a layer of paint is not something so bad. If you are looking at the same board, it can somehow strain you. And look at these boards in the collection. On the wall or ceiling. Looks very nice. You just need to cast aside prejudice and look impartially. Try to understand the intention of the Creator. Then you will feel the beauty of natural wood, heart and mind. Authentic, elegantly laconic Eco style. His canons of aesthetics are slightly different from the standard ones. Understanding people, connoisseurs of the forest, treat knots on wood philosophically. They know how good and beautiful these panels look after assembly. nine0005
Photo 11. Interior trim with cedar plankenWood painting. About yellow spots. White color and knots
Many lovers of strict classics tend to paint imitation timber panels or lining in white. The effort is commendable. White walls and ceilings are always in trend.
 However, here, too, there are many nuances. If your renovation budget is luxurious, like the representative expenses of the head of the Central Bank, then there are absolutely no problems. Choose only knotless types of wood and everything will be fine. "Extra", "Prima", Angarsk pine or larch classes, with our professional painting systems, will make your walls and ceiling immaculately snow-white. nine0005
Photo 12. Angarsk pine ceiling in white colorWhat about those who cannot afford such expenses? Choose a wood species with a minimum number of knots, and one where these same knots are small. Best of all, red-bark Angarsk pine and Siberian larch in the “AB” grade are suitable for these purposes.
We do not immediately recommend cedar and European pine. Some time after painting, in place of the knots, small yellowish spots will appear through the pigment. The knots of all coniferous wood species contain resin - resin. This is a natural analogue of turpentine.
 By the way, in the old days, turpentine was made from it. The resin begins to gradually corrode the organic pigment of the paint. And as a result, it will act as that yellowish spot. In cedar and ordinary pine, these spots will be bright yellow. This is directly related to the high concentration of resin in these types of wood. nine0005
Photo 13. White coloring of low-grade wood may cause yellow spots to appear in place of knotsOur practice shows that this process is less pronounced in Angara pine and larch. The spots will still show up. With a probability of 50%. They will just be much paler, less noticeable. What can be advised here? Take it philosophically. However, if instead of white you choose pastel colors, for example, beige or cream, then the spots on their background are practically not visible. nine0005
In our next articles heading "School of painters" "LesoBirzha". We will continue to cover the following topics for you.
- Interior decoration.
 Painting lining, block house. In general, painting the wood inside the house. Glazing (translucent) staining systems;
 - Interior decoration. Floor painting. Engineering board, how to paint it;
- Painting boards for finishing the facade. How to paint a wooden house outside; nine0058
- Proper painting of the terrace, fences;
- Painting window sills, countertops, bars on the wall and ceilings, stairs;
- Tree brushing. Patina wood. Let's talk about some secrets of our "vintage" "Winter Tale".
Read our articles. Please stay with us.
If you want to get a premium, elite quality of painting for the facade of your house or its interior decoration, then please contact us. Our painters decorators will be happy to help you. nine0005
Look to visit us on the site "LesoBirzha". Develop with us. Please purchase our products. We work for you in Moscow and St. Petersburg.
See how we can
April 26, 2020 3583
Vertical installation of painted imitation timber on walls
170 m 2 442 000
14 days v.