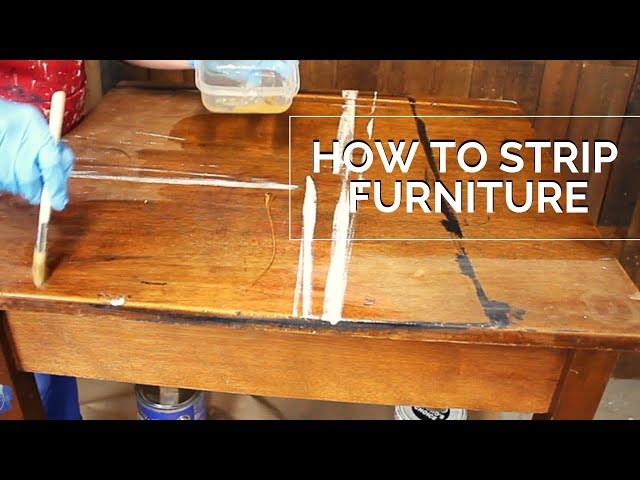
Best way to strip paint off wood
How to Remove Paint from Wood
We get a steady stream of customers asking us for advice about paint stripper use and how to remove paint and varnish from wood. Here’s some practical information about stripping paint from wood, designed to help you choose the right product.
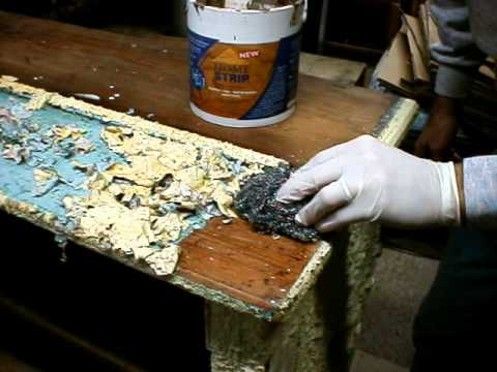
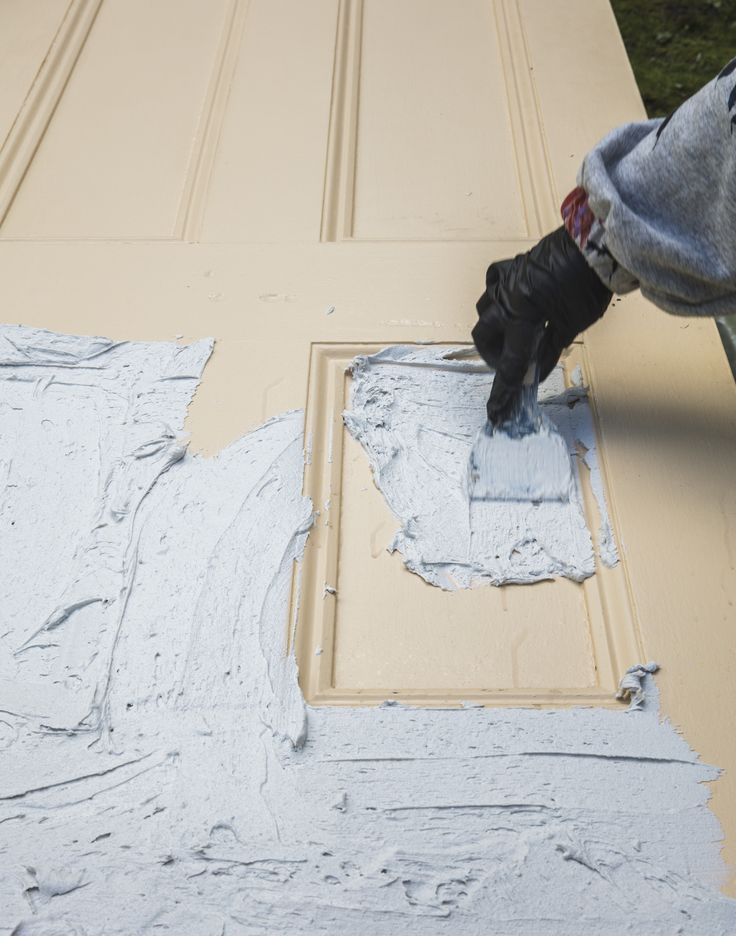
Fast and effective removal of paint using a paint stripper and scraperRemoving paint from wood
You might be the lucky owner of a lovely period home, or have an old wood floor that you’re sure will come up beautifully with a bit of work. You may have found a fabulous piece of old furniture smothered with nasty, brown, shiny varnish that’s begging for some TLC, or you might suspect there’s something really special under all those layers of ancient paint on your doors. Whatever you want to do, first you’ll need to get all of that rubbish off the surface to reveal the stunning wood beneath. Thankfully contemporary stripping products are relatively simple, effective and safe to use. Much better than the bad old days when your only choice was pure caustic soda, nasty stuff!
What kinds of wood can you strip?
You can strip any kind of wood, even heavily-carved wood, as long as you use the right products and materials and follow the instructions meticulously, particularly if you want to strip something expensive, rare or precious.
- Outdoor and indoor furniture
- Exterior and interior doors and door frames
- Stair rails and banisters
- Antique and vintage furniture
- Window frames and sills
- Floorboards
- Parquet flooring
- Built-in furniture
- Skirting boards
How to remove paint from wood – 3 ways
There are three ways of removing paint from wood: sanding, using a hot air gun and chemical paint strippers.
- Sanding is best kept for small projects unless you want to hire an industrial sander to remove paint and varnish from your floor. A quick word about sandpaper and wire wool, both of which can cause damage to wood unless you take it easy… When you sand wood you take the surface off, and you need to do it as evenly as possible without rubbing it thin in places or creating gouges. Power tools help because their design forces you to apply even pressure. Whether you’re sanding by hand or with a machine, experts recommend you take it slow and easy until you get a feel for it.
 There’s plenty of good advice online about sanding wood to perfection, and some excellent guidance here on the Period Property website.
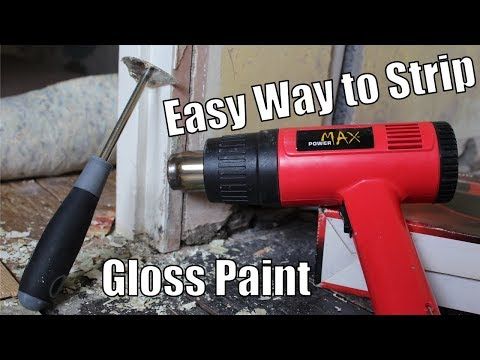
 - An electric hot air gun removes paint in no time but can scorch the wood if you’re not careful. Scorching is less important, of course, when you’re planning to re-paint the wood. Bear in mind, also, that a hot air gun can only be used as a paint remover, not a varnish remover as varnishes tend to go very gooey, almost glue-like, when heated.
- Chemical stripping is the best method for stripping carved wood with hard-to-reach, intricate areas, but in reality, you will probably use a combination of mechanical and chemical methods for your project, especially if you have layer-upon-layer of old paint to take off. Chemical paint removers deliver the best results, remove varnishes and paints faster than sanding, and tend to be the least harsh. Care needs to be taken when using chemical strippers, however, as these present their own care and safety issues.
As Kirsty Allsop says on the Channel 4 Homes website:
“Chemical strippers, available from DIY stores, are good for intricately carved wood. You will need to follow the manufacturer’s instructions as these vary. Make sure you keep the area you’re working in well ventilated. Protect the floor with dust sheets or thick newspaper. To get a chemical stripper into nooks and crannies on intricate woodwork, use wire wool. Also, check the manufacturer’s instructions to see if you need to neutralise the stripped woodwork.”
Different types of chemical wood stripper
Solvent paint removers take off all kinds of finishes, even contemporary ones. They are usually very gentle on the wood and won’t damage it, which is why they’re used in the antique trade. There’s no discolouration and solvents get the wood cleaner, deeper down into the grain. On the downside, you tend to use more of it, so it can end up more expensive than a caustic stripper. Solvents can also have a strong odour and must only be used in very well-ventilated areas. Last of all, you might have to work a bit harder to remove heavy paint build-ups than with a caustic paint stripper. So to sum up, solvent strippers are:
- More expensive and messy to use
- Not so good at removing heavy paint
- Cause no damage or staining
- Can have a strong odour
- Give a cleaner, finer finish
- Perfect if you want that “natural look”
- The best product for stripping old, damaged items like beams
Caustic paint removers take off most finishes and are particularly good at getting rid of thick layers of paint and varnish. They give off fewer fumes than solvent-based paint strippers, are cheaper and tend to work faster. On the other hand, caustic products usually contain a very strong alkaline which may react with chemicals in the wood resulting in staining or scorching of the wood. This is more common with dense woods such as mahogany and some types of Oak, especially old Oak. In summary, caustic removers are:
- Perfect for removing heavy paint build-ups
- Great for complicated mouldings
- Best reserved for stripping pine doors that will be repainted or stained
- Best suited for use on plaster, stone and metal (Please Note: They may not be suitable for aluminium)
What’s the best paint stripper for wood? You can always test drive a few different products to see which stripper best suits the job and matches your capabilities. Just carry out testing in inconspicuous areas and keep your test areas small.
Does the paint you’re stripping contain lead?
Most paints manufactured before 1960 contain lead, so if you’re stripping something older than that it’s always wise to check. You can pick up a lead testing kit at your local decorating centre or DIY store.
If you find any lead, the British Coatings Federation have produced a leaflet about how to deal with it, which you can read here: “Old Lead Painted Surfaces – A Guide on Repainting and Removal for DIY and Professional Painters and Decorators”.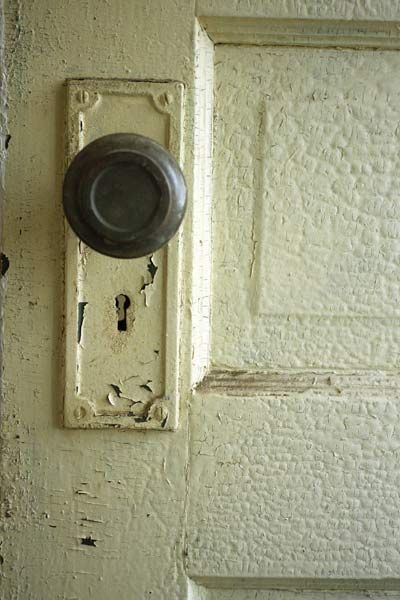
How do chemical paint strippers work?
Chemical paint stripping and varnish stripping products partially dissolve the paint or varnish. You can buy paste and gel paint stripping products, which are handy because they’re so thick that they stick to vertical surfaces – perfect if the item you want to strip can’t be moved.
4 steps to stripping paint from wood
- Obviously every product is slightly different. But as a general rule your first step is to apply a thick layer of stripper with an old paint brush you can throw away afterwards. Make sure you force the product into any carved, intricate areas. Don’t paint it on like emulsion, dollop it on generously then work it into the surface.
- Step away! Different products work over different timescales. Leave it alone until the product has done its thing, according to the instructions.
- Once the paint has softened, scrape it off with a plastic or metal scraper. You can use steel wool to get rid of stubborn areas of paint or varnish, and old toothbrushes and wire brushes are also useful.
 Take care with metal scrapers when stripping wood so as to avoid scratching or gouging the wood when removing the paint or varnish.
 - If there’s still some paint left, re-apply the stripper and go through the process again until it’s all gone. Then, if the instructions tell you to, wash the stripped item to neutralise the active chemicals.
Paint removal from wood – Safety recommendations
- Wear old clothes
- Chemical paint strippers give off fumes, some of which are toxic. If the instructions say you should only use it outdoors, then follow them
- Whatever product you use, it makes sense to wear gloves and a face mask
- To avoid causing damage to the surrounding area, lay old newspaper, a tarp or drop sheet underneath the item you’re working on
- Never leave the lid off – you don’t want fumes evaporating into your workspace
What is the best paint stripper and varnish remover?
Paints and varnishes have evolved over the years, so have their formulations and chemical make-up. Paint strippers and removers have also had to evolve to keep pace with these new formulations. As a result, its often the case that where one type of stripper works perfectly with a modern paint formulation, it may be ineffective against an old paint or varnish from the 1960’s or 70’s. The same applies the other way round, where strippers that are effective against old paints may not be as effective on new paints and varnishes. So what is the answer?
Paint strippers and varnish removers are usually available in sample or small tin sizes of between 250ml to 500ml. Our recommendation is to buy a sample or small tin and to trial the effectiveness of a product before committing to buying the quantity of wood stripper needed for the project. This could save time and money in the long run.
We highly recommend Paint Panther Paint and Varnish Remover, one of the best wood strippers on the market for day to day paint and varnish removal. It’s great for removing paint and varnish from wood.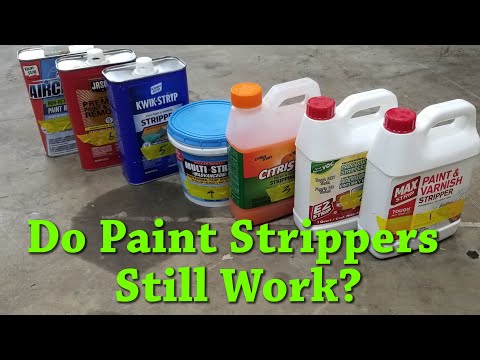 It’s a remarkable product, highly effective and incredibly fast-acting, removing as many as six layers in just five minutes! It’s a gel, sticking conveniently to vertical surfaces, and it is ideal for removing water, oil and solvent-based paints, varnishes and lacquers.
We also love PeelAway 1 and PeelAway 7, which are both used to restore antiques and items like decorative or carved fireplaces, wooden or plaster coving, cornices and ceiling roses. The ‘Peel Away’ paint removal systems work by applying a poultice or paste over the painted areas. Left for a period of between 12 and 48 hours, the PeelAway poultice dissolves the many layers of paint accumulated over the years. The dried poultice is then removed with a spatula, pulling out the dissolved paint from deep detailing, nooks and crannies to restore the intricate detail and design of the original piece.
PeelAway 1 is better suited to paints from the 1970’s and prior, the old-style metal and lead-based types. PeelAway 7 works better on modern paints, dating from the late 1970’s onwards. For some projects you might need to bring both into play, using PeelAway 7 on the newer layers and PeelAway 1 on the deeper layers. PeelAway 1 is caustic-based, so always try a test patch first. Remember, caustic-based strippers can scorch the surface of some woods, such as old Oak and Mahogany.
- Fireplace awaiting treatment.
- Fireplace after application of PeelAway 1. Photos credit to: Rosie
Both PeelAway products are available in a handy PeelAway 1 and 7 Sample Twin Pack, making it easier to test each product to find out which works best for your paint removal project.
All PeelAway products are supplied as a kit including an application spatula and protective blankets, to prevent the applied poultice or paste from drying out too quickly and before it has dissolved the paint or varnish. If required, extra PeelAway 1 Neutralizer and PeelAway 1 spare blankets, as well as PeelAway 7 spare blankets are also available. These are useful if the protective blankets need to be cut to shape or into strips for metal pipes, table legs or other required shapes.
Here’s a blog post in which we give the Peelaway paint remover a rigorous trial.
Beautiful, clean, stripped wood…revealed. What’s next?
You’ve stripped it. Now it’s time to choose your wood finish. We have a huge selection of amazing products designed to breathe new life into your wood, whether it’s a gorgeous old floor, a splendid piece of antique or vintage furniture, a pine door or rococo picture frame.
Here are some ideas to help you get creative with your good-as-new wood:
- Polish it to a stunning mirror-like sheen with a deep-nourishing wood wax polish
- Colour it with a vast choice of superb wood stain shades
- Oil it with a clear or coloured wood oil
- Preserve it – essential for exterior wood; use a clear or coloured wood preserver
- Lacquer it with a high quality wood lacquer
- Dye it with a water-based or solvent-based wood dye
- Re-paint it – off with the old and on with the new. Choose a matt, satin or gloss interior or exterior wood paint
- Paint and distress it for a cool, shabby chic look with a matt emulsion, clay or chalk paint
Paint and varnish strippers aren’t the only removers we do. See our full range of paint, varnish, wax, stain and polish removers to find the product for your interior, exterior restoration or renovation project.
Need more help with paint strippers?
We’d be delighted to help. Just contact our team of wood finishing experts. They’re always on hand to offer friendly help and advice. Alternatively, visit our wood stripper and remover FAQ page which covers many of our most commonly asked questions.
We love to see before, during and after photos of any wood finishing project. If you would like to share your decking project pictures with us, you can either send us some photos or share on our Facebook, Twitter, Pinterest or Instagram pages.
Other great blogs that discuss paint stripping
How to Remove Paint from Wood (Fast and Effectively)
Photo: depositphoto.com
It can be a mighty labor-intensive and time-consuming process to remove paint, which is why many DIYers dread or even avoid the task. That’s a shame, given that the results so often are worth the effort.
Fortunately, by following the simple steps outlined below, you can learn how to strip paint from wood and successfully remove paint with minimal aggravation and without causing damage to the wood during the paint-stripping process.
Tools & Materials- Work gloves
- Safety glasses
- Respirator
- Solvent-based paint stripper
- 5-gallon bucket
- Paintbrush
- See full list «
- Paint scraper
- Wire brush
- Rags
- Sandpaper
Before you can apply a fresh new paint, you’ve got to get the old stuff out of the way. You might need to strip old paint for a few reasons. “Some reasons include changing from a solid paint to a transparent or semi-transparent stain or to fix significantly uneven wear,” says Octave Villar, manager of quality/applications for Behr Paint Company.
Advertisement
These seven steps are easy to accomplish and can make the job go more smoothly. Gather those tools and get started!
Step 1: Ensure the Wood is Worth StrippingSome wood—especially trim—appears worn or rotted to the point that stripping will leave little left to paint. Before setting up to strip old paint from potentially worthless wood, try a few tests to determine whether your work will be worth the time.
Wood is tough enough to frame buildings, but it’s not invincible, especially if it has not been maintained well. If wood is rotted, you might have to treat it before painting. Rot is the most common problem to detect. Dry rot spreads more rapidly and can ruin wood. Check for dry rot by noting spore dust on the wood, a damp or musty scent, or appearance of fruiting bodies of fungus.
Wet rot occurs where moisture lurks. Test for it by gently poking a small portion of the wood to see if it is spongy. Signs of shrinkage or warping also indicate problems. Also check for large cracks or wood coming loose. For small problems, eliminate the cause of moisture before stripping and replacing. Fill small holes of cracks, let the filler dry, and sand it.
And know when to give up the ghost on removing paint from wood. “Stripping paint can be a messy and labor-intensive affair; sometimes it’s just more convenient to replace wood,” says Villar.
Step 2: Be Sure the Paint Does Not Contain LeadAny home built before 1978 is more likely to have lead-based paint lurking on surfaces. According to the EPA, 69 percent of homes built between 1940 and 1959 contain lead paint, and 87 percent of those old fixer-uppers constructed before 1940 have lead. The dust from that lead can be toxic, especially once you start messing with it, and especially in children. Lead poisoning can cause a variety of symptoms, including seizures and developmental delays in children.
Advertisement
If you believe you have lead paint, be sure to test for it before beginning stripping. DIY kits give instructions for slicing through the paint to retrieve a small sample. Choose a rhodizonate-based or sulfide-based kit, depending on the paint color. If the paint tests positive for lead, follow the EPA’s recommended steps for lead assessment and abatement.
Photo: depositphoto.com
Step 3: Remove any Protruding Nails, Screws, etc.Remove all hardware (nails and screws, brackets and doorknobs) from the wood. Cover any non-removable parts made of materials other than wood with protective tape.
Take a second to assess the wood’s condition and your desired results. Villar suggests thinking through the project to determine how much of the previous coating needs removal. Some jobs don’t require the use of chemical strippers. “Despite the additional labor, sanding is really my preferred way to remove paint,” says Villar. For minor jobs, like just getting past some peeling paint or to make a surface smoother, you might be able to skip the stripper step and simply sand instead.
Once you determine that stripping the paint is the way to go, always observe the proper safety precautions when dealing with paint strippers and take care to select the right product.
Before you begin work, don the safety gear that’s essential to wear in the presence of chemical paint strippers. That means gloves, glasses, and a respirator. Having closely consulted the manufacturer’s instructions, pour your chosen solvent-based paint stripper into an empty bucket.
Photo: depositphoto.com
Step 4: Apply Paint StripperProtect floors beneath the wood, wall edges, windows, or doors by taping off and covering them before applying the paint stripper. Shake the can well before opening and pouring some into a shallow container. Concentrating on one small section at a time, liberally apply the paint stripper with a paintbrush.
Advertisement
Leave the product on the wood for about 20 minutes, or until the paint starts to bubble and peel.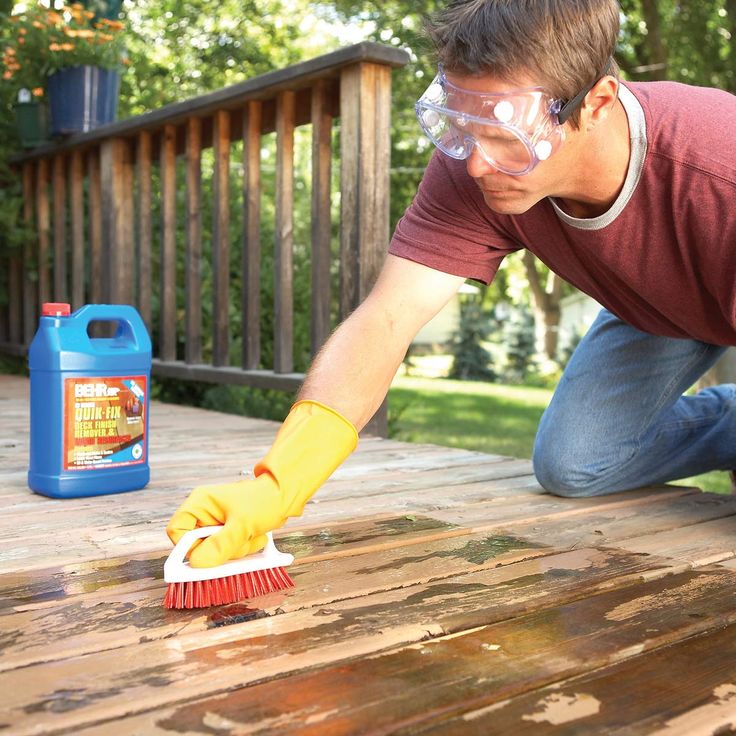 Bear in mind that if you are removing several layers of paint, the solvent might need to sit for up to a few hours. As time elapses, test the paint intermittently to see whether it has softened. Be sure to remove all applied stripper on the same day. Once it dries, it can be very difficult to remove.
Photo: istockphoto.com
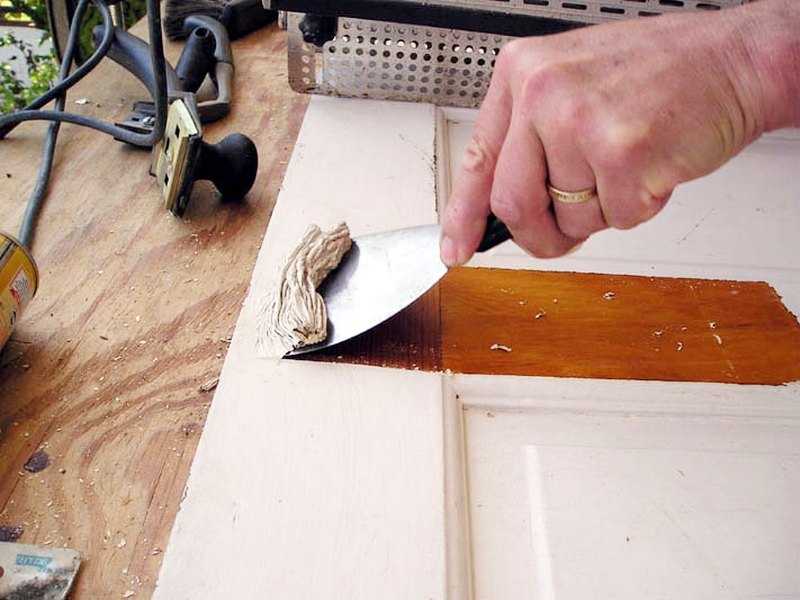
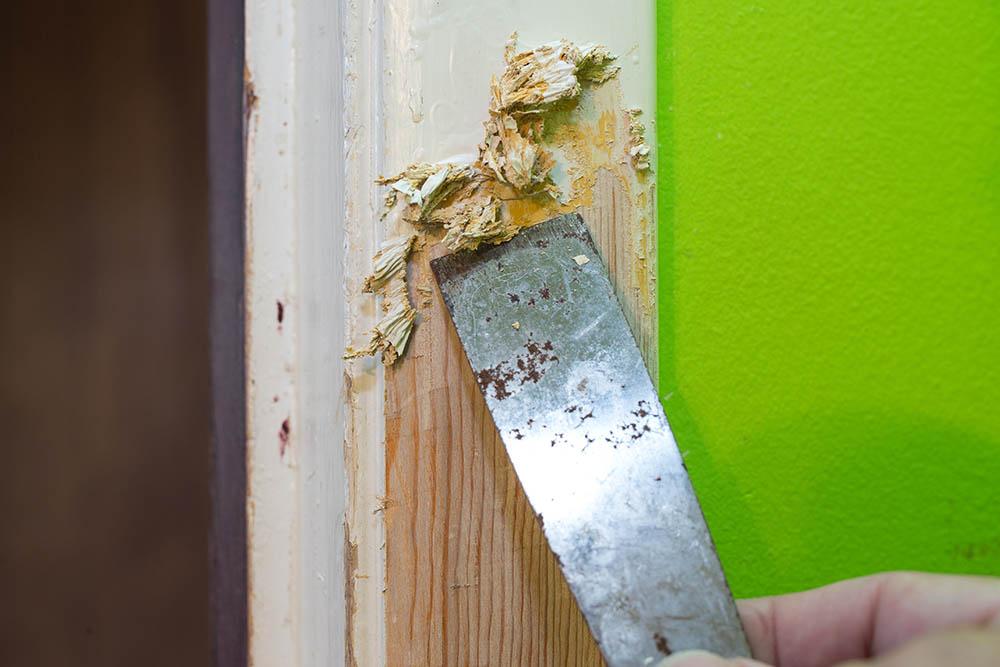
Step 5: Use a Paint Scraper to Remove the PaintUse a paint scraper to take off as much paint as possible from the area where you applied the stripper. Be gentle as you scrape; don’t gouge the wood.
If you’re feeling more resistance than you’d like, give the remaining area a little more time under the stripper. Once you’ve removed all you can with the scraper, you may choose to repeat the process, reapplying stripper and going through the steps once more. When satisfied with the condition of the area you’ve been stripping, move on to the next step.
Photo: depositphoto.com
Step 6: Get into Those Hard-to-Reach PlacesAfter you have worked section by section removing all the paint from the flat portions of the wood, it’s time to address any raised or recessed areas (for example, in moldings). Spread the stripper on the wood again and wait at least 20 minutes, but this time scrape with a wire brush or steel wool to access those hard-to-reach crests and depressions.
For large and fairly flat projects, you can attach a metal brush to your cordless drill to speed up the process. Take care not to scrape too hard, which can leave scratches on the wood.
Step 7: Wash and Sand the Wood to a Clean FinishIt might feel like you’re done once you’ve stripped those thick layers of paint. But this last step really is critical. “Final sanding and washing of wood helps to ensure the wood is free of loose materials, such as dirt and debris,” says Villar. In addition, sanding gives the wood a consistent surface for accepting paint or stain. “Although labor-intensive , these steps are critical to ensuring the success of your wood project,” Villar adds.
Advertisement
Before sanding, wash the wood with a clean, water-soaked rag, then sand down the entire surface.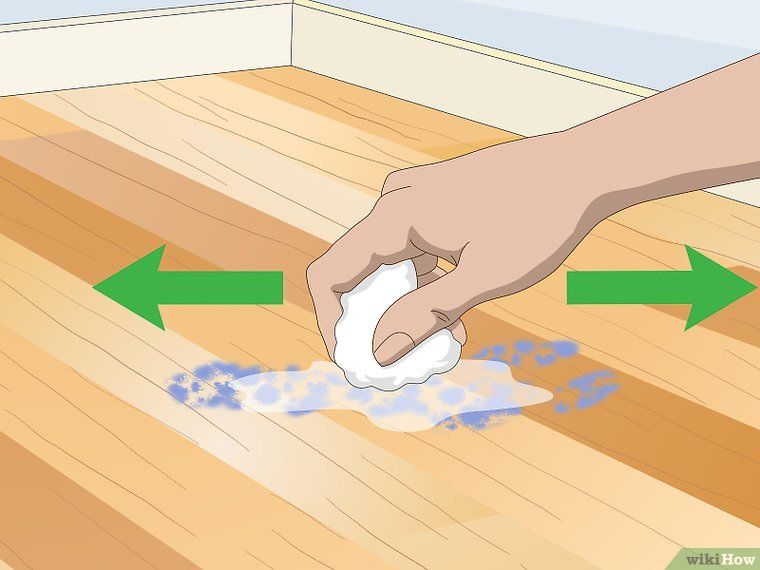 If you have access to a power sander, you can use it to make quicker work of sanding the broad, flat sections, but you should still manually sand any fragile or carved parts of the piece.
Wipe the wood again to remove any particles or debris left from sanding. If you aren’t ready to paint, wipe the wood surface again with a barely damp cloth just before adding new paint. This removes any sanded particles or other debris that might have settled back onto the wood. Villar suggests DIYers pay attention to how the wood feels on that final wipedown. “The surface should feel neither too rough (such as splinters grabbing the cloth) nor too slick,” Villar says. You should see no residue while moving your hand over your nicely sanded wood, and the surface should be clean and dry before painting.
Photo: depositphoto.com
All-Natural Ways to Remove Paint from WoodChemical strippers can make quick work of paint removal, but you can strip wood using more natural methods.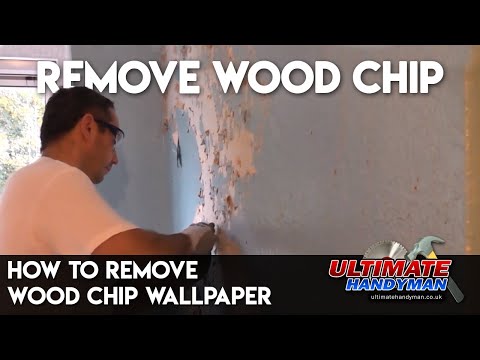 Heat, pressure washing, citrus-based removers, and even vinegar are just a few choices, depending on the surface size and how many layers of paint need to be removed.
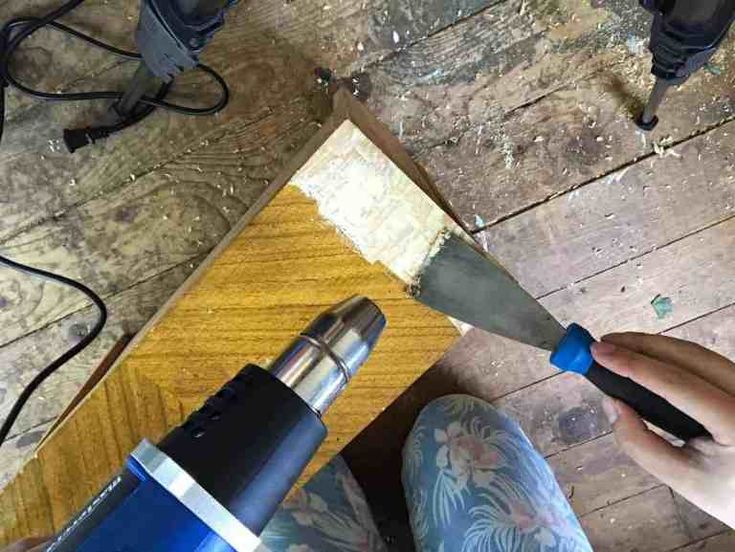
A heat gun can help “melt” paint so it is easier to strip away. Heat guns are safer than blow torches but still can cause accidental combustion or magnify vapors that are unpleasant and even harmful. When using the heat gun, move it back and forth in a sweeping motion; don’t focus too long on a single spot.
Once the paint softens, use an angled scraper to peel the old paint away. Keep the heat about 2 inches away from the surface to avoid burning the wood, and keep a fire extinguisher handy, just in case.
Advertisement
VinegarWith its acidic properties, vinegar is a versatile household staple and a potential paint remover. Heat a small amount of distilled vinegar and about twice as much water in a pan on the stove or in the microwave. Place a clean cotton rag into the container to soak up the warm vinegar, and then dab it on the surface.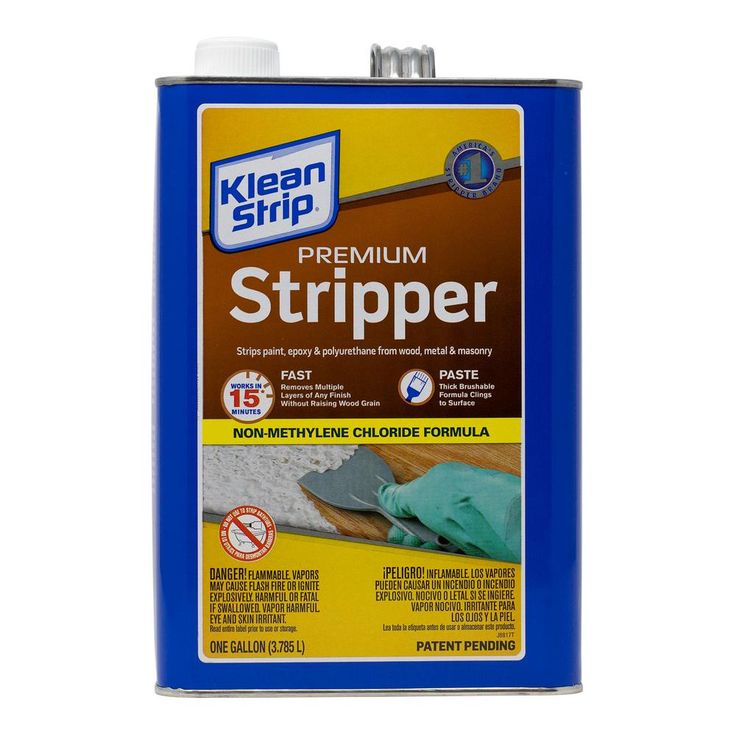
Wait up to 15 minutes and try scraping the paint off. If it won’t budge, try applying the vinegar again and waiting 10 to 15 minutes.
ScrapersFor fine paint layers, especially where paint already is cracking or peeling, you might be able to scrape the paint off without chemicals or heat. Plastic scrapers are less likely to mar the surface and are inexpensive, but scrapers with brass blades can better handle tough jobs.
Always scrape in the same direction as the wood grain when applying force to remove paint. When doing lighter scraping, go against the wood grain to get any remaining paint chips, but keep pressure light.
SandingSanding often can grind away paint for small or big jobs. For small jobs, use a strip of sandpaper and reach easily into crevices. For big jobs, get out the power sander. Just be sure to attach or have a friend hold a vacuum to capture dust when sanding wood indoors.
Depending on the thickness of paint, start with a coarse paper (about 80 grit) and switch to medium or fine grits for later steps, using a fine (around 220) for the finishing step.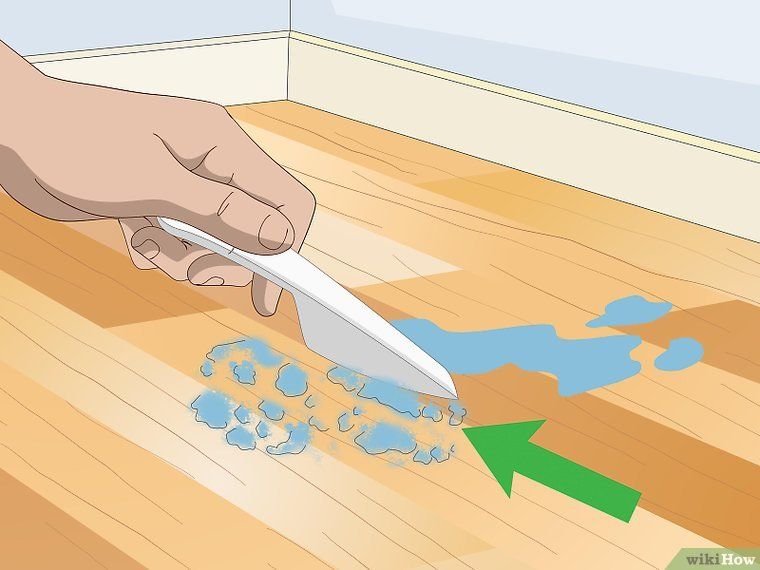
You might save time on large and outdoor surfaces with a pressure washer. It is possible to use a pressure washer to remove paint, but it has to be a really strong pressure—about 2,500 to 3,000 psi—to strip peeling paint. Be sure to wear safety glasses and wash along with the grain in a continuous motion. Pressure washers can damage wood, especially hardwood siding.
Advertisement
Few DIYers have heavy-duty pressure washers, but you can make quick work of final cleanup with a pressure wash at 1,200 to 2,000 psi.
Citrus-Based RemoversCitrus-based paint strippers have organic compounds called terpenes derived from plains. Citrus strippers are nontoxic and biodegradable, but they do contain some chemicals. However, the more natural strippers smell like oranges instead of hazardous fumes.
Shake the container, pour the stripper into a container, and apply the solution with a paintbrush. Allow 30 minutes (and up to 24 hours) before scraping.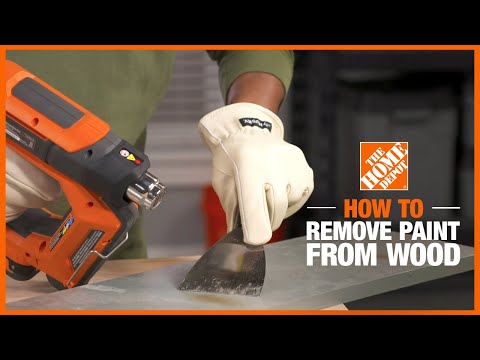 You can leave the stripper on overnight if you cover the surface with plastic. Buy citrus-based strippers on Amazon or at your local home improvement center or hardware store.
That kitchen staple—vinegar—can remove paint from wood in many instances. If you don’t have a paint scraper, try a plastic pot scraper instead, especially for small jobs. Steamers might soften paint, but their moisture can warp wood, so their use is not a good idea.
How do you remove oil-based paint from wood?Caustic strippers work well at removing oil-based paint from masonry, and can work on wood. However, the strippers can blacken some hardwoods like maple. Special oil-based paint strippers are effective, but most contain VOCs and require plenty of safety precautions, especially when used indoors.
What can I use to strip stain off wood?Strip stain from wood is a little tougher than removing paint.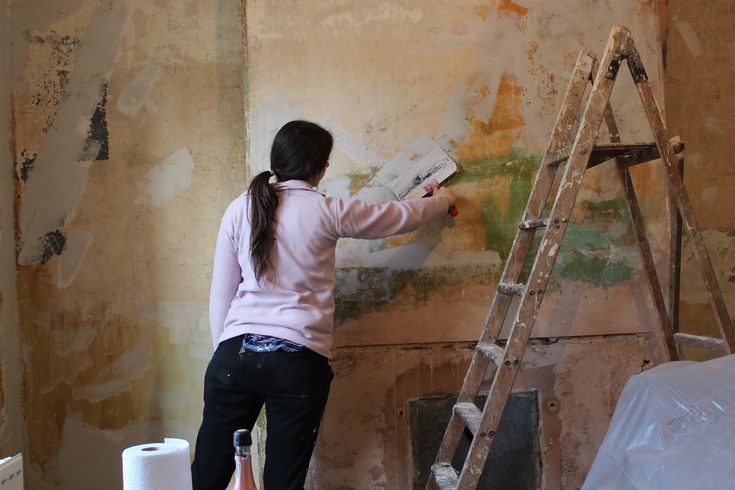 Wood absorbs stain. Removing stain starts with removing any varnish layer using a chemical stain stripper. Apply a thick layer of stripper with a brush and follow many of the same steps as for paint removal—scraping first and then wiping the surface with steel wool. Sand when dry.
Be sure to remove paint stripper from wood when the paint has bubbled up. Attempting to scrape it off too soon might lead to reapplying stripper. Wait too long and the stripper hardens.
Advertisement
The best way to remove paint stripper is with a plastic or bladed paint scraper. You also can use a putty knife and wire brush for hard-to-reach spots. Always guide the scraper at an angle. If some chemical remains in spots, dip a steel wool pad into mineral spirits or paint thinner to scrape off the remaining stripper. Finally, wipe the surface with a soft cloth dipped in mineral spirits.
Advertisement
5 ways, instructions and tips
Paintwork cracks and fades over time. This gives the surface an unsightly appearance. In this case, you can remove the old coating from the tree at home. Rigid materials such as cement and concrete are not as difficult to remove paint as wood substrates. This is because wood surfaces are soft and therefore easily damaged.
Mechanical and chemical methods can be used to remove old house paint from wood. Before starting the repair, find out what is best to use so as not to damage the natural material.
Why remove the old coating at all
Before restoring furniture or decorative surfaces made of wood, you have to remove the old paint. The service life of the new layer depends on the correct treatment of wood before coating. First, inspect the surface to determine the need for cleaning it.
We remove the old coating in such cases:
- The surface is bumpy due to repeated application of paint.
- The presence of blisters and cracks on the base.
- Another texture and color of the old coating.
The tree serves for several decades, if you provide it with constant care.
| Advice! When cleaning wood from an old coating, it is necessary to treat it with protective compounds. Otherwise, the new layer will not last long. |
List of tools for work
Wood stripping is a complex process that requires skills, training and special tools. Before removing old paint from wood at home, you should inspect the product to determine its suitability.
It is important to take into account such points:
- Wood age.
- The thickness of the previous coating.
- Shade of the old paint layer.
- Species of wood.
- Old paint texture.
- Service life of the previous coating.
The next step is to select the tools and protective clothing for the job. Tools are taken sparingly so as not to harm the natural material. A building hair dryer, a washer, a grinder, a spatula, gloves, a grinder, rags, glasses, a respirator will come in handy.
All options for removing the old layer from the tree
You can clean the wooden base from the old paint layer in different ways. Consider all 4 options. They will help clean the surface of window frames, window sills, carved elements, doors.
| Advice! The paint from the thread should be removed using chemical compounds. This reduces the risk of damage to fragile decorative parts. Sandblasting for carved elements is used only in a gentle mode. |
mechanical method
If the coating is already cracked and easily flies off, then use a metal scraper or spatula. Areas that could not be cleaned by hand are finalized with a power tool. You can remove the paint from a wooden door, but the coating must be even. This method is not suitable for removing a thick cracked layer or treating hard-to-reach places. Excellent manual mechanical cleaning lends itself to water emulsion.
Sandblasting with fine abrasive
In this case, a powerful jet of air + sand or soda crushes and knocks down pieces of paintwork. This is not the most popular way. Its disadvantages are expensive equipment, specialists are needed. Pros - quick cleaning of the surface from paint. With the right choice of abrasive grit and air pressure, the tree does not get damaged.
thermal method
The paint is heated under the influence of a building hair dryer, it becomes soft. After that, the coating can be easily removed with a spatula. If the tool temperature is set too high, the base of the tree may be damaged. Different types of wood have their own limits of thermal exposure.
This method of cleaning old paint on your own from wood is suitable for processing even the oldest paintwork materials.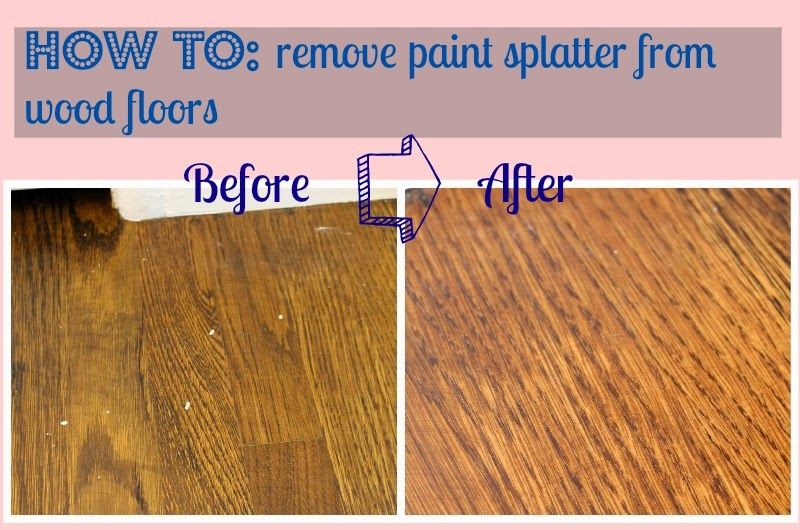 The layer can be removed by a person without experience with electric tools. The working technique is suitable for cleaning hard-to-reach elements or large objects.
After a hair dryer and a spatula, we use sandpaper. It will help to eliminate minor defects. Wood is treated with a solvent or alcohol. This will help prepare the surface for decoration.
| Advice! Before processing, the base is prepared. To do this, the surface is cleaned with a stiff brush. Dust is removed with a damp sponge or construction vacuum cleaner. |
Chemical option
Softeners and special washes are used during work to clean paint from wood. They are sold in hardware stores or departments with household goods. When buying, you should consider the type of paint and varnish composition. In this case, the wash should not damage the base.
A layer of a reagent is applied to the paint, which reacts and dissolves the old coating layer.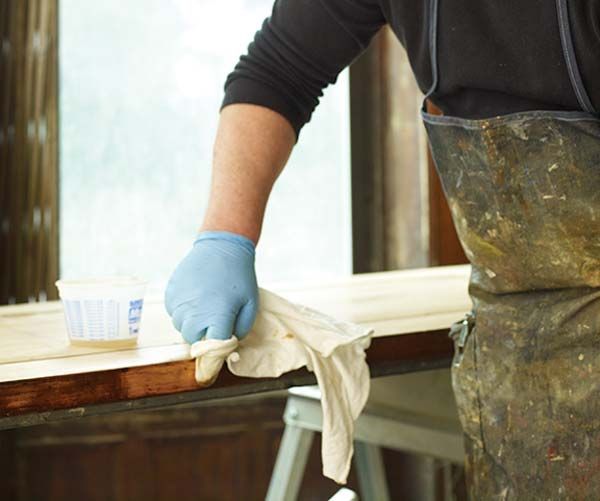 Chemical compositions weaken the bond of the dye molecules, so it easily lags behind the wooden surface. Some masters call this method the most effective. Manufacturers produce reagents for different types of wood.
When choosing a wash, consider the following points:
- Gel products are more expensive than liquid products. Thick consistency gives faster results.
- Do not use aggressive chemicals when working in poorly ventilated areas. Take more gentle formulations. They exclude getting toxic poisoning.
- No need to take cheap domestic reagents to quickly remove old paint from wood. A multi-layer oil coating can not be removed only with a wash. But the compositions of foreign production will quickly cope with the task.
- Some washes darken the treated surface. If it is impossible to refuse funds, then after bleaching the tree with chlorine.
When using chemicals, you need to follow the basic safety rules. Otherwise, it is easy to harm the body, injure the skin.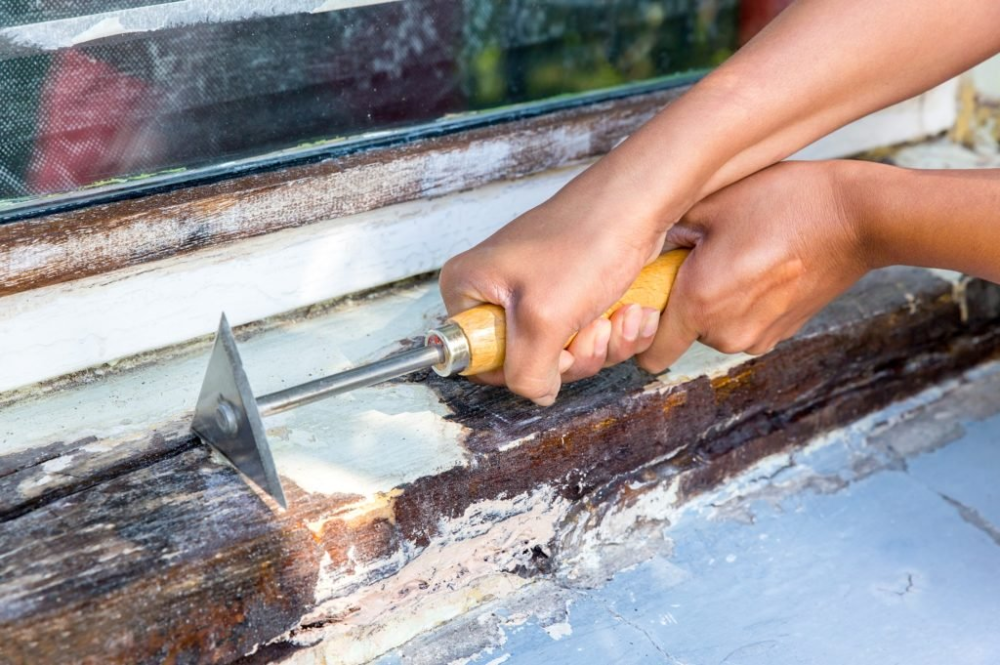 Chemical treatment of wood is considered more gentle on the surface of the product. Thinner for old paint is inexpensive, so you can get started with this method.
What can be processed
List of products that can be subjected to the procedure for removing paint from wood:
- parquet;
- wooden floor boards;
- skirting boards;
- doors and door frames;
- windows, window sills;
- external, internal fittings;
- stair railings, etc.
If the old layer is of small thickness, there are no visible defects, then it is enough to work with sandpaper. Then a new coating can be applied. But if the base is covered in several layers, they are thick, then the coating must be removed.
How to choose the option of removing paint from wood
When choosing a method for cleaning wood, you need to rely on the specific task that you face:
- If a high quality surface treatment is required, the base is treated with a solvent and then cleaned by hand.
- To save money, only sandpaper, hot air gun and foil can be used.
- When the safety of wood flooring comes to the fore, they buy a remover.
If you have a lot of time to work, then you can use several methods at once. First, apply the reagent, and then use a spatula or an electric jigsaw.
| Advice! The chemicals in washes and solvents have an unpleasant odor and are toxic. When interacting with them, you need to wear protective equipment. In addition, reagents require special disposal. |
Homemade wood cleaner
If you don’t have a building hair dryer or sandblaster at hand, then you can peel the paint off the tree at home. To do this, we use a tool of our own production. The main component is caustic soda.
Recipe:
- You need to prepare 4.5 liters of water, 0.9 kg of slaked lime, 1 kg of soda and 1 kg of chalk.
- Soda is dissolved in water and heated to 60ºС.
- Pour lime, chalk into the solution.
- Composition is ready to work.
The tool allows you to quickly remove a medium-thick layer of paint from a tree. After you can walk on the surface with a spatula or sandpaper.
Subtleties of removing different types of dyes
Depending on the type of paint, the composition from the wood will be removed in different ways:
- The oily layer is perfectly cleaned with a grinder or spatula.
- The water-based composition is easily removed with a solvent.
- Powder materials are removed with a powerful jet of water, for example, from a pressure washer.
- Acrylic paint is chemically and mechanically cleaned.
Hair dye that has landed on a tree can be washed off with an ordinary alcohol solution. Several layers of coatings are most effectively removed by the thermal method.
Errors when working with wood
Keep in mind the most common mistakes people make when trying to get paint off wood:
- Pour the chemical composition over the entire treated area at once.
 First, test the reagent on a small area.
 - Cleaning wood with coarse abrasive nozzles or hard brushes. All this will lead to the destruction of the rock.
- Long exposure of the solvent to the surface will damage the product. Even the most expensive foreign funds do not provide 100% coverage protection. Therefore, leaving the reagent longer than 1-2 hours is not recommended.
- Overheating of the base when using the thermal method of stripping old paint from wood is a fire hazard.
- Use of plastic containers when handling solvents. Some compounds will easily damage the container.
Regardless of the method chosen, you should read the instructions for using the wash.
When you can not remove the old layer
If the old coating is cracked, moving away and has become uneven, bumpy, then it must be removed. In some cases, it is easier to cover the old layer with new paint. To begin with, the surface is prepared. The base is ground, the tubercles are removed and washed with an alkaline solution (water with ordinary soap).
The surface is primed with an alkyd or synthetic compound, and then dried thoroughly. At the end, you can apply a new layer. If after grinding the base is not leveled, then the product must be puttied before priming.
| Advice! If you want to get a translucent effect with a translucent wood texture, you will have to remove the old layer of paintwork, even if the base has no defects. Otherwise, a similar color on the product will not work. |
Important recommendations
To quickly peel off old paint from wood, you should consider the following tips in your work:
- Do not press hard on the wooden base. This can only be done using the mechanical method.
- Always wear a respirator, gloves and goggles before removing old paint from wood at home.
- You can protect surrounding objects, decor, floors with walls with a plastic film.
- Do not heat the wood surface in the area where electrical appliances and wiring are located.
- After the solvent, the wood should be rinsed with clean water.
- If aggressive substances come into contact with the skin or mucous membranes, rinse the injured areas with plenty of water.
- Acrylic paint on the old composition must be applied in several layers. In this case, the work surface should be sanded and primed.
- Before using the water-based emulsion, the base is completely cleaned so that it is even and smooth.
- Experts recommend priming the old layer to remove defects. This will ensure a firm grip on the new surface.
By following the above recommendations, you can quickly and efficiently clean any surface. The main thing is to correctly approach the solution of the problem. Be sure to take into account the type of wood, the type of old paint, the thickness of the previous layer and the time you plan to take to work.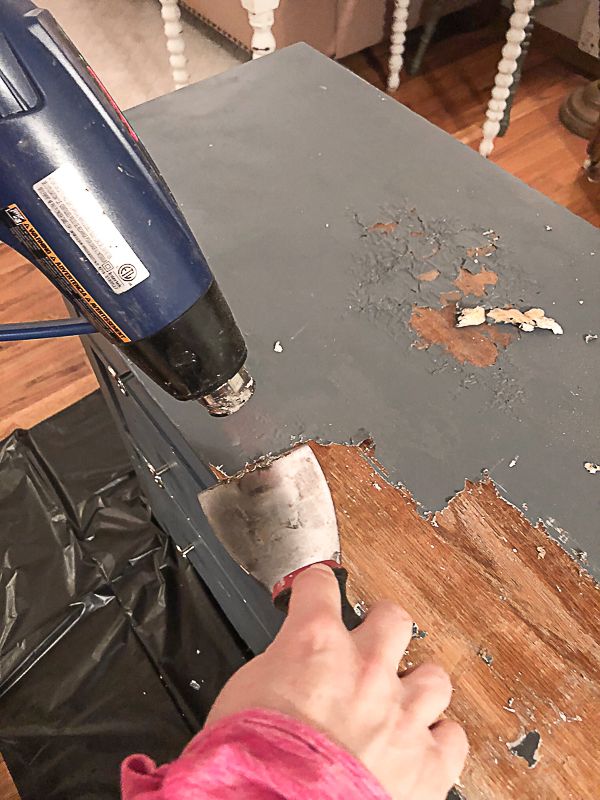
How to remove old paint from wood
Before painting a wood surface that already has one or more previous coats of paint on it, remove the old coating using household tools. If you do not know how to remove old paint, use the step-by-step instructions.
First, prepare the wood for painting by sanding and impregnating it with a primer. By choosing the right tools and calculating the effort, you can process up to a meter of painted surface area in 10-20 minutes .
The specificity of wood as a working material is its softness (depending on the species and quality of the wood). When preparing a wooden surface for painting or varnishing, determine whether the entire layer of old paint needs to be removed or the product can be treated partially. Consider the following characteristics of the paint to be removed:
- thickness - single coat may not be removed. Lacquer (dye) is applied to it easier, it holds better, and the wood does not lend itself to harmful effects once again.
 At the same time, the creation of very thick layers is fraught with a decrease in strength and density - they are easily destroyed at the slightest mechanical impact
 - invoice (may not match the quality and functionality of the new coating)
- color - if a layer of new paint is not thick enough and dense enough, the old one will show through or change the color of the new one (for example, superimposing blue and red colors will give a purple tint)
- age of old coating - it may peel off on its own. Painting without removing the old layer, which is peeling, will “make” the treated area bumpy
What is needed to remove old paint from a wooden product?
Inspect the condition of the treated surfaces, the structure and quality of the wood, make sure that the product is suitable for further use. Based on this, select surface treatment methods, dress appropriately (in work, protective clothing) and take special means.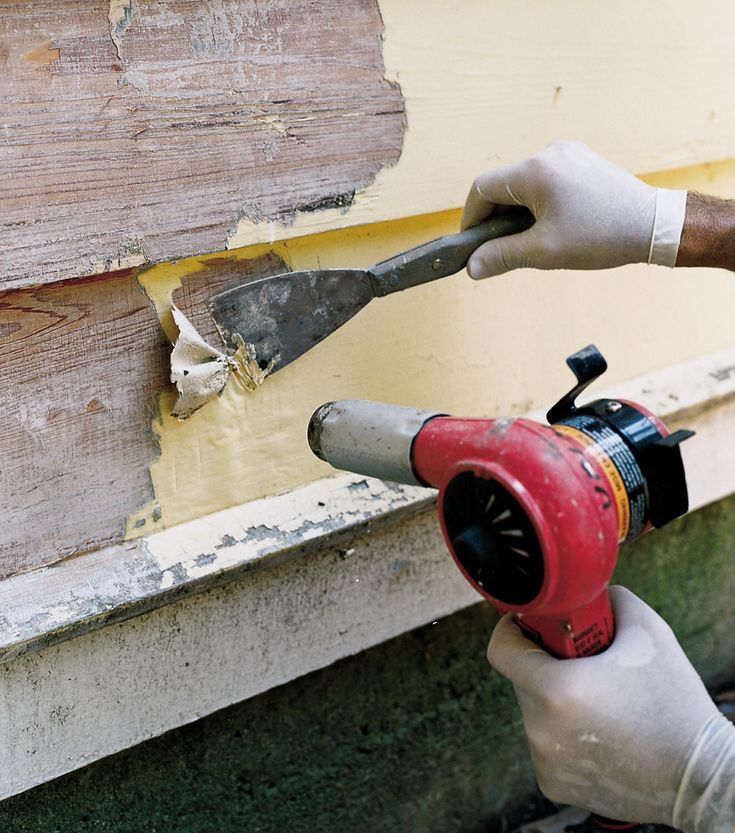 Before removing the paint from the wood, prepare the product accordingly (one of the methods that will be discussed later).
To remove the paint and prepare the surface for various operations, use the following tools and a set of materials:
- chemical impregnation for cleaning surfaces from paint and varnish substances
- hair dryer used for building purposes
- grinder with grinding disc or drill with abrasive attachment
- sandpaper, small spatulas
- protective equipment against toxic substances
How to remove old paint from wood-based products?
To safely and accurately remove old paint from wood, gentle methods and tools are used that cause minimal or no damage to the wood substrate. Before the paint is removed from the wood, it is treated:
- chemically
- mechanically
- temperature
Removing paint from wood with chemicals
Chemicals are the quickest and most convenient way to remove cracked paint from wood substrates. In a specialized store, you will find a product based on potassium carbonate and lime. The jar contains instructions for the correct application of the substance to the surface, as well as an explanation of how to remove the old paint. Use a soft bristled roller or brush to apply the product to the painted product. After a few minutes, use a small construction spatula to remove the paint from the surface.
The disadvantage of this method is the need to isolate the product from other household items before removing the old paint from the wood. The applied agent is very toxic and easily impregnates everything around (it is best to linger on upholstered furniture and thick wallpaper, fabric upholstery). Removal of old paint must be carried out in protective ammunition.
How do I remove paint with heat and abrasives?
Before repainting a product, learn how to remove paint from wood using temperature. This method is simpler than the previous one, but more dangerous, as it can cause a fire in the paintwork.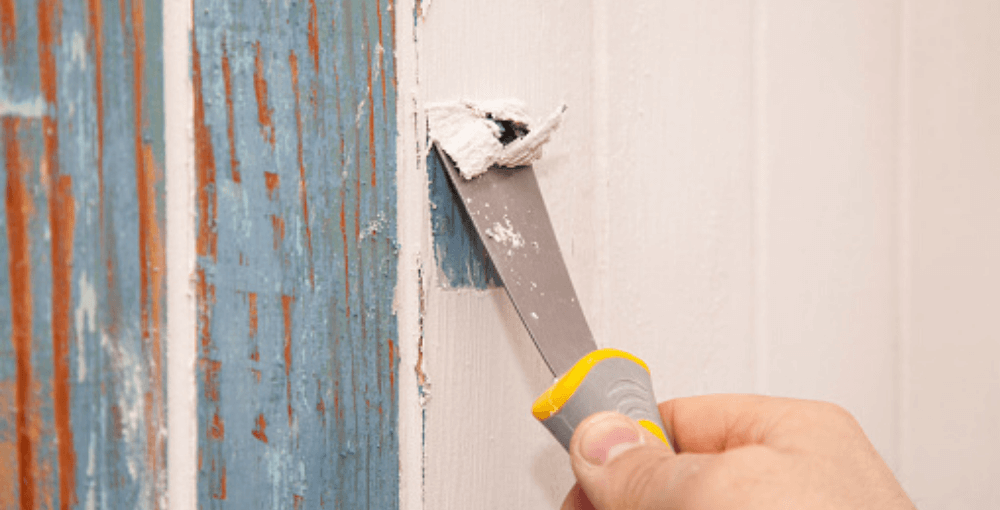 The method is based on the fact that when exposed to temperature, the paint begins to decompose and release gas. It penetrates and accumulates under the coating, causing the paint to bubble and completely separate from the wood base.
To thermally remove old paint from a wooden surface, use a construction iron or hair dryer. The hair dryer works like a normal one, but it has very high temperature modes for heating the air. In the second case: the foil is applied to the surface, warmed up with an iron from above, and then removed along with a layer of unnecessary paint.
The easiest way to remove old cracked paint is mechanically using:0250
This generates a lot of dust, so bring protective breathing masks and a gown to safely remove old paint from wood.
Unsafe methods of cleaning old paint from wood
It is not recommended to use open fire (gas burners) to heat the paint layer. This leads to the ignition of the coating material, and then the wood itself. In addition, some types of wood emit special resins during heat treatment, due to which you will not be able to repaint the product later.
Any kind of product pre-treatment can lead to unpleasant consequences if you do not follow the safety rules and work without protection. If the product can be taken out into the open, then it is advisable to do this before removing the old paint from its wooden surfaces. This will help you avoid the extra hassle of cleaning the house, as well as unpleasant odors obtained after the chemical treatment of a wooden item.
Should old cracked paint be removed from the product?
Pretreatment of the wood prior to painting further facilitates the efficient application of the new paintwork. Inspection of the wood surface will help you determine how to treat and remove old paint, and if it should be done at all.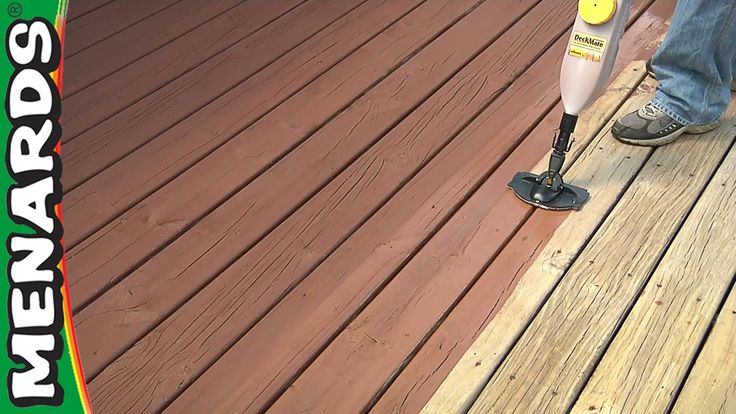 Removal of the coating is necessary if:
- it is cracked, blisters appear
- several coats have already been applied to the surface, causing the coating to become uneven, bumpy
- the previous version was of a different quality/texture or color. This may have a negative effect on the final result of painting, or the latter will lie unevenly, lag behind, etc.
You need to prepare for the fact that removing paint from the surface is a laborious process that will require a lot of effort and time. If you do not know how to remove paint from wood or do not want to bother with such work, contact qualified craftsmen.
Anastasia's task "Apartment repair master"
from 4 000 ₽
Thanks to Oleg for a job well done, about a week has passed since completion, everything is holding up perfectly, not the slightest complaint. Oleg independently purchased draft materials, which significantly accelerated the work, for which a separate respect.