Alkaline soil test
How to Test Soil pH With and Without a Kit
First, try household materials to test acid/alkaline at home
By
Erin Huffstetler
Erin Huffstetler
Erin Huffstetler is a frugal living expert who has been writing for over 10 years about easy ways to save money at home.
Learn more about The Spruce's Editorial Process
Updated on 09/26/22
Reviewed by
Barbara Gillette
Reviewed by Barbara Gillette
Barbara Gillette is a master gardener, herbalist, beekeeper, and journalist. She has 30 years of experience propagating and growing fruits, vegetables, herbs, and ornamentals.
Learn more about The Spruce's Review Board
The Spruce / Almar Creative
Project Overview
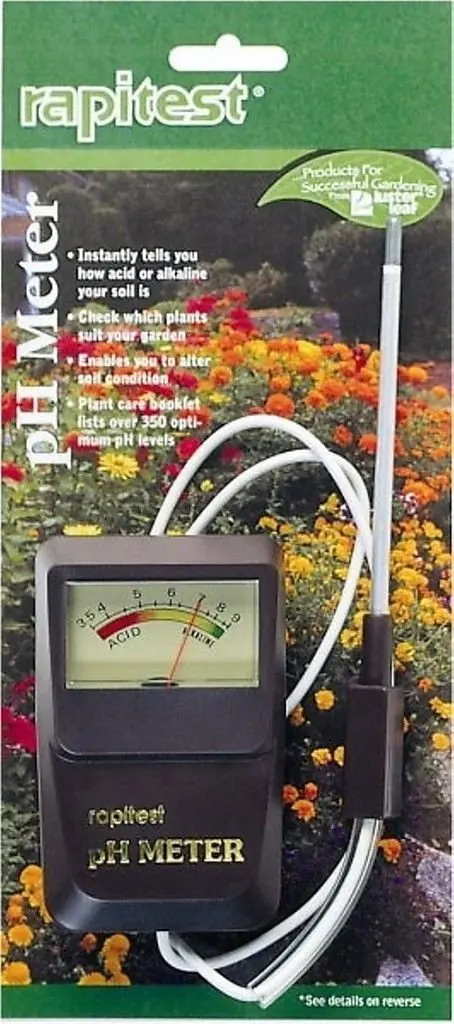
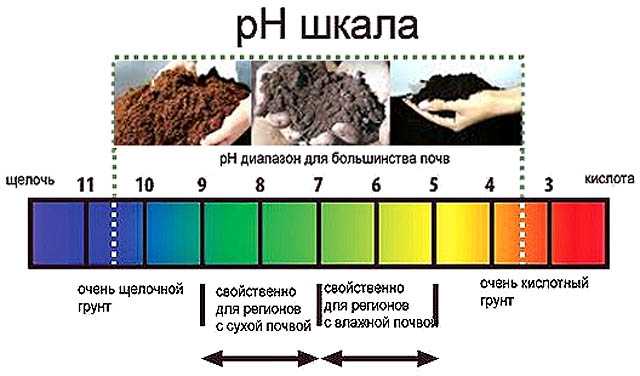
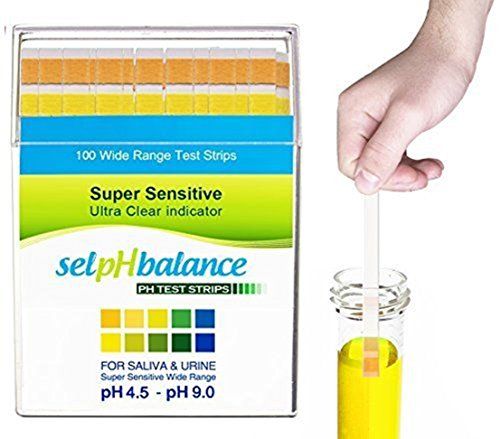
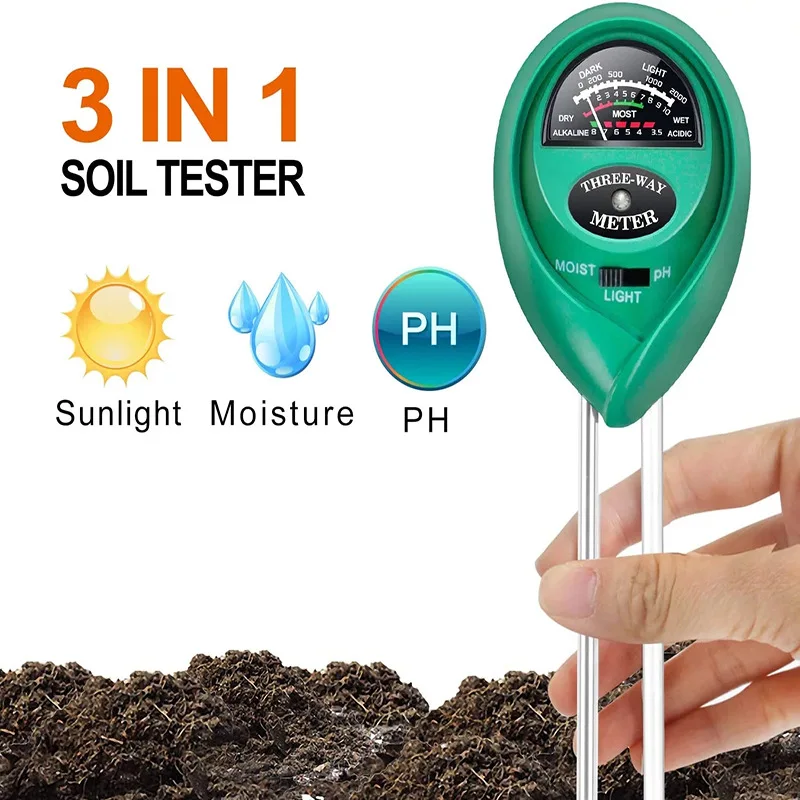
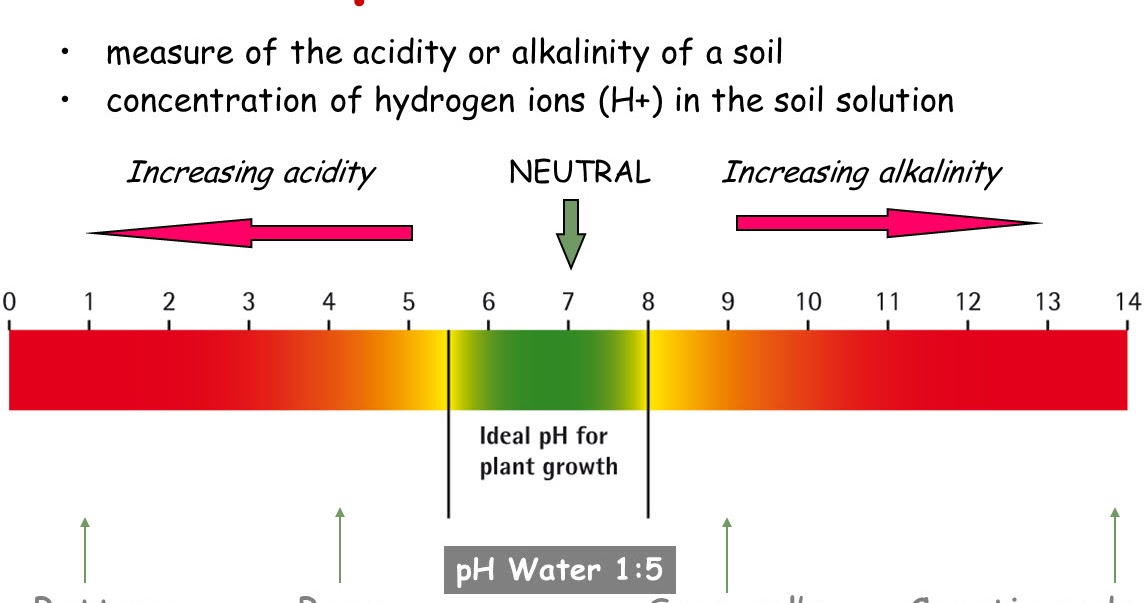
Knowing how to test soil pH is important for proper plant growth. Most plants have a preference for the degree of acidity or alkalinity in the soil, which is measured by a pH scale that ranges from 0 (extremely acidic) to 14 (extremely alkaline). It's possible to have your soil pH tested by taking a sample and sending it away to a lab for analysis (usually for a fee). You also can test your soil pH yourself at home with test strips.
If you don't want to purchase test strips, you can test your soil with baking soda and vinegar. Using these common household items for a DIY soil test will give you immediate results, and the test is easy to conduct. The results won't be as precise as a lab test, but they will give you a ballpark idea of whether your soil is acidic or alkaline. An extreme reaction in either direction will let you know whether you need to amend your soil either to raise or lower the pH.
Tip
Most garden soil across North America is naturally slightly acidic, falling in the 6 to 7 range, and most plants do well in this range. But if you have soil that falls outside this range, you might have trouble growing garden plants, vegetables, or even lawn grass. There are some trees, shrubs, and flowers—such as hawthorn, lilac, and lavender—that prefer a more alkaline soil.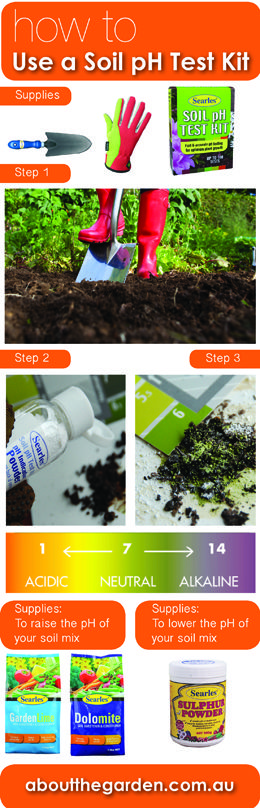 There are also some acid-loving plants, including azalea shrubs, spruce trees, and camellias.
When to Test Soil pH
You won't know if your soil pH is too low or too high unless you test it. You don't want to wait until your plants start to struggle with an incorrect pH, and even then it can be difficult to pinpoint a problem with the pH unless you run a test. Thus, it's a good idea to test soil pH whenever you are planting a new garden bed, you move to a new location, or you are growing a new plant variety that has very specific pH needs.
Some experts recommend that gardeners test the soil every few years, especially when you have needed to amend the soil in the past. The materials used to adjust soil pH, such as elemental sulfur (used to lower soil pH) or lime (used to raise soil pH), break down over time and might need to be reapplied to keep the pH level at optimal levels.
Equipment / Tools
Vinegar and Baking Soda
- Trowel
- 2 small containers
- Measuring cup
- Spoon
Test Strip
- Trowel
- 2 small containers
- Spoon
Materials
Vinegar and Baking Soda
- 1 cup distilled water
- 1/2 cup white vinegar
- 1/2 cup baking soda
- Soil amendments (if needed)
Test Strip
- Distilled water
- Coffee filter
- Soil pH test strip
The Spruce / Almar Creative
Soil pH Test With Baking Soda and Vinegar
-
Collect 2 Soil Samples
To test your soil pH at home, first scoop some soil from the planting area into two clean containers with your trowel.
 Take soil from a few inches below the ground surface. You'll need approximately 1 cup of soil in each container. Break up any clumps, and remove any rocks, sticks, or other debris.
 For best results take a blended soil sample. For example, if you're planting a single garden bed, take a few samples from just that area and mix them together. If you're planting a large area, such as an entire lawn, take samples from many areas of the yard and blend them together for testing.
Testing a blended soil sample will give you the most accurate results because a single garden spot might be atypical of the rest of the soil. For example, a sample taken from an area near a pine shrub might be extra acidic because pine needles tend to add acidity.
The Spruce / Almar Creative
-
Test for Alkalinity
Add 1/2 cup of distilled water to one soil sample container, and mix it up with a spoon. Then, add 1/2 cup of white vinegar. If the soil shows a visible bubbling or fizzing action, then it has an alkaline pH.

The chemical reaction that you're seeing occurs when an acid (vinegar) comes in contact with something alkaline (soil). The more pronounced the fizzing action, the higher the soil pH is. Because most soils are naturally slightly acidic, any reaction at all with this test usually indicates that you have alkaline soil.
The Spruce / Almar Creative
-
Test for Acidity
Now, add 1/2 cup of distilled water to your second soil container, and mix it up. Then, add 1/2 cup of baking soda. If the soil bubbles or fizzes, that means it's acidic.
The reaction you're seeing is the result of acidic soil coming in contact with an alkaline substance (baking soda). Again, the vigor of the action indicates how acidic the soil is. A very small amount of fizzing is natural because most soils are slightly acidic to begin with. But a forceful reaction might indicate that you have very acidic soil.
The Spruce / Almar Creative
-
Amend the Soil if Necessary
If your tests show your soil pH is too alkaline or acidic for your needs, you can blend in amendments to bring the pH into a suitable range.
 Agricultural lime is commonly used to help raise soil pH. But you can also raise the pH of soil without lime by using wood ashes. To lower soil pH and make it more acidic, pine needles and elemental sulfur are traditional amendments used.
 It can be difficult to gauge how much amendment is needed. You can start by amending with small amounts and then repeating your soil pH test at home to gauge where you're at. But if you want to lower or raise the pH of your soil fast, it's often best to invest in a laboratory test to determine exactly the type and quantity of amendment needed. University extension offices usually offer soil pH testing services, and the report you get will give you lots of detail on how to do it.
Tip
Even if your soil has an ideal pH, amending it with compost, peat moss, leaf mold, or another organic material is an excellent idea. Any organic material blended into the soil or applied as a top-dressing mulch will improve its texture and nutrient value.
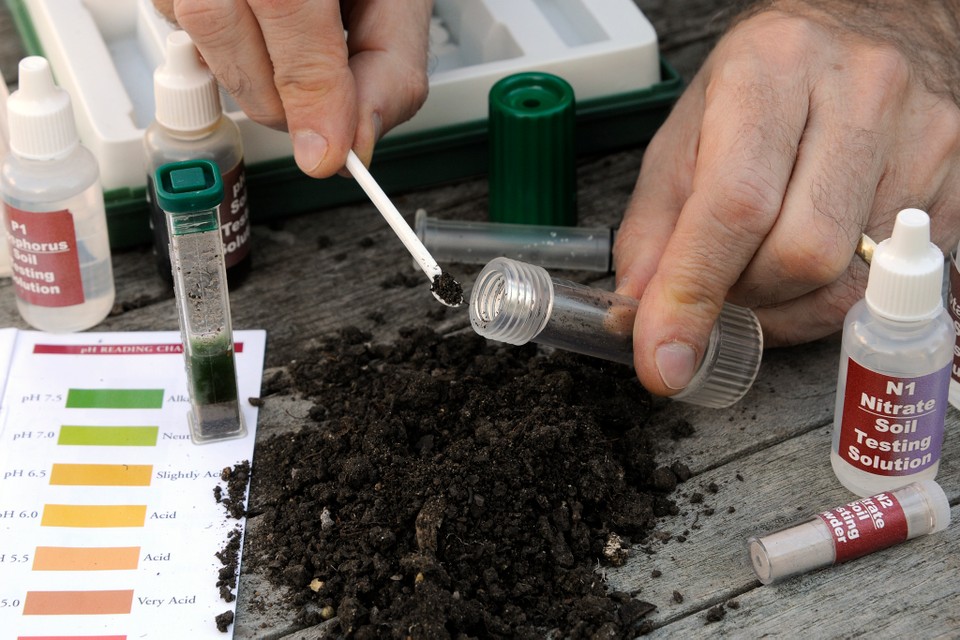
Soil pH Test With Strips
-
Dig for a Sample
Take a blended soil sample from different parts of your planting area. Dig for it with your trowel a few inches below the soil line, and put the soil in your clean container. You'll need about a half cup to a cup of soil; it doesn't have to be exact. Break up clumps, and remove any debris from the soil.
-
Pour in Distilled Water
Pour distilled water into your container up to the same level as the soil. Vigorously stir the mixture, and then let it sit for around 30 minutes.
-
Drain the Sample
Pour the soil sample through a coffee filter and into another clean container. Make sure you are capturing the solids and allowing the liquid to pass through.
-
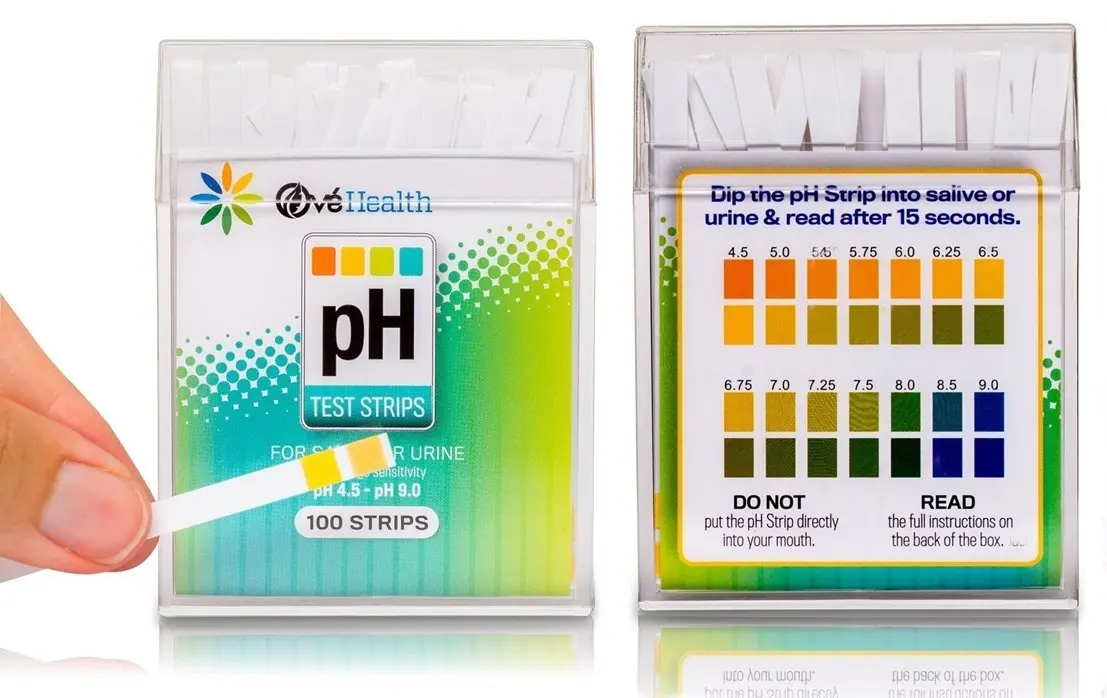
Use the pH Test Strip
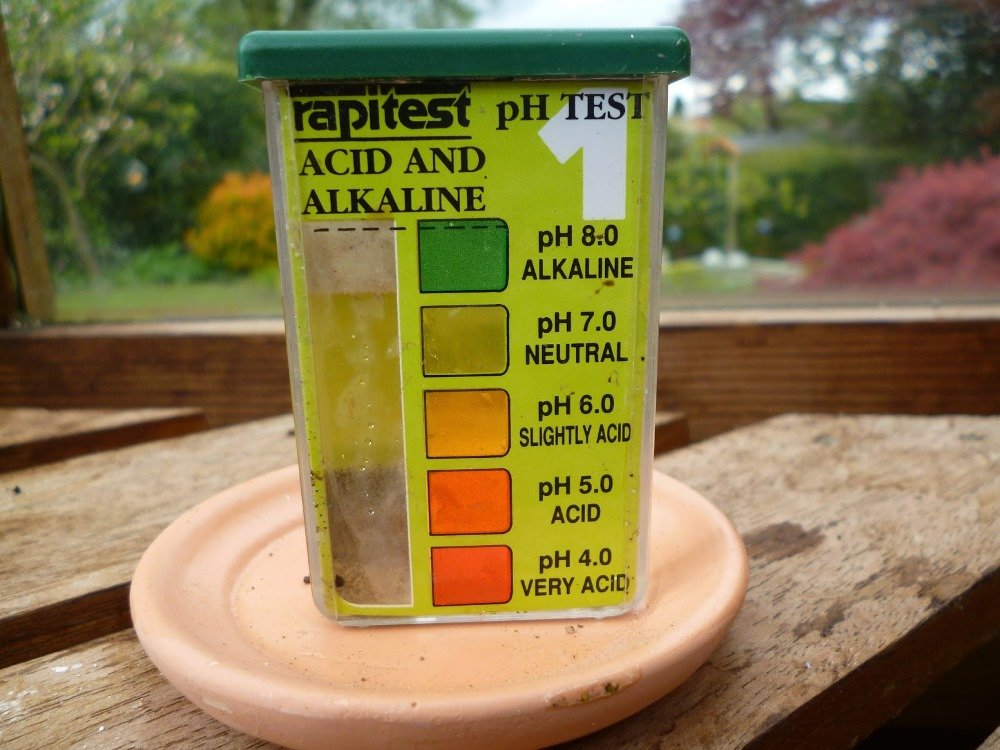
Dip the soil pH test strip into the liquid. Pay close attention to the instructions that came with the test for how long to leave the strip in the liquid.
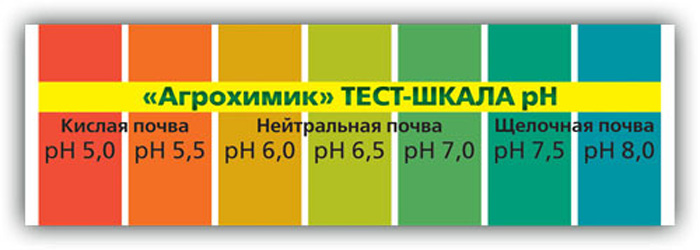 When the strip turns a color, compare the color to the chart on the test strip packaging to determine the pH.
Soil Testing Tips
- You might have different types of soil in different parts of your yard, so consider testing each of your garden beds.
- The DIY soil pH test with vinegar and baking soda will be your cheapest option but also the least specific. Purchasing a test strip kit will be slightly more expensive but more definitive. And a laboratory test will be the most expensive, but it also will give you precise information about your soil.
- If you test your soil pH at home using vinegar and baking soda and neither produces much of an effect, your soil is probably in the neutral range.
- Continue to test and tweak your soil over time. Maintaining healthy soil is an ongoing task.
How to Improve Garden Soil With Amendments
Soil Testing: How to Test Your Garden Soil
Success in the garden starts with healthy soil. Soil—as much as water and sunlight—determines whether plants thrive or die. Getting a soil test is the best way to find out your soil pH and soil health. Learn more about how to get a soil test—plus, learn three DIY soil tests.
Why Get a Soil Test?
Your soil needs to be able to provide nutrients to plants. Otherwise, your plants just won’t grow well. Having the right soil pH (level of acidity) means your plants can take up the necessary nutrients in the soil. If your pH is too high, many nutrients such as phosphorus and iron may become less available; if your soil pH is too low, it can be toxic to plants. Without healthy soil, it is very difficult to have a successful garden.
Another reason we test the soil is because we won’t need to rely on fertilizing the soil too much. If you start with healthy soil, you won’t need so much “fixing.” Before you start dumping on the lime and fertilizers, your first step should be taking a soil sample to send off for testing.
What Will a Soil Test Measure?
A good soil test will evaluate the basic texture of your soil—sand, silt, or clay—and determine its acidity—the pH level.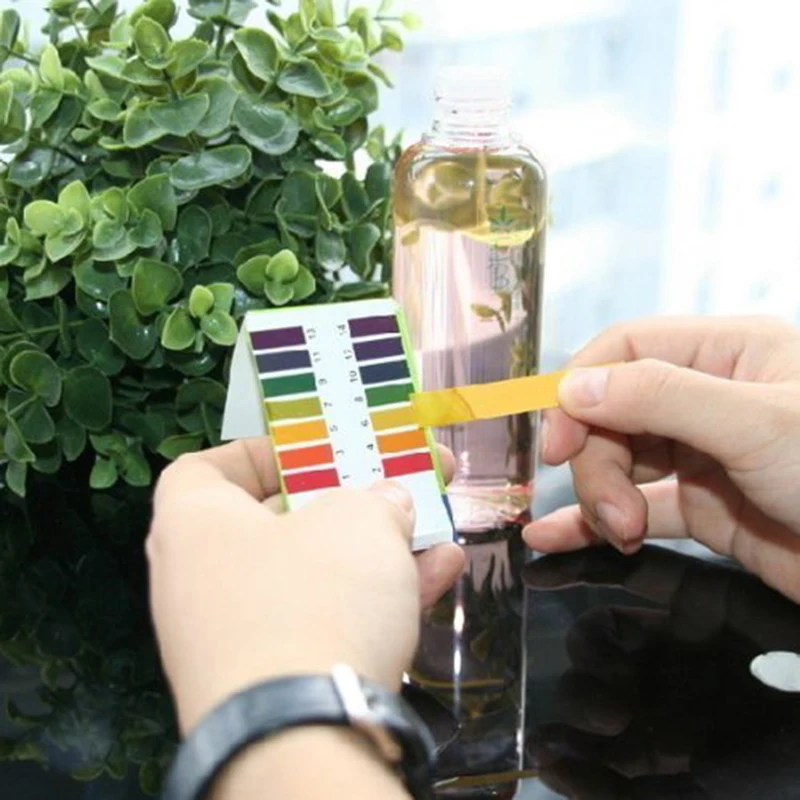 The available amounts of nutrients, including magnesium, calcium, phosphorus, and potassium, will be calculated and recommendations will be made for raising each to the correct levels for optimum plant growth. Armed with this knowledge, you can make the proper improvements. Too much of a good thing can be just as harmful as too little so let your soil test be your guide.
How Often Do You Do a Soil Test?
For optimum plant growth, it is recommended to test your soil pH and nutrient status every 3 to 5 years. You can take soil samples at any time of the year, with fall being preferable. That way, you can get your results and make any fixes in time for spring.
Where to Get a Soil Test
Home test kits are available at gardening centers; they are not as accurate or thorough as professional testing through your local county extension office. And the good news is that your county extension soil test is usually free or low cost. Here’s a list of cooperative extension services by state.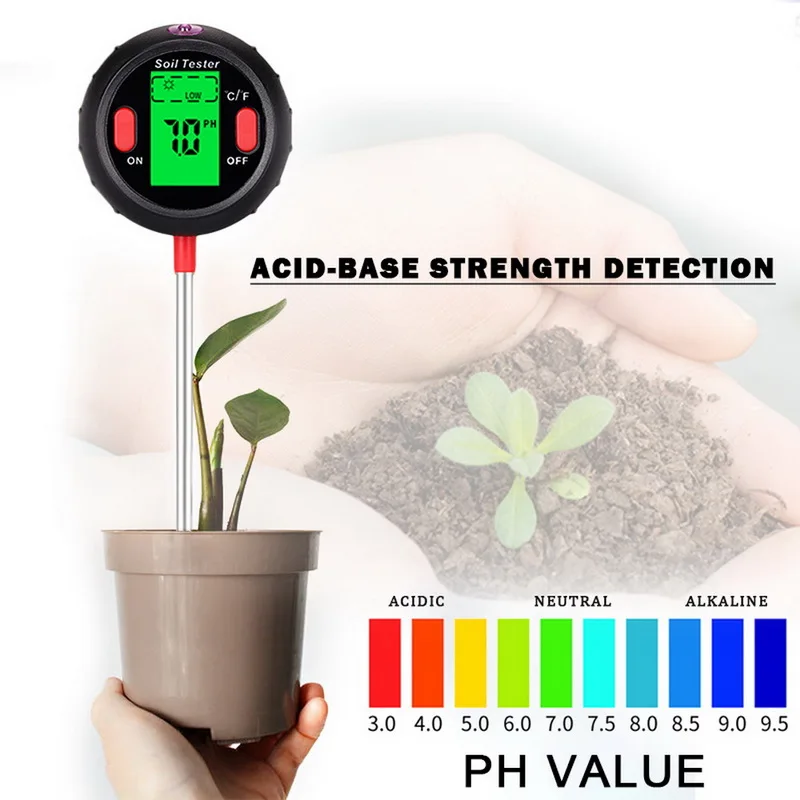
How To Take a Soil Test
- To take a representative sample, scrape away any surface litter, plant residues, leaves, etc.
- Avoid sampling in a spot where ashes have been dumped, manure or compost stored, or brush burned.
- Cut straight into the soil with a shovel or trowel 6 to 8 inches deep making a V-shaped hole.
- Cut a 1 inch wide slice of soil the length of the hole from one side. Take a 1 inch strip from the center of this slice to use in your sample.
- Repeat sampling randomly around the garden and mix the samples together in a clean glass jar or bucket. Since we use raised beds we take a slice from each bed and mix them all together.
- Measure out a cupful of soil, dry it indoors for a few days, and seal in a plastic bag with your information on it.
- Send it in with the proper forms and fees, then wait for your results!
Reading Test Results
When you get your test results, the fertilizer recommendations will be quite specific, and speak to three elements: nitrogen, phosphorus, and potassium.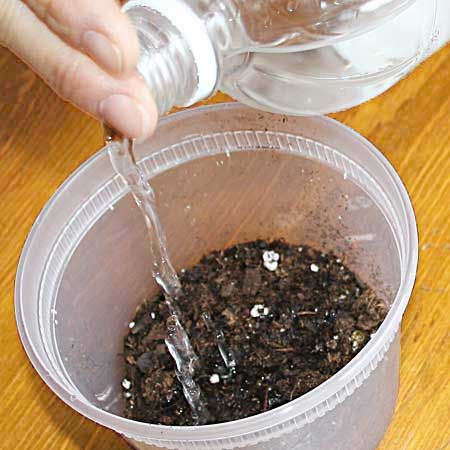
- Nitrogen: N stands for nitrogen, which helps plants make leafy growth. For nitrogen, they will tell you how much manure or compost to use. If you are using fresh manure, spread it on in the fall so it can break down over the winter and be safe for spring planting. If you prefer, dried blood, alfalfa, soybean, or cottonseed meals can be substituted. Nitrogen is released quickly from them, so it is best to wait until spring to add it to your soil. Ten pounds of blood meal supplies the same amount of nitrogen as 10-20 bushels of manure, but without the added benefit of all the organic matter that manure contains.
- Phosphorus: P stands for phosphorus, which is necessary for germination, strong root growth, flowers, and fruit. It helps plants absorb minerals, grow strong stems, and withstand disease. Rock phosphate provides phosphorus, magnesium, and trace minerals. Rock powders are wonderful soil enhancements. They are slow acting but long lasting, so they need to be applied only every 3 to 4 years.
 Bone meal and bone char are more readily available sources of phosphorus.
 - Potassium: K stands for potassium or potash. It regulates the flow of water in plant cells and is necessary for flowering, fruiting, and disease resistance. A lack of potassium will cause plants to have weak stems and stunted growth. For added potassium you can use granite dust or greensand which is made from glauconite, an ocean mineral high in potassium and iron. Wood ashes are also high in potash.
→ See more about NPK Ratios and what this means.
3 DIY Soil Tests
To learn more about your soil and its health, here are three DIY soil tests covering 1) your soil’s texture, 2) soil pH, and 3) soil health.
Soil Texture: The Peanut Butter Jar Test
Find out what kind of soil you have! Healthy soil typically consists of 20 percent clay, 40 percent silt, and 40 percent sand. This should take about 1 hour to set up and a full day to conclude. Find an empty straight-sided jar, such as a peanut butter or mason jar, with a lid, and have a ruler handy.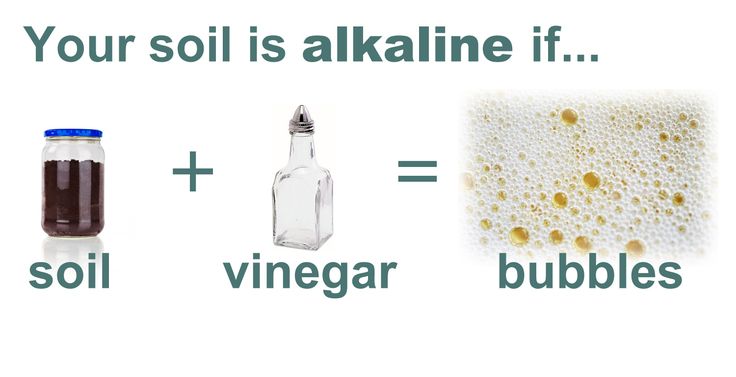 Dig down to root level—about 6 inches—in the area that you want to test and remove enough soil to fill the the jar to between one-third and one-half full. Next, fill the jar to the shoulder with water, then set the jar aside to let the soil soak up the water. Put the lid on the jar and shake it hard for about 3 minutes.
- Set the jar down and look at your watch. In 1 minute, measure (with the ruler) the amount of sediment that has collected at the bottom. This is the sand in your soil.
- Wait 4 minutes more. Measure the sediment again: The difference between the two numbers will be the amount of silt in your soil.
- Take a third measurement in 24 hours. The difference between the second and third number will be the amount of clay in your soil.
Calculate the percentages of sand, silt, and clay, which should add up to 100 percent. Nice, loamy soil will be 20 percent clay, 40 percent silt, and 40 percent sand. This simple test can help you to decide what to grow: If your soil is high in sand, it will be well-draining.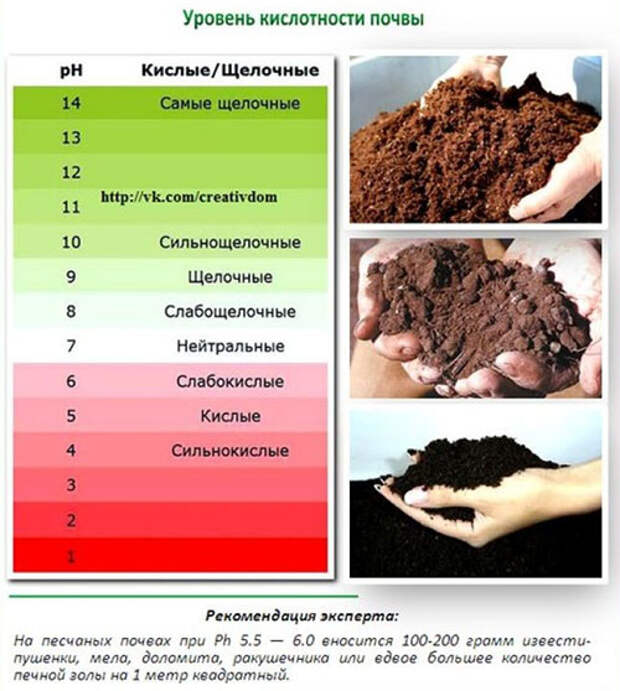 Silt and clay are hard to get wet, but they stay wet; plants that like “wet feet” would be happy here. Choose your plants accordingly and/or amend the soil:
- If you have sandy soil, add humus or aged manure, peat moss, or sawdust with some extra nitrogen. Heavy, clay-rich soil can also be added to improve the soil.
- If you have silty soil, add coarse sand (not beach sand) or gravel and compost, or well-rotted horse manure mixed with fresh straw.
- If you have clay soil, add coarse sand (not beach sand), compost, and peat moss.
→ Learn more about soil amendments and preparing the soil for planting.
Soil Acidity or Alkalinity: The Pantry Soil pH Test
- Place 2 tablespoons of soil in a bowl and add ½ cup vinegar. If the mixture fizzes, you have alkaline soil.
- Place 2 tablespoons of soil in a bowl and moisten it with distilled water. Add ½ cup baking soda. If the mixture fizzes, you have acidic soil.
- If it does not react to either test, the soil has a neutral pH.

- A very high or very low soil pH may result in plant nutrient deficiency or toxicity.
- A pH value of 7 is neutral; microbial activity is greatest and plant roots absorb/access nutrients best when the pH is in the 5.5 to 7 range.
Once you figure out your soil pH, you can change or adjust it. Acidic (sour) soil is counteracted by applying finely ground limestone, and alkaline (sweet) soil is treated with ground sulfur.
→ See a list of Soil pH levels for different plants.
Soil Health: The Earthworm Test
The best time to check for earthworms is in the spring when the soil’s temperature has reached 50°F and its surface is moist. Use a shovel to dig up about 1 cubic foot of soil. Put the soil on a piece of cardboard, break it apart, and look for earthworms.
If your soil is healthy, you should find at least 10 earthworms! If your soil has fewer than 10 worms, add more organic matter—compost, aged manure, leaf mold. Organic matter improves structure, slowly releases nutrients, and increases beneficial microbial activity.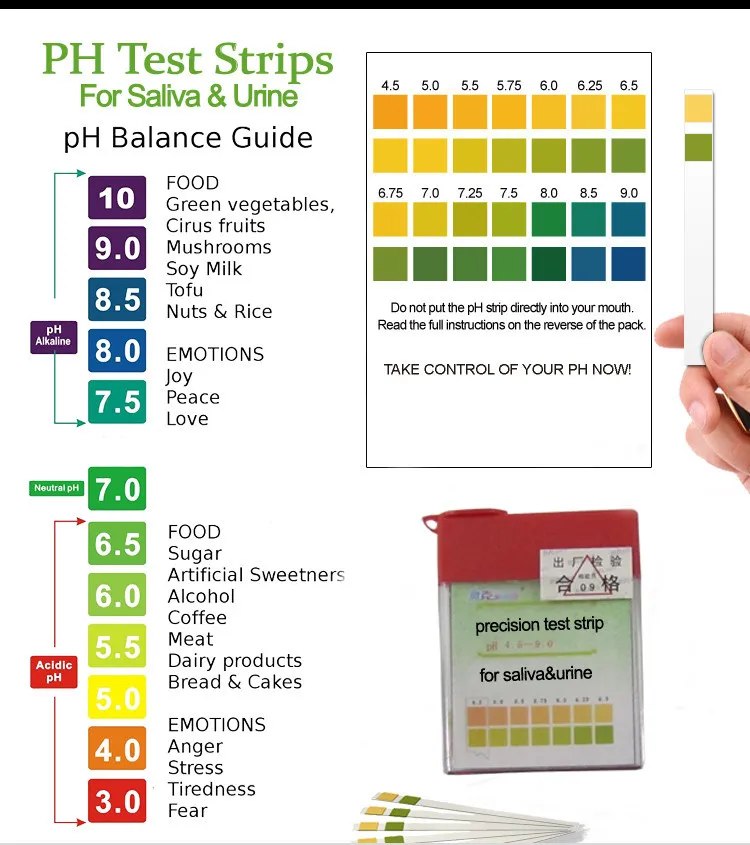
→ Learn more about the wonderful world of earthworms.
Use these DIY tests to gauge the overall health of your soil, but for more granular information, be sure to order a proper soil test as described above!
Four Easy DIY Soil Tests
which you want to grow. If you can learn more about the texture, composition, drainage, acidity, and mineral density of your soil, you will avoid the disappointing results that can result from making sure your soil is not suitable for your dream garden. nine0003
Soil Test #1: Compression Test
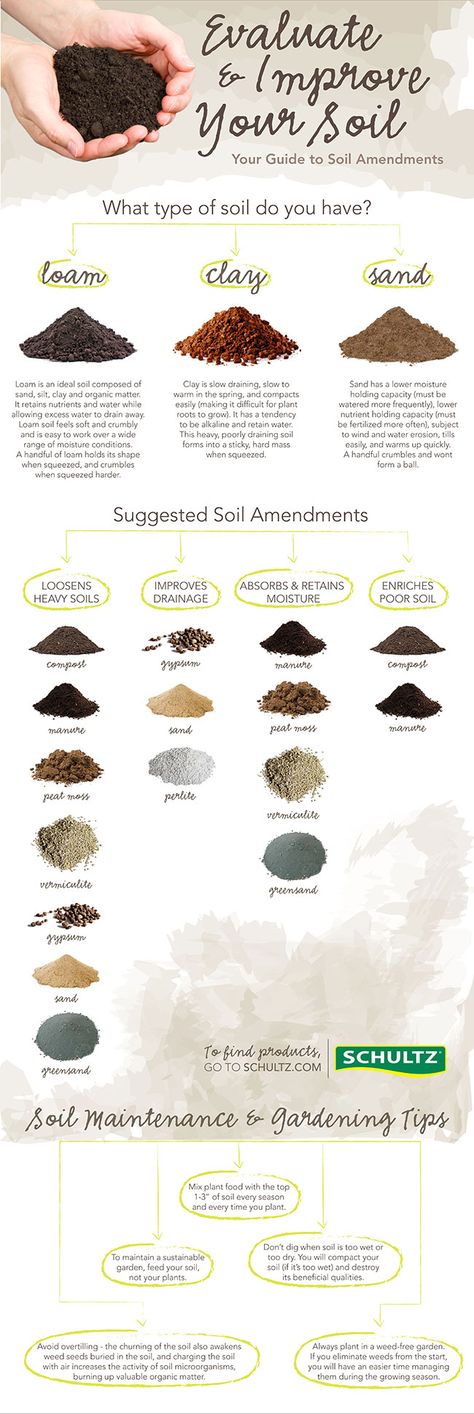
One of the main characteristics of soil is its composition. In general, soils are classified as clay soils, sandy soils, or loamy soils. The clay is rich in nutrients but drains slowly. Sand drains quickly, but has difficulty retaining nutrients and moisture. Loam is generally considered an ideal soil because it retains moisture and nutrients but does not remain damp.
To determine your soil type, take a handful of damp (but not wet) soil from your garden and squeeze it firmly.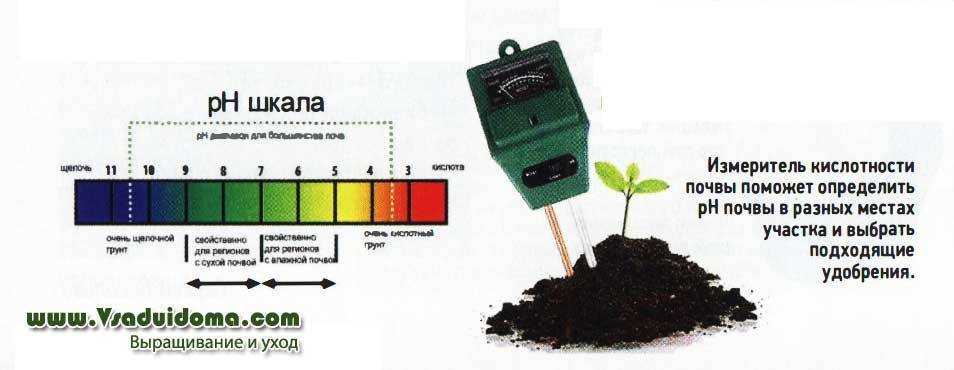 Then open your hand. nine0003
One of three things will happen:
- The soil holds its shape, and if you poke it lightly, your clod will crumble. You are lucky - it means you have a luxurious loam!
- The soil will hold its shape, and when pressed, your lump will only deform. So you have clay soil.
- The soil will fall apart as soon as you open your hand. This means you have sandy soil.
Now that you know what type of soil you have, you can work on improving it. nine0003
Soil Test #2: Seepage Test
It is also important to determine if you have drainage problems or not. Some plants, such as some culinary herbs, will eventually die if their roots are left too wet.
To check soil drainage:
- Dig a hole about 10 centimeters wide and 30 cm deep.
- Fill the hole with water and let it drain completely.
- Refill with water. nine0022
- Keep track of how long it takes to drain the water.
If the water drains for more than four hours, you have poor drainage.
Soil Test #3: Worm Test
Worms are excellent indicators of overall soil health, especially in terms of biological activity. If you have earthworms, chances are you may also have all the beneficial microbes you need for healthy soil and strong plants.
To test for worms:
- Make sure the soil is at least 13 degrees warm and at least slightly moist but not wet.
- Dig a hole 30 cm wide and 30 cm deep. Place the soil on a tarp or piece of cardboard.
- Sift the soil with your hands as you put it back in the hole, counting earthworms as you go.
If you find even ten worms, your soil is in pretty good condition. A lower value indicates that your soil may not have enough organic matter to support a healthy worm population, or that your soil is too acidic or alkaline. nine0003
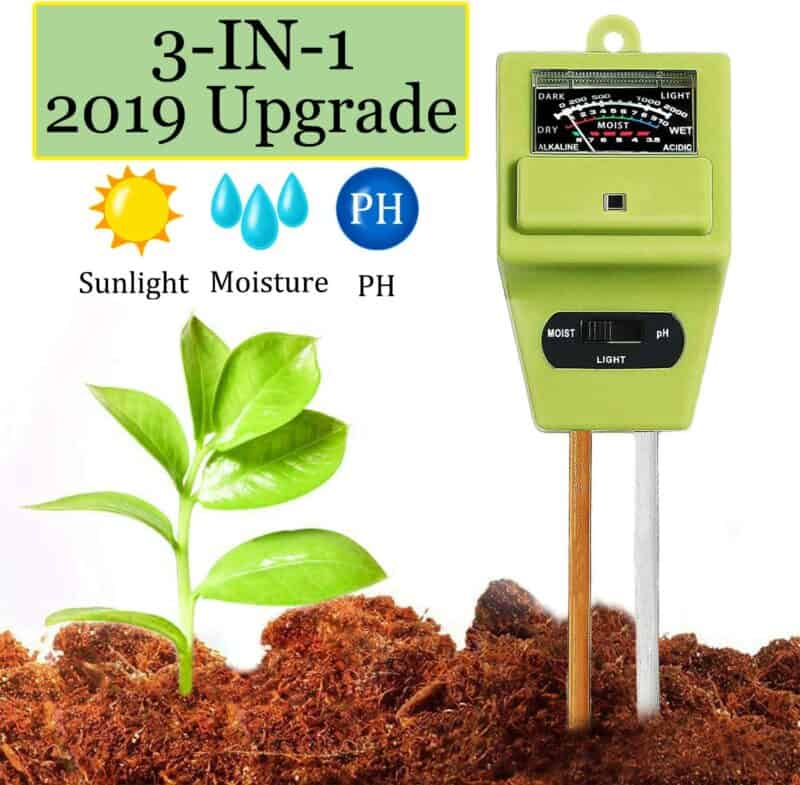
Soil Test #4: pH Test
The pH level (acidity level) of your soil largely depends on how well your plants grow.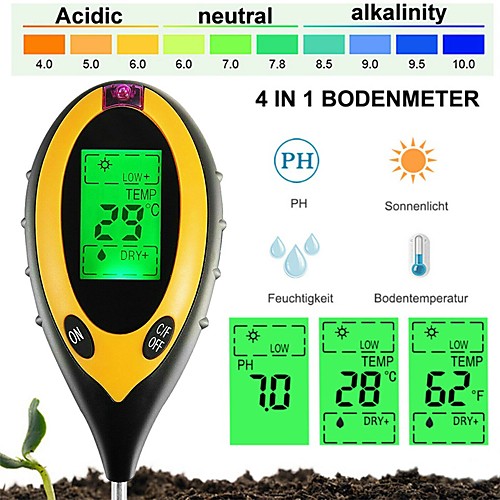 pH is measured on a scale from zero to 14, with zero being very acidic and 14 being very alkaline. Most plants grow best in soil with a fairly neutral pH, between six and seven. When the pH is below five or above eight, plants simply won't grow as they should.
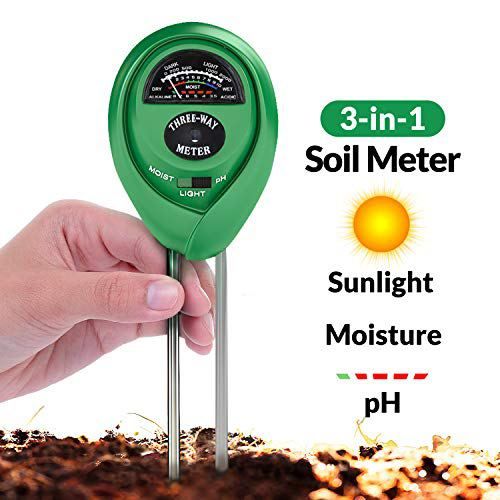
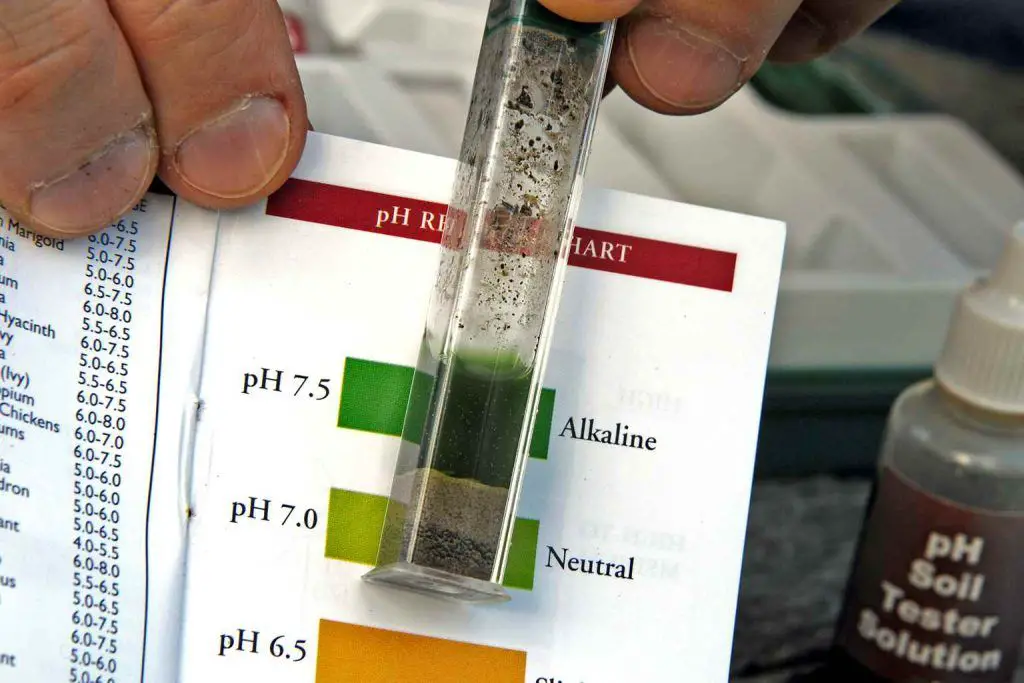
Every home and garden center has pH test kits. These kits are fairly accurate, but you must follow the testing instructions exactly. Once you know if your soil's pH is a problem or not, you can start working on fixing it. nine0003
If you find that you've done all of these tests and changed the soil as needed to correct problems, and your plants are still struggling, the next step is to contact your local cooperative extension service. They will tell you how to collect a soil sample and send it to their lab for analysis. They will return a report that will alert you to any mineral deficiencies in your soil, as well as steps to correct the problems.
These tests are simple and inexpensive ways to make sure your garden has the best foundation possible.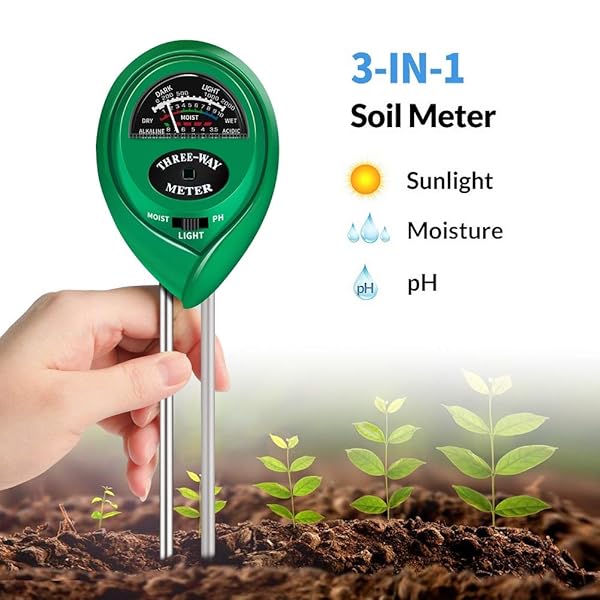 nine0003
Sergey Ermashkevich / author of the article
For many years I worked in a construction hypermarket in the garden and vegetable garden department, studied plants and at the same time everything that could be useful to me for arranging my personal home, garden and kitchen garden. Now I am happy to share this knowledge with you.
Soil science intermediate test | Test:
Intermediate test in the section "Soil Science"
35.02.12 "Gardening and landscape construction"
EP Fundamentals of soil science, agriculture and agrochemistry
SP group - 04
Teacher: Efimova N.G.
1. Recognized as the founder of scientific soil science
1. Lomonosov M.V.
2. Dokuchaev V.V.
3. Vernadsky V.I.
4. Sukachev V.N.
2. The leading process of soil formation is:
1. Biological cycle of substances
2. Geological cycle of substances
3. Climate
4. Relief
3. The group of soil formation factors includes:
1. Climate, seas and oceans, rivers, quicksand, people
2. Climate, soil-forming rocks, living and dead organisms
3. Climate, soil-forming rocks , living and dead organisms, relief, time
4. Climate, soil-forming rocks, living and dead organisms, relief,
time, anthropogenic activity
5. The founder of genetic soil science did not consider soil formation as a factor
1. Time
2. Climate
3. Human activity
4. Soil -forming rock
6. Energy of soil formation is primarily associated with
1. Climate
2. Waters
3. relief
4. anthropogenic factor
7. Soil composition can be:
1. dense
2. loose
3. crumbly
4. all of the above
nine0003
1. Inclusions
2. Structure
3. Structure
4. New formations
not associated with the process of soil formation
3. External expression of the density and porosity of soils
4. The ability of the solid phase to aggregate and naturally break up into stable units
10. The sum of fractions whose particle size is less than 0.01mm is called
1. Physical sand
2. Soil skeleton
3. Physical clay
4. Sandy loam
in soil is called
1. Granulometric composition
2. Aggregate composition
3. Mineralogical composition
4. Chemical composition
12. Soil layers with more or less the same morphological features are called:
1. Soil profile
2. Genetic horizons
3. Soil
4. Pitting
13. The method uses the method:
1. Suburb
2. Dry
3 to determine the granulometric composition of the soil. wet
4. dry and wet.
14. The essence of the dry method for determining the granulometric composition of the soil:
1. in the rolling of the cord
2. in the separation of sand and clay in water, due to different falling speeds of mechanical elements
3. in rubbing soil lumps with fingers
4. in sifting soil through sieves
15. In field conditions, clay can be determined by the wet method according to the following description: when rolled up
3. Cord solid, ring with cracks
4. Cord solid, ring resistant
16. In the field, wet sand can be identified by the following description:
1. The cord is not formed
2. The rudiments of the cord are formed
3. The cord is solid, the ring breaks up when rolled up
4. The cord is solid, the ring is cracked
17. The mineral composition of the soil, its chemical and physico-chemical properties depend mainly from:
1. Plants
2. Soil-forming rocks
3. Groundwater
4. Terrain relief
18. Humus is:
1. Litter entering the soil
2. High molecular weight colloidal organic substance of phenolic nature
3. Organic substance that has lost its anatomical structure
4. The totality of soil microorganisms
19. Humus contains:
1. Humic acids 90,03 2 Humic acids, plant and root litter
3. Semi-decomposed organic compounds
4. Fulvic acids, root and plant litter
20. The most abundant and diverse group of soil microorganisms
1. Actinomycetes
2. Fungi
3. Algae
4. Bacteria
2. Increase in the concentration of solute molecules on the surface of solid soil particles surrounding colloids
3. Exchange of part of the cations contained in the solid phase of the soil for cations of the soil solution
4. Absorption by soil biota and plant roots of substances from soils
22. Connectivity, plasticity, stickiness, shrinkage - it's all
1. general physical properties
2. water-physical
3. physical-mechanical
3 4. agronomic
23. Soil swelling is:
1. The ability of the soil to change its shape under the influence of some external force
2. The property of the soil to stick to other bodies
3. The increase in soil volume when moistened
4. The ability to resist the external effort, striving to disconnect soil units
24. Gravitational water belongs:
1. To hygroscopic moisture
2. To free moisture
3. To the associated moisture
4. For film moisture
25. The gravitational moisture of the soil is:
1. the total amount of water contained in the soil
2. the water that forms capillary columns, but does not merge with groundwater below
3. amount of water absorbed by the surface of solid particles
4. water moving freely through the pores under the action of gravity
26. Capillary-suspended moisture in the soil is: with groundwater
2. water forming capillary columns, merging below with groundwater
3. water moving freely through the pores under the action of gravity.
4. Water absorbed in the surface of solid particles
27. Moisture is available to plants:
1. Frolled
2. Free
3. Hygroscopic
4. Crystalline
28. The greatest water permeability has soils:
1. Clay
2. Sandy loamy
3. Loamy
4. Sandy
29. Air permeability of the soil is:
1. the property of the soil to pass air through the pores
2. total volume of pores free from moisture
3. total volume of all pores
4. air content in the soil in volume percent
30. Actual soil acidity is:
1. ability of the soil to absorb gases solid phase acidity
3. soil solution acidity
4. solid phase and soil solution acidity
31. Soil buffering is:
1. soil property to maintain a constant soil solution reaction
2. property of the soil to maintain an acid reaction of the soil solution
3. property of the soil to maintain an alkaline reaction of the soil solution
4. property of the soil to acidify the soil solution
nutrients
2. property of the soil, measured by the value of the crop
3. the ability of soil to yield plants
4. property of the soil formed under natural vegetation during the natural course of soil-forming processes
33. Effective fertility is formed under the influence of:
1. natural factors
2. human activities
3. natural factors and human activities
4. nature of vegetation cover
34. Soil evaluation is:
1
2. assessment of soils by profile depth
3. assessment of soils by the nature of effervescence
4. assessment of soils by thickness
35. The most favorable conditions for humus formation and humus accumulation are in the natural zone:
1. Peat formation process
2. Podzolic horizon
3. Carbonation process
4. Intrasoil weathering
37. Chernozem soils are formed
1. in the semi-desert zone
2. in the forest-steppe and steppe zones
3. in the taiga zone
4. in the arctic zone
38. Gray forest soils develop in forest-steppe conditions
9002 0.023. Little forests
4. Taiga
39. Subzolas develop in conditions:
1. Steppi
2. Forests
3. Lifting forests
4. Taigi
40. Select three correct answers and select three correct answers and circle their numbers
The group of soil formation factors includes:
1. Climate
2. Seas and oceans
3. Wind
4. Pre -forming rocks
5. Rivers
6. Living and dead organisms
41. To morphological Soil characteristics include:
1. Amount of humus
2. Composition of exchangeable cations
3. Color
4. Structure
5. Mineralogical composition
6. Neoplasms
003
42. Complete the definition by filling in the missing word instead of the ellipsis
The ability of the soil mass to naturally break up into separate parts or
aggregates of various shapes and sizes is called -………………….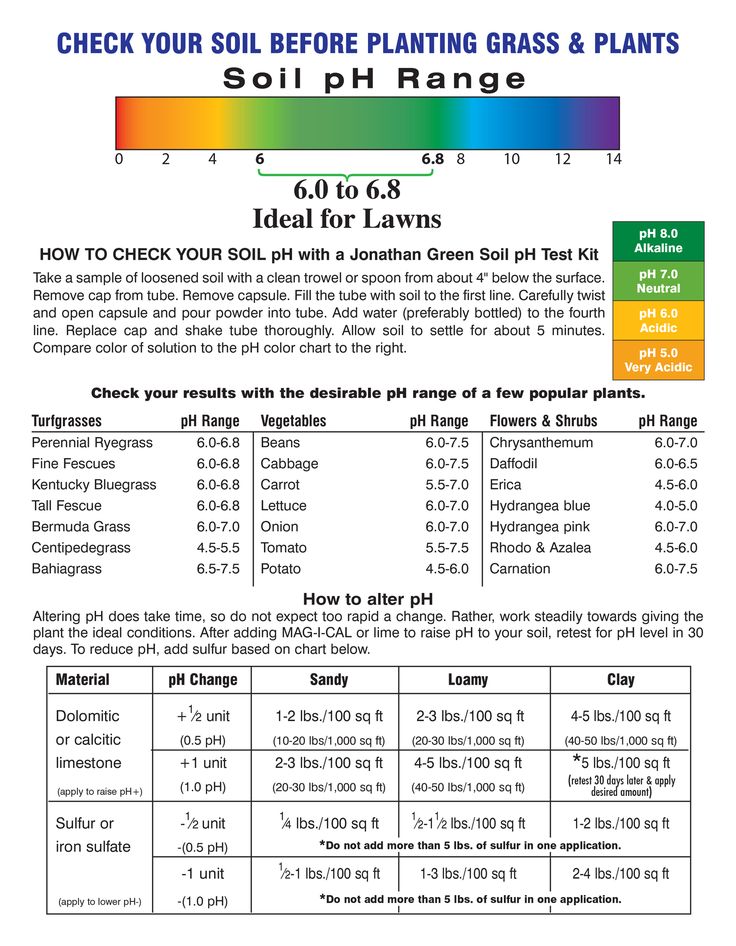
structure
43. Complete the definition by inserting the missing word instead of an ellipsis
Foreign bodies that are not genetically related to soil horizons are called - ……………….
inclusions
44. Establish the sequence of soil particles in order of decreasing size of their fractions by entering the corresponding letters in the answer. nine0003
A. Sand -3
B. Dust - 4
C. Stones-1
D. Gravel-2
E. Colloids -5
, formed in the upper part of the soil profile, where the maximum amount of ground and root plant residues enters, having the darkest color is called -……………………
Humus
46. Complete the definition by entering the missing word instead of the ellipsis
The horizon formed in the middle part of the profile due to washing in of relatively mobile products of soil formation is called -…………………..
illuvial
:
A. Sandy-1
B. Sandy-loamy-2
C. Clay-4
D.![]()