Wreath ideas with burlap
How to Make a Burlap Wreath – 3 Easy Styles! – The How To Mom
206 shares
- Share
Learn how to make a burlap wreath with rustic burlap ribbon, using one of three different and very easy step by step tutorials! Burlap wreaths are the perfect base wreath for any seasonal embellishments.
Its easy to make a burlap wreath, this project is fool-proof, even if you don’t consider yourself “crafty.” There are three different techniques that each have a slightly different look, and are very simple to make. All you need is a couple spools of burlap ribbon, a wire wreath frame, wire or pipe cleaners and less than an hour, and you’ll have your very own burlap wreath, perfect for any decor or season!
Burlap Wreath for Every Season
Because of their neutral color and style, wreaths made from burlap can be modified to use for any season or holiday. They are a perfect blank canvas for any decorative accent or embellishments!
Spring is the perfect time to use a burlap wreath. Bunnies, spring carrots, tulips and burlap all go together beautifully. For a spring burlap wreath, a small bunch of tulips tied with a springy pastel plaid bow would be lovely.
Summer and burlap is also a great combination. Sunflowers, daisies, magnolias and cotton all go great with burlap. An Americana style bow with a sunflower or two would look great on a burlap wreath.
And of course fall and burlap are a great match. Rustic fall leaves and mums pair perfectly with a burlap wreath.
Even in the winter, burlap wreaths can be a great choice. They are a beautiful base for wintery greenery and a crimson or ivory bow.
I have a fantastic and super easy bow tutorial, if you need some help making bows for your wreaths for each season. I promise you can make a pretty bow in a few minutes!
How to Make an Easy Burlap Wreath
To make a burlap wreath, you need:
- wire wreath form (more about wreath forms here)
- burlap ribbon (I used a little less than two 20 ft spools of 6″ burlap ribbon for each wreath)
- Pipe cleaners or floral wire
Depending on which burlap wreath tutorial you choose, it typically takes less than an hour to make a burlap wreath, from start to finish.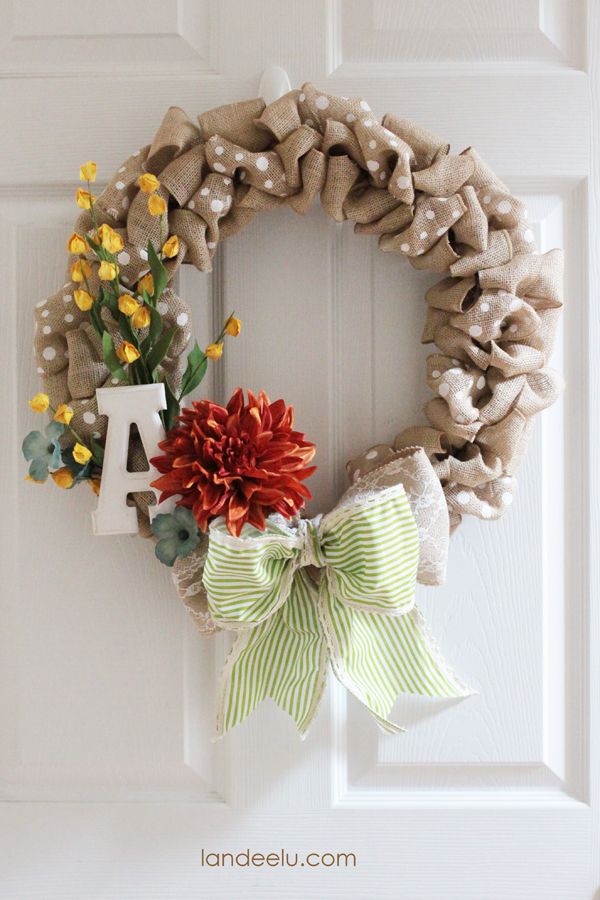
Burlap wreaths can be made to be as full and poofy or streamlined as you like. To make the wreath more poofy, you’ll need more burlap ribbon to create the depth and fullness. Using less ribbon creates a more classic look.
For my exact supplies, I used
- 14″ wreath form from Dollar Tree
- 6″ burlap ribbon (2 spools)
- pipe cleaners
The Three Basic Burlap Wreath Techniques
Burlap wreaths, much like ribbon wreaths or deco-mesh wreaths, are made with one of three basic styles:
- Push-up
- Ruffle
- Poof
There are variations on each of these, depending on width of burlap ribbon and whether you want to add in ribbons or mesh with the burlap. But to keep things easy, I have decided to simplify this tutorial down to these three burlap wreath styles.
Push-up Burlap Wreath Instructions
This is probably the most popular burlap wreath technique. Most of the tutorials online or on Pinterest are this style.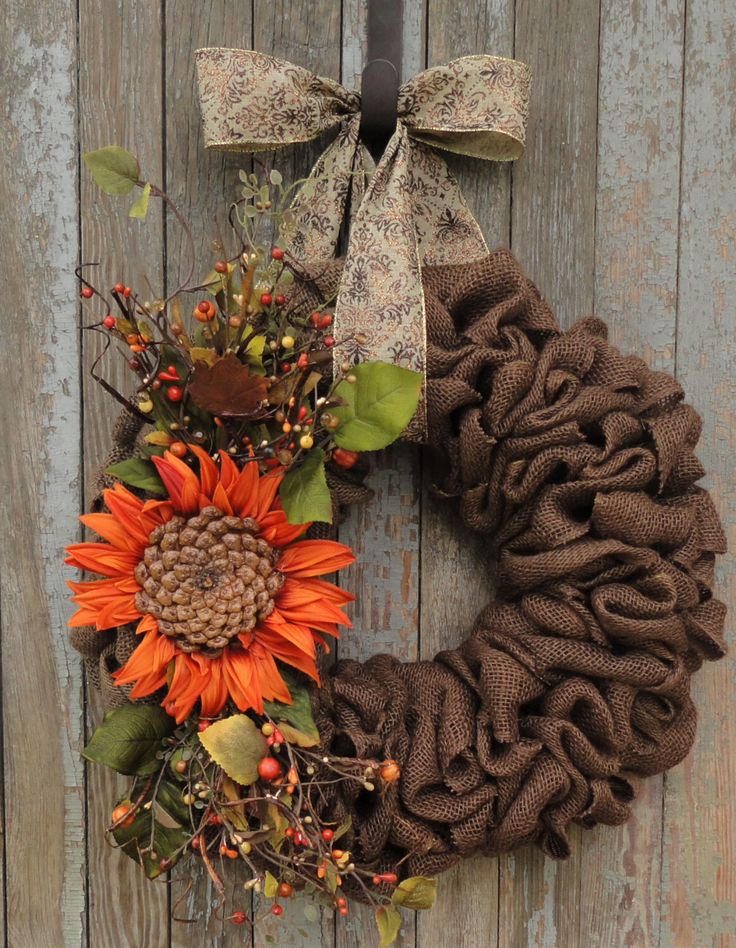 Its easy because its just weaving the ribbon up and down through the wire frame. There isn’t any cutting and securing the burlap to the frame, besides the very beginning and the end.
To create this type of wreath, start by securing the end of the 6″ burlap ribbon to the underside of the wire wreath frame. You can use floral wire or pipe cleaner, or even zip ties if you want to.
Now you can start pushing the burlap ribbon up in between each horizontal wired section, to create three “loops”. Try to make them equal sizes.
Now repeat by twisting the underside of the ribbon a little and then pushing it up through the three openings again. You can start to “scrunch” the previous loops.
Keep pushing up loops in groups of three. You can repeat it as much as you’d like within each wired section, depending on what look you prefer. For this wreath, I did three groups of three within each section.
If you run out of ribbon, you can wire the end of one burlap ribbon to the end of the next. And then continue on pushing up loops.
Once you’ve finished pushing loops up around the entire wreath frame, secure the end of the burlap to the beginning of the burlap.
And that’s it! You can twist and scrunch and fluff the loops to create a full and uniform look.
Ruffle Burlap Wreath Instructions
I really wanted to call this style the “taco technique”, for reasons you’ll soon understand! This is another easy burlap wreath tutorial, and its pretty fun to do!
To create this ruffly burlap wreath, start by securing the end of the 6″ burlap ribbon to the underside of the wire wreath form.
Start by pulling the sides of the ribbon up parallel to one of the two inner wires (we’ll use both wires, one at a time), kind of creating a taco shape with the burlap and the wire. The wire should lay on top of the middle of the burlap ribbon.
To create the ruffles, continue to pull the burlap ribbon through, along the wire. I like to hold the top edges of the burlap and pull them up as I go along. Pull up as much ribbon as you’d like, to make it as ruffly as you like. Just try to be consistent for each section.
When you get to one of the cross wires, just continue pulling the ribbon up into the next section. You don’t need to cut and reattach the ribbon, you can just keep going. When you run out of ribbon, you can just start threading the next ribbon through, no need to really secure it.
Once you’ve gone around the whole wreath and are back to the beginning, switch to the other inner wire and repeat the taco ruffle technique on that wire, all the way around.
When you finish the second wire, and are back at the beginning point again, cut the burlap ribbon and attach it to the frame. All done! Easy pease ruffly burlap wreath!
Poof or Bubble-Style Burlap Wreath
This method is a fun technique, and can be really versatile. It would be easy to layer a decorative ribbon on top of the burlap. I used a 6″ burlap ribbon, but a wider ribbon would be really pretty as well.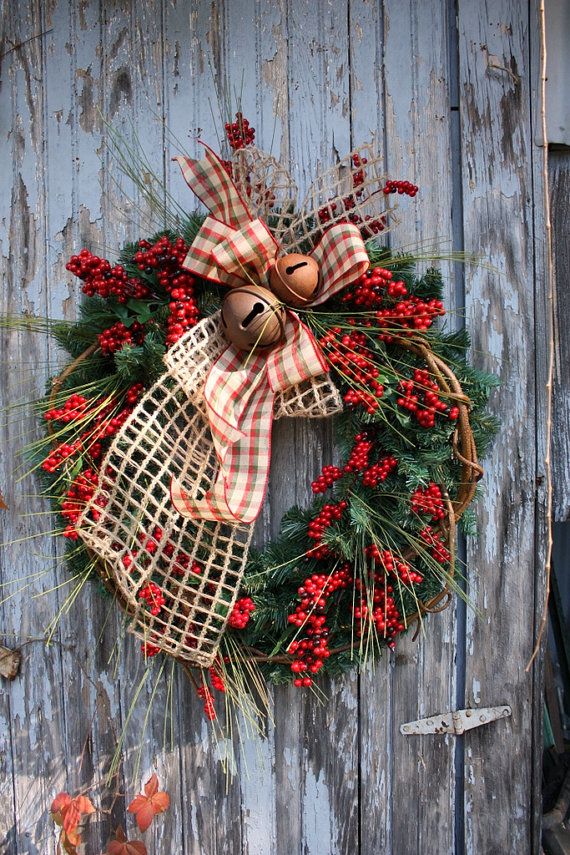 You’ll need a lot more pipe cleaners or wire to make this style. I keep a pile of pipe cleaners cut in half, ready to go.
To start, secure the end of the 6″ burlap ribbon to the top side of the wire wreath frame, along the two inner wires, at a vertical junction.
To make the poofs, measure a length of burlap ribbon. I use my hand held vertically to measure the burlap consistently and easily. You can also use a small ruler if you want to be precise.
Bunch the burlap and secure it with the wire or pipe cleaner.
Then attach it to the wreath frame. I like to just use the inner two wires, but depending on how big and full you want your wreath, you can use as many or whichever wires you’d like.
Continue measuring and securing poofs, attaching the same amount of poofs to each section of the wreath. For this wreath, I liked 8 poofs per section.
Continue around the entire wreath, attaching a second spool or burlap ribbon, if necessary. You can just tuck the ends towards the back.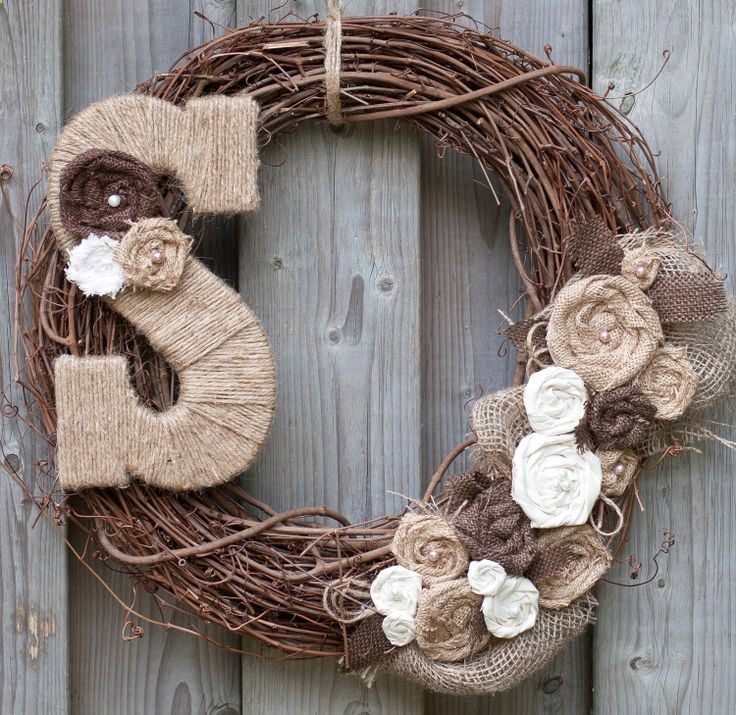
All done!
You’ll likely need to adjust the poofs to be spaced evenly and to make sure the wires aren’t showing. I pull the loops apart from each other to cover up the wire frame. Also make sure to tuck in the ends of the pipe cleaners or wires so they aren’t visible either.
Burlap Wreath FAQs
Here are some commonly asked questions about making burlap wreaths. If you have a question that I haven’t answered below, feel free to email me at thehowtomom @ gmail.com and I’d be happy to answer!
How much burlap ribbon to I need to make a wreath?
For each of these wreaths, I used about 30 feet (or 10 yards) of 6″ wide burlap. If you use a wider burlap, you might not need as much. If the burlap you want to use is skinnier than 6″, I’d consider using my ribbon wreath tutorials.
Where is the best place to buy burlap?
Its easy to find burlap at most craft stores and discount stores. The quality can vary from place to place, and you typically get what you pay for.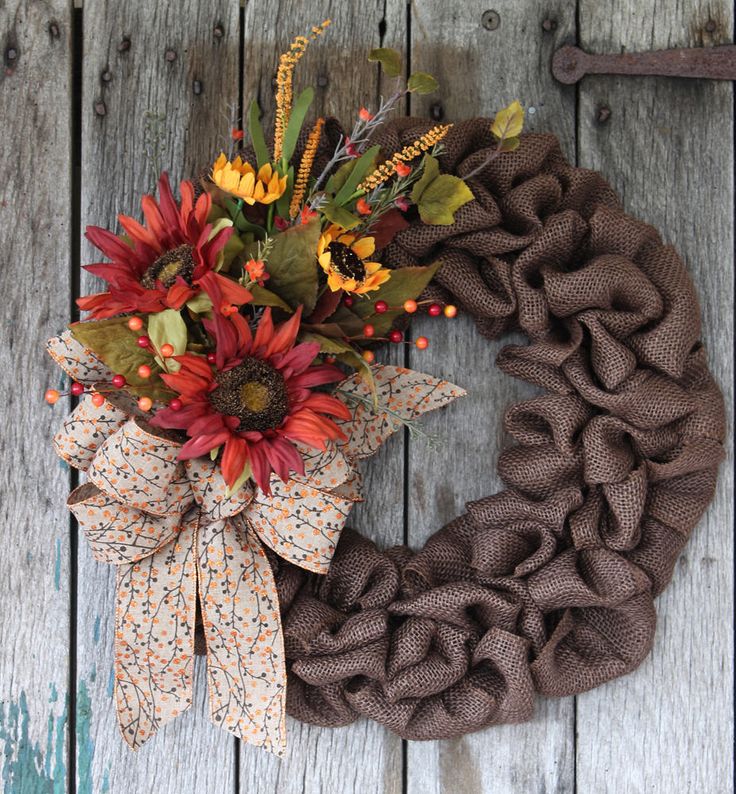 I like to buy my burlap ribbon at Michaels, I buy this one: 6″ Burlap Garland, Tight Weave.
How do you decorate a burlap wreath for holidays?
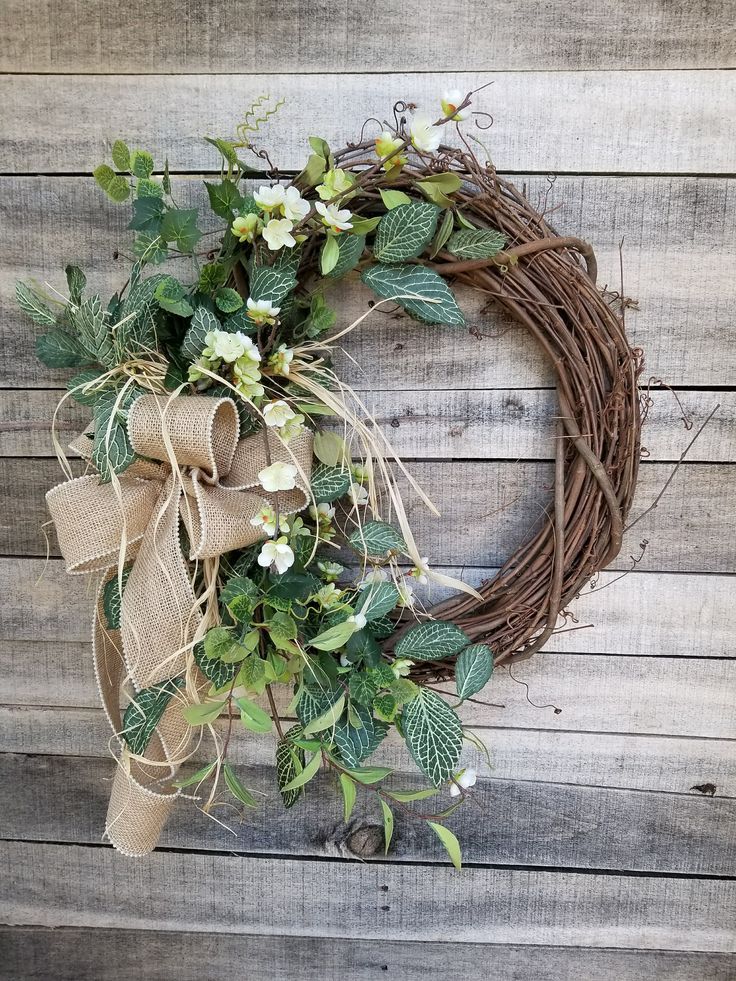
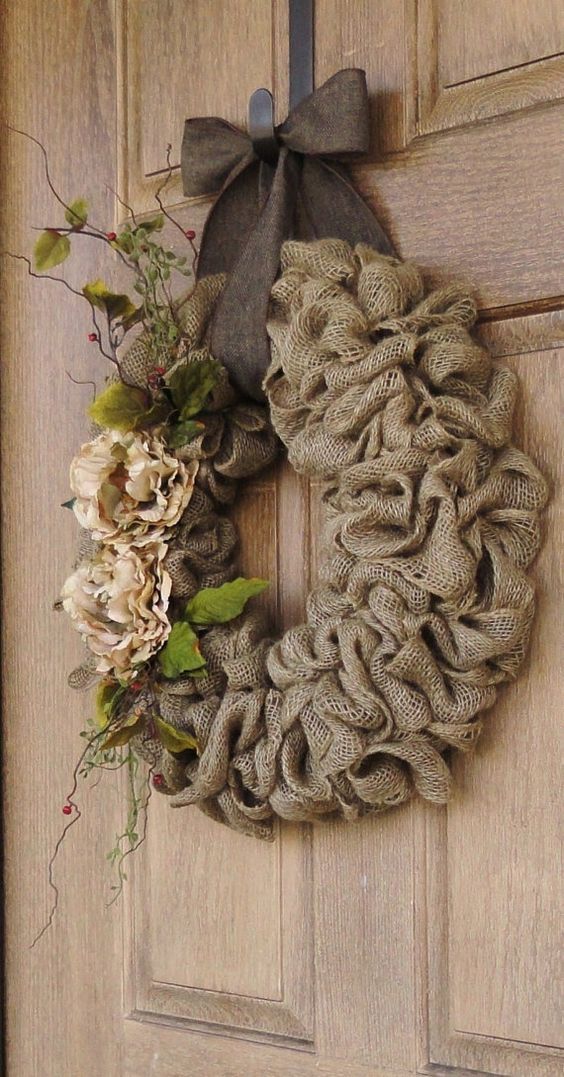
Wreath made out of burlap are a great neutral base wreath, that can easy accommodate a variety of flowers, bows and embellishments. Decorations can be attached with either wire or hot glue. Create a small “bouquet” with some flowers, attach a bow and voila!
For more gorgeous wreaths, check out my Beautiful Wreaths Pinterest board for more ideas and inspiration. I also have LOTS of wreath tutorials right here on my site. Happy crafting!
- Author
- Recent Posts
Kylie
Kylie is the original founder of The How To Mom website. She is a mother of three and enjoys crafting, especially making gorgeous wreaths.
Latest posts by Kylie (see all)
Did you find this article helpful? Let us know!
Make Your Own Beautiful Living Succulent Wreath Centerpiece! Complete video course by Jeannine Romero now available through Skillshare.
206 shares
- Share
Burlap Wreath Tutorial for Beginners
A burlap wreath tutorial is perfect if you want to transform your outdoor home this season. If you love all of the burlap wreaths that you see on Pinterest, in home decor magazines and at your favorite arts and crafts store, but have been afraid to make them, then this quick and easy tutorial is for you! All you will need are some simple materials such as burlap ribbon, a wire wreath frame, and other tools to get started with. What we love about burlap wreaths are their versatility. They can be rustic and vintage looking or you can make them modern with simple embellishments. Don’t feel like you have to make your burlap wreath look exactly like the ones you see on Pinterest – Burlap Wreaths. Be creative and start with this one first, then move on to different sized shape wreaths, different ribbon types, and more.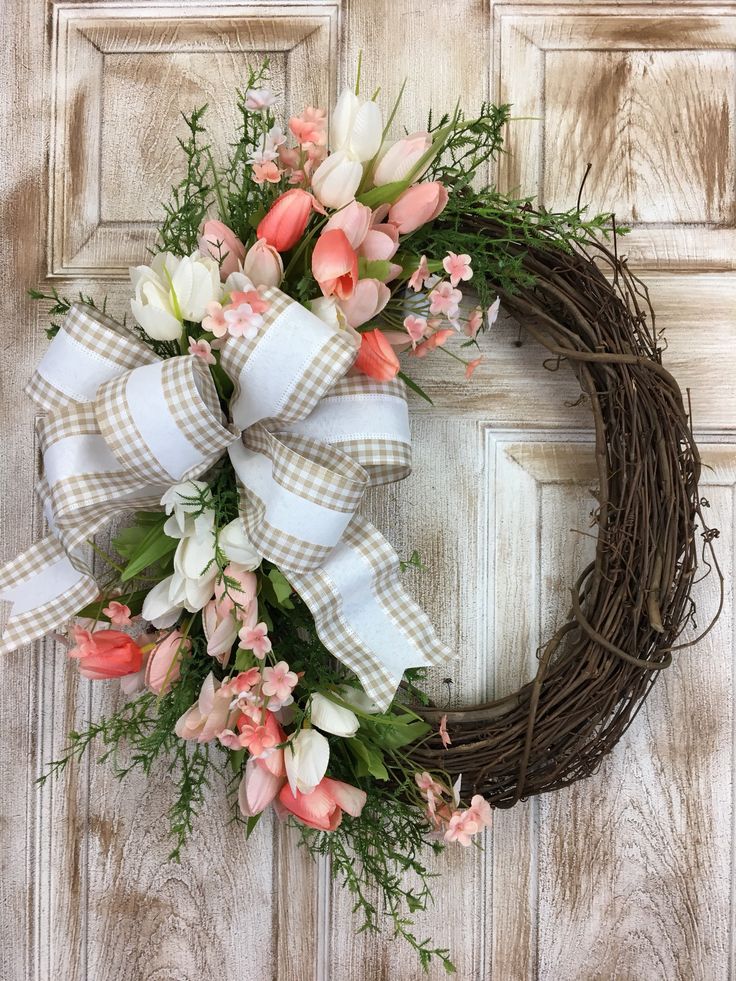
See how to make a burlap wreath in this easy tutorial
Image via – Etsy – Sunflower Burlap Wreath – Our Sentiments
Learn from this Burlap Wreath Tutorial:Before you get started take a trip to your local arts and crafts store or you can get all of your supplies online. We have created a materials list for you to go from. Feel free to try different types of burlap ribbon. They come in all types of colors, embellished with lace, gold, silver and more. Think of the occasion, setting your wreath will be displayed in. Choose colors that will compliment your front door, your fireplace, or even over a mirror in your bedroom can be gorgeous.
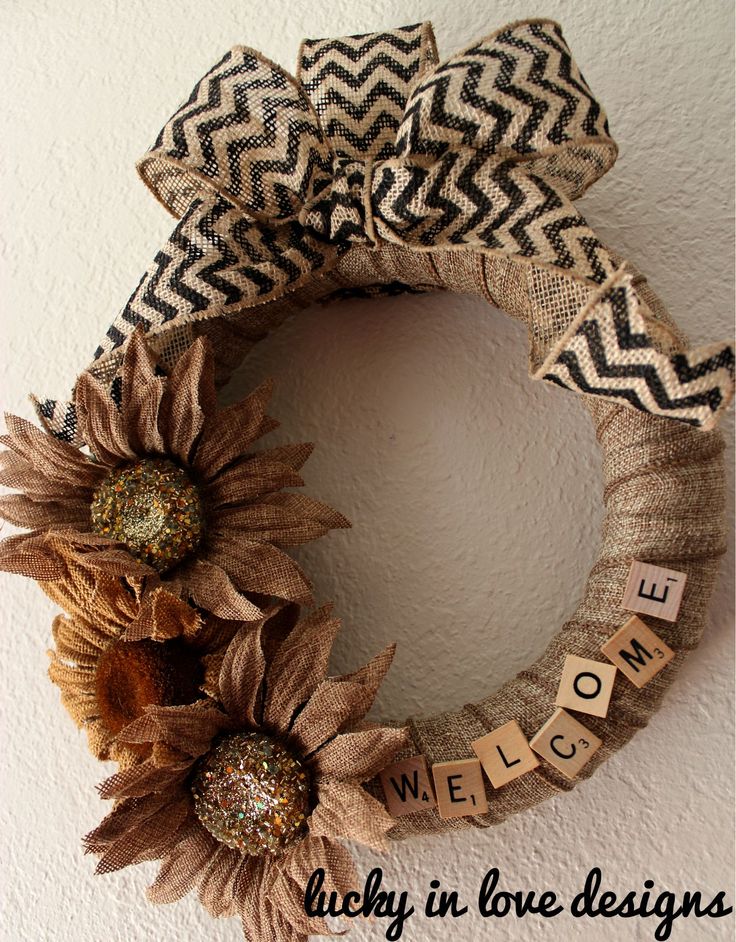
Try different types of burlap ribbon for your wreath
Image via: Etsy – Chevron Burlap Wreath – Cindi Davis1
How to Make a Burlap Wreath Video
Link to burlap wreath tutorial video.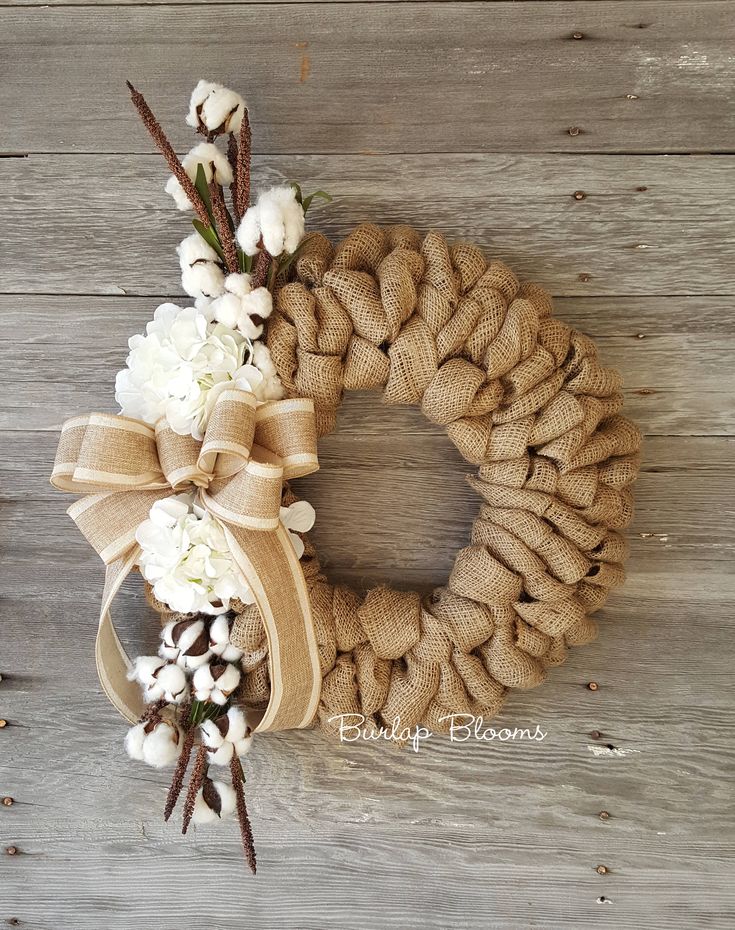
- Roll of 6″ wide Burlap Jute Ribbon * (30 feet long) : (Ideas for Types of Ribbon Burlap with White Lace Ribbon, Burlap with Red Lace Ribbon, Chevron Print Burlap Ribbon )
- Scissors
- 12 inch Wire Wreath Frame Form: (Ideas for Types of Wire Frames – Heart Wire Wreath Frame, Square Wire Wreath Frame, Star Wire Wreath Frame)
- 6 Black Pipe Cleaners cut into 6″ pieces
- Wired Ribbon, 2-1/2-Inch Natural Color
- Leaves and flowers to decorate if you’d like to add after the wreath is completed
- Hot Glue Gun with Glue Sticks – to attach leaves and flowers
Directions for Making a Burlap Wreath:
1. Use one end of the burlap ribbon to make a knot around the wire wreath. You can also secure the burlap with a piece of string or pipe cleaner.
2. Push the burlap into one of the sections of the form. Be sure to twist it so that the loop is sideways (this ensures that the wire wreath form is covered).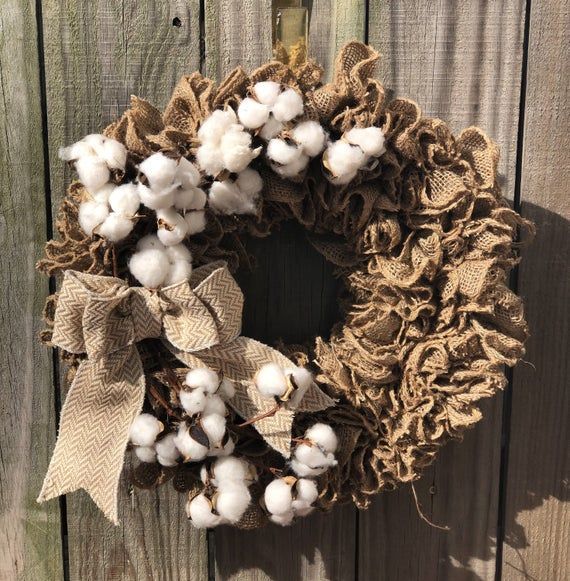
3. Continue making loops but make sure that the next “bubble” in the wreath is next to the one you just did. This helps hold the previous loop in place. Keep the loops even in size as you push the burlap through the form.
For a more uniform wreath keep the bubbles or loops even
Image via: Little Lovely Leaders
4. Continue making loops until the wreath is as full as you want. You can make all your “bubbles” the same size or vary the size for a more asymmetrical finished burlap wreath.
5. Cut off the burlap if you have extra.
6. Make another knot to complete the wreath or tuck the end into the bubbles.
7. Use pipe cleaners to keep the burlap in place on the back of the wreath.
Extra Tips for your Burlap Wreath Tutorial:Depending on if you want to embellish your wreath with flowers or bows you can hot glue on your accessories or you can create your own bow from Wired Ribbon, 2-1/2-Inch Natural Color.
1. Hot glue the leaves, flowers, bows, and other ornaments you may have.
2. Watch the wreath video above to learn how to attach the wire ribbon bow.
Once you’ve completed your wreath, step back and decide if it’s how you envisioned. If you need to add more embellishments, more colored wire ribbon, or if it looks good for your home. If you have any ideas of how you make your burlap wreaths, we’d love to hear from you in the comments section!
Looking for more Burlap Wreath Ideas?Check out these seasonal burlap wreath tutorials, also on How to Make a Burlap Wreath:
How to Make a Multicolored Ribbon Wreath
Muti color ribbon burlap ribbon
Image via: Etsy – Sandplum Studio… – Multi-colored burlap ribbon wreath
You can make a similar wreath like this, or purchase this one from Sand Plum Studio on Etsy.
How to Make a Burlap Ribbon with Pretty Colored Burlap
Image via: Etsy – All Doors Wreaths – Colored Burlap Ribbon Wreath
How to Make a Burlap and Deco Mesh Wreath
Image via: Etsy – Craft N Relax – Deco Mesh Wreath Ideas
Don’t see a burlap wreath tutorial you’ve been looking for? Leave us a comment of the style you’d like to see created and we may add it to our upcoming wreath tutorials.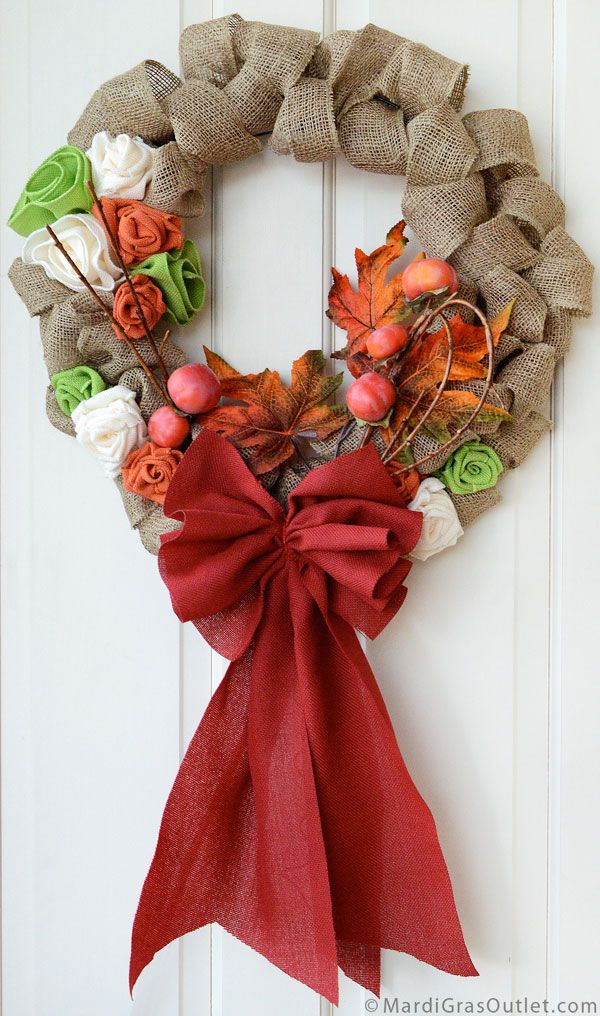 🙂
🙂
For more burlap wreath ideas, click here.
Save
Save
Save
Save
Save
25 best ideas for a DIY Christmas wreath - a catalog of articles on the site How to make a Christmas wreath with your own hands from affordable and inexpensive materials? Here are 28 variants of this decoration with photos and descriptions of the work.
Where to get materials for making a Christmas wreath
Wreath base. We have already written about how easy it is to make a base of rods for a door wreath. It will fit most of these decorations. You can also purchase a ready-made base - it's inexpensive.
Needles. A decor that is especially often used in Christmas wreaths is spruce or pine needles. Ordinary "live" branches can be collected or bought for next to nothing at the Christmas tree bazaar. If there is a forest nearby, you will definitely find them there.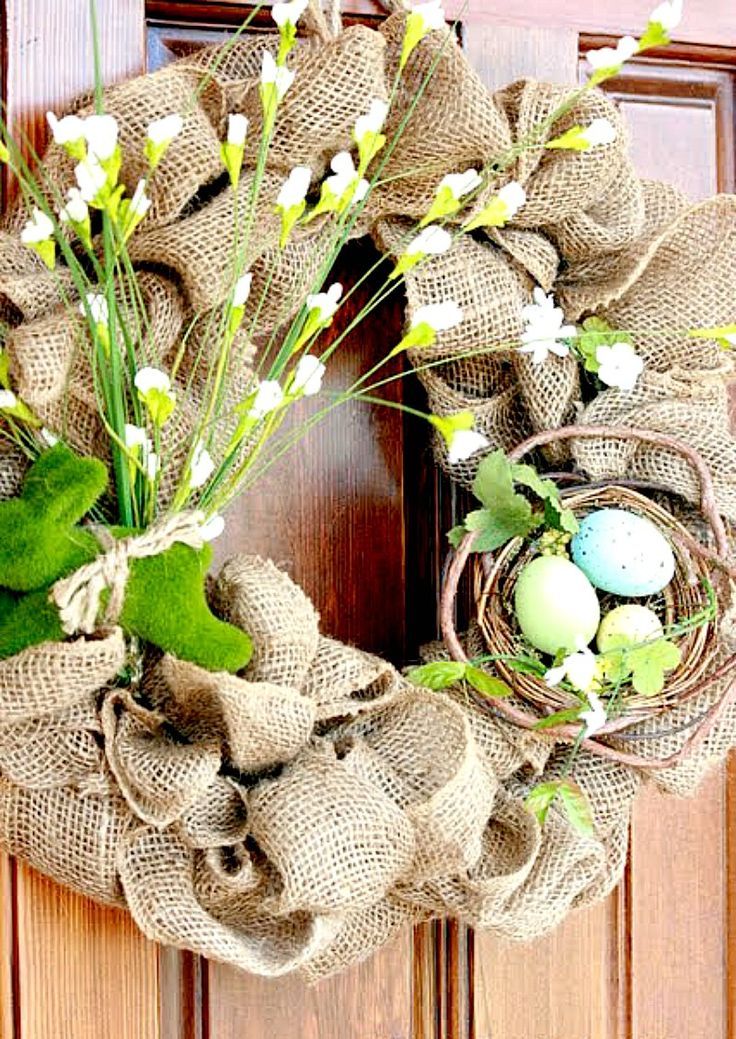 Many grow ornamental conifers on their plot - they will definitely share a few branches with you. If Christmas trees or pines do not grow on the site, use branches of other conifers - juniper, arborvitae, yew berry. Artificial branches are sold in the departments of Christmas decorations, but you can always buy them in online stores.
Small decoration toys - store-bought or self-made.
Classic Christmas wreaths
The classic door decoration with winter motifs is made on the basis of a simple coniferous wreath. Wire a branch of pine needles to a wreath of twigs and sprinkle it with artificial snow. If there is no spray can with such snow, white frost can be applied to the needles with acrylic paint. Or glue pieces of foam, crumbling it finely.
Small artificial Christmas trees, artificial houses are also better to fix on a wreath with wire - it's more reliable than gluing.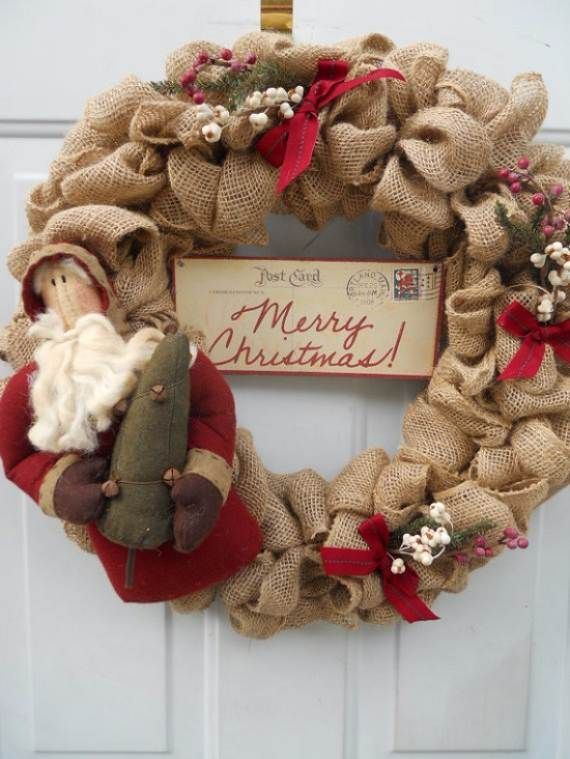
Read: How to make a Christmas tree wreath If you hang it on a wide decorative ribbon, no more decorations will be needed.
Multi-colored cars can become a wreath decoration if the family has a car enthusiast or a child who loves boyish games.
Pieces of cotton or synthetic winterizer perfectly imitate snow drifts on the road. Cars drive through the winter forest! The houses on the wreath were also covered with snow. Snowdrifts have occurred in this fabulous town.
Illumination will make your Christmas wreath truly festive. Fairy-tale houses in the forest are a wonderful wreath decoration.
Cones, needles, dense leaves of other plants - a classic decor for a New Year's wreath.
Read: How to make a New Year's wreath of cones
If we weave a garland with small light bulbs into a Christmas wreath, we get such beauty.
Very simple but incredibly effective winter wreath. Part of the base of rods is free from decorations. On the other - branches of needles and cones. It is easy to fasten the cones with wire, hooking on the scales at the base.
Large poinsettia and Christmas decorations.
Luxurious winter wreath - no one will doubt that Christmas is eagerly awaited in this house.
Great Christmas arrangement. The owl is alive. Branches, peeled of bark, painted with white paint. Snowflakes in garlands are white and blue. Christmas balls of different sizes, but in the same color scheme.
How to make a Ribbon Christmas Wreath
It is easy to make a snowman from a wide white tape. Gather one end of the ribbon onto a thread, pull it tighter and fasten it.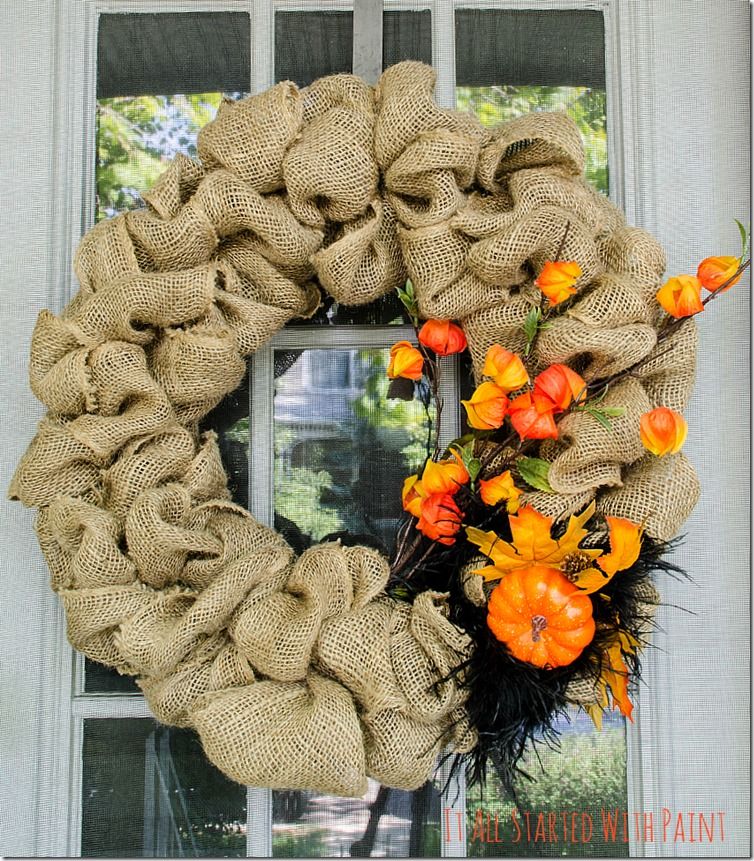 You will need a lot of ribbons, but the effect is amazing. The eyes and mouth of the snowman are made of black mushroom buttons (with a stem).
The cylinder seems to be the most complex part, but it is not.
- Cut out a circle from cardboard and cover it with black cloth.
- Also cover the tin can with the same cloth.
- Fix the jar on the circle - get a cylinder.
- Decorate the craft with red ribbon.
In this wreath, the snowman's head is a ball of fabric stuffed with padding polyester.
- Cut out a circle from white fabric.
- Place a synopon in the center of the fabric.
- Draw a circle around the edge with a needle and thread.
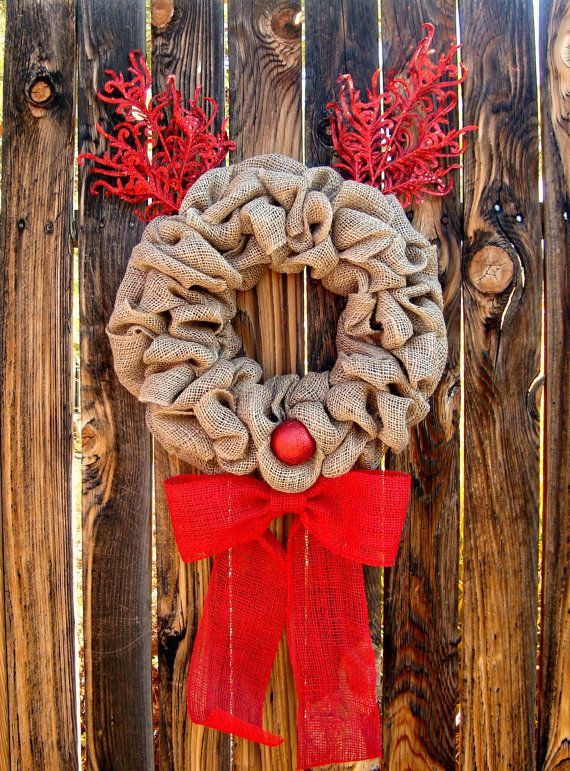
How to make a funny Christmas reindeer:
- Make a wire ring.
- Attach the ribbon gathered on the thread to the ring.
- Cut out the antlers from cardboard and paint with white paint.

- Make the eyes and nose by painting small styrofoam balls or small Christmas balls.
0003
Sew a wide strip of burlap along the edge to form a “pocket along the entire length”.
Thread the wire into the pocket and roll it into a ring - the burlap ribbon will gather into beautiful flounces.
Decorate your wreath with colorful ribbon and other Christmas decorations.
How to make a wreath for Christmas from pompons
Large pompons in this wreath are very similar to snowballs, you just need to choose the material of light shades.
We make pompoms from leftover woolen yarn. The photo is clear without any description.
Little white pom poms make cute snowmen.
Santa Claus Claus Claus Claus
Sold a lot of decor for the New Year.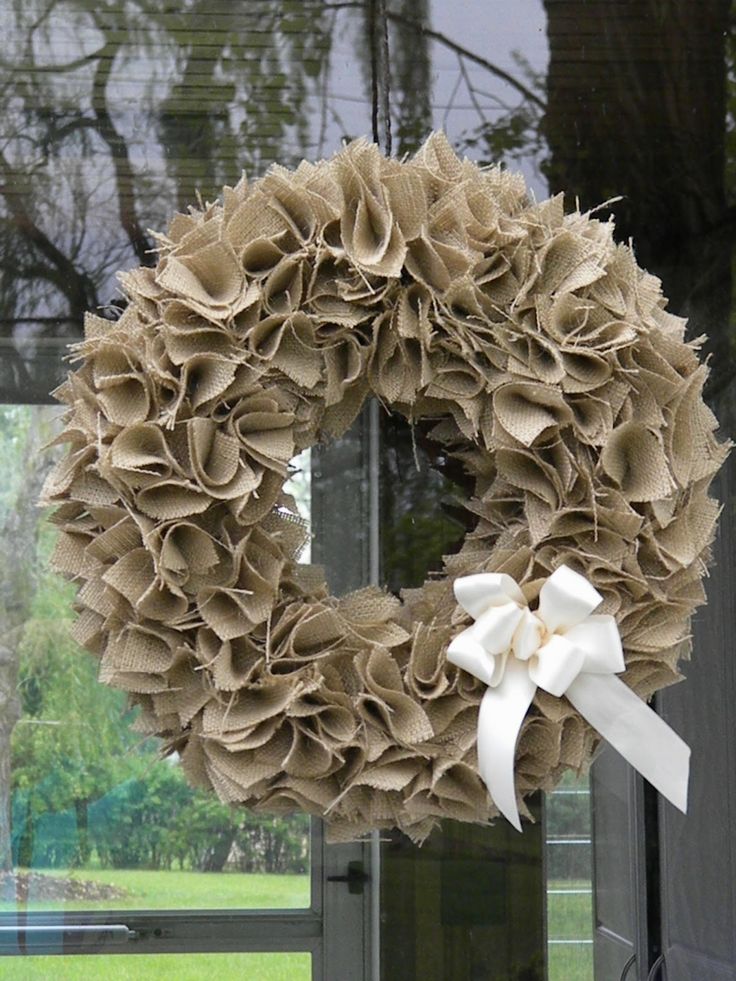 Such a wreath can be made almost instantly from the so-called Santa Claus staffs. The parts are glued together with hot glue. In the middle is a plastic or any other snowflake.
How to make your own Santa Claus staff:
- Cut a white-wrapped round wire (electric cable will do) into pieces.
- Bend the lengths of cable into staffs.
- Attach the red ribbon to the wire in coils.
Rozhdestvensky wreath with gifts
A wonderful idea is to fix Christmas gifts for family members and guests. To attach a box to a wreath, you need to make a couple of holes in its bottom, through which you can stretch a wire, ribbon or cord. Since it takes a long time and is not convenient to unfasten the boxes, it is better to put a wrapped gift in a large box. When someone takes their gift, the large box can be closed again, and the decorative effect of the wreath will remain the same.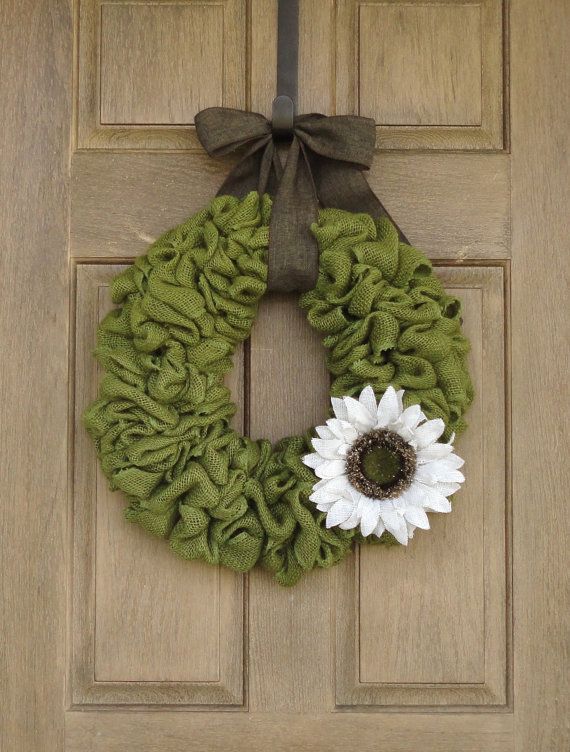 It is good to attach a label to each box with an inscription to whom this gift is intended.
Simple Christmas wreaths for the door
The elements of the wreath are exactly the same as the large decorations.
Original double wreath of large and small hoops.
The Christmas holidays go by fast. You can hide the wreath, and next year update it with some special elements.
Tags:
grandfather frost snowman
DIY felt wreath
Felt wreath is becoming more and more popular decor not only for New Year holidays. It is not difficult to make it, and felt is not an expensive or inaccessible material. Of course, it will take some time and effort to create such a decoration, but such a wreath will last more than one year. In our article, readers will learn how to make a felt wreath with their own hands and find many interesting ideas on this topic.
Contents
- Wreath base - the basis for a beautiful idea
- New Year's wreath with felt base
- Felt wreath in the form of holly leaves
- Wreath workshop with felt toys 9022 Wreath of flowers simple quickly make a burlap wreath and decorate it with felt
- Other ways to decorate a felt wreath
- Autumn felt wreath
- Felt Christmas wreath ideas
The basis of a wreath - the basis for a beautiful idea
Sizes of felt wreaths can be very different and they will depend on the size of the base. But what is a wreath ring made of?
Materials for the base of the felt wreath can be:
- cardboard;
- foam;
- wire;
- wood;
- vine;
- plastic;
- PE foam.
Cardboard is perhaps the simplest and cheapest thing that can be found in every home, which is why wreaths are most often made from this material.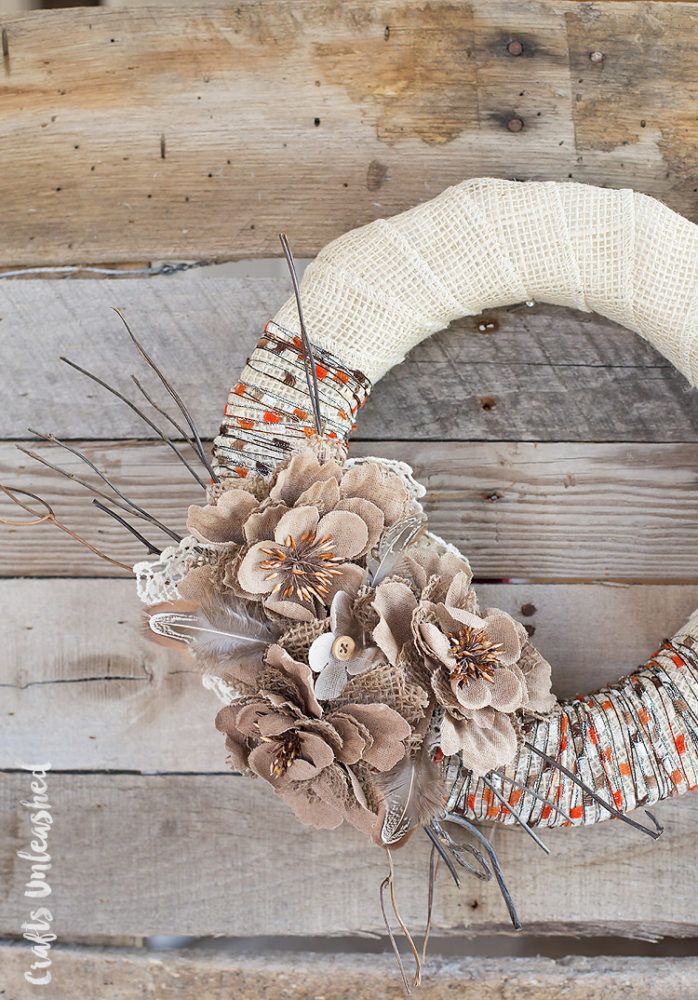 Watch the video for an example of such a wreath with a cardboard base.
But if you want to make a wreath completely out of felt, then the base can also be sewn from this fabric and stuffed with holofiber or padding polyester.
Once you have decided on the basis of the wreath, think about how you will decorate this basis. There are several design options.
- We wrap the base of the wreath with yarn. Usually cardboard rings or rings made of foam or polyethylene foam are masked in this way.
- Multi-colored (satin) ribbons or strips of fabric also look great on the base of the wreath.
- If the base is made entirely of felt fabric and then stuffed with filler, additional decoration is not necessary.
 Such wreaths are immediately decorated with felt according to the theme of the holiday for which this wreath is made.
The same principle applies to vine wreaths. It is not at all necessary to wrap their base with something additionally, it is already original and non-standard in itself.
The more interesting and / or brighter the base of the wreath is decorated, the more beautiful and elegant the wreath itself will be.
We recommend watching the process of creating a felt wreath on video.
Christmas wreath with felt base
Christmas wreath with felt base is just an example of how to approach the idea of creating this type of decoration.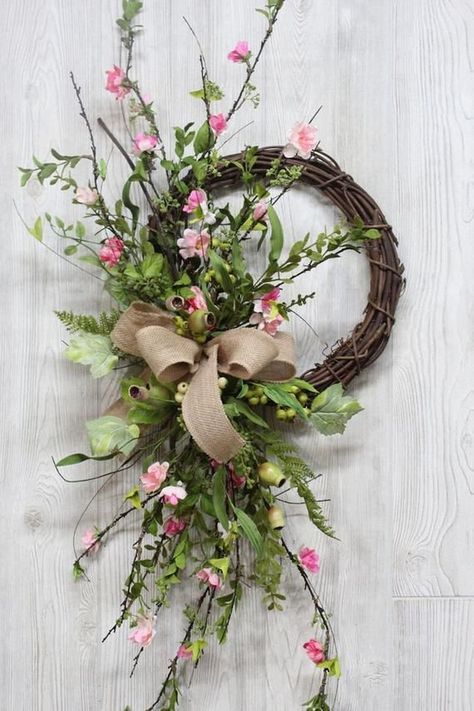 If you don’t want to make a New Year’s wreath, make a Christmas or autumn wreath, or, in the end, decorate the base of the wreath according to your taste and imagination.
For the same wreath we will need:
- fabrics - felt and interlining;
- filler - holofiber or synthetic winterizer;
- threads, scissors, glue "Moment" or "Crystal";
- decorative satin ribbons (red and gold) and decorative golden mesh;
- tinsel on green wire;
- templates for Christmas trees and snowflakes (or toys) with which you will decorate the wreath;
- cardboard template - ring with an outer diameter of 20 cm. But, if desired, you can take more or less than the specified size;
- Christmas decor (stars, sparkles, pompoms).
From felt and non-woven fabric, cut out a ring on a cardboard base. Smooth the non-woven parts with an iron to the felt parts and sew the inner and outer ring with threads to match the fabric.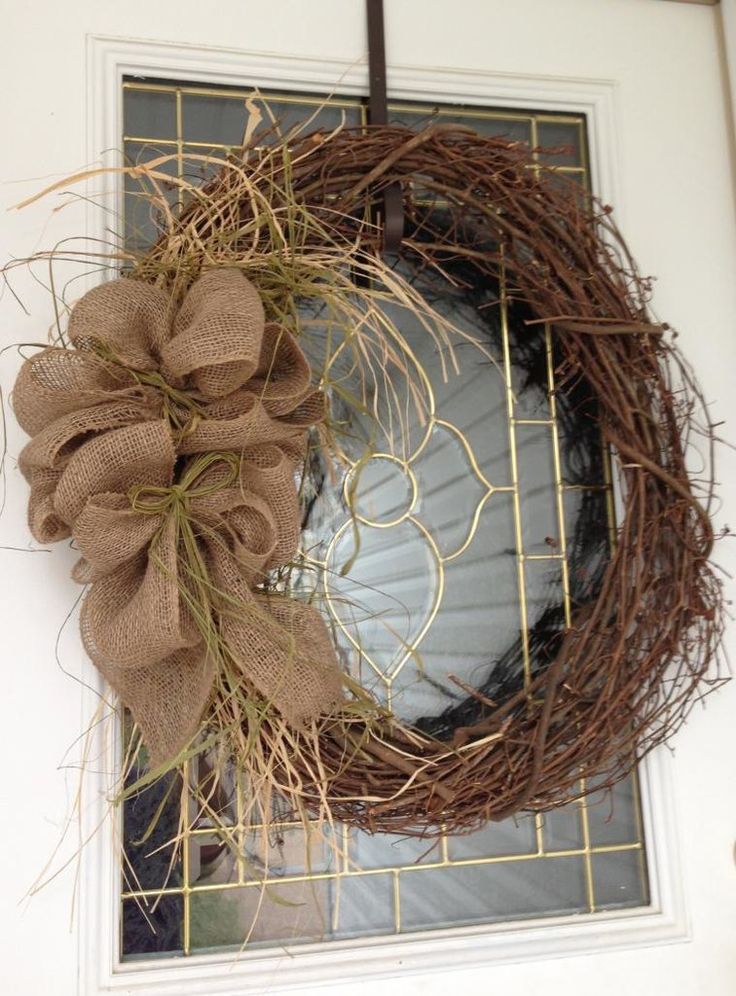
Don't forget the filling! Stuff the felt ring with holofiber tightly so that there are no wrinkles or voids. Fill the base not immediately, but gradually, stitching the outside of the wreath as it is filled.
Now you need to decorate the base with decorative ribbons and do not forget to make a loop for hanging the wreath from them.
It remains only to decorate the wreath to your liking. Above in the photo - a couple of wreath decor options with a blue felt base.
Felt Holly Leaf Wreath
This very simple wreath on a wire (cardboard) frame can have many variations. The main thing here is what the master will choose to create the composition. Holly is a New Year's theme, but Christmas attributes or (if the wreath is not winter) flowers, butterflies, autumn leaves and so on can be chosen instead.
But if you chose holly, then prepare for creative work:
- two or three shades of green felt;
- small red pom-poms;
- glue gun and scissors;
- holly template;
- base ring made of wire or cardboard.
Then everything is simple. It is necessary according to the template (photo above) to cut holly leaves from felt of different shades of green. Leaves can be made in different sizes, but can be the same.
Cut the leaves at the base and use glue to overlap them on different levels of the base ring to form a wreath. Glue the berries on top - and the wreath is ready.
And these are templates for fabric New Year's toys, which can also be used to decorate a felt wreath.
In principle, any wreath can be made on a flat wire or cardboard base. For example, with flowers and leaves of the New Year's flower poinsettia.
By the way, if you don't have the opportunity or desire to bother with printing templates, try making a wreath with felt stripes. It's simple, but original. The wreath is terry and voluminous.
Decorate the wreath with colorful pompoms and a colorful bow.
We recommend watching the video - how to make a simple wreath with felt palms.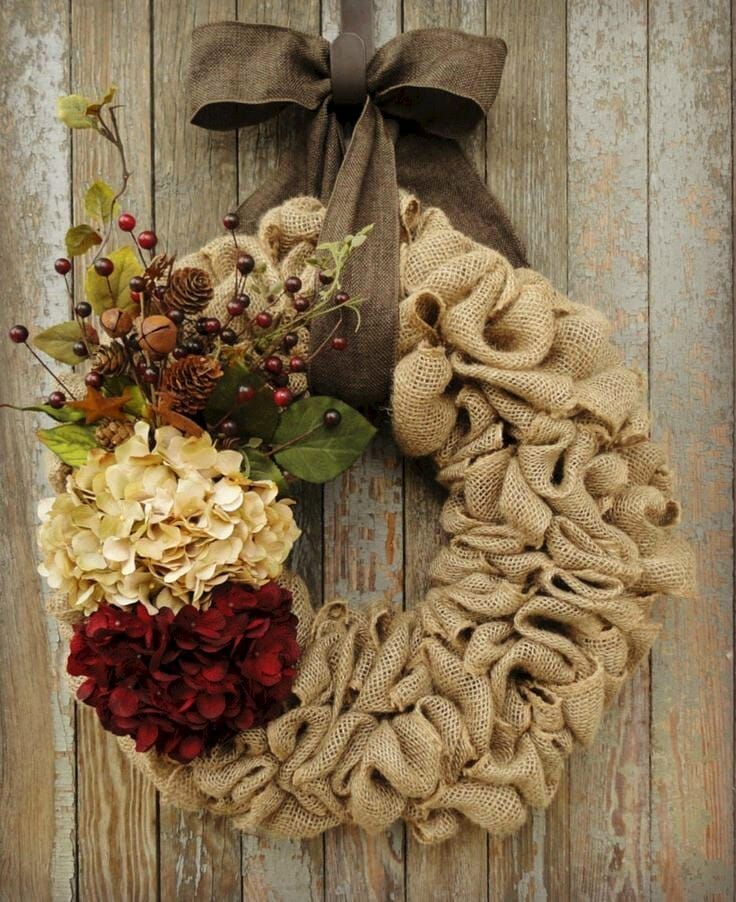
Felt Wreath Workshop
Prepare the following materials and tools for crafting:
- PE foam base ring;
- yarn "grass" green or light green;
- sheets of felt, assorted colors;
- decor - satin ribbons, fabric with different prints, multi-colored buttons;
- scissors, thread, pen, paper with printed templates;
- filler - synthetic winterizer or holofiber.
Starting work on the wreath from its base. The ring must be wrapped tightly with yarn so that it becomes fluffy and resembles Christmas tree branches.
Now choose the toy templates to decorate the wreath with, download, print and cut them out.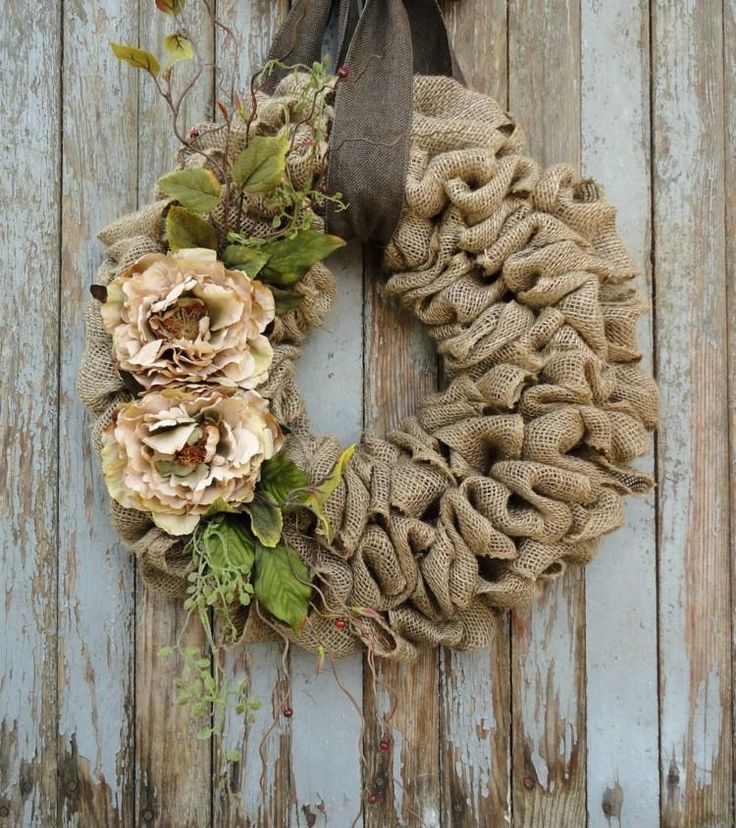
Transfer the templates to the felt and fabric and cut in the desired details in duplicate.
Before sewing the two felt halves together, decorate one of the pieces to your liking.
Sew two parts into one and fill the toy with padding polyester, giving it volume.
Now it remains only to decorate the toy, and it can be glued or sewn to the wreath. By the way, such a wreath with toys-attributes of Christmas can be made for a child. How exactly - see the video below.
And a few more photos of such wreaths for inspiration.
Flower wreath: simple MK
To make such a beautiful voluminous felt wreath, you do not need to spend a lot of effort, just follow the instructions below and see photo MK.
Simply cut out rectangles from different colors of felt and cut flower petals out of them.
No need to collect each flower separately - string the petals on one long thread to get a long garland of petals sticking out in all directions.
This is how the garland should turn out, which now needs to be tied (sewn) with threads to the wire frame. Such a wreath can be hung on the front door, and it will decorate it at any time of the year. By the way, the choice of flowers for such a wreath is easy to choose according to the time of year and the theme of the holiday. If you take the blue-white-blue shades of felt or red-blue-white, then they are suitable for Christmas and New Year. And if you choose brown-yellow-orange and red, then such a wreath will fit perfectly into any autumn holiday.
Below are ideas for wreaths with felt flowers.
How to quickly make a burlap wreath and decorate it with felt
Very beautiful and original retro wreaths are made from burlap.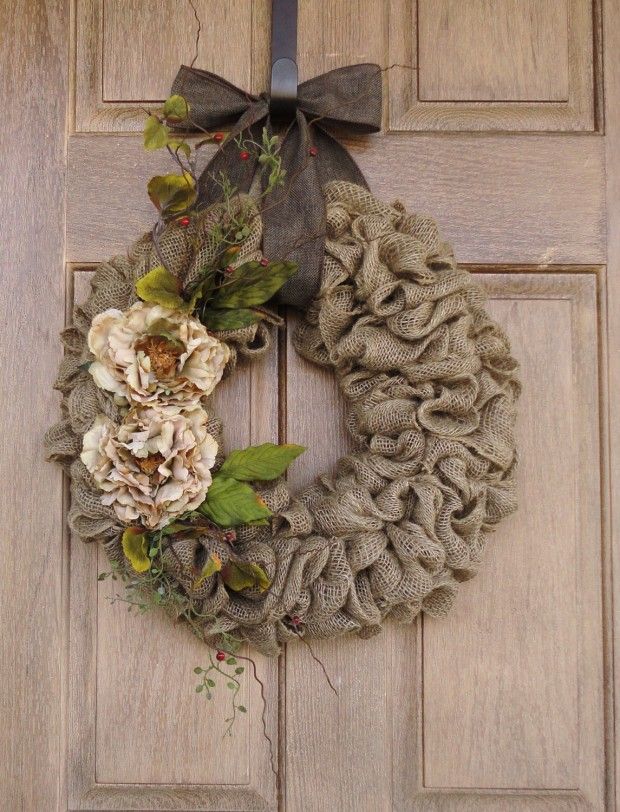 If you decorate them with figurines on a New Year's theme or bright colors of felt poinsettia, then such wreaths will look very fashionable in the interior.
The first option for picking up a burlap strip is when the ribbon is strung on a thick thread, and then the wire base is formed with this garland, sewing with threads to the frame.
The second option is to gather the fabric directly on the frame. You just need to wrap the base with burlap tape and pick it up, passing it through the middle two strips of the wire frame.
Download and cut out leaflets for poinsettia flowers. Transfer the template to red and orange felt. For one flower, so that it looks voluminous, you need to cut out a petal of each size in the amount of 6 pieces. You can collect a flower either with hot glue, or sew with threads. Make the middle out of golden sequins. Glue or sew the flower to the burlap base.
How else can you decorate a felt wreath? But we still offer some interesting, in our opinion, ideas to our readers.