Cleaning wax off wood floors
6 Steps to Remove Wax From Hardwood Floors
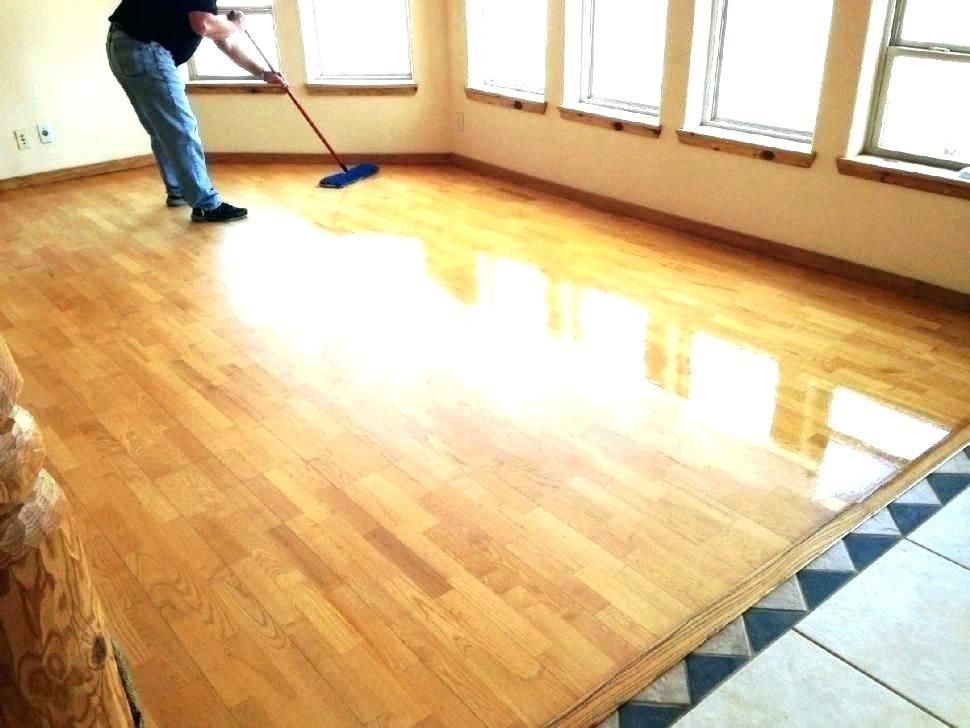
Hardwood floors are popular because of the natural beauty they bring to a home. Wax on hardwood floors never really hardens. Sooner or later, the wax will collect enough dirt and cloud the finish. You will find all the information you need to remove wax buildup from your hardwood floors.
To remove wax buildup from hardwood floors, use odorless spirits that dissolve wax without affecting the floor’s finish. Dab a cloth with mineral spirits. Working on small floor sections, continue rubbing while adding more spirits to the microfiber cloth. Use a pad of fine steel wool moistened with mineral spirits and rub over the cleaned area.
Removing wax is not an expensive process. A few simple supplies are all you need to remove wax buildup and get the job done right. In this article, we will walk you through everything you need to know.
How To Remove Pet Stains From Hardw...
Please enable JavaScript
How To Remove Pet Stains From Hardwood Flooring
To Remove Wax Buildup, you need a SolventTo better understand how to remove wax buildup from your hardwood floors, knowing the ingredients in floor wax is a good idea. While most waxes vary, most contain an emulsion of paraffin or Carnauba, an extract from Brazilian palm trees in a solvent.
When the wax is applied, the solvent will evaporate, and only the wax coating will remain. The wax doesn’t cure and will remain soft.
You could scrape the wax off a floor with a sharp blade or putty knife, although this would be time-consuming and would probably damage the floor finish. The efficient method to remove wax buildup is to redissolve it in a solvent and wipe it off.
So, What Dissolves Wax Buildup?
The best solvent for dissolving carnauba wax or paraffin is mineral spirits. Mineral spirits are the ingredient that gives wax products their characteristic odor.
Stronger solvents, like lacquer thinner and acetone, will also remove wax, but they will also remove the finish. These products are not recommended.
Hot water will dissolve wax, mainly if it contains vinegar, washing powder, ammonia, or a similar cleaning product, but no flooring manufacturer would recommend its use.
Leaving hot water on your wood floor long enough to dissolve wax will let the water seep through the cracks; the wood will swell up and ruin your floor. Using any water-based product to remove wax buildup from your hardwood floor is not recommended.
https://youtu.be/1NyK70rogIAVideo can’t be loaded because JavaScript is disabled: Cheap and Easy way to Remove wax buildup from wood floors (https://youtu.be/1NyK70rogIA)
Removing Wax buildup on Hardwood Floors: What you need
- Knee Pads or Knee Cushion
- Broom and Dust Pan
- Mineral Spirits
- Microfiber Cloths
- Bucket
- Mop
- 0000 Steel Wool
- Rubber Gloves
- Spray Bottle
- Wood Floor Wax
When removing wax buildup from hardwood floors, working in small sections of the floor at a time is recommended. Start with a roughly 4-foot by 4-foot area, making it easy to reach from any single position. Protect your hands by using rubber gloves. It is a good idea to wear old clothing because stripping wax is a messy process.
6 Easy Steps to Remove Wax Buildup
Wax buildup removal is a big job if you have a large hardwood floor. Unfortunately, there are no shortcuts to getting on your knees and removing the wax one section at a time. Spot cleaning can be done in a few minutes. However, It would be best if you planned on working for 4 to 6 hours for an average living room and kitchen.
1. Rub with Mineral Spirits and Soft Cloth.Use a broom and sweep loose dirt and other debris to create a clean working surface. After that, dry-mop with a microfiber pad and vacuum the floor using the dust brush attachment. You should remove any loose dust and wax from the floor.
NSF Certified Food Grade Mineral Oil – Gallon (128oz), Certified Food Safe Conditioner for Wood Cutting Boards, Butcher Blocks and Stainless-Steel Kitchen Equipment
$27.99 ($0.22 / Fl Oz)
Buy Now on Amazon
We earn a commission if you make a purchase at no additional cost to you.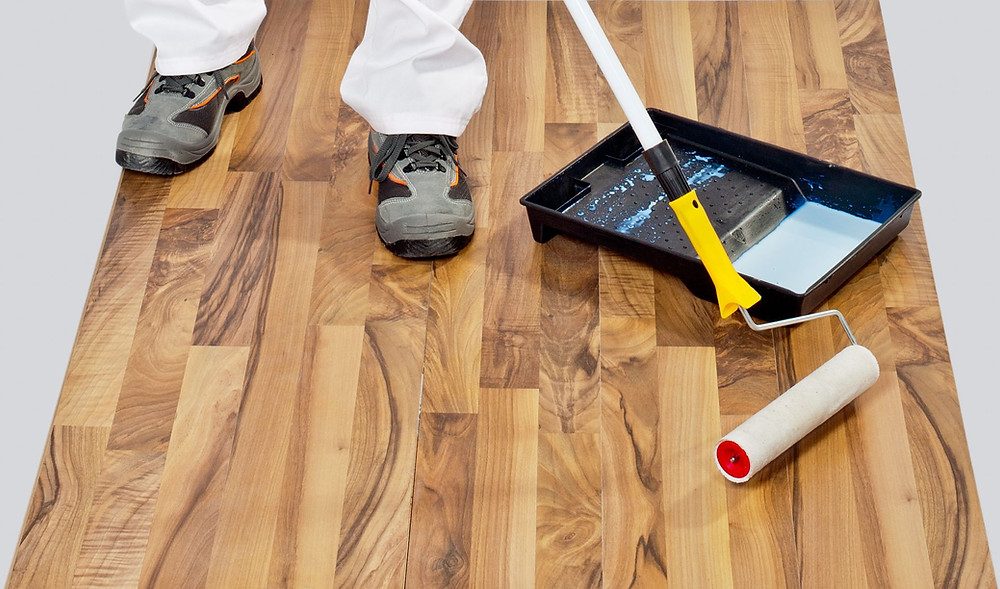
11/10/2022 03:39 pm GMT
Fill a spray bottle with odorless mineral spirits. Even though the name suggests odorless, mineral spirits are not odorless. Mineral spirits give off VOCs (Volatile Organic Compounds), so ensure to open the windows and keep the room well ventilated while you are stripping. If you’re sensitive to VOCs, wear a respirator.
Moisten your cloth with mineral spirits. Spray in the cracks to dissolve the wax there too. Work on a tiny section of floor at a time. Start working from the corner of the room until you are out of the room.
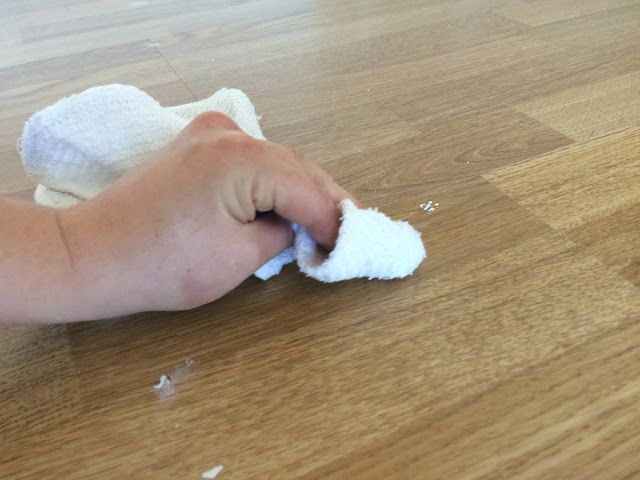
Start rubbing the mineral spirits into the wax coating in the same direction as the wood grain. Wax will come upon the cloth as you rub. When one section of your cloth gets dirty, moisten another area of the cloth and keep rubbing.
As the wax continues to come off, you will notice that the cloth turns yellow. When your notice moistened cloth comes up clean, the wax has been effectively removed from the wood. Continue rubbing the hardwood floor with mineral spirits and a clean cloth until all the wax has been removed from the section.
Once all the wax has come upon your cloth and is clean, it is time for the next step. Moisten a fine steel wool pad with mineral spirits and rub it over the cleaned section of flooring. Ensure to rub along with the wood grain. You can efficiently work the steel wool into any deep grooves featured on textured wood planks.
As soon as you have stripped the wax layer with mineral spirits and both cloth and a steel wool pad, start on to the next flooring section. Make sure you move along in a pattern to track where you have already cleaned and what part of the flooring still needs to be cleaned. Knee pads or gardening cushions will help protect your knees as you strip the wax buildup from your hardwood flooring.
Once your whole floor is stripped of old wax, give your floor a final cleaning by mopping the surface of the hardwood floor with hot water. Ensure to dry any remaining water with a cloth, as water can easily damage the surface of your hardwood floors. Work in small sections with the mop and go over it with a dry microfiber cloth on a dry mop to make sure all traces of water is dried up completely.
O-Cedar EasyWring Microfiber Spin Mop, Bucket Floor Cleaning System, Red, Gray
$39.99 $34.97
Buy Now on Amazon
We earn a commission if you make a purchase at no additional cost to you.
11/10/2022 07:49 pm GMT
4: Tough Stain RemovalIf it is an older floor, there might be some deeper stains. Spray the stain with the mineral spirits. Then carefully scrape using a putty knife or scrub with a toothbrush. Wipe the stain with a clean cloth and repeat, if necessary.
Make sure there is enough time to let the floors dry before applying a new finish. When you have finished stripping wax from the floor, the floor should be clean, dry, and ready for a new coat of wax.
6: Refinish the Wood FloorWhen re-applying a new layer of wax on the floors, read the label and follow the manufacturer’s instructions. Significant commercial wax products are listed below if you decide to re-apply wax to your floor.
If you decide NOT to re-apply wax to your hardwood floor, you could apply a polyurethane coating. Polyurethane is more durable than a wax coating and can be a more robust and longer-lasting alternative if you want to prevent another wax buildup in the future. However, do not apply a layer of polyurethane until you are sure all wax is removed.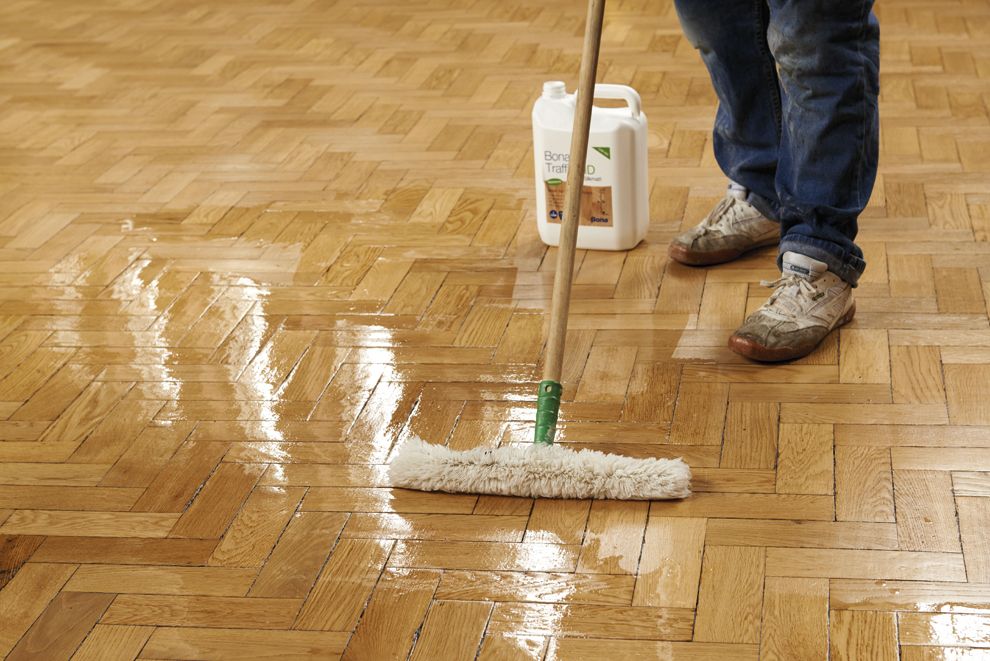
What Type of Wax Should you Use to Refinish your Hardwood Floor?
Unfortunately, not all floor wax is the same. It is advised to research available products and read the label before you buy any product. It must clearly state the wax is suitable for a wood floor, not just wood.
Furniture polish can work for wood, but furniture polish creates a slippery, dangerous finish if you apply it on the floor. Avoid water-based or acrylic waxes. These kinds of waxes can damage unfinished hardwood floors.
Do not use “No-Buff” wax. This kind of wax is stickier than most other waxes and will collect dust and dirt much faster.
Two favorite types of wax appropriate for wood floors are solid paste and liquid. The liquid wax is thinner because it contains more solvents. Liquid wax applies faster and dries faster but may not save you time. You will need to apply multiple coats of liquid wax to get the same protection and finish as paste wax.
Here are a few commercial waxes that will do an excellent job on hardwood floors.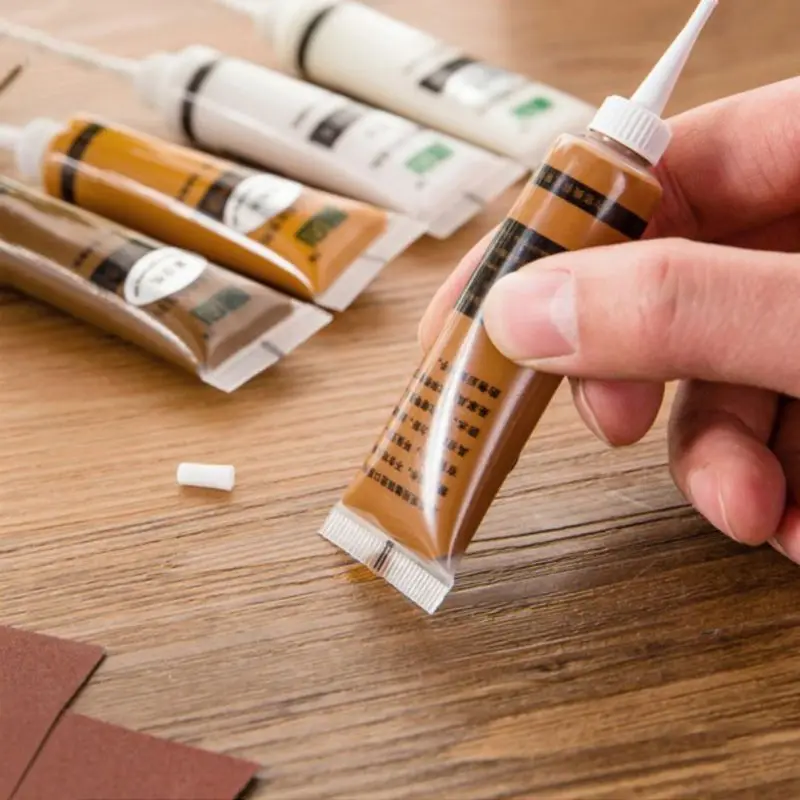
Trewax Paste Wax with Natural Carnauba Wax, Clear, 12.35-Ounce
$17.97
Buy Now on Amazon
We earn a commission if you make a purchase at no additional cost to you.
11/10/2022 10:14 pm GMT
Trewax Paste Wax contains Brazilian Carnauba, which is the hardest natural wax. Homeowners love the finish but complain about the container. The wax usually dries out after an extended period. Ensure to cover the container of unused wax with some plastic wrap before covering the container and storing it again.
Lundmark Liquid Paste Wax with Carnauba Wax, 32-Ounce, 3208F32-6
$25.27 $23.94 ($0.75 / Fl Oz)
Buy Now on Amazon
We earn a commission if you make a purchase at no additional cost to you.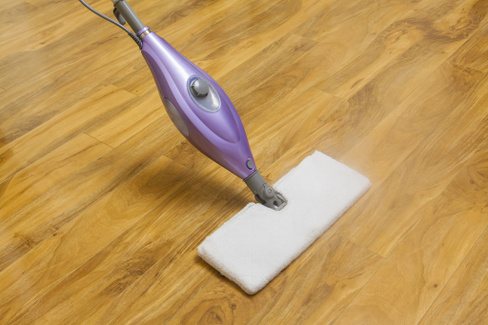
11/11/2022 11:59 am GMT
Lundmark Liquid Paste Wax that contains Carnauba Wax is available in a liquid floor cleaner and wax combination that contains carnauba wax. The manufacturer of this product says you can use it for Plank, Parquet, and all Finished Hardwood Flooring.
Holloway House Pure Wax 27oz | A buffable, Waterproof Finish for Regular and Hardwood Floors | Restore Protect Refresh, 27 Fl Oz, 27 Fl Oz
$10.99 $10.08 ($0.37 / Fl Oz)
Buy Now on Amazon
We earn a commission if you make a purchase at no additional cost to you.
11/10/2022 04:19 pm GMT
Holloway House Pure Wax is a liquid wax that you can apply straight from the bottle. It is a favorite with customers as it has a beautiful shine, but you will need to apply more than one coat on the wood for an excellent finish.
Should you Use Commercial Floor Wax Removers?
Before you use any commercial floor wax strippers, check to see whether it is wax on your floor or a polyurethane finish.
Almost all commercial wood floor waxes use mineral spirits to dissolve the wax to make it soft enough to apply. The most recommended hardwood floor wax remover is mineral spirits. Potent solvents like lacquer thinner and acetone will remove the wax, removing any other finish and stain the floor. It is advised not to use them.
Homemade recipes might use hot water with ammonia or vinegar and detergent; however, the hot water will soften the wax and ruin the wood.
I do not recommend water-based floor strippers because the water will seep into each tiny crack, causing crowning and stains on your floor.
Most commercial wax removers are too harsh for wood floors.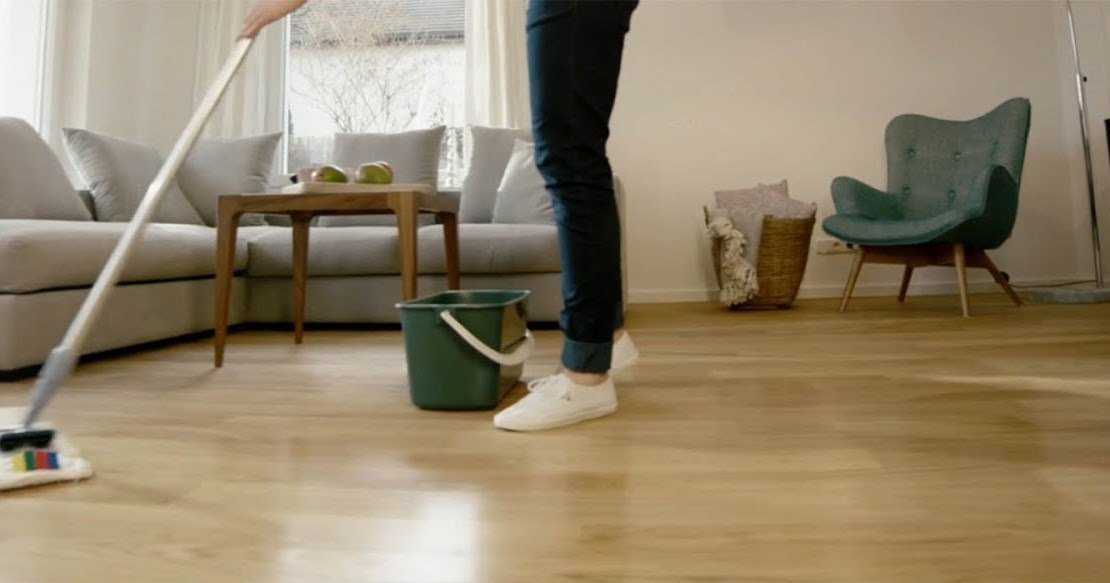 Always read the label carefully before you decide to buy one.
You need a product formulated for hardwood floors. Buying a wax remover for linoleum or vinyl can seriously damage your floor’s finish.
Don’t Use These Products to Remove Wax Buildup from Hardwood Floors
Here are a few products you should NOT use to strip wax buildup from your hardwood floor.
- Trewax Instant Wax Remover – Not Recommended
Trewax Instant Wax Remover is not the ideal stripper for hardwood floors. This water-based product should only be used on sealed or finished wood. Using this product on unsealed or unfinished wood can allow the product to soak into cracks or crevices and cause swelling or lifting.
- Lundmark Wax High Power Wax Remover – Not Recommended
Lundmark Wax High Power Remover is another wax remover not meant for hardwood floors. The label on the bottle clearly states, “This product is NOT intended to be used on unprotected wood surfaces.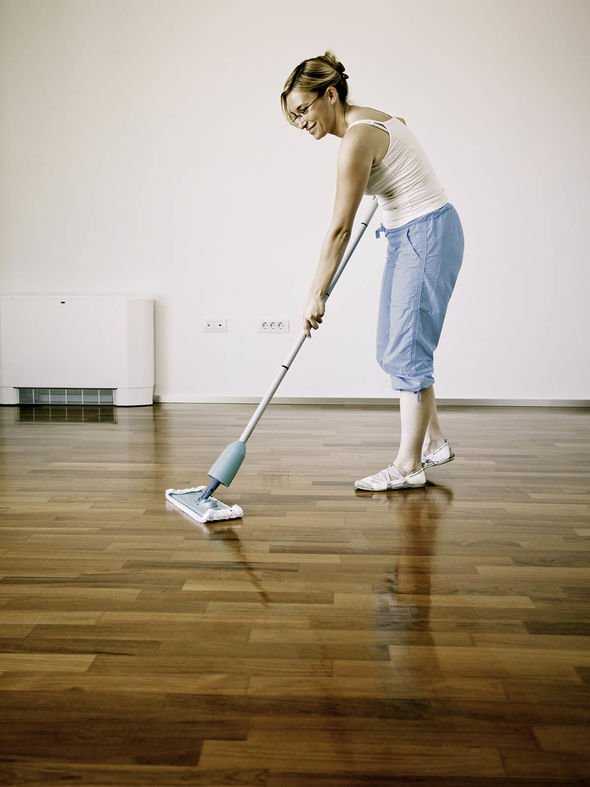 ” Unfortunately, some websites will recommend it because they get a commission.
- Liberon Wax and Polish Remover – Not Recommended
Liberon Wax and Polish Remover are for furniture, railings, and molding. This product will make your floor slippery. Be careful of wrong information. Sometimes websites promote these products as usable on wood floors. Make sure you read the label first. Check with a flooring or paint store before you use this product.
Removing Stubborn Wax Buildup from Hardwood Floors
If the above cleaning process wasn’t sufficient to remove the wax buildup from your floors, you might wonder what options remain for reviving your hardwood floors. Don’t fret because you’re not out of options!
Depending on how long the wax has been building up on your hardwood floors, removing the hazy buildup may be difficult. If the process outlined earlier wasn’t successful in removing the wax buildup on your hardwood floors, it might be necessary to sand your wood floors.
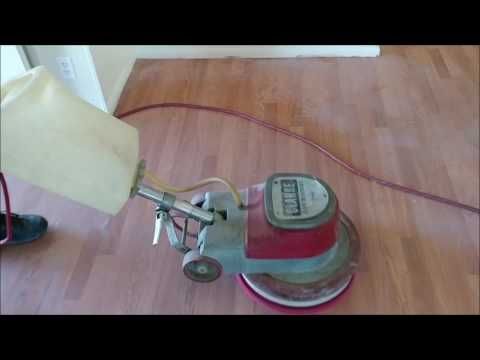
Sanding your floors will allow you to penetrate this layer of wax buildup. However, this can be a very laborious process. For the best results, you might want to hire a professional to sand down your floors in the event of impenetrable wax buildup.
A professional will use a specialized disk sander to sand down your hardwood floors. This is often a safer sanding hardwood floors than a drum sander. Unless you have the necessary experience utilizing these tools, this is something you’ll want to let a professional handle for you!
Sanding your hardwood floors is a perfectly safe practice. Flooring experts have estimated that most hardwood floors can be sanded up to ten times. Sanding is often done to refinish hardwood floors by adding a new protective coating.
In the last section of this article, we’ll look at refinishing your hardwood floors once you’ve removed the wax buildup. There are a few different options for you to choose from!
Re-applying a Finish to Your Hardwood Floors
Earlier in this article, we looked at removing wax buildup from hardwood floors.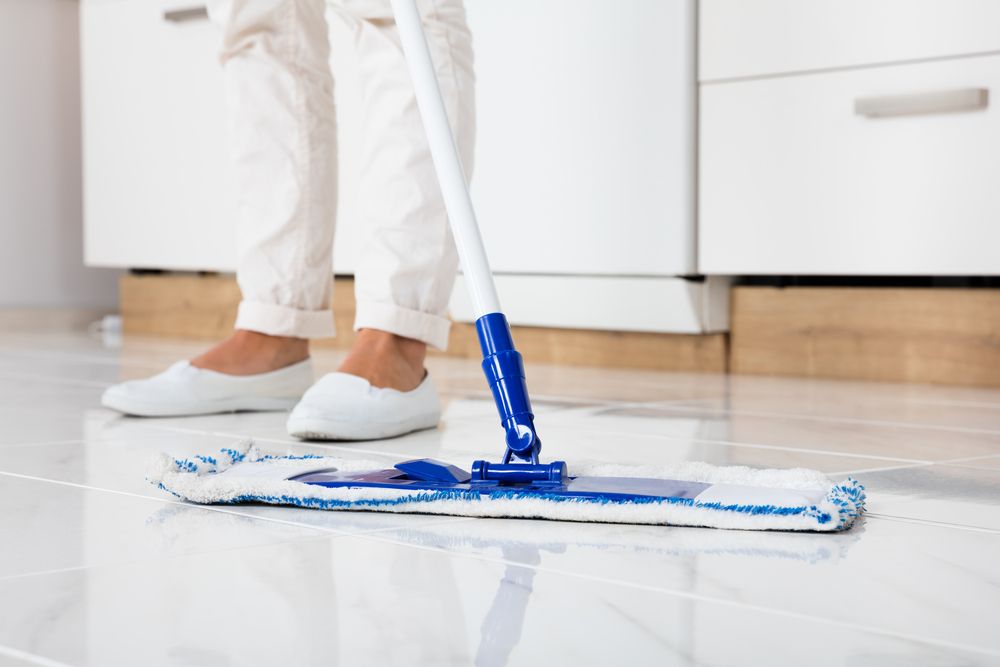 Once you’ve done this, you’ll likely want to apply a new finish to your hardwood floors to protect them from dirt and grime.
Once you’ve removed wax or cleaning product buildup from your floors, you’ll want to let them fully dry before applying a finish to them again. Once your hardwood floors are completely dry, you’ll be ready to apply a new protective coating.
If you remove wax buildup from your floors, you’ll want to re-wax them properly now that they’re clean. If you decide to apply a new wax coating to your floors, you should carefully follow the provided instructions.
Furthermore, as discussed earlier, it’s important to note how often this coating should be applied. When you re-apply the wax coating after cleaning the buildup, you should ensure that you stay on track with reapplications.
However, once you’ve removed this layer of wax, you can even opt to apply a different type of finish to your hardwood floors. Many homeowners find alternative finishes to a wax coating to provide longer and more durable protection.
Polyurethane remains a prevalent, long-lasting finish option for hardwood floors. Once you’ve removed all of the wax from your hardwood floors, it will be possible for you to apply a polyurethane coating to your floors for maximum protection.
Applying a varnish finish or a sealer to your hardwood floors is also possible. These finishes can enhance the natural look of your hardwood floors while protecting them. However, these finishes may be less durable than polyurethane.
There are many great finishes for you to choose from and consider. Regardless of which finish you decide to apply to your wax-free hardwood floors, one thing is sure: your floors will be gleaming in no time!
Why There’s Wax Buildup on Your Hardwood Floors
Hardwood floors have remained a classic choice when it comes to the different flooring options. Whether you get maple, oak, or ash hardwood floors, one thing is for sure: it adds a certain elegance to your home. Wax buildup on your floors, however, isn’t part of that elegance.
Unfortunately, no floor is perfect. Over time, many factors contribute to dull or hazy hardwood floors. Below are two of the main reasons why wax builds up on your hardwood floors:
- Buildup from waxing your floors
- Buildup from soaps and other cleaning agents
Understanding these factors is the first step toward combating these factors and restoring the natural shine of your hardwood floors. Let’s look at what you should look for on your hardwood floors!
Buildup Due to Waxing Practices
If you’ve recently noticed that your hardwood floors have a cloudy appearance, this could likely be due to the practice of waxing hardwood floors. Different types of floors have different waxing needs. It’s important to know how often you should be waxing your floors.
Many modern hardwood floors don’t need to be waxed due to their specialized finishes to prevent damage. Thus, waxing these hardwood floors could result in a cloudy appearance.
Waxing hardwood floors with specialized coatings such as polyurethane could interfere with the eventual re-coating process. Contact your flooring manufacturer if you’re unsure whether your hardwood floors have been coated. They’ll be able to give you the correct care instructions for your floors.
If your hardwood floors need to be waxed, ensure to not over or under-wax. As a general rule of thumb, hardwood floors should be waxed at least once every 36 months. However, ideally, you’ll want to wax your floors once every 12 to 18 months.
If your hardwood floors receive a lot of foot traffic, waxing the floors every six months may even be necessary. At the end of the day, how often you wax your floors will depend on your specific needs. When you wax your floors, you should ensure to follow the correct instructions.
Of course, waxing is a practice designed to restore the shine of your hardwood floors, so why would it diminish it?
Buildup from Soaps and Cleaning Agents
Often, the cloudy appearance of your hardwood floors is not due to the buildup of wax but rather due to the soaps and cleaning agents you use. You must choose a cleaning product suited to your hardwood floors.
For example, if your hardwood floor has a polyurethane coating, using an oil-based cleaner could negatively react with the coating, leaving your floor looking dull and cloudy. Water-based cleaners can also leave hazy marks on hardwood floors.
Using the wrong product could result in the buildup of a hazy residue that’s difficult to remove. Additionally, using the correct product too frequently can result in this cloudy buildup on your once shining hardwood floors. For the best cleaning results, you should use a product recommended by the manufacturer of your hardwood floors.
Luckily, once you become aware of this, you can correct your floor cleaning practices. This may mean changing your product to clean your hardwood floors or cleaning them less frequently. First, however, you’ll need to remove that hazy residue that has built up on your floors.
Conclusion
Stripping years of wax buildup from your hardwood floors can be a labor of love, but with a bit of work and using the most straightforward cleaning supplies, it is easy to restore the finish of your hardwood floors.
How to Remove Candle Wax From Wood (4 Easy Methods)
If you accidentally spill hot candle wax on wood furniture or floors, don’t fret.
I’m going to teach you four tried-and-true ways to clean spilled wax without damaging the wood.
The easiest and safest way to remove wax from wood is to allow the wax to cool, then gently scrape it off with a plastic utensil, spatula, or credit card.
For a substantial mess, gradually soften the wax with a hair dryer or clothing iron before wiping it off of the wood with a cloth. If you don’t have an iron or hair dryer handy, harden the wax with ice, which makes it brittle and effortless to remove.
Additionally, there are products designed specifically for removing wax from wood and other surfaces that are worth trying if these other methods don’t do the trick.
Although the steps are simple, there are several pitfalls that you need to know to avoid damaging the wood in the process.
Keep reading to get the full details on each method, including the materials needed, things to consider when preparing, and the step-by-step instructions.
By the end, you’ll be able to weigh your options and choose the best course of action for your situation.
Okay, let’s get into this!
Use these links to navigate the article quickly:
- Quick Summary: How to Remove Candle Wax From Wood
- Method 1: Settle and Scrape
- Method 2: Heat and Wipe
- Method 3: Freeze and Scrape
- Method 4: Use Wax Removing Products
- Removing Candle Wax From Unfinished Wood
- Preventative Measures
- Final Thoughts
If you only have a minute, here’s a quick summary of each method.
Method 1: Settle and Scrape – Allow freshly spilled candle wax to cool, then gently remove it with a plastic spatula, spoon, or side of a credit card. Finish up with a good buff by applying a round of furniture polish with a lint-free cloth. Skip ahead to read the full details.
Method 2: Heat and Wipe – There are two versions of the Heat and Wipe method: one that requires a clothing iron, and another that requires a hair dryer.
For the first version, keep the iron on a low setting without steam. Lay a few paper towels over the wax and then cover them with a washcloth or other heat-safe cloth. Press the iron over the washcloth for five-second intervals. As the wax melts, it will absorb into the paper towels. Repeat the process until the majority of the wax is removed, then wipe any remaining wax with the cloth.
If using a hair dryer, keep it on a low setting aimed at the wax. Once the wax softens, gently wipe it away with a lint-free cloth.
Skip ahead to read the full details.
Method 3: Freeze and Scrape – Place a plastic bag full of ice cubes on top of the wax to freeze it. Once the wax is cold and brittle, gently scrape it away with a plastic spatula, spoon, or credit card. Skip ahead to read the full details.
Method 4: Use Wax Removing Products – There are several highly-rated products available formulated to help remove candle wax, among other things. My favorites are Goo Gone, Weiman Wax Away, and De-Solv-it Orange Sol Citrus Solution Spray. These products work well for minor spills or wax stains but are not designed to clear major wax spills (use the Heat and Wipe method for those). Despite some experts’ advice, avoid mineral spirits because they are a stripping agent and could remove the protective sealant on your wood floors or furniture. Skip ahead to read the full details.
Remove Candle Wax From Unfinished Wood – The best way to remove wax from unfinished wood is to use the Heat and Wipe method with an iron. This method works on unfinished wood because it draws the wax upward into the paper towels, including wax that’s embedded deep in the wood grains.
Preventative Measures – Nothing beats the warm glow and relaxing scent of a real candle. But, if you want to be extra careful around expensive wood furniture, opt for a safe alternative such as LED candles, ultrasonic diffusers, or electric oil lamps. Another way to avoid damaging your wood is to simply place a protective mat under your candles or buy candles in glass jars.
Final Thoughts – Take your time when applying these methods. Rushing through them or skipping steps could lead to unnecessary damage. Remember to address the spill soon after it cools, use low heat settings with the Heat and Wipe method, and stick to plastic utensils when scraping.
Method 1: Settle and ScrapeThe Settle and Scrape method is the simplest method, and it works best for removing minor wax spills.
If you have a significant mess, skip ahead to Method 2.
This method, which is recommended by the Home Care & Cleaning Products Lab of the Good Housekeeping Institute, requires patience and a gentle hand.
Let’s get into the details.
The Settle and Scrape MethodMaterials Needed- Firm, plastic spatula, plastic spoon, or credit card (make sure it’s expired in case it gets damaged)
- Piece of paper
- Clean, white, or light-colored lint-free cloths
- Hand towels or protective cloths
- Furniture polish of your choice (or furniture wax cream)
- Step One: Using the spatula, spoon, or one side of a credit card, begin to scrape the wax off in the direction of the wood grain. If your wood has cracks or deep crevices, use the pointed tip of the spatula or rounded edge of the credit card to help dislodge the wax.
- Step Two: As the wax fragments begin to accumulate, gently push them onto a piece of paper with the spatula or credit card in a broom and dustpan fashion.
- Step Three: Repeat this process until the wax is completely removed.
 It may take several rounds of scraping.
 - Step Four: Once the wax is removed, use a clean, lint-free cloth to buff the treated area.
- Step Five: Next, use furniture polish, working it in with the cloth, and blend until you are satisfied with the results.
Not sure what furniture polish to use?
I recommend Orange Glo (see on Amazon), which is an alcohol-free wood polish and conditioner designed to remove grease, wax, and dirt. Another great option is Weiman Wood Cleaner and Polish Wipes (see on Amazon), which are rejuvenating furniture wipes made with plant-based ingredients.
Preparation and ConsiderationsIf the spill just occurred, allow the wax to cool completely. Patience is critical because, if you try to wipe or scrape hot wax, you’ll end up burning yourself, ruining a cloth, and spreading the wax around, furthering the mess.
Before you start, peel off as much as possible with your hands. This will minimize the amount of scraping necessary.
The main downside of this method is that you run the risk of scratching the wood if you’re not careful. To minimize this risk, work in the direction of the wood grain.
Sometimes the wood grain is evident just by looking at the direction of the lines, but it may be much harder to see on stained or painted wood.
In those cases, run your hand across the wood. The direction that feels smoother is the direction of the wood grain.
Use white or light-colored cloth to buff and apply polish to avoid any potential dye transfer from a colored cloth.
Finally, protect the surrounding area with hand towels to avoid stray wax from getting onto clean wood surfaces.
Method 2: Heat and WipeThe Heat and Wipe method is the best way to remove major wax spills from wood.
Why?
Because other methods, like the Settle and Scrape, only work for cleaning a few drops of wax. If you try scraping off a giant blob of wax, you’re almost guaranteed to scratch the wood. This method works wonders on major messes because it doesn’t require scraping with sharp objects at all.
In short, this method involves gradually warming the wax, so its composition becomes softer. Once the wax is soft enough, you can wipe it with a cloth or absorb it into a paper towel, avoiding the risk of scratching your furniture.
There are two different ways to go about this method. One involves a hair dryer, and the other involves a clothing iron.
Let’s get into the details.
Materials Needed- Clean, white, or light-colored lint-free cloths
- Heavy-duty paper towels
- Cheap washcloths
- Heat source: iron or hair dryer
- Furniture polish of your choice (or furniture wax cream)
- Step One: Hold the hair dryer at least three inches away from the affected area.
- Step Two: Using a low setting, point the hair dryer toward the candle wax.
- Step Three: When the wax begins to soften, try to peel off what you can with your hands. And then use a lint-free cloth to wipe the area.
- Step Four: Repeat the heat application and wipe the area until the wax is completely removed.
- Step Five: Use a clean, lint-free cloth to wipe the treated area, apply furniture polish, and buff.
- Step One: Place your iron on the lowest setting with no steam.
- Step Two: Cover the affected area with at least three layers of heavy-duty paper towels.
- Step Three: Place a clean, iron-safe, lint-free cloth, or washcloth over the paper towels.
- Step Four: Press the iron onto the cloth over the affected area for three to five seconds.
- Step Five: Pull back the cloth to see if the wax absorbed into the paper towels.
 If not, you may need to add an extra second or increase the temperature slightly.
 - Step Six: Repeat the process with a clean section of the paper towel until the wax is entirely removed. You may need to replace the paper towels after a few heat applications, depending on the amount of wax.
- Step Seven: Using a clean, lint-free cloth, wipe the treated area, apply furniture polish, and buff.
You can use these methods separately or together. If you have deep grooves in the wood, the iron can be used as a secondary step once you’ve removed the majority of the wax with the hair dryer.
Using an iron is a slower process than removing wax with a hair dryer because you must gently apply the iron to a cloth over the affected area, repeatedly. But, it’s the best method to use when the wax is deeply embedded in the wood grains because it draws the wax upward into the paper towels. If you don’t have the time, try the hair dryer method.
If using the iron method, start on the lowest setting with no steam and only increase the temperature if the wax is not melting. The iron should be warm, not extremely hot.
Make sure to place several paper towels on the wax. This is very important. If you don’t use enough paper towels, the wax will absorb into your cloth, harden within the cloth’s fibers, and cause an annoying mess.
Wax absorbed into a paper towelUse a large washcloth to ensure that the surface of the iron never comes in direct contact with the wood.
Check the fabric makeup of your washcloth to avoid scorching the cloth during the process.
Method 3: Freeze and ScrapeI recommend the Freeze and Scrape method because it’s a relatively quick fix and doesn’t require heat, so it’s safer if you want the kids to help.
This Old House, an Emmy-winning trusted resource for homeowners and DIY enthusiasts since 1979, recommends this method and involves freezing the wax with ice.
Here are the details.
The Freeze and Scrape MethodMaterials Needed- Firm, plastic spatula, plastic spoon, or credit card
- Clean, white, or light-colored lint-free cloths
- Ice
- Plastic zipper-style bag
- Furniture polish of your choice (or furniture wax cream)
- Step One: Add several ice cubes to a plastic bag.
- Step Two: Place the bag over the affected area for one minute to help freeze the wax.
- Step Three: Use a plastic spatula, plastic spoon, or credit card to remove the cold wax gently. It usually will break off in one clump but may leave trace amounts of wax behind.
- Step Four: Use the spatula or credit card to help gently scrape the remaining wax.
- Step Five: Once the wax is removed, clean and buff the area using a lint-free cloth and the furniture polish of your choice.

Use enough ice to cover the affected area. Be sure to place a lint-free cloth as a buffer between the bag of ice and the wax stain so that condensation will not make the wax wet.
When wax gets cold, it becomes more brittle, which makes it easier to break or scrape off wood surfaces.
If the wax is deeply embedded in the wood grain and there are remnants left behind after using this method, consider using the Heat and Wipe method to finish the job.
Method 4: Use Wax Removing ProductsAnother way to remove wax from wood is to use a product specifically designed for the job.
There are several wax-removing products on the market, but these are the three I recommend. All three get are inexpensive and get extremely high ratings on Amazon:
- Goo Gone or Goof Off (check out my comparison)
- Weiman Wax Away
- De-Solv-it Orange Sol Citrus Solution Spray
These products have multiple uses, so follow the instructions on the label for best results.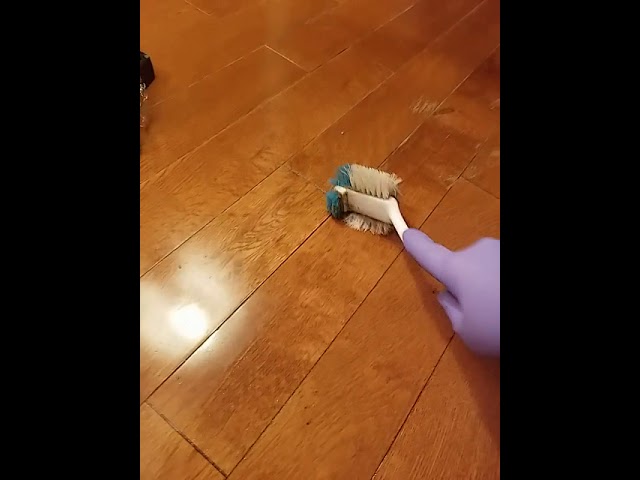
One major caveat—these products work well if you need to remove a minor smear of wax, but they don’t stand a chance against significant spills. If you have a considerable mess, you need to alter the composition of the wax so it detaches from the wood (as I described in Method 2).
Although some experts suggest using mineral spirits to clean up wax, I wouldn’t recommend it.
Why?
Because mineral spirits are stripping agents. Sure, they may remove the wax, but they also could remove the protective sealant on your wood surface.
So, you’ll solve one problem, but you’ll create an even bigger problem in the process—the damage it could cause may require you to sand and reseal the surface of the wood. In my opinion, it’s not worth the risk.
Speaking of repairs, if you damage a few minor areas while removing the wax, all is not lost. These simple-to-use products will help you fill in scratches and restore your wood:
(click to see each product on Amazon)
- Coconix Floor and Furniture Repair Kit
- Ram-Pro Furniture Markers Touchup Repair System
- Katzco Furniture Repair Kit Wood Markers
Wood is innately hygroscopic, which means it absorbs and retains liquid easily, just like a sponge.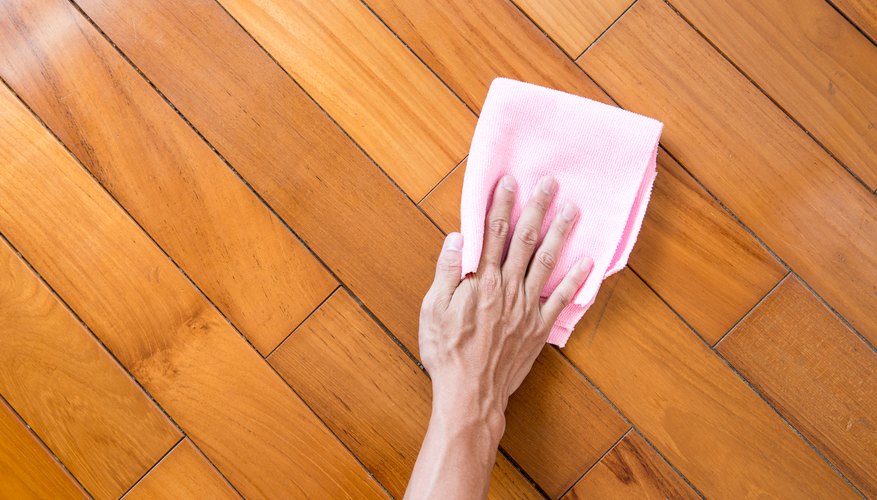
Most wood floors and furniture are sealed with a protective layer, usually polyurethane, which prevents liquids such as water and hot wax from absorbing.
But, if you spill wax on unfinished wood that’s not protected with a sealer, the wax will soak into the wood’s pores, making it extremely difficult to remove.
Even worse, if the wax has dyes or color tints, it can permanently stain the wood. Again, due to the porous nature of unfinished wood, the stain will settle deep in the layers of the wood.
If you find yourself in this situation, don’t panic.
The best way to remove wax from unfinished wood is to use the Heat and Wipe method with an iron as the heat source.
As I described earlier, here’s what you need to do:
- Place several layers of paper towels over the wax.
- Lay a washcloth over the paper towels
- Set the iron to the lowest temperature (no steam)
- Press the iron on the washcloth in five-second increments.
- Replace the paper towels as they absorb the wax.

The Heat and Wipe method works best on unfinished wood because the heat from the iron draws the wax into the paper towels. Other methods, such as the Settle and Scrape, may remove the top layer, but won’t remove the wax that’s embedded into the wood grains.
If you give the Heat and Wipe method a solid try, but your attempts are unsuccessful, you may need to sand the wood gently.
If you’re dealing with an expensive piece of furniture, I suggest calling a professional. You can get a free quote from sites like HomeAdvisor to get an idea of what it will cost.
Preventative MeasuresWhile there’s nothing like the beauty and fragrance of a flickering candle, there are some safer options to try if you’re worried about ruining expensive wood furniture or floors.
These options will either give you the close-to-real glow you desire, scent, or a combination of both without the risk of creating a waxy mess.
LED Candles (see on Amazon): Many LED candles are battery-operated or solar-powered and shaped like pillar candles, votives, or tea lights, and mimic a flickering flame. Some even come in wax form with a scent, but the flames are all LED lights.
Ultrasonic Diffusers (see on Amazon): While you won’t get the candle-glow feel with these devices, many of them light up. Adding essential oils provides a pleasant scent profile without the threat of spilling candle wax.
Scented Oil Lamps and Warmers (see on Amazon): Scented oil lamps and warmers are another safe, flame-free option that smells fantastic without the waxy mess on your wood. You can use oils or scented wax melts for the fragrance.
You can also set your candles on heat-safe mats or stands to guard against spills. Options such as candle mats, heat-resistant placemats, or silicone trivets all do the trick.
Final ThoughtsWhen you discover a hard clump of candle wax on your beautiful wood floors or furniture, there’s no need to stress.
If you follow the steps I outlined in this article, you’ll have it cleaned up in no time.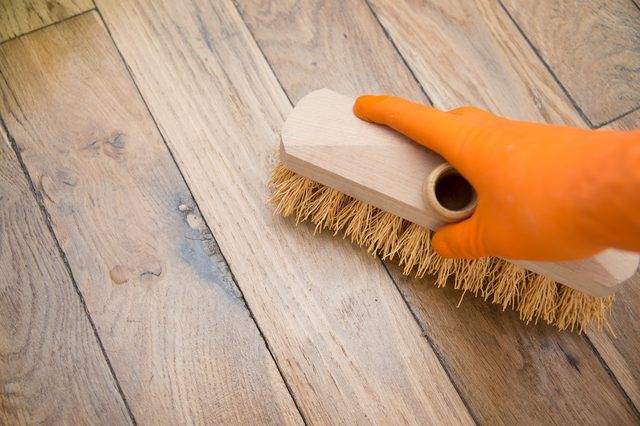
But, before you roll up your sleeves and tackle that mess, keep these “do’s” and “don’ts” in mind.
Do’s
- Attend to the spill as quickly as possible (but not right away since fresh wax will be piping hot). The longer it sits, the more it can settle into the wood.
- Take your time when scraping the wax and use a plastic spatula, plastic spoon, or credit card to limit the risk of scratching the wood.
- Use a low heat setting on an iron or hair dryer to remove wax.
- Use furniture polish or wax already proven to work well with your finished wood furniture to put the finishing touches on the cleanup.
Don’ts
- Don’t allow a candle wax spill to sit for several hours or days.
- Don’t apply an iron directly to the wood surface when using the Heat and Wipe method.
- Don’t use metal, including knives and razor blades when scraping the wax. You can damage the wood surface.
- Don’t use products with mineral spirits as they can strip the protective finish from the wood.

- Don’t use abrasive materials such as steel wool, green scrub sponges, or Mr. Clean Magic Eraser or magic eraser-type products on finished wood.
What methods have you tried?
Have you tried any of these methods? If you have, let us know how they worked for you—and please share your tips in the comments below!
If you found this article helpful, you should also check out:
- The Ultimate House Cleaning Checklist (Printable)
- Bona Hardwood Floor Cleaner (The Ultimate Review)
- How to Deep Clean Hardwood Floors: 5 Simple Steps
- Top 4 Best Vacuums for Hardwood Floors and Area Rugs
- Goo Gone vs. Goof Off: Which Adhesive Remover Is Better?
- Bona vs. Swiffer: Which Floor Mop Is the Best?
- Rejuvenate vs. Bona: Which Floor Cleaner and Polish Is the Best?
- How to Clean and Disinfect Microfiber Cloths (Step-by-Step)
- Clorox vs. Lysol: Which Disinfecting Wipes Kill More Germs?
- Tide vs.
 Gain: Which Laundry Detergent Is the Best?
 - Canister vs. Upright: Which Type of Vacuum Is Best for You?
- How to Fix a Cracked or Chipped Porcelain Sink (8 Easy Steps)
- How Long Does Grout Take to Dry? (With Real Examples)
- Mr. Clean vs. Pine-Sol: What’s the Difference?
How to remove wax from the floor
Wooden floors are coated with a special wax to provide additional protection and decorative surface. Wax gives the floor wear resistance, moisture resistance, repels dirt. Thus, it extends the service life of the floor surface.
Waxing your floor is an excellent alternative to varnish. The wax mixture is an environmentally friendly product that does not have an unpleasant odor, so it is absolutely safe for human life.
Wax is applied by rubbing it into the surface of the wood with a woolen material or a special brush. Waxed floors are floors with breathable wood. The wax penetrates into the pores of the wood without forming a film on the surface.
But what to do if the waxed floor has lost its original appearance, how to renew it and remove the top layer of the coating?
If only some areas of the waxed surface have worn out and you intend to wax the floor again without changing it to another paint, it is sufficient to simply sand the damaged areas and cover with a new coat of wax. To do this, it is absolutely not necessary to remove the entire wax surface from the floor and renew the entire coating.
If you decide to change the paintwork material, for example, to varnish or floor paint, the wax must be removed from the surface. To do this, you just need to buy a wax remover from the same company as the wax itself, and wash it off the surface.
When it is not possible to remove the wax with a professional, special remover, scrape or remove the wax from the wooden surface. This must be done very carefully so as not to damage the wooden surface of the floor.
Small residues can be melted with a hair dryer, then blot the melted wax with a paper towel or towel.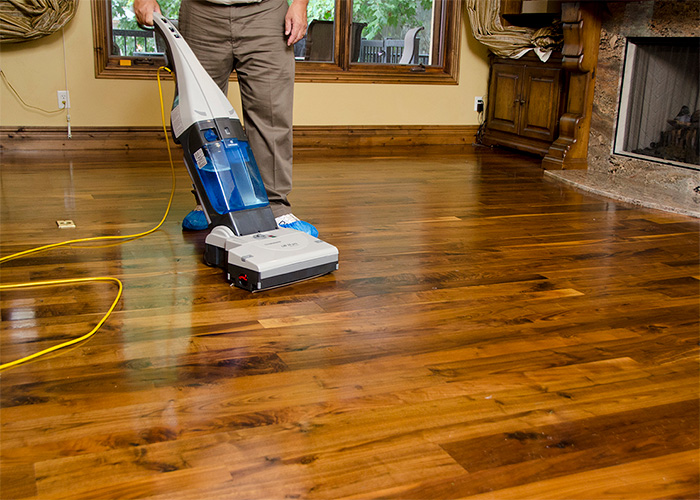
After all the wax has been absorbed into the towel, the wooden floor should be wiped off dirt and dust, rinsed and sanded. After that, the wooden floor can be primed and start applying a new paint and varnish.
When applying varnish or paint to the surface, cover the floor in two even thin layers. The second layer is applied only after the first has completely dried. After that, the surface is polished.
Also, to remove wax from the surface, you can contact the floor painting specialists - StroyHaus company. The company's employees know everything about the technology of applying and, conversely, removing wax from a wooden surface.
The company's employees will also be able to cover the floor with a new flooring product - high-quality Feyco products. You can cover the floor surface both with transparent materials that will favorably emphasize the rich look of wood, and with various colored varnishes and paints. They hide the wood texture well.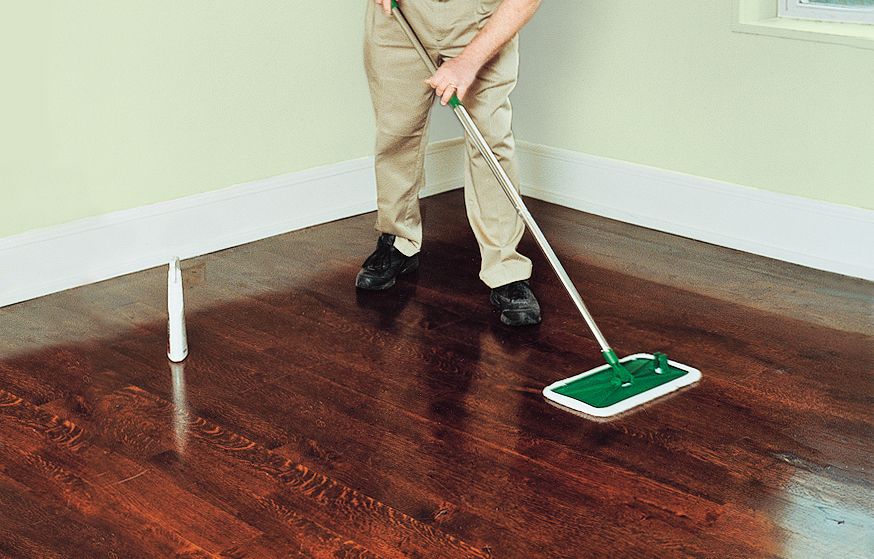
The most important thing is to choose a color that fits perfectly into the overall interior of the room. Then your house will be bright, attractive and comfortable.
How to gently remove wax from wooden floors: some effective ways | Lifestyle
Perhaps you have decided to surprise your loved one and prepared a romantic dinner with candles. What a surprise it was when the next morning you found drops of wax on the wooden floors. You start to panic and in a hurry try to get rid of the pollution with improvised means.
In fact, wax on wooden floors is not as big a problem as it seems. It can be solved by several means that are available to absolutely anyone.
Materials needed
What you will need:
- ice cube;
- plastic credit card or razor blade;
- hairdryer;
- wood furniture wax;
- cotton fabric.
You probably won't have to go to the store to get all the supplies you need. All of the above are in most people's homes.
Step-by-step instructions
First, use an ice cube to solidify the wax droplets. This is one way to remove wax from wood floors with minimal scraping. Just hold an ice cube in place for thirty seconds. If the drop of wax is fresh and still pliable, you may need more time: a minute or even two.
Use a credit card or a thin razor blade if available to scrape off frozen candle wax drops. Refreeze the stain if the stain cannot be removed from the floor.
Polish the floors after removing the drops of candle wax. Wipe the area dry with a clean cloth. Be sure to collect all the water that has melted from the ice cubes! If there are still traces of wax on the surface, clean a wide area of the floor with wood furniture wax to cool any remaining dirt.
You may find it pointless to use wax to remove a wax stain. In fact, your fears are unfounded. Furniture wax is specially formulated to help remove surface imperfections and protect wood products. Polishing a large area, rather than a small affected area, helps to make the surface on which the stain was located less noticeable.
Use a hair dryer to remove dirt.
Use a hair dryer. Turn on the device, setting the medium mode, and point it at the wax droplets. It is very important to keep the hair dryer at a distance of 20-30 centimeters from pollution. The heat will help soften the wax. It will be easier for you to scrape the wax off the floor without damaging the surface.
Once the wax has softened, use the edge of a plastic credit card or a razor blade to remove the stain from the wood floor.
If there are still traces of wax on the surface of the hardwood floors, finish the cleaning by applying wood furniture wax to polish and clean the entire damaged area. This process will help remove any remaining dirt and help refinish your floors.
What to avoid
Do not use mineral spirits, as they can break down the real wax on the floor from the "sealed" wood surface, leaving it unprotected.