White shelf decorating ideas
Decorating A Bookshelf - StoneGable
Do you need a little help and some creative ideas for decorating a bookshelf in your home? Here's a super easy way to decorate any bookshelf and lots of bookshelf ideas.
Does decorating a bookshelf seem like a daunting task? Is it hard to know where to begin to style shelves that add beauty and interest to a room? You don’t need to be an interior designer to create the prettiest and most meaningful bookshelves! Let’s demystify the process and create interesting and curated bookshelves. Here is my easy process that you can use over and over again to style any shelf in your home.
This post contains affiliate links. That means when you click on some of the links in this post and you make a purchase I earn a small commission at no cost to you. All my opinions are my own. You can view my full disclosure here.
OUR BOOKSHELVES
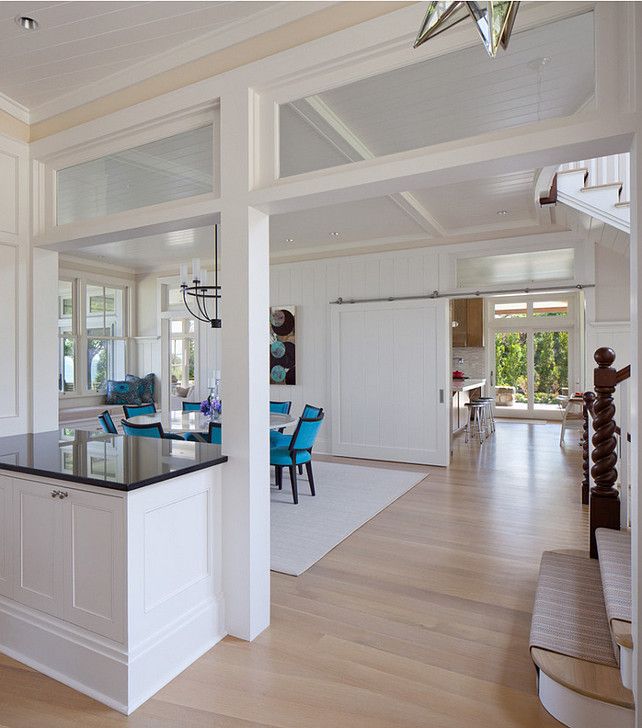
Our bookshelves sit at the end of our long entryway just before it opens up to the living room.
It was because of the long wall that I felt a piece of furniture, the right piece, would add lots of interest to this area. But I did not want something big or heavy that would look out of place.
You can see from the image below that this bookcase is quite narrow. Just what I was looking for!
So we chose this white bookcase with black metal doors. You can see it HERE. It’s really a very well made, lovely piece of furniture. It has a light with three settings that light up the cabinet from above.
And it is a nice focal point connecting our foyer and living room. We are finally going to replace the tile with hardwood. Yay!
Because of the openness of our Tanglewood House, there is really no place for shelves in our living room or family room. So this new handsome bookcase gives me the opportunity to do one of my favorite things… style shelves!
We do have built-in bookshelves in our home office and I use the same styling technique to decorate them.
Here are some helpful tips and ideas for decorating a bookshelf.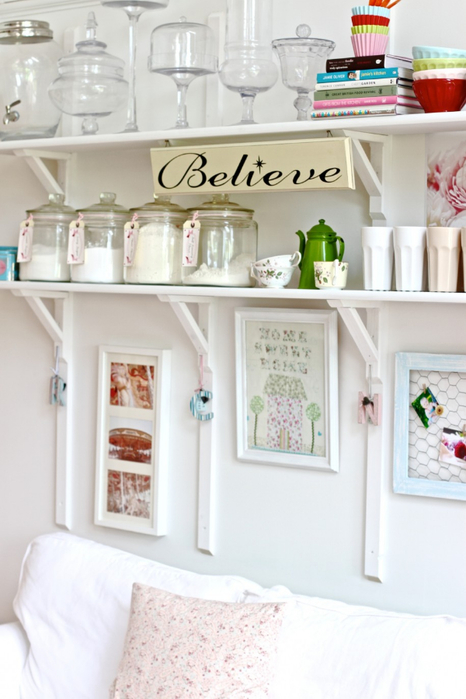
TWO THINGS TO KNOW WHEN YOU DECORATE A BOOKSHELF
There are so many things to consider when styling bookshelves. We will briefly overview them later in the post but there are two major things to know.
- a curated bookshelf does not happen in 15 minutes
- my grid method for decorating a bookshelf
First, you really cannot rush the process and inspiration when you decorate bookshelves! Give yourself time to work and rework and add and edit and leave and return and do it again the next day! I have never just styled a bookshelf and, viola, got it perfect the first or even the third time.
The second thing to know is how to use the easy grid styling technique I developed more than a decade ago. It works like magic every time!
START WITH EMPTY SHELVES
Start with totally empty shelves. And since there is nothing on the shelves give them a good cleaning!
MY EASY DIVIDE AND CONQUER BOOKSHELF TECHNIQUE
I came up with a super simple, works every time technique to help me decorate flat surfaces like shelves and buffets and hutches, and even coffee tables.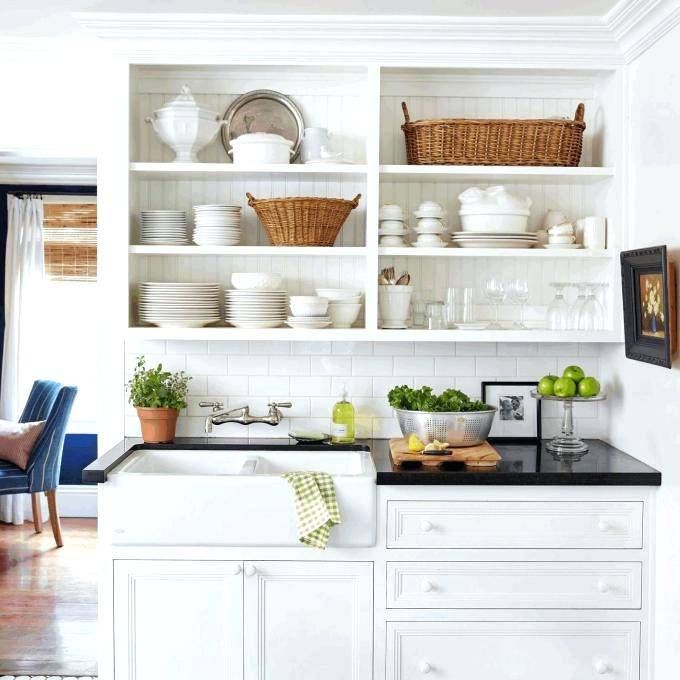 And it works especially well when styling a bookshelf.
Here’s how it works…
I divide a bookshelf using a grid layout.
I use the evenly spaced shelves as my horizontal lines and divide each shelf into imaginary equal parts vertically. This gives me a grid to help me decorate.
The longer the shelf is the more grids it will have. My new bookcase is 44 1/2 inches wide, so I divided each shelf into thirds. All the thirds are equal.
Here’s an example of items in each grid.
Each grid can…
- be filled with one or more things
- or left bare
You can also forgo using the spaces made by the grids and decorate a shelf by putting objects on the grid line. See the example below…
Think about creating a little vignette in some of the spaces.
So with the grids in mind, I started to decorate the bookcase.
START WITH LOTS OF OPTIONS
When starting to decorate a bookshelf you want to give it a curated look. That means all the books and objects on the shelves look like they have been carefully and expertly chosen.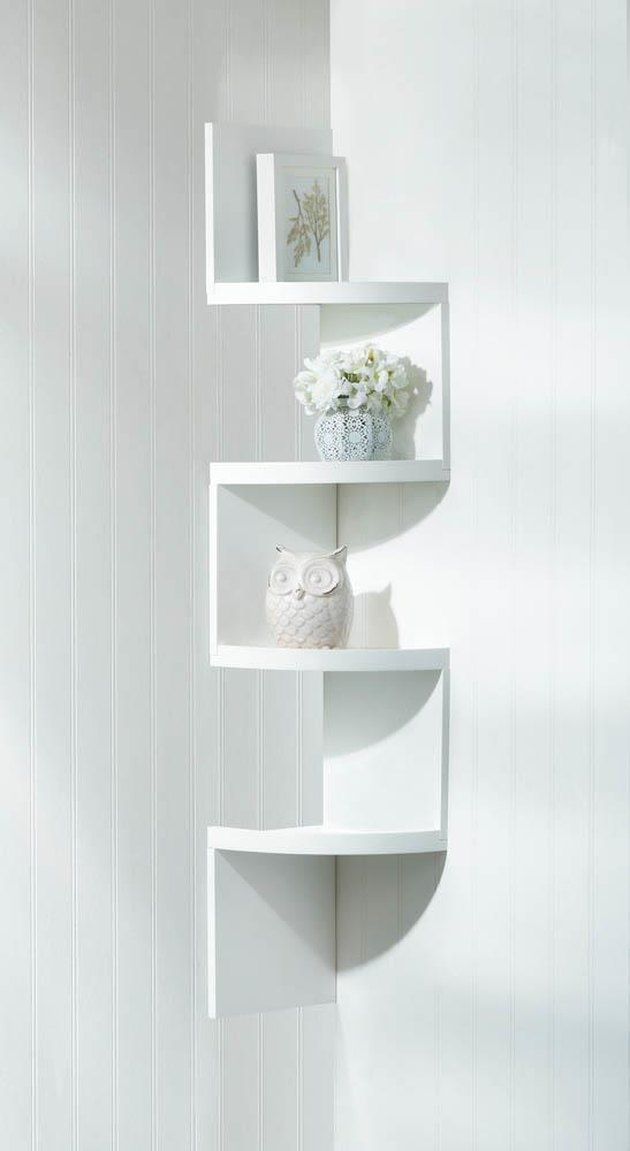 It also means that these objects have been culled out of a larger group of objects.
In other words, the items that should go on a bookshelf are purposefully chosen and are samples of the best decor and books you cherish.
So, bring out lots of accents and other decor. Give yourself lots and lots of choices! I put a utility table up near the bookcase and brought up lots of options from the basement and other rooms in our home.
WHAT KINDS OF THINGS SHOULD GO ON A BOOKSHELF?
The easy answer is almost anything. Anything but clutter. For there is nothing pretty about clutter!
Here is a list of the most popular accessories and other things you will often find on bookshelves…
- vases
- baskets
- a vertical stack or horizontal stack of books with spines out or pages out
- bookends
- a unique bowl
- greenery
- book collections in one color
- a decorative box
- sculpture
- piece of art
- large coffee table books
- battery operated candles
- a tray
- picture frames
- family photos
- a pedestal
- something you have made
- plates
- collection of trinkets with a theme
Really there are so many things you can add to a bookshelf!
Bookcase decor is very personal! Choose things that are so meaningful to you that you want to display them.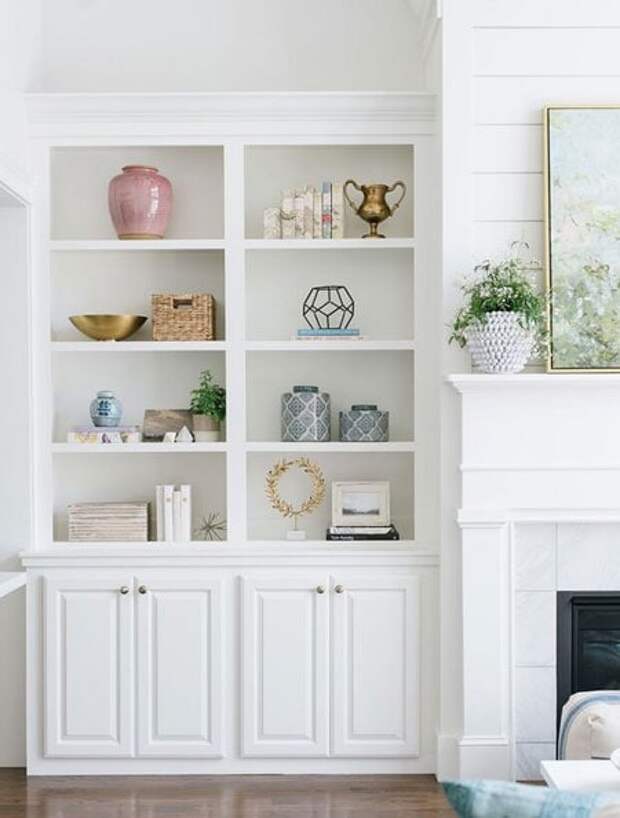 And also choose things to display that add to your bookshelves’ overall look and beauty. The idea is to showcase all the lovely things you have curated to go on a bookshelf.
CHOOSE THE PERFECT COLOR PALETTE
One thing that will really help the items on your bookshelf look nice together is keeping a color palette in mind. Choose a bookshelf color palette that works with the room your bookshelf is in.
A bookshelf looks so pretty when all the items in it work around a coordinating color scheme.
If your bookshelf decor is very monochromatic or neutral you might want to think about adding interest with a pop of color! A contrasting color can liven up a booshelf.
CHOOSE YOUR DECOR STYLE
Most of the things in a bookshelf should also work with your decorating style. Because many of the things we put on shelves are things we already have then it’s a good bet they will work within the parameters of your style.
That does not mean there can’t be an outlier or two just to add a bit of fun to a shelf. The bright yellow ceramic giraffe your child made in the third grade might find a home on a shelf. It certainly will be a conversation piece!
When someone looks at your bookshelf they should be able to tell a bit about you! After all the things that go on them are things you have!
I love the cheetah print books in the bookcase! They are special to me because I made them. What an easy DIY! You can see how I made the TORN TISSUE COVERED BOOKS HERE.
WHERE TO START ADDING DECOR TO A BOOKSHELF
There is no right or wrong place to start decorating a bookshelf. Some start on the top shelf and others might start on the bottom shelf but I usually start on the middle shelf! And that is what I did when I styled this bookcase.
The best thing to do is just to start!
Here are a few things that will really help you when you decorate a bookshelf…
IT’S ALL ABOUT BALANCE
Ballance is your best friend when styling bookshelves.
Balance is all about distributing visual weight in a pleasing way.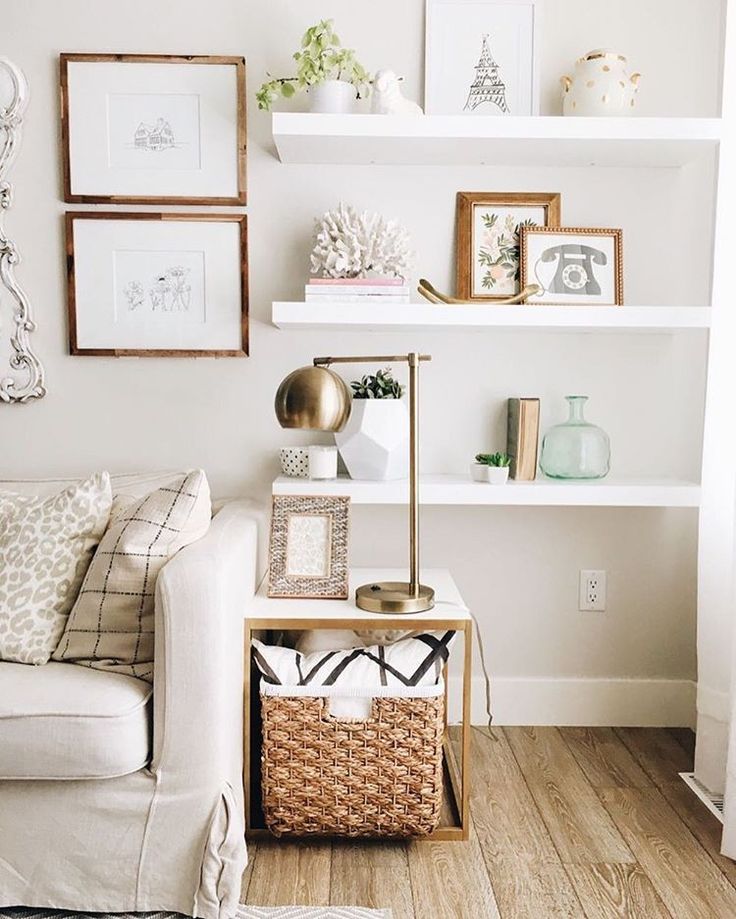
Did you know we assign visual weight to everything we see?
We want to distribute our decor across a shelf and between the shelves in a way that balances the visual weight of the decor evenly.
The easiest way to do this is with another imaginary line. Draw a line down the middle of your bookshelf like the image above.
We want the things on one side of a shelf to be about equal in visual weight to the things on the other side. This is often done using symmetry.
From left to right the things in the image above look pretty balanced. BUT overall the left side is too visually heavy!
There was too much visual weight on the left side of the bookshelves! Moving the books with the artichoke bookend to the opposite side on the shelf and one shelf above looks much better because the shelves are more balanced!
You might like to read more about THE DESIGN PRINCIPLE OF BALANCE.
HEIGHT IS IMPORTANT
Our eyes LOVE to travel from one object to the next.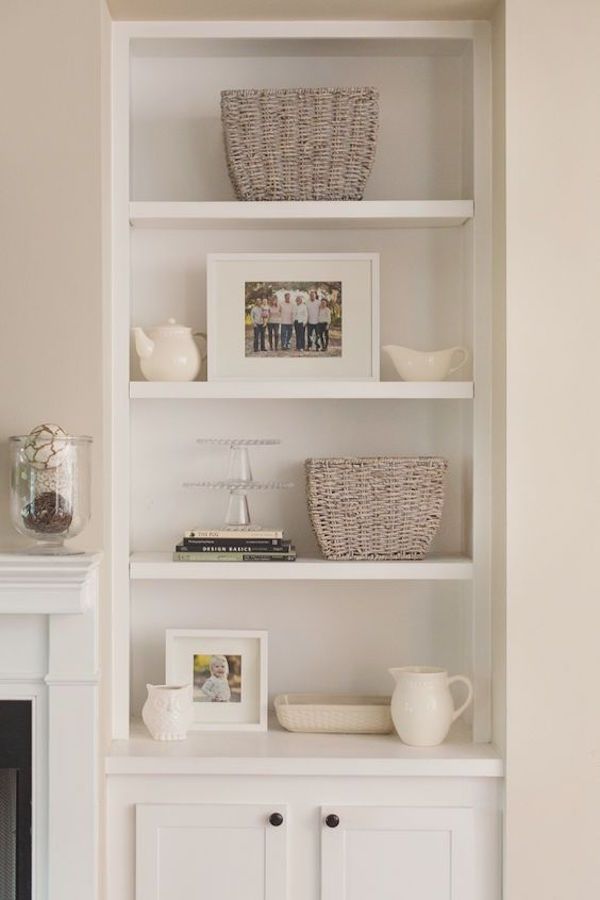 And they do this by noticing the difference in height of objects.
So we want to make sure that some things on a bookshelf are different heights.
Just remember: Different heights are pleasing. Everything the same height is boring!
REPETITION IS A GOOD THING
Another way our eyes work their way around a bookshelf is by finding things that repeat.
Here are some of the things to repeat in your bookshelf design…
- texture
- color
- objects
- pattern
- metals
- shapes
- textures
- and lots more
Here are a few examples of repetition on the bookshelves.
Color and shape are two other strong repeated elements in our bookshelves.
You might like to learn more about RHYTHM AND REPETITION IN DECORATING.
LAYERED DECOR ADDS INTEREST
Putting two or more items together in an artistic way is called layering. Objects can be put on top of each other, beside each other, and adjacent to each other.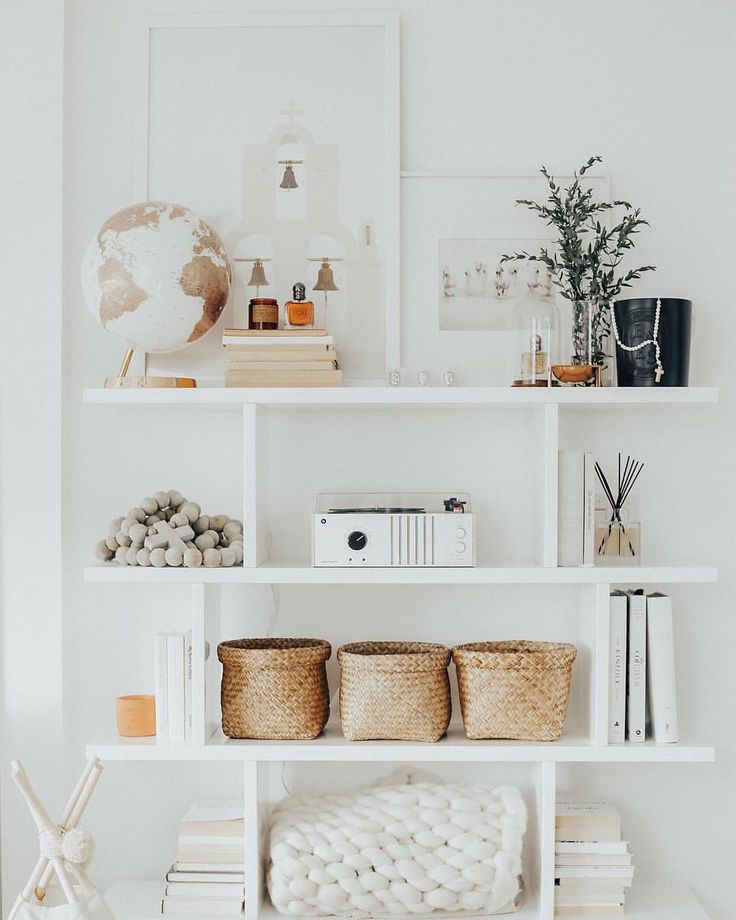 They just need to be artfully arranged in proximity to each other.
You might want to think about adding wallpaper, fabric or shiplap as a backdrop layer in your bookshelf! So pretty! Just remember to keep the wallpaper or fabric pattern unfussy!
The main function of layering decor is to create interest and add depth. Most of us layer decor without really being conscious of it!
One word of caution! Over layering or using too many things in a space can look cluttered and busy. Opt for simple layering with it comes to bookshelves!
You might like to read HOW TO LAYER DECOR LIKE A PRO.
GIVE YOUR SHELVING A BIT OF BREATHING ROOM
When it comes to decorating multiple shelves, remember to leave a bit of space between your decor. I like to call it a bit of breathing room!
Negative space, an area with nothing in it, gives our eyes a tiny rest! And that is a very good thing.
You might like WHY SPACE IS IMPORTANT IN DECORATING.
ARRANGE AND REARRANGE
Arranging bookshelves is all about adding and editing and arranging and rearranging different items until you have achieved a well balanced, attractive looking display.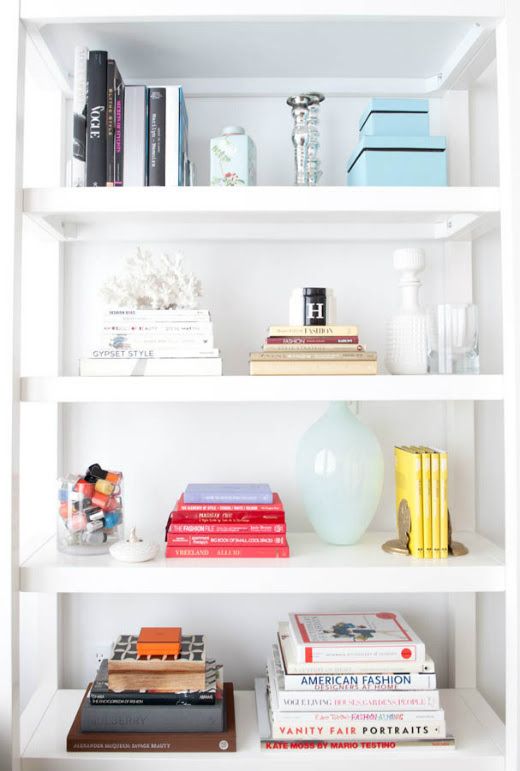
The images below are just some of the arranging and rearranging I did on the shelves!
This usually takes lots of time and many many tries. At least, it does for me! Enjoy the process and be confident that you will create something you love in the end!
Here’s the shelf styling I decided on for today! I think I’ll probably edit a few things out tomorrow when I look at it with fresh eyes.
USE YOUR SMARTPHONE
Your smartphone is like your decorating assistant! Snap a few pictures as you work and you will be amazed at what those pictures can show you.
As we work, our eyes can get used to our design, and often we don’t see what might not be working.
But pictures can! So get out your phone and snap away!
WALK AWAY FROM YOUR BOOKSHELF
At one time in my life, I used to paint. I loved to paint and took lots and lots of painting classes.
One teacher told me to take my painting home and leave it in the trunk of my car overnight and not look at it until the next day.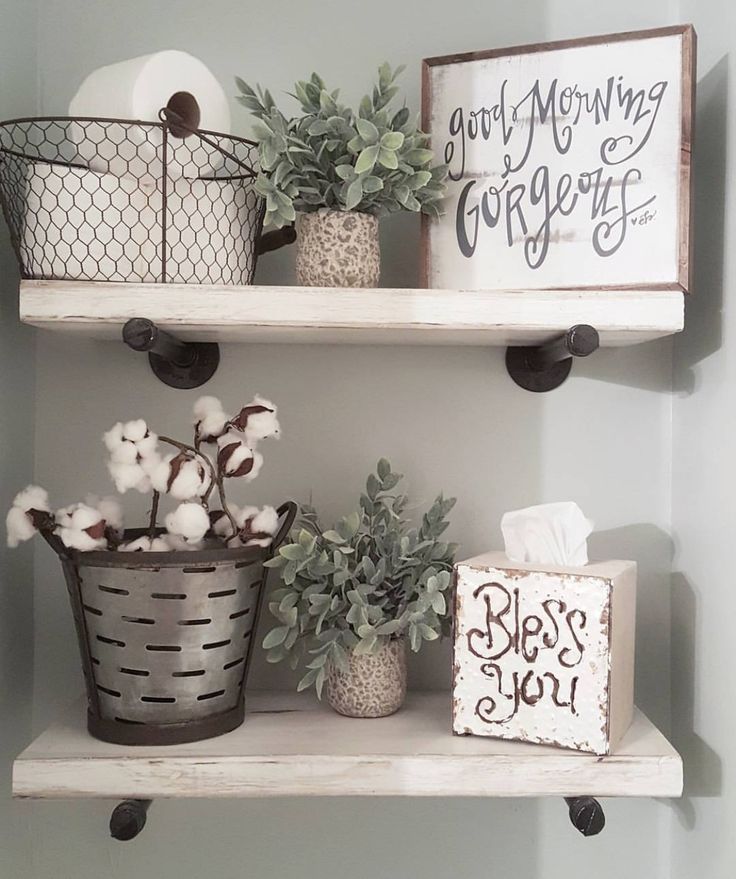 So I did.
And when I took my painting out of the trunk the following day I was actually surprised at how much better it looked! I called that trunk magic! It seemed to work almost every time!
Here’s how I use this lesson when I decorate.
After I style something I walk away from it for a while, especially if I’m a bit frustrated. Then the next day I go back and give what I’ve decorated a good look! It’s amazing how much better it looks! Or if something is not quite right I can pick it out right away and change it.
Trunk magic works when decorating a bookshelf too!
Don’t be too hard on yourself! Decorating is a continual learning process. Find joy in learning interior design and all the secrets, tips, and tricks of the trade.
I hope you have lots of useful tips for styling the shelves, bookshelves, or bookcases in your home!
DECORATING A BOOKSHELF SOURCES AND FAVORITES
Turn on your JavaScript to view content
Bookshelf Decor Ideas: Simple Formulas That Work!
In this post: Struggling with how to decorate a bookshelf? I’m sharing my simple tried and true formulas for adding bookshelf decor that works!
Our previous home was pretty limited on closet and storage space, but we’ve had LOTS of built-in bookcases so I was basically forced to figure out how to decorate shelves and bookcases to keep those rooms from looking bare and boring.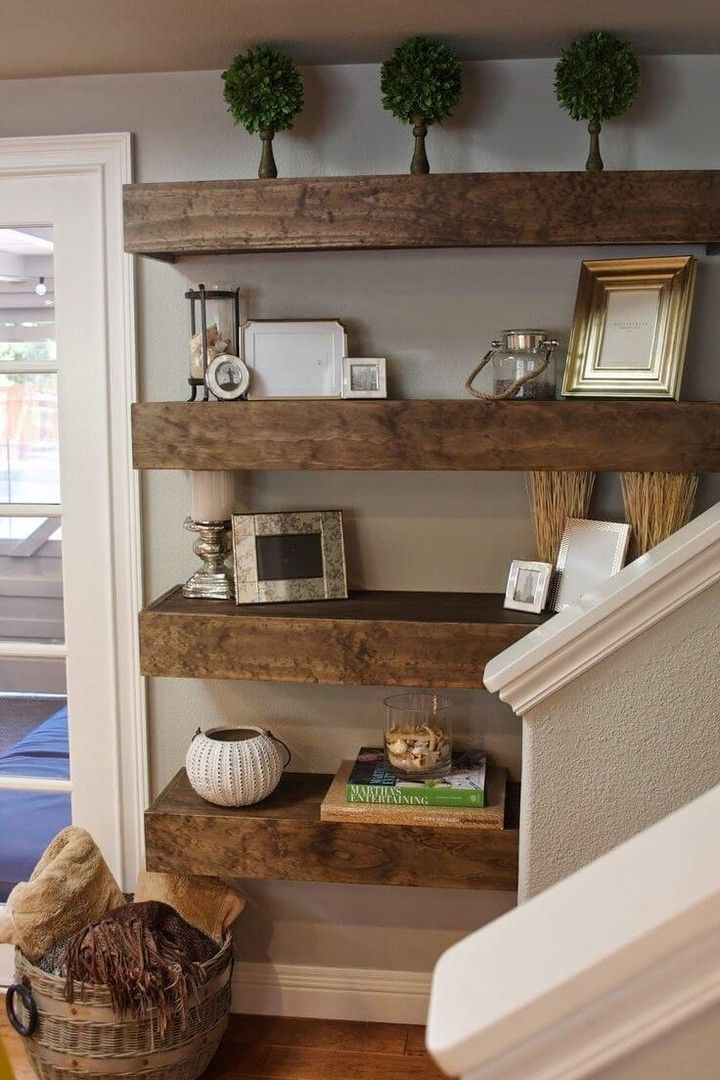 And I’ve made it super easy for you to do too by sharing six simple formulas that you can use to jump-start your shelf decorating. So if you’ve got some bare shelves that have been bugging you, hopefully you’ll find the inspiration and know-how to finally decorate those babies up! Let’s head on into the family room first… (post includes affiliate links – full disclosure statement available {here})
Sources: Chandelier (satin bronze) | Sectional | Patterned gray pillow covers | Black & white dot pillow covers | Tasseled pillow cover | Plaid throw (similar) | Rug | Acrylic coffee table (similar) | Coffee table tray (28″ square) | Grasscloth wallpaper behind shelves (Charcoal) |
Most of you have been following my blog long enough that you’ve seen this space many times before but if you’re here for the first time, you can check out more pics of it and get a better idea of the layout of the two bookcases in the room {here}. Whoever designed this bookcase made it pretty easy on me because they broke the shelves up in a way that the shelving space on both the left and right sides is perfect for housing a single decorative accessory so for those it was one and done:
The middle shelves aren’t quite as simple but I figured out a few no-fail formulas as takeaways for you to use:
#1. Books + bookend next to filled bowl
Choose 5-8 books (you can bring some color into your space by choosing ones with spines in your favorite colors or by wrapping them in a favorite fabric or you can keep things neutral by turning the books around so the pages show instead of the spines) and add a decorative bookend. My favorite online source for unique bookends is Etsy {here}. Place a bowl next to it (it doesn’t have to be wood – it can be metal, woven, etc.) and fill it with something decorative. These are a few of my favorites:
Turn on your JavaScript to view content
I threw in a bunch of faux cabbages that I had laying around after using them on my fall fireplace mantel but you could also use decorative ceramic balls, faux flowers, shells….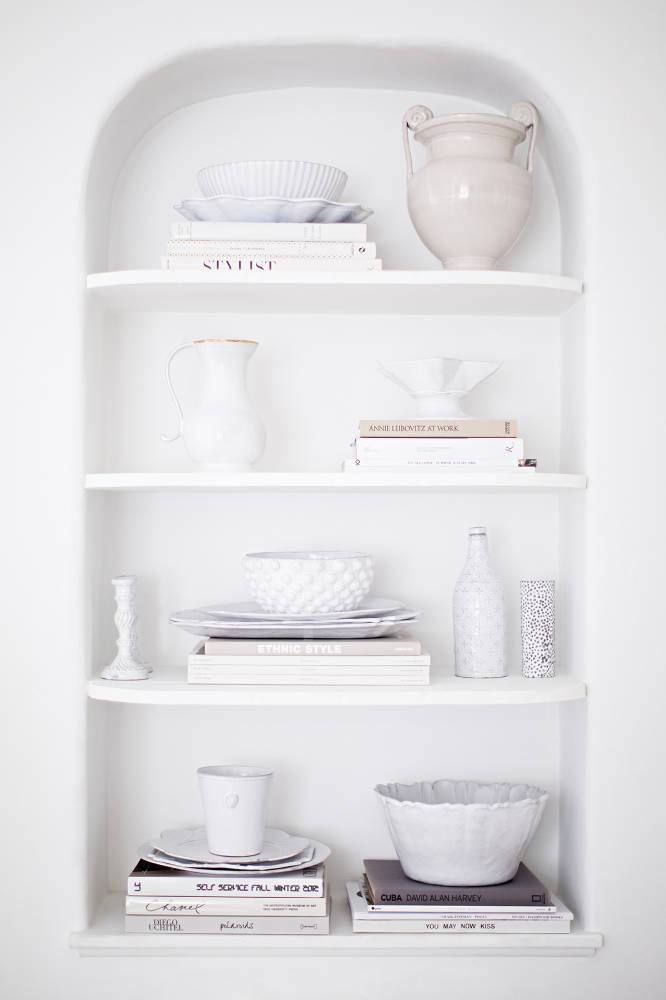 just about anything!
#2. Leaning books + ball shaped accessory next to vase on books/box
Lean a few books (starting with one or two that are fairly tall) against the end of the bookcase and put some type of ball shaped accessory next to it such as my oyster shell ball (you can find a similar one {here}). The rope whatchamacallit on the bottom right of my bookcase would have worked well in that spot too! Next to it, place a either a shallow box or two stacked books and put a medium sized vase (mine was a HomeGoods find!) on top.
#3. Tray or art print in middle + tall accessory on left + low accessory on right
Start with a sizable shallow round tray (mine was a thrift store find but {this one} is similar) or an art print or mirror (it doesn’t have to be round – square or rectangular would work fine too). Ideally you want something fairly tall but you can always cheat like I did and put a few books under it to add height. Add a tall accessory such as a plant on one side (this is my FAVORITE plant – it’s a type of snake plant and it survives even the worst neglect!) and an accessory that’s fairly low in height on the other. I used {this dried star pod} – it’s kinda weird but I kinda love it and have used it on my fireplace mantel too! I have another example of this formula on our other bookcase too – let’s head that way…
Can you guess which shelf it is? Yep, the middle shelf on the left – there’s a center art print (mine is similar to {this} Let’s Stay Home printable) with a small plant on one side and a large accessory (like {this candelabra} that’s similar to mine) on the other:
And there are two other simple formulas you can steal from this second bookcase:
#4.Tall, thin accessory + smaller accessory next to framed print
Start with a tall, thin accessory such as a vase (mine is a HomeGoods find!) and add a small accessory in front and a bit to the side. Place a framed photo, art print, or a mirror next to it. In choosing your accessories, the important thing is to have some variety in height (my vase is closer in height to my framed photo than I’d actually like – having a several inch difference is best!).
#5. Large accessory next to decorative box + small accent piece on top
Start with a large accessory – it can be a sculpture like mine, a bust, a ceramic horse head…. pretty much anything! Then next to it, place either a horizontal stack of a few books or a decorative box (such as {this black & white striped box that I have}) and then add a small accent piece (such as {this small piece of coral} on top of the box.
Now we’re going to head on into our home office but before we go did you notice that the top middle shelf = formula #1?! It’s definitely a formula that works because I didn’t even realize I had decorated two shelves the same basic way until writing up this post 🙂
I’ve shown our home office on the blog and Instagram many times before but usually I’m sharing pics of our gallery wall that’s on the other side of the room. Today we’re turning the camera round to the big ole built-in bookcase:
Home Office Sources: Rug (similar) | Faux cowhide (similar) | Semi flush mount ceiling light | Wingback desk chair (similar) | Acrylic curtain rods | Drapes – no longer available
A chunk of the shelving space is already taken up by a TV and two speakers and the area above the desk has little wood cubbies that I filled with {these IKEA KVARNVIK boxes} but there was still plenty of shelving in need of some styling:
I came up with two more shelf styling formulas you can use as take-aways to style your own shelves:
#6.
 Books + vase (or similar) as bookend + long, narrow basket
Start with a few upright books on the end of the shelf and then use a vase or other decorative accessory as a bookend. Anything that’s the right height and heavy enough to support the books will work so it’s a great spot for something unique and/or meaningful – for ex., I love horseback riding and have used my old saddle stirrups as bookends before. Here are a few vases I love that would work:
Turn on your JavaScript to view content
Next to it, add a long, narrow basket that you can put books in, fill with something decorative, or use as storage for office supplies, etc. (mine has some of my zillion fabric samples in it). Having more variation in the height of everything (i.e. taller books and a shorter vase) than my shelf does would look better – do what I say, not what I do – ha!
#7. Upright books + horizontal books + small decorative object
This is one of my simplest shelf styling formulas and one I use all of the time (including on the shelf above the TV in this bookcase).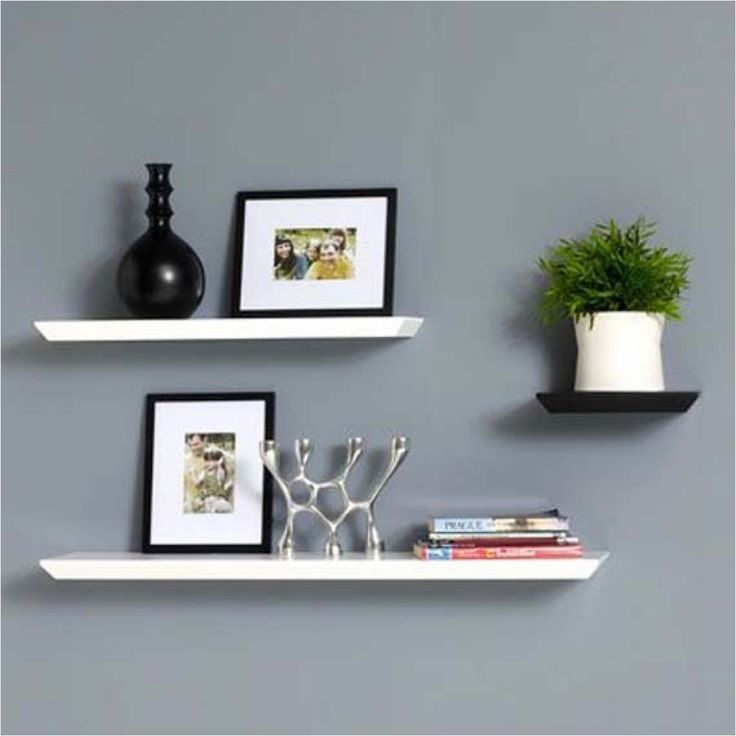 You simply stand about 4-6 books upright on the end, then lay 1-2 books down right next to them and put a small decorative accessory on top. I LOVE white coral and have several pieces of it so am using that on top of the book but it can be anything including sentimental pieces like those big ole ceramic pieces that kids make in art class and you don’t know what to do with! Place whatever you want next to this little arrangement on the shelf – I layered a piece of plaid artwork that my youngest daughter made plus a brass pig that feeds my weird love for brass animals.
Update! I’ve started decorating our shelves in our new house – you might get a few new ideas from these too:
Sources: Patterned rug | Wallpaper on back of bookcase | Round rattan mirror | Terra cotta handled vase | White coral on stand | Jewelry box | Brass cross base planter | Round basket | Plant mister | Rope door stop (similar) | Other bookcase decor no longer available
Tips & Ideas for What to Put on Your Shelves
I hope you guys found those formulas to be helpful – I’m a girl who likes to spell it all out! To wrap things up, I wanted to share a few final tips and suggestions to keep in mind when you’re decorating your shelves:
- Odd numbers typically work best – you’ll notice that most of my formulas involve doing things in 3’s
- Keep things interesting with lots of different textures (like chunky baskets, coral, etc.
 ) and finishes (different metals, colors, etc.)
 - Don’t be afraid to leave some empty space! My large jug on the bottom shelf in our family room is all alone on a shelf that’s a couple feet long but it works!
- Show your personality, interests, etc. Shelves are a great place to put family photos, keepsakes, or anything that makes you smile. They can be filled with books too but don’t have to be. Whenever I share a pic of our bookcases on Instagram, at least one person says “bookshelves should be for books”. Nope. They should be for whatever you want them to be – it’s your home so do what you love!
- Stagger the heights of your objects (but you guys already picked up this tip earlier, right?!)
- If you don’t have enough light to keep plants alive on your shelves, go with faux! There are some great ones out there:
Turn on your JavaScript to view content
- Dress up your bookcase by lining the back of your shelves with wallpaper! I used {this grasscloth wallpaper} on my shelves in the family room.
Phew… are you still with me?! Drop a comment and let me know if you have any questions or if I just confused the heck out of you!
XO,
- Pin
- Share
8 wow ideas for decorating open shelves in the kitchen
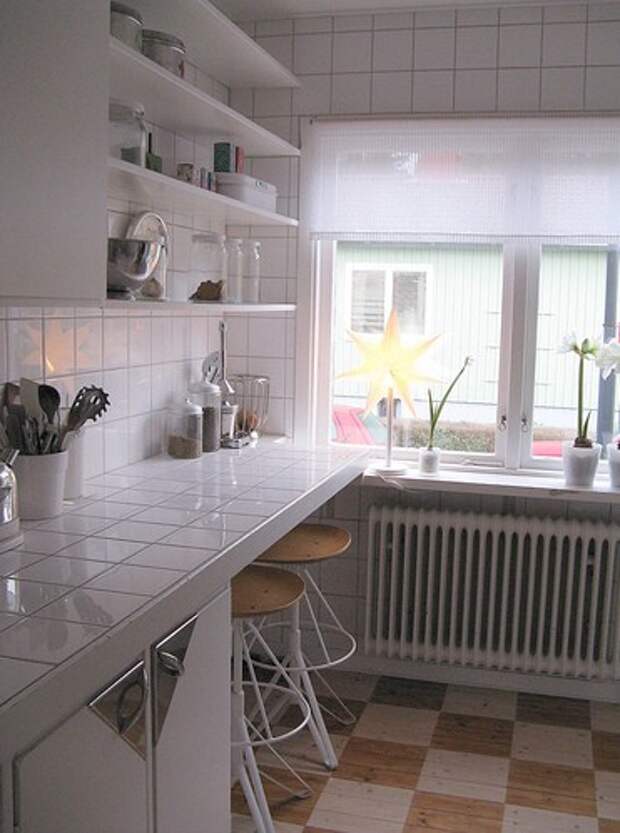
1 Use one color
If you paint the shelves to match the walls and fill them with dishes or jars in the same shade, you get a concise and visually light composition. This design option is suitable for small spaces or interiors where you need to maintain a minimalist style of storage.
Social media blogger mini_residence
Transparent glass goes well with any, even the most complex shade. It is worth remembering this when considering the filling: it is not necessary to choose containers strictly in one color. Some of them may be, for example, partially or completely glass. nine0005
2 Vignette with crockery
Storage on open shelves can be designed not only useful and ergonomically, but also very aesthetically pleasing.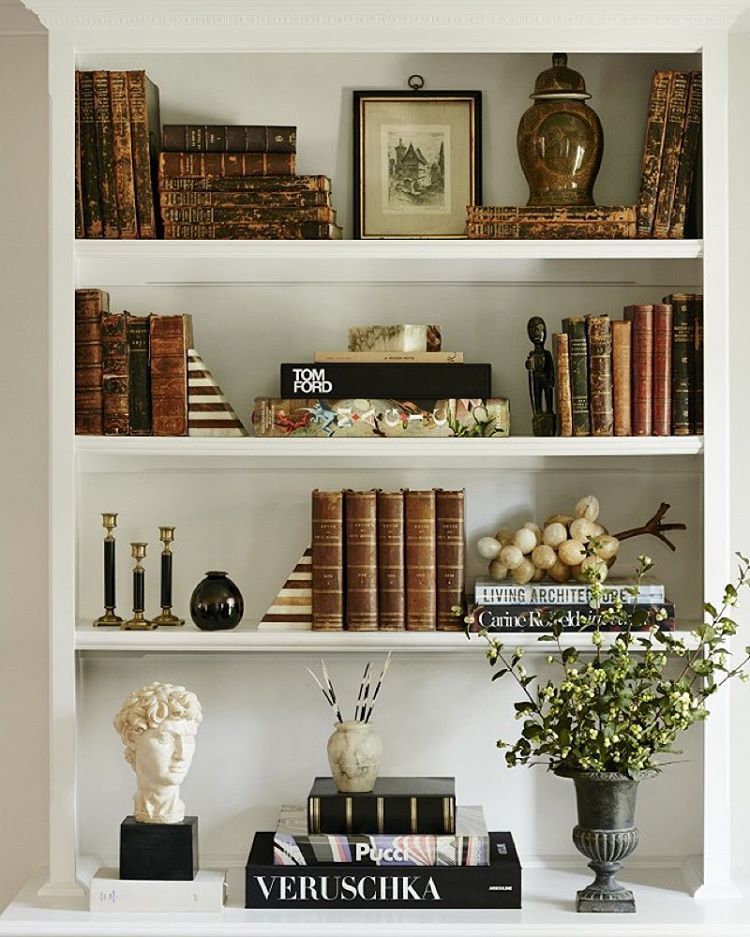 For example, make the dishes part of a decorative composition with photographs, flowers, inscriptions and any decorations that you like.
Social networks of blogger kaityj.designs
When creating such a vignette, remember about moderation: do not put too many things next to each other, a few light decorative touches are enough. Otherwise, instead of decoration, you get a warehouse of assorted items in a conspicuous place, and this spoils the interior. nine0005
3 Cross-divided
An interesting open storage option, ideal for country or Provence style interiors, are shelves divided crosswise. Inside you can store glasses, beautiful bottles or a collection of wine.
Vatter Construction Social Media
With sufficient depth, you can place containers with spices, cereals and pasta on such a shelf. Transparent jars will look especially beautiful, in which the texture of the products is clearly visible.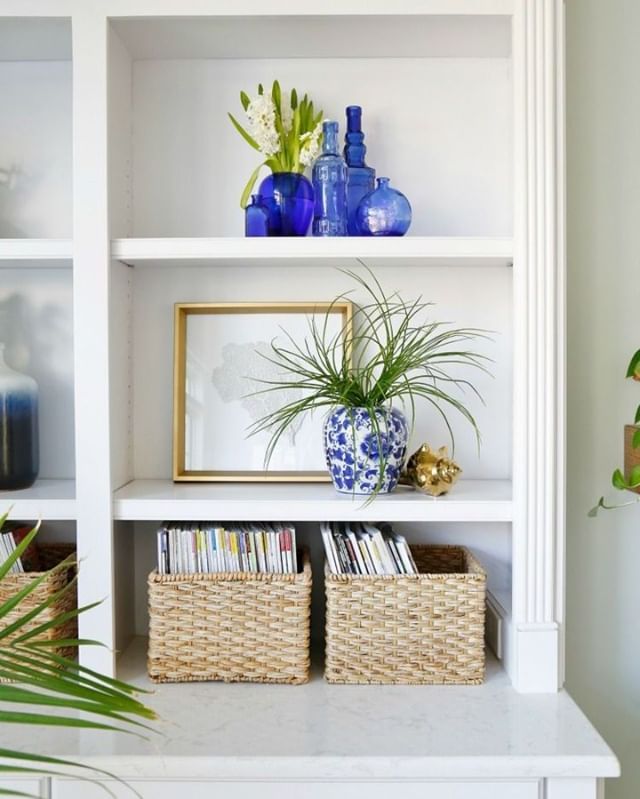 nine0005
4 Fill with matching jars
A simple and beautiful way to organize open storage in the kitchen is to fill all the shelves with the same style jars. For example, these can be clear glass jars with cork or wooden lids.
Blogger social networks agv_my_lifestyle
The jars do not have to be the same size. You can create an interesting rhythm on the shelf by using higher or lower containers. Or experiment with their shape. nine0005
5 Choose dishes to match your interior
Open shelves look especially stylish, the contents of which completely match in style, color or shape with the rest of the space.
DMD Bespoke Interiors Social Media
For example, if you have a white kitchen, then let the plates with cups on the shelf be the same color. And in a minimalist interior, you should forget about monograms and prints on dishes, complex shapes or colorful accessories. nine0005
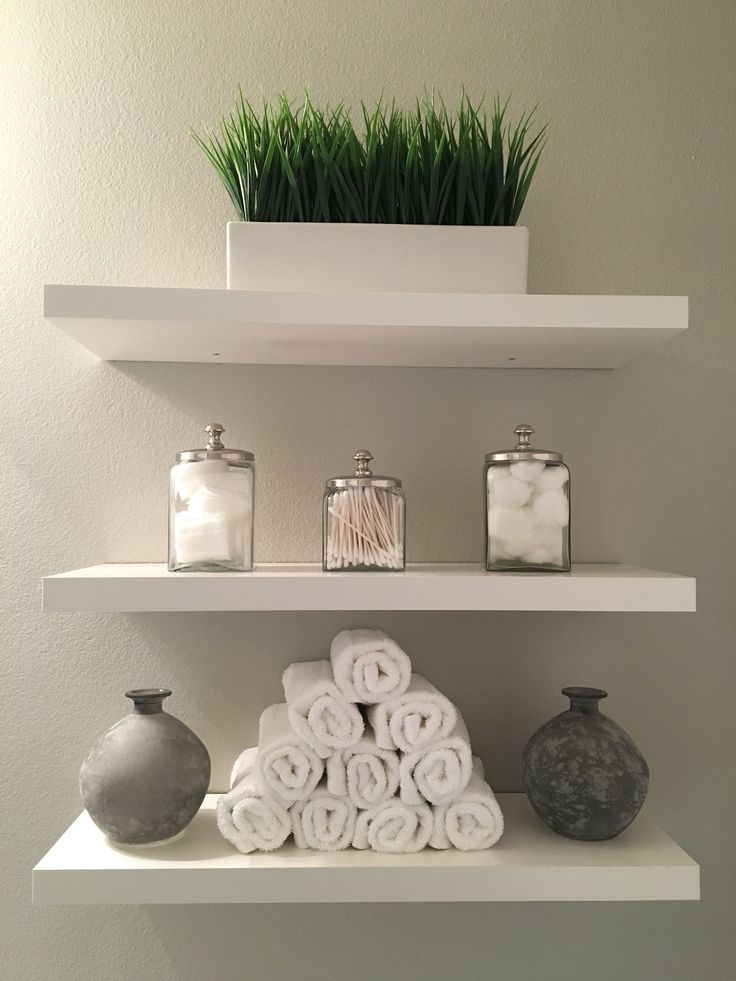
6 Place plants
Houseplants are a win-win solution for open shelves. They look appropriate in different styles, refresh and complement any interior, making it harmonious and complete.
AOM Studio Social Media
The loaches descending in a beautiful cascade down from the shelf look especially impressive. But they can only be placed on high shelves and away from the hob so that the plant feels comfortable and does not interfere while cooking. Or choose small flowers in compact pots. nine0005
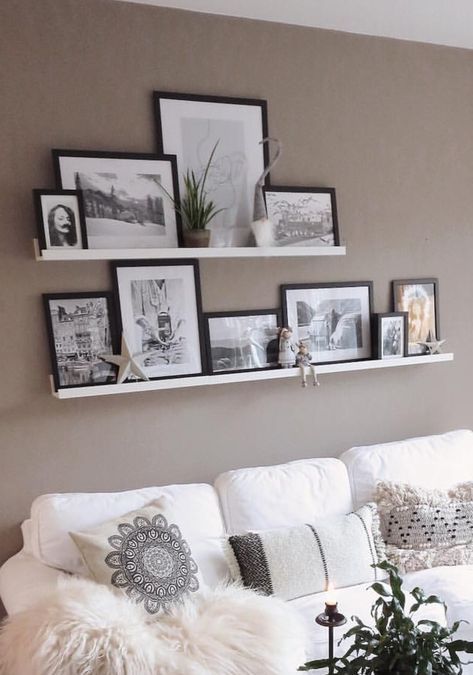
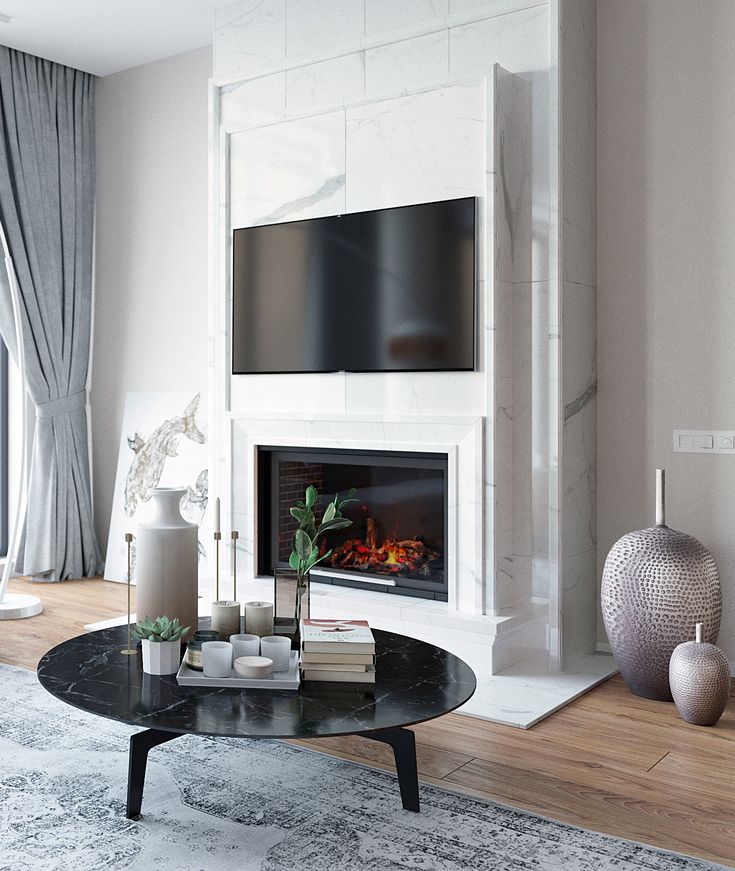
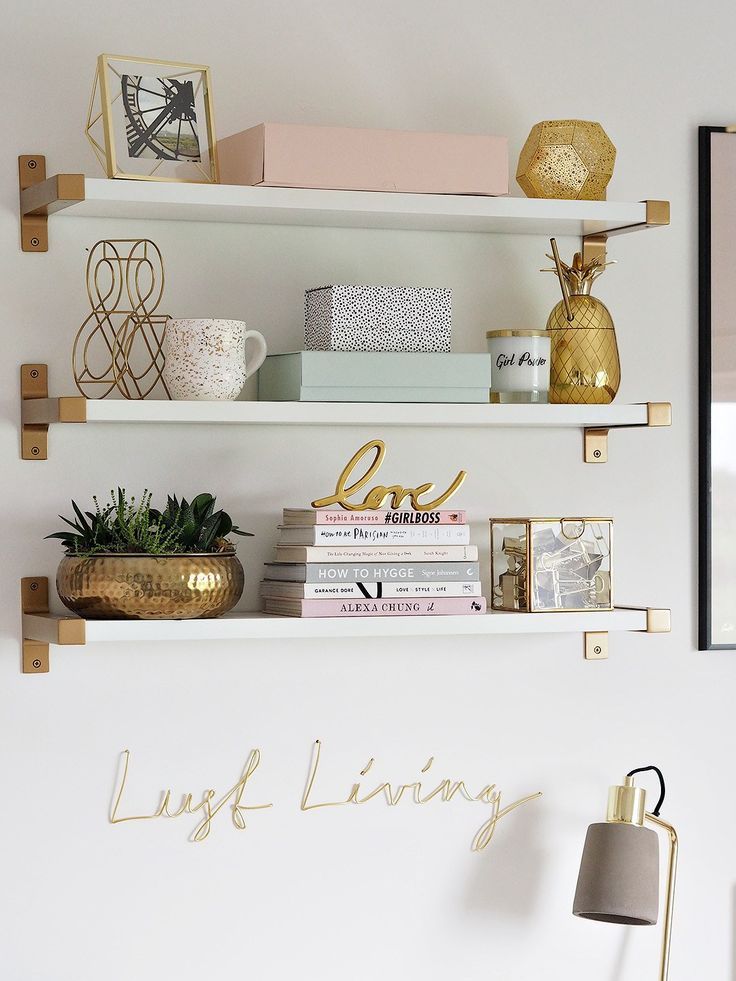
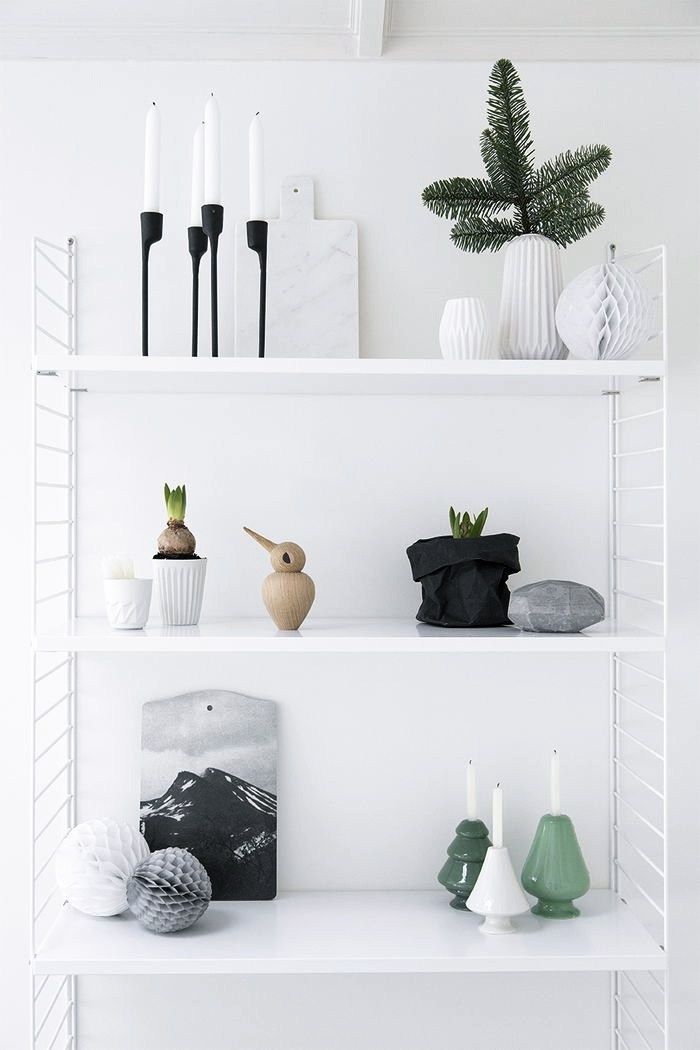
7 Decorate with a poster and candles
Just a few details are enough to give your shelves a purely decorative character. For example, a beautiful poster or a picture surrounded by candles in candlesticks will look very colorful.
Blogger social networks _wohnhaft_living_
This option is suitable for kitchens with ample storage, where there is no need for additional space for plates and cups. In this case, you can give the open space for decor without regret. nine0005
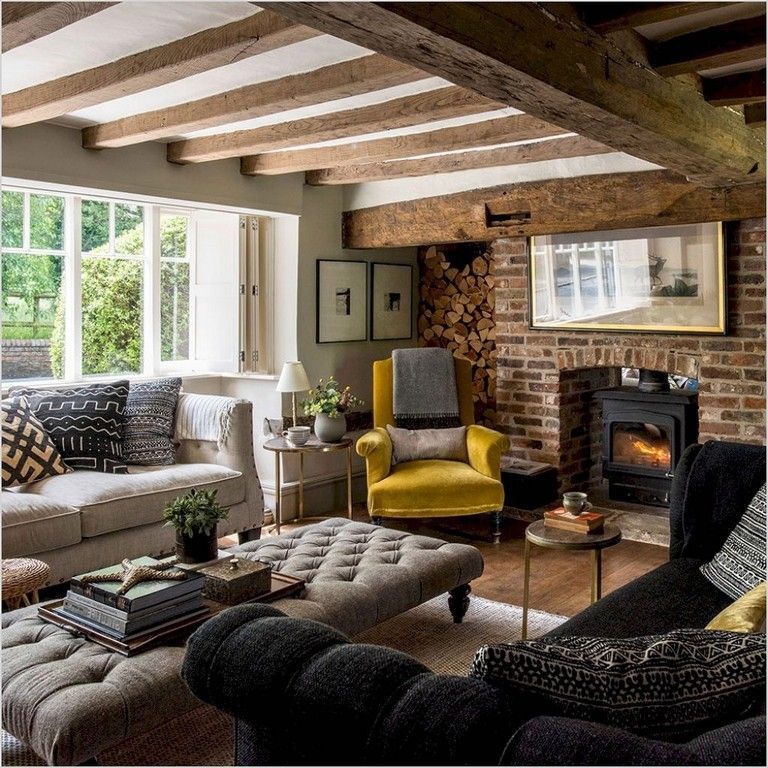
8 Bring out the texture of wood
Create a cozy interior in Scandinavian or rustic style with the help of wood texture. It can be used not only in decoration, but also in small accents.
Social media blogger villaarniano
One of these touches can be wooden dishes on open shelves. In addition to plates, beautiful cutting boards or just cut wood will do. Of the latter, by the way, excellent coasters for hot dishes are obtained. nine0005
Prepared by
Elena Perlova
8 decorator tips — INMYROOM
Interior decor
How to turn a simple rack into a stylish piece of decor? What and how to arrange on the bookshelves? Practical tips and examples of original shelving
The design of shelving or shelves is not so much an interior design as it is a decorating art - that is, in fact, something that we can do on our own in our free time.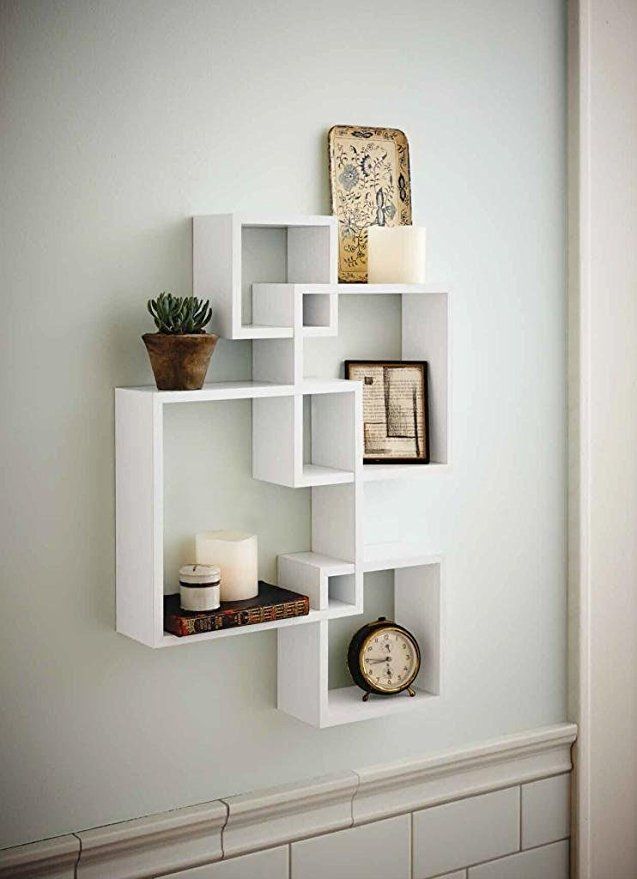 nine0005
Shelving should not be written off as purely functional. With a few tips and tricks, you can turn your shelves into a stylish piece of decor that reflects your passions and matches the style of your home.
Where to start?
Here, your imagination is only limited by the available items. Definitely not just about books.
Put on the shelves everything that makes sense to you: collections, travel souvenirs, photo frames, cups and awards, beautiful tableware and flower vases. nine0085
Limit the number of shades you use
Be careful not to make a mistake with the combination of shades - use no more than three colors. When decorating the rack, you can add another neutral (white, black, gray). Combine the color of the decor on the shelves with the color of other interior items.
Hide everything you don't need in boxes and baskets
Beautiful boxes, caskets and wicker baskets look neat and aesthetically pleasing. Remove small items, magazines, books, dishes that are not intended for display in them.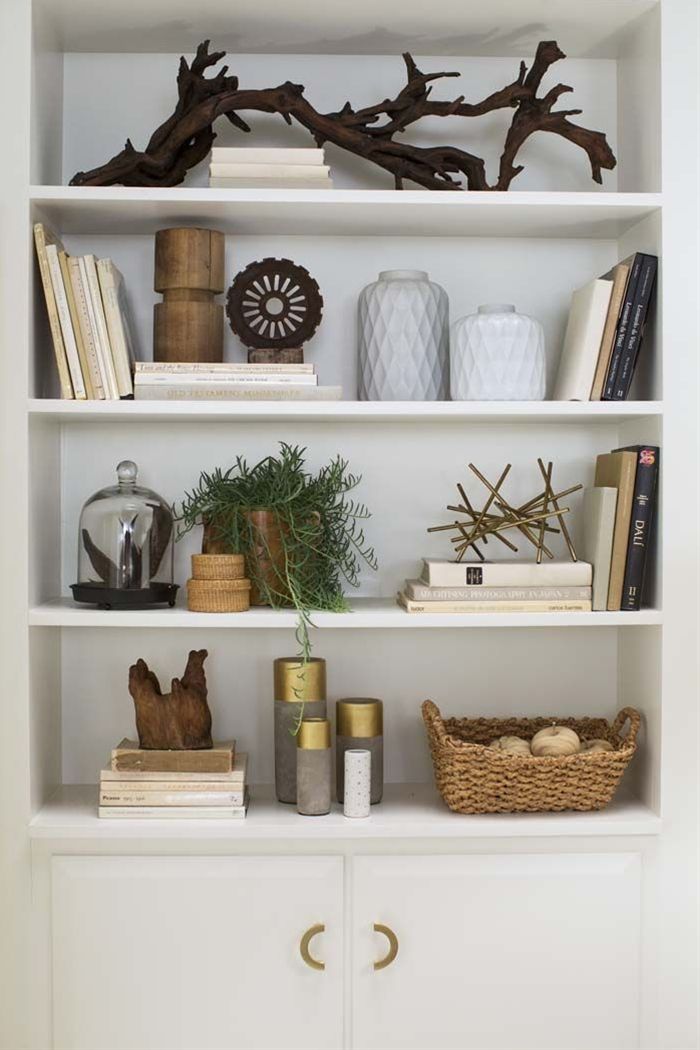 nine0005
How to arrange decor and useful items?
1. Build triangles
Check out the shelving designed by a professional decorator. Everything looks logical and harmonious. But how to achieve the same effect?
Visually connecting vintage jugs, white books, figurines, aged greenish bottles with lines, you will see triangles. Each item in this composition has its own clear position, which corresponds to the triangle rule.
Moreover, the triangles do not have to be the same and isosceles. Triangles of different shapes give the composition dynamics. nine0005
On each of these racks, if you look closely, you can see such triangles, due to which the composition looks balanced and logical.
2. Layering: use the height and depth of your shelf
All items on the shelf should be in harmony in height: if you want to put a low vase or small figurines on the shelf, put them on stacks of books. Thus, you seem to put them on a pedestal and draw attention to them.