When to prune a crape myrtle
Crape Myrtle: Pruning - Lewis Ginter Botanical Garden
Feb 6th, 2021
by Beth Monroe
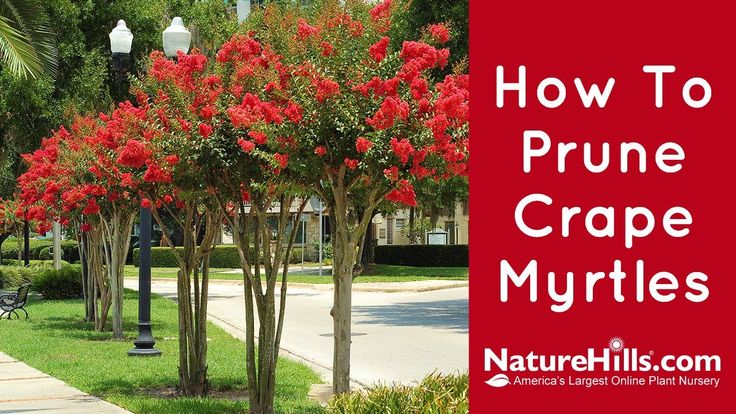
February is the time of year you may notice stark “stubs” of crape myrtles in parking lots and other areas around town. Often crape myrtle is so harshly pruned only trunks are left, with the top half of the tree hacked off.
The look is so prevalent that many believe this is the correct way to prune a crape myrtle (Lagerstroemia). Some might even think the trees need this type of harsh treatment.
You may notice severely pruned crape myrtles in commercial landscapes. This is not a best practice!
“Not so!” exclaim horticulturists and arborists. In fact, there’s a movement to stop “crape murder” and share best practices.
If the look isn’t appealing and doesn’t benefit the tree, why do people do it? “It’s faster and easier and, quite frankly, the crape myrtle can take it,” explains Horticulturist Dean Dietrich.
But just because the resilient crape myrtle can take the abuse doesn’t mean it should have to.
February is a good time to prune crape myrtles. It should be done before fresh growth appears in March.
Its toughness makes crape myrtle a popular plant. They are fast-growing and highly adaptable. They come in many shapes and sizes and provide interest through the seasons. The mottled barks of crape myrtles are attractive year-round, especially in the winter landscape, and the leaves offer fall color. Depending on the variety, in summer they offer frothy clouds of colorful blossoms ranging from white, pink, red, and purple.
The beautiful and interesting barks of crape myrtles are a standout in the winter landscape.
The horticulturists at Lewis Ginter Botanical Garden have some suggestions to help you look at crape myrtles and pruning in a whole new way.
Step 1: Look at your tree
It sounds so basic, but don’t rush this first step. Dietrich explains, “Look at the limbs. What is your overall aesthetic? What do you want structurally? Do you want the branches to be overhanging to provide shade? Or are you looking for an upright form?” One of the reasons for the crape myrtles in the Sunken Garden is to provide shade for seating, so they are pruned according to that purpose.
Crape myrtles in the Sunken Garden. You can see those on the right have already been pruned.
Step 2: Think ahead
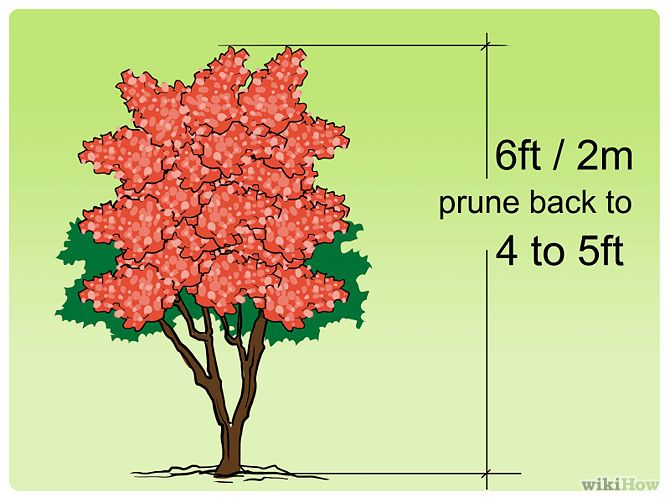
Which branches can you do without? How will the remaining branches grow? This future view is important because what you do now will influence the tree’s scaffolding. Deciding what to leave in and what to take out requires judgment calls. “If you cut too many of the small branches or “suckers,” you won’t have as much to work with in the future,” says Dietrich. This is especially the case should you ever want to bring the tree down in height.
Typically you can prune up to one-third of the canopy. Cut more than that and it may result in a stressed tree pushing out a lot of new growth.
And if you don’t feel like pruning every year? You don’t have to. However, as Dietrich points out, “If you leave too many branches, it can be harder to retrain the tree when it is older.”
Step 3: Making the Cut
Safety is extremely important when pruning.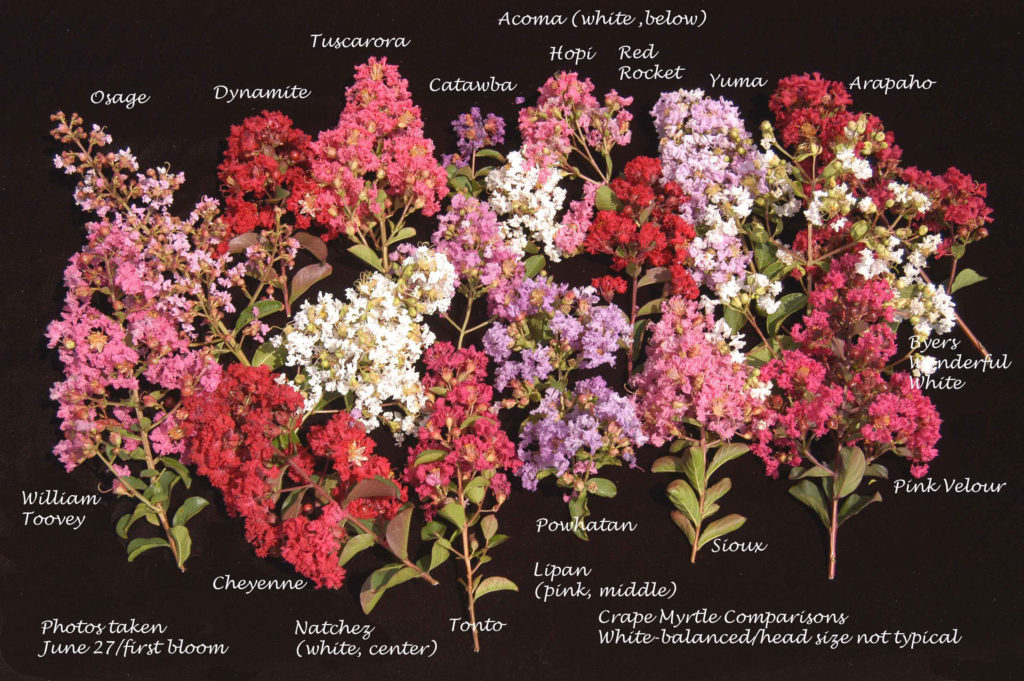 Make sure you have the proper equipment and follow safety protocols. It helps to have someone assisting you.
The best tool is a hand-saw, however, you can also use hand pruners, pole pruners, and lopers, depending on the size of the branch.
The first cut should be away from the tree trunk and on the underside of the branch.
When pruning a branch, you are going to make three cuts. Although the first impulse is to cut directly through the top of the branch, that can result in the limb snapping and tearing the bark, making it harder to heal and causing the tree to be more susceptible to pests and disease. Instead:
- Make the first cut underneath the branch at least several inches from the tree trunk. Cut about one-third of the way through the branch.
- Then start a second cut on top of the branch about an inch farther out than the first cut. Keep cutting until the branch breaks free.
- For the third cut, identify the branch collar. The branch collar is where the limb attaches to the tree.
 You want to cut cleanly across the outer edge of the branch collar (see the image.) You do not want to cut flush up against the tree.
Find the branch collar. The third cut should be on the outer edge of the branch collar.
There should be a small stub left, which allows the bark to grow over and the tree to heal properly.
There are always new varieties of crape myrtles coming out onto the market. Be sure to know what you are getting before you purchase and think about how it will work in your landscape. Some varieties at Lewis Ginter Botanical Garden include:
Lagerstroemia ‘Lipan’
These line the outer edge of the Sunken Garden. They can grow 8- to 15- feet tall and have lavender-pink flowers.
Lagerstroemia ‘Lipan’ blooming in the Sunken Garden.
Razzle Dazzle Series
Developed by breeder Michael Dirr, the Razzle Dazzle series is known for their compact form and brilliant color; you can find them in the trade under the names: Ruby Dazzle (pink flowers with bronze-red foliage), Cherry Dazzle (cherry-red flowers), Snow Dazzle (white flowers), Dazzle Me Pink (pink flowers) and Raspberry Dazzle (raspberry-red flowers).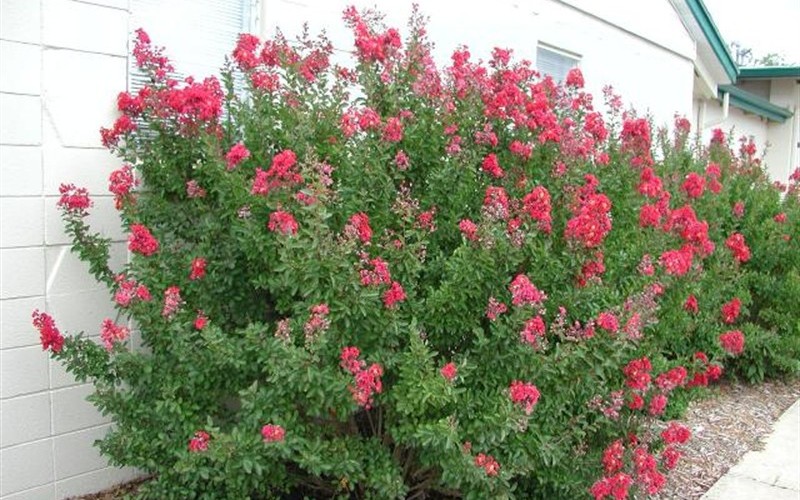 Their mature height is 4 feet tall, which makes them more of a shrub in the landscape.
Lagerstroemia fauriei ‘Townhouse’
This crape myrtle cultivar is a tall one, growing to heights of 23-30 feet. They have white flowers and are especially known for their beautiful deep brown and cinnamon-colored bark. You may have admired these planted in the North Terrace Garden, the first space you come to when you exit the Visitors Center into the Garden.
This article is meant to provide an alternative to “crape murder” and to help people see crape myrtles in a different way. It’s a subject that we’re passionate about and have even covered in a past Facebook Live video. We suggest additional research to learn more about pruning. Dietrich suggests fixing a cup of coffee, standing back and really looking at your crapes before you do anything. Sounds like a good plan to me!
It’s always good to have help! Horticulturist Laurie McMinn shares: “You don’t prune when temps are below freezing or wood is wet. ”
”
About Beth Monroe
Beth Monroe is public relations and marketing director at Lewis Ginter Botanical Garden. She feels honored to be part of a team connecting people and plants to improve our community.
You May Also Like
Trim your Crape Myrtles like a pro. Don't make these 4 mistakes.
You might be wondering.. How should I prune my Crape Myrtles like the pros do.
No worries, this is a common question we get and by the end of this article you'll understand how to prune your crepe myrtle trees without making the same mistakes you've seen your neighbors make.
First things first
You need to decide what look you would like for your tree to have
- Single Trunk
- Multi Stem
- Natural Look
Now the good news is that Crape Myrtles are one darn tough plant. So the bottom line is if you make a mistake most likely your tree will recover in a few seasons.
Most people don't know this
The reason you should prune your Crape Myrtles is because of one reason… blooms.
Only the new growth each year is what produces those lovely blooms that you admire each spring and summer.
So with that being said, it pays to prune your Crape Myrtles in the winter months as soon as November at as late at March when they are dormant.
The good news is most Crape Myrtles can be pruned with hand held shears or long handles loppers. If yours are way out of control, then a chainsaw might be necessary in the most extreme cases.
So now on to the good stuff.
Click on image to view larger
When you prune your Crape Myrtle the proper way it will will maximize blooms, promote new growth and give your plant a great shape.
That said.. Your pruning is done in winter when the Crape Myrtle is dormant, between the months of December and February.
The good news is that super aggressive pruning that you might have seen around town is not actually needed to get a beautiful, healthy plant. Picture Picture Picture
But that's just part of the story.
You need to know about “Crape Murder"
"Crape Murder" is what the pros say describe the butchering of Crape Myrtles.
What's more… When Crape Murder is committed it can literally appear that half, or more, of the plant has been removed.
On the one hand... This technique is used by some no professional landscapers and homeowners because it's quick, fairly easy, the plant almost always recovers.. Fair enough , BUT This technique is NOT recommended as it may damage you plant. OK… that's fine you say… but meanwhile you might be wondering "What are Suckers?"
Simply put .. the "Suckers" are the new growth that comes from the base of the trunk.
Most professional lawn care services and homeowners who know what they are doing will prune these off.
Now with that being said , if you want your Crape Myrtle to have a more "natural" look or would maybe would even prefer for it to grow multiple trunks, then the good news is you can leave some of the suckers to grow up.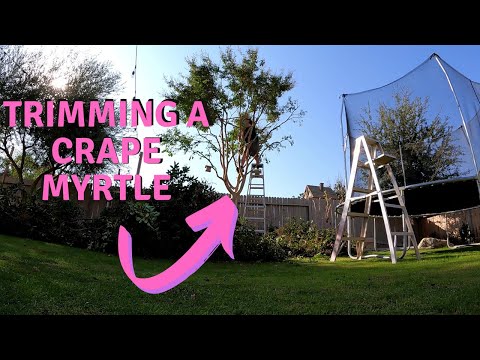 The best part? Blooms will appear on new growth suckers.
Now…these are your Crape Myrtle’s… So it's up to you how you would like for them to look. But it helps to identify which pruning style meets your ideal look, so keep reading to find out more about the three main pruning styles.
The Single Trunk
In my opinion , the single trunk Crape Myrtle is one of the more beautiful shapes the tree can take on with proper pruning, however, will require the most investment in pruning each year.
Why is the case? First you'll need to remove any extra stems protruding from the ground, as well as any suckers.
Next you what all of the tree’s branching to happen at the top quarter of your tree. That said, you’ll need to pick a dominant single trunk for the tree, and prune away another others at the base.
If you choose the single trunk method its best to start while the Crape Myrtle tree is younger as more established trees most likely can not be retroactively pruned to this style and shape.
Multi-Trunk
The multi trunk look for Crape Myrtles is probably the most common professional trimming approach. It is relied upon by lawn care services all over the country to establish beautiful Crape Myrtle bushes full of blooms each spring and summer for their clients.
So to make a point… to achieve the multi stem look, allow your Crape Myrtle to branch along the length of the stem and follow these steps
- Try to prune later in winter, February is ideal.
- Cut off suckers from the bottom, rubbing and cross growing branches and branches growing inward.
- Gradually cut off all side branches from the main base as the tree gets taller.
- Never leave lone or clustered stubs.
- Be sure to remove unwanted branches before they get too thick (thickness of a pencil).
Finally… The Natural Look
So you might not know this but allowing your Crape Myrtle to grow into its natural shape has been the trend in recent years. So the good news is you can tell that to your neighbors and even better this approach requires little to no pruning.
It's easy.. Just allow your plant to branch and spread naturally. Your Crape Myrtle will still bloom and be beautiful so long as it's watered and fertilized properly
The bottom line is….
Crape Myrtles are one of the most resilient and prune-able plants I have ever seen. So its really just a matter of your preference how much time and effort you are willing to invest into heir pruning and care. There's really no "wrong" way to do it, so experiment and have fun!
Meanwhile… I'll leave you with a helpful how to video on pruning your Crape Myrtles.
Powered by Froala Editor
Myrtle tree
We have already told about what a wonderful home plant myrtle is on the pages of our Encyclopedia.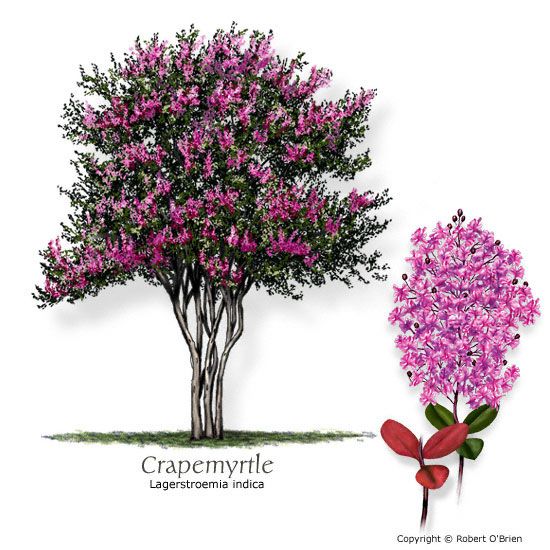 Here we will talk about how to grow myrtle from cuttings to an adult tree.
Myrtle tolerates pruning and pinching well at any time of the year, with the difference that in an adult wintering plant in the dormant stage, without signs of growth, one branch can be painlessly cut to the stalk, well, if you really need - two, no more. And in a vegetative myrtle that continues to grow, you can safely drastically cut off the crown. The best time for cutting myrtle twigs for rooting is spring, the end of winter. If you cut branches from a "sleeping" myrtle, they must be immediately transferred to conditions suitable for vegetation: warm (20-25 ° C), air humidity not lower than 50% and light (if necessary, additional lighting) - several hours of direct sun in the morning or evening.
For rooting, you can use twigs from 7 to 15 cm, the optimal length is measured not in centimeters, but in a piece of the stem - rooting occurs in the semi-lignified tip of the cutting. It is clear that a 5 cm twig still has a green stem, it will simply fade.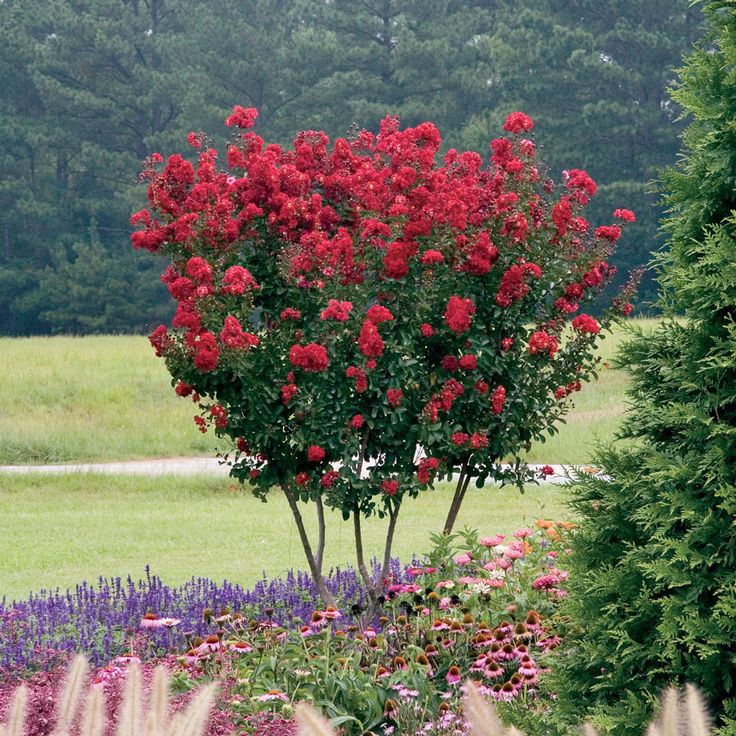 At the cut cutting, you need to cut off the lower leaves and put on rooting in water or wet vermiculite.
As you can see, in the first variant, there is one handle in the cup, it is supported by the circle of a polyethylene foam cup cut to the diameter and cut to the center. It not only supports the cutting, but also prevents the water from evaporating too quickly. You can cut out such a circle from foam rubber.
In the second version, many cuttings are rooted in one jar. Not all of them will give roots.
What is the difference and how best to root? The fact is that if you got one single cutting, you must do as shown in the first photo. Moreover, the water must be very clean, boiled. Carefully observe the first two days - if the water remains clear, everything is fine, it just remains to wait until the roots appear. If the water turns cloudy, replace it with fresh water and add the secret ingredient to it. There is such a drug in the pharmacy Polyphepan (Polyphepan) - this is an adsorbent (black powder looks like dry earth), which will not allow water to deteriorate, prevent the development of bacteria, but does not interfere with the rooting of cuttings.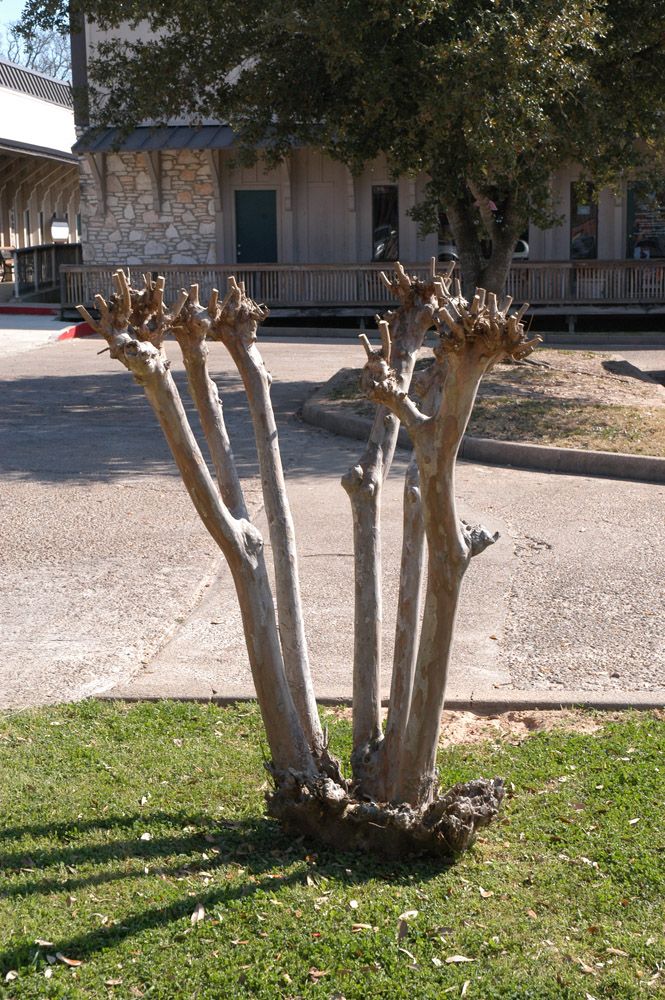 It needs to be added half a teaspoon to half a glass of water.
Yury Aleksandrovich Markin (YUM) shares his many years of experience: If everything is in order with water and the viability of the cutting, the roots are formed quite quickly - in the first week a callus is formed (white bumps on the tip of the stem), and good roots grow in 2-3 weeks. When they reach at least 5 cm, and more, it's time to transplant the cutting into the ground.
In the photo you can see strong roots and the beginning of vegetation in a rooted cutting of myrtle, but you need to plant it carefully so as to minimally injure the delicate root shoots. Therefore, Yuri Alexandrovich ties the stalk to a peg. A peg stuck into the ground securely holds the cutting without deepening the root neck.
If myrtle roots are strong, they take root immediately, and in high humidity conditions they grow very quickly. Thickened plantings in a common container require good ventilation of the room and timely seating in separate pots. Perhaps it is more correct to immediately plant the myrtle cuttings in separate containers, depending on the desired shape of an adult plant. If you plan to grow a dense bush, you can plant 2-4 cuttings together, if the myrtle is planned to be grown as a bole or as a potensay, then each cutting is a separate pot. Another option is the fusion of trunks, it also involves planting several cuttings in one container, but it requires some skill and preparation.
Is it possible to prune myrtle roots when transplanting rooted cuttings?
Yes, you can, if the root system is well developed, has many lateral roots of the upper part, then you can painlessly trim the elongated roots. After cutting the roots, they should be sprinkled with a crushed activated charcoal tablet or ground cinnamon.
Dimensions of myrtle transplant pot
Selecting the right pot for planting the cuttings will determine its health, growth rate and appearance. Many tend to take pots with a large margin, but if the pot is large, after watering the earth will dry for a very long time, as a result, a salt effusion forms on the surface - a whitish or red coating of calcium and magnesium salts. The acidity of the soil in this case shifts to the alkaline side, in such an environment some nutrients are poorly absorbed and there is a high probability of root rotting. In a pot that is too small, especially when planting in pure peat, on the contrary, the root system of the plant can be very dry.
Here is an example, planting a rooted twig (stem thickness initially 2 mm), which has long grown, and the height has reached 75 cm from the ground.
Myrtle grew in a glass (200 g) for about two years. The thickness of the trunk at the root neck reached 6 mm. The earthen ball is almost completely mastered by the roots. If the roots of your cutting have grown only in the lower part, have formed a "beard", or crawled out of the drainage holes, and the upper part of the pot has not been mastered by the roots, it makes sense when transplanting to cut off those roots that stick out of the holes of the pot, or those that curled on spiral bottom, displacing all the soil. After that, you need to transplant the young myrtle again into the old pot. It can be transplanted into a new one only when the roots fill the entire space of the pot.
Myrtle formation
The myrtle tree is constantly forming. Trimming the ends of the shoots can be carried out repeatedly during the spring-summer season. You can grow a myrtle tree in a completely free style, shaggy bush. You can form a stem or another style. But first you need to imagine the image you want to strive for.
A myrtle tree blooming with pink buds (on the right in the photo, Pavel Karpenkov) is so beautiful not because of extreme unpretentiousness, but because it is grown in ideal conditions for it: it stands in an area where the illumination is close to sunny, the humidity is under 90% and temperature 24°C. It is watered every 2-3 days (does not dry out and is not flooded). Planted in soil with a mixture of akadama and sand and some soil for seedlings. Drainage is high - myrtles do not like waterlogged roots. Spray it every day.
Important: when wintering in cool and especially cold conditions, spraying is not required, and watering is scarce.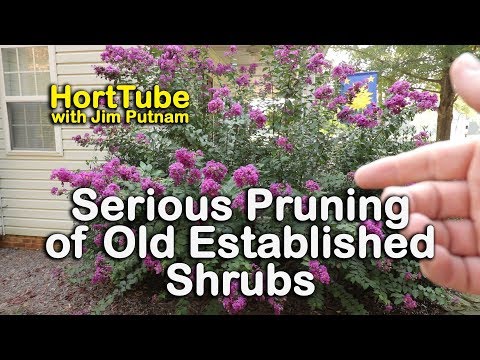
With the help of a wire, you can pull the branches in the right direction, they are quite flexible even in adulthood. But old branches covered with brown bark can be bent gradually, smoothly, over several months.
Please note, while the myrtle tree is gaining thickness of the trunk, it does not need to be planted in a bonsai pot, the pot space is needed for the plant to disperse the trunk.
From personal experience, Borya: My myrtle grows on the northwestern window, but it will not be possible to form a spherical crown without additional illumination. I use this technique: as the branches lengthen, I tilt the largest of them to the sides almost to a horizontal position, and fix them with wire. Then, along the entire length of the branch, new shoots begin to appear from sleeping buds (before that they were in the shade), and the entire branch turns out to be densely leafy.
The size of the pot should correspond to the size of the root system and increase as the earthen clod is braided. It all depends on how many roots the myrtle has. In my opinion, it is better to take a cramped dish than a spacious one, since in the second case, part of the earth may turn sour and become unusable even before the roots have time to penetrate into it.
I prefer to plant myrtles in a 1:1 mixture of some kind of peaty soil and coarse sand. Of the purchased ones, in my opinion, you can use the 'Cactus' mixture, as the most porous and suitable for most plants.
What should be done to give the myrtle the appearance of a tree from a cutting
From personal experience, Borya: You need to choose the largest, central, and, most importantly, nice branch of the bush and cut off all the rest. It is convenient to do this with small scissors for cutting nails. On it, you need to remove the leaves and side shoots from below to the height of the intended trunk. This will result in a smooth trunk, which will slowly thicken.
Since, when growing in a 'bush', the branches touch and, as it were, 'support' each other a little, then, 'left alone', this branch may for some reason bend (from accidental grazing, or as a result of tilting towards the light , for example).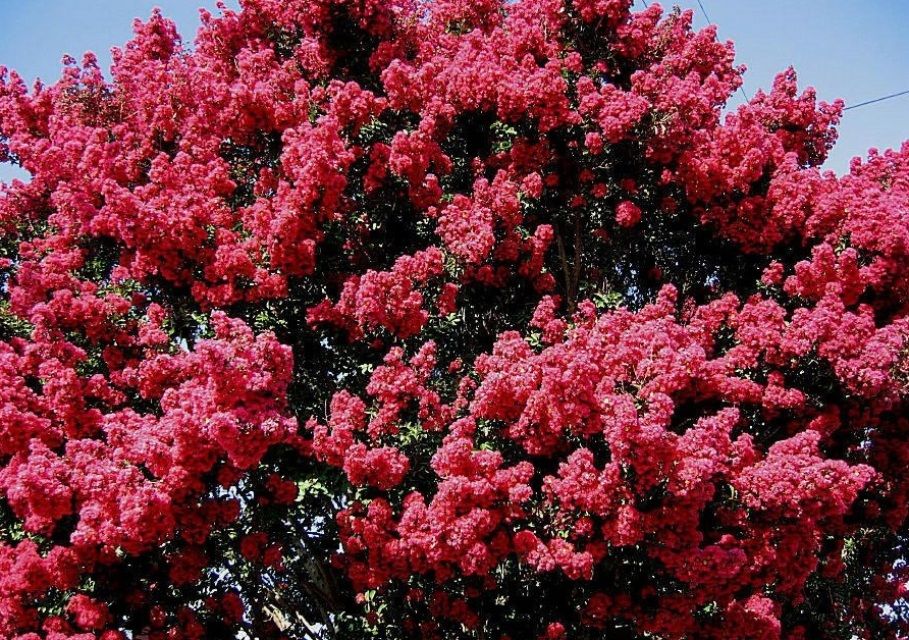 Therefore, a support in the form of a peg stuck nearby is desirable for her.
As a result, the growth of shoots on the upper leafy part begins. Those shoots that do not appear on the 'crown', but on the stem, must be removed (otherwise a bush will turn out again). When the stem reaches a thickness of about 0.5 cm, the support can be removed.
Bamboo skewers (3-4 mm thick and approx. 30 cm long) are very suitable for sticks. The peg should be located, in relation to the plant, from the side of the room or on the side, so as not to obscure.
Myrtle - bonsai
Many want to have a miniature myrtle tree in a bowl, but before the myrtle trunk gains thickness (from 1.5 cm or more), there is no question of transplanting into bonsai trees. And all the plant material with which the formation work is being carried out is called potensai .
An example of such work from Yuri Alexandrovich Markin:
Bonsai Sokan style
And this is Potensai - Sokan style "Twin Trunks".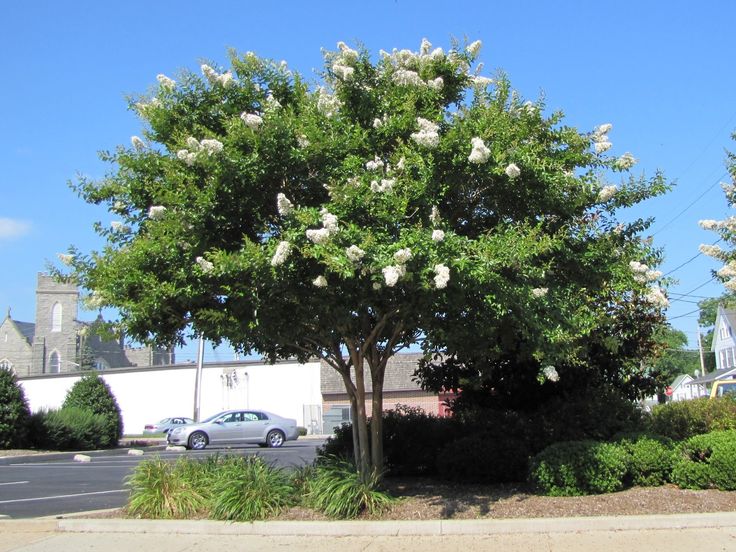 2-3-year-old plants grown from rooted cuttings are used. Rearranged from wintering to prepare for the spring growing season - pruning and shaping to suit bonsai styles. The skeleton and stems of the first potensai are shaped in the Sokan style with ligatures and stretch marks. The height of the workpiece in the final form - 28 cm:
Formation work in progress. Myrtle has its own subtleties, says Yuri Alexandrovich - fragile wood and loose bark, although, when broken, it grows together remarkably.
Before all manipulations, I take a long shower to soak fabrics. When bending vertical and rather plump branches at an angle of 90 °, I sort of knead the near-stem area between my fingers - I crush it like a joint on a finger.
Next, I begin to ligature the trunk and put the wire on the branch to be bent. Then, the branch, together with the wire wrapped in two turns, I begin to slowly bend. Under the branch, you can substitute a screwdriver and create an emphasis at the bend.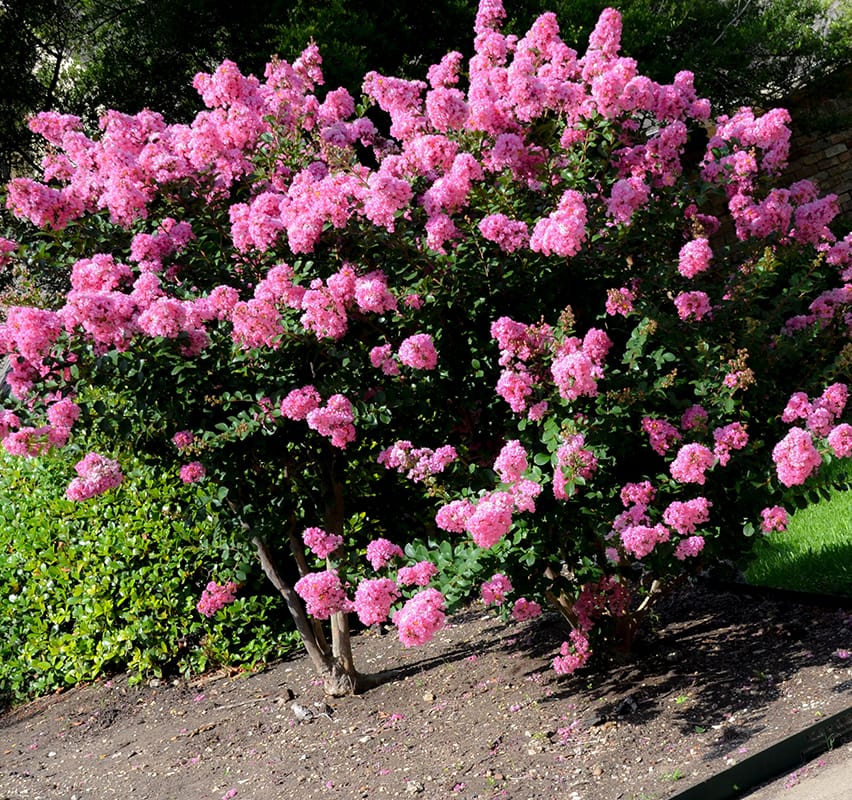 After bending the branch, more than 90 °, I rewind the ligature already with the branch fixed in the desired position.
It is also possible to perform a directional fracture, i.e. break a branch and wrap it around with raffia, and then apply a ligature (the main subtlety is not to break it completely when applying raffia and ligature, skill and a sensitive tactile sensation of the material are required).
Another method can be applied to thick branches. Make a crescent cut under the branch, in the place of the intended bend, to the middle or 2/3 of the thickness of the branch. The cut is made in thin sections with adjustment (bending and refining the position of the branch in the final form), if not enough, then another thin fragment is removed from both sides (such as slices).
Further according to the scheme - wrapping with raffia and applying a ligature. If it is difficult to bend a copper wire in insulation with a cross section of 2.5 mm, then you can apply two wires of 1. 5 mm each or several wires of an even smaller cross section folded together - an example is the photo above (lower left corner), the coil of wire in the photo with myrtle. This wire can be used for both ligatures and stretch marks.
Ikadabuki style bonsai
Another example of myrtle bonsai formation in Ikadabuki style from Gennady Boronin (Genn). The author also modestly calls it only an attempt at formation: "2 years trying to become a bonsai." The height of the myrtle tree is 27-30 cm.
All the details and photos in the topic I'm trying to grow bonsai.
Photos and materials used: Yu. A. Markin (YUM), Borya, Natali, barsuchok, Alexander, P. Karpenkov (beomaster), G. Boronin (Genn).
how to prune, when to shape the plant and what care is needed after the procedure?
Myrtle is perfect for lovers of indoor plants, as it is known for its healing effect, it can decorate the interior, clean the air from germs and bacteria. Knowing the basics of shrub care, you can get a beautifully shaped plant with fragrant flowers.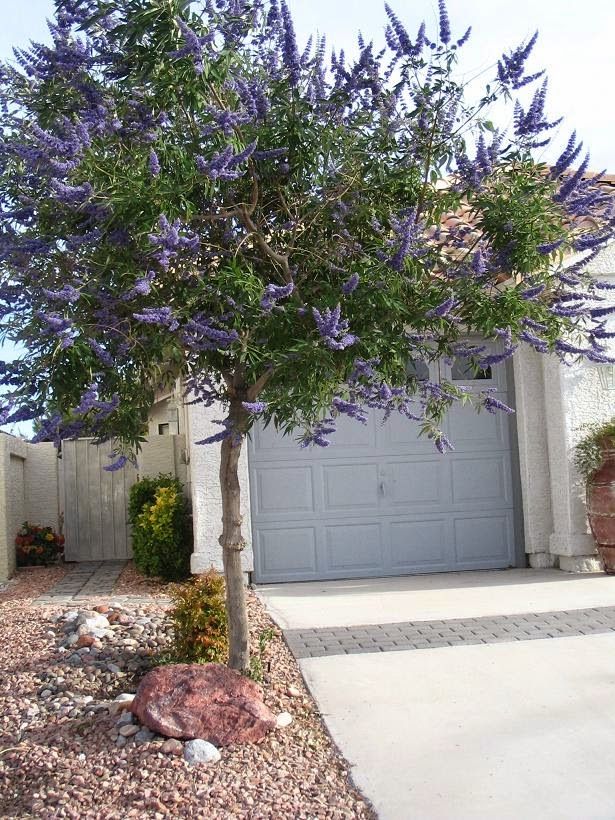
How to cut myrtle and organize proper care for it, taking into account all the subtleties of the content, you will learn from this article.
Contents
Why is pruning necessary?
By trimming the shoots, you can achieve a neat crown. If you pinch the branches all year round, the density of the bush will increase. However, the measure should be observed: with frequent pinching, the likelihood of flowering is reduced.
When should the plant be pruned?
Pruning of myrtle at home is carried out in the spring before the vegetative period strictly once every two years. When carrying out the procedure, it is necessary to carry out fertilizing with fertilizers for indoor plants with the absence of chlorine. After pruning the plant in the spring, new branches will appear; in the summer, the tree will not bloom.
If it is necessary to achieve annual flowering, pruning is carried out in summer after flowering or in winter.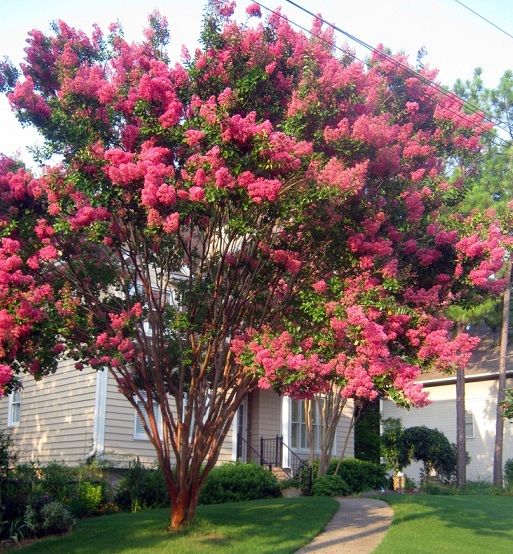 Thus, it is important to decide: the grower needs the appearance of a neat branching shrub or flowering plant.
How to form a bush?
Systematic pruning of myrtle will help to achieve a decorative look and will allow you to shape the plant according to the wishes of the grower. Regardless of the final goal , it is important to pinch and trim the shoots correctly:
- formation is carried out in the spring after the beginning of the growth of new shoots;
- pinching possible during the growing season;
- if you want to give the shape of a trunk, you need to cut off the lower branches;
- to obtain a branchy shrub, pinch the tops of the shoots;
- bonsai is created when the plant reaches the age of three, for this, the top leaves are regularly pinched;
- pruning in winter is not carried out.
Crown formation is associated with lighting.
For uniform growth, the pot with the tree is periodically rotated around its axis: this way the leaves will receive an equal amount of light.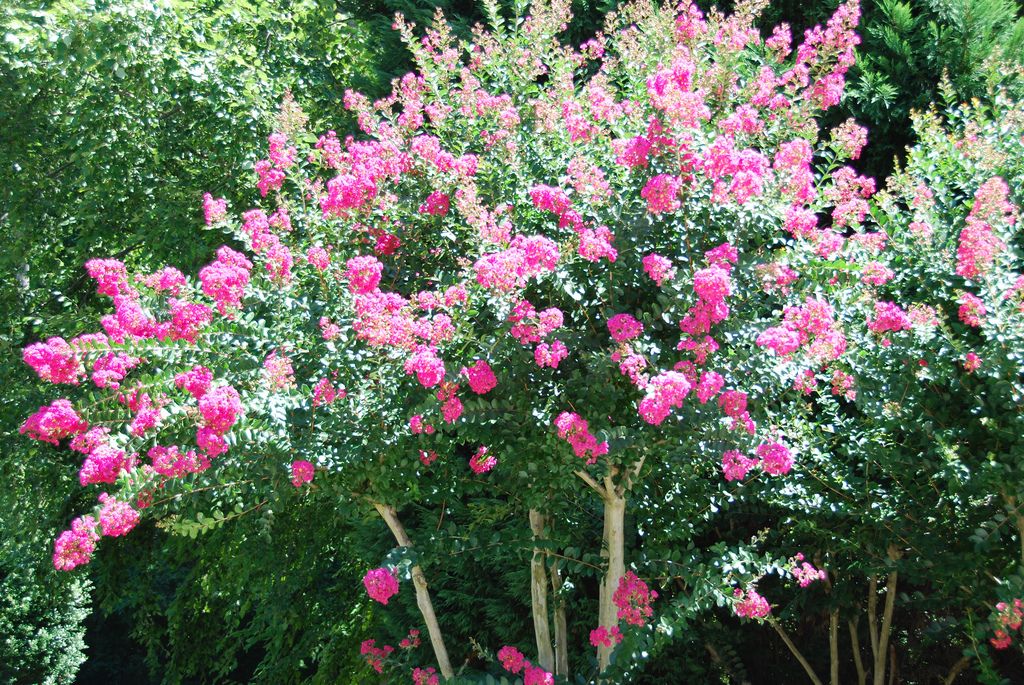
- If the plant is not pruned, it will take on the shape of a pyramid.
- Trim the top to create a squat, thick cushion.
- By cutting off the sides, you can get a high crown.
Further care
If the grower wants myrtle to bloom, create the following conditions:
- the required amount of light, fresh air;
- pruning at the end of winter or no pruning;
- tight container;
- in winter, the plant rests in the cool, and it is rarely watered during this period.
Since the tree is sensitive to temperature, the temperature regime must be observed. In spring and autumn the temperature should be 20-22 °C, in winter + 10-12°C.
Important! In summer, in sunny weather, the myrtle should be taken out to the balcony.
The myrtle tree loves moisture, so it's important to mist it frequently. You can also put a humidifier nearby. For myrtle, bright sunlight with shading is useful.
During active development, the plant is watered with warm settled water four times a week. In winter, watering is carried out once every ten days.
A drainage layer is created to avoid moisture stagnation. Planters for common myrtle are chosen with drainage holes: this helps to accommodate a bulky root system, drainage and avoid moisture stagnation.
The soil is purchased universal with a slightly acidic reaction or a substrate for citrus fruits. To make the soil nutritious and breathable, add to the soil:
- vermiculite;
- brick chips;
- coco substrate.
Soil composition can be improved with powdered charcoal or crushed moss.
From the beginning of March to the beginning of October the bush is fertilized every two weeks.
- Before the myrtle blooms, use a foliar solution containing a high dose of nitrogen.
- With the appearance of buds, a fertilizer with a high concentration of phosphorus and potassium is used: it is necessary to dilute the product twice and give after watering.
After top dressing, the shrub is kept in the shade for a day.
If a tree plant is poorly cared for or kept in unsuitable conditions, it becomes sick or attacked by pests.
The appearance of the myrtle will tell about the poor state of health:
- yellowing of the leaves is a sign of a lack of nutrients, so you need to feed;
- roots and stem base rot as a result of deepening of the root collar during transplantation, in this case it is impossible to reanimate the plant;
- leaf fall indicates a lack of light, dry air or incorrect watering, so it is important to put the tree in a well-lit place, spray more and adjust watering;
- elongation of the stem and blanching of the leaves is also observed with a lack of light;
- leaves become dull and their edges curl when exposed to excessive direct sunlight, it is important to shade the plant;
- when attacking a myrtle tree with a scale insect, mealybug and spider mite, insecticides are used.