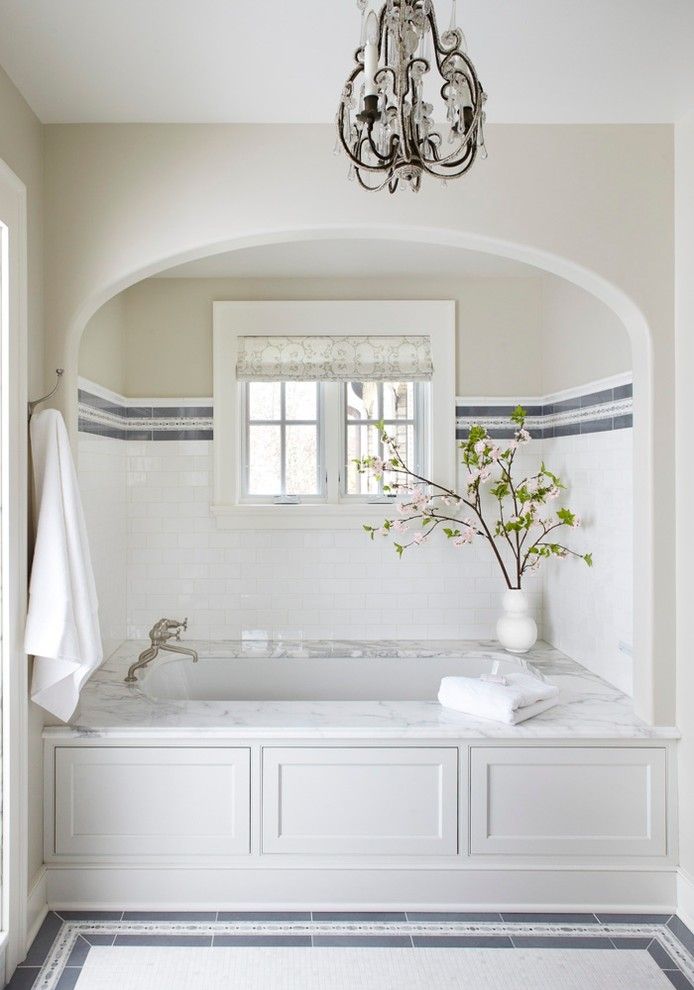
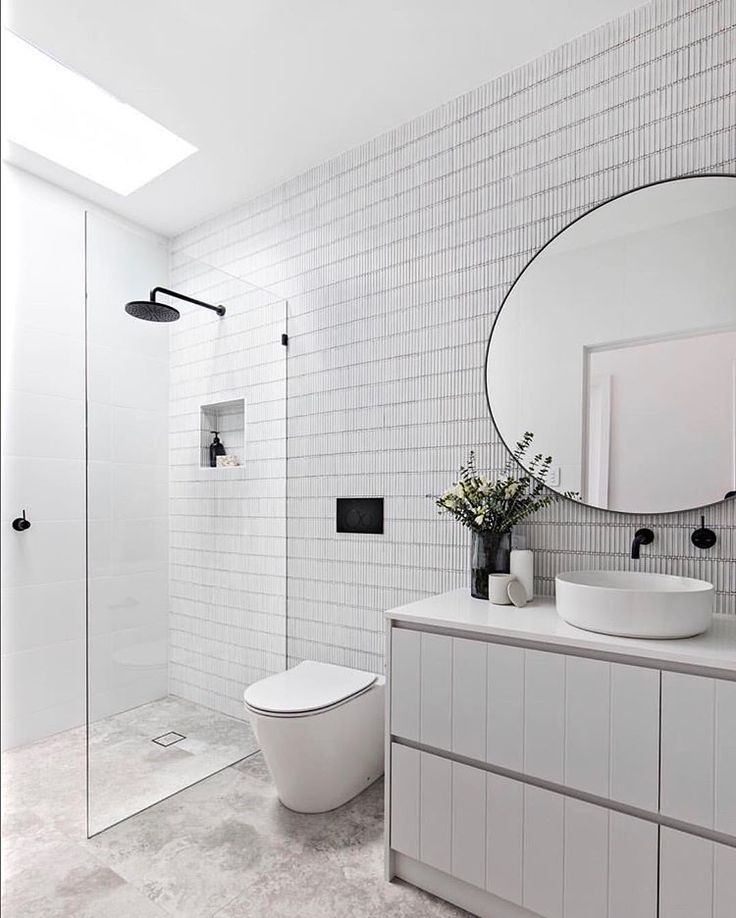
Tile around a bath
How to Tile a Tub Surround
Project details
Skill
3 out of 5 Moderate Setting bath tile isn’t all that strenuous, but precise layout, proper prep and diligent work habits are required to obtain professional results.
Cost
$400 to $1,300
Estimated Time
8 to 10 hours
Tile is the most popular choice for walls in new and remodeled baths because it’s impervious to water, extremely stain-resistant, easy to clean, and available in dozens of colors, sizes, and styles. With the right tools and materials—and the patience to lay out the tiles properly—tiling a shower or bath surround is a job that most homeowners can pull off.
For the project shown here, we enlisted the help of tile contractor Joe Ferrante, who has been laying tile for This Old House projects since 1986.
How to Install Tub Surround Tile
The first and most important step for tiling bathroom walls insists Ferrante, is to start with a clean, stable substrate. He then fills the backer board seams with thinset mortar and embeds fiberglass-mesh joint tape in the mortar. Finally, to ensure a strong, long-lasting bond for the new tiles, Ferrante goes one step further and trowels thinset mortar over the entire wall.
For this installation, Ferrante used 4¼-inch-square ceramic tiles, the most common and easiest-to-install bath tiles. However, the methods shown here work on any wall tiles, including stone and glass. Ferrante glued the tiles to the backer board with latex tile mastic, not thinset mortar. Mastic is much stickier than mortar, so you won’t have to worry about the tiles sliding down the wall.
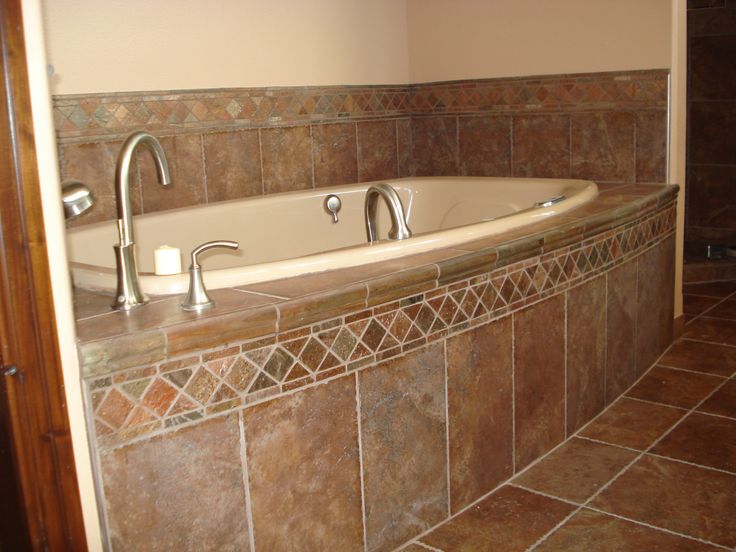
Tiling Around a Tub Shower Overview
Gregory NemecUnderstand how your bathtub is setup.
How to Tile a Tub Surround
1. Mark the Layout Lines
Webb Chappell- To tile around a tub or shower, start by measuring the height of the back wall from the lip of the tub to the top of the area to be tiled.
 Divide the dimension in half and make a mark there.
 - Check if you need to adjust this mark to avoid laying slivers of tile at the top and bottom. Calculate how many tiles it takes to reach from the center mark down to the tub. If you end up with less than half a tile at the tub, adjust the mark downward by the height of this partial tile so you end up with a full tile at the bottom and a larger cut tile at the top. Using a level, draw a horizontal line across the wall at this mark.
- Next, measure the width of the back wall horizontally. Divide this dimension in half and draw a plumb line down the center of the wall. If this leaves tile slivers on both sides, adjust the line right or left as necessary.
2. Trowel On the Tile Mastic
Webb Chappell- Start at the intersection of the two layout lines and spread a thick layer of tile mastic onto one quadrant of the wall with the smooth edge of a trowel.
Pro2ProTip: If the mastic starts to lose its tackiness, or “skin over,” scrape the wall clean and apply fresh mastic.
- Tile mastic has a working window of about 20 minutes, so apply it to an area no larger than 2 or 3 square feet.
- Use the notched edge of the trowel to rake out the mastic and make a series of deep ridges.
3. Start Installing the Tile
Webb Chappell- Set the first tile at the intersection of the two layout lines. Press the tile tight to the wall, making sure its edges are flush with both the horizontal and vertical lines.
Pro2ProTip: Make sure to leave space for caulk between the bottom course of tile and the tub.
- Continue setting tiles in both directions along the two lines, working out toward the end wall and down to the tub in a stepped pattern.
- Set only full tiles in each course.
- Many tiles have small nubs on the edges to keep them evenly spaced at the proper width for grout. If your tiles aren't self-spacing, use plastic spacers to maintain consistent joints.
4. Cut Tile to Fit
Webb Chappell- Where the tiles need to be cut to fit against a corner or ceiling, hold a full tile in place and mark where it overlaps the last full tile already on the wall.
- Place the tile to be trimmed on the tile cutter so the mark lines up with the cutting wheel. Slide the cutter's adjustable fence against the edge of the tile so that you can cut the remaining tiles without marking each one. With slight downward pressure, pull the cutting wheel across the face of the tile to score the glaze. Do not score the tile twice. Press down on the handle to snap the tile in two.
- Lay tiles with their cut edges against the corner or ceiling.
5. Drill for Tub or Shower Supply Pipe
Webb Chappell- Finish setting the tiles in the other quadrants of the back wall.
- Extend the horizontal layout line to the end walls, draw the plumb lines, then set the tiles for these walls using the same procedure as above.
- At protruding fixtures, such as the tub and shower supply pipes or the mixer valves, you'll have to use tile nippers to carefully create notches in several tiles to fit them around the rough plumbing. Or, if the pipe or valve body falls within a single tile, drill a hole with a diamond-grit hole saw.
6. Nipping Tiles To Fit Around Fixtures
Webb Chappell- Once the hole is cut out, slide the tile over the pipe (or position it next to the protruding plumbing) and press it into the mastic.
7. Apply the Grout
Webb Chappell- Complete each end wall by installing rounded-end bullnose tile along the edges. Allow the mastic to cure overnight.
- Next, pour a quart of fortified unsanded tile grout into a bucket. Mix in just enough water or latex additive (which strengthens grout) to create a mayonnaise-like consistency.
- Place some grout on a rubber trowel and smear it diagonally across the tiled surface, forcing it deep into every joint.
 Apply grout to all three walls in this manner.
 - Let the grout cure for 15 to 20 minutes, then wipe the tiles with a large damp sponge held flat against the wall. Rinse the sponge often in clean water.
- The next day, buff the remaining grout haze off the tiles with a clean, dry cloth.
- Finally, use siliconized acrylic caulk that matches your grout color to fill the joint between the tub and first course of tile.
Tools
Tools & Materials
-
Notched trowel
-
Grout sponge
-
Rubber trowel
-
Drill with diamond-bit hole saw
-
Tile nippers
-
Margin trowel
-
Tile cutter
-
Level
-
Straight edge
-
drywall knife - 4-in.
-
Caulk gun
How To Tile A Tub Surround
Follow these step by step instructions on how to tile a tub surround that could save you a lot of money on bathroom renovation!
Do you know how much money we saved on the kids' bathroom renovation by tiling the tub surround ourselves?
About seventeen hundred dollars!
When we were planning this project we got a quote to see what we were up against. We were quoted $1,700 just for the labor to install the tile in the new tub area.
That wasn’t in our budget and we knew it was something we could do ourselves and I’m so glad we did because I’m pretty sure I paid more attention to the details that were important to me than anyone else would.
It took us two days, but if you do the math, those two days were absolutely worth our time.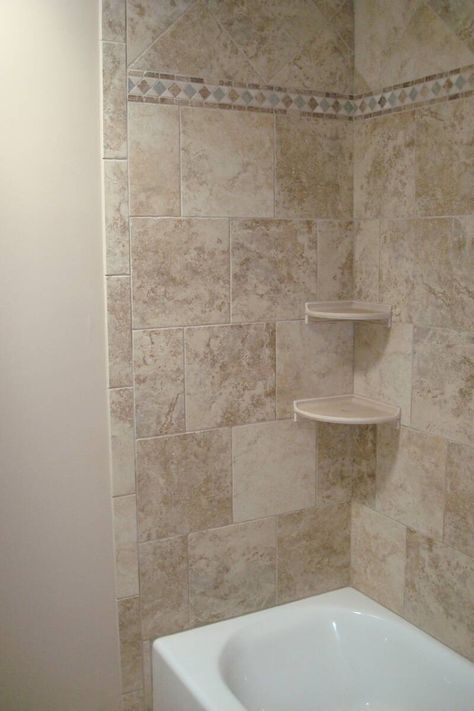
This was the first time the hubs and I took on a tile job of this size and if we can do it, you can too.
Today I’m going to walk you through the steps and show you how to install tile on the walls of your bathtub surround.
PinOnce we set the tub and had the plumbing all figured out we installed HardieBacker (cement board) around our tub in place of drywall because it won’t absorb water. It installs just like drywall, it’s just harder to cut since it is much more solid.
A few things to note before you start installing your wall tile…
- Double check to make sure your tub is level in all directions (you probably already did this during the tub install).
You must make sure that you have a moisture barrier before tiling.
- Cement board is not waterproof and some water will penetrate it and reach your studs (which can mold) if you don’t have proper water proofing. There are a few ways to do this.
 One can be a vapor barrier installed behind the cement board or you can tape the seams of your cement board and use a paint on vapor barrier on top of your cement board before tiling. This post from the DIY Tile Guy goes over different ways to waterproof before tiling.
 - Once you’ve prepped and are ready for tile, decide where you are going to start placing the tile. You will want to consider the size of your tile and the length of your space so that you don’t end up with a really thin tile on the sides. I started on the bottom closest to the top of the tub and at the wall since my measurements made it so that I would have about ½ of a tile at the other end of my row. This makes for a really nice look. Take the time to plan it out before you start.
- This project will go a lot faster if you have 2 people. The hubs was the tile cutter and I placed the tiles. We rented a tile saw and set it up in the backyard. I applied mortar to the walls while he was cutting, which made things go faster.
- Enlist the help of a licensed contractor if needed (see my hold harmless disclaimer).
Below is a list of the exact tools and materials that I used and worked well for me. I received the tile for this project from The Tile Shop and was pleasantly surprised how easy it was to select tile online which saved me a lot of time. I definitely recommend them.
Tools For Tiling A Tub Surround
- Two 5 gallon buckets for mixing mortar and grout
- Drill with a universal mixing paddle
- Two large sponges
- Large putty knife
- Grout float
- Trowel
- Level
- Marker
- Tile saw (we rented ours from Home Depot)
Supplies For Tiling A Tub Surround
- Imperial Brite White Matte 4×8 ceramic tile from The Tile Shop
- Imperial Brite White Matte 4×8 (single bullnose short side) ceramic tile
- Tile spacers (I used ⅛ inch spacers)
- Thin set mortar (we used white since we planned to do white grout)
- Tile and grout sealer– you will want one that doesn’t change the color or create shine.
- Sanded grout (You will want non-sanded if working with glass tiles)
How to Tile the Walls of a Bathtub
Once your surface is ready you are ready to get tiling!
We mixed our mortar according to the instructions in a large 5 gallon bucket.
Apply a nice coat of mortar to your wall using a putty knife.
As soon as you have a row or two of mortar, scrape the mortar with a trowel to create your ridges. (The size of trowel you use matters. Check this resource to learn more.)
Place your first tile onto the wall and press evenly while giving it a little bit of movement back and forth. Slide it into place and check to be sure it is level. Repeat these steps with each tile, using a spacer between each tile to ensure evenly spaced tiles.
On the bottom row, use a spacer on its side to create a space between the tile and the top of the bathtub.
PinWhen you get to the end of a row, hold a whole piece of tile up and mark where you will need your cut.
Once you know the size of that piece you will most likely be using that size for each row, starting with that one on your next row if you’re doing a modified subway pattern like we did here.
The size of your cut tile may change as you work your way up the wall if your walls aren’t plumb.
PinWhen we got to the top of the wall we had to cut each tile length wise to finish the wall. Don’t worry too much about the gap between the top tile and the ceiling. You’ll be filling it with grout and it will look nice and finished in the end.
PinOn the next wall we ran into a few things we had to figure out.
The first was creating a clean edge where the tile would stop. We drew a line on the wall using a level to ensure it was exactly straight up and down.
PinThen we used tiles that had a bullnose edge on the short side to create a clean edge.
PinOn this wall we started each row at the line and worked back toward the corner.
When we got to a point where there were no tiles underneath to support the newly placed tiles above, we used a nail (see picture above) to give support until we could come back and work our way down the side of the tub.
When it came time to tile around the plumbing, we held our tile in place to get the height of the pipe and then to the side to get the distance we needed from the edge of the tile.
Then the hubs cut a square into the tile according to our marks.
And we set the tile.
PinWe followed this same process when going around the other plumbing fixtures. You will want a tight fit, but don’t worry too much if it looks ugly; your fixtures will cover up these cuts nicely.
PinPinLook at that! Who knew we could be so handy?
How To Grout Wall Tile
Before you grout, let your tile set for at least 24 hours, but follow the exact instructions given on the mortar that you used.
Before grouting, inspect the lines and remove any large pieces of mortar that seeped out during installation. Use a metal scraper or putty knife to scrape out any excess mortar, being careful not to damage your new tiles.
PinPrepare your grout according to the instructions on the package and gather your grouting tools!
Apply a blob of grout to your float and smooth onto your tiles so that all your grout lines are covered.
I found that moving my float in an X pattern ensured that I had filled each grout line well and didn’t leave any gaps or air bubbles.
You will want to work in one area of about 3 feet by 3 feet at a time.
Once the grout lines are filled, go over the area again with your float, removing as much excess grout as possible from the surface of the tiles.
If you don’t remove all the grout from the surface of the tiles, don’t worry about it. You’ll be wiping it off soon.
PinWhen I grouted where the tub and tile meet, I used a piece of painters tape to protect the tub.
Then I grouted like normal and immediately lifted the tape out slowly.
I dipped my finger in a little bit of water and ran it along the grout line to create a seal and to smooth it out (much like you do when caulking).
PinThe instructions on your grout will tell you how long to wait before going over the surface with a damp sponge.
Once you are ready, get a clean bucket of water and a large sponge and wipe the tiles to remove the grout on the surface of the tiles. Once your sponge is dirty, rinse it in your bucket and keep going.
Your grout lines get smoothed out during this step, so pay attention to smoothing out any blemishes because they will dry this way and be permanent.
PinThe next day you will need to wipe the foggy residue from the tiles clean with a wad of cheese cloth. Wear a mask during this part because it creates a lot of dust.
PinOnce you have the finished surface cleaned up all of the dust, let your grout cure according to the instructions.
You will also want to caulk around your fixtures and along the top edge of the tub.
Once the grout is cured, seal the tile and grout using an appropriate sealer for your type of tile.
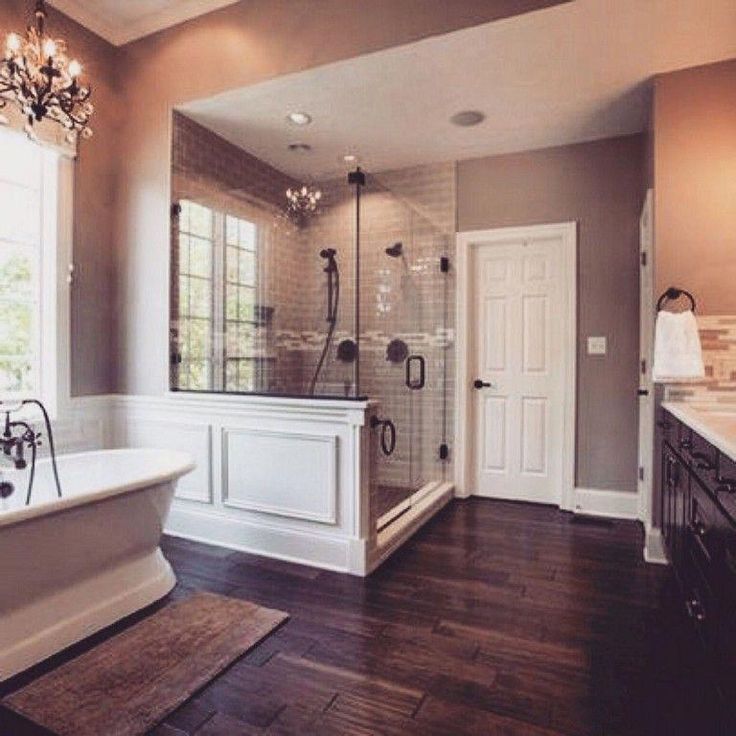
A few days of hard work later (and even eating lunch in this bathtub), we have a beautiful clean new bathtub that is a far cry from the one piece yellowish insert we started with!
PinSo, what do you think? Have you ever taken on a project this big?
A big THANK YOU to The Tile Shop for providing the tile for this project!
Frequently Asked Questions - DIY Tile A Tub Surround
How did you create the little soap/shampoo cut out?
We created this during the drywall step and used an insert to make sure it was waterproof since it has extra seams. This video shows the gist of how we did it.
How many 4×8 tiles did you use?
I don't recall; we have a standard size tub and did the tile all the way to the ceiling (8 foot ceilings.) For help estimating, you can google “tile calculator” and some great free ones pop up.
What was the cost of the project?
We did this bathroom for under $5K and that included cement boarding and waterproofing the tub area, a new tub, tile for tub surround and floor, new cabinets (IKEA kitchen cabinets), countertop, and plumbing fixtures.
Where do you get the blue plastic to cover the tub?
It was on the tub when we bought it and so we left it on till we were done!
Ready to create a home that feels like you without the overwhelm?
Inside my course, Style Your Way Home, I'll teach you my step-by-step approach to discovering your unique design style and how to incorporate all the styles you love into your own home design plan. Plus, you'll learn my simple 4 step process to to apply your decor plan to any room in your home so you can make quick and confident decisions and create a home that feels like YOU.
CLICK HERE TO LEARN MORE ABOUT STYLE YOUR WAY HOME
What comes first: tile or bath? We determine the sequence
When planning a bathroom renovation, it is necessary to determine the sequence of work. What comes first: tiling or installing a bathtub? What algorithm is the most correct and rational? The answer to this question depends on several factors. The size of the room, the material of the bath, and the level of skill of those who will carry out finishing and plumbing work are important. There are some other nuances.
Sequence options
Option 1: tiles first, then bathtub
The bathtub is brought into the tiled bathroom. It remains only to install it. To fill the gap between the bathroom and the wall, sealant is most often used. It protects against water ingress and holds the bowl.
If the bathroom is large and the bathtub is on legs, you don't have to put it against the wall at all.
Option 2: first the bath, then the tiles
The bath is brought in before the walls are finished. Installed, fixed. Only then does the laying of the tile begin.
In fact, the bath is lined with ceramics or, in other words, built in. The tile comes on the side of the bath, but does not rest against it, but “hangs” with a gap of several millimeters. The gap is subsequently filled with sealant and / or moisture-resistant grout (preferably epoxy). Further, the junction can be decorated with a special ceramic border or a plastic corner.
Option 3: measure the bathtub first, then lay the tiles
The bathtub is brought into an unfinished room and installed. Measurements are taken, markings are made for the tiles. Then the bath is taken out or moved away. The tile is laid not from the floor, but from the level of the bath rim, taking into account the necessary clearance. When the finishing is over, the bath starts under the already laid tiles.
Mistakes are unacceptable here: a little overshoot with measurements - and the bath may not enter.
How to choose the right option?
Depending on the size of the room
If the bathtub fits exactly from wall to wall, it is risky to choose the first option. It may happen that after leveling the walls and laying the tiles, the distance will be reduced, and the bath simply will not fit. Therefore, if the bathroom is very small, you first need to install a bathtub and lay tiles from it. So more reliable.
If the bathroom, on the contrary, is large, you can choose the third option: bring in, install, measure, mark, move and lay out the tiles not from the floor, but from the level of the bath rim.
Depending on the type of tub
Read the instructions for the new tub. As a rule, manufacturers of acrylic bathtubs recommend laying tiles first and only then installing the bathtub, sealing the joint with the wall with sealant.
Manufacturers of steel bathtubs are not so categorical, however, they do not advise to rest the edge of the tile directly against the rim. A steel bath is able to "walk". As a consequence, a row of tiles lying on the ledge may be extruded. It is possible to tile a steel bath, but it is necessary to leave a gap.
A cast-iron bathtub is most often “embedded” into the tile, rather than attached to an already tiled wall. Such baths are the most reliable, heavy, stable. And they usually last a very long time. Therefore, their embedding does not entail any special risks.
There is another important aspect associated with a cast iron bath. If you cover the bathroom with tiles and only then bring in the bath, the finish may suffer. Cast iron is hard and heavy, so even a slight blow to the tile can lead to chips and cracks.
Unlike cast iron, an acrylic bathtub, which is especially inexpensive, may require replacement in just a few years. If it is built into the tile, you will have to break the structure. Before deciding on a sequence option, you need to decide - are you ready for an unplanned repair? If the bath is installed in a lined bathroom, and the joint with the wall is filled only with sealant, there will be no special difficulties with its replacement.
The size of the tub also matters. If it is very large (for example, corner models differ in such dimensions), it will be inconvenient to tile it, to put it mildly. How will this affect the quality of the installation? Will the new bathtub be damaged during the finishing work? Maybe such a bath should be installed only in a lined bathroom?
Here, of course, much depends on the skill and experience of the tiler. If he is ready to work in such conditions and at the same time guarantees that the bath will do without damage, you can give preference to the option with the "insert".
If the bathtub is equipped with additional functions (hydromassage), it is fraught to “sew” it into the tiles. If there is any breakdown, you will either have to put up with it, or destroy the structure.
Let's summarize the type of bathtub.
Recommended for installation in a bathroom already tiled:
- acrylic bathtubs, especially inexpensive
- atypically large bathtubs
- bathtubs with extras
Recommended for tiling:
- heavy cast iron baths
The exception is, of course, free-standing cast-iron bathtubs, also on legs. They are never built in and often do not join the wall at all.
Depending on your budget
Tiling only from the edge of the tub saves on material. After all, the walls under the bathroom are not lined.
If repairs are being made in an apartment that will be rented out, it is still advisable to bring the bathtub into an already lined bathroom. Here it is better to save on the bath itself. Fortunately, changing it, with this installation option, will not be difficult.
Depending on whether the bathroom is used during the renovation
If the owners live in an apartment that is undergoing renovation, they want to minimize the period during which the bathrooms are not functioning. In this situation, it will be convenient to bring and install the bath in a prepared, but not yet tiled bathroom, and then tile it. While the renovation is going on, the bathroom can be used.
Depending on the opinion of the masters
If the conditions allow you to choose any of the options, you can trust the masters who make repairs. Specialists with extensive experience will determine the optimal sequence and tell you about all the possible pros and cons.
Tips
1. If a whole tile comes from the side of the bathtub, and not a short cut, the picture is more attractive. When planning to bring the bath into a lined bathroom, it is advisable to determine approximately at what height the side will be even before laying the tiles.
2. Before sealing the "seam" between the wall and the bathtub with silicone sealant, it is recommended to fill the bowl with water until it drains. Water can be drained only after the sealant has dried. It is argued that if an empty bathtub is “sealed”, then after filling it can come off the wall. To protect the bathtub and walls from traces of sealant, it is necessary to stick mounting tape on them before work.
3. If you want to “drown” the bathtub into a long-laid tile, you can make a shallow scratch in the tile. The width of the groove is the size of the side of the bath. The bath is pushed into the shtraba, the joint is treated with sealant and / or moisture-resistant grout.
See also:
The sequence of repair and finishing works in the room
Sockets in the bathroom
What and how to cut tiles?
Corrugated tiles in the interior
Where to put the washing machine?
How to lay tiles in the bathroom: horizontally or vertically?
Bath installation - before or after tiling?
Even before the start of repairs, many people have a question - how to lay the tiles correctly? Before bath or after? Despite the fact that both options are used today, the choice of the order of repair and finishing work is determined by various factors and is selected in each case depending on the material and shape of the bath itself, its dimensions and the size of the bathroom.
Let's take a look at the difference between bath installation before and after tiling, and in which case which option would be preferable.
Installing a bathtub after tiling
This is one of the most common options for a major bathroom renovation, when the old bathtub is thrown away and a new acrylic, steel or cast iron bathtub is purchased instead.
The room is completely freed from old furniture, old plumbing fixtures are dismantled and repairs begin with cleaning all surfaces from the previous finish - torn off, used tiles, paint is cleaned, wallpaper is removed. The walls are leveled and securely primed before tiling. After that, the tiles are laid and proceed to other work.
The same applies to the floor - it is prepared depending on the chosen type of coating. After that, it is leveled with a screed and either tiled, or a bulk self-leveling floor is arranged.
After completion of all finishing work, they begin to install plumbing equipment and install a bathtub.
If an acrylic bathtub with a reliable metal frame is being installed, then its location, with a sufficiently spacious bathtub, can be chosen at some distance from the wall.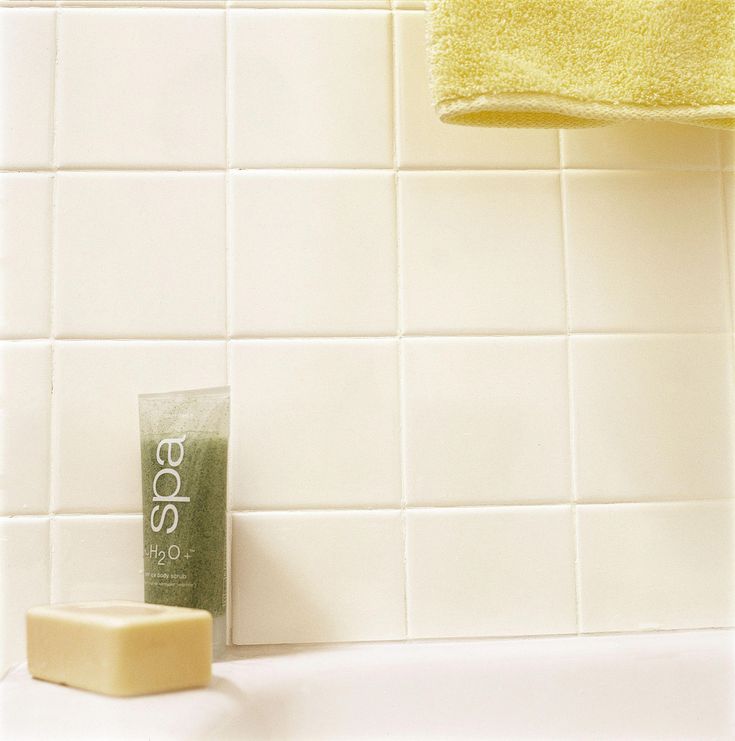
If the bathtub is installed close to the wall, all dimensions and distances from the surface of the tile on one wall to the surface of the tile on the wall opposite should be carefully controlled even at the stage of laying the tiles. After all, in case of an error, the bathtub simply may not fit in and you will have to tear off the newly laid tile in order to shove it into the resulting "Procrustean bed".
After installing the bathtub, the joint between the rim and the wall is sealed with silicone sealant or in any other way.
This method is most often used when installing a light acrylic bathtub, the rim of which, as a rule, is not embedded in the wall in order to avoid the occurrence of stresses under the action of the load from the tile.
You can watch the video of the installation of the bathtub after laying the tiles below:
Installing the bathtub before laying the tiles
then tiled.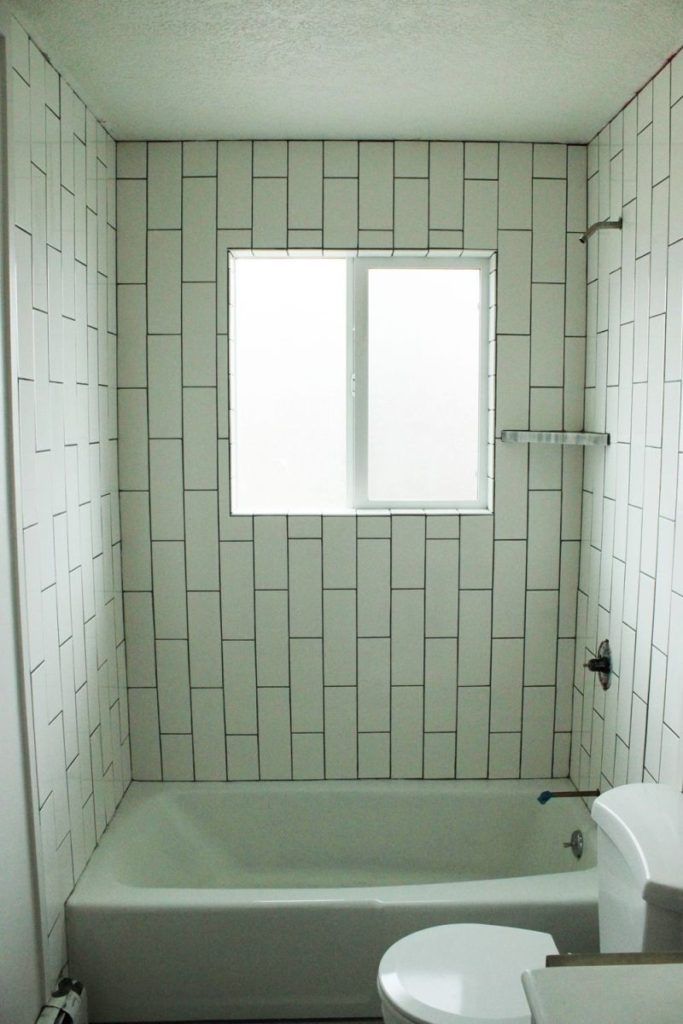
In this case, the tile does not start from the level of the finished floor, but from the edge of the bathtub with a small indent (literally a few millimeters). Subsequently, the gap is sealed with sealant or in any other way using modern moisture-resistant materials.
The tile goes over the edge and the bathroom seems to be built into the wall.
You can watch the video of tiling from the bathtub edge below:
Measurement before tiling
When performing repairs, the third option for performing the order of all operations can also be used, when the bath is brought into the room and placed against the wall the way it will stand later. They mark the wall and take out the bath again so that it does not interfere with finishing work. The tile is laid starting from the marks of the edge of the side with a small gap and is led up towards the ceiling.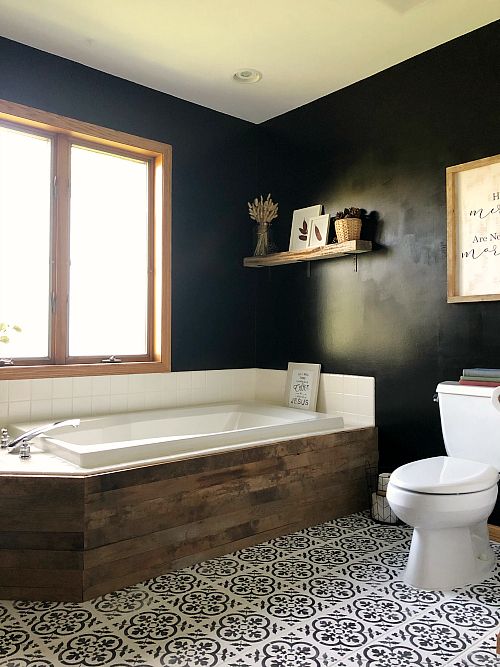
After the tiling is completed, the bathtub is brought in and set in place, carefully closing up the place where it adjoins the wall.
This method allows you to perform wall cladding with great convenience (the bath does not interfere), but it also imposes special requirements on the careful observance of all distances - after all, with the slightest mistake, the bath may simply not fit in and you will have to tear off the tiles and redo everything.
Which way to choose?
The choice of the sequence of actions is dictated by the following factors:
- bathroom size;
- bath material;
- bath size;
- bath shape.
Choosing a method depending on the size of the room
If the size of the bathroom is very small and the bathtub just fits in, literally resting its edges against opposite walls with a small gap, then it is better to install the bathtub first and only after that lay the tiles.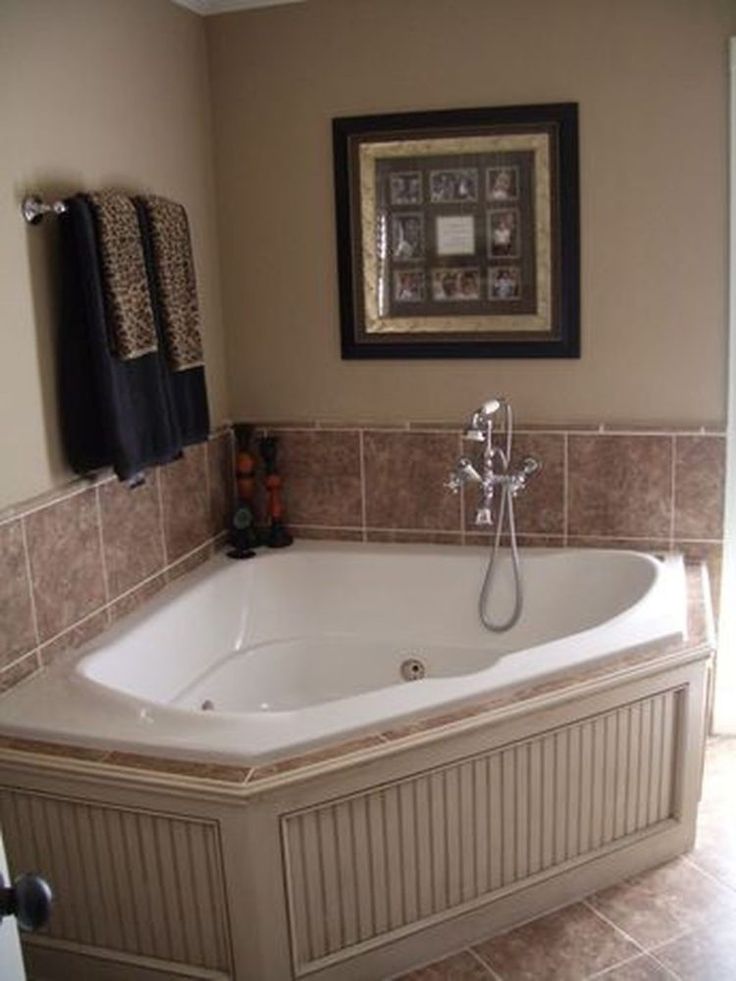
Otherwise, the bath may simply not fit between the walls, the distance between which has decreased due to the leveling layer and the thickness of the tile itself.
Choice of method depending on bath material
Depending on bath material, the choice can be made from the following considerations.
The cast iron bathtub is quite difficult to move due to its considerable weight. Even for a few healthy men, this is not such an easy task. Therefore, cast-iron bathtubs are often installed before laying tiles and then the side is sealed into the wall.
Cast iron bath, securely fixed on legs, does not change its shape under the weight of the water or depending on the weight of the person in it.
However, the same cannot be said for bathrooms made of more flexible materials such as acrylic or steel. The side of an acrylic or steel bathtub is able to "walk" under load. As a result, the edge of the bath embedded in the wall loosens over time, and cracks appear along the side.
In addition, acrylic bathtubs are less durable and if you need to change it, you will have to break the bottom row of tiles to dismantle the wall-mounted bathtub. In the case of installing a bathtub close to the tile, such difficulties will not arise. It will be enough just to cut off the sealant with a knife, which sealed the gap between the wall and the side.
The choice of method depending on the shape and type of the bathtub
If there are no problems with the installation of a conventional rectangular bathtub of the usual dimensions, then the installation of a large corner bathtub equipped with hydromassage, which has an additional piping in addition to the overflow and drain hole, can cause certain difficulties.
These bathtubs are best not to be wall-mounted, as possible breakdowns of the complex equipment that such bathtubs are equipped with may require access for repair and maintenance. Therefore, preference should be given to installing such a bath after laying the tiles.