Terracing a sloped garden
Directions for Terracing a Hill | Home Guides
By SF Gate Contributor Updated February 16, 2021
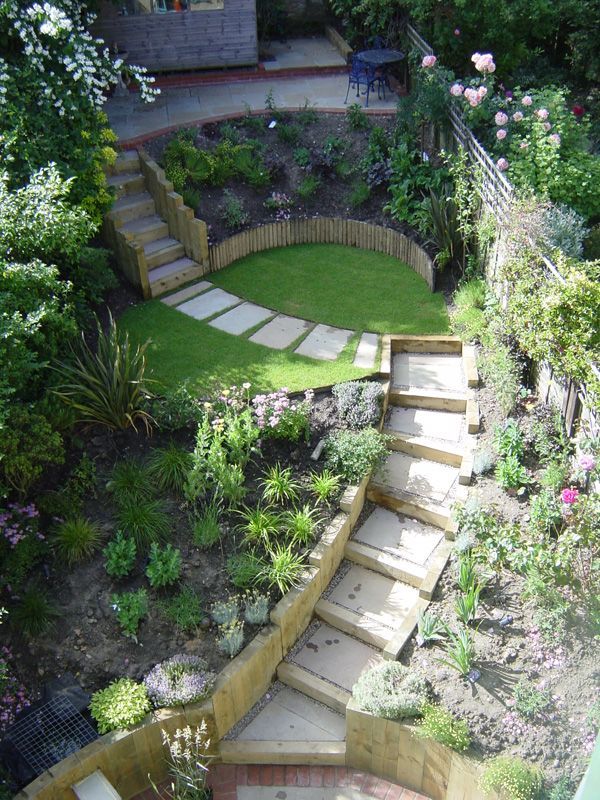
If your yard is sloped and has had consistent trouble with erosion or runoff, or you've had difficulty accessing gardening areas, then terracing may be the solution. A simple idea, terracing involves leveling a hillside's ground in sections so that the flat areas, the terraces, stack above one another like stairs. You can terrace a hill yourself, or you can hire professional help, which may be necessary if the hill is large.
Basic Terracing Principles
Besides leveling land on a slope, terracing a sloped yard requires using walls to hold the level terraces in place, reports the University of California. The downhill wall of each terrace supports the weight of the soil above it, allowing you to back-fill lower areas on the slope and dig out upper areas, creating much more workable spaces. Usually, the soil is held in place with the aid of simple retaining walls, with their distance from one another down the hill dependent on the slope. If your hill is very steep, then its terraces need to be narrower and closer together than the terraces on a gentle slope.
Materials to Choose From
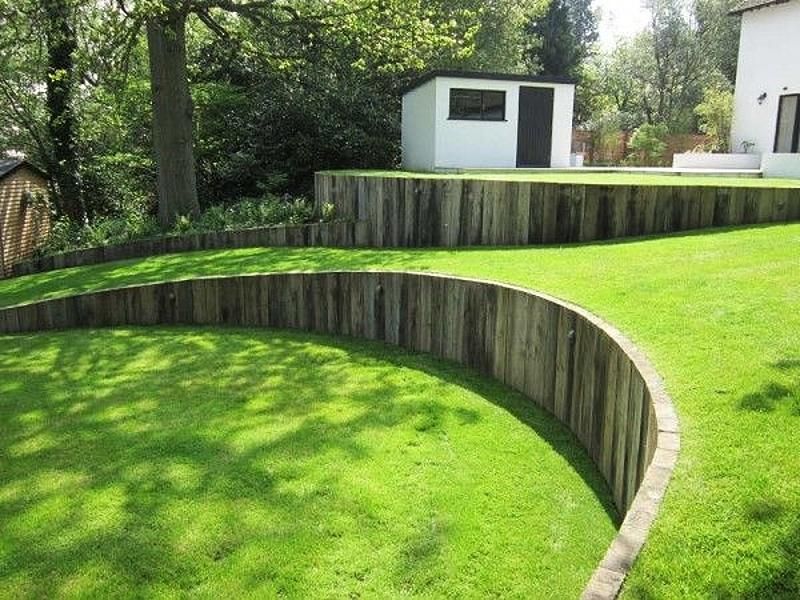
Many kinds of materials can be used to build the terrace retaining walls that keep soil in place. Wood works well, says Family Handyman, as long as it is naturally rot-resistant or pressure-treated to withstand decay. Other types of wood that can be used include railroad ties and landscaping timbers. If you prefer the stone look, you could use boulders or smaller rocks stacked against one another or commercial retaining wall blocks made for simple stacking. Concrete blocks that can be stacked are also an option.
Terraced Hillside Backyard Dimensions
Terrace walls should be no higher than 4 feet. Therefore, plan the number of terraces needed in order to build them accordingly. The distance between retaining walls should be at least twice the height of the walls to avoid putting too much stress on the wall materials.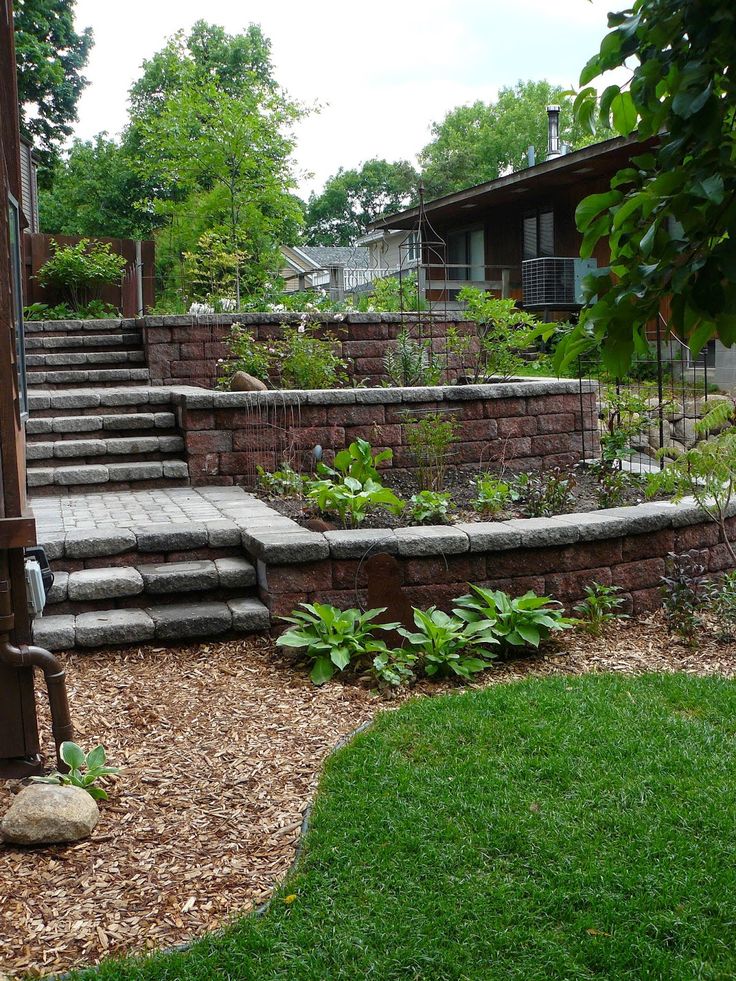 So 4-foot-tall walls, for instance, would have 8 feet between them. If such an arrangement is not possible because of the slope's steepness, then consider hiring a professional to build the terraces to ensure they are safe.
Soil Rearrangement Tips
The main point of terracing is to transform the soil surface from a sloped one to a series of flat ones, which requires digging. When you begin to terrace, start at the bottom of the hill, and build your first retaining wall there. Then dig out the slope above it to back-fill the space you created to just below the height of that first wall. Keep leveling the soil until you reach the distance from the first wall at which point the next terrace should start.
The process begins to repeat when you construct the second terrace wall. Allow the soil in each terrace to settle, and then add soil on top of that soil. Allan Block stresses the importance of compacting the soil, as this is the key to keeping the natural settlement that happens over time to a minimum.
References
- University of California, Sonoma County Master Gardeners: Gardening on a Hillside
- University of California, Sonoma County Master Gardeners: Gardening on a Slope
- The Family Handyman: How to Build a Treated-Wood Retaining Wall
- Allan Block: Retaining Wall Terraces and Planters
Here's a Quick Way to Terrace a Hill [+ Free Download]
Are you challenged with sloping land? Here’s a solution to stop erosion on a hillside and create an easily-navigable terrace garden. Oh, and don’t forget to grab your FREE DOWNLOAD: Building a Check Log Terrace Quick Start Guide at the end of the article.
This page may contain affiliate links. Please read my disclosure for more info.
In 2011, I started Hillside Community Garden, and as the name implies, we had a steep challenge. The hillside was prone to land-sliding and erosion. Any topsoil and nutrients that may have been there at one time had since washed away.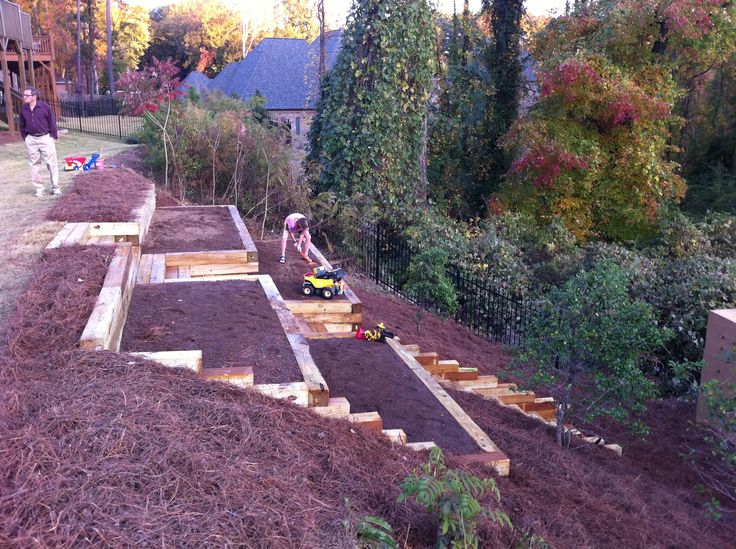
We were looking for a garden terrace solution that not only helped stabilize the hillside, but also helped increase fertility (to make up for all that had washed away). Oh, and the solution needed to be cheap and low tech, because after all, we’re just a volunteer group operating on a small budget.
Check Logs: A Garden Terrace for a Slope
I sought council from local permaculture practitioners, who suggested that I look into the concept of check logs.
I had no idea what check logs were, but I found more information in Edible Forest Gardens as well as in Rainwater Harvesting for Drylands and Beyond, where they are referred to as check dams.
A Check Log Terrace Summary
So what is a check log terrace?
In this method, logs and brush are laid across the hillside like a beaver dam and held in place with wooden stakes. Organic matter is added above the dam.
Perennials are planted above and/or below the dam, whose roots will soak up and slow the rain and nutrients as they rush down the hill.
Want to grow fruits, vegetables, and herbs in your front yard landscape without sacrificing curb appeal? Check out my ebook, The Permaculture Inspired Edible Landscape.
Building a Check Log Terrace in 8 Steps
The following are the steps to build your own check log terrace.
#1: Drive stakes along an elevation contour line.
Contour lines are those that you see on an elevation map.
Imagine a flat dinner plate with a tablespoon of water on it. When the edges of the plate are level (all on the same elevation contour), the water stays on the plate. However, if one edge dips to the side (changes elevation), the water runs off.
When building terraces, find the contour line to keep the rainwater on the plate (terrace) so it can slowly sink in. A low-tech gadget called an A-frame level can help identify contours. Read all about this tool and how to build one here.
Drive stakes in along the contour line every 2-6 feet.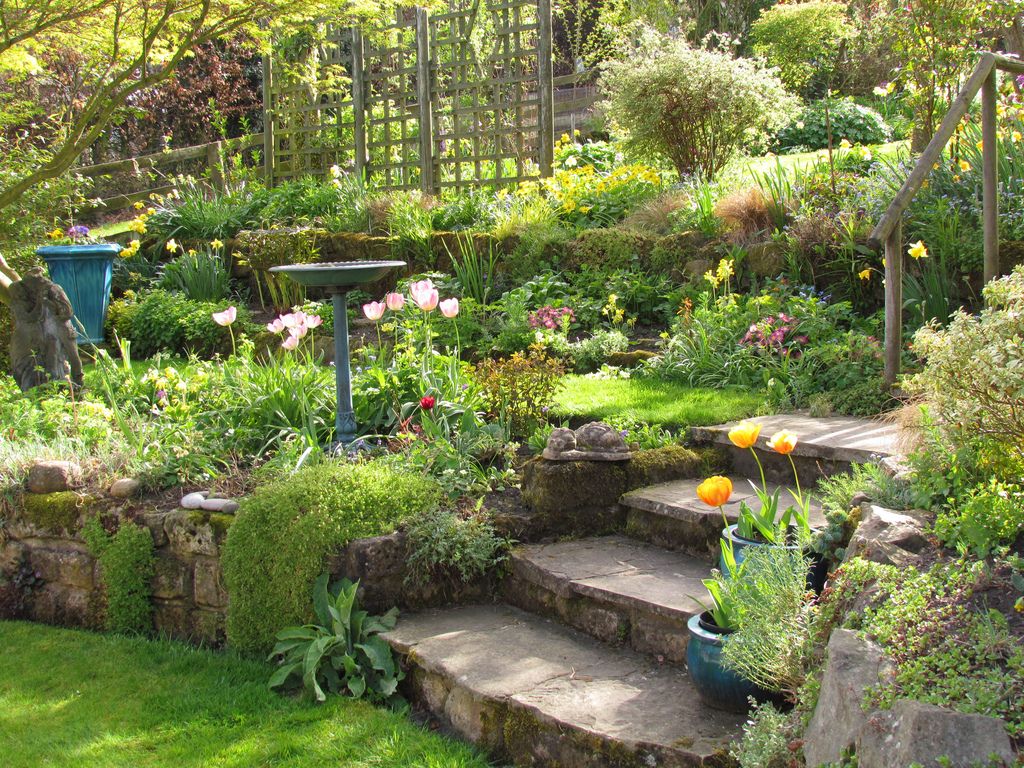 The steeper the slope, the closer together the stakes should be.
Make stakes out of waste wood, buy 2 x 2 x 36-inch untreated pine stakes from a home improvement store, or buy untreated wooden deck balusters.
#2: Lay cardboard as a weed barrier behind the stakes. (We covered enough space to make a garden terrace three feet wide).
Free cardboard is a great weed blocker in managed garden areas. Lay cardboard like shingles on a roof—start at the bottom, top pieces at the top of the slope. Overlap the pieces by several inches on all sides—weeds will find any openings.
#3: Lay logs, limbs and brush uphill of the stakes to act as a dam.
We used logs and limbs that we cleared from the area in preparation for this project. If your check log area is already cleared, a local tree trimming company may be able to supply you with the wood you need.
Logs and limbs 1-4 inches in diameter work best. Logs that are 6-8 inches in diameter will work, too, but first, dig a little trench for them to sit in, to take some pressure off the stakes.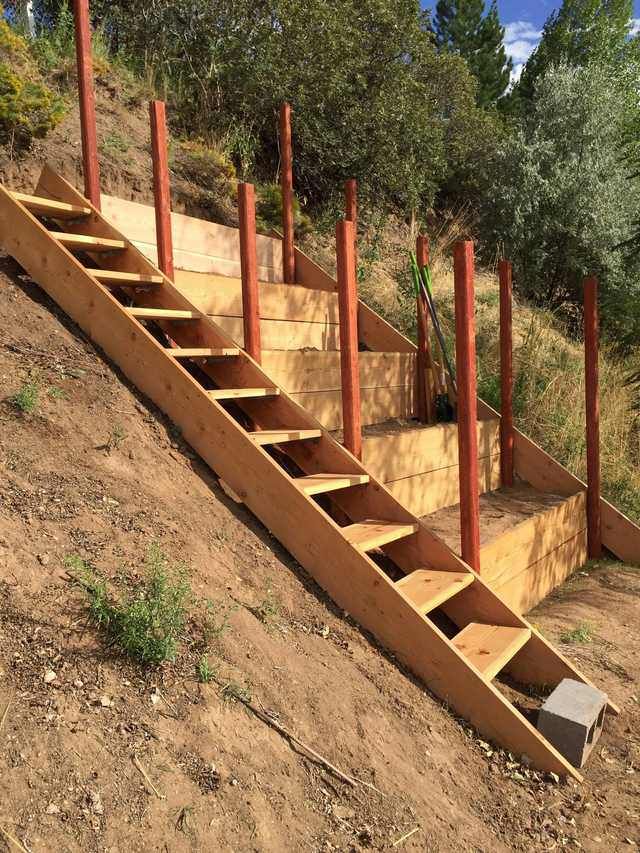
Pile the logs up so that they’re slightly higher than level, because the terrace will settle over time. Like this:
#4: Plug up the holes.
Pack twigs, brush, and leaf litter into the logs and limbs to act as a filter and hold in soil.
For this reason, fall is a perfect time to build a check log terrace!
#5: Add soil uphill of the limbs and brush, on top of the cardboard.
Fill soil on top of the cardboard until it’s level with the terrace. The soil will settle over time, so expect to add more in the future.
If you want to plant below the dam instead of above it, you can skip this step.
#6: Observe the terrace after a couple of hard rains.
How did it hold up? Are there any low spots that need more logs, leaf litter, or soil?
Check log terraces provide the foundation for wood chip paths to flank either side of this to-be fruit tree terrace.
Check log terraces provide the foundation for wood chip paths to flank either side of this to-be fruit tree terrace.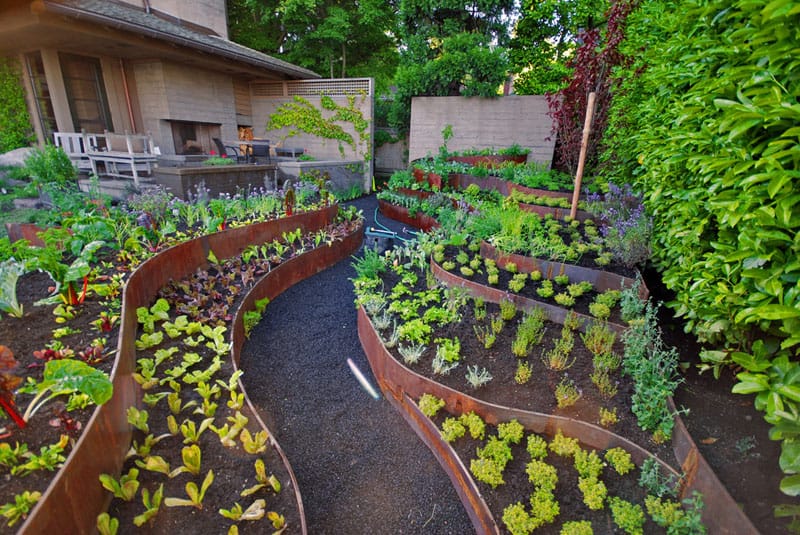
Do you have a grand vision for your site? If so, check out my Permaculture Design Program and become your own designer!
#7: Plant perennials in the new soil.
At this test garden, we’re planting fruit trees, berry bushes, and edible/medicinal herbs. It’s best to focus on perennials, whose roots will be permanent fixtures in the terrace to stabilize the hillside.
For my favorite planting ideas, see:
- Create a Food Forest
- How to Build a Fruit Tree Guild
- 4 Berry Bushes That Fertilize, Too!
The lower cinder block terrace includes strawberries, while the upper terrace is planted with raspberries.
Mulch the planting area well to reduce erosion and to stabilize the soil in these new planting areas. I like white clover. For more ideas, see: Mulching in the Permaculture Garden.
#8: Observe over time.
As the terrace settles and decomposes over time, there may be little spots here and there that need to be plugged up, or a stake that needs replaced.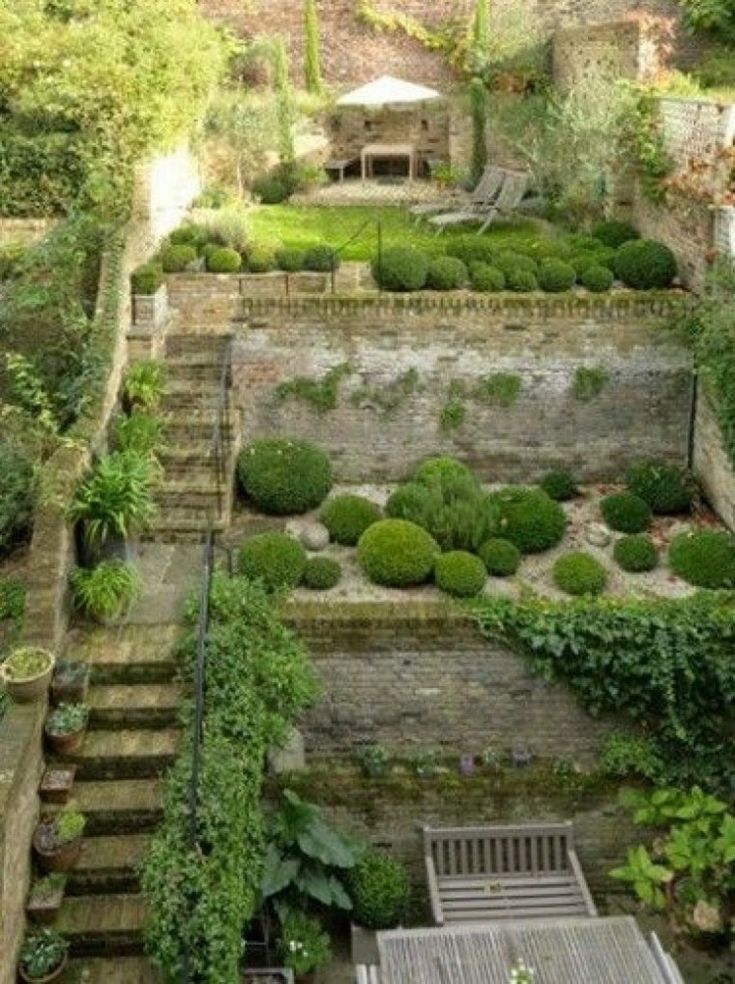
In general though, this little ecosystem you’ve built will do a good job of stabilizing itself without a whole lot of work on your part.
6 Benefits of the Check Log Terrace Garden
#1: Aerate Soil
Check logs loosen and aerate this soil so you can have a successful hillside garden.
#2: Catch Nutrients
Check logs are like nets, catching essential nutrients before they rush away in the rain.
See: How to Prevent Soil Erosion in Gardens and on Farms.
#3: Improve Plant Life
In check log terraces, plants thrive in the loose, aerated soil, rich in nutrients.
#4: Increase Organic Matter
Rich, aerated soil attracts worms and other beneficial soil organisms. As they go about their daily business, they wiggle in and out of the new and old soil, forming little tunnels and fertilizing everywhere they go.
Worms excrete a sticky exudate in these tunnels, which holds the loosened soil together so it doesn’t wash away. The tunnels allow air, water, and nutrients to penetrate deeper into the soil, preventing even more runoff and building nutrient-rich soil to support thriving plants.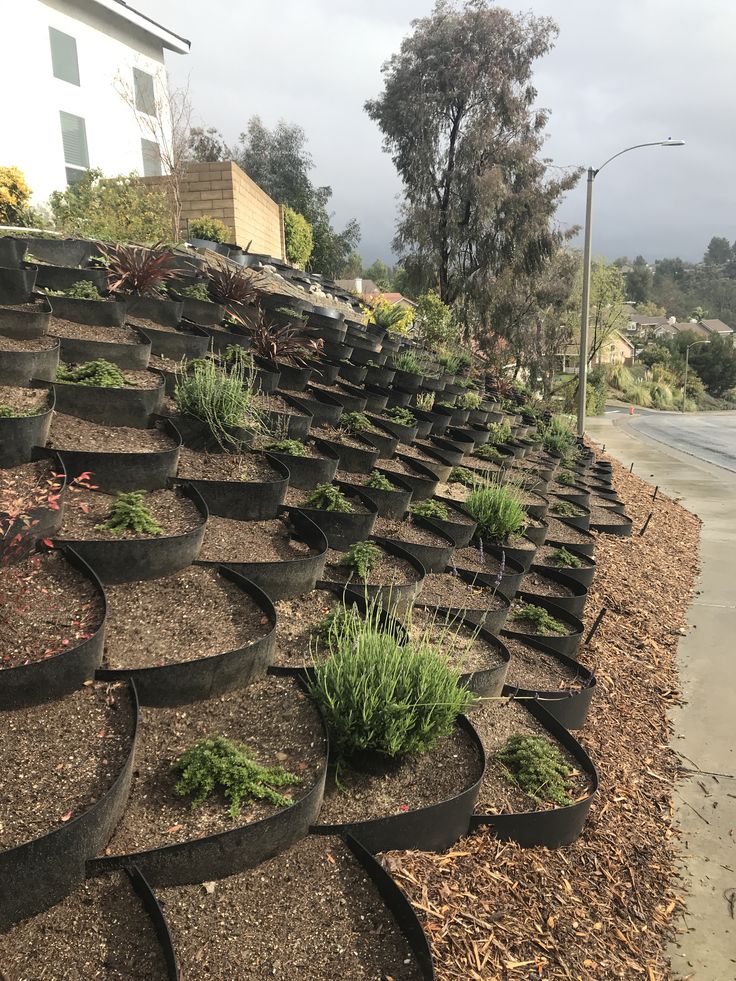
#5: Attract Beneficial Fungi
Fungi are an indication of healthy, mature soil, and show up fairly quickly in check log terraces because of the decomposing logs. These fungal networks form beneficial relationships with the roots of the plants, and catch and hold both soil and nutrients.
#6: Build an Ecosystem With Very Little Work
Ultimately, a check log terrace on a slope will become its own self-sustaining ecological system, drastically improving the stability of the hillside and contributing to the regeneration of an eroded landscape.
SUMMARY
A check log terrace is so simple that it’s worth a try on your hillside today. Even better: if you change your mind, it’s just as cheap and easy to deconstruct 🙂
What do you think? Will a check log terrace garden improve your hillside?
READ NEXT:
- Front Yard Rainwater Catchment
- 5 Reasons to Grow Chives
- 6 Flowers to Grow in the Vegetable Garden
Terracing a site with a slope: preparation, creation of retaining walls
Terracing is a method in landscape design that allows you to create several more even areas from an inclined area.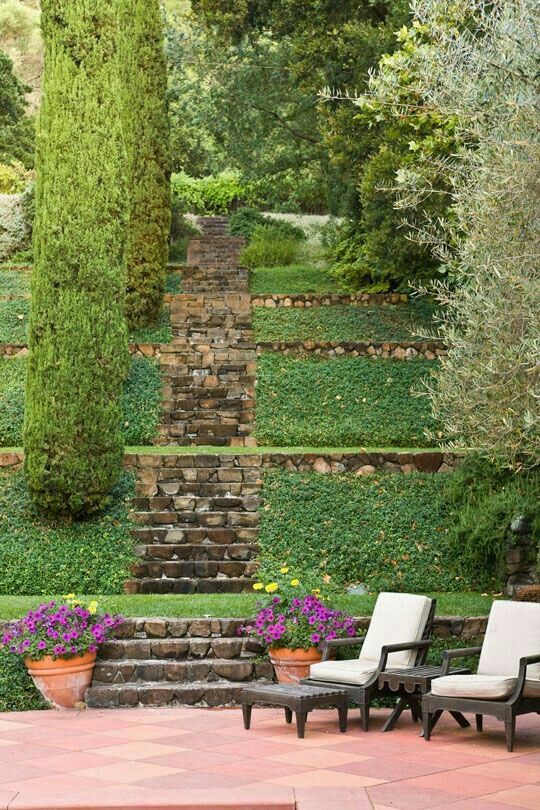 Together with slope leveling, terracing allows:
- Create a simple drainage system, which means preventing or eliminating soil water erosion.
- Perform zoning of the territory and design it uniquely.
- Useful to use all available space. nine0006
- Move around the site safely.
Terraced slopes look impressive, but the use of this technology has several significant drawbacks:
- Preparatory work: soil assessment, analysis of the depth of groundwater.
- Plants require a lot of effort to take care of: they need more frequent watering.
- High set-up costs.
To minimize imperfections, it is important to inspect the site in advance, especially the slope, its angle. This will help prevent unnecessary spending on unnecessary designs. Also, before creating terraces, you need to designate for yourself their functional purpose. If you plan to grow plants on the site, it is better to immediately choose those that require less watering. nine0003
Contents
Types of terraces and their features
The purpose of using future terraces and the angle of inclination of the land plot determine the choice of a structure of a certain type. It can be the following types:
Types of terraces: 1 - ridge; 2 - trench; 3 - terrace-ditch; 4 - stepped.- Stepped structures are suitable for areas with a slope of 8-12 degrees. Steps are made from 3 to 15 meters wide and reinforced with masonry. nine0006
- Trench terraces are used if the slope angle is more than 10 degrees. A layer of fertile soil is removed from the trench and from the adjacent territory. The bottom layer of soil from the trench is used to create ramparts. After the shafts are formed, the previously removed soil layer is laid out on the bottom of the trench.
- Ridge structures are created when the site slopes up to 8-12 degrees. Mounds of ridges are formed across the slope, their height is about 30-50 cm.
- Ditch terraces are used on steep slopes, the angle of which is from 35 to 40 degrees.
 Soil is taken out of storm ditches and shafts are poured from it. Each subsequent shaft is made higher than the previous one by 2-2.5 m.
How to terrace a plot with a slope?
Preparation
The first stage of terracing is to assess the topography of the site, the possibility of terracing on it and the feasibility of such work. Then you should pay attention to the following characteristics of the territory where the creation of terraces is planned:
- Soil composition, its features. This will allow you to determine what is the optimal purpose of the selected site. nine0005 Groundwater depth. A high level of occurrence will require the creation of a drainage system.
- Slope value, height differences. Both the choice of the type of terraces and their functional purpose, the design features of steps, stairs, and plants depend on these characteristics.
When all the parameters are calculated, you need to work out a plan indicating all the terrace areas and their width, the height of the retaining walls, the location of the stairs.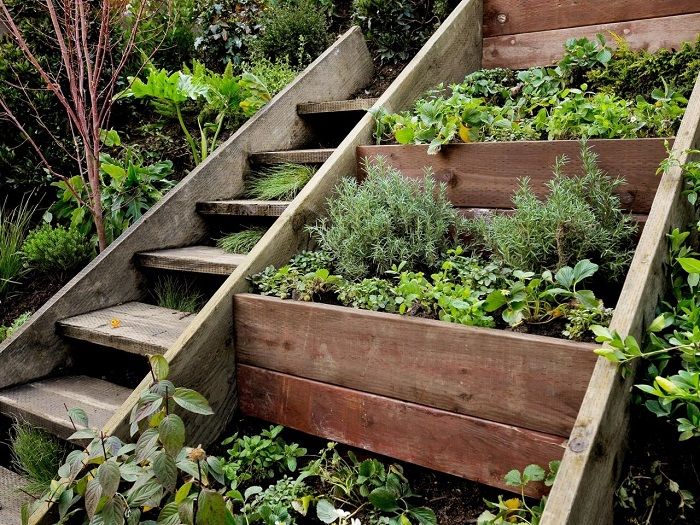
When creating a plan, it is important to remember the basic principles of terracing:
- Inadmissibility of removing the natural relief.
- Designing not only relief, but also buildings.
- Installation of surface storm drains.
The plan must correspond to the site where the terracing will be carried out. To do this, the territory must be divided into separate fragments in accordance with the rules of dimensional binding. If there are buildings, such objects as flower beds, reservoirs, they should be indicated on the layout plan, reflecting their location. nine0003
Creation of terraces
After the preparatory work on planning, you can start marking the desired area. It must be fenced around the perimeter with stakes with a stretched cord or wire.
Marking contours on the slope: A - line of placement of pegs-benchmarks; B - contour lines of the slope The first peg is driven in at the top of the slope, the rest of the stakes are located below.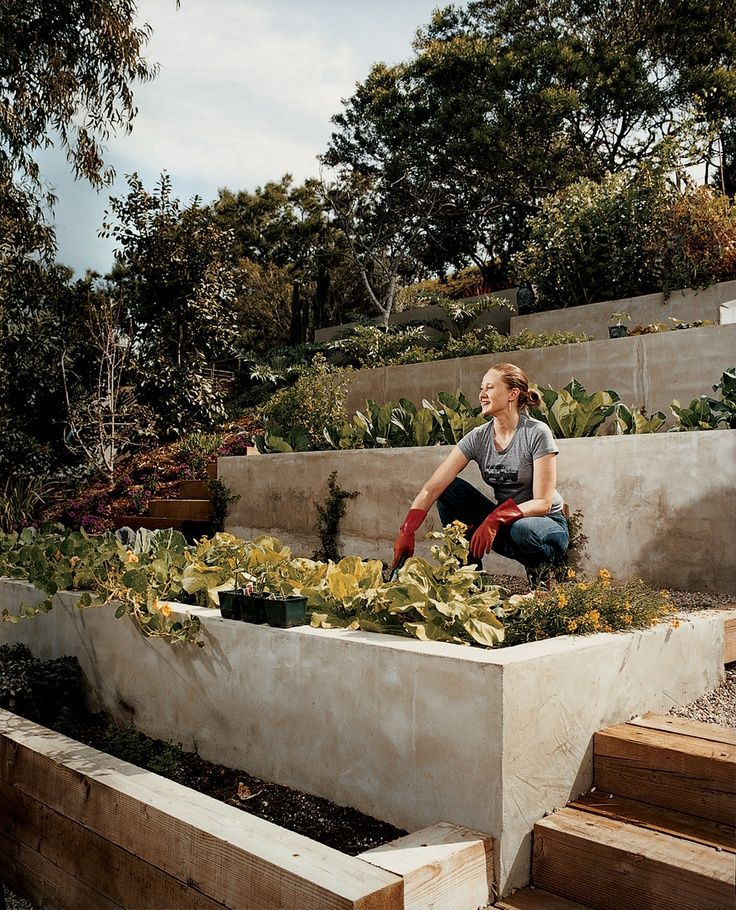 They must divide the slope along its surface. The width between them should be half the planned width of the terrace. nine0003
Then use a spirit level to find the transverse points on the slope. The level of the point on each line is equal to the level of the points indicated by pegs along the slope. After marking these lines, you can start adding soil, forming terraces in accordance with the plan. Their surface should be made with a slight slope to prevent stagnant water on the site.
Reverse slope of the terrace surface: A - terrace surface; B - horizontal lineThe fastest way to do this is with an excavator, as in this video:
Strengthening slopes
When the platforms are ready, their slopes must be strengthened. This will strengthen the terraces, preventing soil from washing out. There are several ways to strengthen terraces. They depend on the slope of the slope:
To create a wooden retaining structure, first dig a recess along the slope 10 cm deeper than the dug-in part of the logs.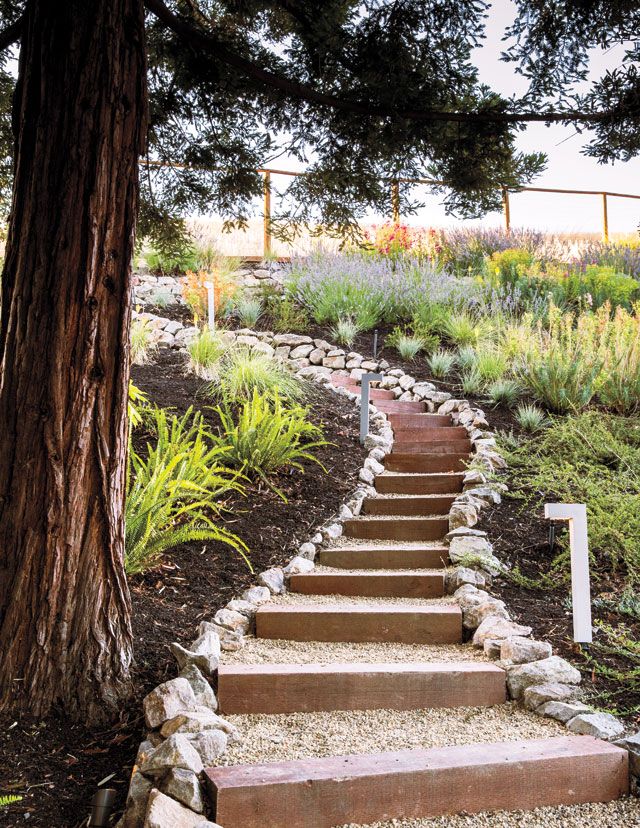
The width of the pit is 20 cm wider than their diameter. Then the bottom needs to be covered with crushed stone and compacted. The logs are installed vertically, tightly to each other, then the trench is covered with rubble, poured with concrete and covered with soil. nine0003
Wooden formwork must be built for concrete stumps. Pour stones and gravel into it in layers, pour each layer with concrete. For the outflow of water at a height of 5 cm, a drainage pipe must be laid.
A stone structure is built by stacking stones and fixing them with cement mortar.
A brick retaining wall will require a concrete foundation. Bricks are held together with a cement mortar with the addition of fine-grained sand and water. Drainage holes are made in the first row. The lower 5-6 next need to be strengthened, so the bricks are laid out in one and a half or two rows. nine0003 Brick retaining wall: 1 - crushed stone; 2 - brickwork; 3 - drainage hole in the masonry; 4 - concrete foundation.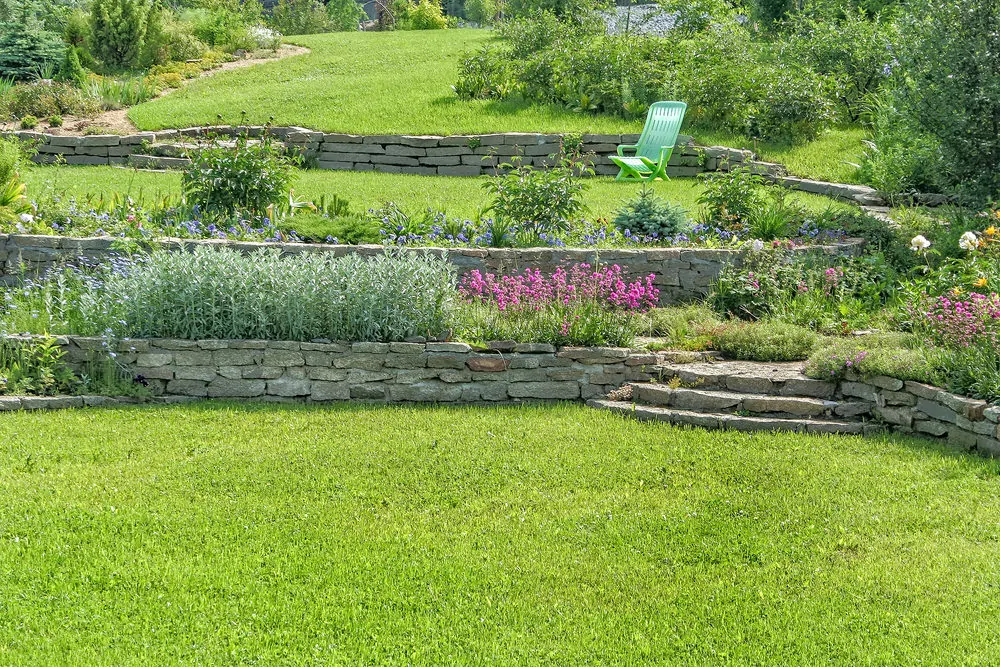
When installing retaining walls, special attention must be paid to the nuances of the work.
The construction of the support structure starts from the bottom of the site. It is not placed vertically, but with a slight slope relative to the slope, in order to increase the strength and durability of the support. In this case, it is necessary to observe the proportions of the retaining wall, the ratio of its height to width is 3:1. nine0003
Decoration
The final stage of site terracing is the decoration of terrace areas.
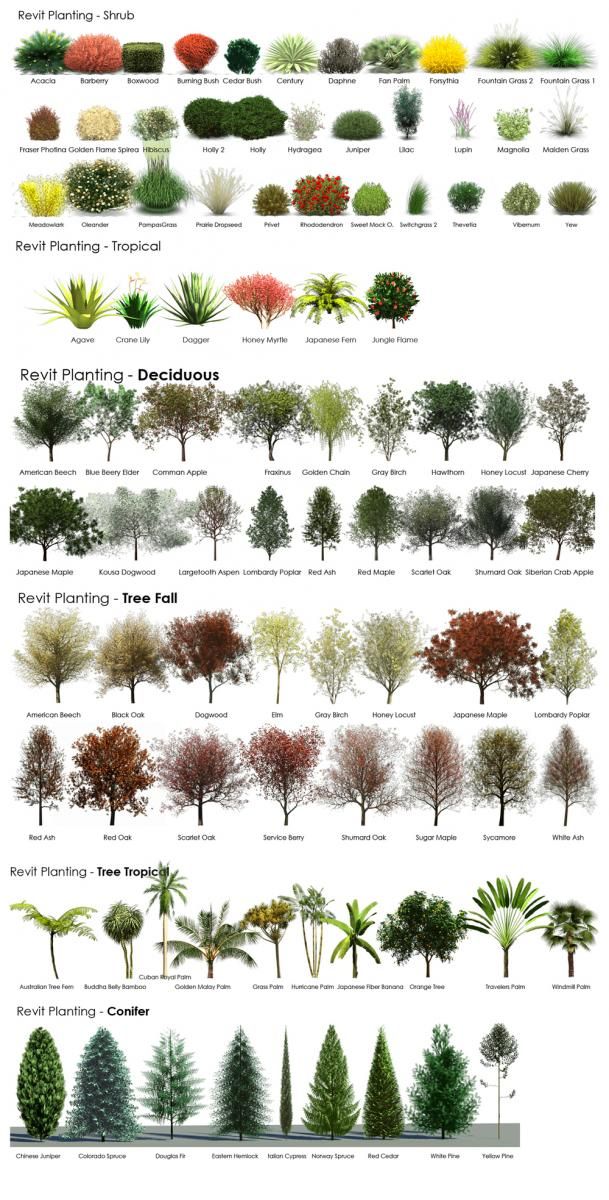
Herbaceous plants, shrubs, fruit trees can be used for decoration. Features of the created structures allow you to create hedges. To do this, next to the retaining walls, you need to plant climbing plants, such as grapes, ivy, creeping vines. The plants used can be both ornamental and fruit crops.
Own garden on terraces When planning terraces for growing plants, it must be borne in mind that the angle of inclination of the site significantly affects the illumination, humidity, and soil temperature.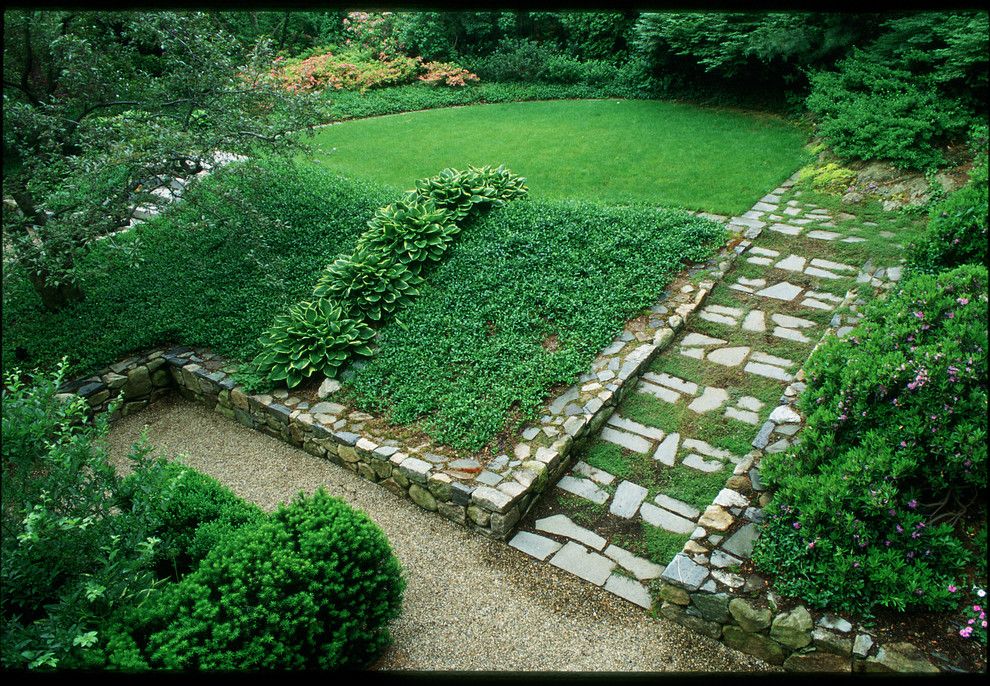 So one degree of slope shifts climatic factors by 8-10 km in the direction in which it is directed. That is, on the southern slope with a slope of 1 degree, you need to grow plants that are grown in a climate located at a distance of 8-10 km to the south.
In addition to flower beds and bushes, terraces are ideal for building small waterfalls, a group of ponds on neighboring sites. nine0003
dizlandshafta
Terracing a dacha on a slope: a bed on a slope
If your plot is located on a slope, you can make a beautiful and original landscape element - a terrace.
When terracing a slope, it is important to assess the size of the plot, usually terraces do not exceed 80 cm with a width of at least 5 meters. Their number depends on the size of the garden plot, sometimes it is 2 or 4 terraces, in large areas there can be much more. nine0003
Terracing slopes protects the soil from landslides and erosion. Each of them can be designed individually, but so that all together they look harmonious.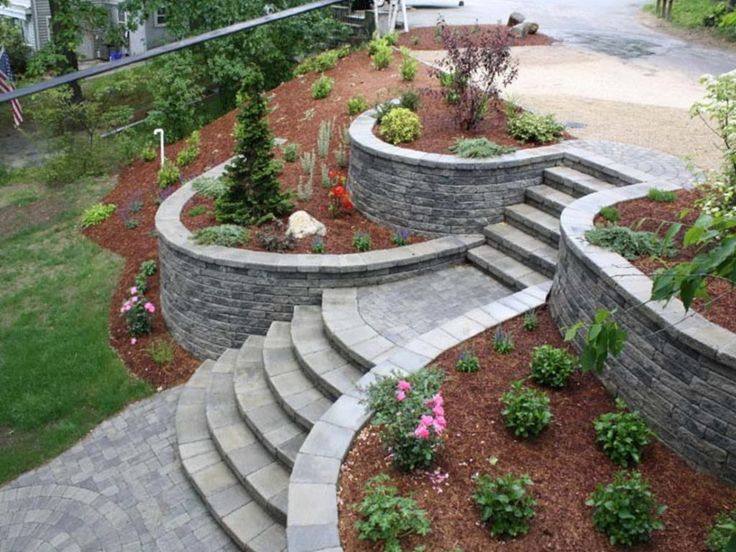
The main stages of terracing a suburban area
First you need to level the surface. How to do it? First, it is necessary to conduct an eye survey in order to estimate the number of terraces and the size of the ledge. Then the slope is broken with the help of pegs from top to bottom into segments equal to one and a half width of the terrace, and, moving across the slope, using the level, they find points that are located at the same level as the first peg. By placing auxiliary pegs at these points, they find a line that cuts the slope exactly horizontally. Having completed work with the first line, they move on to the next peg and determine the direction of the second horizontal. nine0003
Then, after determining all the horizontals, they begin to form a terrace. When backfilling, its surface must be made not horizontal, but with a slight slope, the opposite of the slope of the slope. Next, the terrace is reinforced with a retaining wall.
Pay attention to the design of the walls, as they attract attention in the first place.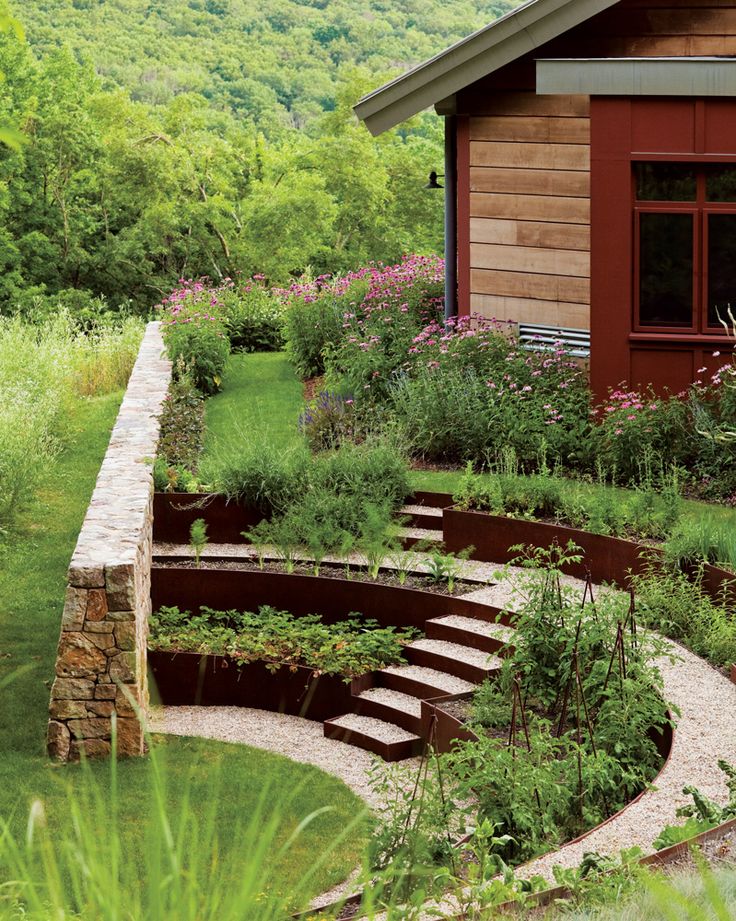
Retaining walls are: wooden, concrete, stone, brick.
How to make a wooden retaining wall
Wooden retaining walls, of course, look more natural and beautiful, but their service life is short, much shorter than that of walls made of other materials. But the price of this material is not so high. Such walls are made of logs or beams. With a wall height of 1 meter, the bars and logs should go underground for half a meter and rise above it by 1 meter. Accordingly, the diameter and length are calculated with smaller or larger differences.
How to build a wooden wall. First, a trench is dug, 10 cm deeper than the dug-in part of the bars and 20 cm wider than their diameter. Then the bottom is covered with rubble and carefully rammed. Next, the bars are installed tightly to each other. Between themselves, the bars are fixed with nails or wire, and from below they are covered with rubble. From the inside, the wall is covered with roofing material. Next, the trench is poured with concrete, then they fall asleep and tamp the soil. To protect the beam from moisture, their surface is fired or treated with special means, it can also be covered with hot bitumen. nine0003
Concrete retaining wall
Concrete walls do not look very nice and to fix this, they are usually covered with tiles, shingles or pebbles.
To build a concrete wall, first formwork is made from planks or boards. Outside, it is necessary to make supports that can withstand the weight of concrete. Further, large stones are laid in the lower row of formwork, and the voids between them are filled with gravel. Then the stones are poured with a small layer of concrete. Then the process continues, laying the stones in layers and pouring them with concrete until the entire formwork is filled. It is necessary not to forget to lay drainage pipes at a height of 5 cm from the ground level to drain water. nine0003
How to make a brick retaining wall
Brick walls look very nice if they are built of good quality and good material. Such walls are usually made if the house is also made of bricks.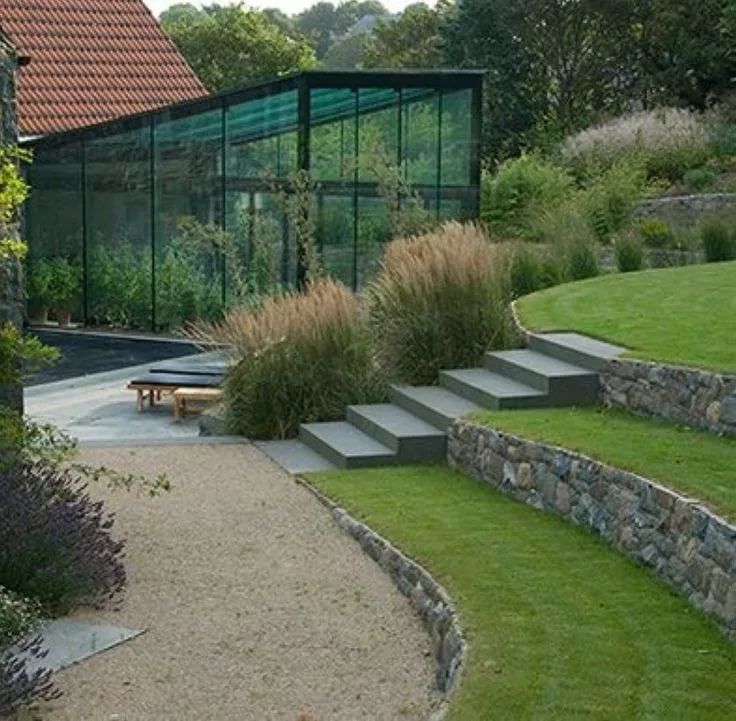 Clinker bricks with high strength and moisture resistance are best suited for its construction.
When building a brick wall, by analogy with a concrete wall, a foundation is made. In the first row of brickwork, it is necessary to make drainage holes with a slope towards the lower terrace. The thickness of such a wall directly depends on its height, that is, the higher the wall, the greater its width. Reinforce the wall by thickening its lower part (5-6 rows) to one and a half or two bricks. Bricks are placed on the mortar. A mortar of 1 part cement, 3 parts fine sand and 3 parts water. nine0003
Stone walls are the most expensive, but also the most durable. For its manufacture, raw sawn or chipped stone is taken. It is usually basalt, quartzite or granite. Walls of various shapes can be laid out of stone.
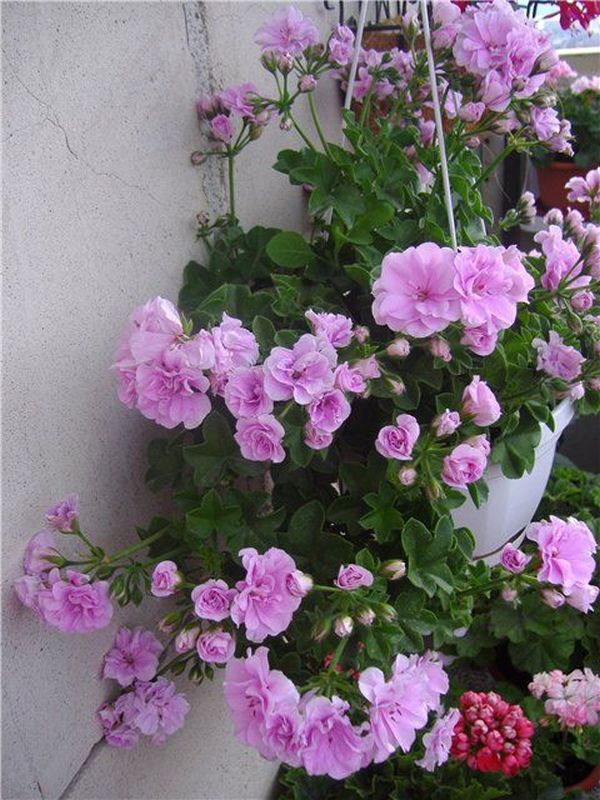
Creeping plants can be planted along the upper edge of the wall, the hanging stems of which will partially cover vertical surfaces. And by attaching wire to the walls, you can make supports for climbing species.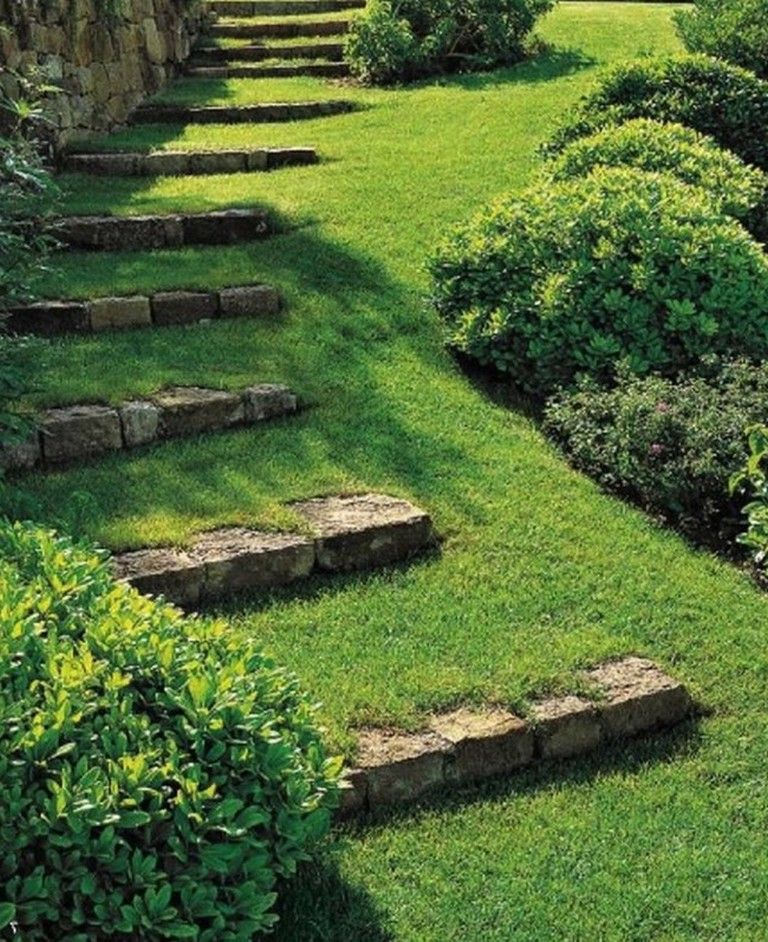 For landscaping, you can use climbing plants in special containers, which are placed in niches of retaining walls. nine0003
Climbing plants such as ivy or wild grapes, sweet peas or clematis can be planted along the wall.
How to decorate the terrace
The terrace can be decorated with small flower beds or flower vases. The terrace looks very nice, entwined, for example, with purple clematis, next to which there are small flower beds with orange flowers, for example, calendula.
The terrace is usually decorated with floral arrangements, usually of undemanding plants and flowers. As in ordinary flower beds, the main thing is to choose a good combination of colors according to color and flowering time. nine0003
On the slopes of the terrace, it is best to plant shrubs that will hold the soil. It can be barberry, wild rose, euonymus, etc. Coniferous ornamental shrubs look good on the terraces.
Fountains, cascades and small waterfalls running from one terrace to another will be a wonderful decoration of the garden.