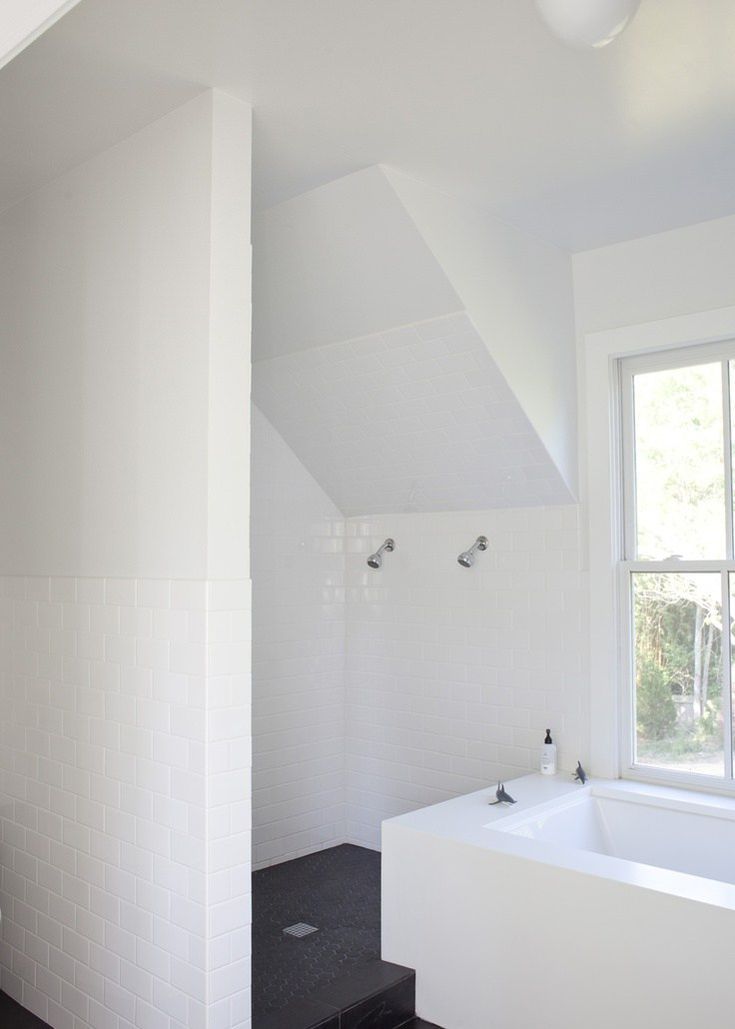
Shower low ceiling
Shower design for a small bathroom: 6 space-boosting tricks
When you purchase through links on our site, we may earn an affiliate commission. Here’s how it works.
(Image credit: Future)
Shower design for a small bathroom need not compromise on style and comfort.
A small shower room or bathroom can feel cramped and unwelcoming, particularly if it has low ceilings. But there are many ways to make it feel more spacious, according to Yousef Mansuri, head of design at bathroom experts CP Hart.
So, if you are considering walk-in shower ideas that take over the whole space or simply a cubicle you want to feel spacious, this is what to consider.
These clever tricks will help with shower design for a small bathroom, particularly if you are in the planning stages and looking for small bathroom ideas.
1. Fit a flush shower head and tray to boost headroom
(Image credit: C. P. Hart/ Paul Craig)
'A low ceiling requires careful showerhead positioning,' Yousef Mansuri explains. 'A flush-to-ceiling shower can help gain extra headroom, as will a low-level shower tray.'
A ceiling-mounted shower head – also known as a rain shower – is the perfect shower design for a small bathroom or walk-in shower and very desirable because it gives the bather a more immersive and often more luxurious experience.
While it may need more extensive plumbing work compared to standard shower head, it is a great solution for low ceilings and comes in a range of models, including ones with adjustable nozzles and changeable colored lighting.
2. Enhance space with a glass shower screen
(Image credit: C. P. Hart)
Another trick to help maximize space in a small shower room is using a glass screen. This will help trick the eye into thinking the room is bigger, and also creates a smart, streamlined look.
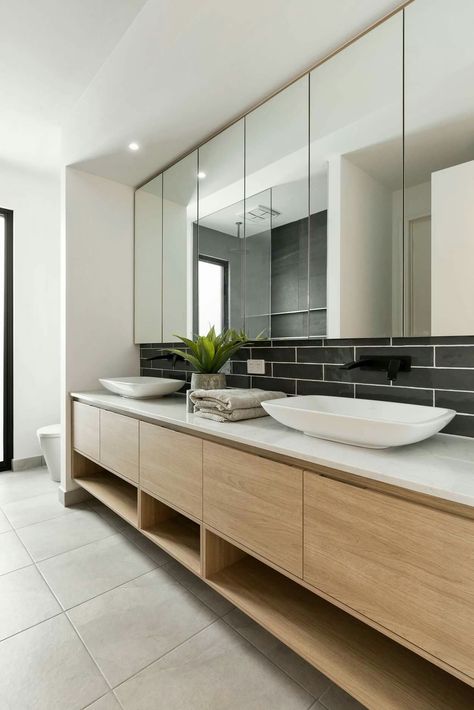
3. Pick wall-hung fittings to make a small space look bigger
(Image credit: Future / Davide Lovatti)
Choosing the right sanitaryware is key in any shower design, but in a small bathroom you need to think particularly carefully about how to choose a shower.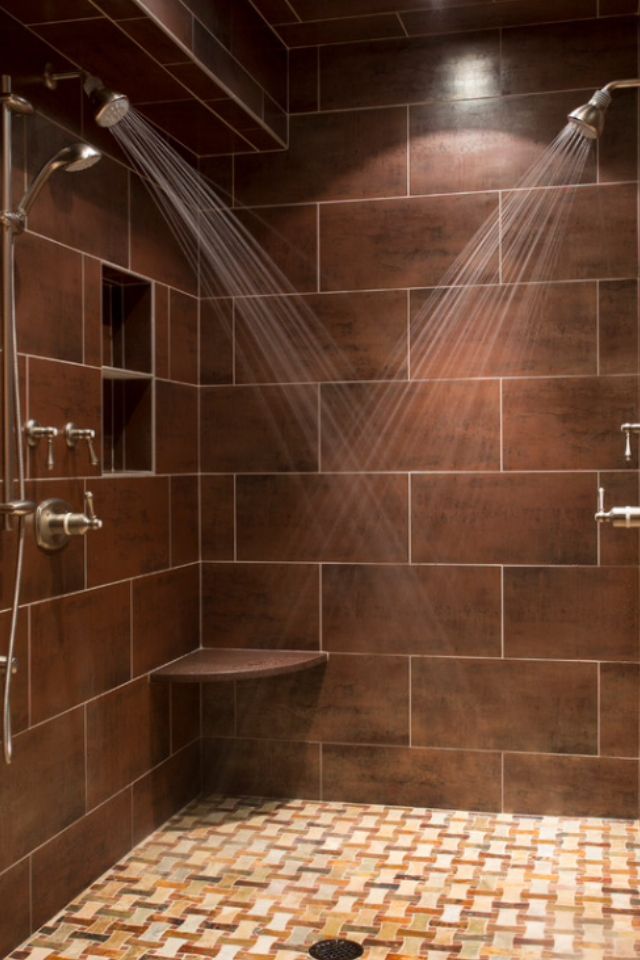
Wall-hung fittings allow you to see right to the walls beneath them, giving a better sense of space, adds Yousef.
'A stud wall is built out by at least 12-20cm to hide cistern and pipes, but if you have a partition wall already, for example it’s a newly created en-suite, you can utilise the interior voids.'
4. Create more wall space with niches
(Image credit: Future / Jonathan Gooch)
Floating shelves are great for having essentials to hand without taking too much space. Other clever small bathroom storage ideas include creating a niche or ledge above the sink if you don’t have room for a vanity.
Building large niches into the shower walls also means you have an easy and clever spot to hold all your bathing needs.
5. Swap a shower room for a wet room for tiny spaces
(Image credit: West One)
If you are short of space, wet room ideas can be a game-changer, although there has to be consideration given to ensuring the room is completely waterproof.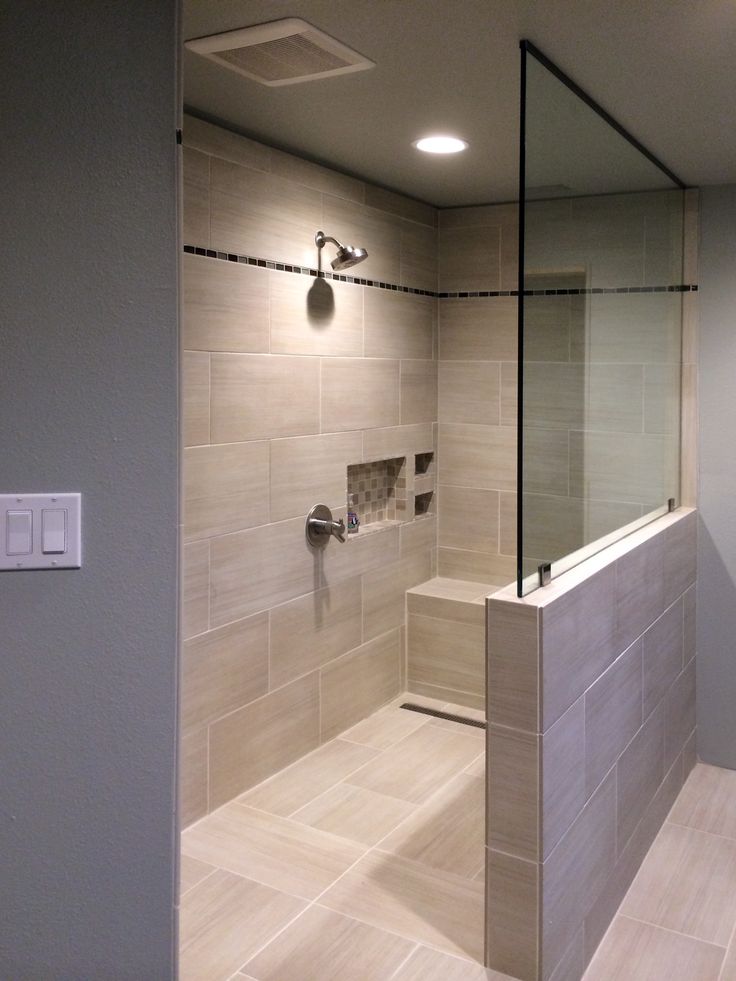
'Wet room floors give the illusion of extra space, as there is no break in the floor type. Underfloor heating can free up wall space for other fittings,' says Yousef.
6. Hang a large mirror
(Image credit: Future / Jonathan Gooch)
Hanging a large mirror is another way to get the illusion of space. Clever mirror ideas can bounce light around in a room, making it look brighter and larger.
With clever tricks like these, any shower design for a small bathroom can be as stylish as one that is twice the size.
As the Deputy Editor of Livingetc's print version, Busola Evans works across both the physical magazine and digital and specializes in kitchens, bathrooms and projects. She is an expert at explaining how to improve, extend and convert your home. Prior to her current role, she was Associate Editor on both Livingetc and Homes & Gardens, where she authored kitchen and bathroom articles. Busola has also written for The Guardian, The Sunday Times Magazine and Grazia, and was an interiors columnist for the London Evening Standard's ES Magazine.
Shower Renovation Raising a Low Ceiling
Welcome to how we are updating our boys bathroom - demo week. Today we are sharing tips on our Shower Renovation Raising a Low Ceiling.
Some say 7 feet is tall enough for a shower ceiling.
It's functional because it keeps the heat in allowing for a warmer shower.
But they didn't ask my 6'6" son's opinion.
So here we are at week 2 of the One Room Challenge - demo week - which is notorious for running into unforeseen issues.
Want to know how we fared? We were pleasantly surprised.
This week was all about demolition and raising the roof!!
Look at this low ceiling.
So as you can see, the shower ceiling in this bathroom was very close to the shower head, dropped down about a foot from the rest of the room.
When we renovated our master bathroom last fall, we were able to raise the ceiling and we hoped to do the same here.
So, how do you know if you can raise the ceiling to allow for more head room?
First, head up to the attic.
Before making any cuts, you want to make sure there aren't any pipes, electrical, or HVAC ductwork in place. That low ceiling may have a purpose.
Once we found out there weren't any structural hurdles, we cleared out all the blown insulation from that area.
We, being Trent, because I don't do attics!
You don't want to open up that ceiling and have all that insulation fall on your head, so go ahead and remove it before you cut it open.
Table of Contents
Shower Renovation Raising a Low Ceiling
Next, clear away any drywall to expose the framing. It's another way to get eyes on what you're facing before doing any demolition.
Trent was able to see the framing could easily be cut away and raised up a foot. No pipes, vents, or electrical issues to deal with!
Now we were in business!
But this next step got super-duper messy.
We lined the tub with moving blankets to protect it from damage.
Next, Trent covered his ears, eyes and nose to keep any debris or flying objects from hitting him.
IMPORTANT! Shut the door before you make any cuts. Dust will be flying everywhere, so I had a shop vac going while Trent made the cuts to control the dust.
Using a tile saw and a spray bottle filled with water, Trent cut a square into the tiled ceiling.
After that, he was able to use a hammer and pry bar to remove the rest of the ceiling with minimal mess.
See what I mean! If you prep properly, you can minimize the amount of dust and debris that spreads to the rest of your home.
Now we could see the framing that we want to raise up a foot.
We removed the nails and used our Dremel Multi-Max tool to cut away any nails we couldn't reach.
Now it's as simple as raising that framing up into place and securing to the exposed studs.
We gained about a foot of head room - which is perfect for our tall boy!
Using Green Board, we drywalled the ceiling in. Green Board is specifically made for moist environments.
This was the biggest hurdle for this room and we are so glad we could do this for our son and it wasn't a huge task to figure out.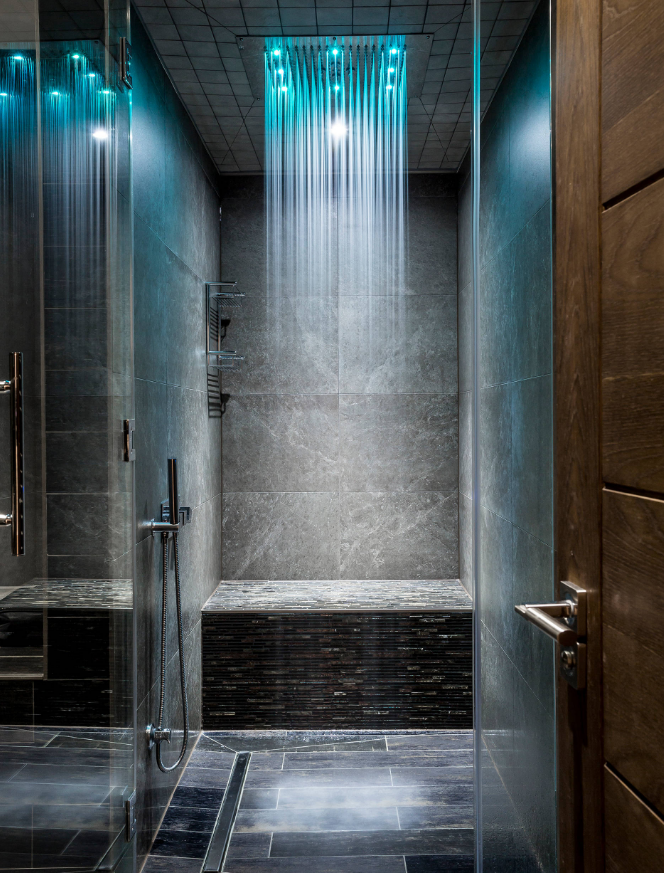
So that was the high five moment of the week! It couldn't have gone better for us.
We also were able to remove the mirror behind the vanity as well as the countertop. We did find one issue that we had to change our design plan on.
Our original plan was to raise the vanity up, however, after seeing how they installed it and tiled around it, we had to switch gears.
We built a frame on top of the existing vanity to increase the height.
And it was a pleasant surprise!
Had we gone with the original plan, we would have needed to fix the flooring underneath the raised vanity.
This option not only saved us time, but also money!
I was able to tackle the grout issues in the bathroom.
But, to keep things orderly, I taped off where the grout was in great shape and only removed the grout on the lower half of the tub surround.
I'll be sharing tips later this week on how to easily remove grout and the secret tool to make it easy on yourself!
We also removed the old ceramic towel bars and toilet paper holders.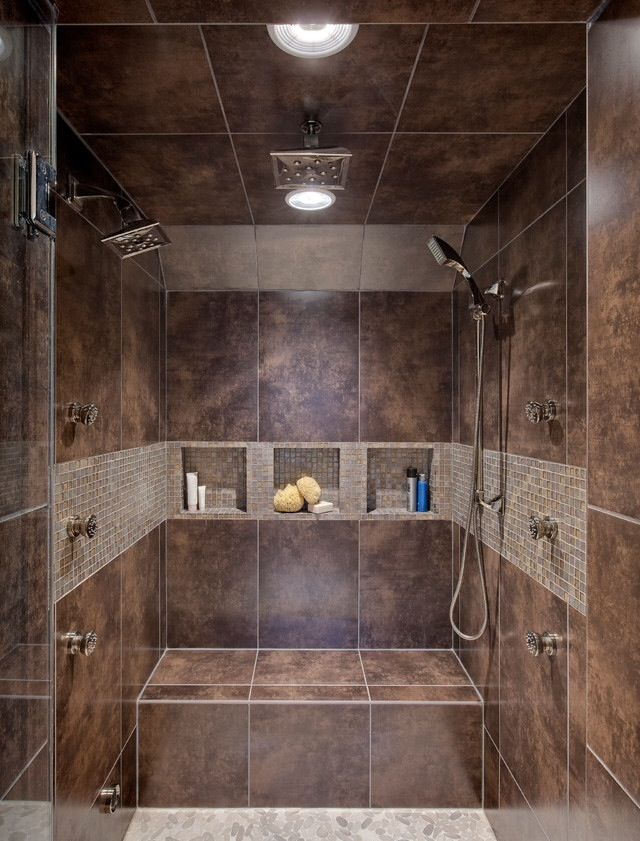
During the ceiling demo, we saved some tile to fill in the missing gaps from where the ceramic fixtures were.
Another thing that got moved was the electrical!
Remember from last week where I showed that the electricity was IN the shower?
We removed that and swapped it to the wall on the other side.
In other electrical news, Trent also prepared the wall for two separate lights instead of the single one in the center of the wall.
So I started sanding away the paint from the front of the vanity.
It was painted with oil, so it was a bit of a chore and stripper wasn't cutting through.
And last but certainly not least, I was able to scrape the ceiling from all that ugly popcorn!
Not too bad for demo week. In the past, we have always run into issues that were game changers. And while we did have a design plan mishap - it ended up being in our favor.
So I hope this Shower Renovation Raising a Low Ceiling tutorial gave you some ideas!
Check out our finished to do!
ORC Budget Bathroom
Remodel To Do List
Remove Countertop- Build DIY countertop
Remove Vanity MirrorRemove Tub Grout problems- Re-grout the Tub Surround
Remove Ceiling over TubRemove Ceramic FixturesDrywall CeilingMove Electricity- Sand Vanity Base
and Add 6 inches Scrape Popcorn Ceilings- Paint all Tile and Floor
- Paint Walls
- Install Brick Accent Wall (This is something I am SOO excited about!)
- Find Used Shower Doors
- Cut and Frame mirror to 2 DIY mirrors
- Replace Light Fixture
- Replace Faucets
- Paint or replace door hardware and hinges
- Replace cabinet hardware
- Replace Shower Head
Update Light switches- DECORATE!
So, next week is all about prepping the tile for paint and grouting the tub, mudding the ceiling in the shower and adding tile around the top of the shower surround, and building the vanity top.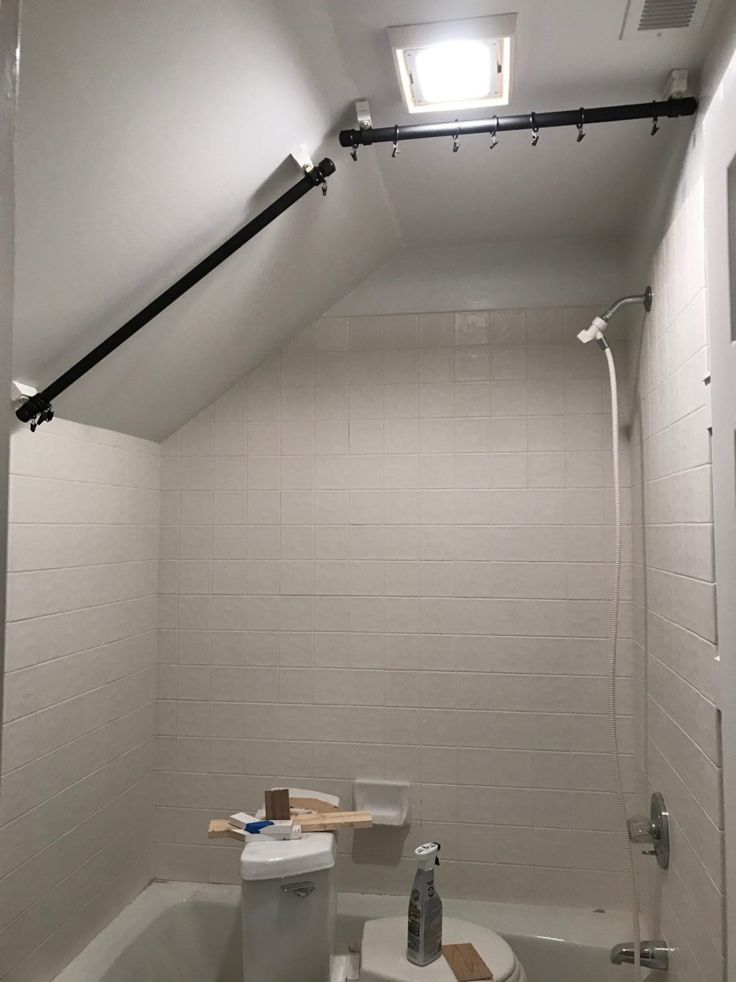
Don't miss out on the other spaces my blogger friends are renovating. Over at the One Room Challenge, you can follow along with the 20 featured bloggers or the other guest bloggers like me. This year, there are close to 300 participants across blogs and social media.
You will definitely find creative ideas for any room you are tackling.
A huge thanks to Linda from the One Room Challenge and the sponsors listed below for giving me the inspiration I need to create a room for those I love!
Don't miss the other posts
in this Bathroom Makeover!
THE BEFORE
RAISE THE ROOF: HOW WE MADE THE BATHROOM CEILING TALLER
DIY SHOWER DOOR UPDATE
HOW TO MAKE A BATHROOM VANITY TALLER
REGROUTING BATHROOM TILE
INSTALLING AND LIMEWASHING BRICK VENEER
DIY CEILING PLANKS FROM LAMINATE FLOORING
HOW WE CHANGED OUR BATHROOM TILE FOR $150
HOW TO MAKE CEDAR FRAMED MIRRORS
THE BIG REVEAL!
Previous Rooms we've completed through this
One Room Challenge
Low ceiling - no problem.
 5 life hacks for interiors with low ceilings
 On the pages of overseas publications, interiors with ceilings so high that one glance at them takes your breath away flicker. Domestic realities in most cases do not have such a scope. In our progressive century, there are objects with ceilings below 2.7 m on the Russian real estate market. This is not only a relic of the Soviet era in the form of Khrushchev apartments, but also some representatives of the new building. Interior designers suggest considering the low ceiling not as a disadvantage, but as a feature of the room that can be competently beaten. The ceiling in the interior will seem higher than it actually is and will not put moral pressure on you if you follow simple rules.
Nothing superfluous
If the height of the walls in the apartment is below 2.7 meters, stretch and suspended ceilings should be abandoned. The same applies to stucco and complex ceiling structures. The latter safely went out of fashion, giving way to modern minimalism, and stucco is much more appropriate on the ceilings in ballrooms than in Khrushchev.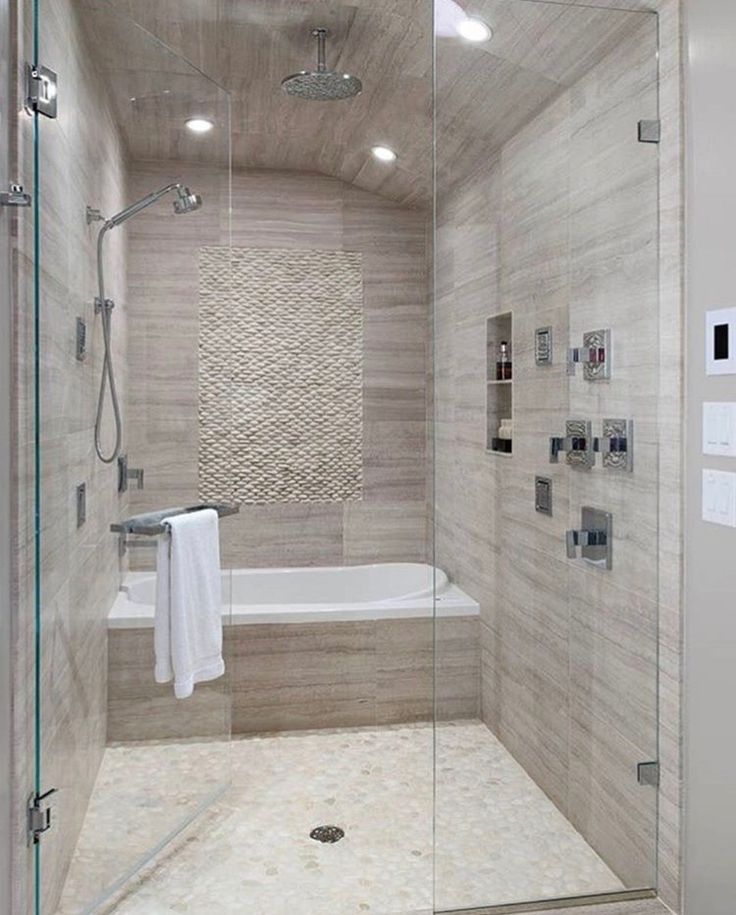 If you gravitate toward complex structures in the interior, you can always win back on the walls by decorating them with moldings or arranging beautiful and functional niches (necessarily vertical ones).
The best option for apartments with low ceilings is water-based paint.
If the soul does not categorically lie to the ceiling minimalism, you can decorate the ceilings with caissons. This design in our time is experiencing a rebirth and is returning to modern interiors as a design element. The coffered ceiling is decorated with beams that form recesses. In fact, this design will make the ceiling a few centimeters lower, but visually it will appear higher and more voluminous.
The right light
Museum chandelier with pendants, known worldwide as the "pendant chandelier" - a taboo for rooms with low ceilings. Even if all this luxury does not hang down to the middle of the room, massive lighting fixtures have every chance to visually overload the interior. Any fixtures on a low suspension will have to say no. Preference should be given to lighting fixtures that fit snugly against the ceiling. Such lamps will provide soft diffused light. In addition, the darkness in an apartment with a low ceiling can be dispelled with the help of sconces, table lamps and floor lamps with lampshades directed upwards.
If you have not spared precious centimeters and decided on a suspension or tension structure, you can safely include laconic ceiling spots in the lighting scenario. An interesting solution for a modern interior will be spots or LED lighting, launched around the perimeter of the room. Such a lighting scheme will create an optical illusion and visually raise the ceiling.
In addition, spots and LED strips can serve as an alternative to traditional lighting fixtures - they can be used to illuminate wall niches, floors, and storage systems. An interesting way to visually raise the ceiling is to equip the top of the hanging cabinets with spotlights pointing upwards.
Minimum horizontal, maximum vertical
All girls know that a horizontal stripe on clothes can visually expand the figure and make it more squat. The same rule applies to apartments with low ceilings. In such interiors, we say a categorical no to curbs, long hanging shelves and other unnecessary horizontal lines. But the vertical lines opposite are welcome guests. Everything in such apartments should strive upwards: floor lamps, cabinets, shelving, decor elements and print on the wallpaper. A classic design technique that allows you to make the ceiling visually higher - wallpaper in a vertical stripe.
In addition, living space parameters can be deceived by increasing the height of interior doors. Doors can be "built up" to the ceiling with the help of a false transom. In small apartments with low ceilings, it is recommended to give up interior doors to the maximum, opting for a high arched opening.
Floor-length curtains will also add verticality to the interior.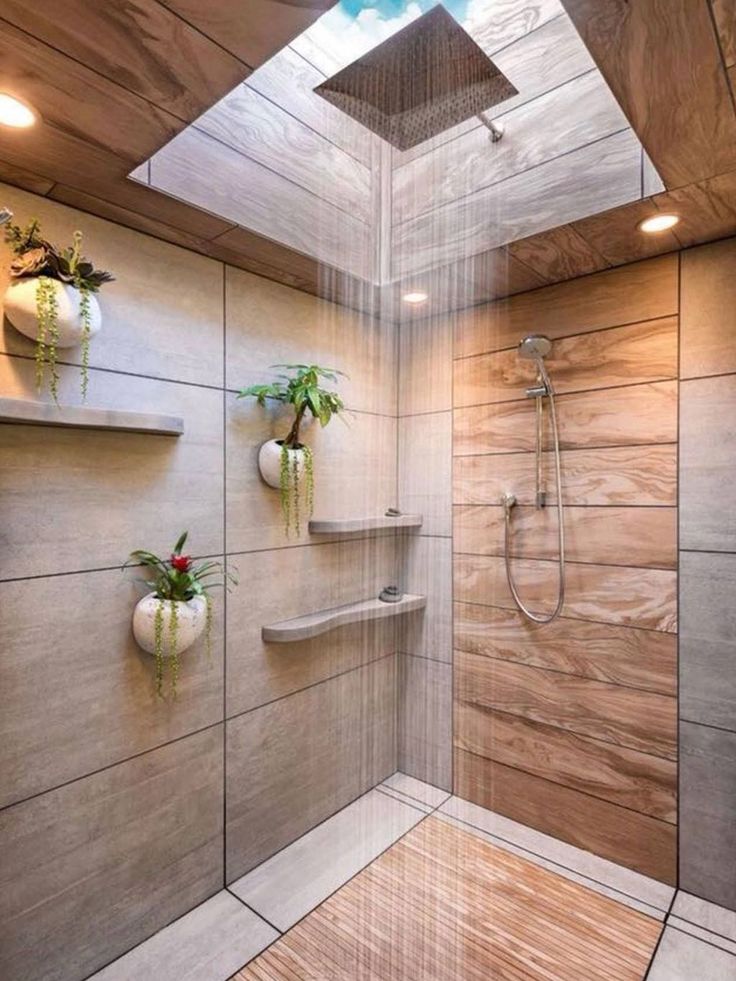 If short curtains "cut" the room and create a forbidden horizontal, long curtains opposite will help to "stretch" it.
Working with color
You can immediately forget about design experiments with bright ceilings. A bright low ceiling will put even more visual pressure on you. In our case, the color of the ceiling in the interior is traditionally white or categorically black. The black ceiling in the interior will not only declare your original personality, but also help the ceiling to "get lost". The true height of a black ceiling is not easy to establish by eye, especially in small rooms. Another way to "lose" the ceiling is to paint it the same color as the walls.
The color of furniture in such interiors is better to choose neutral. A long sofa in a bright shade will create that very cutting horizontal, while its neutral counterpart will not attract too much attention. If you want to add color, place bright accents with decorative pillows.
The Power of Reflection: Mirrors and Gloss
Mirrors again, a truly magical artifact in the arsenal of interior designers. The first thing that comes to mind is a mirror ceiling. He will do his job and will seem taller, but the idea is so ambitious that few dare to bring it to life. Mirrored ceilings in modern interiors are usually found only in bathrooms. In residential areas, mirror surfaces rarely appear on the ceilings, but no one will stop them from reclaiming the walls. The wall can be decorated with vertical mirror panels resting on the ceiling. And if you do not tolerate half measures - make the wall completely mirrored
Reflective properties in the interior have not only mirrors, but also glossy surfaces. Light gloss scatters light throughout the room and visually expands the footage. The glossy ceiling will make the room visually higher and lighter.
How far higher?
At the beginning of the article, we mentioned overseas interiors with their endless ceilings. Looking at these, one might think that it is simply impossible to adapt them to Russian reality. In fact, an experienced interior designer will be able to transfer the main features and atmosphere from any reference you like to a real interior project. An insufficiently high ceiling will definitely not become a hindrance. Moreover, some designers find rooms with low ceilings more cozy and interesting and willingly work with this feature. And in such rooms, sound insulation is better, the cost of finishing materials is less, and it is easier to change the light bulbs in the chandelier.
types of watering cans, modules, functions, tips for choosing
Once upon a time, a shower was mounted on a wall or ceiling, which was very popular back in the days of our grandparents, but over time this technology was undeservedly forgotten - “classic” became more in demand » a shower to hold in your hand. But recently, the overhead shower has begun to gain popularity again, ceasing to be the prerogative of hostels and communal apartments. For this, it is worth saying thanks not only to the convenience and ease of use, but also to the rich variety of models that can satisfy the taste of the most demanding customer and fit into the most sophisticated interior. One of the most convenient is the overhead shower.
Types
As a rule, there are two types of overhead shower:
- Built-in shower is located under the ceiling covering. All communications are hidden from view, there is only a watering can outside. However, it can also be built into the surface of the ceiling - it all depends on taste.
- Shower head is fixed to the wall or ceiling with a special beam. The convenience of this design lies in the fact that a shower can be made if you buy a wall mount for a classic shower, as well as the ability to adjust the angle of the watering can. Unfortunately, this feature is usually provided for more expensive models.
The type of overhead shower should be chosen primarily depending on the size of your bathroom - for small rooms, a built-in shower is suitable, since the beam for the hinged one takes up extra space.
It is also worth considering the peculiarities of the ceiling structure, since the installation of a built-in shower is not possible everywhere.
Your best bet is to consult with a plumber.
Materials
There are 3 main types of shower depending on the material.
Plastic
Lightweight and inexpensive. However, its main disadvantage is the lack of strength - their plastic structures often break, crack, which causes the shower to splash or leak. If you are willing to buy a shower at a low price and change it often, then plastic is a good option for you.
Metal
Metal in steel, brass and other - does not have the disadvantages of plastic. It is more durable, does not break, does not deform, that is, the quality of metal showers is much higher than plastic ones. However, quality has its price - metal showers are much more expensive and, as a rule, heavier than their plastic counterparts.
Metal-plastic
This is a good compromise because it combines the advantages of plastic and metal showers and has almost no disadvantages. All important communications prone to breakage are made of metal, the watering can itself is made of plastic with a metal impurity. A metal-plastic shower will cost you less than a metal one and will last longer than a plastic one.
Design
As a rule, the overhead shower is a design of a watering can and a hose or pipe connected to the mixer. The watering can is mounted on a wall or ceiling, and communications connect it to the mixer.
With a built-in shower design, communications are implanted into the wall and ceiling, and faucets and a watering can are brought out. This installation method is good because the appearance of your bathroom does not spoil anything - no pipes and beams.
With a wall-mounted structure, the hose or pipe is usually left outside and connected on one side to the faucet and on the other to the beam on which the shower is attached. This method is somewhat less aesthetic, because all the connections are visible, but much more convenient in case of breakage - you do not have to go far to fix the problem.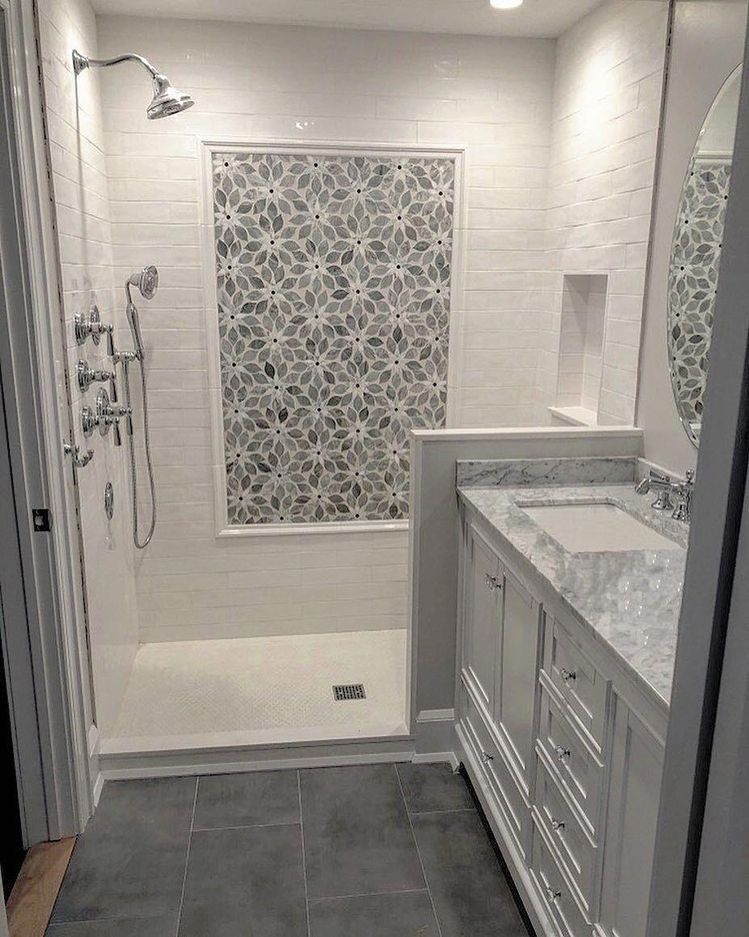
Overhead showers come in a variety of sizes and shapes. Perhaps the most popular is the round watering can - it is stylistically neutral and will suit any interior. But depending on your preferences and the design of your bathroom, you can also choose a square or rectangular watering can, and original shapes with curved edges are suitable for the most sophisticated interiors.
The diameter of the round watering can vary from 20 to 80 centimeters, and even more. However, the choice depends not only on your taste, but also on the pressure that your mixer can create. The fact is that large-diameter watering cans have a greater throughput than small ones, so the pressure must also be strong enough - otherwise, instead of many thin streams of water beating from the shower, you will get a few, sadly flowing.
Models and functions
Modern shower models differ from their predecessors in a variety of functions and modes. If earlier the shower was a device from which water was beating, today it has practically transformed into a relaxing hydromassage.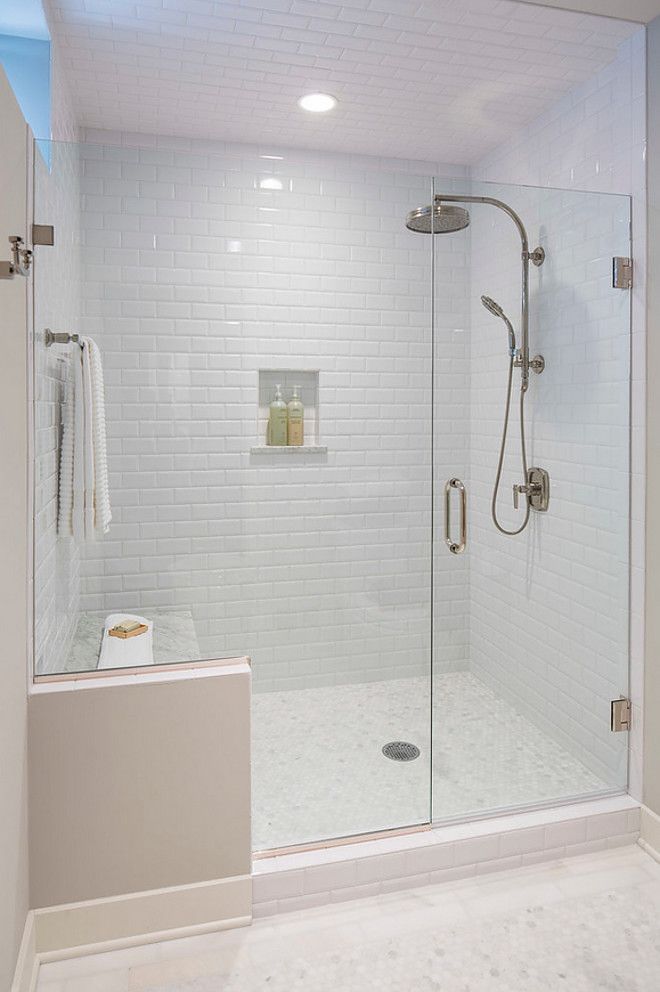 In modern showers it is possible to regulate the temperature of the water, the pressure and the angle of the watering can.
To avoid sudden changes in water temperature, you need a mixer with a thermostat.
With it, you can not be afraid to get burned or get under an icy shower. Almost all modern faucets have a built-in thermostat, but this point needs to be further discussed with the seller.
A pressure reducing valve - the so-called "pressure regulator" - will help you smoothly change the pressure, choosing the one that is optimal for you personally .
Modern overhead shower models often have several water pressure settings:
- hard massage,
- soft relaxing,
- shower system with rain shower.
The latter provides a low pressure, reminiscent of raindrops in the jungle. It is especially pleasant if your watering can is large - you can adjust the water temperature, turn on your favorite music and relax after a hard day's work.
Models with oblique jets are of great interest. They not only look beautiful, making up whole compositions of water, but also deliver a lot of pleasant sensations.
Adjustable shower angle, as a rule, provide more expensive models. This function is possible only for wall-mounted showers - it is clear that the watering cans built into the ceiling are not adjustable. However, you should not overpay just for the sake of a movable watering can, since this function is not so important. But if you need it for some reason, you should ask the sales assistant to help you with the choice.
Some modern showers have a jet light function. It should be noted that the price of such models is quite high, but this option can serve as a nice bonus if you are ready to allocate an impressive amount for the purchase of a shower.
The backlight can be single color or fade color depending on which mode you select. We can safely say that you will not regret such a purchase - standing in the evening under the "tropical shower" with multi-colored jets, you will forget about everything in the world.
Perhaps many of you remember the old overhead shower models - unattractive brown metal structures that greatly spoil the look of the bathroom. However, you should not be biased against modern models because of this - go to the nearest plumbing store, or look at catalogs on the Internet, and you will be pleasantly surprised.
Designers do not sit idly by, fashion does not stand still and even concerns such seemingly insignificant things as a shower. Overhead shower today will fit into any interior - both the most refined and uncomplicated. Typically a metallic construction with chrome details, sometimes with clear or matte plastic elements in various colors. However, there are also expensive designer models with elements made of stone, glass and even precious metals. Decide for yourself what is right for you.
Tips for choosing
A few tips for choosing an overhead shower:
- Always pay attention to the country and manufacturer - it's even better if you know in advance which manufacturers have a good reputation.