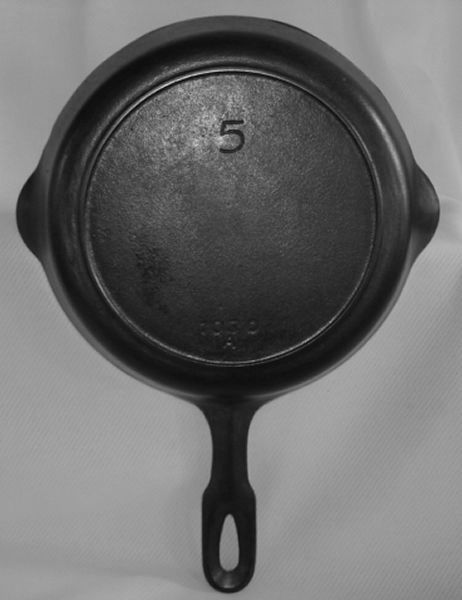
Restoring old cast iron skillet
How to Restore Rusty and Damaged Cast Iron Skillets and Cookware
Serious Eats has become a pretty great resource for cast iron cooking, thanks to some of the articles Kenji has written on the topic, from recipes to care and maintenance guides as well as some serious myth busting.
One of the wonders of cast iron is that it's tough as nails, and can last for generations. For those looking to take their cast iron cooking to the next level, a nice piece of vintage cookware is a pretty sweet first step. It's not that the vintage stuff is worlds better than the modern pans available today—the smoother finish characteristic of very old cast iron provides only marginally better non-stick properties.
But, for those of us nerdy enough to get excited about the details, vintage cast iron has a lot going for it. First, it tends to be lighter than its modern equivalents, which, if you use cast iron regularly, can start to make a difference in your quality of life (at the very least, your back will thank you for it). Second, it has that smooth finish, a final production step from long ago that was eventually dropped in favor of manufacturing speed and efficiency. Aside from the small improvement in non-stick qualities that the smooth surface does offer, it's also just a heck of a lot more beautiful to look at.
But perhaps the best thing about vintage cast iron pans is the past they connect us to—those pans go back to a period of American history dating from the mid-1800s to the early 1900s when cast iron was a serious industry, not just for pans but steam radiators and wood-burning stoves, bridges and even buildings (the Serious Eats headquarters is just blocks from SoHo, home to an amazing collection of 19th century cast-iron architecture).
Beyond the national history, there's the everyday life that's baked into each and every old piece of cast iron cookware: just think of all the meals that have sizzled in a skillet that dates back to the first World War, or the Civil War even.
That's the magic of vintage cast iron, but what about the reality of actually buying it? You could take the easy route and pay a premium for a piece that's already been refurbished.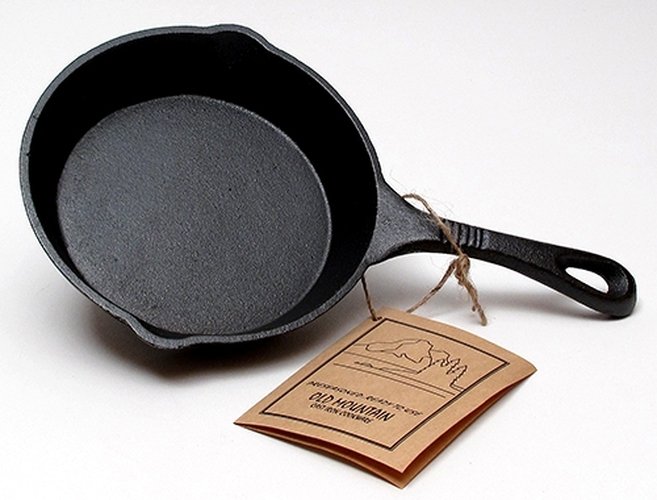 Or you can go the DIY route by picking up a rusted old clunker at a garage sale or flea market and fixing it up yourself. Look online, though, and you'll find a whole lot of different ideas about the best way to clean it up.
Normally here at Serious Eats, we do all of the methodical testing ourselves, but that's not practical with vintage cast iron: I simply can't get my hands on enough to try each and every method out. So for this story I did the next best thing, and got a lesson from Nick Zdon, the product director at Best Made Company, a store dedicated to cool stuff like axes, pocket knives, camp supplies, and other collectibles a guy like me shouldn't be allowed anywhere near lest I bankrupt myself.
Nick started out restoring vintage ax heads, then became interested in cast iron cookware, which he hunts for at junk shops, barn sales, and antique stores in rural Maryland and Pennsylvania.* He's worked on several hundred pieces at this point, and has tried most of the common methods.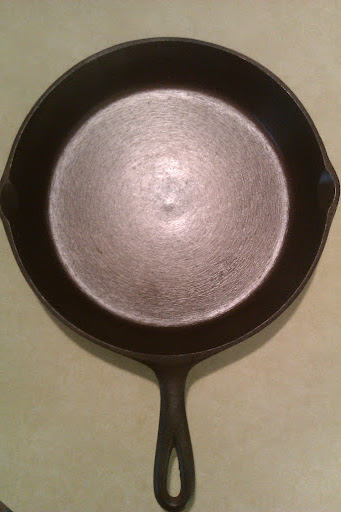 In short, he's done the legwork so I don't have to.
*If any SE readers in that part of the country have trouble finding vintage pans, you can blame Nick: he says he's pretty much bled those areas dry.
All of the pieces Nick restores are sold at Best Made's Tribeca store and through their website. There's a big batch about to go up at the time of writing, but I can't guarantee they'll still be available when you read this—if past lots are any measure, it's all gonna sell very fast. But that's just fine. "I'd rather teach people how to do it themselves, because this vintage cast iron program we're doing isn't sustainable," he says.
Tips for Buying Vintage Cast Iron
The first step is getting your hands on a piece of vintage cast iron. Books can probably be written on this subject alone, and it can take some time to familiarize yourself with the landscape of the many brand names from America's cast-iron heyday. There are the Griswolds and Wagners, Victors and Favorites, old Lodges, Wapaks, and Birmingham Stove and Ranges.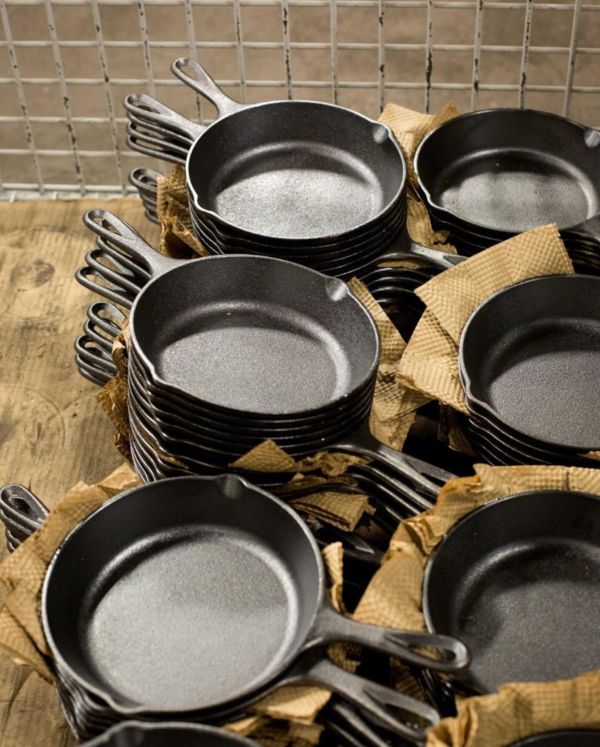 There's more to know than I can hope to cover here, so check out the following sites to get started: The Griswold and Cast Iron Cookware Association, The Cast Iron Collector, and Brimingham Stove and Range.
It'll take some time to become familiar with each brand's logo and how it changed over the decades (useful for knowing just how old an antique piece is), but even if you aren't totally up to speed, if you see something that looks old, smooth, and not as heavy as modern pans on sale for cheap, you can always grab it and worry about those details later.
Still, right from the get-go, there are a few things you should definitely look for. First, make sure you're getting plain old cast iron, at least if your goal is a pan that can be seasoned to a non-stick finish. The one you see above, for example, is an old Wagner cast iron skillet that's coated in nickel. There's nothing wrong with it, and it's collectible too, but, like enameled cast iron (e.g. Le Creuset), it can't be seasoned.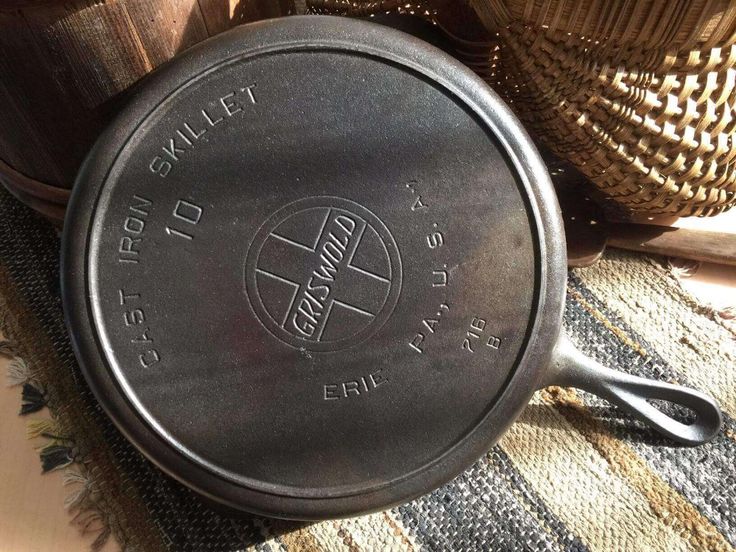
Detecting Cracks
So let's say you're at the junk yard and an old cast iron skillet catches your eye. According to Nick, one of the first steps is to search for cracks, because you don't want a cracked pan—it's a flaw that can render the pan useless. Some cracks, as in the pan above, are easily visible. But others may be buried under layers of rust and seasoning.
The trick, says Nick, is to pick the pan up and rap the bottom of it with your knuckles. A solid, crack-free cast-iron pan will ring with a bell-like resonance. If the sound is dull and clipped, like a cheap piece of tin, move along, since there's likely a crack you can't see.
Pitting and Other Flaws
Some considerable pitting and erosion on a skillet's underside. Pitting is another flaw to consider. A lot of old pans will have some pitting, and it's not an absolute deal breaker. Still, it's better to avoid cookware with any more than a tiny amount of pitting on the cooking surface since it can make it more difficult to get a good, even layer of seasoning. Exactly how much pitting you're willing to tolerate, and where it's located, is a personal call.
The reddish color you see on the pan above isn't just rust: it's heat damage to the metal that is irreversible, and it's difficult to build good seasoning on top of it. Some people like to clean their cast iron in an oven set to the cleaning cycle. This can work, but Nick warns against it, since there's a risk that over time it will do exactly this type of damage.
The minor pitting on the cooking surface of the pan above could interfere with an otherwise seasoned finish, though it may be possible to build up enough seasoning to overcome it.
Before buying, it's best to read up on cast-iron defects, including pitting and warping, and whether they're surmountable or not to make an informed decision.
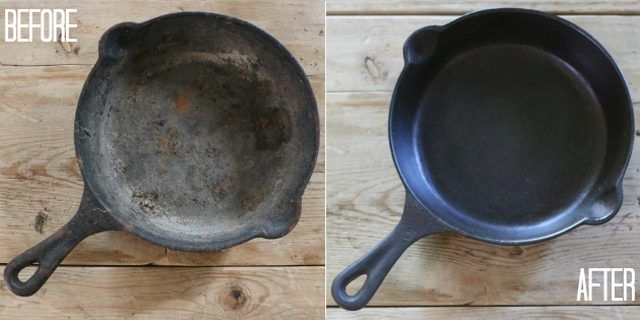
Restoring Cast Iron
Once you have your cast iron, there are generally two things you'll likely need to do: remove the old layers of seasoning and also get rid of rust. Once a pan is beat up enough, it's not worth trying to salvage the seasoning that's on it. For a really beautiful, functional piece, you're going to want to strip that baby down and then build it back up from scratch.
Not Recommended: Naval Jelly
First, a tip on what not to do. Some sites will tell you to use Naval Jelly, a form of phosphoric acid. The photo above is of a pan that had Naval Jelly painted onto it. It dries on, as you can see, and then becomes very difficult to remove. According to Nick, it can work for very small pieces of cast iron that can be fully submerged in the jelly, but most cookware is just too large.
Sandblasting is another method Nick says to steer clear of: it not only cleans everything off, it also permanently alters the original surface of the cast iron.
How to Remove Old Seasoning: Lye
The seasoning on cast iron is polymerized oil, essentially a plastic-like coating that forms when oil is heated in the presence of the iron and oxygen.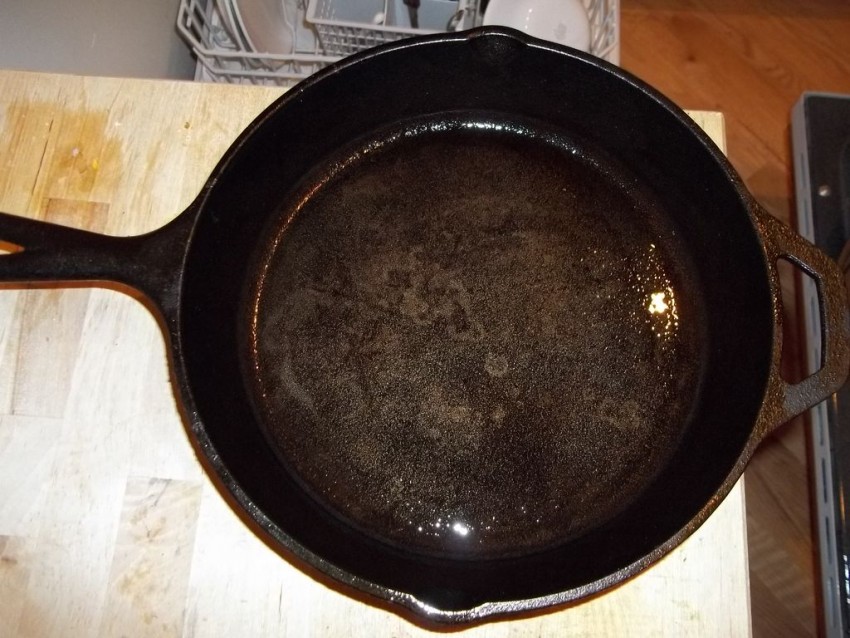 Lye, the common name of the alkaline compound sodium hydroxide, can break down that polymerized oil.
Lye is used for all sorts of things, from making soap to giving pretzels their deep brown crust, but it needs to be handled with caution: lye solutions are capvable of causing nasty chemical burns and should be treated with the same care as 350°F frying oil. Like hot oil, when handled responsibly, it can be used without trouble—just like frying oil, don't get it on your skin. Make sure to use heavy-duty rubber gloves and eye protection, and keep the rest of your skin covered.
If you have one or two vintage pans, the easiest thing to do, according to Nick, is to use a product like Easy-Off, an oven cleaner that sprays a lye-based foam. To use it, spray the foam all over the cookware, then seal it in heavy duty garbage bags and let it sit for 24 hours.
Then scrub the pans with a heavy duty scrubber to remove the seasoning and strip the pan down to its original metal surface, which you'll recognize by its gunmetal gray color.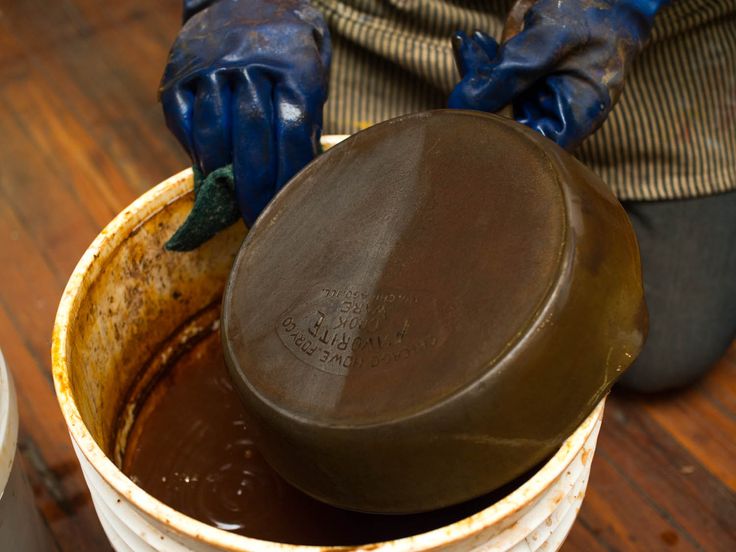 The downside of Easy-Off is that it will often take several applications and scrubbing sessions before all of the seasoning is removed.
For larger jobs, or if you want speedier results, the next best option is to fill a large plastic bucket with a lye solution and submerge the pans in that. Nick buys lye at hardware stores, such as the bottle of drain cleaner you see above (just make sure the product you buy is pure lye). He adds the one-pound bottle of lye to five gallons of water, and again, take note: you should always add lye to water and not pour water onto the lye, since that can cause a violent reaction.
Nick lets the pans soak in the lye solution for 24 hours, then scrubs them. If they need a little more time in the lye solution, he puts them back, checking them and scrubbing from time to time until all the seasoning is removed. The good news is lye won't harm the metal at all, so there's no fear of soaking the cookware for too long in the lye.
One more safety note: a bucket of lye solution is a dangerous thing, as dangerous as a pot of scalding hot oil. Keep children and pets far away from it, and make sure the lye is not in a place where a curious child or pet could find it on their own; also always keep the bucket securely covered when you're not working on the pans.
You can see in the photo above that the skillet has just a little more seasoning left (the dark spots) before it's ready to be rinsed and then moved along to the next step.
Removing Rust: Vinegar
Once you've removed all of the old seasoning, the next step is to get rid of any rust. Thankfully, removing rust doesn't require anything as nasty as lye: acetic acid, A.K.A. vinegar, will do the trick. Make sure to buy big jugs of cheap distilled white vinegar for this.
Nick lets his pans soak in the pure distilled white vinegar for six to twelve hours, then scrubs it. But he warns not to ever let this step go longer than 24 hours—vinegar may not present much of a problem to our skin, but it will erode and pit the cast iron if left on for too long.![]()
I love these photos: you can finally see the original cast iron emerge.
Nick labels each bucket so that there's no confusion about which one contains lye and which one contains vinegar.
There's just a little rust left on the handle, but otherwise this skillet is ready for its new life. Just note that once exposed, the cast iron will begin to rust almost immediately from the air alone. To prevent that, oil the pan as described below right away.
A restored vintage piece of cast iron cookware, ready to be seasoned. Photographs: Daniel GritzerRemoving Seasoning and Rust Simultaneously: Electrolysis
For those who want a solution that deals with the seasoning and rust simultaneously, look no farther than an electrolysis setup. This isn't practical for a lot of people at home, but car enthusiasts may already have the battery charger on hand. If that sounds like you, read on.
Nick runs his with this Schumacher charger that he sets to 10 amps.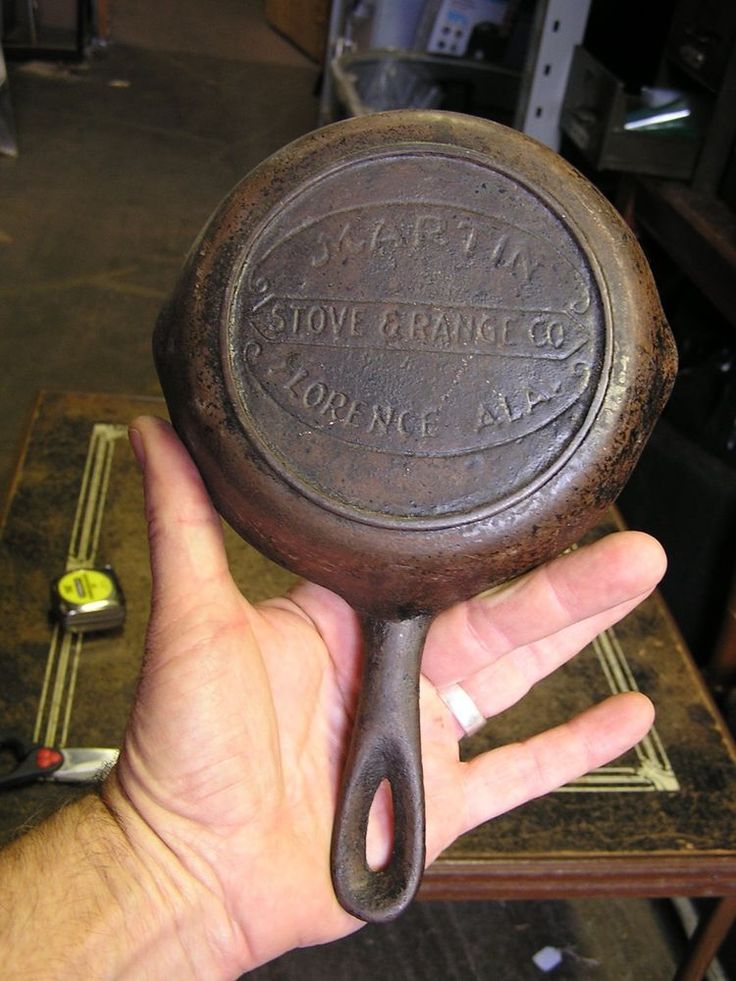 He connects the positive red clamp to a steel plate in the tub and the negative black clamp to the pan being cleaned. "Just remember that the black cruddy pan gets the black clamp," he says.
In these photos the pan isn't fully submerged, but it ideally should be, since the only portion of the skillet that gets cleaned is the submerged surface that faces the steel plate. (It also isn't a cast iron pan, but we can ignore that.) Some folks will surround the pan with steel plates on all four sides to speed the process up even more; otherwise you'll need to turn the pan from time to time to expose all surfaces to the current. (Also be sure to turn the battery charger off before touching anything in the setup—there's an electric current running through it, after all.)
The closer the pan is to the steel plates, the better the reaction will be, but they can't touch or it won't work.
The solution itself is water with about one tablespoon of washing soda (sodium carbonate) mixed in per gallon.
You'll know it's working once it's switched on by the cloudy stream of bubbles flowing between the steel plate and the cast iron.
Nick lets his electrolysis run overnight.
Once it's done, all the crud—both seasoning and rust—should scrape and scrub off.
Post-Stripping Care
As I mentioned above, cast iron will start to rust almost immediately once it's been stripped down to just the pure metal. If you're not going to season it right away, you can stave off rusting temporarily by rubbing your pan with mineral oil.
Rub the oil well with a cloth until the shine is gone. Then be sure to wash it off with warm soapy water before attempting to season the pan.
Re-Season
Photograph: Vicky Wasik. Once you're ready to season, follow our instructions here. Any neutral kitchen oil like corn, vegetable, or canola will work; avoid flax seed oil, which makes beautiful looking seasoning, but has a tendency to wear away easily.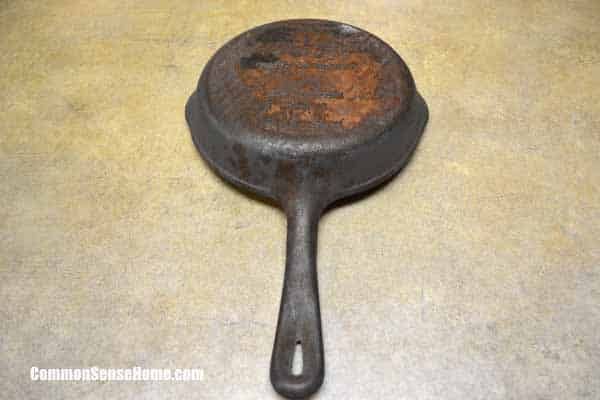
Once you're done, step back and take in the beauty of your work. If you're generous, it'll be a gift for someone you love who also happens to love cast iron cookware. In my case, that'd likely mean I'd give it to myself. 'Cause I'm greedy like that.
This article has been updated with improved oil tips for seasoning.
The Easy Way to Restore a Rusted Cast-Iron Skillet
“My cast-iron skillet is ruined. Maybe I should just throw it away.”
When I heard a friend say this the other day, my jaw nearly fell to the floor. What could have gone so terribly wrong for her to want to throw away a cast-iron skillet? Did it break in half? Was it cracked? Did she drop it in some sort of radioactive acid? Cast-iron skillets are practically indestructible, and they’ll last you a lifetime-especially when you’re taking proper care and making sure to clean it after use. Learn how, here!
“It’s rusted,” she said.
With a quick sigh of relief, I consoled her.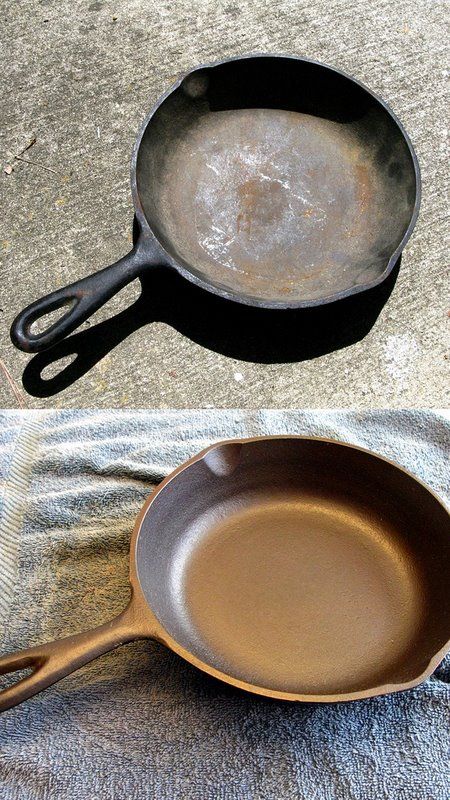 Cast-iron skillets are naturally prone to rust. But even if it has turned bright orange, the pot absolutely can be fixed. (Even if you snag an old, rusty skillet at the flea market, that orange will come off!) It only takes a few simple steps to have your rusted cast iron looking brand-new. We’ll show you how it’s done.
(Psst: Master cast iron cooking with our guide.)
How to Remove Rust from a Cast-Iron SkilletYou’ll need:
- Steel wool
- Sponge (with a scrubber side)
- Mild dish soap
- Vegetable oil
Taste of Home
Ignore all those times you’ve been told to be gentle with your cast-iron skillet. The reason to be gentle while cleaning is to preserve the seasoning. The iron itself is virtually indestructible. Here, you’re going to strip away all the rust (and the seasoning). Don’t worry-we’ll add more seasoning later.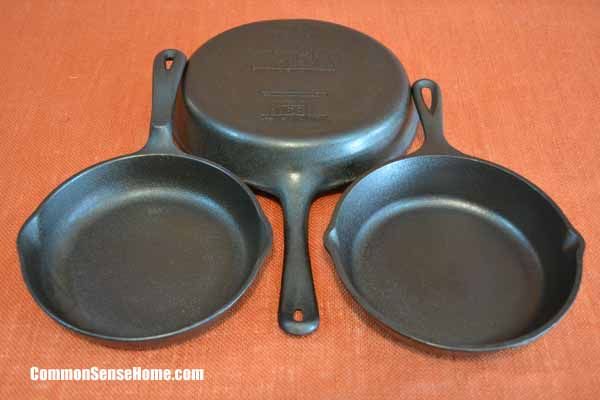
It’s going to take a little bit of elbow grease and a hard abrasive tool to remove the rust. Get the pan wet, add a little soap, then go to town with your scrubber (depending on the level of rust, a tough sponge will do). Scrub in small circles, focusing on the rustiest parts first. Continue scrubbing until you see the original black iron emerge.
Test Kitchen tip: Have a newer pan that’s developing small amounts of rust? There’s an easier way to restore it to new. Simply dampen a paper towel with oil and use it to wipe away the rust. Continue wiping the entire skillet, then skip to step 3.
Step 2: RinseTaste of Home
At this point you’ve likely worked up a copper-brown mush. Rinse that gunk off in the sink. Make sure your skillet is totally clean by doing another scrub-this time with a soft soapy sponge. Buff off any residue or rusty bits that remain.
Step 3: DryWith the rust completely removed, your cast-iron skillet should be looking almost back to normal.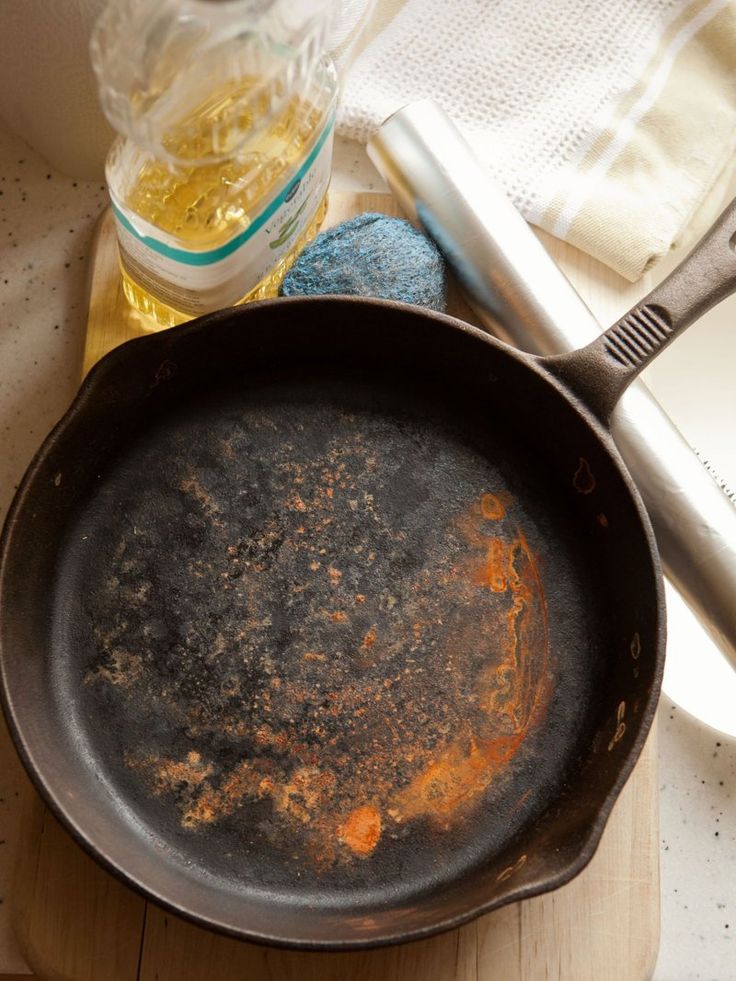 But without any seasoning, it’ll have a dark gray, matte finish. Dry it off with a clean dish rag. (Psst. Don’t use a rag you’re fond of. The skillet can leave dark stains!) To dry it completely, place the skillet on the stove and turn on the heat for a few minutes. Any lingering moisture will evaporate right off.
Now that you’ve returned your skillet to its base layer, you’ll need to season it for use. Drop a tablespoon of vegetable oil on the pan and spread it around with your fingers or a paper towel. (Take care not to burn yourself on a warm skillet!). Oil the outside and the handle, too. Next, take a folded napkin and wipe off the excess oil. You’ll want the skillet to be lightly greased. Set your oven to 350 degrees and put some aluminum foil on the bottom rack. Then pop the skillet in, upside down, on the upper rack for about 1 hour. Turn the oven off and leave the pan inside until it’s cool. The oil will bake into the pores of the pan, providing a non-stick finish.
Repeat this step a second time and you’ll have an almost glassy surface of seasoning.
Ta-da! Your rusted cast-iron skillet is good as new. That means it’s time to start cooking. Start here, with our favorite cast-iron skillet recipes. You’ll learn how to sizzle up some fajitas, pan-fry pork chops and even bake an upside-down cake.
Tips for Preventing RustWant to avoid a having a rusted cast-iron skillet in the first place? Keep the following tips in mind:
- Never soak the pan. Since cast iron is so vulnerable to rust, it’s best to limit your pan’s exposure to water as much as possible.
- Don’t let the pan air dry. Wipe off any excess water with a towel immediately after rinsing. To get your skillet bone dry, pop it on the burner to remove extra moisture.
- Lightly oil after use. Once dried, rub your skillet with a thin layer of vegetable oil before storing.
- Avoid certain foods: Acidic ingredients like tomatoes or vinegar can eat into seasoning and lead to rust.
 If you have a well-seasoned pan, this shouldn’t be a problem-but avoid that cooking that tomato sauce in your brand-new skillet.
 - Use often: Cast-iron skillets love to be loved. They’ll start to rust if they’ve been cooped up for a long period of time without much air-circulation or use. This is often the case in coastal climates, where the salty air can have a big impact.
Now Cook Something in That Cast-Iron Skillet!
1 / 65
Taste of Home
Treat your sweet-salty tooth! Sweet potatoes dressed with buttery, herby, garlicky goodness make for a stunning, delicious side dish. —Lauren Knoelke, Milwaukee, Wisconsin Get Recipe
I scribbled down this recipe when our family visited The Farmers' Museum in Cooperstown, New York, many years ago. I must have gotten it right, because these biscuits turn out wonderful every time. —Patricia Kile, Elizabeth, Pennsylvania
Go to Recipe
This recipe was given to me 25 years ago and remains a family favorite. It's a tasty twist on traditional spaghetti, and making a one-skillet pasta saves time on prep and cleanup, too. —Susan Spence, Lawrenceville, Virginia
Go to Recipe
When my husband and I were newlyweds and far from family, we invited friends over for a traditional Thanksgiving feast. I searched for stuffing recipes and combined the best aspects of several to create this one. Everyone liked it, and I still make it for holidays. —Pamela Rickman, Valdosta, Georgia
Go to Recipe
Many years ago my sister and I won blue ribbons in 4-H with this bread. The recipe makes a beautiful golden loaf with cheese peeking out of every slice. —Melanie Mero, Ida, Michigan
Go to Recipe
I found this strawberry rhubarb crisp recipe on a box of Quaker Oats about 20 years ago.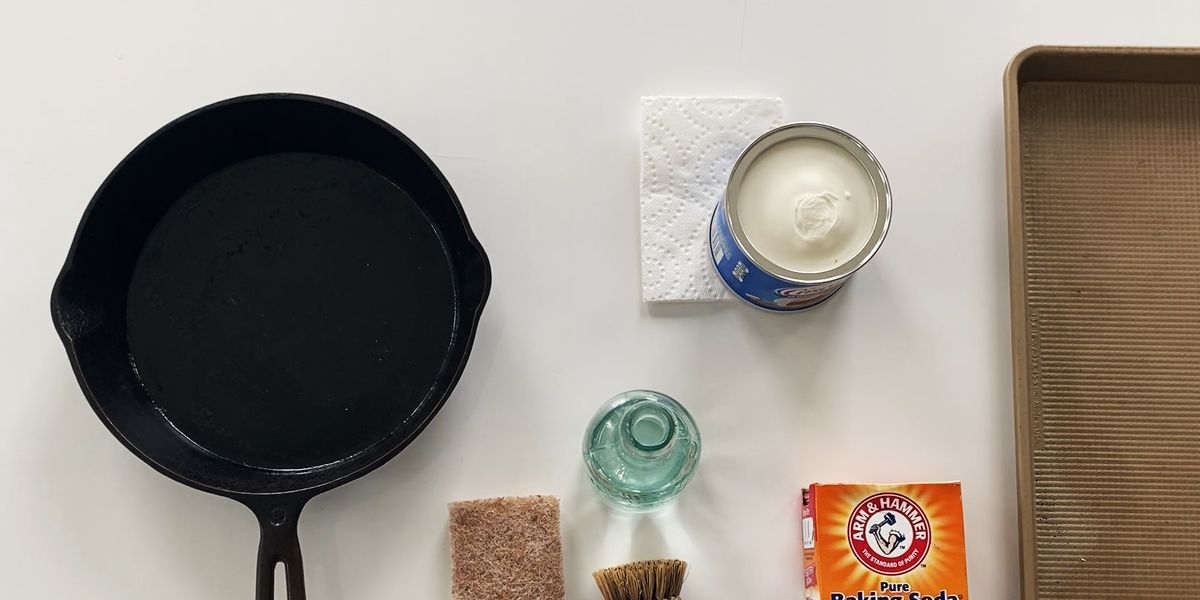 It's quick and easier to make than pie. It's versatile, too, because you can add strawberries in spring or apples in fall. I usually pop it into the oven shortly before we sit down to eat so it's still warm for dessert! —C.E. Adams, Charlestown, New Hampshire
Go to Recipe
Stovetop chicken and gnocchi recipes like this one make for a homey dinner in a hurry. Personalize it with your own favorite sauce and seasonings. —Taste of Home Test Kitchen
Go to Recipe
This recipe is super with fresh or canned corn. I whip up these patties to serve alongside nachos or tacos on hot summer evenings. The salsa is subtle but adds flavor. —Lisa Boettcher, Rosebush, Michigan
Go to Recipe
For this pork hash recipe, we added potatoes and veggies to leftover tenderloin. It's an easy, creamy weeknight supper in minutes! —Taste of Home Test Kitchen
Go to Recipe
Bake up the ultimate shareable cookie.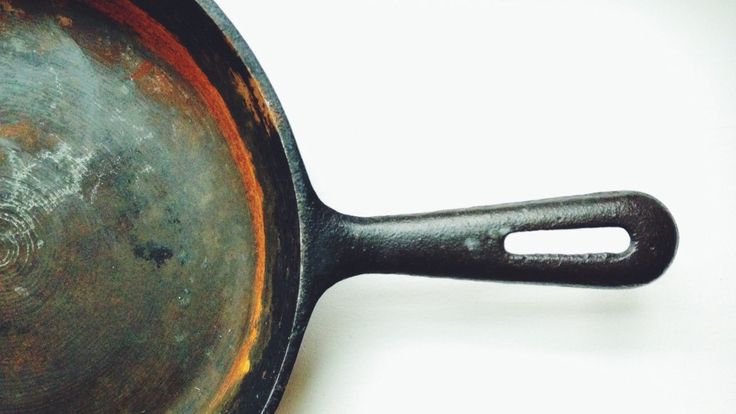 For variety, replace the chocolate chips with an equal quantity of M&M's or chocolate chunks. Or go super fancy by mixing the chocolate chips and pecans into the dough, then gently folding in 1-1/2 cups fresh raspberries. —James Schend, Pleasant Prairie, Wisconsin
Go to Recipe
Sometimes I'll make extra of this comforting, noodle-y supper to guarantee leftovers. It's a great take-along dish for work or school. Trim calories from the entree by substituting ground turkey for the beef and low-fat cheese for the full-fat cheddar. —Tabitha Allen, Cypress, Texas
Go to Recipe
My husband, Clark, and I reserve this recipe for Sundays after the grandkids have gone home and we're too tired to prepare a big meal. It's comforting and quick. —Kathy Thompson, Port Orange, Florida
Go to Recipe
My family loves these rolls and requests them often. They don't take long to make because you use quick-rise yeast.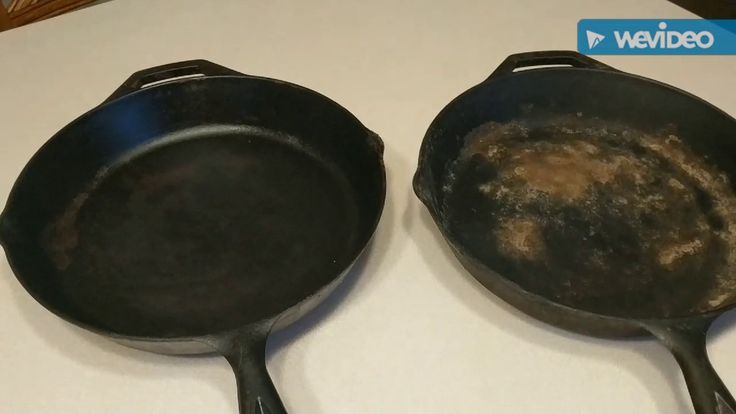 —Connie Storckman, Evanston, Wyoming
Go to Recipe
If you're looking for a pretty dish to make when having guests for brunch, try this. Everyone I've served it to has enjoyed it—except for one time, that is, when my husband tried to make it following my recipe, which I'd written down incorrectly! If you don't leave out the flour as I did, it'll turn out terrific! —Judi Van Beek, Lynden, Washington
Go to Recipe
I also call this "my grandson's mac and cheese." Zachary has been to Iraq and Afghanistan with both the Marines and Navy, and I've been privileged to make his favorite casserole for him for over 20 years. —Alice Beardsell, Osprey, Florida
Go to Recipe
Crumbled macaroons are a surprising addition to this cobbler’s topping. We love that you can make the sweet treat in a baking dish or a cast-iron skillet. —Taste of Home Test Kitchen
Go to Recipe
Our state is known as the Land of 10,000 Lakes, so fishing is a favorite hobby here.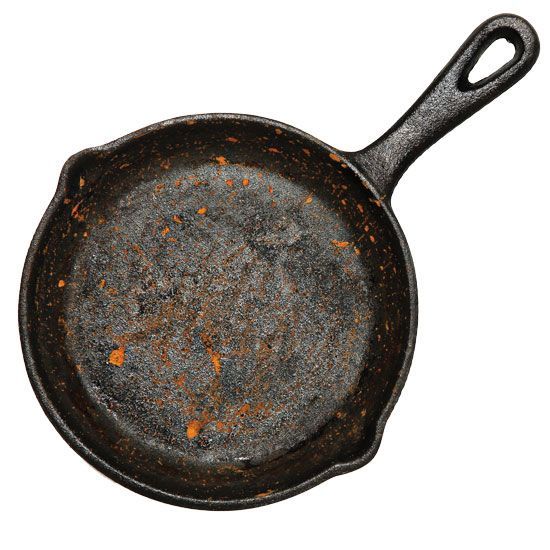 This recipe is my quick way to prepare all the fresh walleye hooked by the anglers in my family. —Kitty McCue, St. Louis Park, Minnesota
Go to Recipe
We love Mexican night at our house, and I love to re-create dishes from our favorite restaurants. This burrito-inspired dish is ready for the table in almost no time! —Krista Marshall, Fort Wayne, Indiana
Go to Recipe
The cast-iron skillet browns these delicious rolls to perfection. My family can't get enough. Use whatever pizza toppings your family likes best. —Dorothy Smith, El Dorado, Arkansas
Go to Recipe
We had a lot of family get-togethers while I was growing up. My grandmother, aunts and mom were all good cooks, and each had her own specialty when it came to bread. Mom's was my favorite—she created this recipe more than 40 years ago. The flavors call to mind the taste of cornbread stuffing! —Shirley Smith, Yorba Linda, California
Go to Recipe
I love making breakfast recipes with eggs for dinner, especially this combo with potatoes and cheese that's started in a skillet on the stovetop and then popped into the oven to bake.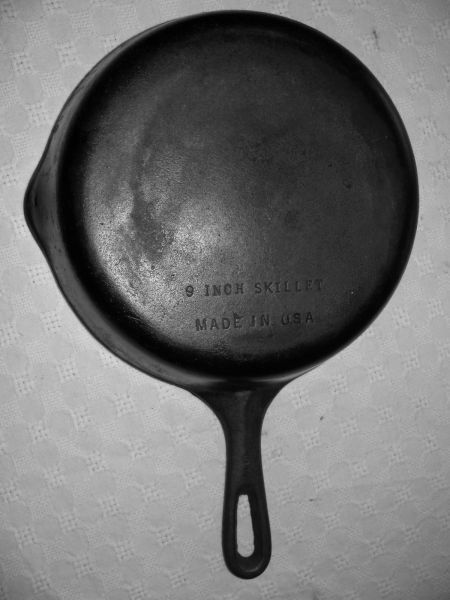 —Nadine Merheb, Tucson, Arizona
Go to Recipe
We love Italian sausage sandwiches, but because the bread isn't diet-friendly for me, I created this recipe to satisfy my craving. If you like some heat, use hot peppers in place of the sweet peppers. —Tina Howells, Salem, Ohio
Go to Recipe
I try to incorporate nutritious sweet potatoes in my meals as often as possible, especially with breakfast. This recipe originated with the purpose of feeding my family a healthy, hearty breakfast...and it worked! —Jeanne Larson, Mission Viejo, California
Go to Recipe
My dad cooked with cast-iron skillets, so when I do, I remember his amazing culinary skills. I keep the tradition going with my veggie pasta. —Sonya Goergen, Moorhead, Minnesota
Go to Recipe
This chicken fajitas recipe is definitely on my weeknight dinner rotation.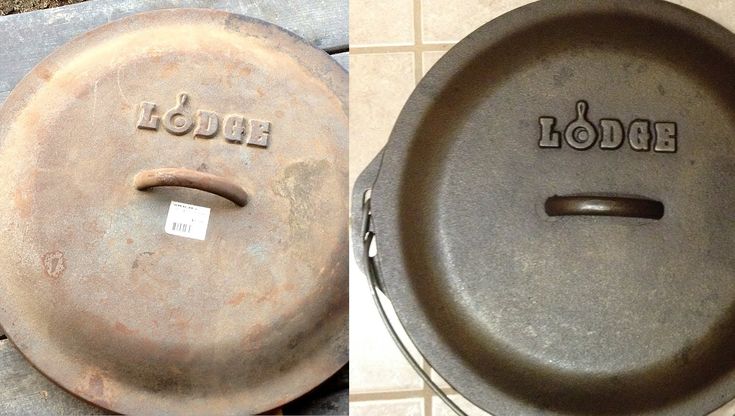 The marinated chicken in these popular wraps is mouthwatering. The fajitas go together in a snap and always get raves! —Julie Sterchi, Campbellsville, Kentucky
Go to Recipe
Cinnamon apple pie baked in a cast iron skillet is a real stunner. This beauty, with its flaky, tender crust, also works in a 9-inch deep-dish pie plate. —Renee Schettler Rossi, New York, New York
Go to Recipe
Tender sweet potatoes match up with ham, eggs and zippy seasonings for an impressive breakfast. Or serve it with salad and have an easy breakfast-for-dinner meal. —Judy Armstrong, Prairieville, Louisiana
Go to Recipe
This chunky stew makes a hearty supper, especially in the fall and winter. It'salso a great way to use extra turkey during the holidays. —Lori Schlecht, Wimbledon, North Dakota
Go to Recipe
My mom often made pineapple upside down cake, but I prefer something creamier. This recipe looks just like her cake, but gets even tastier as pineapple upside down cheesecake. —Marilyn McGinnis, Citrus Heights, California
Go to Recipe
The story goes that when Austrian Kaiser Franz Josef's chef noticed that he always broke his pancake into small pieces before eating it, he began serving it that way. —Erika and Peter Durlacher, Whistler, British Columbia
Go to Recipe
The Cajun flavor is great in this skillet-grilled catfish recipe. You can use this recipe with any thick fish fillet, but I suggest catfish or haddock. —Traci Wynne, Denver, Pennsylvania
Go to Recipe
With their cheery yellow color and delicious aroma, these appealing buns will brighten your buffet table. Plus, I've found this recipe is a wonderful way to use up squash from the garden. —Bernice Morris, Marshfield, Missouri
Go to Recipe
Extra Pesto Grilled Salmon gives this creamy pasta toss a luxurious taste and texture. We love it as is, but you could easily sub in any veggies you have on hand for the broccoli. —Jacob Kitzman, Seattle, Washington
Go to Recipe
My grandma made the tastiest snacks for us when we stayed the night at her farm. Her wonderful pizza, hot from the oven, was covered with cheese and had fragrant herbs in the crust. Now this pizza is frequently a meal for my husband and me and our family. —Michele Madden, Washington Court House, Ohio
Go to Recipe
You’ll be tempted to eat this main dish right out of the pan but try to resist. These chops are sure to wow guests at the dinner table. —Taste of Home Test Kitchen, Milwaukee, Wisconsin
Go to Recipe
Oregano, garlic and sage add savory flavor to these ground pork patties. I've had this Pennsylvania Dutch recipe for years, and it always brings compliments.
Go to Recipe
On cool nights, nothing hits the spot like a steaming homemade potpie—especially one you can get on the table fast. The pinwheel crust on top has become my signature. —Kristin Shaw, Castleton, New York
Go to Recipe
This easy chicken cacciatore recipe makes a good Sunday dinner, since it's so simple to prepare. This recipe is the best because it's loaded with lots of vegetables and is a family favorite. —Barbara Roberts, Courtenay, British Columbia
Go to Recipe
My grandma used to bake a version of this for me when I was a little girl. She would make it using fresh apples from her tree in the backyard. I've adapted her recipe because I love the combination of apples, pecans and caramel. —Emily Hobbs, Springfield, Missouri
Go to Recipe
This recipe was passed on to me by a friend. I've altered it slightly to suit our tastes. We like it with a fresh green salad. —Leann Hilmer, Sylvan Grove, Kansas
Go to Recipe
When my boys were young, they couldn’t drink milk but they could have yogurt. This was a cake they could eat. And it’s one dessert that doesn’t taste overly sweet, which is always a nice change of pace. —Linda Leuer, Hamel, Minnesota
Go to Recipe
Everyone cleaned their plates when my mother made these succulent, tangy-sweet pork chops when I was growing up. Now I get the same results when I serve them to my family alongside applesauce and au gratin potatoes. —Cheryl Miller, Fort Collins, Colorado
Go to Recipe
When I needed to put some leftover bread dough to good use, I started with a recipe I often use for bubble bread and substituted savory ingredients for the sweet. —Lori McLain, Denton, Texas
Go to Recipe
Chili powder and cumin give a mild Mexican flavor to this colorful one-skillet supper. With chunks of fresh zucchini, it's a nice change of pace from typical spaghetti dishes. —Beth Coffee, Hartford City, Indiana
Go to Recipe
I love Mexican-inspired food. I also enjoy experimenting with recipes like this one and making them healthier—and downright good! —Jenny Dubinsky, Inwood, West Virginia
Go to Recipe
When I was in high school, I made these funnel cakes every Sunday after church for my family. They are crisp and tender, just like the kind we always ate at the state fair. —Susan Tingley, Portland, Oregon
Go to Recipe
Spanish Rice Dinner has been a family favorite since I discovered it in our church cookbook. I always have the ingredients on hand, and it reheats very well in the microwave. —Jeri Dobrowski, Beach, North Dakota.
Go to Recipe
This cozy recipe is delicious for breakfast or brunch. I usually make a double batch because everyone wants more! With our own orchard, we have plenty of Delicious and Winesap apples—they make this a true midwestern meal. —Ruth Schafer, Defiance, Ohio
Go to Recipe
A friend gave me this recipe.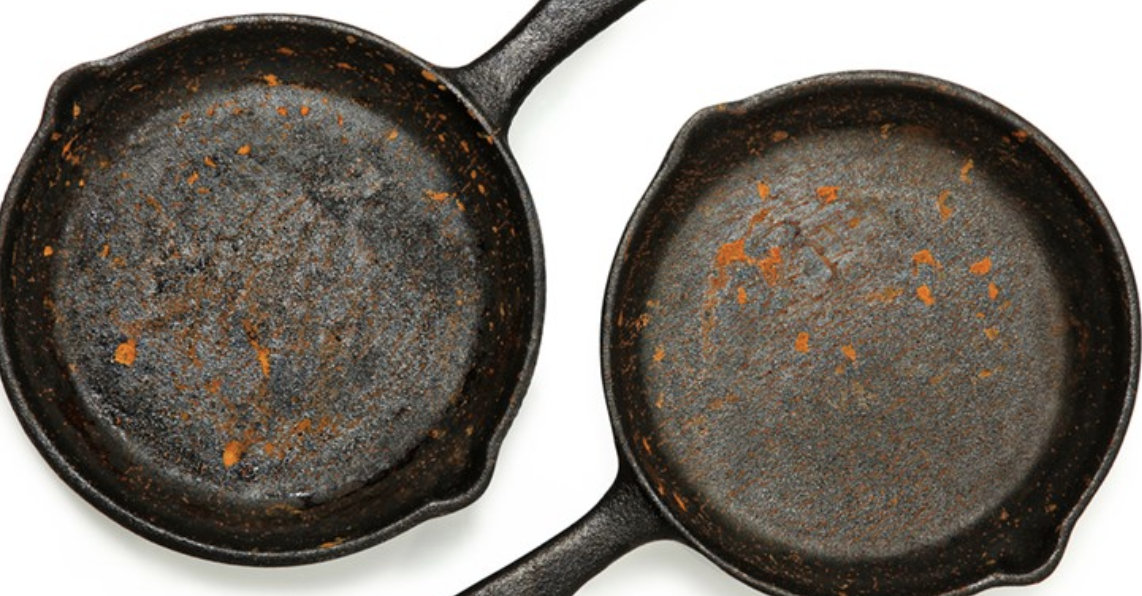 My husband likes the hearty blend of beef, onion and tomatoes. I like it because I can get it to the table so quickly. —Deborah Elliott, Ridge Spring, South Carolina
Go to Recipe
We enjoy southwestern flavors and this six-ingredient recipe never gets boring. The chicken sizzles in the skillet before getting baked and comes out tender and juicy every time. —Nancy Sousley, Lafayette, Indiana
Go to Recipe
When I’m looking for a fast entree, I turn to this beef and broccoli stir-fry. It features a tantalizing sauce made with garlic and ginger. —Rosa Evans, Odessa, Missouri
Go to Recipe
Here's one of my husband's favorite dishes. When it's in season, substitute fresh corn for frozen. Add a dash of cayenne pepper if you like a little heat. —Sheila Gomez, Shawnee, Kansas
Go to Recipe
This is a meal I have my students make in our nutrition unit.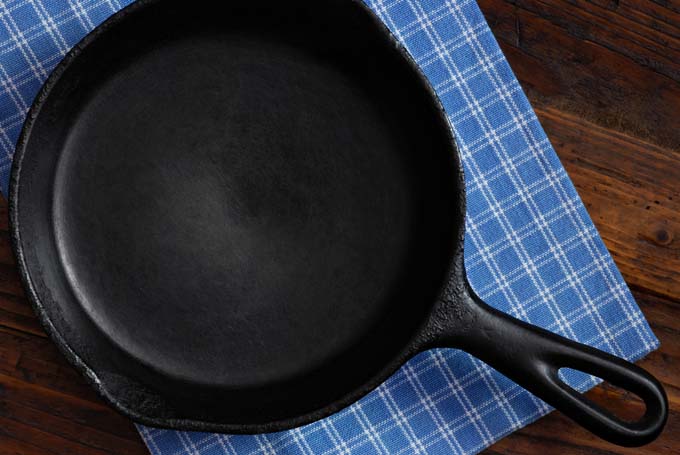 It has a delicious lemon-herb flavor and is simple to make. —Mindy Rottmund, Lancaster, Pennsylvania
Go to Recipe
This cake is filled with fresh peaches, roasted Saigon cinnamon, roasted ground ginger and toasted pecans – and that makes it different. — Jeanette Nelson, Sophia, West Virginia
Go to Recipe
Busy day? Save time and money with this stovetop supper the whole family will love. It calls for handy convenience products, so it can be on the table in minutes. —Kelly Roder, Fairfax, Virginia
Go to Recipe
A few ingredients and 30 minutes are all you’ll need for this incredibly satisfying meal. A simple basil butter gives these steaks a very special taste. —Taste of Home Test Kitchen
Go to Recipe
This Italian skillet toss is an awesome way to use up extra spaghetti sauce at the end of the week. It fits right in on Friday pizza night.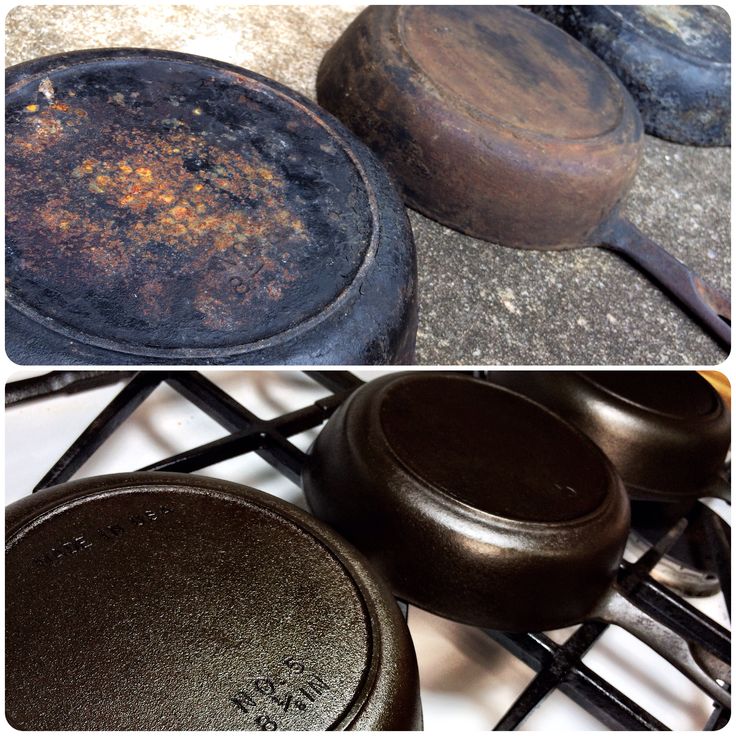 —Clare Butler, Little Elm, Texas
Go to Recipe
Here's a fun and festive way to serve brownies. Family and friends will love topping their pieces with whipped cream and strawberries. —Johnnie McLeod, Bastrop, Louisiana
Go to Recipe
Try serving this spicy halibut recipe with garlic mashed potatoes, hot, crusty bread and a crisp salad to lure in your crew. After trying a few halibut recipes, this one is my family's favorite. —Brenda Williams, Santa Maria, California
Go to Recipe
This is a simple recipe—and especially easy in a well-seasoned cast-iron skillet. The result is a deliciously light, airy cake. —Suzanne Coelman, Rabun Gap, Georgia
Go to Recipe
My husband and I are trying to add more fish and healthy entrees to our diet and this one makes it easy. It comes together in less than 30 minutes, so it's perfect for hectic weeknights. —Donna McDonald, Lake Elsinore, California
Go to Recipe
My cranberry-packed cobbler is the crowning glory of many of our late fall and winter meals. My family isn't big on pies, so this favorite is preferred at our Thanksgiving and Christmas celebrations. The aroma of cinnamon and fruit is irresistible. —Jo Ann Sheehan, Ruther Glen, Virginia
Go to Recipe
As a boy, I wolfed down my grandmother's fried chicken. I never knew how she made it, but my recipe using potato flakes is crispy close. —David Nelson, Lincolnton, North Carolina
Go to Recipe
A delightful and tasty rub makes this quick recipe fantastic. While the fish is sitting to allow the flavors to blend, you can easily assemble the salsa. My family loves this! —Laura Fisher, Westfield, Massachusetts
Go to Recipe
My grandmother gave me my first cast iron skillet, and I've been cooking and baking with it ever since. Sometimes I add drained maraschino cherries to this banana skillet dessert and serve it with a ice cream. —Terri Merritts, Nashville, Tennessee
Go to Recipe
Up Next: If You See Black Residue on Your Cast-Iron Skillet, This Is What It Means
Restoration of old cast iron pans | bestolkovyj-narod.ru
Restoring the original state of cast iron cookware will not cause any difficulties
Cast iron pans are considered the most durable. In addition, they have a number of undeniable advantages, for example, the ability to evenly distribute heat during cooking, and are also characterized by excellent non-stick properties. Therefore, even with the advent of cookware made of new materials, cast iron pans have not lost their popularity.
Often in flea markets and flea markets you can stumble upon old cast iron pans covered with years of dirt and rust, or one of these pans can be inherited from one of the family members.
Frying pans, even in such a deplorable state, can be restored
At first glance, it may seem that such kitchen items have outlived their usefulness and their further use in the kitchen is not possible. However, it is not! Today we will tell in detail and show, using the example of several old cast-iron pans found in the attic, how you can restore their original state .
Let's take a closer look at one of our frying pans to see how much rust and soot we're going to have to deal with.
Old pan before restoration
The most effective way to remove stubborn dirt from cast iron pans is to bake them for a long time, which allows you to burn off all grease and rust from the surface. One of the simplest methods is to place a frying pan in the center of the burning coals. Since there is no way to make a fire in the apartment, we will adapt this method of cleaning cast iron pans to urban conditions. For this, in addition to the oven, we need:
- foil sheet;
- heat resistant tacks;
- bucket or other container large enough to hold pans;
- water;
- distilled white vinegar;
- dishwashing liquid;
- cleaning sponge or steel wool;
- paper towels or cloth;
- vegetable oil.
Spread foil on the bottom shelf of the oven and place the pans upside down on the top shelf. The foil will keep loose pieces of soot from getting on the inside of the oven, making cleaning easier.
Cast iron cookware has been placed in the oven and is ready to be roasted
Switch on the oven in self-cleaning mode and wait for the cycle to complete. This mode is carried out for several hours at a very high temperature. If your oven does not have a self-cleaning system, preheat it to 250 degrees and check the pans after two hours.
Note: This process is likely to produce a strong odor. So schedule your cleaning for a day when you can open the windows to ventilate the room while the pans are miraculously cleaned in the oven.
The toasting process has ended
When the toasting process is complete, remove the pans from the oven and let them cool down. They will still look quite rusty, but a good deal of the old sludge should have loosened up at this stage.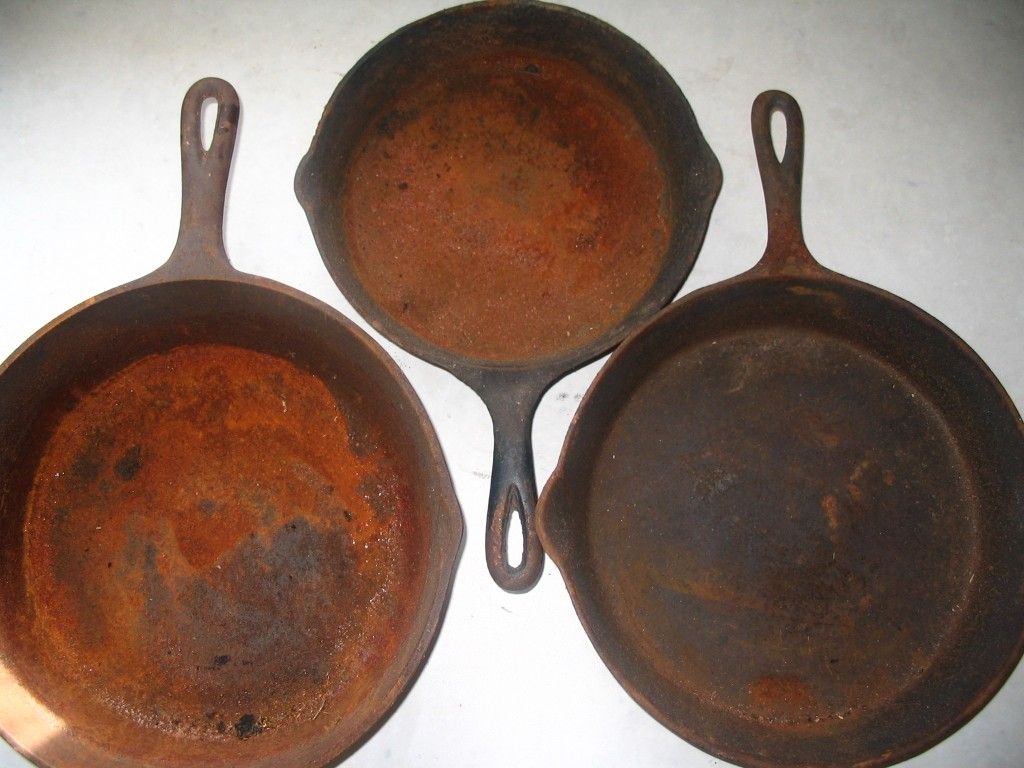
Next, immerse your cast iron cookware in a container of equal amounts of water and white vinegar with a tablespoon of dish soap. Leave it to soak for three hours, keeping in mind that the more rusty the pans are, the longer they should be soaked.
Soaking the pans in the vinegar solution will help remove any remaining dirt.
Remove the pans from the solution, rinse thoroughly under running water and dry with paper towels or a cloth until dry. If any traces of rust or soot remain, scuff them with a sponge or steel wool until a smooth, clean surface is achieved.
Wipe the cast iron skillet dry before the final restoration step
Now let's prepare our cleaned pans for use. This process is quite simple and consists in creating a non-stick coating that, with proper care, will last a long time. If you have other cast iron pans in your home that are in excellent condition (including new ones), then they may also need to update the non-stick layer. The next few steps will show you how to do this.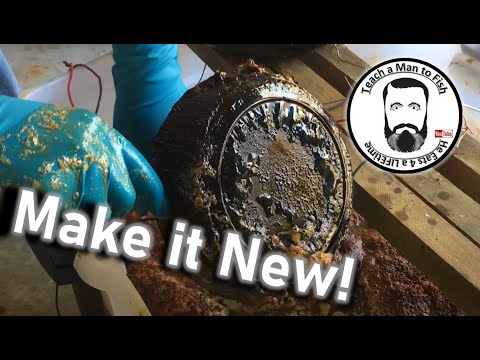
Thoroughly rub vegetable oil over the entire surface of the pan (inner, outer and handle).
Creating a non-stick layer begins by rubbing the pan with vegetable oil
Place it upside down on the top rack of the oven and bake at 180 degrees for one hour. Heating will expand the pores of the cast iron and allow oil particles to be absorbed. When the pan cools down, the pores will narrow again, retaining the oil, and it will acquire a shiny appearance and become completely ready for further use.
The frying pan is completely ready for use after baking
It's hard to believe that these are the same rusty and dirty pans we started with.
Now our cast iron pans look like new
This shows just how durable cast iron pans can be, especially when properly cared for.
With just a few simple steps, this amazing result was achieved.
We hope you now have a fresh look at the rusty pans languishing in your attic or basement and think twice before getting rid of them.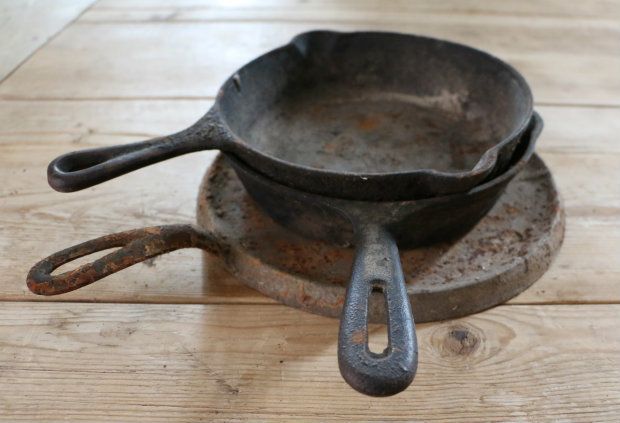
how to restore cast iron cookware and refinish new cookware to make it truly eternal
Cast iron cookware is passed down from generation to generation in some families. With proper care, quality cast iron lasts almost forever. But, if suddenly you find your grandmother's frying pan rusty and unusable due to improper storage and operation, do not rush to throw it away - there is a way to bring it back to life. Also, the tips below will be useful to those who have just purchased or are going to buy cast-iron cookware, because they need to be chosen correctly and processed before use.
Strong soot and rust on an old frying pan
If your pan is covered with a thick layer of soot, as well as traces of rust, do not suffer, scraping and rubbing it off! The easiest way to get rid of burnt food and grease is to put the pan on the fire! Wait until the cast iron is very hot, almost red. After that, everything stuck to it will fall off on its own. There is one important nuance in this method: after removing the pan from the fire, in no case cool it by lowering it into water. Cast iron must cool slowly and on its own. Remember: cast iron should not be cooled abruptly at all!
Choosing a new frying pan
Practice shows that the best quality cast iron was produced in the former Soviet Union. If there is an opportunity to buy dishes of that time somewhere, this will be the best option. If you are determined to purchase a new product, then it is better to pay attention to manufacturers from Ukraine, Belarus and Russia. Most enterprises from these countries still work according to the old GOSTs, which regulate the content of undesirable substances in alloys, which, alas, cannot be said about manufacturers from Asian countries. More expensive, but also high-quality cast-iron cookware is produced in Europe and the USA.
Pretreatment of new dishes.
Often in the memo to the purchased cast-iron pan it is written that it must be ignited by pouring table salt on the bottom.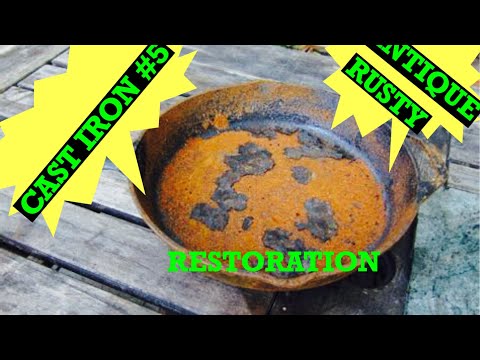 This is necessary in order to remove the remnants of technical oil from the pores. The fact is that immediately the casting field for protection against rust, the product is pollinated with a layer of lubricant. Before baking, it is recommended to wash the dishes with ordinary dishwashing liquid.
Pre-treatment of rusty dishes.
When trying to restore and treat cast iron cookware at home, the first thing to do is get rid of rust. There are several ways to free the surface of cast iron from red deposits: deep calcination, mechanical cleaning (for example, with sandpaper or a wire brush), as well as exposure to acid. Most often, we have acetic or phosphoric acid at hand (it is present, for example, in Pepsi and Coca-Cola, it is designated as acidity regulator E338). Pre-wash the pan with detergent using a metal sponge (at this stage, some rust will already be washed off). Then we collect very hot water into any container, pour vinegar into it (6% or 9% is enough).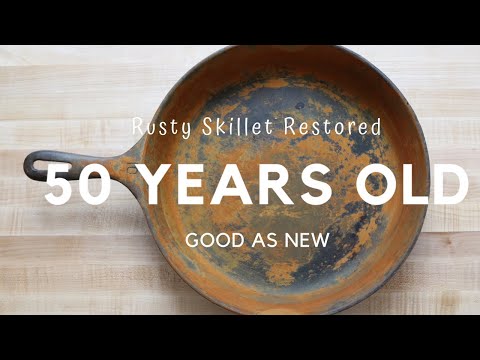 %) and fully submerge the pan. We leave for about half an hour.
By the way, if you fill the dishes with Pepsi or Coca-Cola, thanks to phosphoric acid, an additional protective phosphating layer forms on the surface of the cast iron.
After half an hour, we take the pan out of the solution, go over it again with a metal sponge, wash it and put it on the stove to warm up well.
Second step for new and remanufactured dishes
Many have probably heard that in order to create a protective film on cast iron cookware, it must be treated with oil. Alas, sunflower oil is most often used, which is completely unsuitable for these purposes! The fact is that only the so-called drying oils can provide high-quality surface protection, which, when exposed to high temperatures, polymerize and form a fairly durable hard coating (whereas sunflower oil is a semi-drying oil, it only gels). Drying oils include, for example, linseed, walnut, hemp, etc.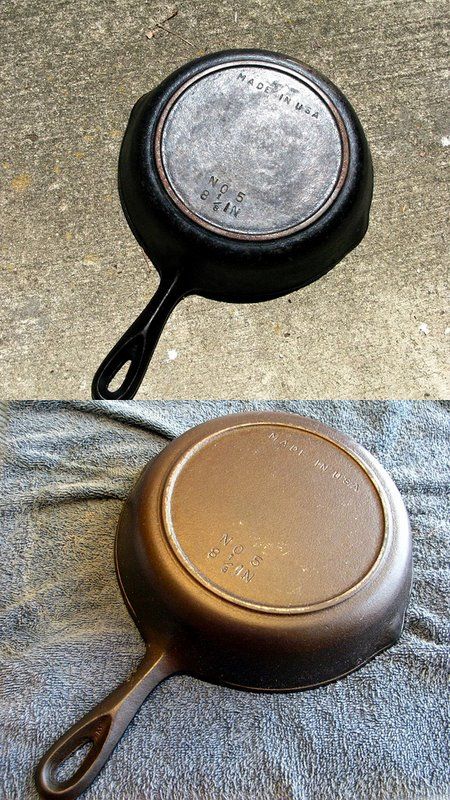
While the pan is drying and heating up on the stove, turn on the oven at full power. For polymerization, hemp oil, for example, requires a temperature of at least 250 ° C for an hour.
When the frying pan is very hot, remove it from the heat and start oiling it. It needs very little - just a few drops. The goal is to create a thin layer. Carefully, without gaps, apply the oil with a cloth or paper towel. Do not be embarrassed if you see traces of rust on a napkin - pure cast iron begins to rust instantly. Do not forget to treat the dishes with oil on the outside as well. After the first treatment with oil, again (for a short while) put the pan on the fire and warm it up. After that, repeat the procedure for wiping with drying oil.
After that, we send the pan for an hour to the oven preheated to the maximum. By the way, polymerization occurs not only from high temperatures, but also, for example, from ultraviolet radiation. Therefore, in principle, a frying pan treated with oil can simply be exposed to the sun.
Learn more
- Growing cucumber from seeds

- Front yard cottage garden

- Best food processors for home use
- Small cottage kitchen design ideas

- A dirty kitchen

- Young bell pepper plants
- Farrow and ball blue paints

- Clean fast growing shade trees
- Ideas for shower tile patterns

- Nate berkus home shopping

- How to plan room lighting