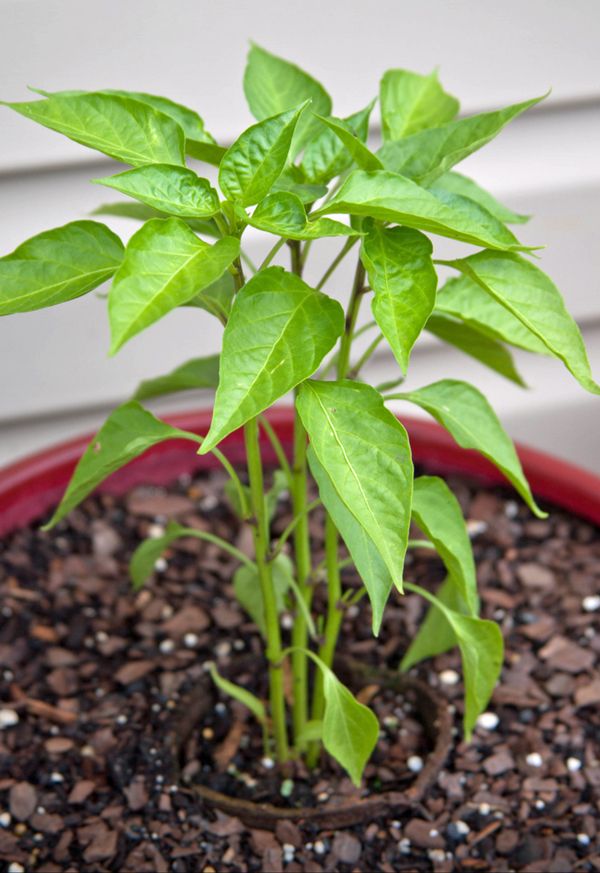
Young bell pepper plants
Beginner’s Guide on How to Grow a Bell Pepper Plant
If you’ve just started planning the perfect layout for your veggie garden, you might be looking for some ideas on what to grow. As temperatures slowly start to rise in the spring, you may be dreaming about vibrant tomato vines, mouth-watering cucumbers, or the perfect bell pepper plant.
While bell peppers might not be the easiest fruit to grow — yes, just like tomatoes, bell peppers are technically a fruit — they are certainly well worth the challenge. These warm-weather species make a great addition to refreshing salads or as a healthy afternoon snack. They’re also great eaten raw or cooked.
With that in mind, it’s time to learn the fundamentals of growing a bountiful bell pepper plant. We’ll show you the different types of peppers to consider and the basic elements needed to cultivate these delicious, versatile, and crisp veggies (er, fruit).
Peppers 101: Pepper VarietiesBefore we get into the technicalities of growing bell peppers, it’s important to understand a few basic things.
The bell pepper plant (Capsicum annum) belongs to the nightshade family, which spans more than 2,300 species, including eggplants, potatoes, and tomatoes. One of the greatest attributes of peppers is that they come in a variety of colors, shapes, and sizes, making them one of the most versatile foods used in many different cuisines worldwide.
Unlike their spicier cousins — like jalapeños and serrano peppers — bell peppers do not contain capsaicin, the compound responsible for pungency and heat in hot peppers.
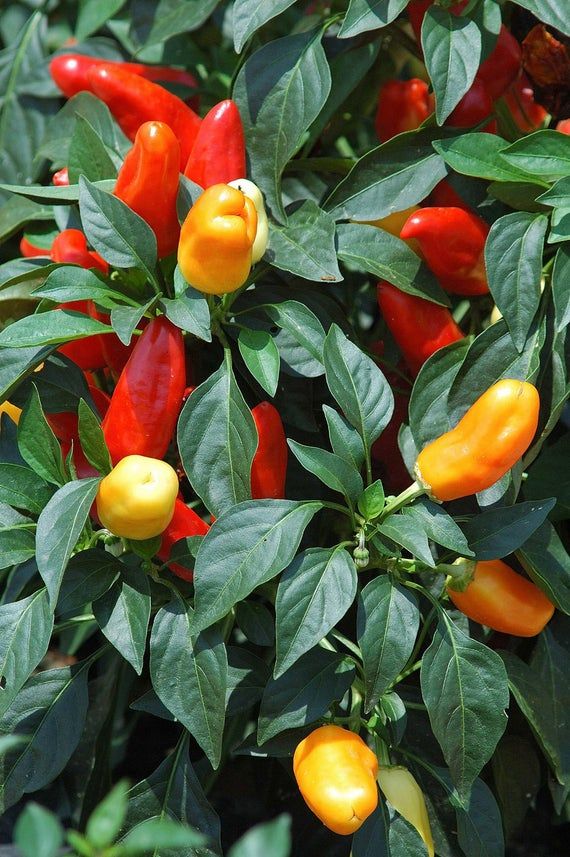
Ever wondered if green bell peppers and red peppers come from different plants? Well, they’re actually the same pepper that are simply at different maturity stages. They start green, but if you leave them to mature on the plant long enough, they’ll eventually achieve their full color: a bright and deep crimson red.
Fun fact: The longer you allow your bell peppers to mature, the higher their vitamin C content.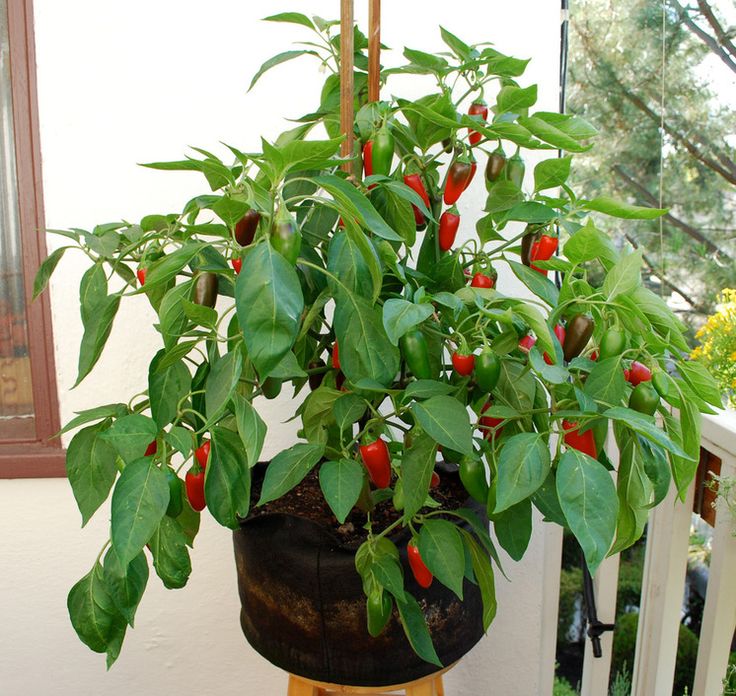 Red bell peppers that are allowed to mature fully also have a sweeter flavor!
While peppers are quite resilient to garden pests, you may want to opt for resistant varieties to ensure your pepper-growing experience goes smoothly. Some of the best species include:
- Green peppers that turn into red sweet peppers: Sweet red Marconi, Lady bell, Gypsy, Lipstick, Bellboy, Sweet California wonder
- Orange peppers: Orange sun, Milena
- Yellow peppers: Golden California wonder, Honey bell, Marengo
No matter if you decide to grow just one type of bell pepper plant or you want to put your gardening skills to the test with a pepper bundle, you’ll need to learn the basics of how to grow thriving and healthy plants.
How to Grow a Bell Pepper Plant: The BasicsThe first thing you should know about bell pepper plants is that they’re quite sensitive to cold temperatures, so it’s a good idea to start them indoors before their growing season begins (spring/summer).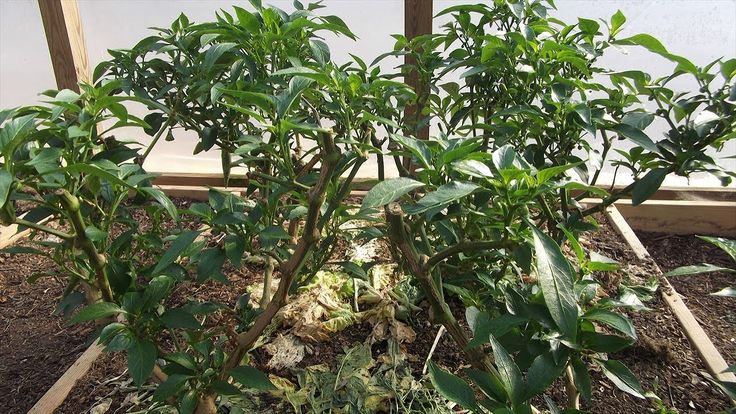
Keep in mind that sweet bell peppers have a long growing season — they take between 60 to 90 days from sowing to harvesting — so the sooner you get started, the better. It’s recommended to sow your bell pepper seeds 8 to 10 weeks before your last spring frost date. You can use the Back to the Roots grow calendar to find out when that is.
Germination occurs within 10 days, and once the first set of true leaves appears, you can begin transplanting them outside if that’s your goal. (Bonus: Bell pepper plants can also be grown indoors.)
But before you move your bell pepper plant out into the open, make sure to check that the nighttime temperatures do not go below 70°F, as this may shock your young plants and contribute to their premature demise. The best way to support these plants is to wait for the last frost danger to pass.
Get Enough SunAs a true warm-weather crop, bell peppers love direct sunlight and full sun, so place them in a location where nothing is blocking the light. If you live in a climate with extreme high heat and intense sunlight, your peppers may be susceptible to sunscald, especially the younger leaves and more tender fruits. While they may look aesthetically unappealing, sunscalded bell peppers are still edible and equally tasty.
Bear in mind that to produce large and healthy fruit, pepper plants need plenty of full sun, at least 6 to 8 hours every day.
Don’t Water Too MuchFinding the right watering balance is the key factor to a thriving bell pepper plant. Since sweet bell peppers cannot tolerate extremely high temperatures, it’s essential to water them appropriately to prevent diseases. If you live in a desert climate or experience a very dry summer season, it may be necessary to hydrate your plants daily — especially in the early morning or evening to prevent water evaporation.
To avoid diseases and pests, such as anthracnose or blossom end rot, avoid overhead watering and make sure you water deeply and evenly at the base of the plant.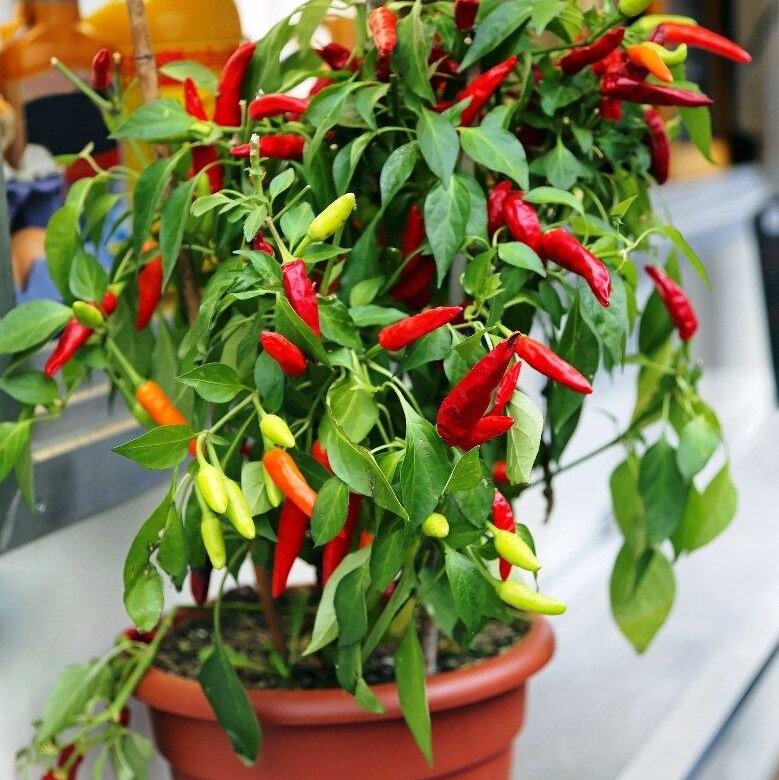 By doing so, you encourage the development of a strong and healthy root system, which in turn will make your plant more resilient to overcome any bumps in the road.
Bell pepper plants prefer sandy to loamy soil, which is enriched with organic matter. You can either buy a potting mix with these characteristics or purchase all the elements individually and create your own. If you’re not sure what the best option is, don’t be shy — ask one of the staff members at your local Home Depot Garden Center for an opinion.
Note: Fertilizing is an important step in vegetable gardening. But don’t go crazy and over-fertilize as it usually encourages your plant to grow more foliage and produce less fruit, which is obviously not the goal.
Since water is vital for growing bell peppers, choosing the proper soil is undoubtedly the best way to ensure optimal moisture levels.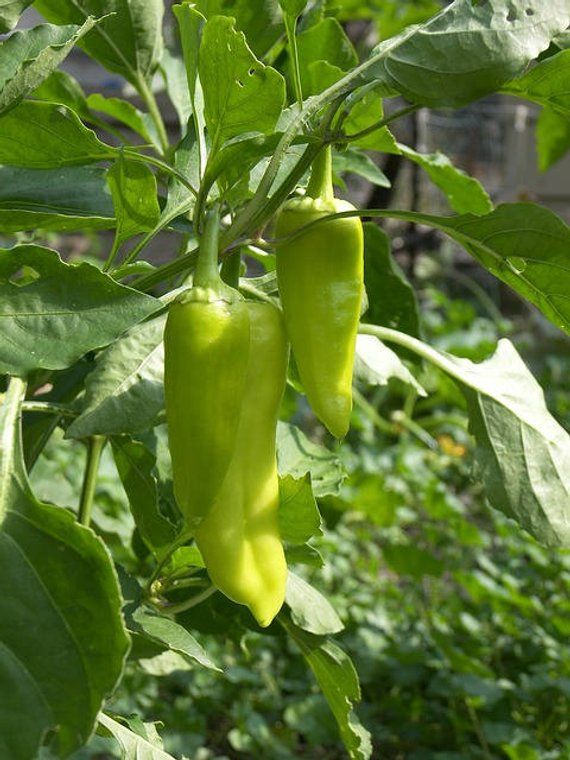 These plants don’t like wet feet, so opting for sandy, loamy soil will ensure good drainage and help the soil temperature rise quicker, a key factor in the cultivation of bell peppers.
Equally important is the soil pH. Veteran gardeners claim that a slightly more acidic soil (between 6.0 and 6.8) is the optimal environment for your bell pepper plant to yield a bountiful harvest. Mixing some coffee grounds into the potting mix is a natural, eco-friendly way to balance the pH levels of the soil and support your plant’s growth.
Pro tip: To prevent blossom end rot — which is primarily a calcium nutrient deficiency — crush some eggshells and add them to the soil. It’s an easy, organic way to provide your plants with an extra nutritional boost.
To speed up the warming of the soil and help retain some moisture during hotter days, consider covering it with a dark mulch.
Choose Your ContainerIf you live in a small apartment with a tiny balcony and think you don’t have enough space to grow bell pepper plants, think again!
Bell peppers are a perfect match for container gardening and raised beds, so you can easily squeeze them into even the smallest spaces.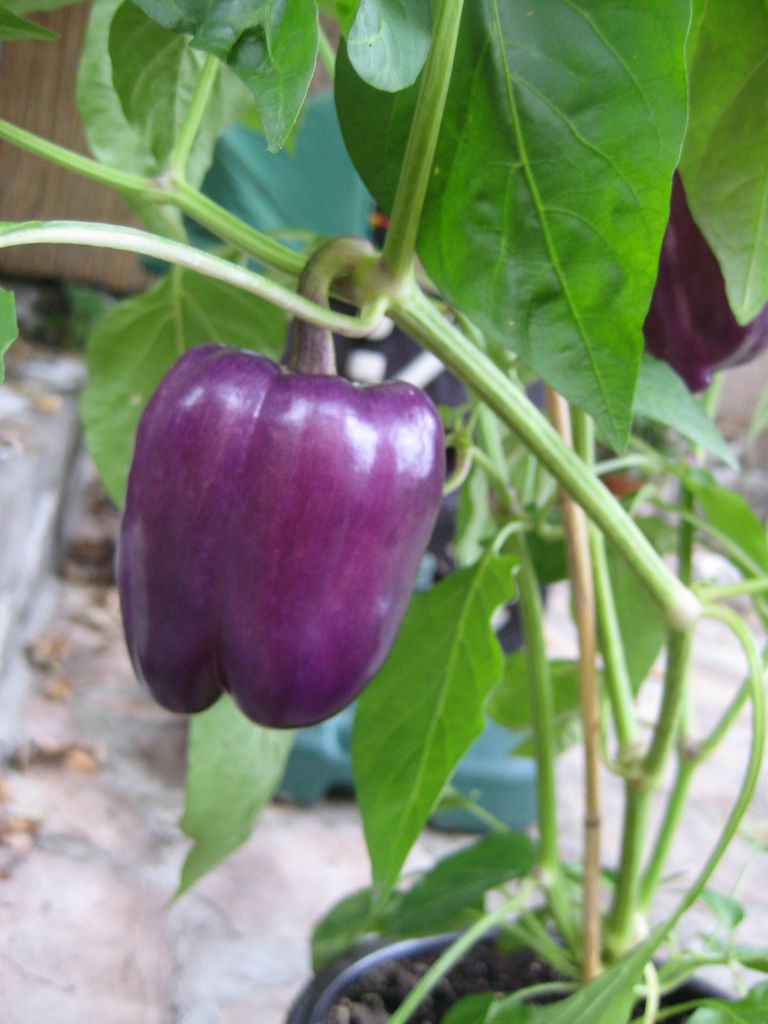 Since these veggies (OK, fruits) require good drainage, a raised fabric bed — like this one from Back to the Roots — is a fantastic and affordable home for your bell pepper plant.
The Back to the Roots Fabric Raised Beds are made with durable felt and are double stitched, so you can easily move them around without worries. They also come with internal grow walls to prevent root tangling between different plants, which means you can plant all sorts of different veggies, herbs, and houseplants simultaneously.
Keep in mind that, like tomatoes, bell peppers benefit from some type of staking or structural support. Tomato cages are a great alternative, and they’re easy to set up. Just make sure you put them in place when the plants are still young, as it can be tricky to position them around fully mature plants.
Growing Bell Pepper Plants Is Rewarding and FunThe coolest thing about peppers is that they come in all sizes and shapes, and you can find a variety that caters to your taste. From sweet to spicy, they offer a great range of flavors that will take your cooking to the next level.
While growing and maintaining a bell pepper plant does come with its challenges, you’ll feel incredibly proud when that first tiny pepper makes its debut in the world. To learn more tips and tricks for cultivating these crunchy and delicious edibles, check out our comprehensive guide on how to grow peppers from seed to harvest.
Growing Bell Peppers For Bright Colorful Harvests
Table of Contents
Peter Piper picked a peck of pepper. But first he had to plant the peppers, and so can you! In fact, it’s so easy to learn how growing bell peppers works that you’ll never have to pick peppers at the grocery store again. This makes them the perfect plant for veggie-loving, low-maintenance gardeners.
Not only are they a great addition to any meal, but bell peppers are also very ornamental plants. Some gardeners plant them in landscapes just for their eye-catching colors. The tasty fruits come in a variety of festive hues from green to orange to red to purple. When the peppers aren’t around, the plant itself is beautiful with its full, green foliage and small white flowers.
The bell pepper is closely related to all other pepper species, like Jalapenos and Habeneros. Unlike its hot and spicy relatives though, it lacks the chemical capsaicin, which is responsible for the heat. Because of this, you’ll often hear them called sweet peppers – which is exactly what they are!
Are you ready to add some colorful flavor to your garden? Here’s everything you need to know about planting bell peppers (and more!).
Good Products At Amazon For Growing Bell Peppers:
- Espoma Garden-Tone Fertilizer
- Neem Bliss 100% Cold Pressed Neem Oil
- Safer Brand Insect Killing Soap
- Monterey B.T. Caterpillar Killer
- NaturesGoodGuys Beneficial Nematodes
Quick Care Guide
Growing bell peppers is rewarding and enjoyable. Source: Ken Cook
| Common Name(s) | Bell Pepper, Sweet Pepper, Red Pepper |
| Scientific Name | Capsicum annuum var. Grossum (Grossum group) |
| Days to Harvest | 60-100 days |
| Light | Full sun |
| Water | Medium, consistent |
| Soil | Well-draining, fertile |
| Fertilizer | Low-nitrogen; early spring and summer |
| Pests | Aphids, whiteflies, Colorado potato beetle, cutworms |
| Diseases | Mosaic virus, blossom end rot, Anthracnose |
All About Bell Peppers
Sweet peppers are native to Central and South America, They were introduced to Europe by Columbus and other explorers and have been grown worldwide ever since. They’re naturally a warm-weather perennial, so people in cold regions only cultivate them as an annual each year.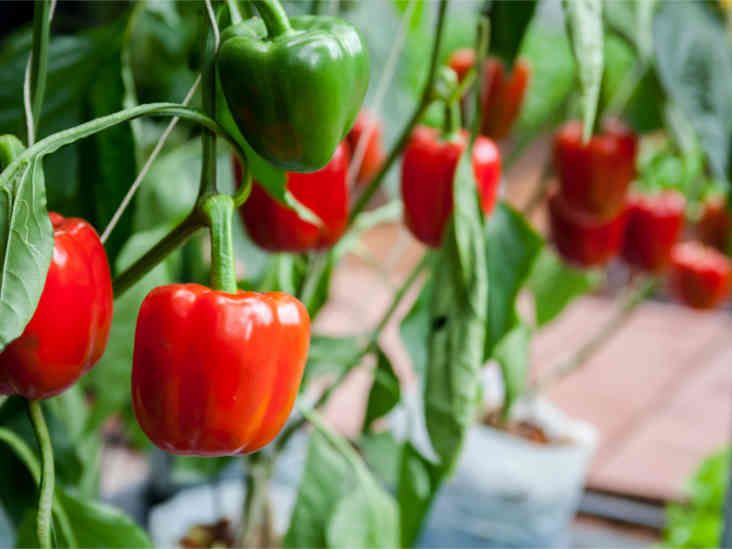 These are generally forgiving plants, but the correct temperature is essential to helping them thrive. As such, you can use your pepper as a perennial if you live in a warm climate or bring it indoors during the winter. If you choose the latter, keep it warm and exposed to plenty of light.
When grown as annuals, pepper plants usually produce one fruit set. As perennials though, they can continue producing through the winter.
The sweet pepper plant stretches up to 4’ tall and 2’ wide. The fruit – yes, it’s a fruit – is usually 3-4 inches long. The peppers are often picked prematurely when they’re green. If left alone though, they turn their full color as they mature. Whether that color is red, orange, yellow, purple, or brown depends on the variety.
Bell Pepper Varieties
A Purple Beauty bell pepper plant, still less than a foot tall. Source: Lorin NielsenThey may seem like their own species, but bell peppers are actually cultivars of Capsicum annuum. This species has been sorted into five groups of edible peppers.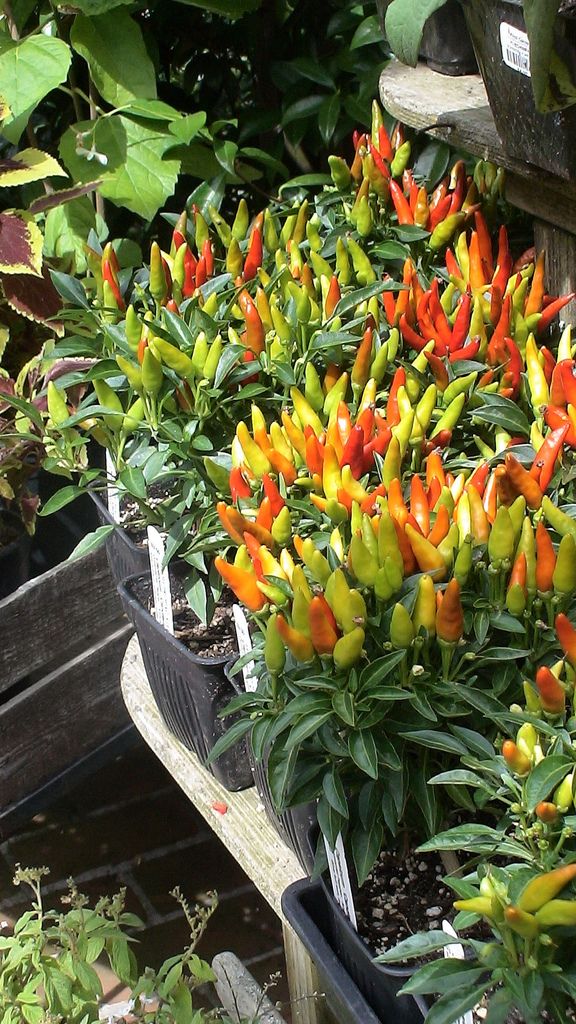 The Grossum group includes all the sweet peppers. Here are a few of our favorites:
Gourmet
You’ll get a beautiful orange hue with the Gourmet pepper. It has thick, juicy walls with a fruity flavor. The plant is highly resistant to tobacco mosaic virus, produces early, and has a high yield. This is an award-winning variety that gardeners rave about.
Gypsy
You can get nearly all colors in one with this variety. Its skin starts out green then turns yellow, orange, and finally red. Pick them at different times to enjoy the full range of colors! The peppers are long, skinny, and ready to eat in just 65 days after transplanting.
Sweet Cherry
This has to be the cutest of all the sweet peppers. They’re round, red, and the size of a cherry, making great ornamentals and bite-sized snacks. The plant bears its cherries generously, so you’ll have no shortage of these sweet treats.
Chocolate
A chocolate pepper? It sounds like a weird combination, but this is a very tasty treat.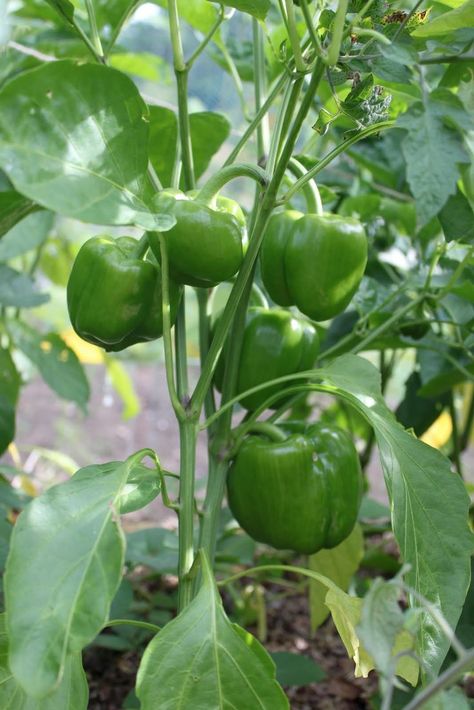 It has a creamy reddish-brown skin and red flesh. Sadly, it doesn’t taste like chocolate, but this pepper is still extra sweet. Plus, it matures quickly (60-75 days).
Bell Boy
This is one of the best capsicum plants to be picked while green, though it turns red later. It has a boxy form and tangy flavor that’s excellent for culinary use. It’s a tough plant that’s resistant to tobacco mosaic virus and other diseases. Unfortunately, this is a hybrid so its seeds are sterile.
Yellow Monster
You’ll definitely get more fruit for your money with these giants. Yellow monster peppers are twice as big as the other varieties – 8 inches long!. You’ll notice they taste very sweet and have a meaty texture. They start out green and gradually turn bright yellow.
Purple Beauty
It doesn’t get more ornamental than the purple beauty. This one is such a dark shade of purple that it almost looks black (like an eggplant). When you cut it open though, the fruit is lime green! If left to mature fully, the purple will turn to deep red. These purple bell peppers are one of the most productive and fastest producing plants, with only around 70 to harvest.
Planting Bell Peppers
Bell pepper seeds form in a mass inside the upper part of the pepper. Source: arbyreedPlant your peppers from seeds or starts. We recommend seeds because there are more varieties to choose from than the limited starts at garden stores. Capsicums have a long growing season, so you’ll have to start the seeds indoors in cold climates. Otherwise, the frost might get your harvest before you can!
Start the seeds indoors 6-10 weeks before the last frost is anticipated. Bury each seed ¼ inches deep in well-draining soil and keep them consistently moist. Optionally, cover the tray with punctured plastic wrap to trap in the humidity.
It’ll take about 10 days for the seeds to germinate. After the seedlings have popped out of the soil, remove the plastic wrap and move the container into a sunny spot indoors.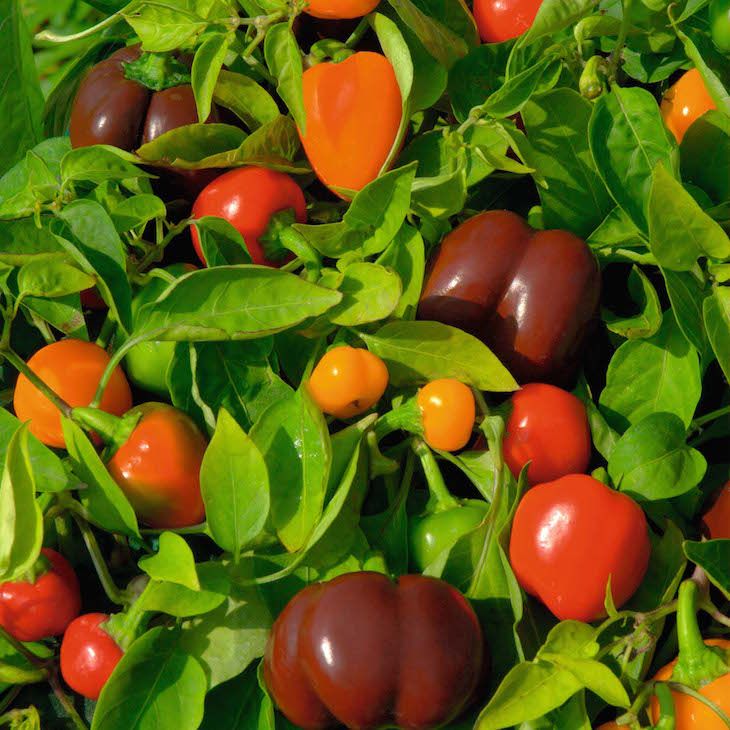 Continue to keep the soil moist until it’s time to transplant.
While your seedlings are growing, prep the soil they’ll be planted in. You can give them a spot in your garden or grow them in a large container. Air Pots are expertly-designed containers that support and nurture healthy root systems for your pepper plants — and they’re in our store! Whichever you choose, use well-draining soil. Add plenty of organic matter, like composted manure, to boost fertility and water retention. When all chances of frost are gone and the soil is consistently 65°F or warmer, you can start transplanting.
Your seedlings should be 6-8 inches tall and have an extensive system of white roots – they may even be flowering already. Before transplanting though, they need to be acclimated to the weather outside. Harden them off by putting the containers outside during the day. Start with just an hour or two and work up to an entire day outside. This will help prepare them for the big move.
When they’re ready to go in the ground, plant each pepper 1-2 feet apart (depending on the expected size of the variety). If you’re concerned that the soil isn’t warm enough, lay some black plastic down to absorb warmth. Or, you can add mulch to warm the ground and trap in extra moisture (recommended for very dry areas).
Now your peppers are all ready to grow! From transplanting, they generally take 60-90 days to produce ripe fruit. You can expect to see baby fruits growing in mid to late summer.
Care
A plant can have many peppers in different stages of ripeness all at once. Source: Zeetz JonesWith a good care schedule, you won’t have to work too hard here. As long as you monitor the temperature and are consistent with watering, you’ll be harvesting before you know it!
Sun and Temperature
Because of their tropical origins, your sweet pepper plants need warm weather to thrive. Ideally, the daytime temperature should fall within 70-80°F and nights should be over 50°F. Along with warm weather, your Capsicums should be placed in full sun.
Failure to pay attention to temperature may result in a poor fruit set or dead plants. Temperatures over 80°F may cause flower drop and misshapen fruits. If needed, protect your plants by providing light shade in hot weather. These plants are also sensitive to cold nighttime temps, so you may need to cover them up.
Water and Humidity
Peppers have shallow roots, so consistent water is key to keeping them happy. Underwatering or sporadic watering can make the pepper wall thin instead of thick while also turning the taste bitter. For the best results, keep the soil moist but not flooded. 1-2 inches a week should be plenty, but extra moisture may be needed during blossoming and hot weather.
Soil
You’ll need well-draining soil that’s a good balance between loamy and sandy. Capsicums love their nutrients, so supply the soil with plenty of organic matter from mulch and top dressings. Exact pH isn’t too important here, but a range from 5. 5 – 7.0 is considered ideal.
Fertilizing
Fertilizer is important for growing quality fruit, as capsicums depend on nutrients for their supreme texture and flavor. You should fertilize your pepper plant twice a year. At the beginning of the season, apply fertilizer to the soil before planting. When the plants start blooming, add a side dressing to boost fruit growth.
We want the plants to use their energy for fruit production, so select a low-nitrogen fertilizer, like 5-10-10. This will slow the leafy growth and help the plants focus on growing the produce.
Pruning/Training
It may not seem like it, but peppers are heavy! Well, at least they are for a 4’ plant with shallow roots. To keep them upright, prune your plants to keep them bushy instead of sparse and tall. When the plant is young, clip back long stems to encourage a fuller shape. Don’t prune more than a third of the plant though, or it may not be able to fruit.
If pruning isn’t enough, you may need to stake your bell pepper plants to prevent the stems from breaking in two.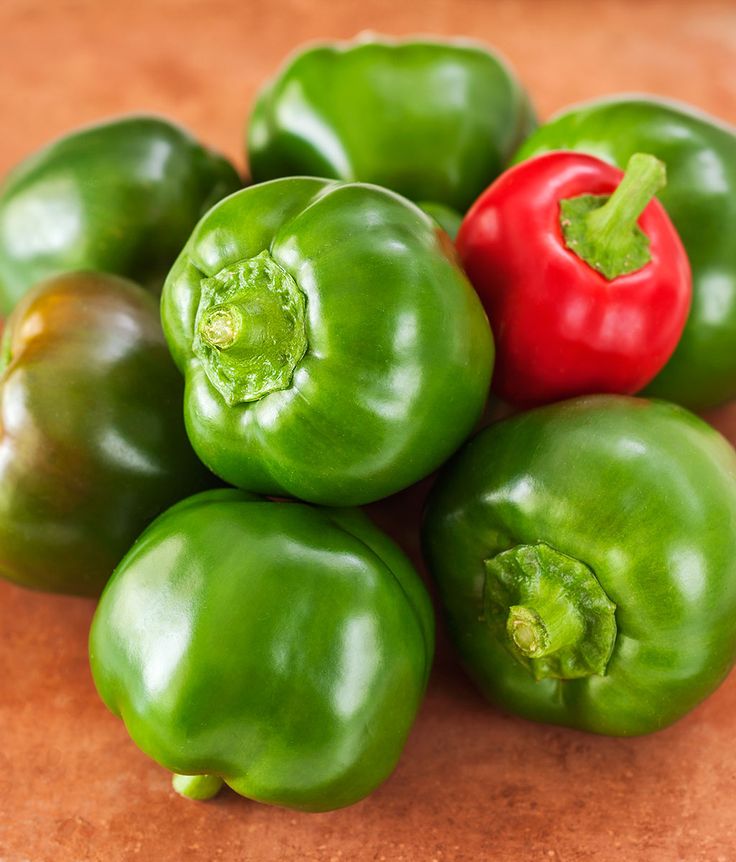 Put a stake in the ground next to the plant and loosely tie the stems to it with a fiber-based tie (wire or twine can damage the stem). This can be done in the ground or in containers. You can also use a tomato cage instead of stakes.
We’ve got a fantastic video that talks about topping, or the art of pruning back that top stem to encourage outward growth. Take a look!
Propagation
Capsicums are one of the easiest plants to save seeds from. You can save them from your home-grown garden peppers or take them from store-bought ones.
Keep in mind that the seeds may not be true to type if the plant was cross-pollinated. If multiple species of peppers are grown together, you may end up with accidental hybrids that taste completely unlike their parent species.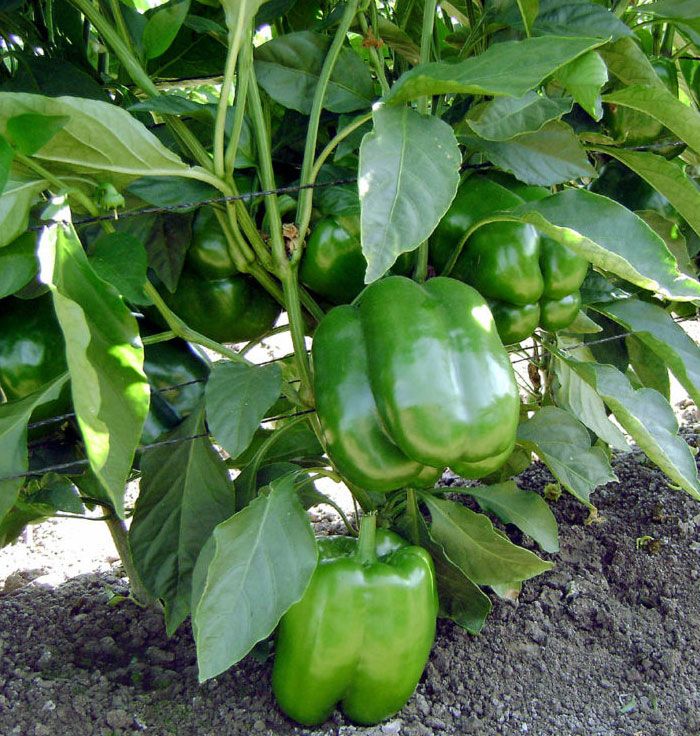 Also, some hybrid varieties produce sterile seeds, so they may not germinate at all! Keep your pepper varieties separated, or pick just a single type to grow if you want to save seeds.
Begin by choosing a healthy, fully mature pepper. Remove the seeds, discarding any that look diseased or discolored. Spread the rest on a paper towel and let them dry for several days, turning as needed. When completely dry, they’ll be so hard that you won’t be able to dent them with your nail.
Place the seeds in an airtight container and store them somewhere dry, dark, and cool. For best results, throw in some silica gel desiccant to absorb extra moisture. The seeds will last for a few years, but the sooner they’re planted the higher the germination rate.
Peppers can also be propagated from cuttings, but most gardeners don’t because the plants are grown as annuals. If you live in a tropical climate though, you can use them as perennials and propagate to your heart’s content!
Choose a healthy stem and cut it off just below some leaf nodes. Remove the lower leaves and any buds, flowers, or fruit. Dip the end of the cutting in rooting hormone and plant it in seed starting soil. Water consistently and keep it in warm weather and indirect light.
Your cutting will start growing roots in about two weeks, after which it can be transplanted into the garden. From here, care for it as you would a regular pepper plant and it’ll turn into one.
Harvesting and Storing
All bell peppers begin green, then ripen to their distinct colors. Source: Theo CrazzolaraIf everything goes as planned, you should be harvesting your peppers in mid to late summer. The season comes faster than you think, so get your recipes ready!
Harvesting
You have a lot of freedom to choose when to harvest. Once the produce turns green, you can pick them right then or let them mature to the desired color. You definitely don’t have to harvest them all at once. Each plant produces about 6-8 peppers at a time, depending on the variety. Instead of pulling, cut them from the plant so as not to damage the stem.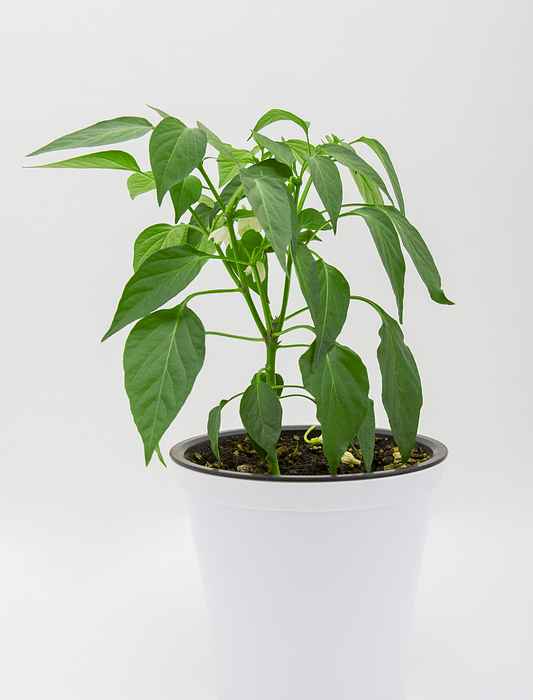
The minimum ripeness to wait for is when the pepper’s green, full-sized, and firm. From there, it can take 3 weeks or more for the full color to develop. As the pepper matures, it will become sweeter, thinner walls, and a shorter storage life. Wait too long, and it will turn mushy.
If you decide to wait until your peppers reach their ultimate color, you’ll likely only end up with one harvest. If quantity is more important to you, harvest your produce frequently when they first mature, which allows more time and energy to go into further crops. You can always plant two pepper plants and allow one to mature while you consistently harvest the other.
Storing
The more ripe your peppers are, the worse they store. Because of this, it’s best to eat them the same day they’re harvested. Peppers will ripen slightly if you leave them on your counter for a couple days, but the fridge is preferrable. In there, they’ll usually last for 1-2 weeks.
You can also cut up and freeze your peppers. You’ll lose the crispy texture but keep the delicious flavor, which is great for adding into recipes. We recommend using them within a year.
Dehydrating is another option for pepper storage, and it’s easier than it seems. Just steam the peppers and place them in the oven for a few hours at 140°F or lower. Once dried, store them in an airtight container.
Troubleshooting
Young bell pepper plants need time to develop before they fruit. Source: Lorin NielsenWe have some growing problems to watch out for, but nothing too serious pest and disease-wise. To really minimize the potential issues, don’t rotate peppers with other nightshade plants, like tomatoes, potatoes, and eggplants. They share common pests and diseases, which will only be encouraged to thrive in the garden.
Growing Problems
Blossom drop, damage, or absence is an unfortunately common problem in pepper plants. This is often caused by temperatures under 60°F at night. However, it can also happen if it gets too hot during the day (80°F+).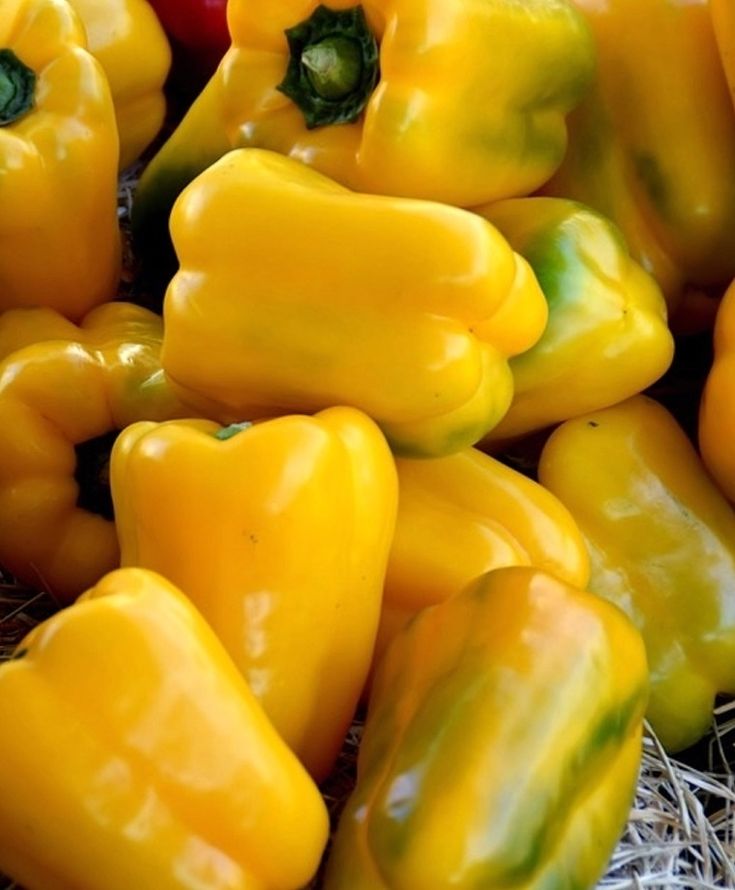 Other potential culprits are underwatering, too much nitrogen, and a lack of nutrients in the garden.
Peppers can be parthenocarpic, which means they can produce fruit without being pollinated. However, the plant may abort the young peppers since they won’t serve a purpose in reproduction. Prevent this by inviting pollinators to your garden with attracting flowers or pollinating by hand.
Bell peppers can get sunburned if exposed to constant high temperatures and humidity. The skin will look dry, burned, and cracked. This doesn’t affect the edibility of the fruit unless the skin turns mushy. If you notice this happening, give your plants some light shade in the afternoon.
Lastly, when underwatered, especially in hot weather, the leaves will start to curl up. Give them a good drink and they should go back to normal. If they don’t, this could instead be a sign of pest damage or disease.
Pests
Aphids and whiteflies are two menaces you may come across in your garden.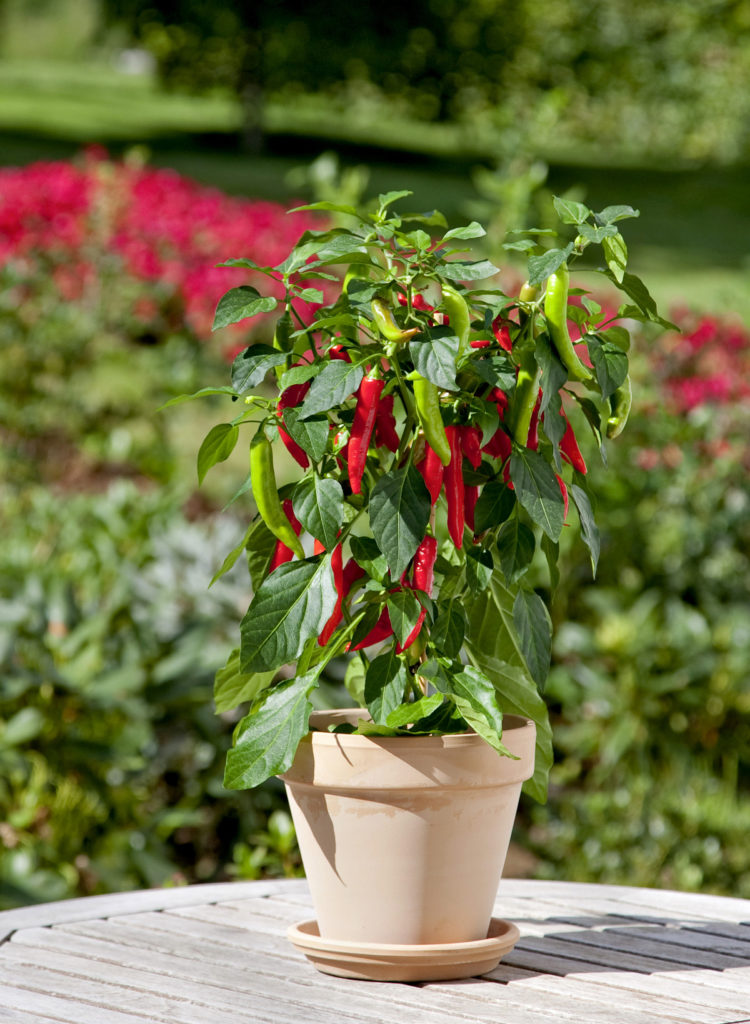 Both feed on sap and secrete ant-attracting honeydew. Prevent them by periodically applying neem oil. Existing populations can be eliminated with insecticidal soap, pyrethrin, and for aphids sometimes just a strong spray of water.
Colorado potato beetles, also called potato bugs, have round, yellow-orange bodies with distinct black stripes. Insecticides such as Bacillus thuringiensis (BT), azadirachtin (the active ingredient of neem oil), or pyrethrin-based sprays usually work very well against them. You can prevent potato bugs with neem oil.
While in their caterpillar stage, cutworms will munch through your plants like a pair of rampant scissors. Bacillus thuringiensis (BT) will prevent and control cutworms, as will tilling the soil before planting. You can also add beneficial insects like nematodes.
Diseases
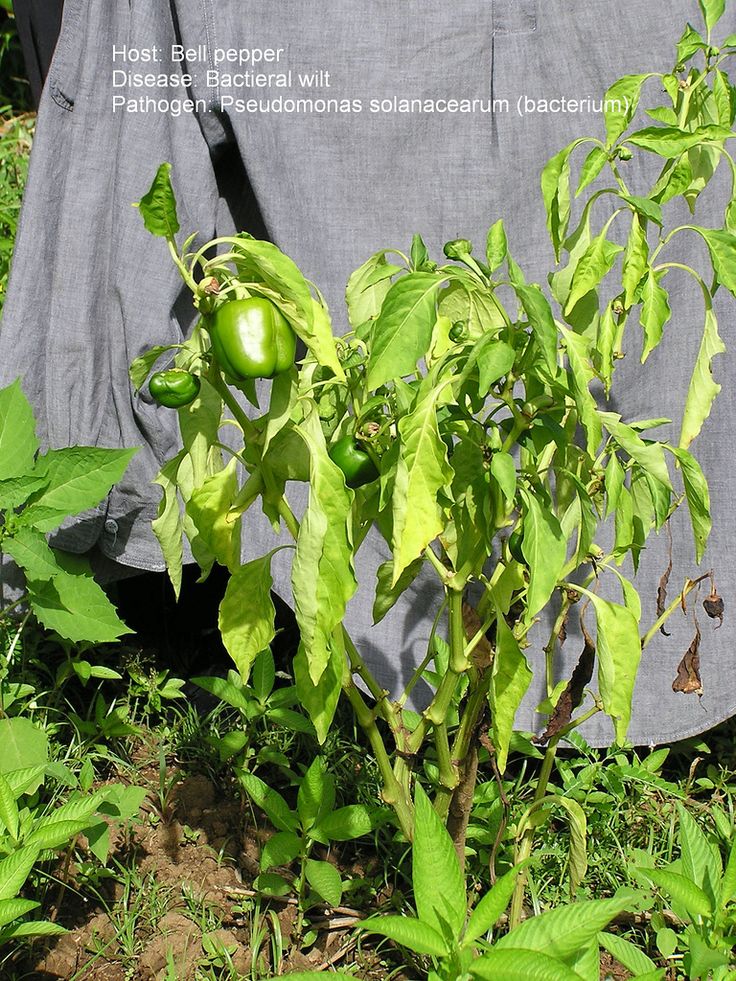
Mosaic virus appears as a myriad of spots on pepper foliage and cupped leaves. It’s deadly and incurable, so you’ll have to destroy any affected plants. This virus is typically spread through seeds, so make sure you get yours from a reputable and healthy source.
Every so often, gardeners report problems with blossom end rot. This shows up as dark, rotting areas on the blossom end of the fruit. The most common cause of this problem is inconsistent watering, and being consistent with that should resolve most issues. However, in some rare circumstances, it can be caused by the plants suffering a calcium deficiency. If the soil’s pH is too high, it can prevent calcium absorption by the plant. Use a soil testing kit to check your pH.
Anthracnose is a fungus that infects many varieties of plants – peppers included. Early symptoms include small, brown or black spots on the leaves, stems, and fruit. If left unchecked, the spots will grow and eventually collapse, leaving behind holes in the foliage. Neem oil does a good job at controlling Anthracnose, as does copper fungicide. You can prevent this fungus, and others, by keeping your plants clean, dry, and well-pruned.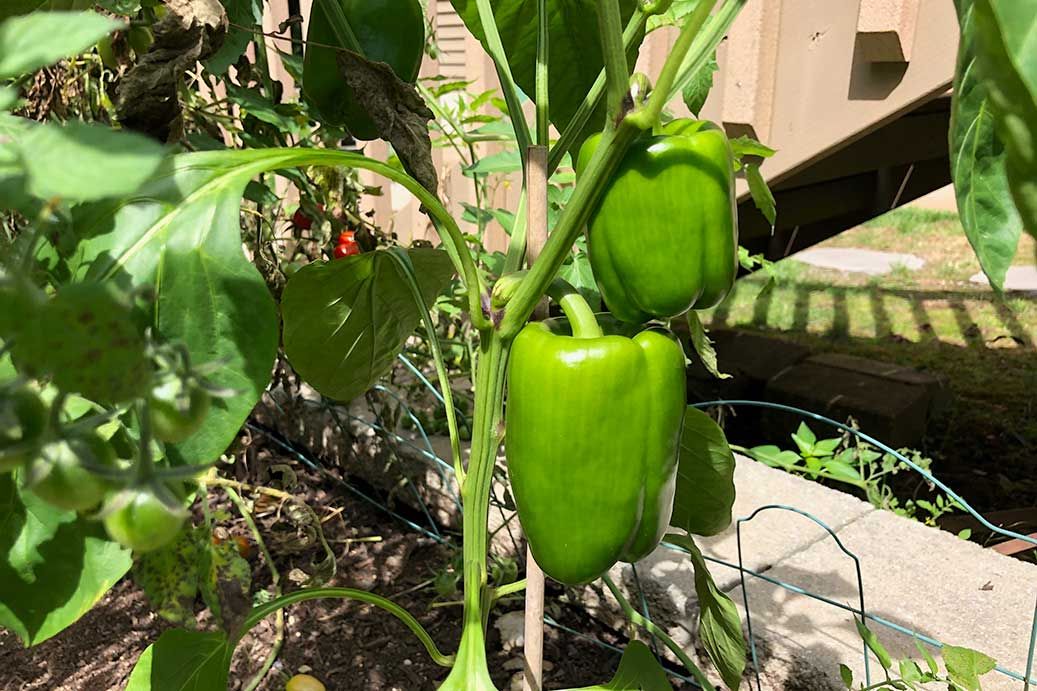
Frequently Asked Questions
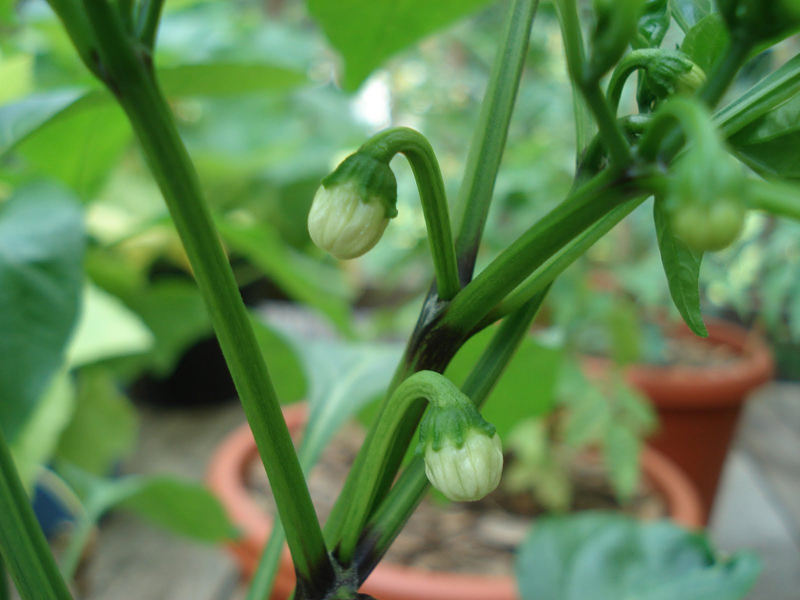
Early flower buds on a bell pepper plant. Source: Lorin NielsenQ: Are bell peppers easy to grow?
A: Yes! They can be picky about temperature but are otherwise very straightforward.
Q: How long does it take to grow bell peppers?
A: They usually take 60-100 days to reach maturity after transplanting. To beat the frost in cold climates, most gardeners start them indoors.
Q: Can you grow bell peppers from store-bought peppers?
A: Yes, as long as it’s not a hybrid with sterile seeds. Use a pepper that’s healthy and fully colored (the green bell pepper isn’t completely matured).
Q: Are there male and female peppers?
A: No. Pepper flowers contain both male and female reproductive parts, not one or the other. The differences in lobes on peppers are a result of garden conditions, not the sex of the fruit.
Cultivation of bell pepper in a summer cottage
Pepper belongs to the Solanaceae family.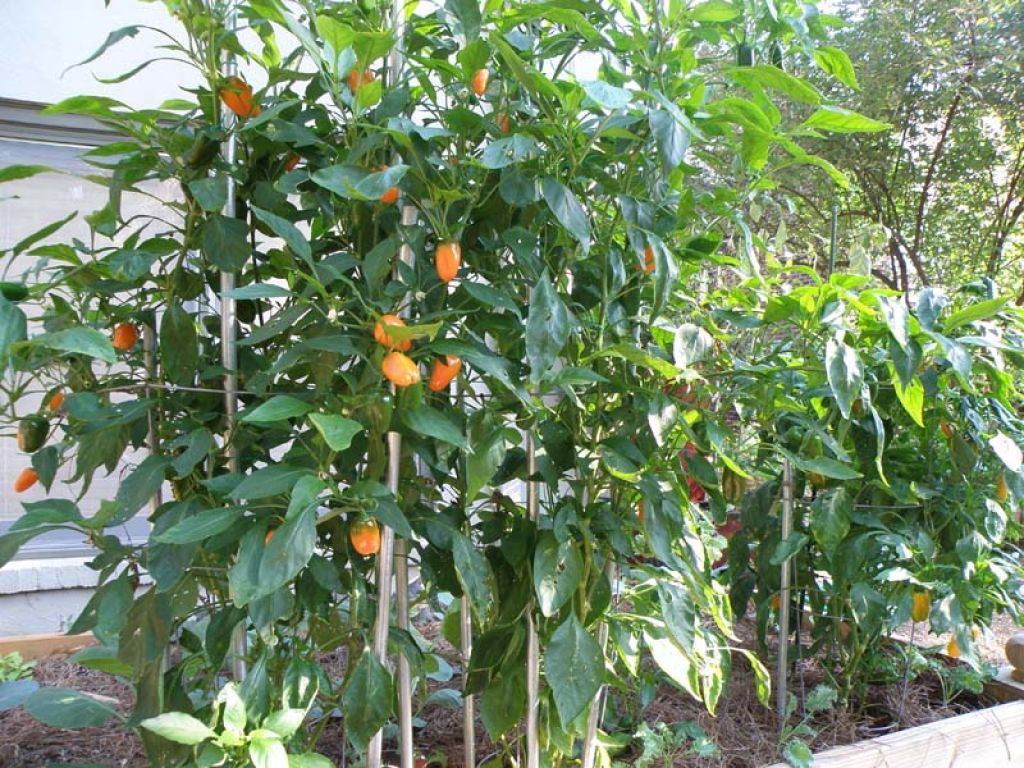 According to the period of development, peppers are early, mid-season, late-ripening varieties. The plant is thermophilic. Grows best with 12 hours of daylight. For planting, you need to use seeds two to three years ago. Pepper seeds are sown in February.
Soil
Light soils are best suited for growing sweet peppers. The soil must be prepared in advance - for a year, organic fertilizers of 5 kg / m² are applied under the predecessor, and in the fall - 50 g of potash and phosphorus fertilizers for deep digging. In the spring, 40 g of ammonium nitrate is added to the top layer of soil. Five days before planting seedlings, it is necessary to disinfect the soil by spraying with a solution of copper sulfate (1 tbsp copper sulfate / 10 liters of water). Seedlings should be planted according to the scheme 40x40 cm or 25x50 cm. Pepper does not like cold soil, so it should be planted on high beds, which must be raised by 25–55 cm.
Predecessors
The best predecessors are onions, cucumbers, pumpkin, cabbage. Bad predecessors are potatoes, peppers, tomatoes, physalis, eggplant. The optimum temperature for the growth of peppers is +20…+25 °C. If we plant pepper in open ground, then immediately after transplantation, young plants can be covered with covering material, making them a greenhouse. This will create favorable conditions for their rapid development. In the greenhouse, it is good to decompose plastic water bottles. Warming up during the day, at night they will give off heat to the pepper. This will smooth out daily temperature fluctuations. When the weather becomes stable, the covering material can be removed. Pepper is highly susceptible to pollination, so different varieties should be planted at the maximum distance from each other and, if possible, separated by planting tall tomatoes, corn, and sunflowers. Pepper care consists of timely watering, garters, weeding and top dressing.
Top dressing
Top dressing is carried out in three doses: 1st top dressing - two weeks after planting seedlings, 2nd top dressing - during the flowering period of pepper, 3rd top dressing - when fruits appear. An excellent result is given by feeding peppers with liquid organic fertilizers: chicken manure, mullein. It is necessary to alternate such dressings with foliar ones, for which mineral fertilizers are used, for example, nitrophoska 1 tbsp. l / 10 l of water; 40–60 g of superphosphate + 15–20 g of potassium chloride / 10 l of water; 150–200 g ash/10 l water. Foliar top dressing is carried out only in warm weather (1 time in two weeks).
Pinching
In hot and humid weather, it is necessary to remove the side shoots, especially the lower stepchildren. If the weather is hot, dry, the plants do not stepchild, since the leaf mass perfectly protects soil moisture from evaporation.
Experienced vegetable growers advise removing the central flower on the plant growing from the first branch, this will help increase the yield. During the growing season, the pepper must be cut several times, trying to shorten the longest shoots. Of the developing stepson shoots, four or five are left, on which the fruits will develop.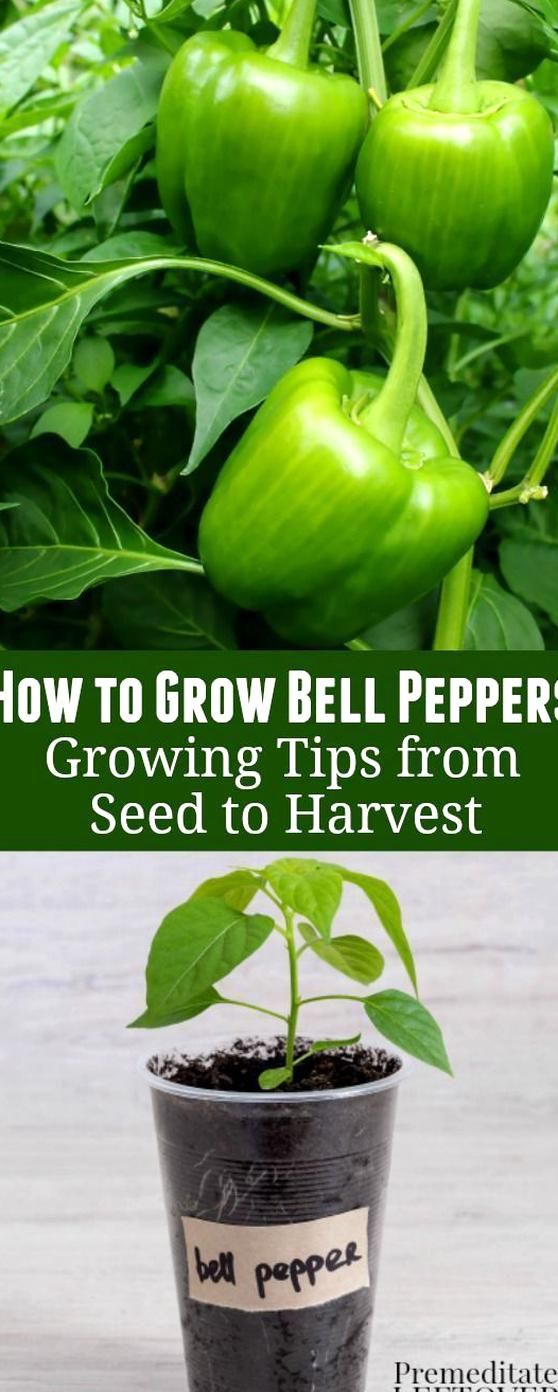 Be sure to remove all shoots below the main fork of the stem, as well as branches inside the crown. Pruning must be done every ten days and after harvesting. Simultaneously with pruning, tillage is carried out. High varieties of pepper must be tied up.
Pepper must be weeded and loosened without harming its roots. During the season, three or four such procedures are carried out, and during the second loosening, the plants need to be spudded.
In the open field, sweet peppers need to choose a sunny place and protect it from drafts and wind. In hot weather, it is shaded from direct sunlight. The soil needs to be mulched. This will keep the soil moisture at the right level and help reduce watering.
Watering
Watering should be regular. It is necessary to start watering five days after planting and more often until full rooting. Then every 10 days until harvest, more often in dry weather. During the fruiting period, watering is needed twice a week. The water should not be cold. Loosening should be carried out carefully and superficially, since the roots of the pepper are not deep. It is useful to mulch the pepper with rotted straw - a layer of about 10 cm, so that you can reduce the frequency of watering. The pepper is harvested by cutting it as it ripens. When choosing varieties for planting, you need to decide what the pepper is grown for. If you intend to use it fresh, then grow large-fruited varieties with thick pulp. For conservation, varieties with small fruits are suitable.
Protection against diseases and pests
During the growing season, pepper is affected by various diseases: late blight, gray rot, fusarium wilt, top rot, etc. Pests of vegetable crops such as whiteflies, aphids, spider mites, bears, slugs, etc. are often found on its plantings. away from plantings of other nightshade crops. To protect pepper, appropriate measures must be taken regularly. In autumn or spring, apply Trichodermin biofungicide for digging the soil.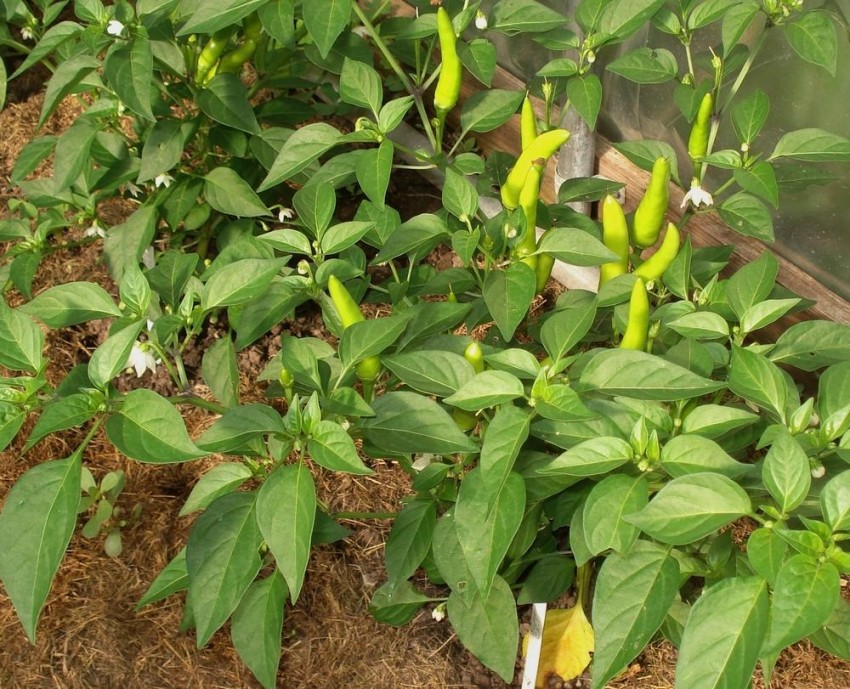 Observe the distance between plants when planting, carefully remove the plant residues of the previous crop; disinfect the structures of greenhouses and hotbeds with bleach (200 g per 10 l of water), a solution of hydrogen peroxide, caustic soda, etc. Seed dressing or soaking followed by drying with biofungicides Rizoplan, Pseudobacterin-2, Trichodermin, Fitosporin-M, Sporobacterin.
During the growing season, immediately destroy plants that have become infected with the virus. When watering, do not allow water to get on the leaves.
During the growing season, spray and water under the root against diseases with biofungicides Rizoplan, Pseudobacterin-2, Trichodermin, Fitosporin-M, Sporobacterin, etc., chemicals Raek, Rhesus, Oksihom, Proton Extra, Bordeaux mixture-F, Hom, etc. with the addition of microbiofertilizers (Azolen, UniPhos, Phosphatovit, etc.) and microfertilizers (Humate "Healthy Harvest", etc.). Against pests, use biological insecticides Biostop, Bitoxibacillin, Lepidocid, Fitoverm, chemical insecticides - Confidor Extra, Golden Iskra, Kalash, Tanrek, etc. with the addition of microbio fertilizers and microfertilizers. Carry out the release of entomophages Trichogramma, Goldeneye, Enkarsia, Gabrobrakon, etc.
The first spraying should be carried out two weeks after planting the seedlings, the next - after 10-14 days.
And four more useful tips
With insufficient pollination of flowers, irregularly shaped fruits may appear. To prevent this from happening, you need to make additional pollination. For this plant in hot, dry weather, you just need to shake.
Bitter and sweet peppers should be planted at a distance from each other. It is desirable for different beds so that mixing does not occur during the pollination period.
Pepper should be protected from the wind. To do this, you need to plant plants behind tall crops, such as legumes, beets, leeks. You can make a shelter from a film.
Do not plant pepper in dark places, otherwise the harvest will be poor, and the fruits will be small.
Guzel KHUSAINOVA, Deputy Head of the branch of the Federal State Budgetary Institution "Rosselkhozcenter" in the Republic of Tatarstan
Photo: archive SHV
outdoor care and cultivation, which variety to choose in 2022 at GoodGrunt
Contents
- How pepper grows in the field
- Rules for buying seeds
- How to plant
- What seedlings love when growing
- Outdoor care
- Best varieties of garden pepper1 906 preparations6
Bulgarian pepper is one of the most popular horticultural crops. The multi-colored fruits are widely used for culinary purposes, they are very healthy, many gardeners are crazy about their juicy and crunchy pulp. Caring for bell peppers in the garden is not difficult, but accuracy and some knowledge still do not hurt. If all conditions are met, then the fruits will grow in a normal shape and a pleasant taste, if not, there is a risk of getting crooked bitter pods.
How pepper grows in the plot
Pepper is an annual plant. Every year, the culture is grown anew from seeds. Some gardeners collect planting material from their own crops, while others buy new varieties to sample.
Important
Do not collect seeds of hybrid varieties: they are not intended for germination.
First, the seeds are sown for seedlings. This is a general rule both for the cold regions of our country and for the southern parts: pepper is very thermophilic. The sprouts are kept indoors until the weather outside allows them to be moved to open ground. Each variety has a recommended time for planting on the site, on average, three months should pass from the moment of sowing.
Young peppers grow quickly. The height of the bush is up to 1 m, it depends on the variety and climatic conditions. Tall bushes require support and garters - when planting, a wooden peg is installed near the bow.
Fruiting of peppers begins in August and lasts until the first frost. On average, up to 10-15 kg of fruits are removed from 1 m 2 .
Seed Purchase Rules
Quality planting material is the first condition for success in growing a crop. Pepper seeds need to be bought in specialized departments for the garden. In the markets, it is easy to get infected, old and hybrid seeds that will not germinate.
Four Important Rules for Purchasing Planting Material:
- Seeds must be sealed in a paper bag.
- Look for information about the manufacturer on each pack.
- The date of collection and expiration date of seeds, their number and percentage of germination must be indicated.
- Choose varieties suitable for your region.
How to plant
It is better to plan sowing seeds at the beginning of February, in warmer regions - at the end of winter. While the peppers are at room conditions, they will develop a strong root system necessary to survive in open ground conditions.
What soil to plant peppers in: garden soil mixed with sand to loosen is suitable. The mixture is fertilized with humus in equal proportions. To improve the nutritional value of the soil, ash is added to it - 1 tbsp. l. per 1 kg of mixture.
Advice
Some gardeners rely on the Lunar calendar for planting dates. The best days for pepper are the phases of the growing moon.
How to properly plant seeds for seedlings:
- First you need to prepare them - soak and disinfect. For this purpose, a 1% iodine solution is suitable. It is necessary to keep the seeds in the solution for half an hour, then they are taken out and washed with clean water.
 Another way to treat the seeds is to soak them in a strong solution of potassium permanganate for 15 minutes. Disinfection is very important, as infected peppers will quickly die before they can get past the seedling stage.
 - Now the seeds are dipped in warm (about 50 degrees) clean water and kept there for at least 5 hours. This measure will speed up their germination. You will see that the seeds swell noticeably.
- Some gardeners germinate seeds before planting in the ground. To do this, they are wrapped with wet gauze and left in a warm room for a couple of days.
- The soil in the boxes is moistened a little before planting.
- Grooves 1.5-2 cm deep are prepared for seed placement.
- An interval of 4-5 cm is observed between each seed. Pepper seedlings do not tolerate picking very well, so the distance is very important: each sprout must have enough space and nutrition until transplanting into the ground.
- Seeds are sprinkled with soil and watered with warm water.
Tip
Pepper seedlings do not need to be in common boxes. Plant each seed in an individual peat cup 8-10 cm in diameter.
What seedlings love when growing
In order to grow healthy plants, gardeners provide them with competent care already at the seedling stage.
These rules are mandatory:
- At first, the boxes are covered with polyethylene or glass to create a greenhouse effect.
- Optimal daytime temperatures - from 22 to 27 degrees Celsius. +14-16 degrees is enough at night.
- When the sprouts hatch above the surface, the film is removed. This will happen within a week or so. If the seeds were germinated in gauze, then seedlings can be expected the very next day.
- Young sprouts need a long light day - at least 14 hours. In cold regions, the problem is solved by additional lighting with a lamp.
- Seedlings are watered daily. The softer the water, the better.
 It is recommended to keep it at room temperature.
 - So that the air is not dry, it is humidified by daily spraying.
- They try not to overmoisten the soil and air: this is fraught with fungal diseases of seedlings.
- The room must be ventilated, but in such a way that cold air currents do not injure young shoots.
- When the seedlings have 3-4 leaves, the first feeding is carried out. The recommended mixture for 1 liter is 0.5 g of ammonium nitrate, 3 g of superphosphate and 1 g of potash fertilizer.
- Feed the second time a few days before transplanting the peppers into open ground. For 1 liter, the amount of potash fertilizers increases to 7 g.
Advice
Do not water the seedlings with cold water - this will make them wither. Water temperature for irrigation - about 30 degrees Celsius.
Outdoor care
Young plants should be prepared for planting outdoors. New conditions can destroy heat-loving vegetables. A few days before the operation, boxes or pots are taken out into the fresh air during the daytime. Every day the interval increases. This is how the peppers harden. It is only necessary to ensure that the temperature outside does not fall below +13 degrees.
How the transplant is done:
- The place should be well lit.
- Planting time is late spring or early summer when the soil is warm enough.
- Do not forget about the rules of crop rotation. Pepper feels comfortable in the area where onions, cucumbers, zucchini, pumpkin, carrots, cabbage used to grow. The worst predecessors are peppers, tomatoes, potatoes, eggplant.
- Another important rule is that different varieties of peppers are placed at the maximum distance from each other, as they can be pollinated.
- It is better to prepare the soil in advance - fertilize and disinfect. Ideally, the gardener should take care of the pepper for a year, introducing organic matter under the previous crop in the amount of 5 kg per 1 m 2 .
 In the fall, the site is deeply dug up and fertilized with a potassium-phosphorus mixture, where each element should be 50 g. In the spring, it will not be superfluous to add ammonium nitrate (40 g per 1 m 2 ), but only in the top layer of soil. The disinfection procedure is carried out a week before planting seedlings: 1 tbsp. l. copper sulphate, water the landing site with this solution.
 - Peppers are moved to the holes along with a clod of earth. The planting depth remains the same.
- Shrubs are placed at intervals of 0.4 m.
Advice
To maximize the yield, organize high beds for peppers - about 30-40 cm. The plant does not tolerate cold soils.
Mature plant care, all rules:
- Peppers do not require excessive moisture, one watering per week is enough. The introduction of moisture is planned for the evening hours. 1-1.5 liters of warm water is enough for one plant.
- Mulch the soil with straw to reduce the frequency of watering and keep moisture at the roots.

- General rules for top dressing: organic matter is applied no more than once a week after watering, mineral complexes - no more than 2 times a month. The first top dressing is carried out 2 weeks after transplantation. In order for the bush to actively develop, it needs nitrogen fertilizers. For 1 liter of water - 1 tsp. urea, pour 1 liter under the bush. During flowering, the emphasis is on potassium. When the first pods appear, the plant is fertilized with potassium and phosphorus, for example, for 10 liters of water - 2 tsp each. potassium salt and superphosphate.
- Obligatory procedure - pinching, or removal of side shoots. They are cut only in hot and humid weather so that the plant does not dry out.
- Periodically prune shoots, especially long ones that shade neighboring branches.
- It is recommended to pinch the first ovary so that the bush gives a more abundant harvest.
Harvesting, fruit drying, selection of cooking methods
Mature vegetables are cut from the bush with the stalk. You need to harvest when you reach the optimal size and color of the fruit, which are characteristic of the variety.
How to use pepper fruits for culinary purposes:
- Marinate in glass jars together with other vegetables or separately. Mixtures of peppers of different colors look beautiful.
- Fresh - in salads and sandwiches.
- Steamed vegetable is a great side dish.
- Chopped fruits go to soup.
- Pepper goes well with any kind of meat. Its pieces can be used to collect shish kebab.
- Peeled and seeded peppers are stuffed with various fillings: meat, rice, vegetables and mushrooms. For this purpose, only large varieties with strong walls are suitable.
- Whole fruits are blast frozen. So they are kept fresh for the winter.
- Some housewives dry fruits to make spices. First, they are washed, freed from seeds and stalks, and dried with a towel. The pulp is cut into thin strips. In hot and dry summers, peppers dry quickly outside.
 An oven or electric dryer will help speed up the process. The temperature for drying is 50 degrees. Peppers will become dry and brittle after about 12 hours.
The best varieties of garden pepper
These varieties boast unpretentiousness, record yields and very tasty, sweetish fruits. Which peppers gardeners choose annually for their plots:
- White gold - large and dense peppers up to 450 g, color - yellow. Grow well in open ground. Ideal for whole stuffing.
- Big Mama - peppers up to 200 g, bright orange. Feature of a grade — early terms of maturing. Suitable for both open area and greenhouse.
- Goldfinch is an early ripe, unpretentious and frost-resistant variety with a relief shape of fruits. Color - yellow, dark.
- Money bags are the best option for Siberian conditions. Red pepper pulp is sweet and juicy, good in all dishes.
- California miracle - medium early variety, dark green and red peppers, juicy and sweet, weight - 150 g.