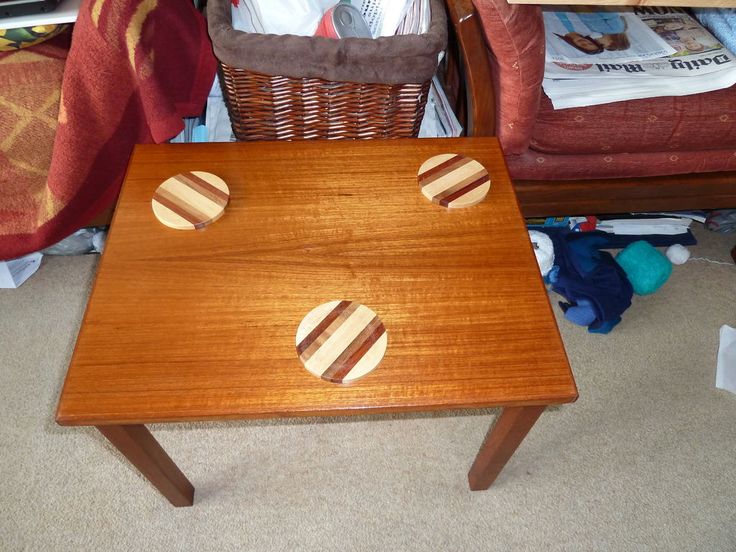
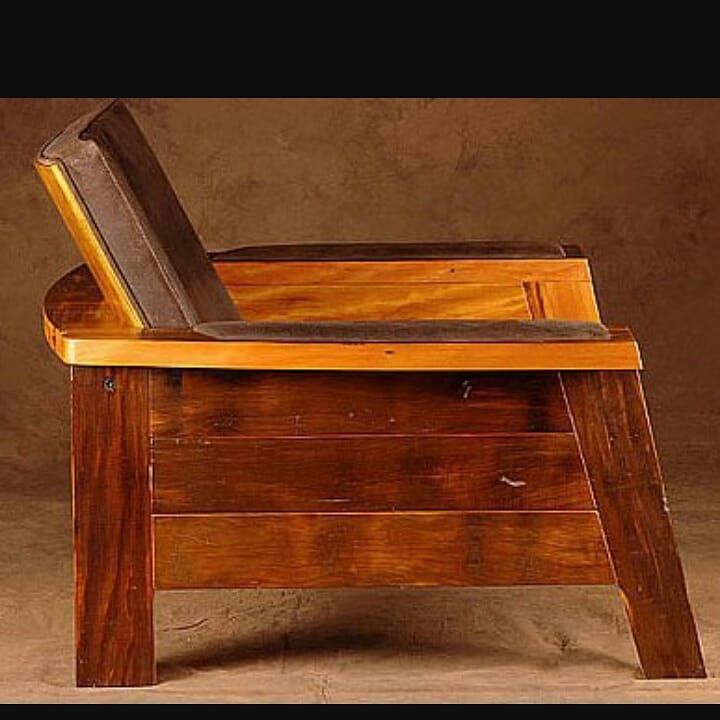
Restoring dry wood furniture
The Easy Way to Restore Old Wood Furniture | Home Guides
By SF Gate Contributor Updated May 11, 2022
When you have a piece of old wood furniture sitting in storage, or you happened across a fabulous thrift-store find that you want to restore and use, look no further than your favorite wood cleaner and furniture oil. As wood ages, its pores open and the natural oils in the wood dissipate, causing it to dry out, and rehydrating wood is easy with the right oils. Years and layers of dirt and grime add to that and can cause the furniture piece to look the worse for wear. As Residence Style suggests, you might be surprised at what a good cleaning followed by a soaking of furniture oil can do. For painted wood furniture, simply clean, sand and repaint.
Tip
Regular polishing with furniture oil keeps the items hydrated and looking good.
-
1.
Begin the restoration of your wood furniture with a thorough cleaning. Apply a bit of a wood cleaner to fine-grade steel wool.
Work with the grain, and rub the surface of the old wood furniture with the cleaner and steel wool. Do not apply too much pressure because you don't want to remove the finish or stain. Most of the time, years of built-up wax turn the surface of the wood dirty and grimy. The steel wool and wood cleaning product cut through these layers. Wipe away loosened dirt and grime with a clean cloth, and allow the piece to dry.
-
2.
Saturate a soft cloth with furniture oil. Rub with the grain to apply the furniture oil to the wood. Fold the cloth and apply oil to an edge to get in detailed crevices or embellishments on the wood. Thoroughly cover the wood furniture with oil.
-
3.
Let the piece soak overnight to hydrate the wood if it is extremely dry. After covering the entire piece with furniture oil, you can put it into operation or choose to follow the next steps, based upon the level of protection you want for the wood furniture.
-
4.
Rub the piece of wood furniture with a clean portion of steel wool in the direction of the grain. This removes any high spots as it prepares the wood for the next step.
-
5.
Add a seal coat to keep the wood hydrated, if desired. Apply tung oil – also known as China wood oil – to the surface of the wood furniture, following the patterned wood grain. Tung oil is a drying oil, as described by the Real Milk Paint Co. That means that it hardens as it dries to provide a plastic-like coat on the wood.
Tung oil is one of the most popular wood restoration products, but it's optional. You can move right to waxing and skip the tung oil if desired. Or don't wax the piece at all and use the furniture after the oil hydrates the wood.
-
6.
Polish the wood furniture with a wax, if desired – but be sure to thoroughly buff the polish after application. Make certain you work in small sections, with the grain.
Things You Will Need
Warning
Some tung oils contain additional chemicals that cause it to harden faster with exposure to air.
 If the Tung oil package says "natural" it does not contain these driers. Natural tung oil can take up to six hours to dry – but once applied, the physical work is done and the item just has to sit.
References
- Residence Style: 6 Fundamental Steps For Restoring Old Furniture
- The Real Milk Paint Co: Pure Tung Oil: A Beginner's Guide
Tips
- Tung oil offers an optional choice to seal in the oil and protect the wood. It's not a necessary step. You can move right to waxing and skip the Tung oil if desired. Or don't wax the piece at all and use the furniture after the oil hydrates the wood.
- Regular polishing with furniture oil keeps the items hydrated and looking good.
Warnings
- Some Tung oils contain additional chemicals that cause it to harden faster with exposure to air. If the Tung oil package says "natural" it does not contain these driers. Natural Tung oil can take up to six hours to dry -- but once applied, the physical work is done and the item just has to sit.

How To Rehydrate Wood Furniture – Proven Ways to Achieve It
How to rehydrate wood furniture to give a perfect look? Many homeowners prefer having wood furniture at home because of their classy and elegant look.
But maintaining their sophisticated appearance may be one of the most challenging tasks you will ever experience.
Fortunately, we have pieced up this ultimate wood furniture restoration guide to help you out!
Here, we will discuss why you should invest in a regular restoration routine, as well as some easy and handy tips to keep your household items looking good.
Any piece of furniture at home may deteriorate over time. Leather couches, marble kitchen tops, and even metal sinks are vulnerable to these changes as they age.
But compared to these things, wood furniture tends to have the worst deterioration effect.
Its rustic and classy aesthetic is sensitive to a lot of external factors. So, when the natural oils present in wood leave its pores, it will have a higher tendency to warp or dry out.
Poor ventilation, as well as accidental spillages and splashes of water, may also contribute to your furniture’s wear.
Accumulation of dirt, grease, and grime is also among the typical reasons why your household items’ appearances fade over time.
How To Rehydrate Wood FurnitureDespite its vulnerability to dirt, water, and poor ventilation, you can still rehydrate your furniture and get its fabulous look back.
But working with wood is more complicated than it seems. It involves a series of steps to ensure the quality and condition of your furniture.
How To Restore Faded Wood Furniture – StepsBefore we dive into some handy tips to maintain your wood furnishing’s rustic vibe, you need to go through five essential steps to properly restore its faded appearance.
Here is how you can do these:
Step 1: Air-DrySince wood dries out quickly when it is wet, the very first step you need to do is to allow it to air-dry.
For this method, all you need to do is wipe off spillages and splashes on the surface before it soaks into its pores.
Step 2: Use SandpaperWhen restoring your wood furniture to its original rustic look, the next step is to sand its surface using a piece of fine-grit sandpaper.
Doing this technique allows you to smoothen and fix all its imperfections, such as water rings and marks.
Materials Needed:
- Fine-grit sandpaper
- Protective clothing
- Lemon oil
How to Do It:
- Wear proper protective clothing before you proceed to the next steps. Ensure that you have a mask and safety glasses.
- Fold the sandpaper.
- Apply a few drops of lemon oil to the sandpaper.
- Sand your furniture back and forth.
- Vacuum the dust and wipe the surface clean using a dampened towel.
- Repeat Steps 1 to 5 until the surface is smooth and blemish-free.

Even though you are using a piece of fine-grit sandpaper, there is still a possibility that you might destroy your wood furnishing’s original finish.
Thus, we highly suggest applying lemon oil while rubbing the sandpaper back and forth on your furniture.
Remember that taking this measure removes all the dead layers and dust and rejuvenates the surface.
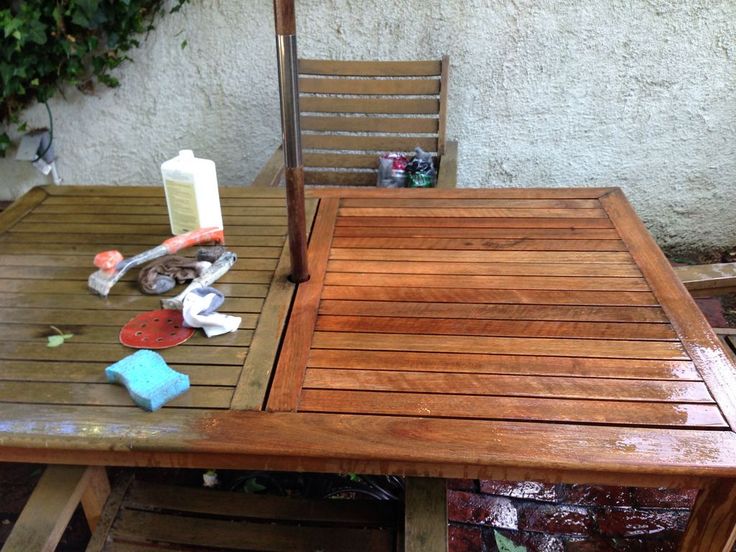
Step 3: Apply Furniture OilOnce you have smoothened and removed the damages and marks on your furniture, the next step you need to do is to apply furniture oil.
Although there are tons of options to choose from in the market, we highly suggest using boiled linseed oil or tung oil.
Not only will this give a natural touch to your wood furnishing, but it will also smoothen out its surface.
Materials Needed:
- Furniture oil
- Gloves
- Two pieces of soft cloth
How to Do It:
- Wear your gloves properly, and then apply the furniture oil on the surface of your furniture.
- Rub the oil back and forth and along the grains to ensure that the whole area has oil on it.
- Allow the oil to dry completely for at least 20 minutes.
- Rub the surface back and forth again, and then remove the excess oil using another soft cloth.
- Allow the surface to air-dry for around three days.
- Afterward, vacuum any accumulated dust and then apply the third coat of oil on the wood’s surface.
- Rub the area back and forth again and wait until the oil dries out for another 20 minutes.
- Wipe any excess oil and then place the used pieces of cloth into a container filled with water.
Remember to follow all the prescribed waiting time to ensure that the oil soaks into the wood’s pores.
We also highly recommend placing the used rags into a container filled with water to prevent them from catching fire.
Step 4: Apply SealantApplying a sealant to your furnishing’s surface is a typical and excellent way to bring back its natural glow.
But aside from this, it also has protective properties from water splashes and spillages to some degree.
Materials Needed:
- Sealant
- Gloves
- Brush
For this we will need to choose the perfect sealants. But since there are tons of sealants available in the market, we first need to choose between oil- and water-based adhesives.
Below is a brief guide about the differences between the two types:
Water-Based SealantsWater-based sealants have a mild odor and low toxicity. They also dry very quickly and preserve your furniture’s natural look over time. However, they only offer decent protection compared to oil-based sealants.
Oil-Based SealantsOn the other hand, oil-based sealants are more affordable than water-based adhesives. They also offer more protection and durability but emit a more pungent odor and have a more prolonged drying and curing period.
How to Do It:
- Before you proceed to the other steps, make sure to have enough ventilation in your room.
- Vacuum any dust on the surface of your furniture.
- Pour the sealant into a container, and then dip a brush into it. Make sure not to go that deep.
- Rub the brush gently onto the surface until you have sealed every area.
- Allow your furniture to air-dry, depending on the type of sealant that you used. This process can take around 6 hours for water-based adhesives until 48 hours for oil-based sealants.
Having enough ventilation in your room while doing this step is vital because both water- and oil-based sealants are toxic.
If you do not keep your windows open, you may experience headaches during or after the entire procedure.
We also highly suggest placing a piece of paper or unused cloth under your furniture while applying the sealant to protect your floor.
Step 5: Apply Paste WaxThe last step when restoring your wood furniture to its original look is applying paste wax.
This technique rejuvenates dull-looking things and allows antique pieces of furnishing to maintain their natural tone.
Materials Needed:
- Paste wax
- Gloves
- Two pieces of soft cloth
How to Do It:
- Wear your gloves properly, and then apply the paste wax on the surface of your furniture.
- Move the soft cloth in a circular motion around the area.
- Allow the oil to dry completely for at least 5 minutes.
- Wipe the surface clean to remove the excess wax using another soft cloth.
Make sure to apply the paste wax in a circular motion for it to soak into the wood. Otherwise, you will have a challenging time getting that protective seal on the surface.
How To Restore Weathered Wood With These Handy TipsAside from restoring your wood furniture to its rustic and classy look, there are several techniques you can try out to prevent it from wearing out quickly.
Let us take a look at these useful tips below:
Tip 1: Give It A Soft GlowThe best way to give your wood furniture a soft glow is by applying natural ingredients. For this handy tip, we highly suggest using coconut oil because of its affordability and unique properties.
Tip 2: Make It Look DarkerNext on our list is using vinegar to make your wood furniture a darker yet more natural tone. We know there are tons of vinegar available in the market, but using apple cider or balsamic will do the trick.
Tip 3: Repair DamagesYou can also use a mixture of ¾ cups of canola oil and ¼ cup of apple cider or white vinegar to repair damages on the surface. You can also use wood fillers for more severe scratches.
How to Hydrate Wood Furniture: Wrapping It Up!Rehydrating your wood furniture and giving it its original look back may seem complicated at first.
It requires several steps and materials, but once you get the hang of it, you can preserve its life longer and have it complement your room’s aesthetic.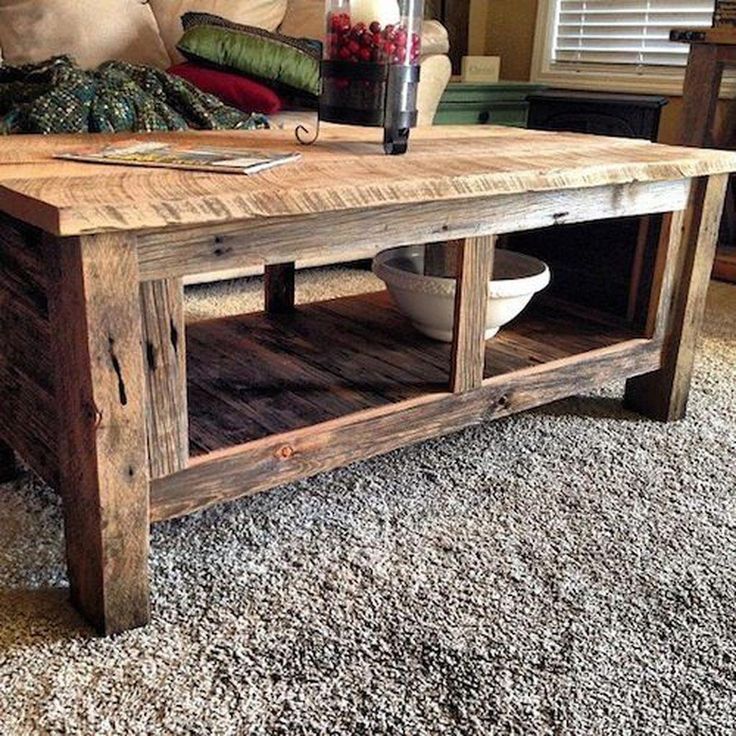
Read Next: Learn how to Clean Grime from Wood Furniture in Easy steps.
- Author
- Recent Posts
Kristina Davis
With over 5 years of experience in Furniture Industry and Home Decors, she has immense knowledge & Expertise. Her guides and reviews are well appreciated by Industry experts.
Latest posts by Kristina Davis (see all)
Do-it-yourself restoration of old wooden furniture
- Home»
- Do-it-yourself wooden furniture restoration
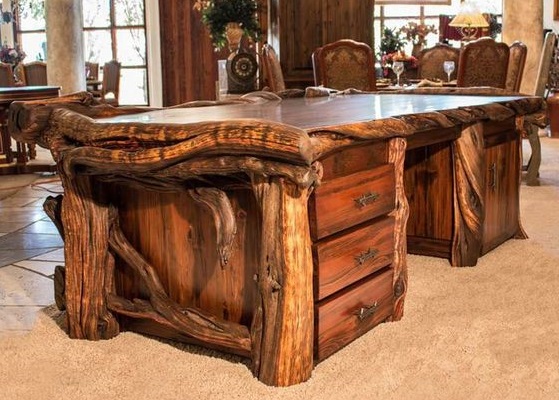
Furniture restoration is a fascinating and useful process, it allows you to get beautiful interior items from antiquity. But in order to do all the work correctly, you should familiarize yourself with the procedure for its implementation and possible nuances.
Pros and cons of do-it-yourself furniture restoration
What is the purpose of restoring old furniture:
- Return functionality to interior items.
 This is necessary when there is a small breakdown of the frame, armrests of the sofa or mechanisms. Throwing away such a thing is a pity, simple manipulations will help restore lost functions.
 - Appearance improvement. Replacing the upholstery or eliminating external defects returns the aesthetics of the furniture.
- Change in appearance. When changing the style of the interior in the apartment, the furniture must also be replaced so that it matches the updated interior in design.
When planning to repair furniture with your own hands, it is worth preparing for possible difficulties. First of all, you need special equipment and materials. They will need to be selected taking into account the type of subject and work. Other disadvantages of self-restoration include:
- Not all damage can be repaired by yourself. Complex mechanisms, carved elements require a professional approach.
- A lot of time and effort will have to be spent on a complete restoration.
- Unpleasant smell of paints and varnishes and dust in the apartment is provided, so it is better to carry out work on the street or in non-residential premises.
- Noise may not please your family and neighbors.
Need to prepare the room - remove other furniture, close the floors and take care of the walls. Most paints and washes leave stains that cannot be removed.
When you restore old furniture yourself, you save money on the services of professional restorers. In the process of work, you will gain experience and knowledge that you can apply to restore other interior items.
Methods for quick and easy furniture restoration
If you want to quickly restore the aesthetics of an object, you can use one of several options:
- Just paint the furniture. If paint has peeled off or peeled off on wooden objects, cracks have appeared, then you can simply apply a new coating, after removing the dirt with any detergent.
 Before applying paint, clean the surface with sandpaper, and then prime for better adhesion. The paint is applied in 2-3 layers. This is a fairly budgetary way to improve the look of old furniture.
Paint in a dry brush style. This method of restoration is suitable for items that want to preserve the effect of antiquity. To do this, the surface is first sanded and then the paint is applied in a dry-brush style, leaving a visible base. Please note that this method is difficult to implement, it may not work the first time, it is recommended to try it on an unnecessary board first.
- Apply ornament. Through the drawings it is difficult to see cracks, chips and places with peeling paint. The ornament is applied to stencils, but can be painted with a regular brush if you have artistic skills.
- Leave everything as it is. Not all furniture needs restoration. Take a closer look, maybe your chest of drawers goes well with the interior of the bedroom.
 Vintage household items are now in great demand, they go well with the design, made in a classic style.
The above methods are suitable provided that the functionality of the item is fully preserved.
Instructions for the restoration of wooden furniture
Do-it-yourself repair begins with the preparation of tools and materials. You will need:
- spatula;
- brushes;
- screwdriver, screwdriver;
- flushing composition;
- paints, varnishes.
This is sufficient for solid wood furniture, if no surface decoration is required.
Disassembly
Furniture preparation begins with disassembly. If possible, remove the doors, remove the fittings. Tables and chairs do not require disassembly, and it is better to disassemble cabinets and chests of drawers to the maximum in order to get to all corners.
Inspect the hardware - if it is in good condition, keep it. Worn parts are best thrown away.
Cleaning
First, remove the old paintwork. This can be done mechanically with a spatula, sandpaper or grinder. Old paint is also easily removed with special cleaning compounds. When choosing a tool, be sure to consider the material of the surface to be treated.
The remover is applied with a thin wide brush in 1-2 coats. Exposure time - from 30 minutes to 3 hours (depending on paint and composition). After the end of the exposure time, the material is removed with a spatula, then polished.
Please note that you need to work with the remover in a well-ventilated area, after putting on a respirator and thick rubber gloves.
Priming and puttying
Priming and puttying are important steps, without which the new paintwork will quickly deteriorate, become covered with cracks and chips. Carried out in several stages:
- The surface is degreased with any alcohol-containing composition or vodka. Do not use detergents - they leave stains.
- Apply a thin coat of primer. You can use a spatula or a brush. After the first layer has dried, the second one is applied. Exposure time - from 2 hours (indicated on the package).
The third step is to apply a putty designed for wood surfaces. For processing, use a rubber spatula. Apply putty carefully, filling cracks, chips. After drying, clean with soft sandpaper. After that, apply a second layer of putty, clean again. The number of layers of material depends on the condition of the surface - the more irregularities on it, the longer it will take to putty.
After finishing work, wipe the surface with a soft cloth to remove dust and putty residue.
Staining
Any paint that can be used on wood is suitable for staining. Many prefer the old shade to completely restore the original look of the furniture.
Use wood stain to preserve the texture of the wood. It emphasizes the original pattern of wood, protects the surface from fading in the sun, and has high vapor permeability. The stain does not leave smudges, it is easily applied with a brush or roller.
You can choose from a quick-drying water-based emulsion paint or based on polymer resins. They do not emit toxins, suitable for painting items in the children's room. Finding the right shade is easy when using color.
Painting is carried out on a previously primed surface. The paint is applied after the primer has dried.
Apply with a small roller or brush with dense bristles, or with a spray gun. The main thing is to handle all corners with high quality in order to capture the entire product.
After the paint has dried, preferably the next day, a second coat is applied or the surface is varnished.
Restoration of the old object is being completed by assembly. Install new fittings, put the hinges and locks back in place. Remember that fittings affect the overall impression of the work done, so you can’t save on it.
Restoration in the style of decoupage
Decoupage is one of the techniques for restoring interior items.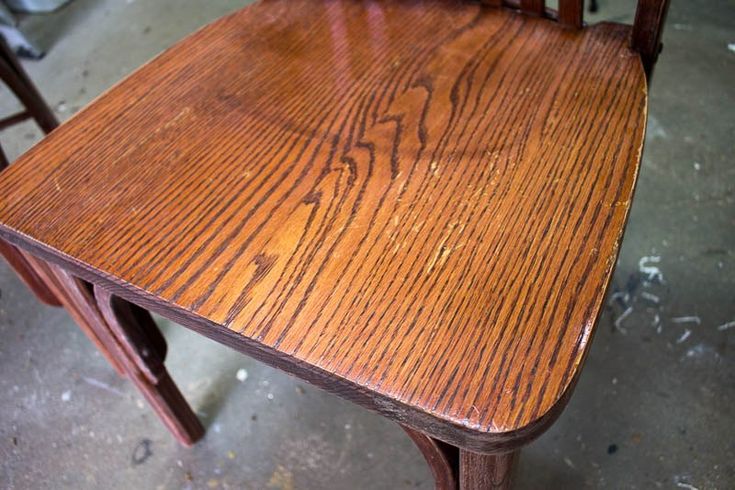 To use it, you will need drawings from paper, lace, fabric. You can take clippings from newspapers and magazines, find old notebooks, or print them yourself. There are quite a few options, the main thing is that the finished design matches the overall style of the interior.
How to work with decoupage technique:
- The surface is cleaned of old paint, degreased, primed.
- You can cover the furniture with a layer of paint or varnish as a base, you can glue drawings on a cleaned surface or do not remove the old paint at all.
- Apply PVA glue to the wrong side of the picture, leave to soak.
- Treat the surface with glue.
- Apply pattern, smooth with roller or brush.
- The final step is the application of clear varnish after the adhesive has dried.
Craquelure on wood
Craquelure is a surface aging technique. It is carried out using a special varnish, on which large cracks appear.
Work with the craquelure technique is required in the following order:
- A layer of base paint is applied to the surface cleaned from the old coating and degreased.

- After the base coat has dried, a craquelure varnish is applied.
- After the lacquer has dried (about 40 minutes), acrylic paint intended for craquelure is applied. It should be applied in the direction of the cracks in a thin layer.
- After the paint has dried (after 24 hours), the surface is varnished.
You can improve the condition of furniture using the craquelure technique with your own hands. The most important thing is to choose the right materials and withstand the coating for the right time.
Veneering
Another option for repairing a wooden product is veneering. The essence of the technique is to glue a decorative layer called veneer. It allows you to update furniture, hide minor flaws and protect wood from moisture.
How the technology is implemented:
- Removal of the old coating.
- Puttying to repair deep cracks and chips.
- Processing with PVA glue.
- Laying veneer sheet.
- Ironing veneer on medium heat. Iron should be through a paper sheet.
Self-repair will save money and allow you to realize any ideas. But if the piece of furniture belongs to antiques, has a complex structure, or serious damage, then it is better to turn to professionals.
Workshop "Klebor" offers restoration of furniture in any condition. We work with kitchen sets, built-in wardrobes, tables, chairs, sideboards and other items. Before contacting, check out the examples of completed orders to make sure of the professionalism of the craftsmen.
How to restore old furniture at home, tips - Do-it-yourself furniture restoration
Restoring old furniture is not a cheap service. Is it possible to save money and do everything yourself at home? Or is it not worth trying? Looking ahead, I’ll say that doing furniture restoration with your own hands is difficult, but real. Subject to a number of conditions.
David Bader Photography
First, let's figure out whether you need to restore the furniture yourself or is it better to entrust this work to professionals? Agree, there is no point in experimenting with the "home" restoration of antiques.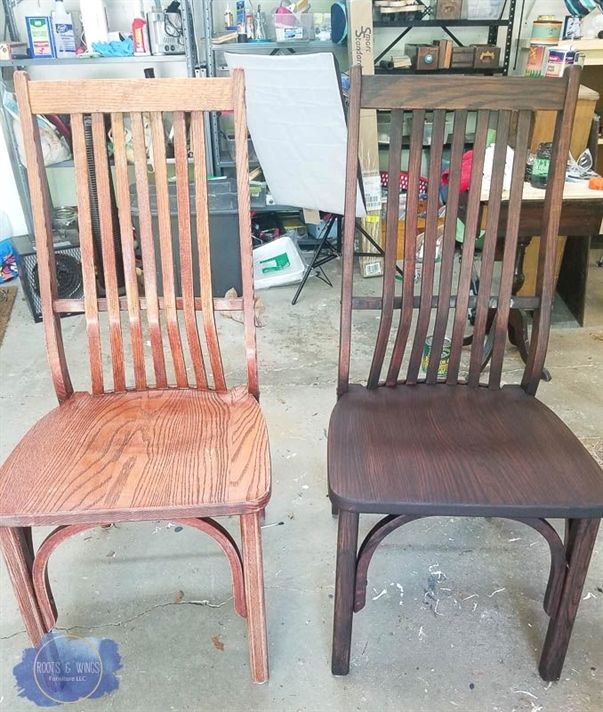 Only professionals will be able to recreate the original shapes and finishes. At home, you can not "guess".
+ Save time and effort. It only seems like one-two-ready - the craftsmen with your chest of drawers will have to tinker with for several weeks. Imagine that you need to do this in the evenings after work and on weekends: it may happen that work will be a burden.
– Complex logistics. Cabinets and sideboards will most likely have to be dismantled in order to be taken out of the apartment for delivery to the workshop. As a result, additional expenses for delivery to the restoration workshop.
– If there is no elevator in the house, you will have to call movers and hire a Gazelle. Of course, all these efforts can be taken over by the workshop staff, but additional services will be included in the cost of restoration work.
Stahl Antiques & Antique Furniture Restorations
Location is the deciding factor
When renovating old wooden furniture, dust and odors are almost inevitable.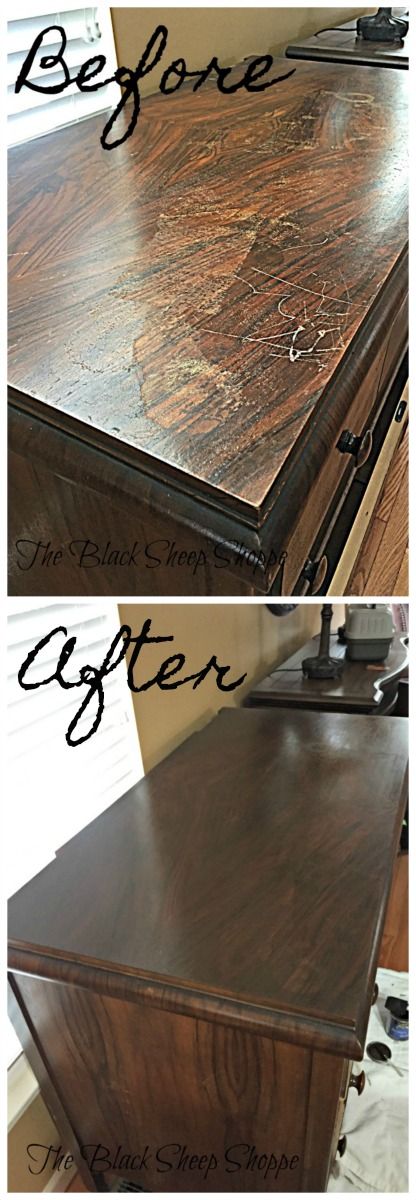 For example, you can remove the old paintwork either by grinding (dust) or by chemical compounds (smell). Many protective and covering compositions for wood also have a pungent odor. If possible, move furniture restoration work to non-residential premises. It can be a garage, utility room, loggia or balcony.
If you live in a private house, you can also work outside in good weather. But in this case, pay attention to the conditions for using the paint and varnish compositions specified in the instructions: minimum and maximum temperatures, air humidity and reaction to direct sunlight.
Tip: if the only possible option is a room in an apartment, cover all other furniture with a protective film, remove textiles and carpets for a while. Also cover the floor with a film to avoid stains from chemical compounds.
Ian Wall Furniture Restoration
Tools and Materials Needed
Depends on the size of the piece of furniture and your understanding of comfort.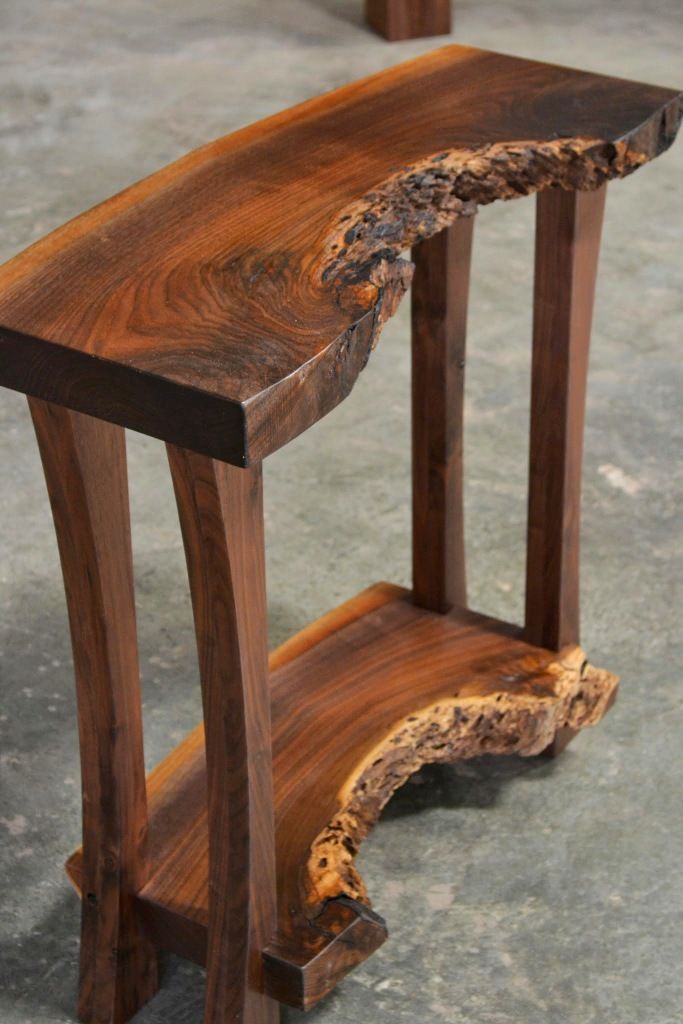 If the table is small, you can get by with only a hand tool. If you don't want dust when sanding, washes can be used. Do not tolerate strong odors - use water-based varnishes and paints to cover. The list of materials and tools in each case will be individual.
Ian Wall Furniture Restoration
You will need different grits of sandpaper, a spatula, brushes and rollers. But, in order to properly sand even a small coffee table or stool by hand, it will take several hours. Professionals use an eccentric (orbital) grinder for these purposes, which is not available in every household. In addition, you may need a screwdriver, electric jigsaw, building hair dryer. It is more convenient to remove dust immediately - with a construction vacuum cleaner.
Tip: is only worth buying a power tool if you have a lot of old wooden furniture that needs restoration or if you plan to do it regularly. At the same time, all these tools are universal and are often used in other repair work.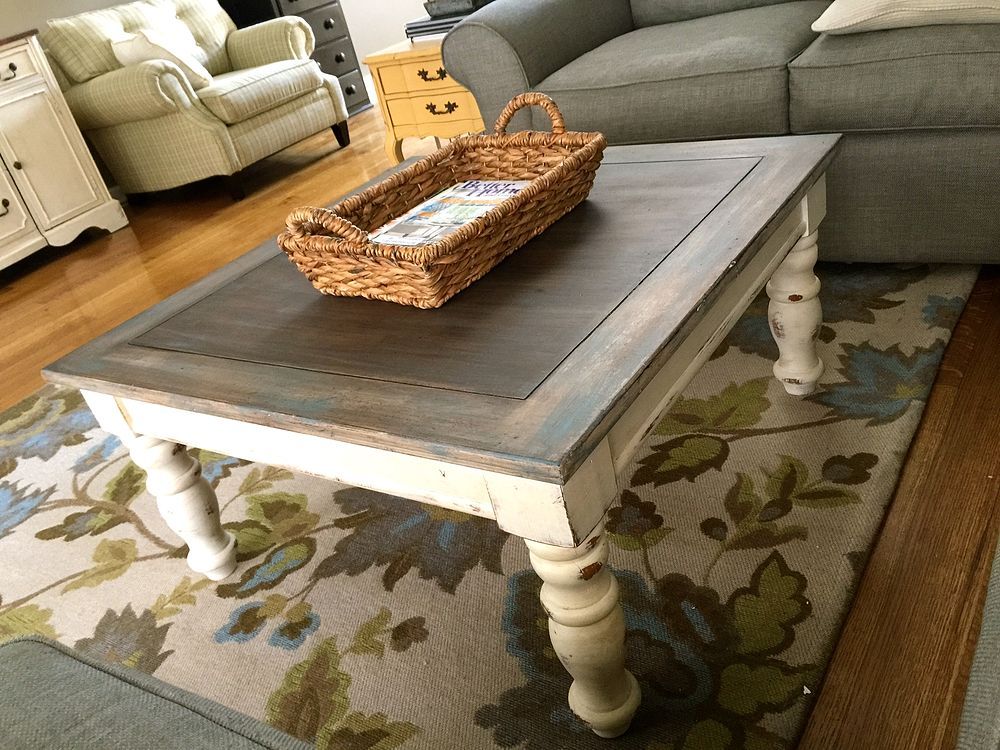 There is a construction or major renovation ahead - purchase it, it will come in handy on the farm. If your plans include the restoration of only one piece of furniture, ask your friends for the tools for a while, or rent them. With a good tool, things will go faster, and the result will look neater and more professional.
Cardona Antique Furniture Restoration Co.
Where to get materials for restoration
For restoration work you may need: paint removers, compounds for filling chips and scratches (wood filler, furniture wax, furniture sealant), paint and varnish materials (paint, enamel, impregnation, oil). Finishing is easy to buy at any building materials store, but I advise you to order goods exclusively for furniture restoration (furniture waxes, pencils, sealants, furniture edges) in online stores that deliver / send goods throughout the country.
Advice: look for ads from private individuals on websites. It is not uncommon for people to sell surplus material, or the color doesn't fit, and they list the items on the internet flea markets. On the Internet, you can also find recipes for making some materials for restoration at home.
DOXA Home
How long will it take
Furniture restoration at home is not a quick process. Everything about everything can take from a few days to a whole month. And the point is not only in painstaking work, but also in the peculiarities of the use of paints and varnishes. Putties, primers, paints, varnishes require a certain drying time before applying the next layer: from several hours to a whole day.
If you don't have much free time, but you take the process seriously, carefully plan the stages of work. Often the delay occurs due to the fact that there is no certain product or tool - you will not run around the shops before each next stage.
Tip: For , to speed up the process, choose products that dry quickly. For example, water-based paints and varnishes dry faster than alkyd-based counterparts. One of the "fastest" coatings is Danish oil. It does not require pre-priming and interlayer grinding at all, and the second layer can be applied after 30 minutes.
Stahl Antiques & Antique Furniture Restorations
Restoration steps
hard-to-reach places. Often it is enough just to remove the fittings and hinged doors, remove the drawers. Whether to disassemble the frame completely - look at the situation. Glued elements such as a box in the photo are definitely better left assembled.
Tip: Before starting work, take a picture of the object and the attachment points of its elements. Arrange the fasteners in small bags and sign what elements it is intended for. This will make it easier for you to assemble the parts after restoration.
Aleksey Bereznyak
2. Removing old paintwork
There are three ways to remove old paint, varnish or enamel: sandpaper, paint remover or using a blow dryer. Choose the method that is most convenient for you and best suited for your piece of furniture. You can combine methods: for example, peel off a layer of paint heated by a hairdryer with a spatula on even surfaces and sand it with sandpaper on uneven, rounded areas.
Important: Be sure to use personal protective equipment - work with gloves and a respirator. In the case of using a building hair dryer, be especially careful not to burn the wood under the paintwork.
Cardona Antique Furniture Restoration Co.
3. We eliminate external damage
Scratches, cracks and chips on furniture are masked with the help of special means. Volumetric damage can be puttied with putty on wood, applying it in several layers. Cracks and scratches - fill with furniture wax.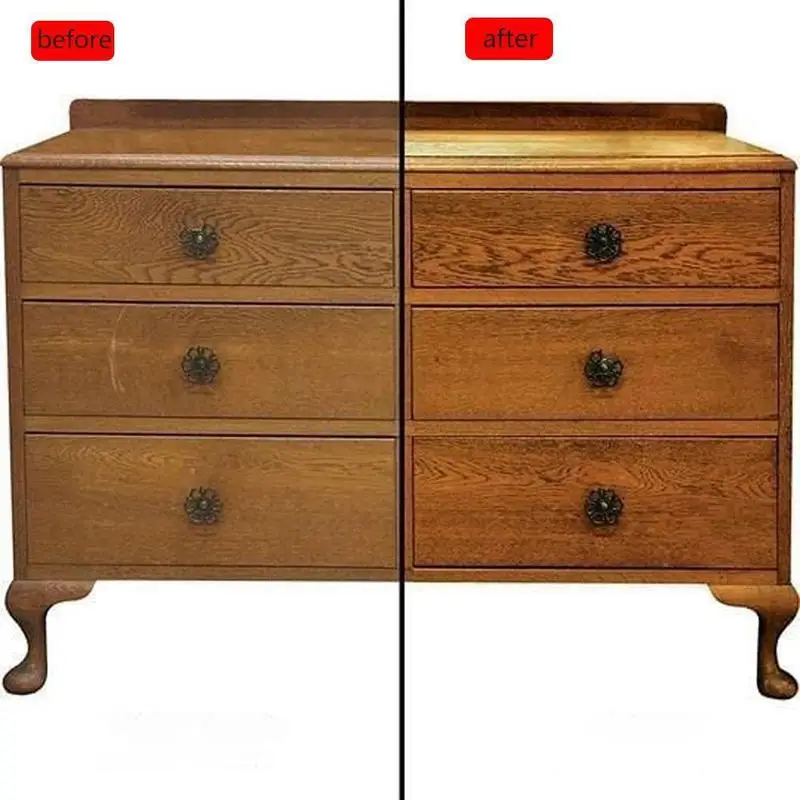
To work with wax, a wax melter or a portable gas burner is used, but wax can be melted without special devices, for example, on a stove or a building dryer. Small scratches are well masked by a furniture touch. To ensure that the restored areas are not visible, the color of the materials used should be close to the shade of the wood from which the furniture is made. The texture of wood can be artificially recreated using a furniture marker.
SashaDOIT
4. Getting ready for the final coat
Before applying paintwork, the surface of the product should be carefully leveled, excess waxes and putties should be removed. To do this, consistently use fine-grained sandpaper (P180-P240). Wipe off the dust build-up after sanding with a damp cloth and allow the surface to dry before the next step. Some paints and varnishes require a coat of primer before painting.
Kelly Nelson Designs
5. Applying the topcoat
What will be the new look of your chest of drawers (stool, coffee table, etc.) depends on the selected paint material. If you want to preserve the natural look of wood, use transparent varnishes and oils for wood. Give preference to water-based varnishes, as alkyd and polyurethane tend to give the wood a yellow tint. If you want to slightly tint the tree, give it a shade of noble wood species, choose the so-called glazing compositions: colored varnishes, stains, oils and waxes.
If you see your chest of drawers in color, use enamel or furniture paint. On sale you will find both colored paints and white bases that can be tinted in any chosen shade. Please note that many varnishes and stains require intermediate sanding, because after applying the first layer, the pile of wood is lifted.
Tip: With , start applying the topcoat on the interior of the furniture, backs, sides, and finish on the front. It is difficult for beginners to avoid small smudges of paint and varnish, but they want the front side to look perfect.
Ekaterina Lieberman
6. Installing fittings
After restoration, you can return the old fittings to their place or replace them with new ones. It all depends on the condition of the details and your desire: either to preserve the authentic appearance of the furniture, or simply to “refresh” it.
As you can see, all furniture restoration problems can be solved, and everyone can master the process. But even if the case still seems long, complicated or costly, do not rush to abandon the idea. It can be made even easier.
RELATED…
Good question: What to do with old furniture?
SashaDOIT
Ideas for a "quick" furniture restoration:
Easy to paint
You don't even have to remove the old coating - remove dirt from the furniture (use any means for "kitchen" cleaning), lightly sand, apply a layer of adhesive primer and two or three coats of paint. It may not come out as perfect as with a full restoration - be prepared.
RELATED…
How to paint a wooden chest of drawers with a gradient - step by step instructions
Daria Nazarenko
Do it casually
Of course, not every style will tolerate this, but sometimes such “antics” are welcome. Especially if you are repainting brand new furniture without damage.
RELATED…
28 ideas for those who want to redo an IKEA chest of drawers
perfectly imperfect
Coat with “white” varnish
This is usually done with dark wood - after sanding it is processed using the dry brush technique - the surface is not completely painted over, but deliberately leaves traces and a visible base.
Important: may not turn out as perfect as in the case of factory "bleached oak". Might have to be redone.
Daria Trebol
In the photo: the kitchen doors are finished using decoupage technique
Paste using decoupage technique
Choose images that will blend well with each other and fit your interior. It can be wallpaper, geographical maps, old newspapers, decoupage napkins, or even inscriptions, as in the photo. Carefully stick on the surface and secure with clear varnish to make the furniture resistant to moisture.
Janna Makaeva/Cutting Edge Stencils
Apply an ornament
In the diversity of patterns and ornaments it is difficult to see scratches, roughness and irregularities. Using this technique, you can effortlessly turn even the most ordinary piece of furniture into the central art object of your home. The easiest way is to order a stencil and apply a drawing through it - then it is not necessary to have artistic skills.