Restoring cast iron garden furniture
How to restore cast iron – make repairs and remove rust
(Image credit: Kasia Fiszer)
Learning how to restore cast iron is essential to give old items a new lease of life, and reduce the need for wasteful replacement. A hardwearing, high-performance metal, cast iron is hugely versatile and is used for everything from skillets and casseroles to garden furniture, gates and balustrades.
See: How to clean cast iron – remove rust, reseason and refinish
Over time, cast iron items will develop surface imperfections that add to their character, and make them look particularly in-keeping with a period home. When looked after, cast iron can last for centuries, but poorly maintained pieces will begin to rust and deteriorate.
'Gates, railings and other items made from cast iron are as much a part of our architectural heritage as the stone and brick of the buildings with which they’re associated,' says Roger Hunt, author of Old House Handbook . 'Although seemingly robust, these metal adornments can suffer corrosion and ultimately failure through lack of maintenance.'
Are you planning to restore cast iron or wrought iron?
(Image credit: Susie Watson)
There is often confusion about whether a metal item is made from cast iron, wrought iron or steel. So, firstly you should check that you are indeed attempting to restore cast iron – although the same restoration methods can often be used.
If you are restoring a heavy skillet or casserole, then it will almost certainly be cast iron – however, items such as furniture or architectural ironwork are harder to identify.
'Wrought iron is a low-carbon malleable alloy that has to be worked by hand or through mechanical processes. It was traditionally used for architectural elements, such as grates and balconies – even the Eiffel tower is made of wrought iron. It is a term that is also erroneously applied to the working of modern steel, a more refined version of wrought iron,' explains Antiques Roadshow expert Marc Allum.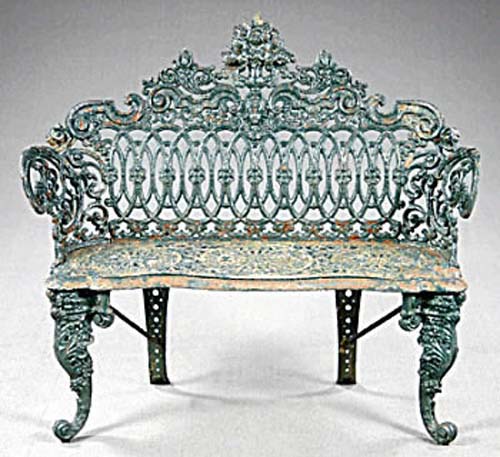
'People become confused due to the many objects of a similar nature being made using either a process or a mixture of the two. Hand-wrought construction is simply completely different to cast-iron objects, which are made in a mould.'
'Castings were frequently joined together by nuts and bolts or by interlocking the parts,' adds Douglas Kent, technical and research director at the Society for the Protection of Ancient Buildings . 'Cast iron is brittle and weaker in tension than wrought iron but is quicker and easier to make. Components have a deeper profile and more repetitive appearance.'
Cast iron is ideal for mass-produced items, such as rainwater goods, fireplaces and door knockers. Unlike wrought iron, cast iron has never entirely been superseded by steel.
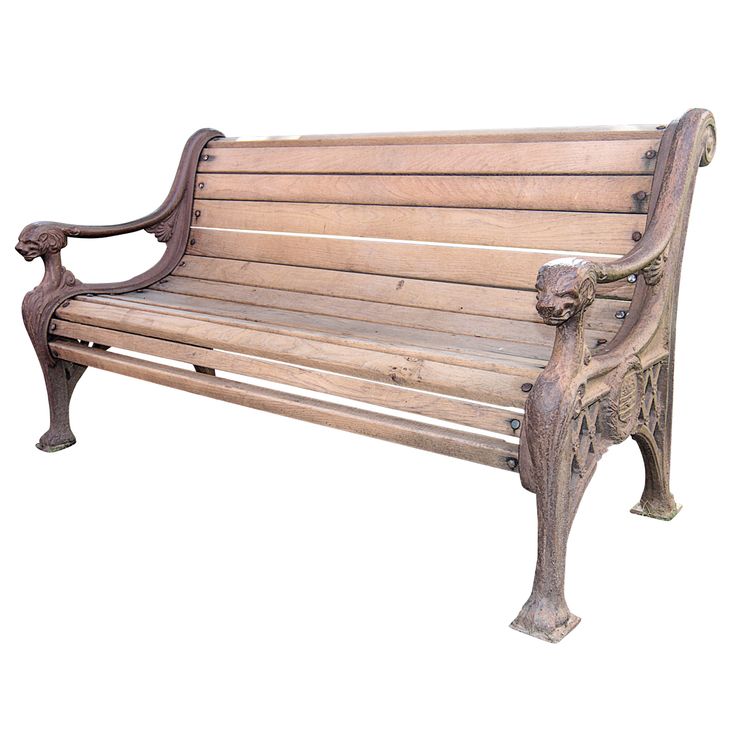
How do you restore old cast iron?
(Image credit: Robert Sanderson)
When deciding how to restore old cast iron, you need to consider the item's value, purpose and finish – is it painted or exposed?
You must also assess the extent of the damage. Flaking paint or rusty patches on cast iron that's otherwise in good condition, can readily be restored. Repairing broken or missing elements, however, may not be possible.
'Another potential problem is the fracturing of cast iron because of impact or casting flaws,' says Kent.
‘Cast iron can be difficult and uneconomic to repair, so if a decorative section is completely missing, there is little hope of repairing it. A proficient welder could, however, restore a detached section or a concealed structural element,’ says Allum.
Kent advises that the best way to repair cast iron is through cold stitching. 'Specialist firms can take moulds from cleaned originals and recast components.' This works particularly well for items with repeat sections, such as railings or balustrades.
Unless repairs are required, you can usually restore cast iron through removing paint, sanding and refinishing, but certain items require more thought than others.
If the item is valuable or an important feature of your home that requires repairs, then it is best to hire an expert to restore cast iron.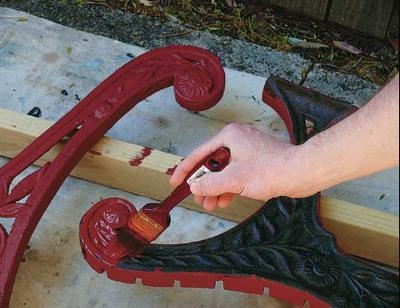
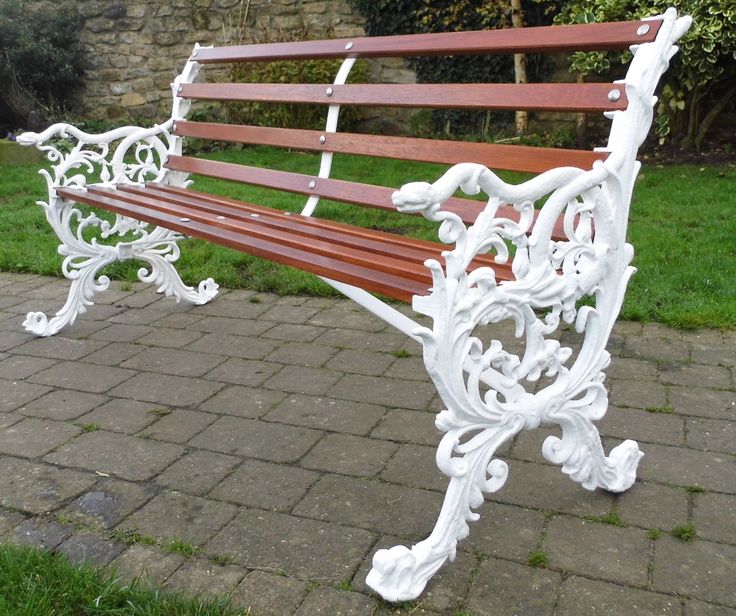
Restoring a cast iron fireplace
(Image credit: Kasia Fiszer)
Whether you have a tired cast iron fireplace in situ, or are planning to fit an antique design, it will likely need some restoration work.
‘The phenomenal demand for fireplaces in the Victorian period led to the production of many millions; hence there are plenty to choose from in salvage yards and with dealers and auctioneers. Some can be purchased very cheaply; however, damage is a crucial factor,’ says Allum.
Cast iron fireplaces can either be finished with paint, or coated with protective iron paste or black grate polish – which gives them that iconic black finish.
If you are restoring a fireplace that has damaged or flaking paintwork, then this will need to be removed with paint stripper. This is unpleasant work, and you need to be extremely careful when working with such harsh chemicals. Do not use a blowtorch, as you could release lead from the paint or damage the fireplace.
Closely follow the instructions to apply the paint stripper, leave it to work for the specified time, then scrape off the paint using a scraper. You may need more than one application, and may need to use a stiff brush to get into the details.
‘To remove rust patches or stubborn marks, cut a pad of medium grade steel wool to rub away the rust and, wearing protective gloves, gently work away at it until it vanishes,’ says restoration expert Helaine Clare.
To prime your cast iron fireplace for its final finish, use fine wire wool, but avoid cleaning the surface with water. If the surface does get wet, wait until completely dry before applying paint, polish or paste.
This feature was created by H&G's sister brand, Period Living magazine
Subscribe to Period Living for more inspiration .
Period Living is the UK's best-selling period homes magazine. A subscription provides you with all you need to know about caring for and improving a traditional house and garden.
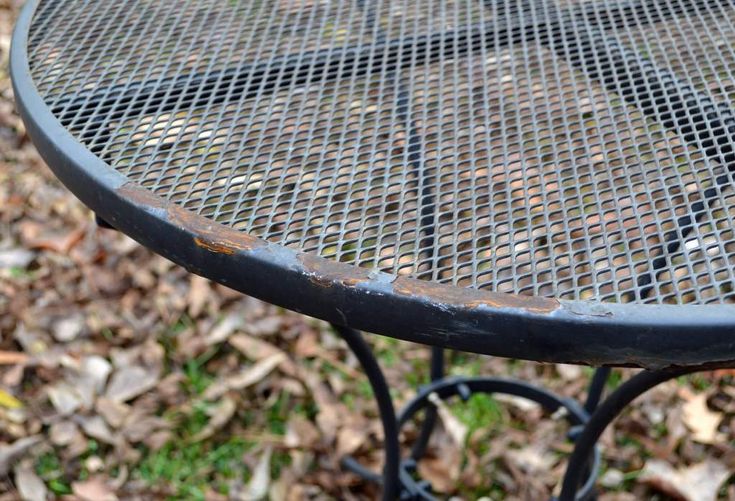
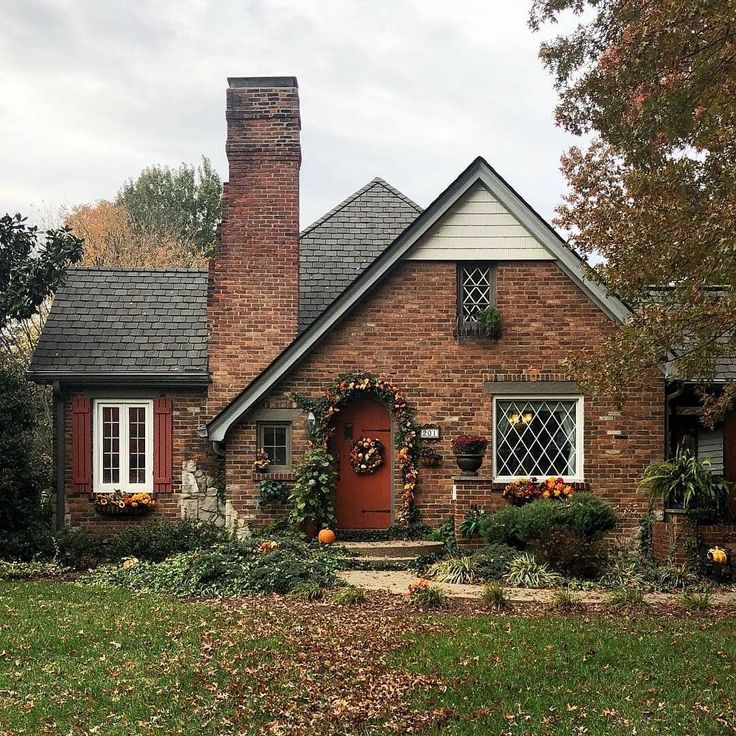
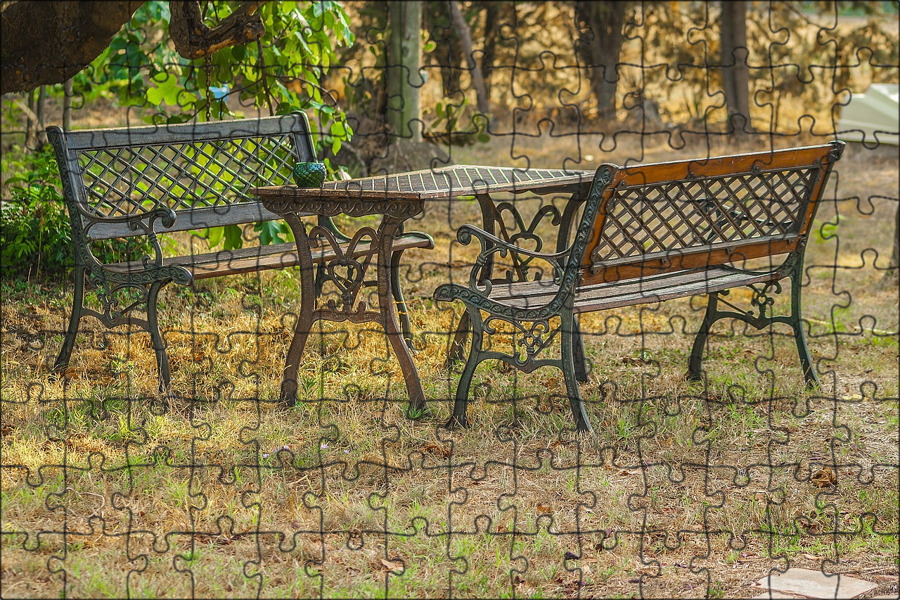
How to restore cast iron garden furniture
(Image credit: Kasia Fiszer)
Left outside, exposed to the elements, cast iron garden furniture will eventually show signs of wear and tear. It is commonly purchased at vintage stores, and though it carries an attractive patina of age, often needs some TLC to keep it in good condition.
Common issues with cast iron garden furniture include flaking paintwork, rusting securing bolts, and general grime and algae on the surface.
'As with most renovation jobs, the hard work comes at the beginning, meaning hours spent scraping, sanding and scrubbing,' says Clare.
Rusty bolts will need to be removed and replaced. 'If a spanner fails to undo them, spray with release oil, then wait and try again. A tap with a hammer will help break the corrosion binding the nut and bolt together, but beware of doing this on cast iron, which is brittle and cracks easily.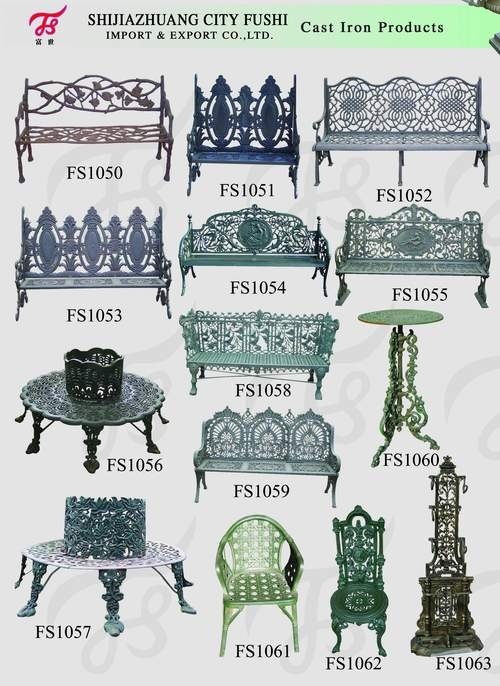 '
'
As a last resort, Clare advises that you can saw through unyielding nuts and bolts with a hacksaw. Replace with new, corrosion-resistant ones.
The next step to restore cast iron garden furniture is to give it a good clean. If there is any algae present, then a fungicidal wash or bleach should be applied with a brush or sponge. 'Leave for 24 hours before washing off with water,' says Clare.
It if there are only small areas of flaking paint, it is not worth removing all of the paint on garden furniture before applying a new coat. 'Wearing protective gloves, use a steel brush to remove flaking paint to make a sound substrate for a new coat of paint,' says Clare.
As the paint wears away, the metal will be exposed to the elements and can form a powdery coating. 'Use a sanding block and wet and dry abrasive paper to work on the unstable surface until a firm base is reached.'
The last step before painting is to clean the furniture with hot soapy water, then allow to dry completely before applying a coat of paint. In some cases you will need to apply a primer first – read the instructions carefully.
How to restore cast iron gates and railings
(Image credit: Little Greene)
Cast iron gates and railings make an important first impression to your home, so if they are looking tired, restoring them will uplift the whole exterior.
'If metal has been overpainted many times, the fine detailing will be obscured. So if there is a heavy build-up of paint or if large areas are affected with rust, it is often best to strip off all the original paint,' says Clare.
This work can be done with a chemical paint stripper. A hot air gun can be used, but older paint may contain lead. If working with a removable item such as a gate, you could take it to an industrial stripping company.
Where the paint is less built up and only lightly flaking, it will be easier to leave it in place and paint over it.
'Use a metal scraper to remove all blistered and flaking paint. Patches of rust should be removed with a steel brush, then cleaned to a bright finish with steel wool,' says Clare. 'Once all the loose paint flakings have been removed, feather the edges of the remaining sound paint with abrasive paper to avoid unsightly "steps" on the finished paintwork.'
Wipe over the metal with a damp cloth and, if needed, apply rust remover, closely following the manufacturer's instructions.
Make sure the metal is completely dry before applying metal primer, followed by two coats of fresh paint.
How to restore cast iron pans
(Image credit: Unsplash)
Once cast iron pans and skillets lose their seasoning, the moisture in the air can cause them to rust. However, with a little elbow grease, you can restore the surface and get the pan back into use. This technique cannot be used on enamelled pans.
See: How to clean a cast iron skillet
Rust patches can be removed using steel wool or fine sandpaper, rubbed in a circular motion.
Vinegar can also be used – mix equal parts of white vinegar and water and soak the item for up to eight hours, checking regularly, until all the rust is gone.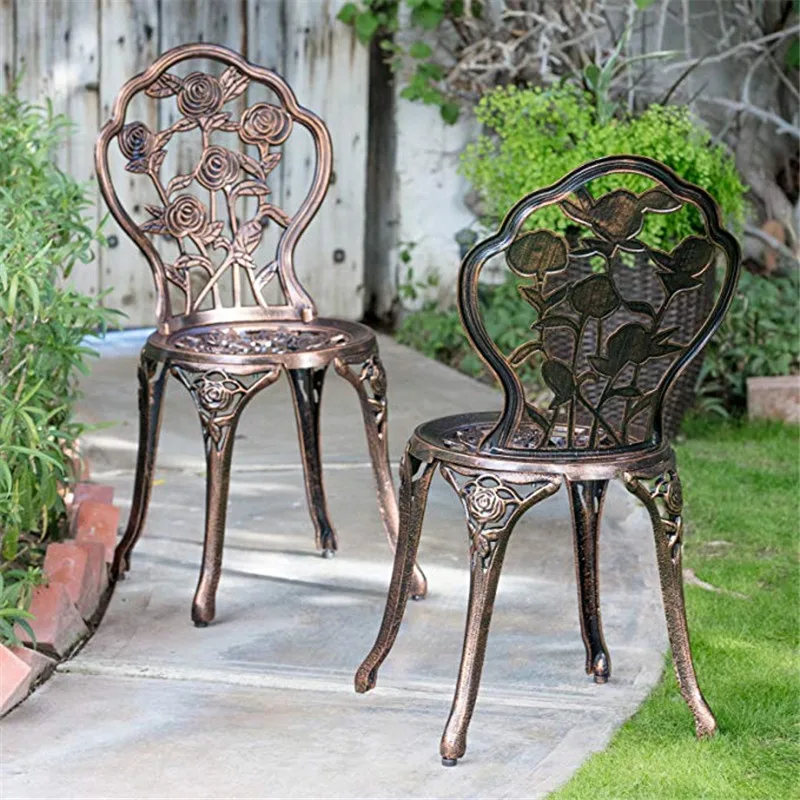
Once the rust is removed, wash the pan thoroughly and dry it completely before reseasoning the surface.
Seasoning is the final step to restore cast iron pans. It's a baked-on layer of oil, which gives a pan a black, glossy finish, protects the metal, and means food won't get stuck during cooking.
‘To season your pan, wash with warm soapy water, rinse thoroughly and dry it. Then, pour a little oil into the pan and use a clean cloth to rub the oil around the whole pan so it has a thin coating all over,' explains James Devonshire, head of the Cookery School at Daylesford . 'Next, place it upside down on the rack inside the oven and bake on a high heat for an hour. Leave it in the oven to cool down completely before use.'
As editor of Period Living, Britain's best-selling period homes magazine, Melanie loves the charm of older properties. I live in a rural village just outside the Cotswolds in England, so am lucky to be surrounded by beautiful homes and countryside, where I enjoy exploring.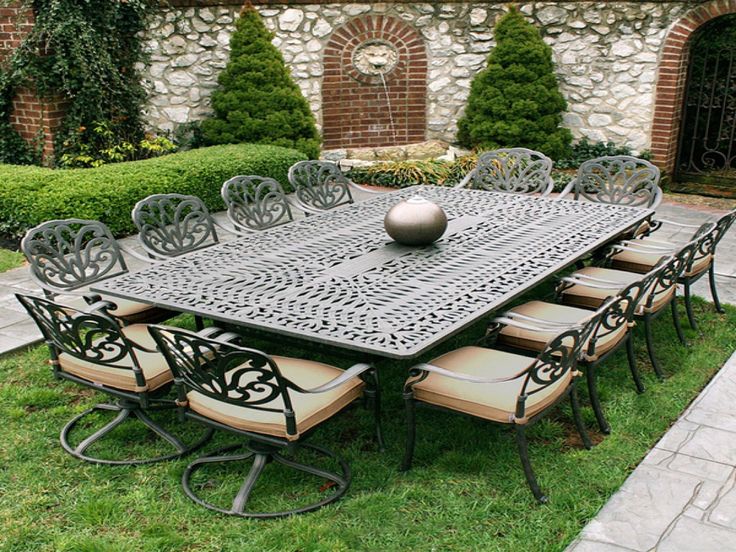 Having worked in the industry for almost two decades, Melanie is interested in all aspects of homes and gardens. Her previous roles include working on Real Homes and Homebuilding & Renovating, and she has also contributed to Gardening Etc. She has an English degree and has also studied interior design. Melanie frequently writes for Homes & Gardens about property restoration and gardening.
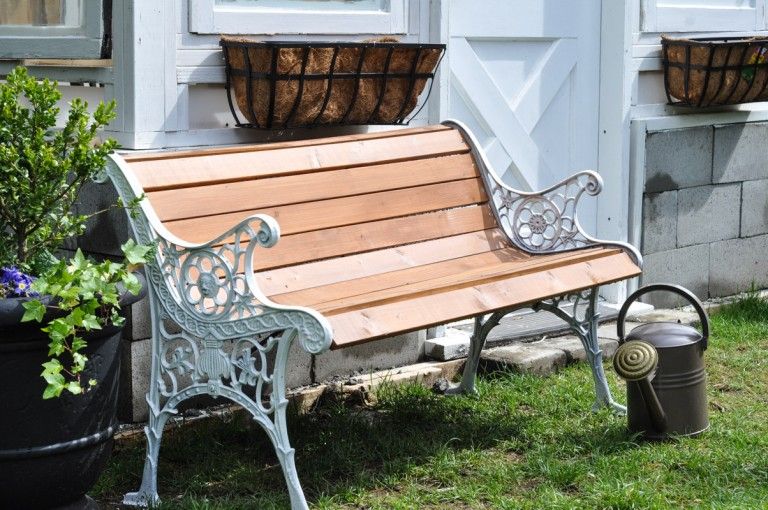
How to Restore Metal Garden Furniture
From priming to painting tips, here's what a professional restorer says to do.
Caroline Biggs, Freelance Writer portrait
By Caroline Biggs June 17, 2020
Each product we feature has been independently selected and reviewed by our editorial team. If you make a purchase using the links included, we may earn commission.
green metal bench in garden
Credit: Jacky Parker Photography / Getty Images
Your old metal garden furniture is teeming with restoration potential, it just takes a little work.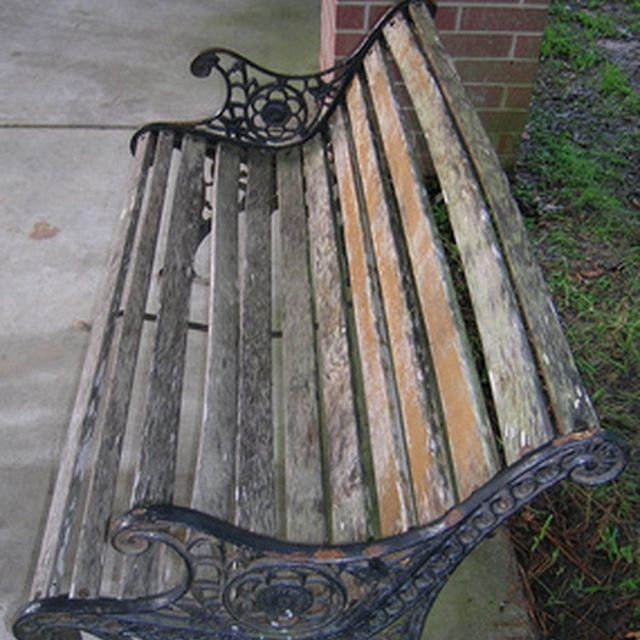 That's why when you find that your favorite piece of outdoor furniture is beginning to rust, chip, or show signs of aging, it pays to know what to do to help bring it back to its original integrity. "At a certain point, if left unattended to, rust can eventually compromise the structural stability of the furniture," explains Jane Henry of Jane Henry Studios, a full-service antique conservation and restoration shop based in New York City. "This is most often caught on the underside of furniture, where the moisture can collect in the nuts or rivets that hold the furniture together."
Looking for advice on how to restore (and maintain) your aluminum and wrought iron garden furniture, so you won't have to ever bid it adieu? We asked Henry to take us through the step-by-step process, and here's what she had to say.
Plan for prep work.
Henry says the first step to successfully restoring metal garden furniture is to handle all of the prep work ahead of time. "Scraping off any loose paint, going over the whole surface, as you can't always see what is loose," she says. "Follow scraping with a wire brush and applying a lot of elbow grease will ensure that you get into all of the crevices, and lift any rust out of the pits and divots. Next, use sandpaper to level out the chips and remove any extra loose paint. Once done, wipe with a tack cloth, and either clean with a solvent, such as acetone or wash with a degreaser or detergent, rinse, and let dry overnight."
Don't skip the priming step.
Once you've prepped your metal outdoor furniture, Henry says to prime the piece with a high-quality rust preventive spray primer, such as Rust-Oleum Stops Rust Spray Paint Primer ($4.27, amazon.com). "Choose a white primer for lighter colors and a dark primer for darker ones," she says. "Spray slowly at an 8-to-12-inch distance, in a consistent spray pattern, lengthwise along each section, to avoid drips and overspray. Remember to treat the back and underside since outdoor furniture can collect moisture and condensation in the crannies." After applying two to three light coats of primer, allowing the primer to dry between each coat, she suggests lightly sanding the piece with very fine sandpaper and wiping it off with a non-wax tack cloth to remove the dust.
Apply the right kind of paint.
When it comes time to paint your metal furniture, Henry recommends choosing an exterior-grade latex or oil-based paint for brushing, or an exterior grade spray paint specific to metal, such as Krylon Fusion All-In-One Spray Paint ($9.14, amazon.com) and Rust-Oleum Stops Rust Metallic Spray Paint ($6, amazon.com). "My advice is to stay clear of high gloss paints unless you are prepared to do sanding in between each coat," she says. "Don't forget to follow recommended re-coat times on each product, as times vary widely between products."
Add a protective coat.
If you aren't applying a protective enamel finish to your painted metal furniture, Henry says you're doing it wrong. "A final clear coat of oil-based urethane will provide added durability and help prevent future damage to the furniture," she says. She recommends sticking with an oil-based enamel, versus a water-based one, since they last longer and often create a brighter finish.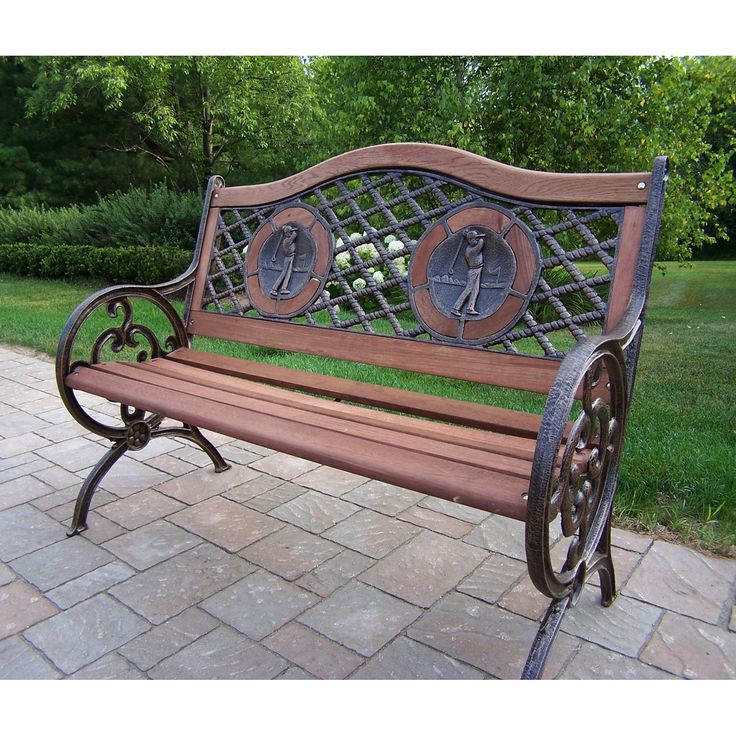
Maintenance matters.
No matter how well you restore it, Henry says proper maintenance is key to extending the life of your metal outdoor furniture. "Use plastic covers on your wrought iron furniture when you're not using it to protect it from the elements or bring your furniture inside to prevent rust buildup," she says. She also suggests keeping paint on hand for quick and easy touch-ups. "When you see something, take care of it immediately before it becomes a bigger problem," she advises.
restoration of cast iron and steel bathtubs
Cast iron and steel bathtubs lose their former beauty, smoothness, snow-white color of the coating from long-term operation, defects appear on the enamel: spots, rough areas, cracks, chips. But if plumbing loses its presentable appearance, it is not at all necessary to immediately change it, spending a lot of money on dismantling old equipment and buying, transporting and installing a new bathtub. You can get by with relatively small expenses and restore the worn-out coating with your own hands, extending the operation of plumbing for another period.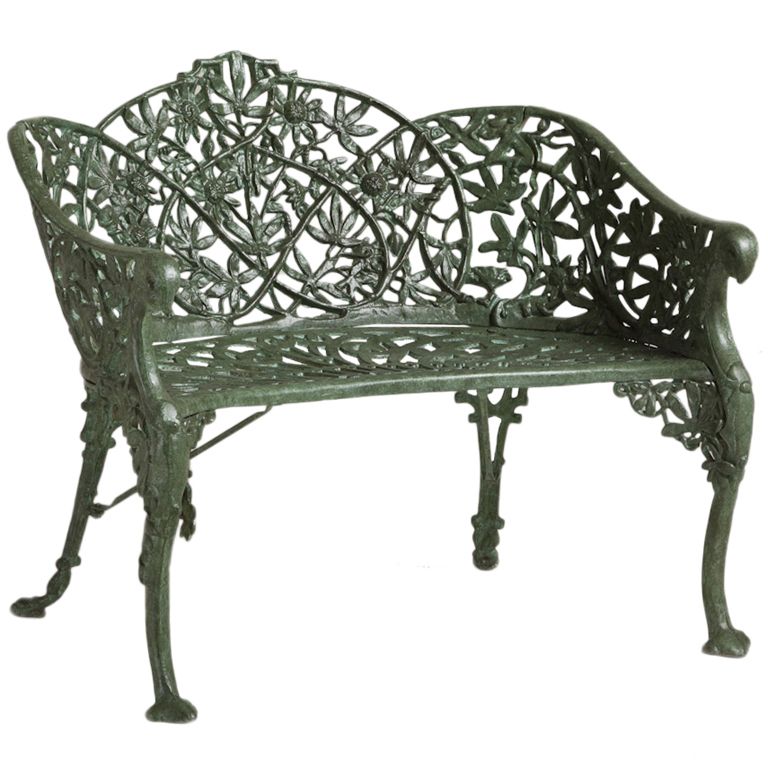 Its duration will be directly related to the choice of bath repair technology and the conditions for using it. nine0003
There are different methods for restoring the top layer of cast iron and steel baths. The most widespread are three repair technologies:
-
restoration with two-component enamel;
-
application of glass pouring technique;
-
installation of a factory-made liner.
Each of the restoration techniques has its own nuances. By re-enamelling a bathtub, rough surfaces, yellow coatings, rusty streaks and a network of minor scratches can be successfully eliminated. But for such serious defects as deep chips and peeling of the coating, this restoration technology is not suitable. This repair method is good because: nine0003
-
carried out at low cost;
-
a layer of renewed enamel practically does not change the volume of the bath in the direction of reduction;
-
when carrying out repairs, there is no need to dismantle the bathroom siphon and tiles along its sides.
The disadvantages of the enameling method include:
-
visible brush marks with poor-quality enamel coating;
-
long drying time, taking 3-4 days;
-
the impossibility of masking significant damage;
-
relatively short service life of the renewed enameled layer - it does not exceed 5 years.
When updating the coating with acrylic, or rather with glass, without using a brush, the repair is carried out by uniformly pouring the bath. The advantages of using liquid acrylic are that:
-
the new coating will not turn yellow after a while;
-
the applied layer is resistant to detergents and protects the metal from the appearance of corrosion foci;
nine0007 -
there is no need to dismantle the restored plumbing;
-
no air bubbles remain on the coating; a bathtub restored in this technique serves for about 15 more years; nine0003
-
the updated coating is resistant to mechanical stress and chipping; excellent thermal insulation qualities of glass do not allow water to cool quickly.

liquid acrylic is universal and suitable for repairing both steel and cast-iron bathtubs; when using this restoration technique, streaks do not appear on the walls;
Disadvantages of bulk technology:
-
before repairing the bath, it is necessary to disassemble the drain;
-
the bulk layer will accurately reproduce the factory irregularities of the bath; nine0003
-
the updated coating is afraid of excessively high temperatures;
-
the pouring layer dries for a long time - the drying period lasts 4 days.
The most expensive way to repair is to install an acrylic liner in an old bathtub, ordered at the factory on an individual basis exactly to the parameters of the restored plumbing. This recovery option should not be done on your own - mistakes made during the installation of the liner can significantly reduce the service life of the updated bathtub. Therefore, it is better to enlist the help of an experienced master. nine0003
Benefits of the bath-in-bath technique:
-
short terms of installation of the liner;
-
the ability to hide any damage, including chips;
-
The liner has all the performance properties of glass: the smoothness of the resulting surface, good heat capacity.
Among the disadvantages of this method of restoring the bathtub are: nine0003
-
the high price of a custom insert;
-
the need to remove ceramic tiles adjacent to the bowl before restoration;
-
reduction in bath capacity;
-
difficulties in performing restoration work independently.
Enameling bath
When choosing this restoration option, you need to carefully select the enamel. Manufacturers offer special formulations designed for this purpose. These can be whole sets containing a two-component enamel, a surface preparation compound, a hardener, and even a color that will give the desired tone to the new coating. But keep in mind that experts advise choosing an enamel color that is close to the original tone. It is not difficult to change the color of a white bath, but it will not work to lighten an initially dark one. nine0003
What tools and materials are needed
When performing restoration work, you will not do without:
-
electric drills with a nozzle for cleaning worn enamel;
-
abrasives;
-
oxalic acid;
-
high-quality two-component enamel; nine0003
-
composition for degreasing the cleaned coating of the bath;
-
brushes for applying enamel - let it be natural, made of fairly stiff bristles, and its width should exceed 7 cm;
-
high-quality construction respirator;
-
adhesive tape for painting works and polyethylene film; nine0003
-
cleaning powder.
Masking tape 50mmx50m white, art.45109
Preparing the work area
Before starting restoration work, it is necessary to remove worn enamel from the bathtub. For this you need:
-
cover with polyethylene the ceramic tiles adjacent to the bathtub and fix the film with adhesive tape;
nine0010 -
moisten the walls and bottom of the bath and sprinkle them with a powder containing abrasives;
-
clean all the old coating using a sandpaper or grinder, wash off the resulting dust;
-
apply oxalic acid to the surface, and then neutralize it with soda;
-
pour hot water into the bath and soak for 10 minutes; nine0003
-
drain the water, dry the bath. To dry it quickly, use a hair dryer;
-
cover the chips with automotive putty, wait for it to dry and sand the puttied areas to smoothness;
-
walk on the surface with a vacuum cleaner, wipe the bath with a piece of cloth and degrease with a solvent;
- nine0002 dismantle the shower, cover the mixer with a film;
-
disassemble the siphon and drain;
-
place a container under the drain, where excess enamel will be collected.
Getting Started
Execute it like this:
-
Enamel is combined with a hardener, strictly following the attached instructions. You need to end up with a homogeneous mixture. nine0003
-
A high-quality, non-shrinking brush made of natural bristles, soaked in water for a day, dip into the prepared enamel, immersing it halfway in the composition. Enamel should be applied from the top of the bath to the bottom.
-
The first layer also plays the role of a primer, and it should not be thick. First, the enamel is applied in a horizontal direction, then in a vertical direction. The resulting streaks are “stretched” with a brush. Try to prevent the formation of "puddles" at the bottom of the bath - drive excess enamel into the hole. nine0003
-
The second layer is applied without waiting for the previous one to dry. After applying the enamel, check the surface again for gaps - you will have only half an hour to paint over them.
nine0010 After this time, the enamel will begin to harden, and it will be impossible to correct the errors. Usually, to obtain the desired result, the enamel is applied in 3-4 layers. The installation of the piping and the operation of the updated bath can be started after about 5 days.
It is advisable to carry out restoration work in the warm and dry season. While the bath is drying, let the windows in the house be open. It is better to temporarily send children and pets to the country or to relatives.
Flat brush KORVUS Hobby natural bristles 50mm, art.0101920
Refreshing the bath with acrylic filling
The technique of repairing a bathtub with glass (acrylic) is reminiscent of updating with enamel. Preliminary work with the surface of the bath in this case is similar to that carried out during enamelling. Then liquid acrylic is diluted, for which a hardener is mixed into it, wait 10 minutes, then the mixture is thoroughly mixed again.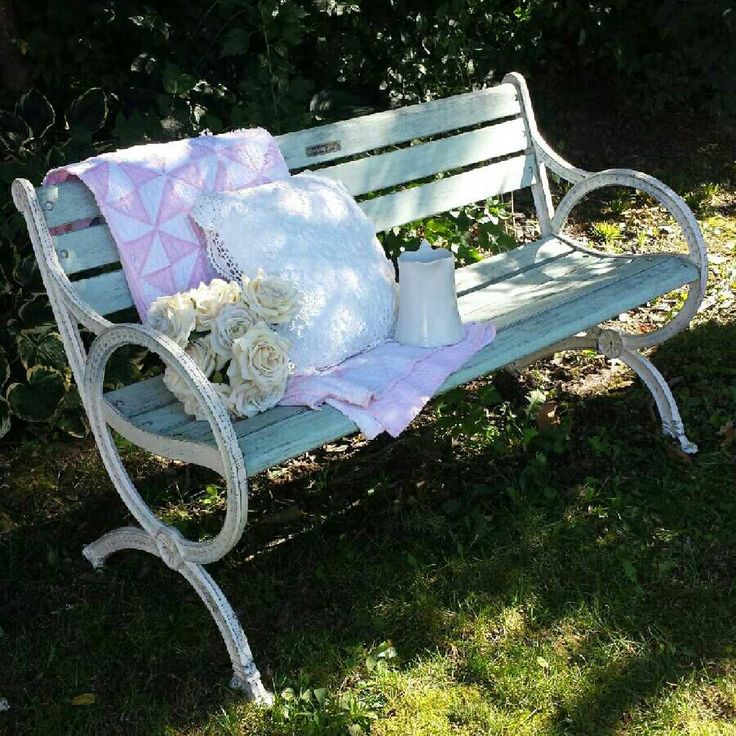 Part of it is poured into a glass of smaller capacity. Glass pouring starts from the top corner of the bath. When the acrylic reaches the middle of the bath wall, the glass is slowly moved, pouring the mixture into the adjacent area. Glass is poured into a glass as needed. After a single treatment of the entire bath along the perimeter, the pouring is repeated. Appearing sagging or bubbles are removed with a rubber spatula or brush. The drying time of the restoring mixture depends on its composition, temperature and humidity in the room. nine0003
Rubber spatula COLOR EXPERT for seams 180mm, art.94081812
Fitting the insert
If the bathtub is significantly damaged, it will not be possible to restore it either by re-enamelling or pouring glass. If you are not yet ready to make the decision to replace the bathtub, or it is technically difficult to do this due to cramped conditions, it's time to order an insert or choose a ready-made, mass-produced one.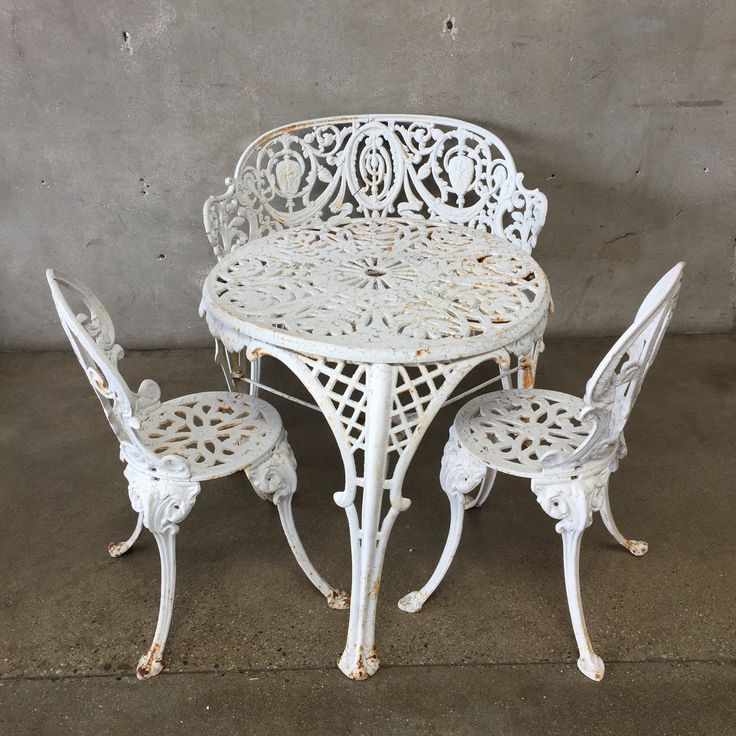 In any case, you need to correctly make the necessary measurements. Measure the full length of the bathtub with a tape measure - this means the distance between the outer edges of the sides, as well as the inner length - the maximum distance inside the bowl. In addition, it is necessary to measure such parameters as the width of the bowl in the area of the drain, in the area of \u200b\u200bthe back, and the depth of the bath. The latter is measured from the plank placed across the bowl, just above the drain hole, to the bottom. nine0003
Installation preparation
The rim adjacent to the bathtub and facing tiles are removed, the upper and lower drain devices are dismantled. The worn enameled surface is sanded, this can be done with sandpaper or a grinder equipped with an abrasive nozzle. The cleaned surface is degreased.
Random orbit sander RYOBI ROS, 300, 300 W, 125 mm
After preparing the bath, mark the liner. To do this, the insert is placed inside the bowl, the edges of the sides are marked, as well as the fixation points for the future strapping. The liner is cut along the perimeter, technical holes are prepared. nine0003
Now you can proceed to the installation of the acrylic liner:
-
once again degrease the surface of the bath;
-
apply mounting foam around the overflow and drain holes, and also squeeze strips along the bottom at a distance of 4-5 cm and vertical stripes along the walls in increments of about 10 cm, the sides also need to be covered with foam, with a continuous tape around the perimeter;
nine0007 -
remove excess foam from the drain hole;
-
mount the drains and fill the bath with water.
install the pallet and press down the liner;
Tubing the bathtub is done carefully. If the fixing bolt is overtightened, a crack can occur, and weak fasteners often turn into water accumulation between the old and new coatings. nine0003
When carrying out a comprehensive restoration of the bath, it would be good to replace the old legs.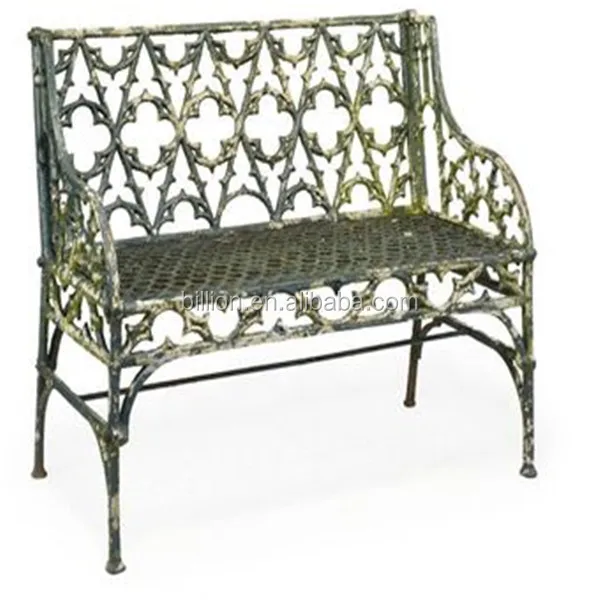 They are sold in ready-made kits, or the bath support is made by hand from a metal profile.
Correction of minor surface defects
Minor flaws can be restored locally without starting a large-scale restoration of plumbing. Following the recommendations of experts, you can get rid of minor defects quickly and efficiently.
Small through holes are sealed with epoxy resin, then a reinforcing mixture is applied on top.
Chips and scratches are eliminated as follows:
-
a rust converter is applied to the damaged area, then the surface is cleaned, ordinary powder can be used;
-
degrease the work area with acetone;
- nine0002 coat the chip with auto-putty and grind;
-
apply the appropriate coating to the area.
Acetone 0.5l, art.POISK-004
If you treat plumbing equipment with care, regularly clean the bath cover, correctly using special products, you will be able to maintain the aesthetics and presentability of home plumbing for many years.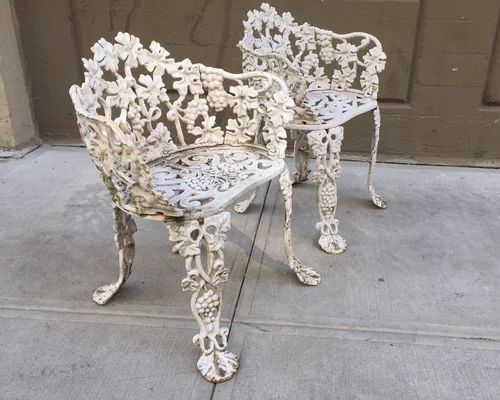 nine0003
Remember that enamel and acrylic are extremely susceptible to abrasives that are part of detergents, choose gentle preparations. They must not contain ammonia, acetone or other aggressive substances.
After cleaning the bath cover, the surface is washed with running water. It would be good to refrain from bathing pets in the bath - their sharp claws often leave scratches on the coating. It is not recommended to put metal buckets and basins in the bath.
High-quality restoration of a bath is not an easy process; it would be good to have special skills to perform it. Without practical experience, serious mistakes can be made. For inexperienced beginners, we recommend using the glass filling method to restore the bathtub.
Cosmetic repair of benches - Skameyka.ru
The winter has passed, the snow has melted. There is a bench in the yard. And it seems to have faded a little after the winter. What to do? Let's try to suggest how it can be refreshed.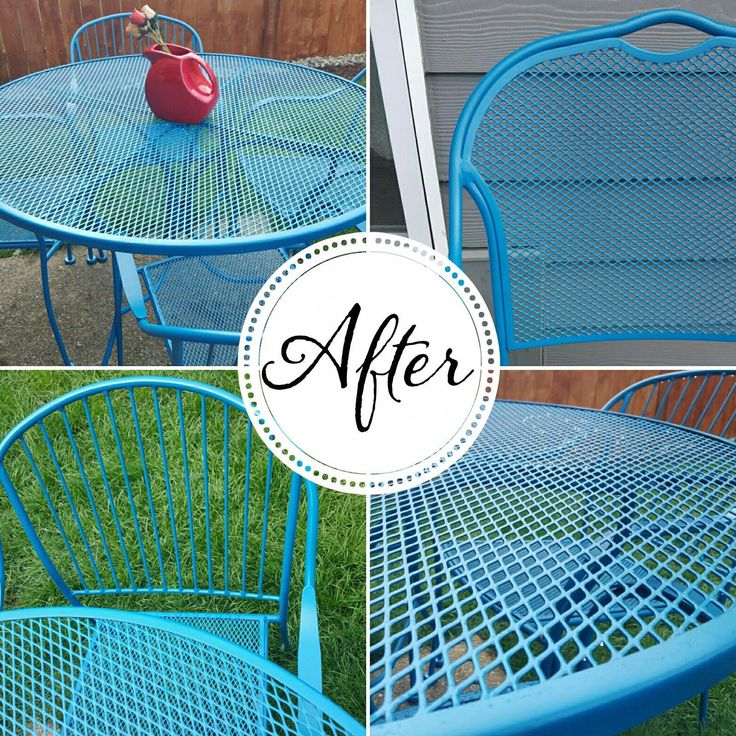 nine0003
Bench legs, steel or cast iron, can be simply washed with water with a soft sponge. The same can be done with a beam. As a rule, this will be enough to make the bench look like new again.
But after a year of use, it is quite possible that the timber does not look as bright as it used to. It's okay, it is quite possible to return it to its previous appearance on its own and quite inexpensively. For this, for example, PF varnish, resistant to weathering, is suitable. I must say right away that you need to restore in dry weather. The varnish is simply gently and evenly applied with a soft brush on the beam, preferably with wide swing movements, but at the same time trying not to get the varnish on the legs of the bench. The varnish has a slightly yellowish tint, so it is best to gently wipe it off the bolt heads with a soft cloth. It is also recommended to wipe it off the legs if it gets on them. Keep in mind that the varnish dries for 24 hours, so it is desirable that no debris gets on it before drying. nine0003
It may also happen that mechanical damage has appeared on the beam and the wood has become visible. These places need to be cleaned with a fine sandpaper and painted over with the Aquatex composition, choosing the color to match the existing one. After drying, which can take several hours, it is worth going over the tinted place with NC varnish with any digital marking. It dries quickly and after drying, you need to lightly clean this place again with a sandpaper to a smooth state. Then use PF varnish again.
In the courtyards, unfortunately, there are cases when someone suddenly made an inscription with paint. If a small area is damaged or it happened recently, then you can try to erase this stain with gasoline or thinner. If that doesn't work, then you'll have to sand it off. And then proceed according to the scheme described above. Alas, this procedure is quite long. And if the damaged area is large, then there are only two options. The first is to replace the damaged timber. It can be ordered from us. And the second option is to paint the entire beam of the bench with paint, which will completely cover the damaged area. Use for this you need enamel. Naturally, after this, the wood texture will not be visible. But there's nothing more to be done here. Unfortunately, not only benches suffer from vandalism. nine0003
If you notice that the paint on the legs of the bench has peeled off in some places, then again I will try to help by suggesting what to do in this case. There are two approaches depending on which legs your bench has. We paint cast iron and steel benches with different paints, so the restoration methods are slightly different. The cast iron is covered with enamel. If the scratch or damage is not deep, the primer layer is not damaged, then lightly clean the sufficiently damaged place with sandpaper and paint over it with paint. It is advisable to use enamel for this. We use powder coating on steel benches. I'll tell you right away. That a full restoration of this coverage in domestic conditions is impossible. However, do not despair. As a rule, you can consider the place of the defect after restoration only by looking closely. So what should be done in this case? First of all, carefully clean the damaged area with sandpaper, and then paint over it again with enamel. Naturally, the enamel should be glossy. As a rule, small scratches can be made completely invisible. nine0003
If the damage is more serious, then in the case of steel benches, the legs will most likely have to be completely repainted. To do this, you need to clean the legs with sandpaper until there is no gloss. It is advisable to prime the damaged area.
If there is a lot of damage on cast iron benches, then you also need to clean this place, prime and paint with enamel. All these operations are actually quite simple and accessible to anyone who wants the bench to look like new. However, many problems can be avoided by simply taking care of the benches. Nevertheless, this product belongs to the category of landscape gardening furniture, therefore it would be nice to treat it as furniture.