Replacing drywall on ceiling
How to Replace Damaged Drywall in a Ceiling
By
Lee Wallender
Lee Wallender
Lee has over two decades of hands-on experience remodeling, fixing, and improving homes, and has been providing home improvement advice for over 13 years.
Learn more about The Spruce's Editorial Process
Updated on 11/13/22
Reviewed by
Kelly Bacon
Reviewed by Kelly Bacon
Kelly Bacon is a licensed general contractor with over 40 years of experience in construction, home building and remodeling, and commercial building. He is a member of The Spruce Home Improvement Review Board.
Learn more about The Spruce's Review Board
Douglas Sacha / Getty ImagesProject Overview
When a large section of the drywall on your ceiling is saggy, warped, droopy, broken, moldy, or wet, you need more than just a spot repair. Sometimes the problem extends so far that it's best to remove an entire 4 X 8-foot drywall panel (or at least a large section of it) and replace it with a new panel of the same size. A few pro tips can help the job go more smoothly.
Tip
Be sure that the problem that caused the damage is fixed before replacing the drywall. Usually, sagging, warped, moldy, or wet drywall is due to some source of moisture. If there's an attic above the damage, there's probably a problem with the roofing system. If the damage is below an upper floor, the problem is typically plumbing-related.
Equipment / Tools
- Gloves (if needed)
- Long sleeve shirt (if needed)
- Face mask
- Painter's Tape
- Drywall saw or reciprocating saw
- Utility knife
- Sandpaper and pole sander
- Ladder
- Eye protection
- Garbage bag(s)
- Putty knife
- Stud finder (if needed)
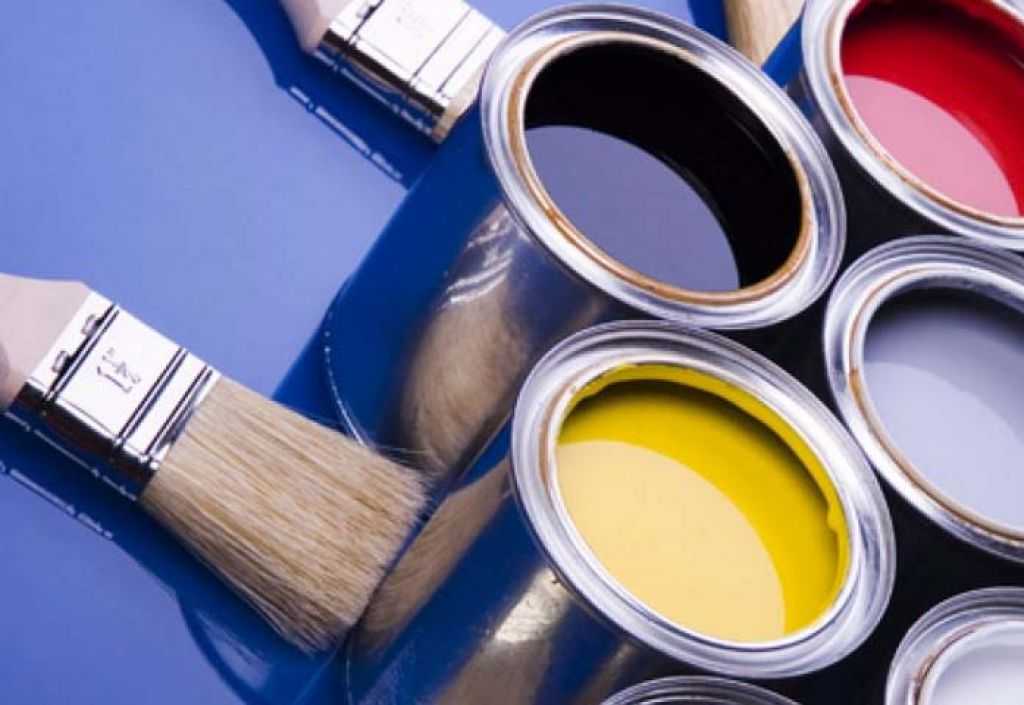
Materials
- New drywall panel
- Nailing strips
- Drywall screws
- Paper drywall tape
- Drywall compound
- Joint compound
-
Clear out Attic Insulation
If the damaged ceiling is below an attic, chances are the attic has insulation.

Hopefully, your insulation consists of strips (short "batts" or longer "blankets") of fiberglass insulation (or possibly cellulose insulation), as this type of insulation is the easiest to move. Don gloves, a long-sleeved shirt, and a mask, and set up a work light in the attic. Move the batts to the side.
P A Thompson/Getty Images -
Remove the Old Drywall
With the area clear, you can see the perimeter of the drywall to be removed. Make sure there are no wires or pipes in the area where you will cut out the old drywall. The edges of the drywall will be attached to ceiling joists, although you may encounter some hanging edges supported by a strip of drywall that bridges to the adjoining sheet. Take note of these hanging edges because they will not be picked up by the stud finder.
Below the ceiling, identify places where the drywall is attached to joists by using a stud finder. Outline your planned "cut edges" with painter's tape.
Removing drywall without damaging adjacent areas is difficult, and there is no one way to go about it. To do so successfully, follow these suggestions:
- If accessing from below, punch into the center of the drywall with a drywall saw or reciprocating saw and slice away strips until you meet a stud. Then, pull strips down by hand.
- If you are removing a section of drywall with an edge that hits the bottom of a joist, you can pull straight downward—it should separate from the adjacent section of drywall at the joint. After the joint compound breaks away, cut through the embedded tape with a utility knife.
- If the section of drywall bridges a joist, but you only want one side of the drywall removed, cut with your saw alongside the joist. Be sure to cut the inner portion so that the adjacent section of drywall is still fastened to the joist. Shown here, the section of drywall that remains is on the right; the portion to be removed is on the left.
-
Add Furring Strips
After all the old drywall is gone, you may still have a bit of an obstacle.
 In some instances, you will have no exposed joists on which to nail your new sheet of drywall. The edge of your drywall can't just hang in mid-air; it has to be attached to something.
 The solution is to add thin pieces of wood called furring strips to the sides of the joists where the new drywall needs backing. The drywall will be screwed to the furring strips.
Position each strip so it is flush with the bottom of the joist, and fasten the strip with screws driven through the strip and into the joist. If there is any deviation, the new drywall panel will not be level with the surrounding panels, and no amount of finishing will fix it.
-
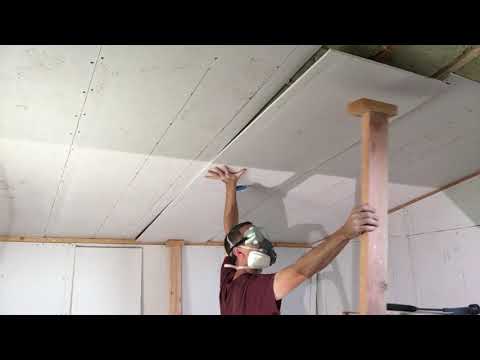
Screw in the New Drywall Panel
Buy new drywall that matches the thickness of the old material. Measure the patch area, and cut the new sheet to fit. It's ok if the patch is a little small, with gaps of up to 1/8 inch or so along the edges. A tight fit is ok too.
Have one or two helpers hold the drywall patch in place while you fasten it to the furring strips or joists with drywall screws.
 Space the screws no more than 12 inches apart. The screws should be set so they are slightly embedded below the face of the drywall paper, though they should not go deep enough to break or tear the surface paper. This is especially important on ceiling applications because screws set too deep will not have enough holding strength. If a screw accidentally breaks the surface, another screw can be placed within a half-inch of it.
 -
Tape and Mud
Once the sheet is in place, finish all edges of the patch with paper drywall tape and an all-purpose drywall compound. Using your putty knife, embed the tape in a layer of joint compound, let dry, and then mud over the tape with another layer of the compound. If you're worried about dust, you can use a low-dust compound. Apply one or two more layers of the compound, as needed, to smooth out the joints until they are flat and blend into the surrounding surfaces.
Cover all of the screws with two or three coats of compound, adding each coat along with the joint coats.
 Sand all of the compound with a pole-mounted sander, or sand it by hand from a ladder. To keep dust to a minimum, you can use a sander attachment hooked up to a shop vacuum, or, for small areas, using a wet-sanding sponge. Wear goggles and a face mask to keep dust out of your eyes and airways.
What If You Have Loose-Fill Insulation?
If you have loose-fill attic insulation, it may contain asbestos, though this is the exception. The most common types of loose-fill insulation are fiberglass, cellulose, and rock wool, and none of these contain asbestos. Watch out for vermiculite insulation, which has a pellet shape and sometimes a mica-like sheen, because it may also contain asbestos. If your attic has vermiculite insulation, have a sample tested at a lab; if it tests positive for asbestos, contact the local health or building department for recommendations.
Loose-fill insulation is easy to move, but a little messy. You can pile it up to the sides of the patch area, or scoop it up with a dustpan and place it in a garbage bag for temporary storage. Do not compress the insulation because this diminishes its insulating quality; keep it fluffy.
What if There Is No Attic?
If your damaged drywall isn't on the top floor of your home, then chances are that it's been caused by a leak from plumbing above. The basic steps outlined above will still work for your repair but, obviously, you won't be removing any insulation first.
You also won't have the benefit of checking for joists, plumbing, and/or wires from above, so rely on your stud finder here and cut very cautiously and without extending your saw very deep to ensure you don't knick any wires or pipes.
Article Sources
The Spruce uses only high-quality sources, including peer-reviewed studies, to support the facts within our articles. Read our editorial process to learn more about how we fact-check and keep our content accurate, reliable, and trustworthy.
Protect Your Family from Asbestos - Contaminated Vermiculite Insulation.
 United States Environmental Protection Agency.
10 Steps to Remove & Repair Drywall Ceilings
Learn how to tear the drywall out from above your head before it becomes a drop-ceiling.
ByJon Behm| Last Updated:07/13/2022
Remove and Replace a Drywall Ceiling Yourself
Drywall ceilings are made to last a long time. However, you could be just one unexpected pipe leak away from needing to repair or replace yours. Even if you need to hire a pro to handle pipe and ceiling joist repair, removing and replacing the drywall ceiling yourself could save on overall project costs.
Whether you simply want a new look to your ceiling or you’re trying to fix a water leak or pesky rodent issue, we’ve put together a step-by-step guide to tear out your drywall ceilings and replace them.
Ceiling Replacement FAQs
Can you remove a drywall ceiling without damaging walls?Yes. Take a utility knife and score the drywall ceiling where it meets a wall.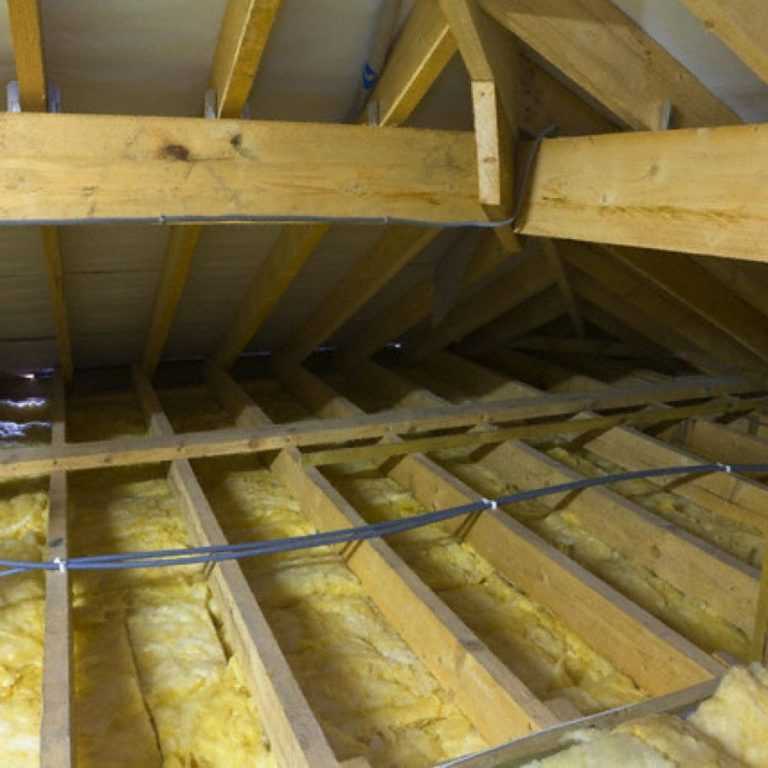 This will help reduce any connection between the two surfaces. Also, be gentle when pulling drywall near a scored line and take care when pulling down drywall near a wall so that it doesn’t crash into it and cause a hole.
The cost depends on the size of your room and the material prices at the time of your project. However, the national average for drywall ceiling replacement is $1 - $2 per square foot.
How long does it take to remove and replace a drywall ceiling?Depending on the size of the room, it should take 1 - 2 days to complete the project.
Step 1: Gather Your ToolsTo remove drywall, all you should need are simple supplies found in a basic toolkit. To install the new drywall ceiling, you may need to rent some special tools from your nearest Lowe’s or Home Depot.
If at any point you don’t feel comfortable using a tool or completing the project yourself, you should consider hiring a contractor to complete the job.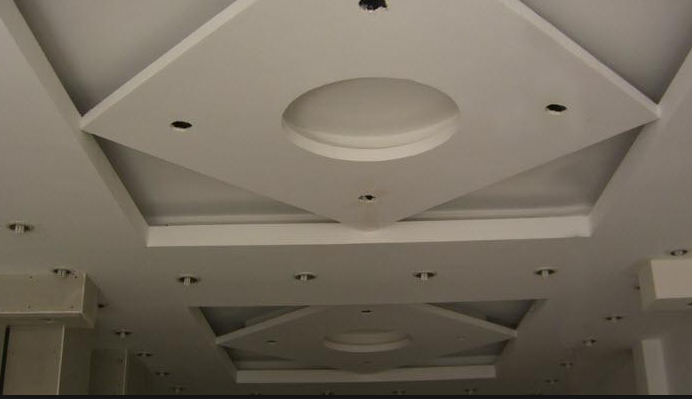
Tools | Supplies |
|---|---|
Hammer | Safety goggles |
Stud finder | Hard hat |
Screwdriver | Work gloves |
Power drill | Face mask |
Utility knife | Drop sheets |
Drywall lift | Ceiling-grade drywall |
Broom and dustpan | Drywall screws |
Marker/pencil | Masking tape |
Bucket/plastic tote | |
Drywall adhesive |
Check Dumpster Availability Near You
Step 2: Clear and Prep the AreaThis project will create a lot of debris depending on the size of your ceiling, but also a considerable amount of dust. As a result, you’ll want to clear or cover your work area as much as possible.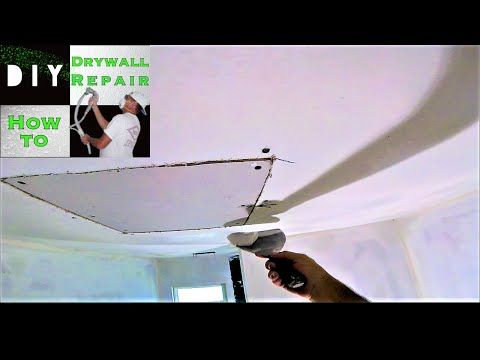 Anything that is hanging on the walls should be taken down. You’ll also want to remove furniture like bookshelves, chairs, tables and even lighter couches.
Once the room is cleared, lay your drop sheets on the floor from wall-to-wall. If you’re worried about them moving, tape them to the floors with masking tape or put a weight on the edges. Next, tape any wall vents closed with a breathable cloth. Finally, cut the power to the room at the breaker box.
Safety TipIf your room has an unfinished attic above it, you’ll want to clear out any items you have stored up there at this point, too. Otherwise, they may tumble down as you remove the ceiling drywall panels.
Step 3: Remove FixturesYou’ve cleared the walls and floors, now it’s time to take down anything hanging from the ceiling. This may include ceiling fans, vent registers, hanging lights or recessed lighting frames.
Grab your screwdriver and utility knife and get to work.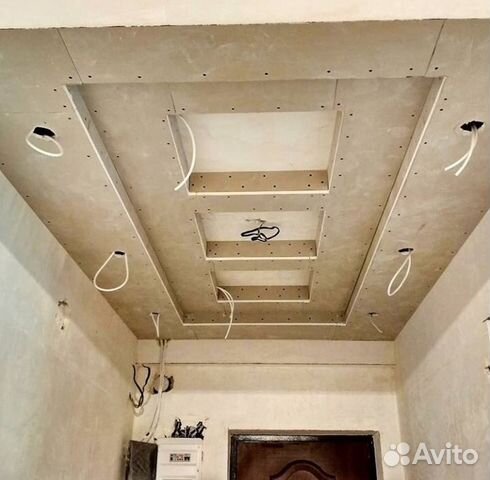 Use the utility knife to break any seals with the ceiling fixtures, whether it's caulk, paint or drywall joint compound. Then use the screwdriver to slowly loosen the fasteners, taking care to hold the fixture so it doesn’t fall to the floor.
Fun fact: ceiling and wall drywall don’t connect, even if it appears that they do. Instead, materials like drywall tape and joint compound, along with paint, give the transition between the two surfaces a seamless appearance.
You’ll need to break that seam in order to start removing your ceiling.
Use a utility knife to slice the seam along the edges of your ceiling. If you hit drywall, it’s not a problem. However, don’t try to cut all the way through it — you might actually be hitting a joist, plumbing pipe or vent. The goal is to break the seal so that when you are pulling down the ceiling drywall later, you can prevent paint on the walls from chipping.
Step 5: Locate Ceiling JoistsYour drywall will be fastened to the joists above.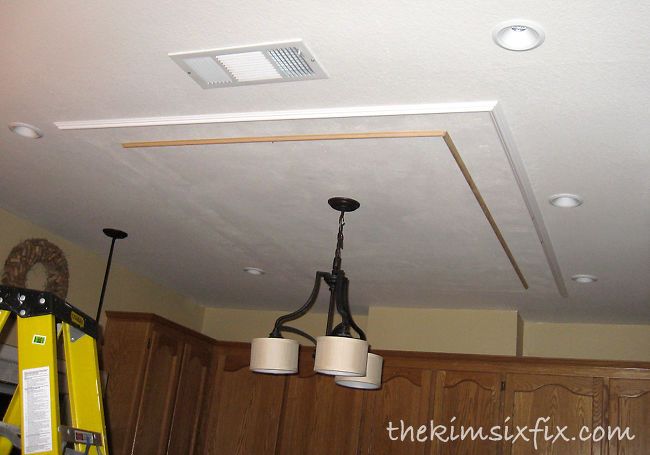 However, if you have any texture or paint on the ceiling, chances are you won’t see the drywall nails or screws.
Grab your stud finder and locate a joist. Mark the location with a marker or pencil. Then, move your stud finder either directly backward or to one side from the mark. Whichever direction continues to indicate a stud will let you know which way your joists are running. Draw an arrow from the mark indicating the direction of the joists.
Keep in MindThe standard distance between ceiling joists is 16 - 24 inches. Once you’ve located your first one and determined the direction it’s running, search for the next joist about 16 inches away.
Step 6: Break a HoleNow that you have a joist map drawn on your ceiling, you can get to the fun part: punching a hole in your drywall.
Grab your hammer and gently break through a section of ceiling between joists. It’s important that you do this carefully and with a light touch — you don’t know what’s directly above the ceiling.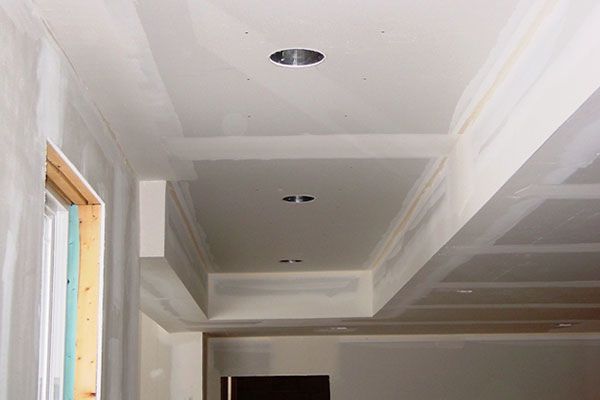 It could be empty space or insulation, or you could strike a fragile water pipe or air duct.
Once you have a small hole created, begin to slowly widen it until it’s big enough that you can fit both hands in — just make sure you have your gloves on first to avoid splinters and scratches.
Step 7: Pull Down the DrywallStrap on your hard hat and goggles. It’s about to get dusty.
Starting with the hole you created, begin tearing the ceiling drywall down. It will come in chunks as you pull with your hands. Drop the pieces right on the ground — you’ll clean it all up later.
Be sure to watch for stray nails as you pull the chunks off the joists and don’t worry if there are still some nails or pieces attached. You’ll take care of those later. The key right now is to pull down all the sheets until you have only small chunks held on by the nails that didn’t come out.
Keep in MindIf you've pulled your ceiling drywall down to repair a pipe or joists: Now that the full ceiling is exposed, it's time to get to work on that.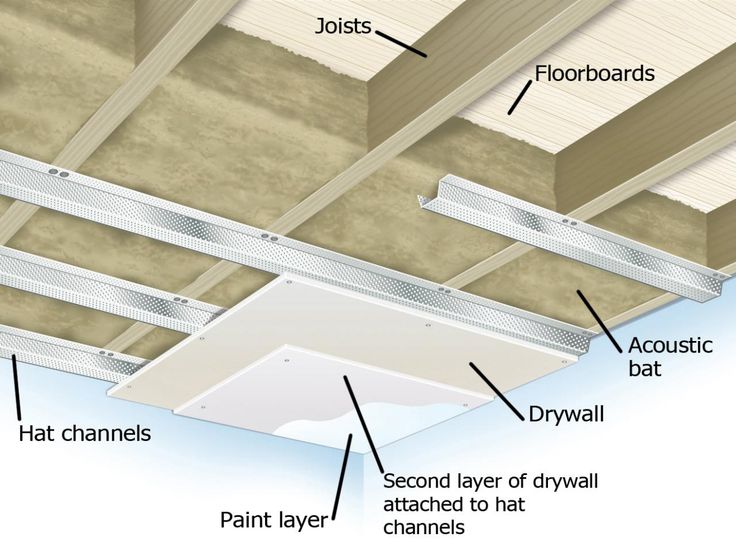 While there might still be some insulation or nails hanging, as long as they aren't in the way they can be taken care of before you install the new drywall.
Get back on your ladder and pull down any insulation that’s still stuck between the joists. While you’re up there, use your hammer to yank out any remaining nails. It’s best to drop these directly into a bucket or plastic tote to avoid stepping on them later.
Step 9: Clear the DebrisIt’s time to clean your mess. You’ll have various sized chunks of drywall, sheets of insulation and a bucket full of nails to dispose of. Get your contractor-sized garbage can ready, then consider which of these two common ways you’ll tackle this cleanup.
- Get the larger chunks of debris out of the way first, then the smaller pieces of drywall and insulation.
- Start in one spot and work your way across the room until it's cleared.
You’ll also want to give a sweep of the drop clothes to get rid of dust, tiny chunks of drywall and any nails that might have fallen.
Curbside pickup rarely accepts construction debris, including drywall. Usually, the easiest way to toss debris from this project is to rent a dumpster.
Check Dumpster Availability Near You
Call 833-499-7510
Request a Quote
Step 10: Install New DrywallIt’s time to fill your newly created blank canvas. While the time spent on this step will be the longest, it’s only because you’ll need to take care and be precise to ensure you accurately install the ceiling.
How to Replace Ceiling Drywall
- Put drywall adhesive on the joists.
- Place insulation on top of your drywall sheets as needed.
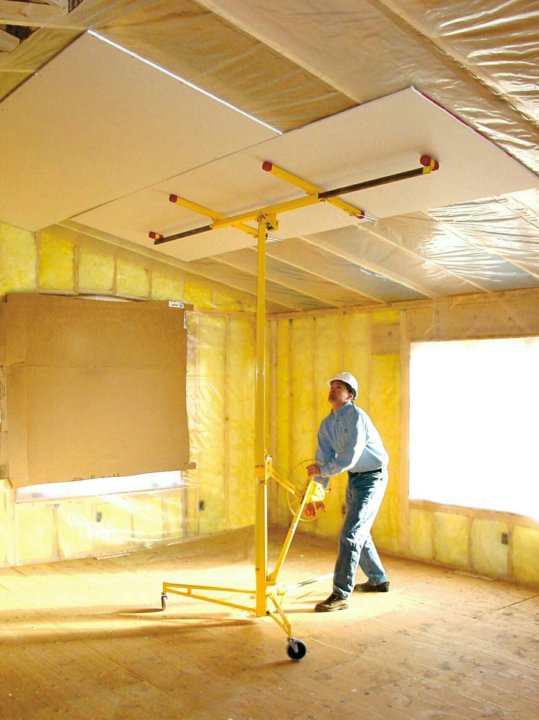
- Press the drywall sheet against the joist with a drywall lift for about 10 seconds.
- Lightly mark any holes you need to cut for light fixtures and where joists are.
- Repeat steps 1-4 until your ceiling is covered.
- Drill or hammer your drywall nails/screws where you marked there are joists.

- Cut holes for your fixtures with a utility knife. Start small and widen as needed.
- Reinstall fixtures.
- Roll your drop clothes up and either toss them right into your dumpster or unroll and shake them out inside the container.
A Fresh Ceiling Brings the Room Together
The work is done. You’ve got a brand-new ceiling, plus the pride of replacing it yourself. Now that you’ve pulled back the ceiling veil, you know where the electric wires, water pipes and heating vents are in the ceiling — giving you inside knowledge on safe places to hang things from the ceiling or to diagnose any ceiling issues in the future. For now, though, sit back, relax and enjoy a job well-done.
What Do You Think?
Did a dumpster rental help make your project easier? We're listening. Head over to Twitter or Facebook,
and use #dumpstersblog to join the conversation.
Need a Dumpster for Your Next Project?
Call 833-499-7510
Request a Quote
how to putty and paint on examples of photos and videos
The fact that suspended plasterboard structures are reliable and functional is evidenced by numerous positive reviews from domestic consumers.
But situations where plasterboard ceiling repairs may be required arise for a number of reasons, often beyond the control of the property owner.
Causes of defects and malfunctions
The main reasons why plasterboard ceilings may need to be repaired are:
- Non-compliance with the technology during the installation process, in other words, poor-quality work. As a rule, the main mistake is that the frame was created not quite in the horizontal plane. It could also be poorly attached to the floor surface or guide profiles.
- Violation of the temperature regime during the operation of the structure. With sharp constant fluctuations in temperature in the room at the junction of the plates, cracks appear on the plasterboard ceiling. nine0016
- The presence of a small hole in the plasterboard.
- Constant leaks from above due to the negligence of the neighbors living on the floor above, as a result of which various spots are visible on the surface of the ceiling structure, sometimes drywall sheets may lose their original appearance with a large flow of water.
 Often, after the flood, it becomes necessary to repair the kitchen: the plasterboard ceiling in this room suffers most often; nine0017
 - long service life of a plasterboard ceiling, which over time may be better to replace with a new one than to repair it.
- Each drywall sheet is stripped of finish material and carefully inspected. If the fastening is carried out correctly (along the perimeter with the help of self-tapping screws, observing a 30-centimeter gap), then the plasterboards are unscrewed and the frame is diagnosed from the profiles. nine0016
- When examining the baguette for breakage, attention is drawn to the observance of a 60-centimeter profile fastening step when installing it. If there is a cruciform connection of the profiles (always using self-tapping screws), then at these points the installation to the ceiling with the help of suspensions must be performed.
- Places where there are defects are first slightly expanded (by a couple of millimeters) to ensure better adhesion of their surface with a fresh layer of putty. To do this, you can use a kitchen knife or even a nail. The end of a sharp object is driven along the crack with pressure, and then a triangular depression is obtained, which is then processed with a thin brush with a primer solution.
 nine0016
 - When the primer dries well, fill the joint with putty so that it is level with the drywall board.
- After the first coat of putty has dried, the final coat is applied. The material should overlap the sheets slightly on each side of the seam.
- Cardboard is cut into a stencil (square, rectangle or triangle) larger than the hole. It is applied to the site of damage and a contour is drawn - a hole is created along it with a saw.
 Strips are cut from plywood, which are led through the hole into the ceiling space and fixed with screws from the outside. nine0016
 - Putty is applied along the contour, the reinforcing tape is laid along the joint and pressed into the putty with a spatula. Then make the final layer. Before painting a plasterboard ceiling or making other finishes, the putty is allowed to dry (read also: "How to paint a plasterboard ceiling - recommendations").
- Each drywall sheet is stripped of finish material and carefully inspected to assess the extent of damage.
 Those plates that are wet are unusable and cannot be used further. nine0016
 - Good ventilation is required in the room in order to eliminate residual moisture trapped in the plasterboard ceiling.
- When the humidity in the flood-damaged room has returned to normal, new ones are installed in places where the damaged drywall sheets were. The seams between them are putty and perform work related to the finishing of the surface of the plasterboard structure.
- Low moisture resistance. Drywall does not tolerate moisture well. Even moisture-resistant sheets at humidity above 80% begin to deteriorate
- In small rooms, it is unprofitable to use it, since the space between the plasterboard wall and the real one will be quite large in relation to the size of the room
Correction of errors made during installation
If errors were made during the installation process during the installation process, they can be corrected as follows:
After the shortcomings in the frame design are eliminated, drywall sheets without defects are mounted in their original places, the rest of the plasterboards are replaced with new ones. Before puttying a plasterboard ceiling, the joints of adjacent sheets must be pasted over with a construction mesh. When the putty dries, the joints are ground and finished, for example, the plasterboard ceiling is painted. nine0003
Removing cracks at the joint of plates
The order of work in case of cracks (see photo) at the junction of adjacent plates is as follows:
Fixing a hole in a plasterboard ceiling
Tip: Use our construction calculators and you will quickly and accurately calculate building materials. nine0003
When the hole is not through and small, then the damaged parts of the gypsum and cardboard are removed with a knife and a thin layer of putty is applied to this place. A day later, the area is cleaned with sandpaper, sometimes another layer of putty is needed.
If the hole in the GKL is through, then
Some helpful tips are shown in the video:
Ceiling leak repair
Usually, after a flood, apartment repairs are required - a plasterboard ceiling, if installed, is also subject to restoration. As a rule, the cladding of a suspended structure made of plasterboard must be done from scratch, while the ceiling frame does not suffer from moisture, even abundant moisture.
Repairs are carried out in this order:
All of the above work on repairing a plasterboard ceiling, if desired and with skills, can be done on your own. nine0003
How to replace drywall for interior decoration
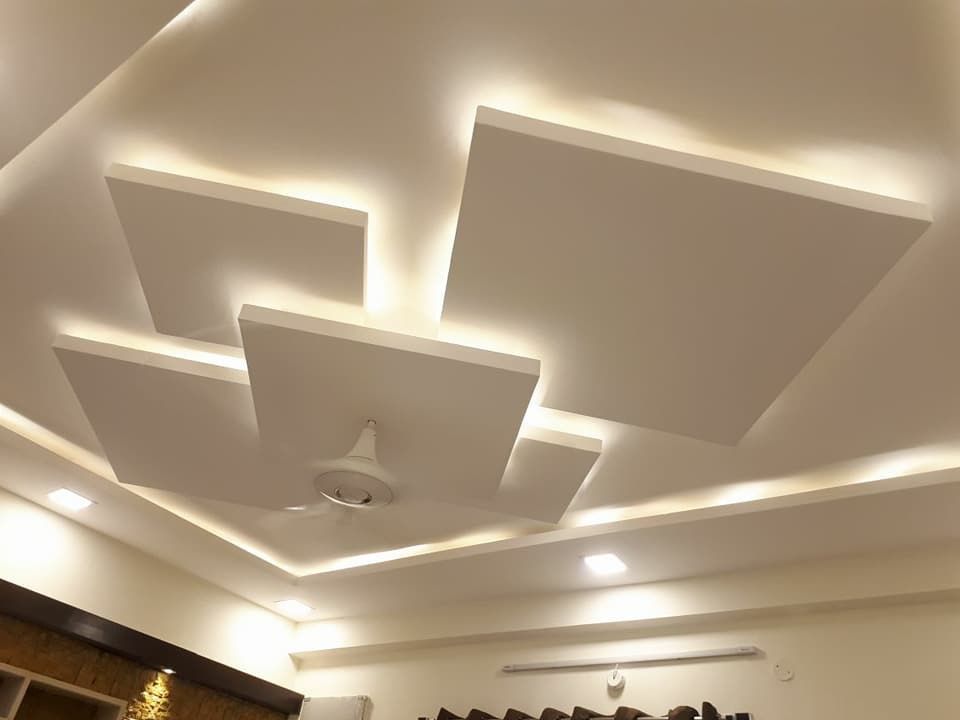
It is difficult to find a material that is as widely used as drywall. It has a lot of advantages: environmental friendliness, lightness, flexibility, durability, it is very convenient to install and finish, it is affordable and versatile. As a result, drywall has become very popular in the market as a finishing material.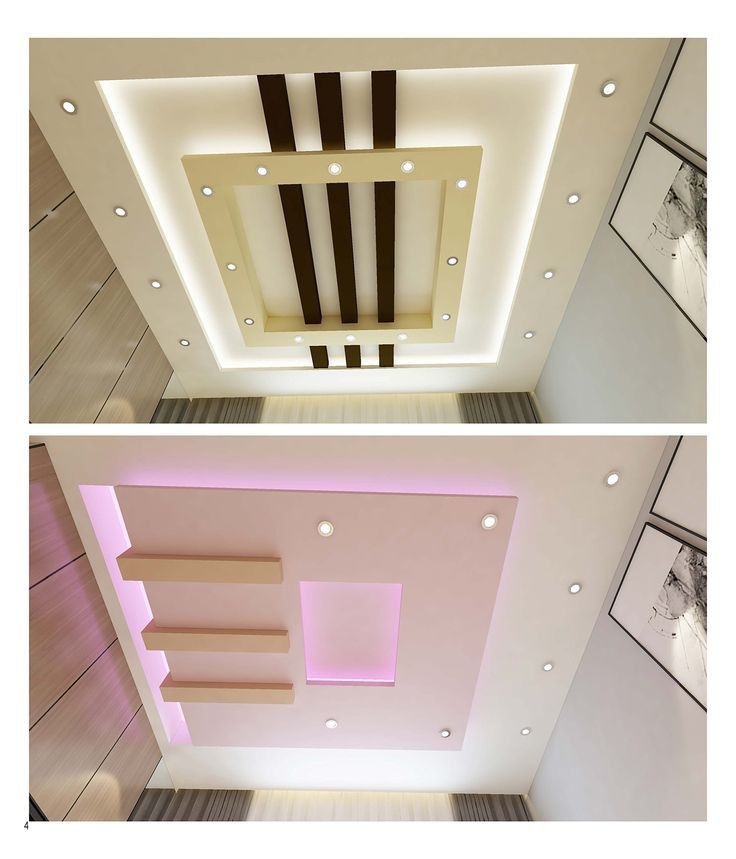 It is used to level the ceiling, walls and even the floor. With its help, various decorative reliefs are created, which makes it possible to realize the most daring design decisions. It is also often used as partitions for dividing the area of \u200b\u200bthe room. However, sometimes the question arises - what can be used instead of drywall? nine0003
When an alternative to drywall is required
Despite all the advantages, drywall has a number of disadvantages: Drywall sheets are not able to withstand heavy loads. Therefore, the use of floor leveling is impractical. For the same reason, it is not always recommended to use it for finishing the ceiling. It will also be impossible to install shelves with heavy objects on a plasterboard wall - you will have to take measures aimed at relieving the load
For these reasons, sometimes you need to find a replacement for drywall - a material that will be more durable and water resistant (if you are interested in what to replace drywall in the bathroom).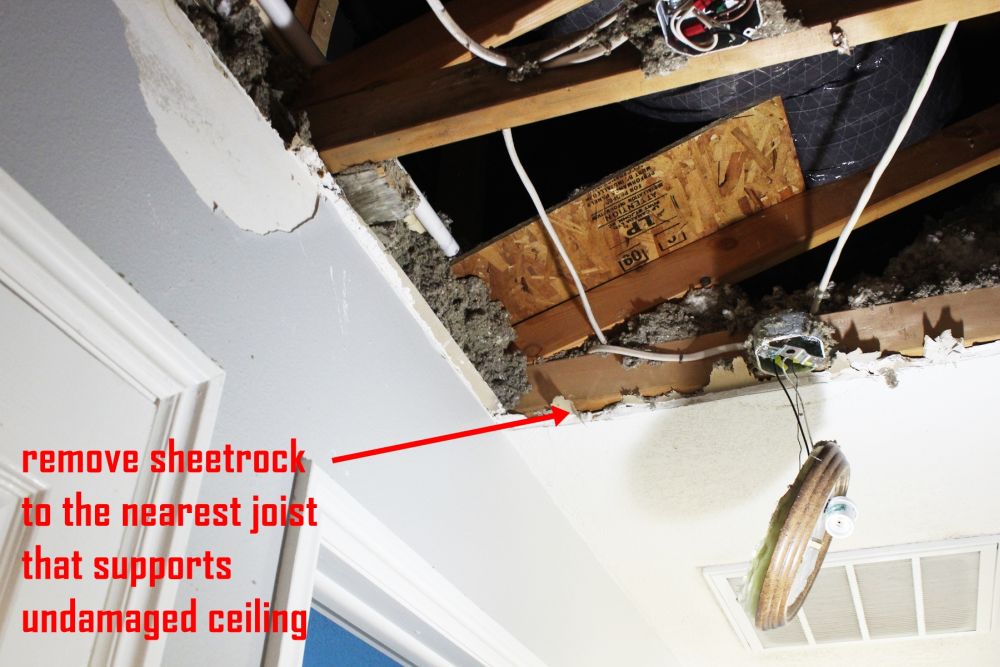 Especially the search for an alternative is required when finishing bathrooms and balconies. nine0003
What can be used instead of drywall
If drywall is not suitable for the above reasons and you need to replace it with some other material, then you should choose from this list:
- Chipboard (chipboard)
- Magnesium glass sheets
- Tongue-and-groove plate
- Cement particle board
- Gypsum fiber sheet
- Oriented Strand Board
- Gypsum board nine0015 Stretch ceiling fabric
- Aquapanel
- PVC panels
- Plywood
Important: the choice of material depends on the place where the installation is made. Some factors to consider:
- Moisture resistance
- Flame resistant
- Easy to work with this material
- Price
Chipboard
Before the advent of drywall, chipboard was widely used as a finishing material. Now she has receded into the background. nine0003
Chipboard is most often used for installing partitions. It also uses a frame made of wood or metal. Noise insulation is made using foam or mineral wool in the gap between the real wall and the chipboard wall.
Benefits of chipboard:
- Strength
- Low price
- Easy to install
However, chipboard is difficult to plaster and wallpaper sticks to it less well. Just like with gypsum boards, the moisture resistance of these boards is low, therefore, chipboard is not suitable as an alternative to drywall in the bathroom, on the balcony or loggia. nine0003
There are also OSB boards. In fact, they are better quality wood chips. They differ from them only in greater strength and longer service life. Disadvantage: require careful surface preparation.
Important! The environmental friendliness of wood-based panels is lower than that of GKL, and they require additional finishing.
Magnesium glass sheets
One of the most worthy substitutes for gypsum boards is LSU. They consist of small sawdust, minerals and fiberglass. They can be easily wallpapered, laid with ceramic tiles or painted. Therefore, first of all, glass-magnesium sheets are used to replace drywall for interior decoration. This is a good alternative to drywall in the bathroom, because LSU is moisture resistant. nine0003
A lot of positive qualities make LSU a worthy alternative to drywall. These are:
- Good elasticity, therefore no crumbling during assembly
- Easy to install
- Strength
- Lightness
- Frost-resistant, thanks to which installation can be carried out even from the side of the street
- Environmental
- Water and fire resistant
The disadvantage of glass-magnesium sheets is thermal expansion, but it is negligible and is unlikely to cause much inconvenience. nine0003
Tongue-and-groove board
GWP is often considered the best replacement for drywall. The main reason for this is the minimum of "dirty" work in preparing the surface for the final finish. Tongue-and-groove slabs are made of gypsum together with astringents and antiseptics. There are two types:
- Hollow
- Full bodied
Positive qualities:
- Durability. Thanks to this, reliable hollow walls can be erected
- Work is done quickly and effortlessly. Contribute to this special grooves in the plates
- Very good heat and sound insulation
- Plates create a comfortable microclimate in the building
Among the shortcomings, we note the sensitivity to high humidity. For this reason, two types of GWP are produced:
- Standard
- With increased moisture resistance
Tongue-and-groove slab - this is how to replace drywall for interior decoration. nine0003
Cement-bonded particle board
DSP - what can replace moisture-resistant drywall. Due to the presence of cement in the composition, they have good moisture resistance, they can be used even outdoors or in wet rooms. Another positive characteristic is fire resistance. Cement particle boards do not burn at all. Disadvantages:
- Less environmentally friendly
- The material does not bend at all, it can only be used for flat surfaces, like chipboard
CBPB is used for the construction of frame houses, as well as for finishing walls, ceilings, floors, window sills, roofs.
Gypsum fiber sheet
Gypsum fiber sheet looks similar to drywall. It differs in that it contains shredded paper, and on the outside it is plastered. Compared to GKL, it has several positive characteristics:
- Better sound insulation
- High resistance to fire
The main disadvantage is that it does not bend well and is not suitable for arches and similar structures. nine0003
Gypsum particle board
Designed for interior decoration - the construction of partitions, cladding and leveling walls, floors and even ceilings. More moisture resistant material than drywall. Without the content of resins, glue - environmentally friendly material. Perfectly smooth surface that resembles glass. Just like the previous material, it practically does not bend and is used only for flat surfaces.
Aquapanel
A new material that has appeared on the market quite recently. Looks like a cement slab. Designed for any purpose in decoration. Moisture-resistant, non-flammable, suitable for any facades and surfaces - it can replace drywall even in the bathroom. The ends are reinforced with fiberglass, and the rest of the surface is reinforced with fiberglass mesh. It is not inferior to GKL in flexibility - it takes any curved shape, which will allow you to create an elegant design in the room. nine0003
PVC Panels
PVC Panels are a good answer to the question "what can replace drywall for wall decoration".
The price of PVC (polyvinyl chloride) panels is enormously different - they can be both more expensive than gypsum boards and cheaper, depending on the size and manufacturer.
Advantages of PVC panels:
- Appearance allows no additional finishing
- There is no need to seal the gaps after installation due to their absence
- Easy to install
- Durability
- High water resistance
But there are a number of disadvantages:
- Lower fire safety
- Mechanical damage almost impossible to repair
Plywood
The question constantly arises: plywood or drywall? Is it even possible to consider plywood as something that can replace drywall in a house?
Plywood is much cheaper. This is its main advantage. nine0003
More disadvantages:
- Fire resistance. Plywood burns very easily, as its composition is wood and glue. Drywall is definitely ahead here
- Moisture resistant. All for the same reason, drywall is ahead here. Plywood gets wet and absorbs moisture much easier
- Flexibility. If the design provides for curved structures, then the use of plywood becomes impossible.