Replacing a bathroom floor
Replacing Bathroom Flooring | Home Guides
By Tim Anderson Updated May 23, 2022
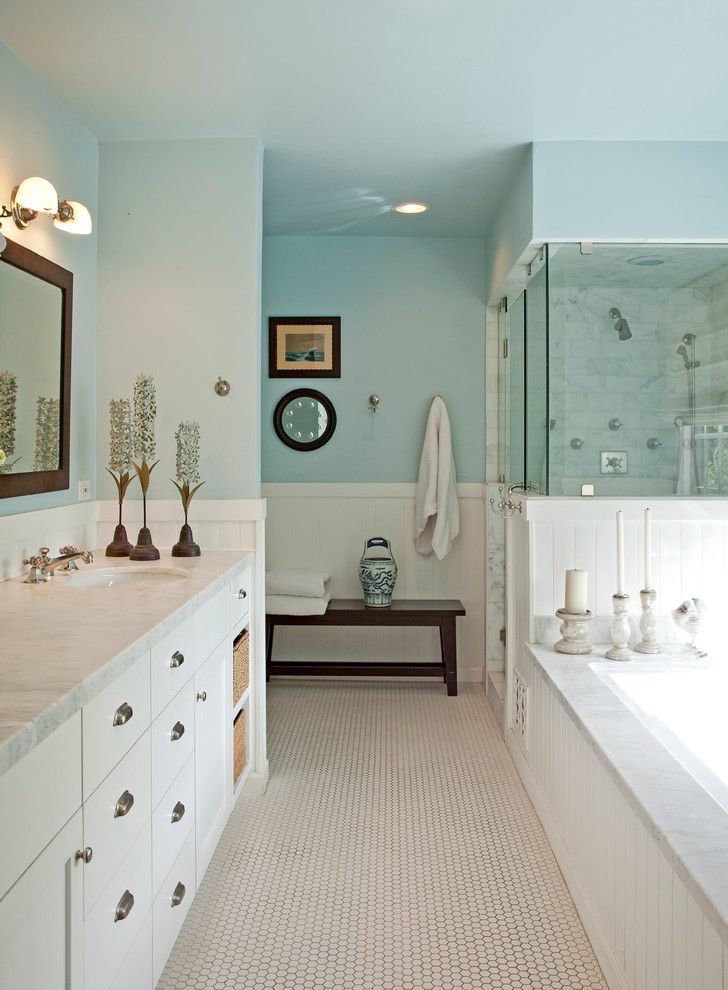
Floors in any setting need to be durable and capable of handling the test of time and foot traffic, but bathroom floors also need the capability to handle the constant presence of moisture. This means certain flooring materials are out the window, so to speak, such as carpet and hardwood. One of the benefits of replacing older bathroom flooring is that you can add new colors as well as certain extras along the way.
Demolition and Inspection
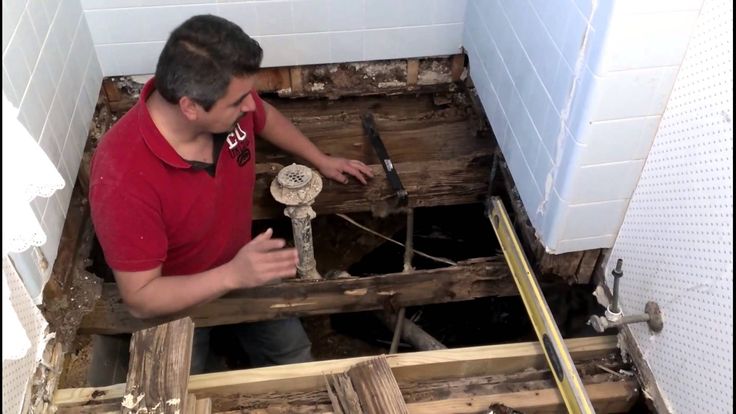
The first aspect of replacing a bathroom floor is to remove the existing material, which means getting into some back-breaking labor. Power tools speed things up and help, but you are still going to do a lot of manual labor. Rent a dumpster from your local trash agency to properly dispose of the old material, or haul it to the landfill or recycling agency if you have a truck.
After you remove the old material, inspect the existing subfloor to make sure there is no rot, advises Water Damage Restoration Specialists. If there is, cut these sections out and replace them with new plywood to provide a solid base to build on top. Also, remove the toilet and replace it after the new floor is installed, with a new wax ring. For best results, remove the cabinets as well and install the new flooring wall to wall. This allows you to move things around in the future and have the flooring installed in all areas.
Install a Proper Subfloor
Every flooring material has different minimum requirements for the subfloor. As a general rule, two layers of 5/8-inch thick plywood stacked on top of each other are sufficient for anything short of natural stone tiles and flagstones. Vinyl and linoleum can install on top of a single layer of plywood, although you should always double up for the best support to avoid deflection (up and down movement) that warps the material or jars it loose over time.
Natural stone materials require two layers of 3/4-inch thick plywood stacked on top of each other.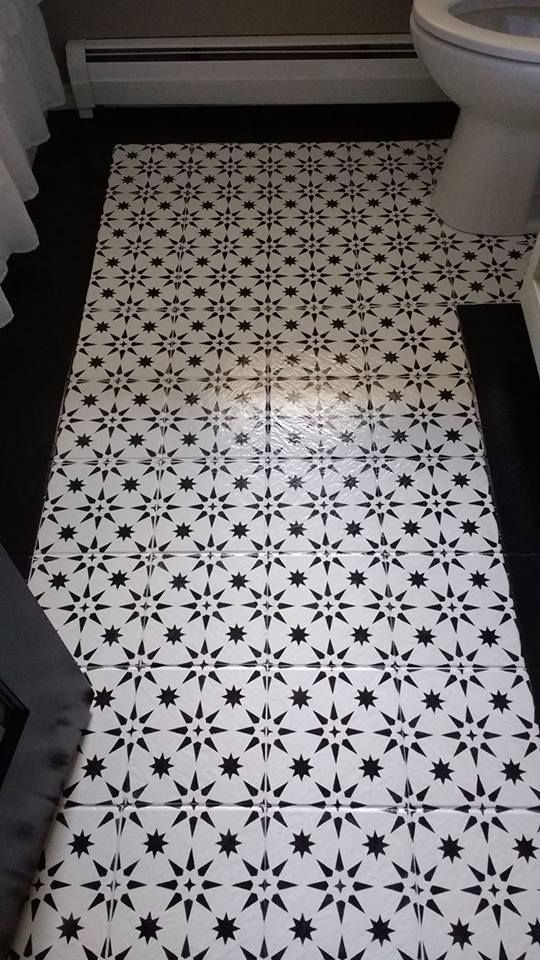 If you are unsure how thick your current subfloor is, pick an out-of-the-way corner and drill down with a small, 1/4-inch drill bit and measure the thickness.
Underlayment and Waterproofing
Although vinyl and linoleum install directly on top of plywood, tile and natural stone installations also require a minimum of 1/4-inch thick concrete or fiberboard mortared and nailed down to the top of the subfloor. Waterproofing benefits all flooring types, regardless if your material installs on top of the subfloor directly or on top of the underlayment board.
The easiest type to install is the paint-on latex waterproofing found in home improvement stores. Other styles are also available, such as peel-and-stick fabric membranes, and some interlocking composite membranes double as underlayment and waterproofing at the same time.
Consider Adding Heat Mats
When you replace the flooring material, add a heat mat under tile and natural stone floors. You must use concrete underlayment as opposed to a membrane underlayment to properly disperse the heat and avoid fire hazards. Mats are available in prepackaged formats, says Innovative Building Materials, or contact a manufacturer and have it create custom mats based on your dimensions for the bathroom.
These are fairly thin mats that are mortared on top of the concrete board, and then tile installs directly on top. Have a registered electrician wire and test the heat mat before installation of the tile to make sure everything works before you cover it.
References
- Innovative Building Materials: How to Install Heated Floors Under Tile
- Water Damage Restoration Specialists: How To Replace A Rotted Bathroom Floor & Subfloor
Writer Bio
Tim Anderson has been freelance writing since 2007. His has been published online through GTV Magazine, Home Anatomy, TravBuddy, MMO Hub, Killer Guides and the Delegate2 group. He spent more than 15 years as a third-generation tile and stone contractor before transitioning into freelance writing.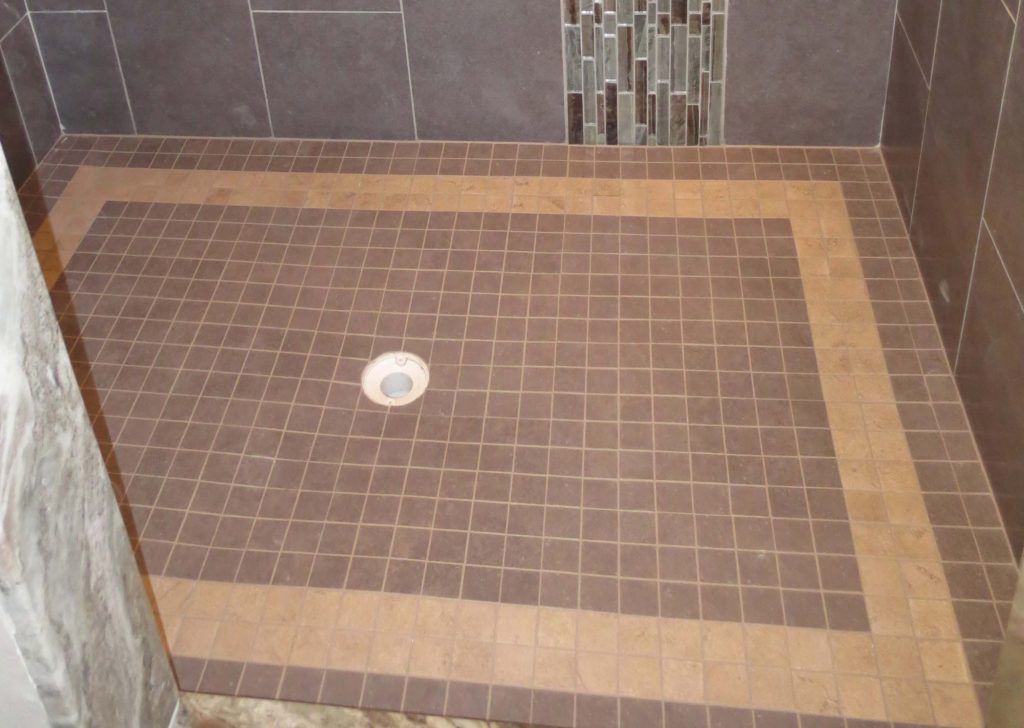
What You Need To Know Before Replacing Bathroom Flooring
If you’re going to be replacing flooring in your bathroom, you need a plan that defines where you’re at, how the bathroom will be used, and how you want it to look. Bathrooms are particularly tricky due to the moisture from steam and the possibility of water on the floor from the shower or an overflowing toilet. On top of that, the flooring has to be flexible enough to handle the heat.
Flooring is a great way to freshen a room. Although there are many trends in bathroom design today, different colors and mediums can add visual texture to increase the perceived size and feel. You can also play around with trim, borders, and focal points using colors and patterns to get the right look.
Bathroom remodels are one of the best returns on your investment if you’re in the Pacific Northwest. You don’t need to remodel just for your home value, though. You can upgrade your bathroom to be more water-efficient and green by using renewable resources.
What Are You Replacing
Each type of flooring will need to be removed and then the subfloor must be evaluated for rot, mold, mildew, and termite damage. Any damaged sections will need to be replaced with matching material. And if the wood has warped, the installer will need to prepare or even sand it down if possible to provide the best, flat base for your new flooring.
Carpeting
Carpeting will be pulled up. The carpet tacks will need to be removed. Usually, they are glued down and can be pried up. (NEVER put carpet in a bathroom)
Tile
Tile will be the most difficult to remove depending upon how it was installed. If it was done properly, it will be easy to pry up one tile at a time. If not, the installer may need to break up the tile.
Linoleum and Vinyl
Linoleum and vinyl are the easiest to remove. In fact, it probably has pulled up around the edges due to the moisture. The installer can slice a hole, and then pull up the flooring.
What Types of Floors Do You Want?
You may have an idea of how you want your bathroom to look. Today’s floor options can provide an amazing look with an “easy-to-care” for product that can come in a range of prices. With bathrooms, you also need to evaluate how often the room is used and how it is used. And you may even what to ask yourself how easy will it be to clean and maintain?
Flooring That Doesn’t Work Well In A Bathroom
Carpeting
Carpeting retains moisture and dries out slowly in the smaller spaces. If you still want to carpet your bathroom, we will just say please don’t. It’s never a good idea to install carpeting in a bathroom for many reasons.
Solid Wood
Solid wood is extremely sensitive to moisture and will eventually rot even with a protective topcoat. Additionally, solid wood will expand and contract with the subfloor increasing the likelihood of warping.
Bamboo
While bamboo is more water-resistant and resilient than hardwood, it can still easily be damaged by water. And it is affected by humidity and heat. Like wood, it will expand and contract and ultimately warp out of place if it is exposed to too much moisture.
Flooring That Work Well In A Bathroom
Stone Tile
Tile provides a great range of looks and is easy to clean. It resists water well. And it can be used with radiant heat. However, on its own, it can be cold and slippery, so make sure you are careful and consider a good bath mat.
When researching stone tile, evaluate how you want the tile placed, what color grout, and how you want it to complement the counter and any additional wall tiles.
Luxury Vinyl Tile – LVT
Luxury vinyl tile or LVT is waterproof, cost-effective, and comes in a wide range of colors and textures. Like stone tile, you want to ensure the design works well with your new countertop and wall tile. There are typically two types of vinyl composition. Wood and plastic composite (WPC) is preferred as it’s thicker and more flexible and resilient than stone plastic composite (SPC).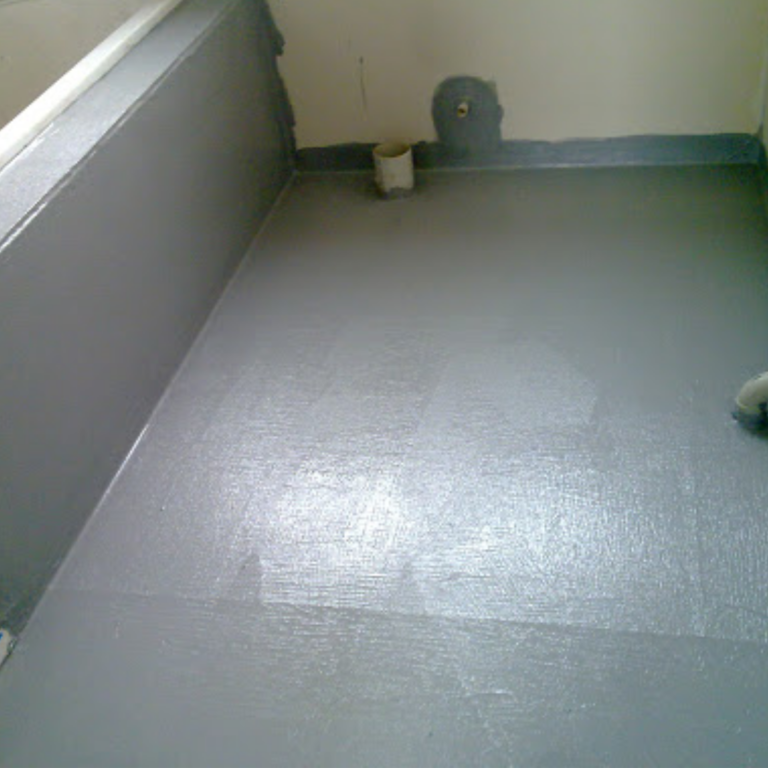
LVT flooring is also extremely durable, can be scratch and damage-resistant. Unfortunately, it can be pierced like many other flooring types, but luxury vinyl tile is easy to replace one at a time.
When researching luxury vinyl tile, look for a thicker top wear layer. The thicker the top wear layer is, the longer your tile can last and withstand wear. Another positive with LVT is that it’s easy to clean. You can vacuum, sweep, and mop up any spills easily.
Laminate Flooring
You can get the look of wood in your bathroom and not worry about water damage with laminate flooring, and it is affordable and durable. It’s also easy to clean. However if it gets water damaged, laminate flooring can’t be repaired, and you will need to replace it, so keep that in mind for how you use your bathroom.
When researching laminate flooring, look for a medium-density fiberboard (MDF) core. It’s made up of water-resistant materials like wax. This gives you time to wipe up any puddles before it gets absorbed.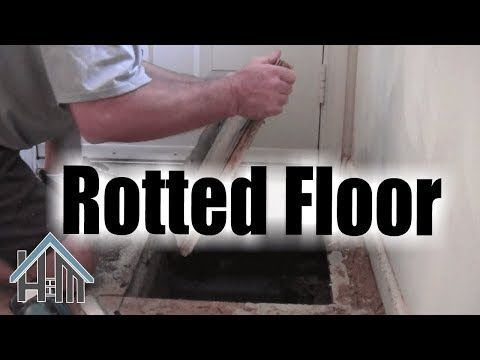
Your installer should apply glue or caulk around the edges of the planks to ensure water won’t sneak down. And they can add an underlayer to act as a barrier between the laminate and the subfloor.
Engineered Wood Flooring in a Bathroom
Engineered wood can resist water, but is generally better suited towards a bathroom that isn’t used as much or doesn’t have a shower or tub. It also depends on where you live.
Since engineered wood flooring floats on top of the subfloor, it can expand and contract with heat and moisture resisting warping. It’s a great choice if you want to have real wood in your bathroom. Plus it’s easy to keep clean with a quick vacuum or sweep.
The downside is if the top layer gets damaged and it needs to be refinished, you may not be able to as you could go through the top veneer level. So wipe up any puddles right away and treat your engineered wood flooring well.
And The Winner Is?
That is entirely up to you. If you’re not certain, our design experts are here to help you visualize how your bathroom could look. Bathrooms tend to stay a little damper here in Portland. So it’s essential you have good ventilation no matter what type of flooring you choose.
Repair of floors in the bathroom: photo, do-it-yourself
Repair of floors in the bathroom with your own hands - a difficult stage in the arrangement of the apartment. Communication pipes that need to be carefully hidden, high humidity of the room, requiring the use of special finishing materials - all this greatly complicates the task. And if you decide to make repairs on your own, then you probably wondered: how to make repairs to the floor in the bathroom correctly, so that it is beautiful, durable and does not flood the neighbors. And below you will receive a detailed answer to this question. nine0003
Bathroom floor requirements
Bathroom floor requirements are as follows:
- Environmentally friendly.
- Travel safety.
- Beautiful appearance.
- Insulation, provides protection against heat loss, negative noise and moisture ingress.
- Durability.
- Beauty in service.
In essence, each of the above requirements can be achieved. It is worth highlighting two main components, the observance of which allows this to be done: a competent choice of flooring and strict adherence to laying technology. Before you start work, you should carefully familiarize yourself with all types of flooring that can be put in the bathroom. nine0003
How to make repairs in the bathroom with your own hands: photo and sequence of actions
In most cases, the arrangement of the floor in the bathroom can differ only in the finish flooring. As for the rest, the design is approximately the same, primarily for apartment buildings.
Bathroom floor layout
As a rule, the bathroom floor is as follows:
- Concrete slab floors.
 nine0012
 - Waterproofing (roll or bitumen).
- Sand-cement screed (approx. 50 mm).
- Waterproofing (painting or coating).
- Leveling screed (self-levelling or cement-sand).
- Floor covering (linoleum, tile, self-leveling floor, laminate, wood).
An underfloor heating system can be installed for additional heating of this room. It is done at the stage of the leveling screed, so it is important to plan it in advance. nine0003
How to make a bathroom floor with your own hands: photos of the main stages of work
If you decide to do everything on your own, be prepared for the fact that you will have to "tinker" with this room. Arranging the floor requires a lot of effort, care and patience. Each of the stages can take a long time. In order for the floor structure to be durable, the materials must gain high strength - dry. Therefore, do not rush - you do not need a low-quality floor. nine0003
Floor arrangement in the bathroom is unified and takes place in several main stages, which you will learn about below.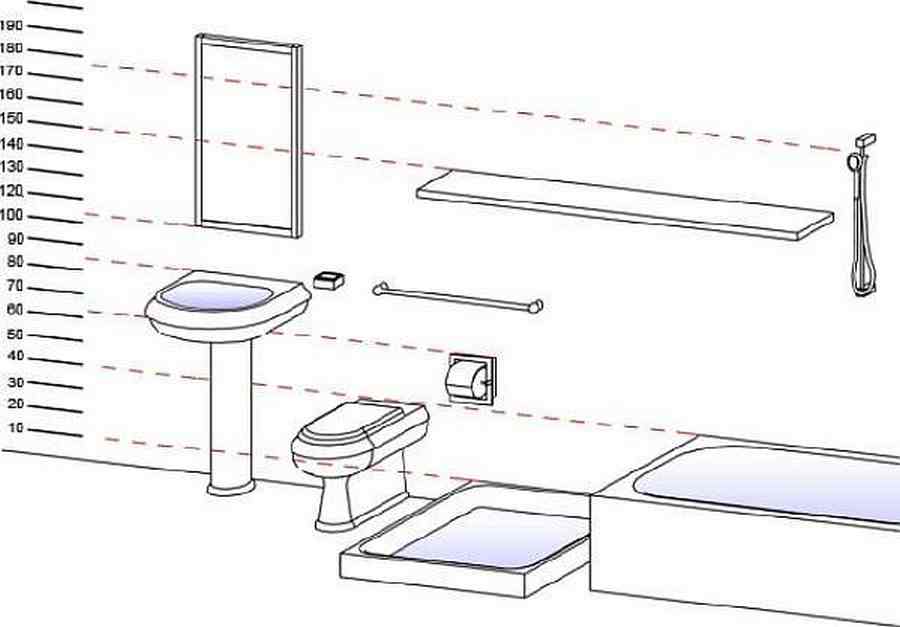
- Preparatory work.
The preparatory work is carried out in two scenarios and is explained by the current state of the bathroom: residential or “after the builders”.
Bathroom refurbishment includes removal of leveling screed and flooring. In most cases, ceramic tiles were laid in the bathrooms, which must be removed with a perforator and the remains removed. During dismantling, the leveling screed will be broken. There will be cracks, holes and splits after the perforator. For this reason, the screed must also be removed. Moreover, if your apartment is old, it is unlikely that during the Soviet Union it was made with high quality, which means that it needs to be rented. If earlier the floor was wooden, you need to saw off part of the boards and then proceed to dismantle the rest. Also, the removal of the screed will be required in order to perform high-quality waterproofing of the floor. After the preparatory work, it remains only to sweep out the garbage, if, of course, there is one. nine0003
The concrete subfloor must then be vacuumed and visible cracks sealed. And this applies to both new buildings and residential apartments. To prevent cracks and holes from getting larger over time, seal them with tile adhesive. After it dries, you need to proceed to the next step.
- Bathroom floor waterproofing.
For better adhesion of the waterproofing material to the floor surface, it must be primed. Therefore, we first treat the floor with a primer and only then proceed to waterproofing. nine0003
There are several options for waterproofing the floor in the bathroom: roll, guided, painting and coating. Each of them has its own advantages.
Guided waterproofing is used for processing floor slabs, it is made with an overlap on the walls of at least 25 cm. Then a concrete floor is poured on it, on which in turn it is necessary to apply guided insulation or use more modern materials.
The paint method is suitable for waterproofing a concrete floor (although note that it is short-lived). The average service life of such waterproofing is three to five years. But on the other hand, paint waterproofing is the easiest and simplest way: with a roller or brush, you need to apply the solution to the floor surface by 10 cm with an overlap on the walls. nine0003
Roll-up waterproofing is useful for applying to walls at the junction of a bath or shower.
Coated waterproofing is the most durable and optimal in this case.
To perform this waterproofing you will need:
- Make a mixture by pouring the dry component into water and stirring well. Moreover, it is important to adhere to the ratio of components 1 to 1. You need to knead thoroughly, resulting in a homogeneous mass. nine0012
- Apply the mixture to the entire surface of the floor with a brush or roller.
 For hard-to-reach places, it is better to use a spatula. Material consumption per 1 m 2 is always indicated on the packaging, so take it into account.
 - Stick a special waterproofing tape on the joints of the floor with walls and other structures.
- Be sure to coat the walls and the tape with the mixture 10-15 cm up, thus making a "trough". In the event of a flood in the bathroom, the “trough” is able to hold back some of the water so that it does not pour into adjacent rooms or neighbors. nine0012
- The waterproofing mixture is applied in two coats. And after applying the first layer, wait until it dries - 4-6 hours. Then apply a second layer.
- Wait until the waterproofing is completely dry. You can start further work only in a day.
At the current stage, you need to stop and think: is it worth making any major changes in the bathroom. And below you will find out what these changes are and how they affect the subsequent stages of do-it-yourself bathroom renovation, and you will also see a photo. nine0003
- Structural changes
If you have already begun renovating and changing the floor in the bathroom, it is possible that you want to make structural changes in the room's devices. Increasing comfort and ennobling the bathroom, you can resort to installing a "warm floor" system, moving the toilet to another location or equipping a water drain. It is imperative to make a decision at this stage, while you have not yet poured the concrete screed.
The "warm floor" system will significantly increase the convenience and comfort of being in the bathroom barefoot. Indeed, in most cases, tiles are laid on the floor, which are quite cold to the touch. In the morning, it is especially inconvenient to step on the tile, when you have just got out of a warm bed. An excellent solution would be to install an electric warm and water floor. Contrary to popular doubts, the "warm floor" system in the form of an electric heating cable can be easily installed in the bathroom.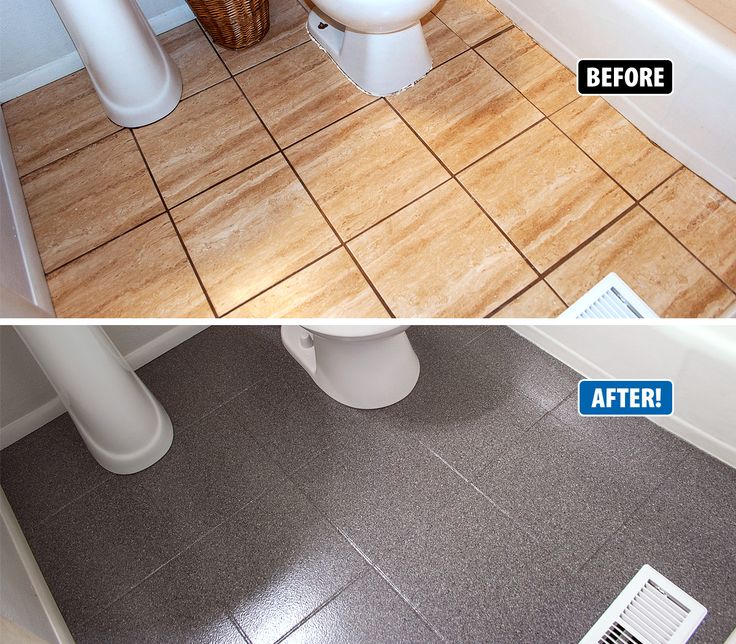 It is easy to install and eliminates combing. However, there is one tangible drawback - you will increase the cost of electricity. "Water heated floor" consisting of pipes with hot water is connected to heating pipes or heated towel rails. nine0003
By equipping a water drain, you can protect your neighbors and your apartment from accidental flooding. In addition, the water, flying to the floor, will immediately go into the sewer. To perform a drain, the floor surface is made with a slight slope towards it. Moreover, the overall level of the floor in this case will rise by 10 cm. It is necessary to mount the drain and the outlet pipe, and during subsequent work, the neck of the drain must necessarily protrude above the level of the screed. It is important to carefully monitor this, and during the repair process, plug it with rags so that the pipe does not clog. nine0003
If you need to relocate the toilet, you will have to resort to a set of structural changes. The toilet must be connected with a pipe to the sewer, making it at an angle for a good flow of water. In order to hide the pipe, you will either have to equip a separate pedestal for the toilet, or raise the overall floor level from 15 cm. At this stage, you need to dismantle the old toilet bowl and lay the pipe to the new place. So that the toilet does not interfere until you put it in place.
Tip! The low level of the floor in the bathroom in relation to the general level of the floor in the rest of the rooms helps to avoid flooding the entire house or apartment, including neighbors. If it is not possible to make such a floor, it makes sense to equip a high threshold (up to a certain point it will hold back the flow of water). nine0003
Before you start pouring the floor in the bathroom, you need to mount all communications and know at what level the floor will be.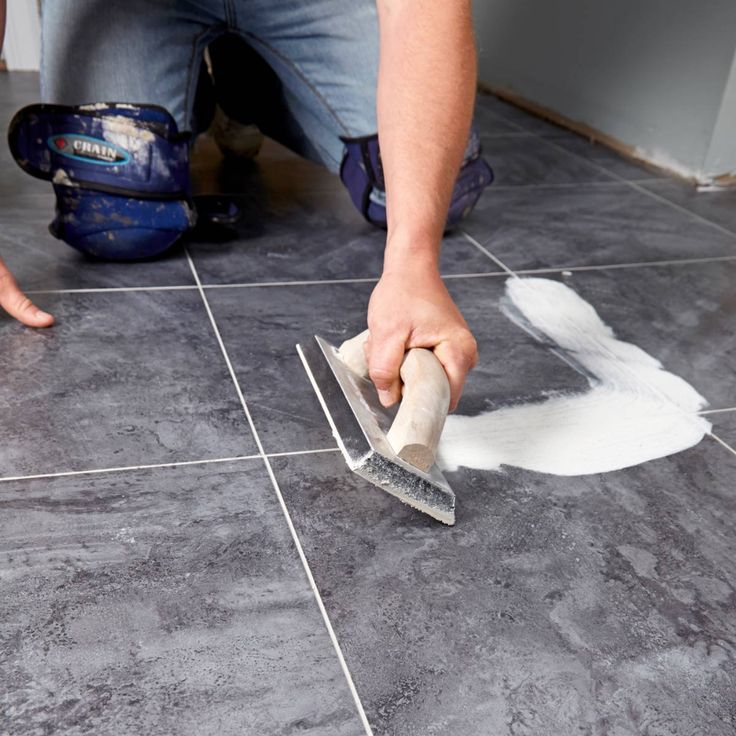 When everything is ready, proceed to the direct screed.
- Tie
The quality of the installation of the flooring and the durability of the entire floor depends on how even the subfloor is. For this reason, the floor screed in the bathroom must be approached as carefully as possible.
The most common leveling screed material is a cement-sand mixture. An alternative would be a self-levelling compound, however, it will not work if the floor has significant imperfections or is uneven. In extreme cases, you can use it for the second leveling layer. nine0003
How to make a concrete screed? Main steps:
- On the walls of the bathroom, mark the level to which the floor will be poured.
- Beacons must be installed one meter apart. To fix them, tubercles of cement-sand mortar are laid out on the floor, where alabaster is added. Then beacons are laid on them and, guided by the marks, are aligned in level.
At the same time, they are slightly pressed into the solution.
- Next, you need to prepare a mortar for screed, mixing it with a drill. nine0012
- Then filled with mortar around the edges of the beacons.
- For leveling, you can use a rule 20-30 cm longer than the distance between the beacons. It is applied to the lighthouses, after which it is pulled towards itself, thereby removing excess solution and distributing the solution over the voids.
- It is important to wait until the screed is completely dry. Observe the microclimate, which is indicated on the packaging with the mixture, eliminating drafts.
To install the electric floor heating system, the screed must be poured in two stages. As soon as you pour the first layer, you need to wait until it is completely dry. Next, lay out the thermal insulation and spread the "warm floor" system. Then fill the system with a second layer of solution. nine0003
- Flooring installation
The final step in repairing the floor in the bathroom with your own hands is laying the flooring.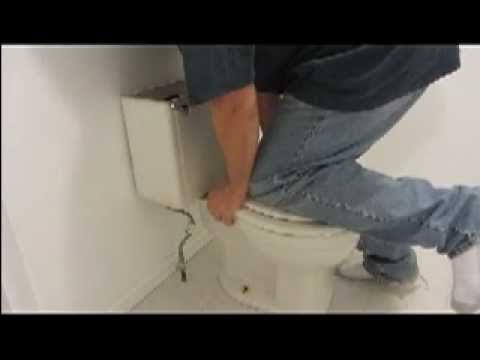 Here you have a lot of options. And as an example, we recommend that you familiarize yourself with the technology for making self-leveling floors:
- Make a mixture by pouring the dry component into water and mixing with a drill with a mixing nozzle. In this case, it is worth observing the proportions that are indicated on the package.
Tip! During the pouring of the self-leveling floor, the temperature in the room should be +15..+25 degrees, humidity should not exceed 80%. nine0003
- Starting from the corner opposite the doorway, fill in the first strip.
- Smooth with a spatula or squeegee, adjusting the layer thickness.
- Blow out air bubbles with a spiked roller.
- The rest of the strips are filled in the same way.
The floor can be used after 6-12 hours, but before that it must be hardened. However, the floor dries completely after at least three days.
Tip! If a “warm floor” system was installed in the bathroom, turn it on no earlier than 7 days after it has been poured.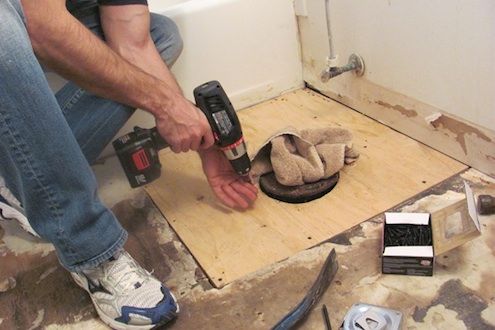 nine0003
- Choice of bathroom flooring
There are many flooring options available these days. When choosing, you need to take into account the budget, personal preferences and of course performance.
- Cork floor
Recently, many homeowners have chosen cork flooring for their bathroom. Such a material has a huge number of advantages: a pleasant to the touch and warm surface, does not spring, does not rot, fungi do not multiply, and does not absorb water. Compared to tiles, cork flooring is completely non-slip. The cork underfoot is pleasantly springy, quickly returning to its original position. Moreover, it is absolutely natural and hypoallergenic. However, keep in mind that only cork array does not absorb moisture. HDF-based floors do not have this feature. For this reason, give preference to a cork array with a thickness of four to six millimeters, glued to the base. nine0003
- Screed
One of the simplest is a self-leveling floor. It has gained recognition and high popularity relatively recently. Another significant advantage is the waterproofing properties, ease of installation, a variety of shades and patterns. In addition, under it you can lay the "warm floor" system. But at the same time, the self-leveling floor has obvious disadvantages: it ignites easily, the freshly prepared mixture has a toxic composition, requires an even base, is unnatural, and feels great to the touch. nine0003
Self-leveling floors are durable, hygienic, moisture resistant and look very impressive. If necessary, you can see photos of different options for such a floor with a 3D effect. This coating allows for an almost unlimited amount of decoration, for example, you can place anything you want under the transparent polymer - nature photos, pebbles, sand and other natural materials. Such floors are perfectly combined with any interior.
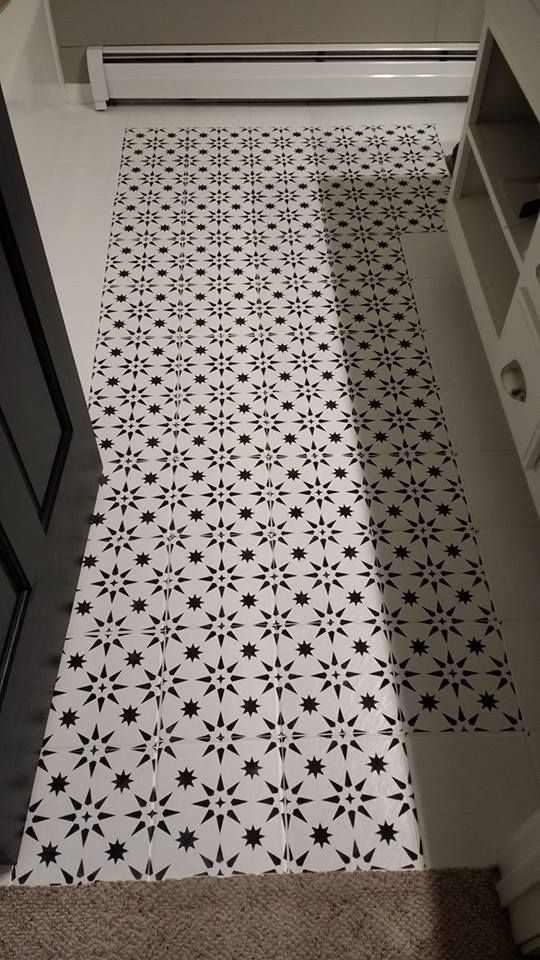
- Floor tiles
As before, tiles are the most popular and widespread material for bathroom floors. And despite the fragility of the tile and the complex laying technology, the variety of colors and shapes and the naturalness of the material, many prefer this particular material. You should not be stopped by the fact that during damage to the tiles during operation, you will have to replace the entire area. All for the reason that during the dismantling of the split tile, its connection will be damaged. But be that as it may, some tradition and aesthetics are more important. nine0003
Tip! It is advisable to buy tiles with a corrugated structure, because this way you will not slip even on a wet floor.
- Wooden floor
Today, such a floor is extremely rare in bathrooms, since not every wood can withstand regularly high levels of humidity. For a wooden floor, larch and teak are used, they provide additional waterproofing. This floor is beautiful, warm and healthy. Nevertheless, experts recommend replacing wood with a moisture-resistant laminate, which will be more suitable for a bath.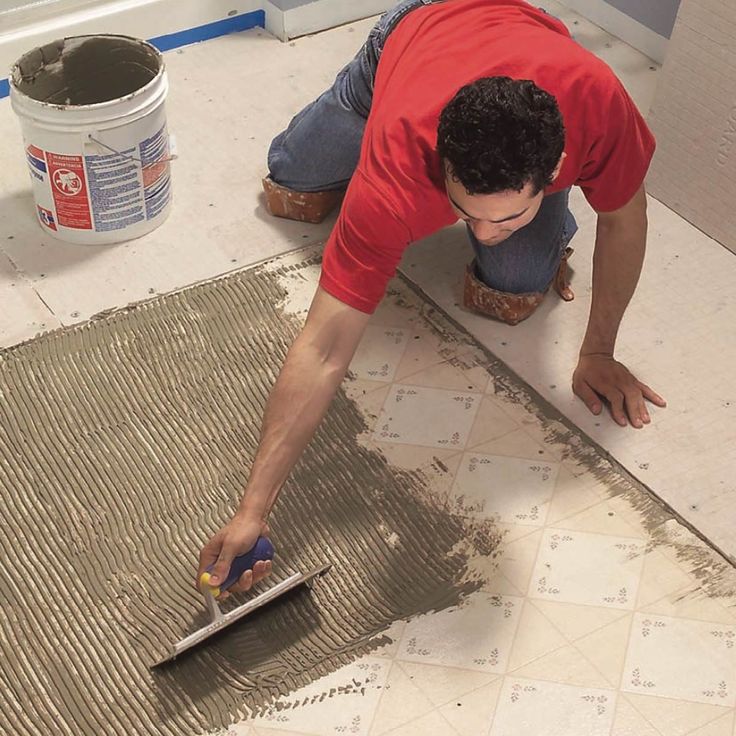 nine0003
- Floor linoleum
As a top coat in the bathroom, you can use linoleum flooring. It will be an additional waterproofing, easy to install and maintain. However, it has one significant drawback - it can quickly wipe off and lose its visual appeal. That is why linoleum is used as an economy option or temporary cover.
Natural linoleum is an expensive and high-quality material, but it is categorically not suitable for a bathroom. Material on a waterproof PVC basis is suitable here. In order to exclude the possibility of injury on a wet floor, it is worth choosing embossed coatings. nine0003
- Other bathroom flooring
In addition to all the options listed above, natural stone, bamboo, slate, mosaics are used for flooring. All these, of course, are beautiful types of coatings that belong to the elite category, but their cost is correspondingly quite high.
Do-it-yourself bathroom renovation: photo and choice of flooring color
0003
- The color of the floor covering should be in harmony with the color of other bathroom interior components or be neutral. For spacious rooms, contrasting combinations are recommended, but the bathroom is usually not one of them.
- When choosing a dark floor (for example, black glossy tiles), be prepared that every speck of dust will be noticeable on this surface, including traces of dried water drops. Therefore, you will have to clean the bathroom a couple of times a day.
- White floors can also create problems, and for many people, the abundance of white creates the feeling of a hospital ward. nine0012
Attention! For the floor in the bathroom, it is better to choose neutral (shades of beige, gray) tones. If desired, each of you can make the floor colored - turquoise, blue. Although, the choice of color is a personal matter of the owners, and they need to rely solely on their own feelings.
Whatever flooring you choose for your bedroom, know that the main task is the quality implementation of each of the previous stages. Any coating will ideally lie on the level of the screed. A well-made waterproofing eliminates the likelihood of flooding neighbors. nine0003
Replacing old bathroom floor tiles yourself
Replacing an old bathroom tile floor can be an expensive undertaking if done by a professional. Fortunately, such work can be done independently - the main thing is the availability of the necessary tools and free time. The bathroom tile replacement process can be broken down into 5 simple steps that give an overview of the job and inspire beginners.
1: Preparation
The first step in replacing bathroom tiles is to collect the necessary equipment and supplies. Tile, mortar or tile adhesive, trowel, level, caulk, tile saw, goggles, chalk, ruler, pencil and paper will be needed for the job. Always keep a supply of rags and paper towels, which will also come in handy when working.
After collecting materials, remove the toilet and any existing furniture from the bathroom. Remove the old tiles, being careful not to cut yourself or damage the subfloor. After the old flooring has been removed, carry out mechanical cleaning - remove the remaining debris and dust, for example, with a vacuum cleaner. nine0003
2: Planning
Create a floor layout based on the new tile. With chalk and a ruler, draw the floor, trying to divide it into perfect squares. Proper tile placement at the beginning of the repair will make the whole job easier and will not lead to crooked laying.
Place the first tile in the center of the room. Align the sides of the tile with the chalk lines. Now place the next tiles on the left and right, top and bottom sides of the first one. You can continue this “dry” placement so that you don’t get confused in the layout during further work. nine0003
3: Installing tiles
Apply a thin, even layer of tile adhesive at the first tile. Gently lower the tile into place and "wiggle" it a bit to make sure it is properly adhered to. Place crosses around the tile to ensure that the next tiles are evenly spaced around it.
We continue to apply glue to the floor and lay the tiles. Do not forget to check the level of correct laying - if necessary, increase or decrease the layer of glue. The thin layer of glue dries very quickly, usually within two hours, so you need to work constantly, without interruption, until this part of the repair is completed. If such a short time is not enough for you, you can use slower drying solutions that allow you to “redo” the styling within 24-48 hours. However, fast drying glue is more suitable for homes with only one bathroom and when the owner does not have much free time. nine0003
4: Grouting
Once all the tiles have been laid and the adhesive has dried, it is time to work on the tile joint. Use mechanical devices ("gun") to spread the grout over the entire surface.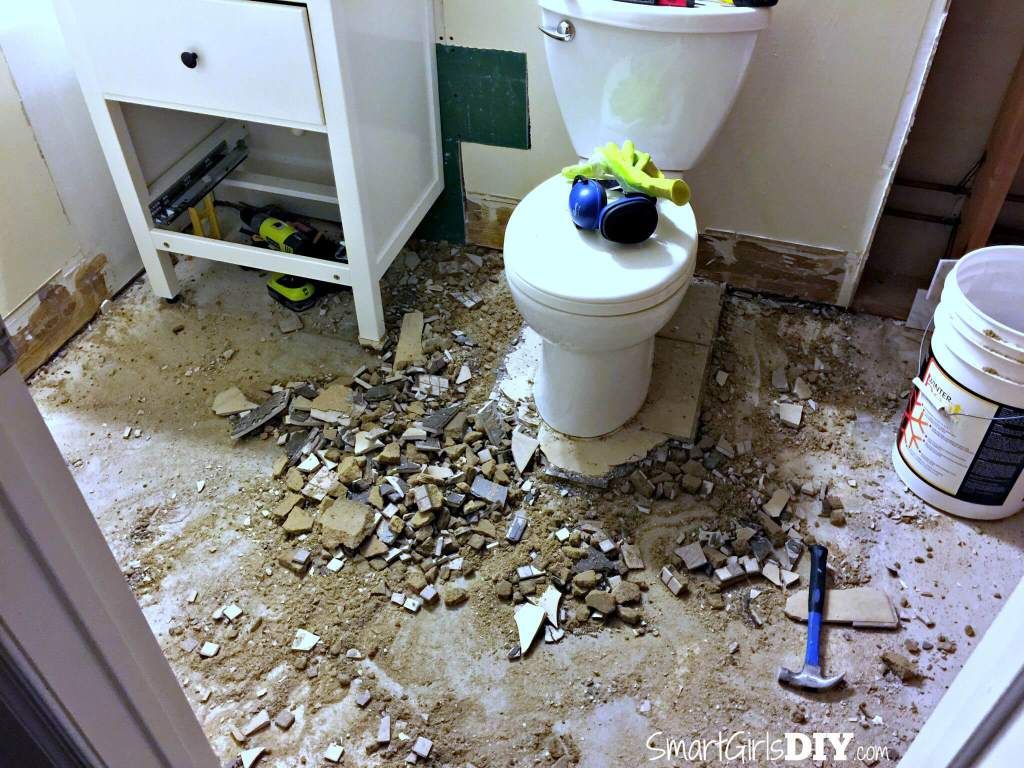 We hold it at an angle and, by pressing, gradually fill the entire seam with liquid grout. Be careful not to allow excess grout to come out of the edges of the joints and contaminate the tile.
If trouble occurs and grout gets on the tile, remove it with a damp sponge. Try to be as careful as possible so that the grout in the seams is not disturbed. After completing this stage of work, inspect all seams and, if necessary, wipe off excess grout from tile surfaces. nine0003
5: Sealant
After the grout has dried for several days, we will process the tile joint with sealant for grouting. This will protect the grout from damage and improve the appearance of the floor. After the sealant dries, we return the toilet and furniture to their place.
Replacing bathroom tiles on your own is time-consuming, but you can save a lot of money than if a professional would do it. In addition, the result of independent work will bring a feeling of satisfaction - "and I can do it!".