How do you grow onion
How to Grow Onions | Onion Planting & General Growing Tips – Bonnie Plants
Learn expert tips for growing onions. They are a tasty, easy addition to your home vegetable garden. Growing onions is efficient and rewarding.
Growing onions is simple: If you can poke a hole into the ground, you can grow an onion from a little plant. Most of our onion varieties are sold as little seedlings in bare-root bundles; each plant will start growing within days after you plant. If you can't plant your onions right away, remove their bindings and place them in a bucket with 2 inches of moist soil in the bottom. Keep them in a cool, bright place but out of direct sun until you are ready to plant. A sunny basement is ideal.
Quick Guide to Growing Onions
- Plant onions in early spring once the ground is workable. In-ground gardens and raised beds are both excellent options for growing onions.
- Space onion plants 6 inches apart in rows that are 12 inches apart. Grow them in a sunny spot that has fertile, well-drained soil with a pH of 6.
0 to 6.8.
- Improve your native soil by mixing in several inches of aged compost or other rich organic matter.
- Onions aren't great at taking up water, so it's important to keep soil moist so their shallow roots can drink up. Water whenever the top inch of soil becomes dry.
- For best results, keep your growing onions fed with a continuous-release plant food.
- Onions can be eaten at nearly any size so harvest when they're the right size for your next culinary creation.
Soil, Planting, and Care
Most gardeners want sweet onions, and the sweetness of an onion is determined by both nature and nurture. For the mildest onions, start with a variety known to produce sweet, mild-flavored bulbs such as Texas Sweet (at southern latitudes) or Walla Walla (at northern latitudes). For great results, start with Bonnie Plants® onion slips, strong plants grown by a company that has been helping home gardeners for over a century.
Growing onions requires abundant sun and good drainage, and they grow best when the soil pH ranges between 6. 0 and 6.8. Raised beds or raised rows made by mounding up soil are ideal, especially if your soil is heavy clay. Fill raised beds with a soil designed to be just the right weight and texture for raised beds, such as Miracle-Gro® Performance Organics® Raised Bed Mix. For mounded rows, mix a 3-inch layer of compost or aged compost-enriched Miracle-Gro® Performance Organics® All Purpose In-Ground Soil into the top 6 inches of soil. Set plants 1 inch deep, so that their roots are well covered with soil but the top of the plant's neck is not buried too deeply. You don't want the part of the neck where the leaves grow away from the clear sheath to collect soil or water down between the young leaves, or they can rot. Space plants 6 inches apart in furrows 12 inches apart. Plants grow best when, in addition to being grown in top-quality soil, they're fed with just the right plant food. To ensure growing onions get all the nutrition they need, feed regularly throughout the season with Miracle-Gro® Performance Organics® Edibles Plant Nutrition Granules, following label directions.
Onions roots are shallow and not very efficient at taking up moisture, so they need a steady supply of water to grow without interruption. Although they actually recover well from drought and start growing again when watered, it is best to keep the soil consistently moist until the bulbs enlarge.
You may mulch with a light layer of weed-free and herbicide-free grass clippings or another fine mulch. Onions naturally push toward the surface as they form bulbs, and it's best if the tops of the bulbs are allowed to bask in dry sun. Remove mulch that might keep the expanding bulbs excessively moist.
Seedlings that are about the diameter of a pencil produce the biggest, most beautiful bulbs, so some gardeners sort seedlings by size before planting. Plant the largest ones together only 2 inches apart to start enjoying as green onions in just two or three weeks. Very small seedlings set at close spacing can serve as a second crop of scallions. Use the pencil-sized plants to grow full-sized onions that will produce extra-juicy slices.
Troubleshooting
As onions leaves expand, they may be found by tiny black onion thrips, which suck sap from onion leaves. These are hard to see because they hide down in the folds and neck of the leaves. Also be on the lookout for aphids. Finally, weak plants that slowly wilt may be infested with onion root maggots, the larvae of a common fly. Contact your regional Extension agency for details on how to control these pests.
Harvest and Storage
You can harvest young onions just a few weeks after planting if you want to use them as "spring onions" or scallions. There is no perfect size, just pull when they are big enough to suit you.
For full-sized bulbs, let onions grow and mature. They are ready to harvest when the bulbs are big and the tops begin to turn yellow and fall over. Pull them up, shake off the soil, and lay them out to cure with the tops still attached. Any warm, airy location is a good place to do this; you can even sling them over a fence as long as they aren't rained upon. Bulbs must stay dry and have good air circulation. As the onions cure, the roots will shrivel and the necks above the bulbs will slowly dry – a natural process that helps to seal the top of the bulb, making the onions less likely to rot. After 7 to 10 days, clip off the tops of the onions and the roots with pruning shears, remove as much dry dirt as possible without taking off the papery outer skins, and store your onions in a cool place. Very sweet, juicy onions may be stored, wrapped in newspaper or paper towels, in the fridge.
Fall Gardening Onions Urban Gardening Vegetables
How to Grow and Care for Onions
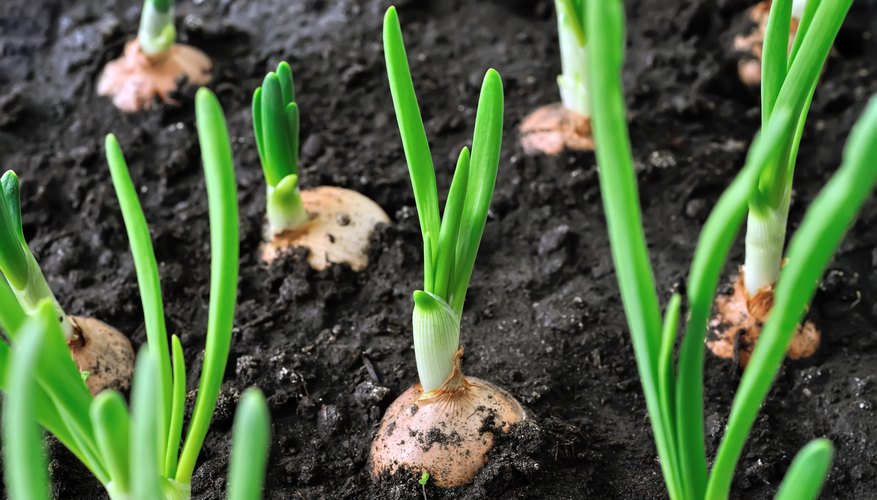
The common onion (Allium cepa) is a biennial bulb that is closely related to garlic (A.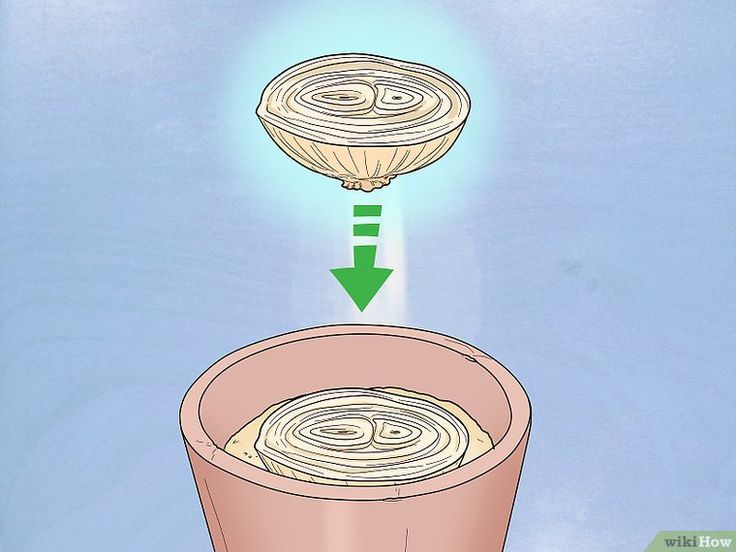 sativum), shallots (A. ascalonicum), and chives (A. schoenoprasum). Onions have hollow, tubular, blue-green leaves that emerge from a bulb, which is actually a modified leaf structure with many layers. A shallow network of roots extend from the bottom of the bulb, and the bulb might push partially above ground as the plant matures.
Onions should be planted in the spring, and they have a moderate growth rate. They can be planted from seeds, transplants (seedlings that have just sprouted), or sets (small onion bulbs that are about to begin their second, final year of growth). Note that onions are toxic to pets due to their chemical compounds, so be mindful about where you plant them.
| Common Name | Onion |
| Botanical Name | Allium cepa |
| Family | Amaryllidaceae |
| Plant Type | Biennial, vegetable |
| Size | 12–18 in.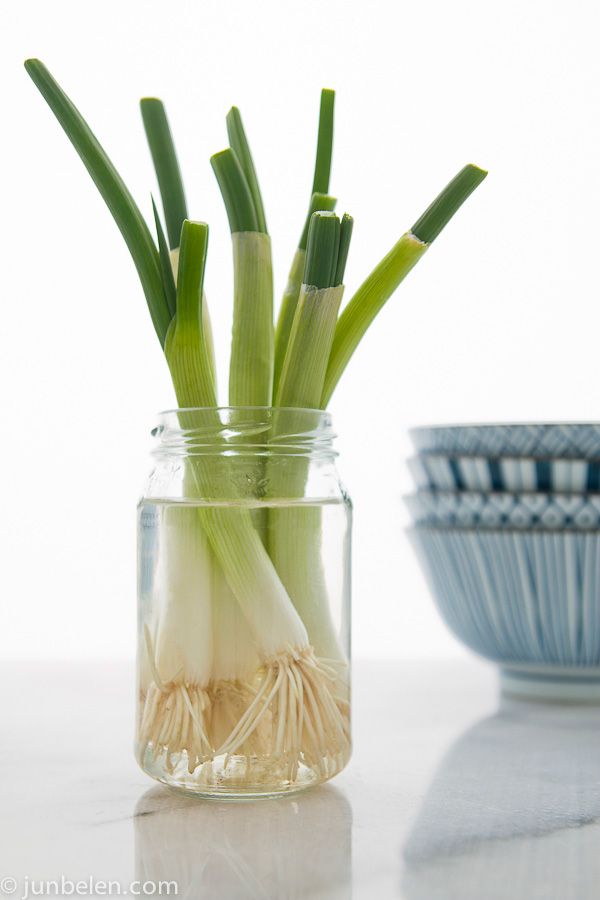 tall, 6–12 in. wide tall, 6–12 in. wide |
| Sun Exposure | Full sun |
| Soil Type | Loamy, well-drained |
| Soil pH | Neutral |
| Bloom Time | Summer |
| Hardiness Zones | 5–10 (USDA) |
| Native Area | Asia |
| Toxicity | Toxic to pets |
How to Plant Onions
When to Plant
Plant onions in the spring when the ground thaws and the temperature remains above 28 degrees Fahrenheit. Sunny spots with loose soil and a neutral pH are best. Leave at least 6 inches between each plant, spacing onion rows about 1 foot apart to allow room for the maturing plants to spread.
Onion seeds are usually started indoors approximately six weeks prior to the outdoor soil temperature being around 50 degrees Fahrenheit. If you're starting with seedlings, plant them outside when the soil temperature is around 50 degrees Fahrenheit as well.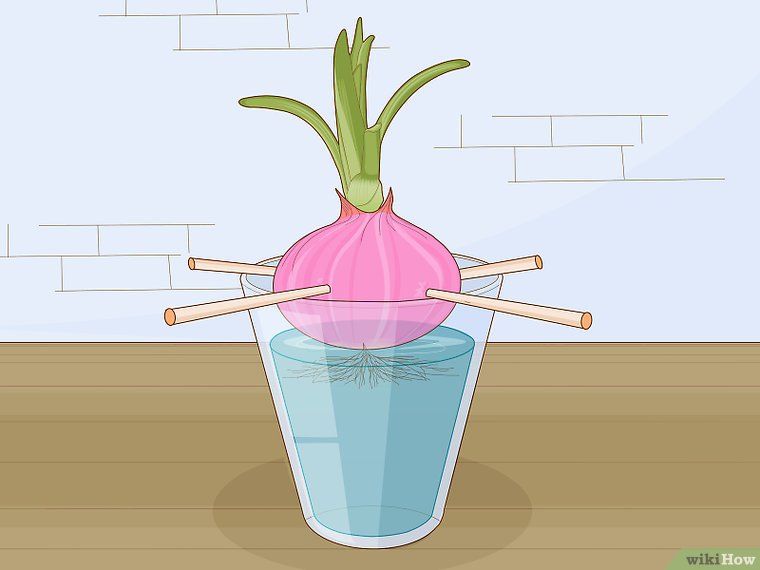
It’s also possible to plant in the fall in warmer climates. The onions will stay dormant over the winter and then continue to grow in the spring.
Selecting a Planting Site
Choose a sunny spot with loose soil. Compacted or rocky soil will hinder bulb growth. Also, avoid planting where other Allium species have been in the past few years. Pests and diseases that target the plants can linger in the soil. Container growth is also an option if you don't have proper garden conditions.
Spacing, Depth, and Support
To plant onion sets, press them into the soil so just the top is visible. Space the sets roughly 4 inches apart, and space rows 12 to 18 inches apart. Once the sets are in the ground, leave them alone; do not hill soil up around them. The sets are supposed to peek out of the ground at all times.
Plant seeds only about 1/4 inch deep. And thin seedlings to around 4 inches apart also in rows that are 12 to 18 inches apart. A support structure generally won't be necessary.
Onion Plant Care
Light
Onions need full sun—at least six hours of direct sunlight per day—to grow properly. With onions, the more sunlight the better.
Soil
Proper soil is the key element to growing onions successfully. The soil needs to be extremely well-drained—even sandy—and it should have lots of organic matter. A loose loam will work well. And a soil pH that hovers around neutral to slightly acidic is best.
Water
Onions need regular water to support the swelling of the bulbs. Give them 1 inch of water per week. But don't overwater or allow the bulbs to sit in soggy soil because this can lead to bulb rot. A light layer of mulch can help to retain soil moisture.
Temperature and Humidity
Onion seeds need temperatures of at least 40 degrees Fahrenheit to germinate. The optimal growing conditions for onions are between 68 to 77 degrees Fahrenheit.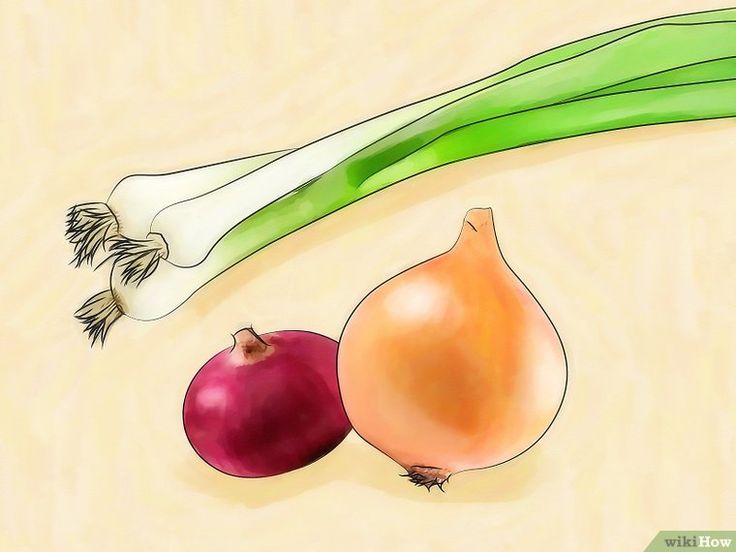 Humidity typically isn’t an issue as long as soil moisture needs are met.
Fertilizer
Onions are fairly heavy feeders. Fertilize them every few weeks with a high-nitrogen fertilizer to support leaf growth, which will produce big bulbs. For the amount to use, follow the product label instructions. Once the soil begins to crack around where the bulb is forming, the foliage growing cycle is complete and no further application of fertilizer is required.
Pollination
Most gardeners grow their onions as annuals and harvest before flower stalks appear. Bees and other insects, as well as the wind, serve to pollinate onion flowers.
The Spruce / K. Dave
The Spruce / K. Dave
The Spruce / K. Dave
The Spruce / K. Dave
Types of Onions
Onion sets or transplants purchased at a local garden center will usually be appropriate for your climate. But when buying mail-order seeds, make sure to choose the right variety based on your climate. There are three main categories of onions you can choose from:
- Short-day onions will begin forming bulbs when there are 10 to 12 hours of daylight each day. They work well in southern regions where summer daylight is comparatively short. Some common short-day onions include 'Southern Belle', 'White Bermuda', 'Granex', and 'Cipollini'.
- Long-day onions begin forming bulbs when there are 14 to 16 hours of daylight per day. They are good for northern climates where the summer days are relatively long. Some recommended long-day onions include 'Walla Walla', 'Ring Master', 'Red Zeppelin', 'Yellow Sweet Spanish', 'Italian Red Torpedo', and 'Redwing'.
- Day-neutral onions begin to form bulbs when they experience 12 to 14 hours of daylight each day. They are good for gardeners in the central U.S. but will produce well in most regions. Good varieties include 'Red Amposta', 'Early Yellow Globe', 'Cabernet', and 'Superstar'.
Onions vs. Garlic
Both onions and garlic are from the same plant family, and they both grow edible bulbs. Plus, they require similar growing conditions—especially loose, nutrition-rich soil. However, garlic bulbs generally mature at a much smaller size than onions. A garlic bulb also is a group of tightly packed cloves while an onion is many layers of leaves.
Harvesting Onions
The time required for the bulbs to mature depends on the variety and whether they were started from seeds or sets. But you can harvest onions at any stage; even seedlings thinned from a row can be used as green onions.
Onion bulbs are fully mature when about half of the top leaves have collapsed and when the bulb skin has a papery feel. Bulbs allowed to remain in the ground until 50 percent or more of the green tops have collapsed will store longer. It’s best to harvest in dry weather.
Once you see that half the leaves have collapsed, gently coax the remaining leaves down without breaking them off the bulb.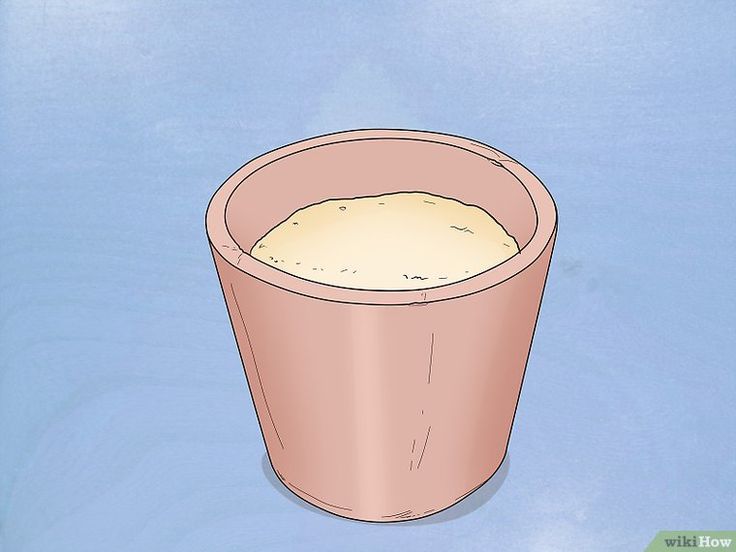 Then, allow the bulb to sit in the ground and cure for a couple of days. Next, dig up the bulb, rather than pulling it. You don’t have to dig deep—just enough to loosen the remaining roots. Brush off any loose soil, and trim the leaves to about 1 to 2 inches from the bulb. Also, trim off the roots.
You can use freshly harvested onions at any point, storing them in the refrigerator once they're cut. To store the rest of your harvest, set the onions outside in a warm, dry spot for a few days to cure. Then, hang them in a mesh bag in a cool, dry spot with good air circulation. The temperature should be roughly 40 to 60 degrees Fahrenheit. However, don’t store them in a refrigerator as that environment is too humid. Check regularly for signs of rot, and remove any culprit before it can impact the other onions.
How to Grow Onions in Pots
If your garden soil is too dense or you don’t have the right light conditions, container growth can be a good option for onions. Choose a container that’s roughly a foot deep. You can plant multiple onions per container as long as they have about 6 inches of space on each side. It’s also essential that the pot has drainage holes. Unglazed clay is a good container material to allow excess soil moisture to evaporate through its walls.
Pruning
Onions generally don't require pruning. However, be sure to remove any damaged leaves promptly. If they're left to drag on the ground, they can introduce diseases or pests to the plant.
Propagating Onions
Besides growing from seeds and sets, you also can propagate an onion from scraps. This is a great way to stretch your harvest and get more out of what would’ve been waste. The best time to start this process is in the early spring. Here’s how:
- Cut roughly an inch off the bottom of a fresh onion, and remove the outer skin.
- Position the piece cut side up on a dry surface to dry out for a day.
- Place the bottom (root) side down in a container filled with moist soilless potting mix.
 Slightly cover the top with soil. Put the container in a warm spot with bright, indirect light.
 - Keep the soil moist but not soggy. In about two weeks, you should start to see green leaves popping up through the soil. Roots will be developing at the same time. Once the leaves are several inches long and you feel resistance when you gently tug on them, you’ll know the roots have developed enough to be transplanted.
How to Grow Onions From Seed
If planting onions from seeds, plant them indoors in trays filled with seed-starter mix at least six weeks, and as much as 12 weeks, before outdoor planting time. Place the tray under artificial grow lights for 10 to 12 hours each day. Keep the potting mix damp but not soggy. When outdoor temperatures are routinely above 50 degrees Fahrenheit, transplant the seedlings into the garden.
Potting and Repotting Onions
Use a quality organic vegetable potting mix with sharp drainage for potting onions.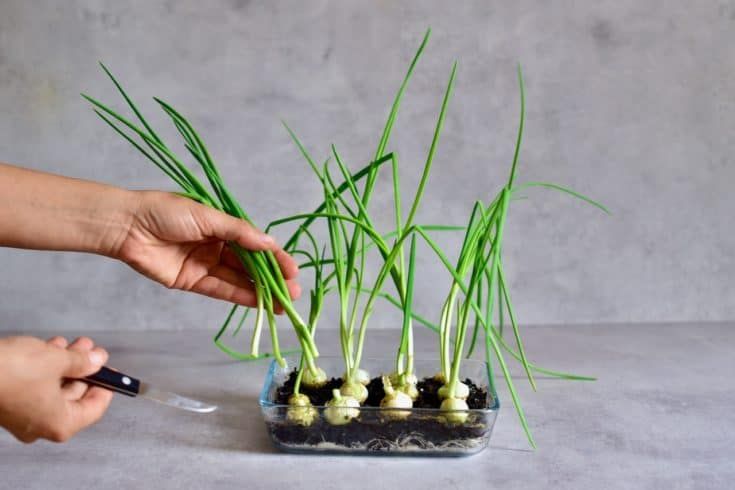 You can mix in some compost to improve the drainage and nutrient content. Furthermore, as it's best to choose a container that can accommodate the onions' mature size, repotting shouldn't be necessary during the growing season.
Overwintering
Because onions are typically grown as annuals, overwintering won't be necessary. If you're planting a fall crop in a warm climate, consider raised garden beds. They will help to keep the temperature more consistent for the dormant onions throughout the winter.
Common Pests and Plant Diseases
Pests and diseases that afflict other Allium species also can impact onions. They include:
- Rot: During wet conditions, onions can develop stem or bulb rot. Avoid rot by making sure there is good soil drainage and air circulation.
- Splitting: Bulbs can split if the soil is allowed to remain dry while the bulbs are forming.
- Thrips: These small, yellowish-brown flying insects feed on leaves and can cause twisting and curling.
 Repeated attacks cause the foliage to stop growing, so the onion bulbs don’t mature. Plant resistant varieties, and don’t plant onions near grain crops. Neem oil and insecticidal soaps can provide temporary control.
 - Onion root maggots: Root maggot larvae hatch from eggs laid by brown flies near the base of onion plants. The maggots burrow into the stems, feeding on the plants below the soil and eventually killing the onions. Rotate plants to a different location each year to avoid infestation. Using row covers for seedlings can prevent eggs from being laid. And diatomaceous earth can also be effective.
Article Sources
The Spruce uses only high-quality sources, including peer-reviewed studies, to support the facts within our articles. Read our editorial process to learn more about how we fact-check and keep our content accurate, reliable, and trustworthy.
Onion. ASPCA.
Onions on the windowsill: the secrets and subtleties of growing
There are amazing stories on TV about how other people grow exotic plants. They talk a lot about agricultural technology: how to choose the right land and fertilizers, what tools to use for planting. Online publications even recommend videos on how to properly cultivate a garden. And, what to hide, I have a lot of books on gardening at home.
How to grow delicious onions on a windowsill
All this is true, but you have to start somewhere, right?
Ads byOnion is one of the ancient vegetable crops
One very famous vegetable crop immediately comes to mind - onion. Some of you now grimaced and said: "Fie, bow ...". No, friends, we will grow a sweet and tasty onion with delicate greens that crunches on our teeth. And we will do everything ourselves.
Onion is one of the ancient vegetable crops
Growing onions is not easy, but very simple. It is one of the most well studied agricultural crops and has been cultivated for over 5,000 years.
In the ground or in the water
To grow delicious onions at home, you need a little: the actual onion and a little patience. There are several ways to grow: the traditional way (in the ground) and the hydroponic method. Well, don't let the word hydroponics confuse you - this is also a method of growing onions in a glass known to everyone since childhood.
Onion in a glass
For those who have little space on the window, I suggest this mini-bed design:
nests as the earth falls into the container. This design can be modified to hydroponic by replacing the earth with a substrate such as mineral wool. If you use mineral wool, wear rubber gloves to avoid skin irritation.
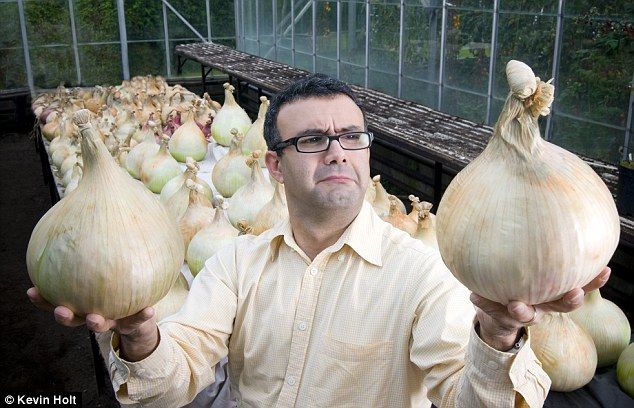
The key to success is the right bulb
For a good harvest, you need to choose the right bulb. It should be round, dense to the touch, without traces of rot. The root cup should be well formed and large enough. For planting on the window, it is best to choose healthy sprouted bulbs - they will allow you to get a green crop at an accelerated pace. The scales of the bulb should be shiny.
The key to success is the right bulb
If there is no sprout, you can carefully cut the head of the bulb parallel to the root base. This will speed up the output of the green pen. Before planting, the bulb should be soaked if you plant it in the ground, and if in the aquatic environment, you do not need to soak it.
Optimum temperature
Onion is a cold-resistant crop: the optimum temperature for growing it is +18...+20°C. Therefore, if the idea of growing onions on the window comes to you, make sure that it does not overheat either from the sun or from the heat of steam heating batteries. However, if you want to speed up the forcing of the green feather a little, you can raise the temperature to +24°C. But note: at +30°C green growth stops .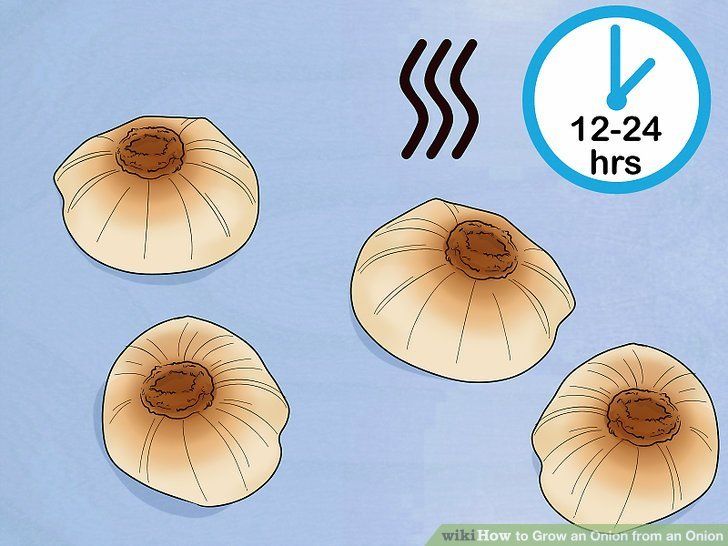
Soil conditions
If you will grow onions in the ground, neutral soil (with a neutral pH of 6-7) is suitable for it. The article How to find out the type of soil and why is it necessary will help to determine the acidity and other parameters. The soil should be loose enough, with good drainage. I recommend adding a neutral filler such as vermiculite to the humus (this is an intermediate technology that lies at the junction of hydroponics and traditional farming).
When growing hydroponic, make sure that the bulb does not float in the solution, otherwise it will rot. To do this, use a cardboard circle or “skirts” of various designs.
Onions are not very picky about moisture, but if you want the greens to be more juicy, you can lightly spray the feathers. In this case, it is advisable not to wet the bulb itself.
Illumination and other miracles
Usually, after planting, the bow is placed on the window, but this is not entirely true. For 10 days it needs to be placed to a cool shady place so that the root system is intensively formed. In Russian: take it off the window and put it away from the battery.
The onion should be placed in a cool shaded place so that the root system is intensively formed.
Then the bow will need a lot of light. He should get it as much as possible. If you live in a region where the nights are long, you should use backlighting. It can be provided using fluorescent lamps, or using specialized grow lamps, or LED panels.
If you have a loggia, then the bow will be the best there. Unlike people, it can be illuminated 24 hours a day, combining natural and artificial light - the longer you shine, the faster you get the coveted result.
Exemplary supplementary lighting beyond the Arctic Circle
A lot depends on the temperature in the room where onions are grown. At low temperatures, the onion feather grows slowly, so it is necessary to maintain the temperature within +25. ..+27°C. Under such conditions, the feather reaches a length of 30-35 cm in just 17 days. To maintain the desired temperature, you can use almost any heating device.
To prevent the onion container from overheating in the sun, it can be wrapped in foil.
Fertilizers and chemicals
Which fertilizers should I use? Better, of course, none, but you can use complex with an indicator of NPK 10-10-10 according to the instructions, in no case exceeding the dosage. It is better to breed them in a large volume, and then draw the required amount with a syringe to feed the plant.
If you use a container of solution for your hydroponic setup without aeration (air saturation), the solution can rot, as can the roots of the plant. To prevent this, you can periodically add a 4% solution of hydrogen peroxide. Or a slightly pink solution of potassium permanganate.
When you outgrow the jar
If you plan to grow more than 10 bulbs at a time, it is better to make a miniature hydroponic setup: choose a container for 20-30 liters, make a floating raft from foam with a hole for the bulbs, and aerate the water with an aquarium compressor .
Hydroponic system for growing onions. Photo from landscape-project.com
Of course, these are not all possible tips, but I hope that they will help you grow tasty and healthy onions.
Read also about my "space" experiment with onions on the window and about the experience of other summer residents:
- 5 types of herbs that are easy to grow on the windowsill
- Garden on the windowsill: we grow onions, garlic and carrots for greens
- Conveyor onions for greens for your table
- Onions: planting and care
- Onions can be sweet. Exhibition - such!
- Growing onions from seeds
- How to grow green onions in a bottle
- Onions on the window. Another Way
Do you have any questions? Write them in the comments.
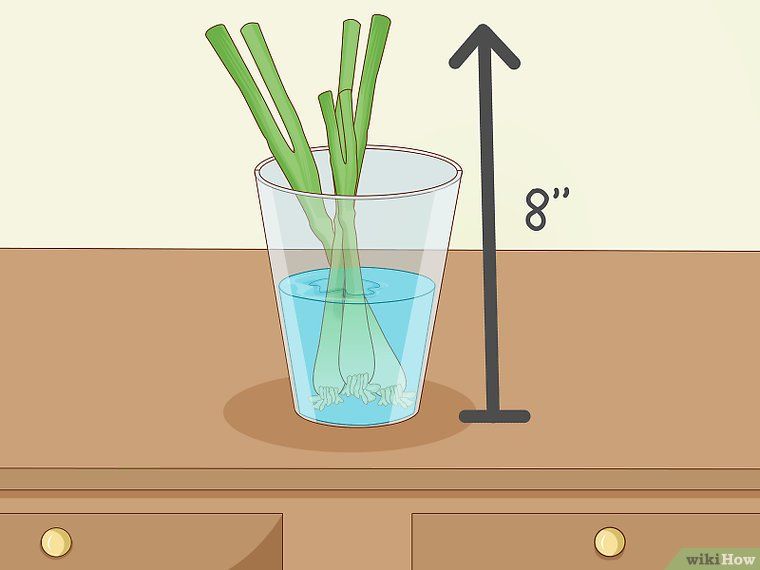
Growing green onions in water: simple rules
Growing green onions in water at home is the easiest way to learn gardening.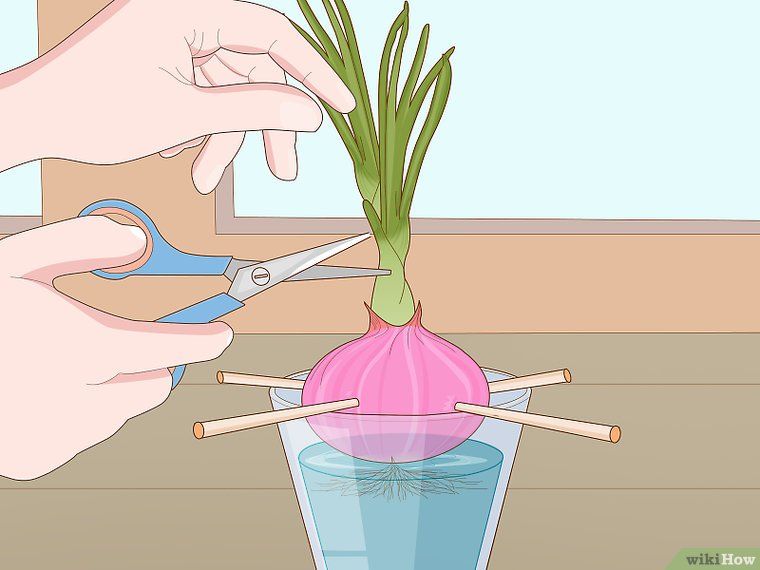 We all remember well the orderly rows of mayonnaise jars with onions that “decorated” our grandmothers' windows all winter. And now, together with our children, we are delighted to see how a juicy green feather gradually breaks out of the bulb and stretches upward.
Indeed, for forcing onions on greens, it is not at all necessary to mess with the ground and force your window sill with bowls or boxes.
For those who don't want to "make dirt", there is a "clean" way to grow green onions - in water. Everyone will get. Nevertheless, knowing some tricks and rules will allow you not only to enjoy the green feather, but to provide the family with fresh green onions quickly and until spring.
Preparing the onion for forcing in water
As with forcing the onion feather in the ground, it is first necessary to select undamaged bulbs preferably of the same size, approximately 3-4 centimeters in diameter.
Selected bulbs are cut to the base, immersed for 20 minutes in hot (50-52°C) water, a solution of ash or potassium permanganate.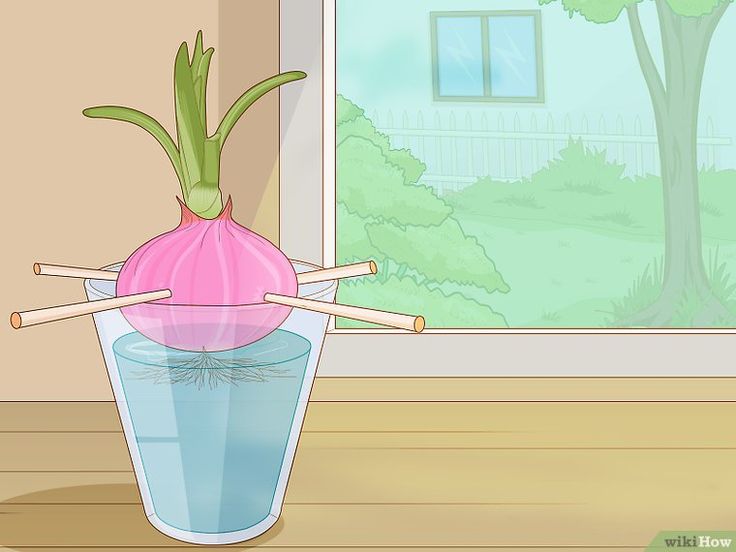
Then they are immersed in cold water, after which they are completely cleaned of the husk (which a good summer resident will collect, dry and store until spring) and only after that they “plant” onions in jars, cups, glasses, bottles, plates, pallets , containers with slots or special "germinators".
Tools for forcing green onions in water
The most commonly used water containers are glass or tin cans, cups, glasses or wide-mouthed bottles. They pour water into them, put an onion on top and you're done, nothing complicated.
Jars, glasses and cups are not convenient only because the bulbs in them very often rot. This is easy to avoid. We insert the bulb into a clean, but no longer needed sock, fill the jar with water by a third and lower the sock into the water. The water will rise up the toe and moisten the bottom of the bulb, and in the future, only its roots. Another way to prevent rotting is to pierce the onion in several places with wooden skewers and, as it were, hang it on a jar.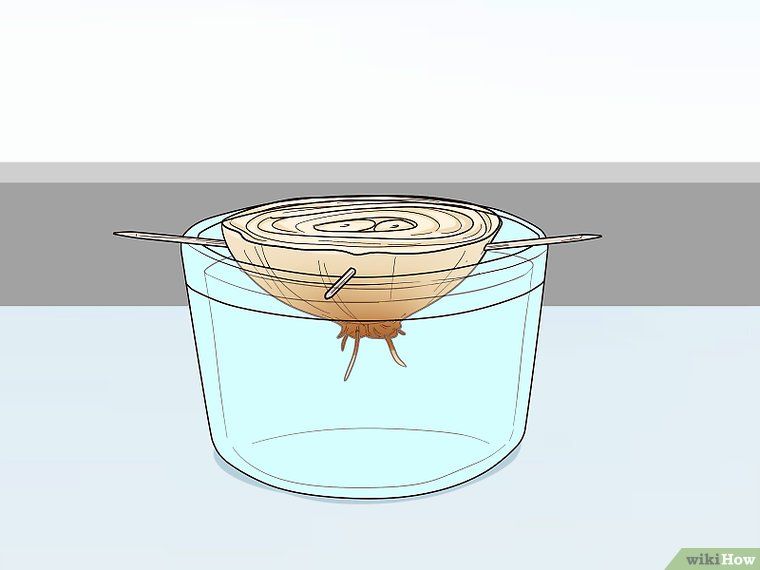 Sticks will not allow the bulb to completely submerge in water.
If you don't have free glassware in the house, you can adapt any containers for forcing onions, for example, plastic boxes in which salads are laid out in supermarkets. How it's done? It's simple:
- We take a sheet of thick cardboard the size of each box,
- Cut holes in them according to the diameter of the bulb,
- Pour water into the container and cover it with cardboard on top,
- Insert the bulbs into the holes so that they just touch water.
You can also grow green onions in a regular plate. A small amount of settled water at room temperature is poured into a plate and the bulbs are placed tightly against each other, trying to keep them upright. Water should cover the bulbs no more than a quarter.
There are also special devices - onion germinators. It is based on the principle of hydroponics. The bulbs are inserted into the holes intended for them, water is poured into the container, and with the help of a compressor, an aqueous suspension is created between the bulbs and the water. The bulbs have almost no contact with water, do not rot, but give roots much faster and knock out a feather.
By growing onions in water, in two weeks you will get green feathers 12-15 centimeters long. Do you want to get the first harvest faster and get the most out of each bulb? Then you have to feed onions with mineral fertilizers.
Top dressing when growing green onions in water
- 1. For 1 liter of water 2 tsp. complex mineral fertilizer.
2. For 1 liter of water 1.5 grams of ammonium nitrate, 2 grams of superphosphate and 1.5 grams of potassium chloride.
3. For 1 liter of water, 5 grams of wood ash.
Fertilizers are applied to the water when the bulbs have already taken root and the growth of green mass has begun.
Finally, the most important thing. Remember a few simple rules for growing onions for greens in water. This will help you avoid unnecessary problems.
Secrets of the correct forcing of green onions at home
- It is better to pre-disinfect a container for forcing green onions, whether it is a jar or a plate, with a pink solution of potassium permanganate.