Refinish wood cabinets
How to Refinish Cabinets and Give Your Kitchen a New Look — Bob Vila
Photo: istockphoto.com
Refinishing cabinets is one of the best ways to give your old, ho-hum kitchen a fresh new look, and it can make a big difference in the way you feel about a space. After all, having expensive cabinets hanging on your kitchen walls doesn’t mean much if you don’t like the color. That’s why many homeowners think about refinishing cabinets with a stain color of their own choosing. It is a big job, but there’s an even bigger payoff.
Before you begin refinishing your cabinets, however, it’s best to do a little detective work. You need to know what materials you’re working with to see if the job is even possible. But, with that research and a lesson on how to refinish cabinets, it’s possible to give a kitchen a serious upgrade.
Safety Considerations for Refinishing Kitchen Cabinets
Before we go too far, it’s important to consider the safety and environmental concerns involved with kitchen cabinet refinishing. You’ll probably need to employ harsh chemicals and create a lot of airborne particulates, so safety does matter.
First, make sure to refinish the cabinets in a well-ventilated area. If the cabinets aren’t mobile, open windows and use a box fan to keep air moving. Next, be sure to wear a respirator when working with chemicals or sanding to avoid inhaling harmful substances. Finally, avoid damaged or stained skin by donning a pair of chemical resistant gloves.
Finally, remember that some chemicals used in kitchen cabinet refinishing (particularly during stripping or staining) are flammable, so be sure to play it safe around any heaters, open flames, or anything of the sort. Oily rags can also combust if left in a pile, so hang them to dry before throwing them out.
Advertisement
RELATED: The Best Under Cabinet Lighting of 2021
Method 1: Refinishing Cabinets to Make Them Lighter
Photo: istockphoto.com
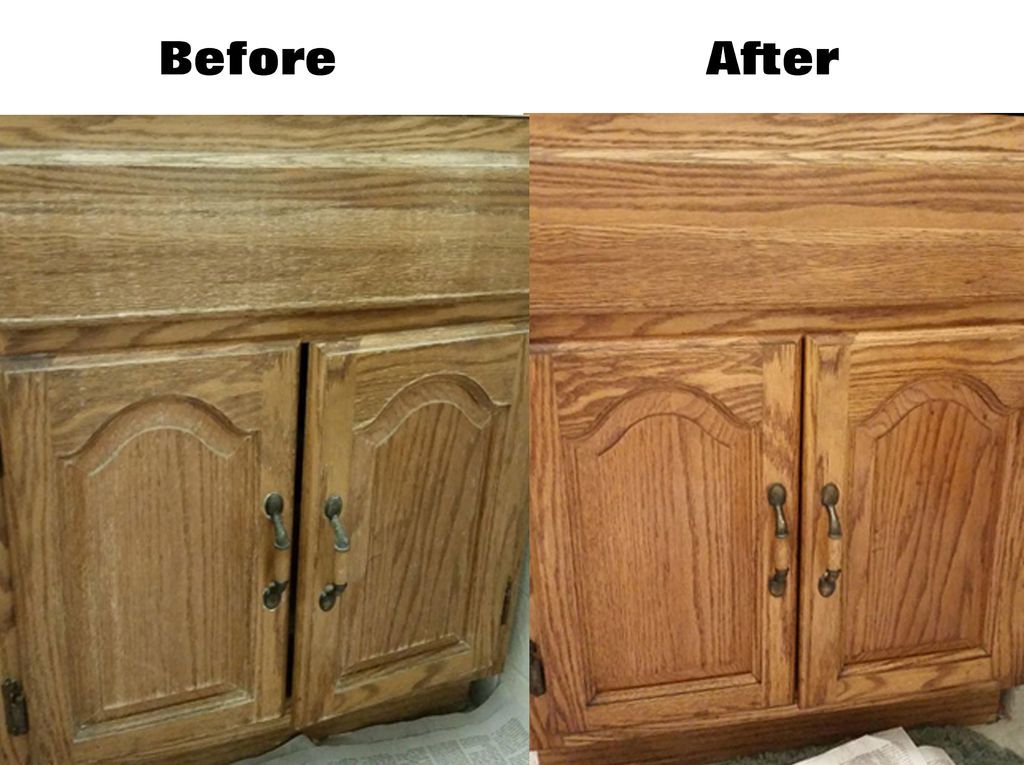
Refinishing darker cabinets to make them lighter is probably the most involved method of refinishing, and it takes some specific knowledge, tools, and materials.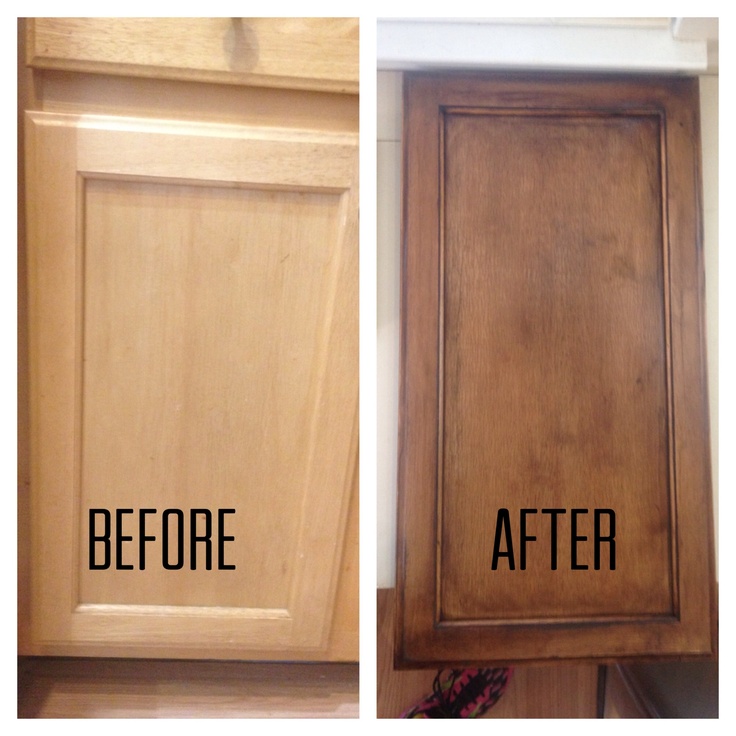 With the following list and steps in mind, you should be able to remove the finish, paint, and stain from wood-based cabinets to bring them to a lighter finish.
– Sandpaper
– Paint stripper
– Chlorine bleach (if necessary)
– Wood filler
– Wood sealer
– Denatured alcohol
– Stain
– Varnish
– Respirator
– Rubber gloves
– Sanding block
– Scraper
– Putty knife
– Orbital sander
– Rags
– Paintbrush
– Steel wool
– Tack cloth
STEP 1 : Remove the cabinet doors.
Before embarking, remove one of the doors and sand off a small area of the finish on the back. Do the same to an area at the back of a rail or stile (horizontal or vertical framing member).
If the doors and drawer fronts are made of hardwood, remove them and take off all the hardware.
Note: If the doors and drawer fronts are fiberboard, forget about refinishing them with stain. The only way you’re going to get the cherry, oak, or birch tones you love so much is by applying a veneer or buying all new doors and drawer fronts.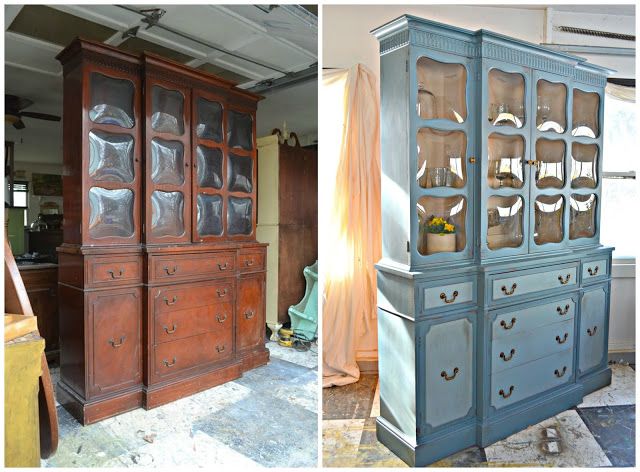
STEP 2 : Strip the old finish from the cabinets.
In a well-ventilated room (or outdoors), use a paint stripper to remove the existing finish. Removing a clear coat finish should be a lot easier than removing paint, but you may have to use an aggressive stripper or chlorine bleach to remove the old stain. The job is messy and potentially unhealthy, but if you’re careful, it’s better than blowing thousands of dollars on new cabinets.
Note: Removing paint from cabinets, or any wood furniture, requires patience. Not all of the paint lifts off after the first application of remover, and maybe not after the second or third, either. It’s imperative to work in a ventilated space, to wear a respirator, to wear protective gloves and a long-sleeve work shirt.
Advertisement
Use a sharp scraper to remove as much finish as possible and use whatever you have on hand (old spoons, dental tools, etc.) to scrape contours and crevices.
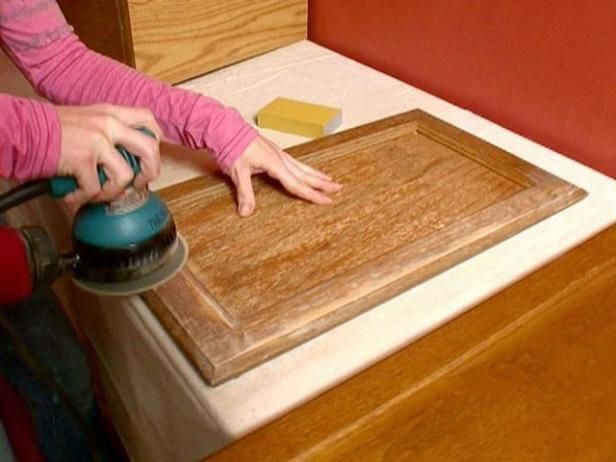
STEP 3 : Fill damaged wood with wood filler, then proceed with sanding the cabinets.
Fill dents and deep scratches with wood filler, then sand thoroughly until all finish is removed and the wood is super smooth with no scratches.
Make your first pass with an orbital sander using 100-grit paper, your second with 180-grit paper, and your last pass with 220-grit.
STEP 4 : Apply a sealer.
Before applying it, thin out the sealer to a 50-50 concentration with denatured alcohol.
Apply the sealer (this is sometimes called a wood conditioner). A sealer does just what it says: It seals the surface with a light, thin coating so that when you apply stain, the color goes on evenly. Zinsser’s Bull’s Eye Seal Coat, an alcohol-based sealer that’s easy to apply and dries fast, is a good option.
When the sealer dries, lightly rub with 000 steel wool, then clean the surface thoroughly with a tack cloth.
STEP 5 : Apply the stain.
Apply stain using a soft cotton rag, a brush, or a brush in combination with a rag. Experiment until you find a combination that allows you to apply a consistent tone.
If the stain is going on too dark, rub some it off. Too light? Don’t worry. You can apply another coat after the first one dries.
Once the stain dries, follow up with another very light rubbing with 000 or 0000 steel wool before cleaning with tack cloth.
Note: It’s always wise to experiment on the backside of a single door before committing to the project, just to be sure you’re going to be pleased with the results.
Advertisement
STEP 6 : Add a protective varnish to the cabinets.
Now you can apply a protective coat of clear polyurethane varnish. Applying any clear coat must be done in a dust-free environment.
Read the directions on the can and follow them, but when it comes to thinning, you may need to deviate from the product literature. Most makers say you won’t have to, and maybe that is the case under perfect conditions, but I find that it’s usually necessary to pour in a little mineral spirits to keep the polyurethane flowing smoothly and drying without brush marks.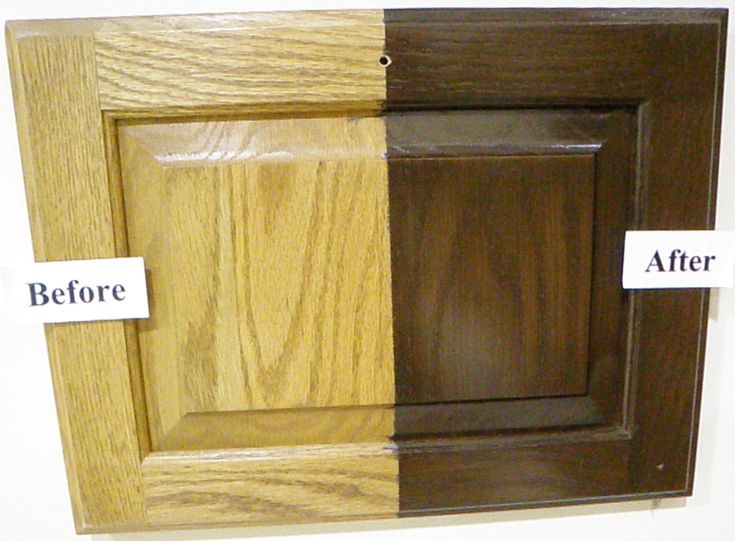
RELATED: These Cabinet Customizations Are Totally Worth It, According to Pro Organizers
Method 2: Refinishing Kitchen Cabinets to Make Them Darker
Photo: istockphoto.com
If you want darker-toned cabinets than what you currently have, you may be able to simply tint the existing finish. This method of refinishing kitchen cabinets, or cabinetry in any space, is much easier to accomplish than others that require stripping and sanding, but there are still a few ins and outs that you need to know.
SUPPLIES– Respirator
– Rubber gloves
– Trisodium Phosphate (TSP)
– Water
– Sandpaper
– Tack cloth
– Tinted polyurethane varnish
– Paintbrush
– Polyurethane finish
STEP 1 : Remove and wash doors and drawer fronts.
After removing the doors, drawers and hardware; begin by thoroughly washing grease and wax off the cabinets with TSP and water.
STEP 2 : Sand and dust the cabinets.
Lightly sand and wipe off the dust with a tack cloth.
STEP 3 : Apply a tinted polyurethane.
Experiment with a tinted polyurethane varnish (such as Polyshades by Minwax) to see if you can achieve the tone desired. Tinted polyurethanes combine stain and varnish in a single product.
Note: It’s always wise to experiment on the back side of a single door before committing to the project, just to be sure you’re going to be pleased with the results.
Advertisement
RELATED: How to Stain Cabinets
Method 3: Repainting Kitchen Cabinets
Photo: istockphoto.com
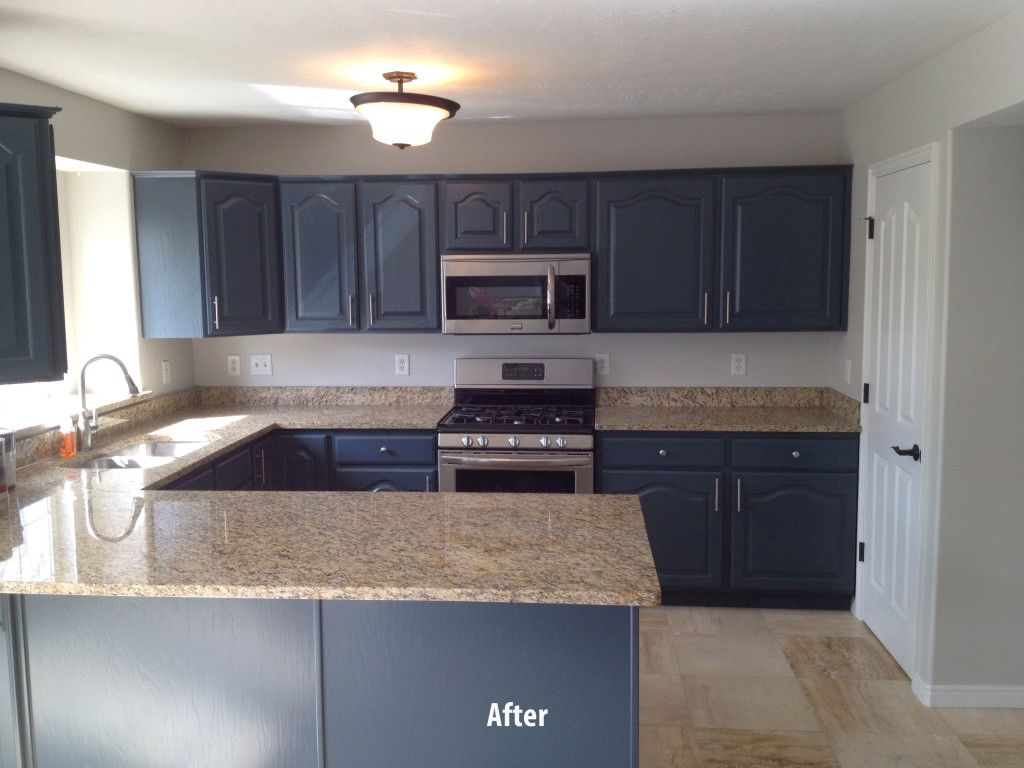
While it might make the biggest impact, repainting kitchen cabinets is actually quite a bit easier than restaining them. And, since you’re applying a whole new coat, the color possibilities are endless.
SUPPLIES– Respirator
– 220-Grit sandpaper
– Foam sanding block
– Tack cloth
– Degreaser
– Primer
– Paintbrush
– Paint roller and tray
– Enamel cabinet and trim paint
STEP 1: Remove the cabinet doors and hardware.

Start by removing the doors, door knobs, drawer fronts, drawer pulls, and other hardware from the cabinets. For very large kitchens, it’s a good idea to number the cabinet doors and drawer fronts to ensure you know where to put them back.
STEP 2: Lightly scuff the cabinets’ surfaces.
Cabinets are typically smooth and covered with a bit of polyurethane. While primer can adhere to this surface, it’s better to scuff it up a bit first. Put on a respirator and use the 220-grit sandpaper and foam sanding block to lightly scuff the surface of the boxes, face frames, drawer fronts, and doors. The foam sanding block should be able to get into intricate door profiles.
Keep in mind that your goal isn’t to sand down to bare wood. Instead, you simply want to roughen the surface of the existing finish to give the primer something to hold on to.
RELATED: The Best Primers for Kitchen Cabinet Transformations
STEP 3: Clean the cabinet surfaces.
After scuffing, remove the dust from the cabinets with a tack cloth. Take your time with this step as any dust that stays behind is going to create a rough texture on the cabinet.
While you’re sanding, you’re inadvertently transferring oils from your fingers to the cabinets. Also, cabinets see a lot of cooking oil, as well, and neither substance is conducive to a great paint job. The answer to this conundrum is to use the degreaser to clean the entire surface of the boxes and doors. Once clean, the surface is ready for primer.
Advertisement
RELATED: The Best Paint for Kitchen Cabinets
STEP 4: Prime the cabinets.
After pouring primer into the paint tray, use the paintbrush and roller to coat the boxes, face frames, doors, and drawer fronts with primer. Be sure to brush the primer into any cracks or corners, especially along the door profiles. This finish might look a bit streaky, but you should only need one coat of primer before moving to paint.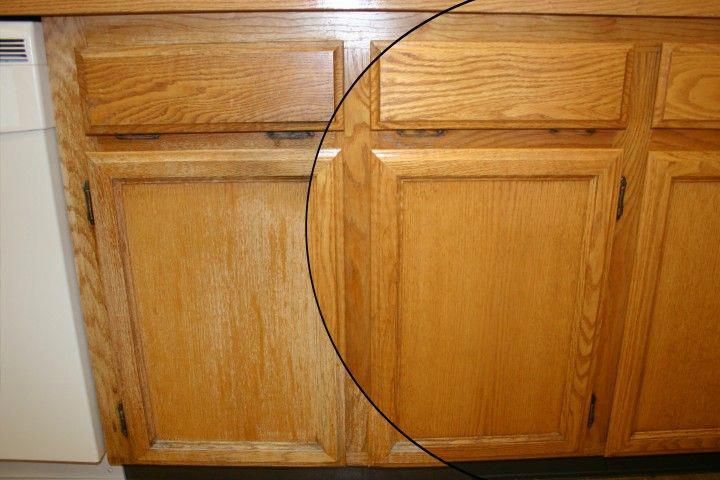 Pour the excess primer back into the can and clean the brush and paint tray while allowing the primer to dry.
STEP 5: Paint the cabinets.
Once the primer dries, it’s time to paint the cabinets. Put a new roller cover on your paint roller and pour some paint into the paint tray. Use the brush and roller to coat the doors, face frames, drawer fronts, and boxes with an enamel paint made specifically for cabinets and trim for the best results. After allowing the first coat to dry, apply a second coat of paint. Once dry, put all the doors, drawer fronts, and hardware back on and enjoy the fresh, new, updated look in your kitchen.
RELATED: The 14 Freshest Kitchen Cabinet Colors
Final ThoughtsPhoto: istockphoto.com
With this primer on how to refurbish kitchen cabinets, you have the knowledge necessary to give those boring or ugly wood boxes and doors a facelift. Whether sanding down to bare wood and restaining kitchen cabinets, using a tinted varnish to darken the color, or painting your cabinets, be sure to wear the proper safety gear while you tackle this big-impact project.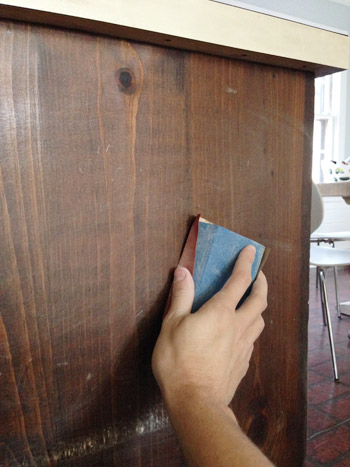
That might feel like a lot of information about the refinishing kitchen cabinets, and it’s hard to cover everything in one coat. If you still have questions about restaining cabinets or simply refurbishing old kitchen cabinets, this section is for you.
Advertisement
Q: What is the average cost to refinish cabinets?Generally speaking, the cost of refinishing kitchen cabinets (with labor) will run between about $1,800 and $4,000, depending on the size of the kitchen. You can save up to 75 percent of that cost if you tackle the project yourself.
Q: Is it worth it to refinish kitchen cabinets?It is absolutely worth refinishing kitchen cabinets. If your boxes and doors are still in good shape, a fresh coat of stain or paint can breathe new life into an old space and save you up to $20,000.
Q: Is it cheaper to reface or refinish cabinets?Generally speaking, refinishing cabinets is less expensive than refacing kitchen cabinets.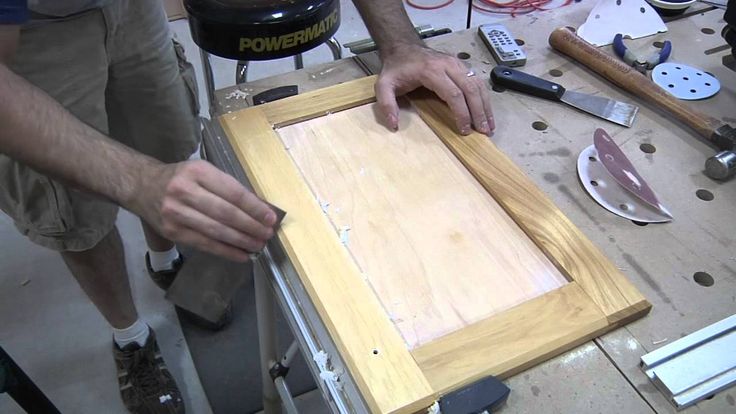 Cabinet refacing costs, on average, $7,132.
Usually, discoloration is caused by old stain that’s deeply embedded in the wood. Liquid strippers and sanding might not even be an option, so it’s best to go with a darker stain or paint that will hide the blotchiness.
Refinishing your cabinets?
Get free, no-commitment project estimates from pros near you.
Find Pros Now
+for a fresh new look |
(Image credit: Alamy)
Refinishing existing cabinets is the perfect solution when you want a new kitchen but don’t have the energy, time or money to invest in ripping the old one out and starting again.
‘Rather than replacing with new, refinishing your kitchen cabinets not only saves money but it’s also a more eco-friendly and sustainable solution,’ says Lucy Searle, Global Editor in Chief for Homes & Gardens. ‘Painting kitchen cabinets is a great option for wooden or painted kitchen furniture, for example, and it can easily be done over a weekend.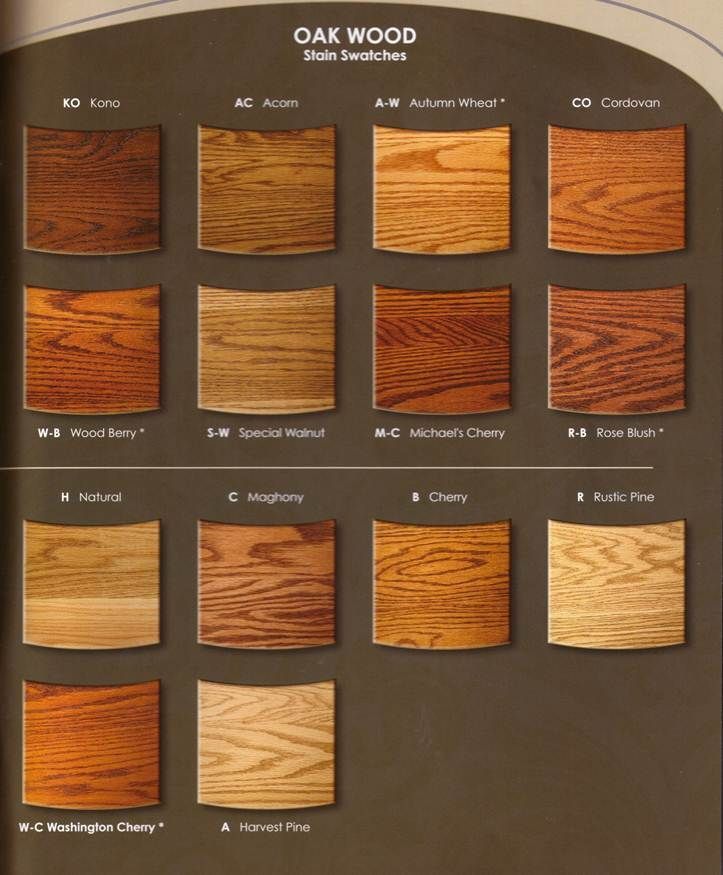 All in all, refinishing is a great way to update kitchen cabinets without replacing them.'
‘Before you even begin this process, the cabinets need to be super clean,’ advises Looeeze Grossman, founder of The Used Kitchen Company . ‘Wipe them down with a good multi-purpose cleaner or dish soap and water, which also works really well. Follow with a sugar soap formation to remove any residue. Once this is done you need to lightly sand the cupboards down. Use a low-grade sandpaper and go gently over the surface. Fill in any chips with wood filler.’
Below, we take you through the process of refinishing kitchen cabinets, step-by-step.
How to refinish kitchen cabinets
As well as painting or staining kitchen cabinets, there is the option to varnish them to refinish the surfaces. It will give the room a makeover without the need to remove kitchen cabinets that are tired or damaged and install kitchen cabinets you’ve selected to replace them.
‘After sanding, I’d always choose a non-toxic finish to varnish the cabinets,’ adds Looeeze.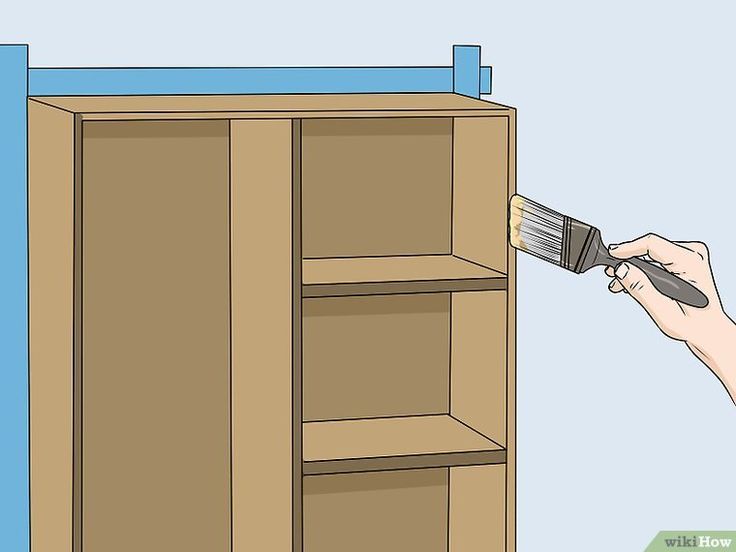 ‘It’s more sustainable and less harmful to your household members and pets. I use an extra-wide paint brush to stain the facia of the cabinet, using a waterproof finish.'
Here's how to refinish kitchen cabinets, whatever the existing finish, with advice from experts.
1. Protect the area
Before you start, make sure the kitchen is well protected. This means laying down plastic sheeting, building paper (which is more eco-friendly) or canvas cloths on the floor as well as over the countertops, appliances, table and chairs and any other items within the space. This will protect them from dust and sanding during your refinishing process.
Next, you want to remove the doors and drawers from your cabinets. Remember to label or number them so you know which door or drawer goes where once you’re finished. Now you need to plastic and tape off the insides of the cabinets to protect from dust and don’t forget to cover up backsplashes too.
2. Prepare the surfaces
Preparation is key, and the results will depend on how much care and attention you give during the preparation process.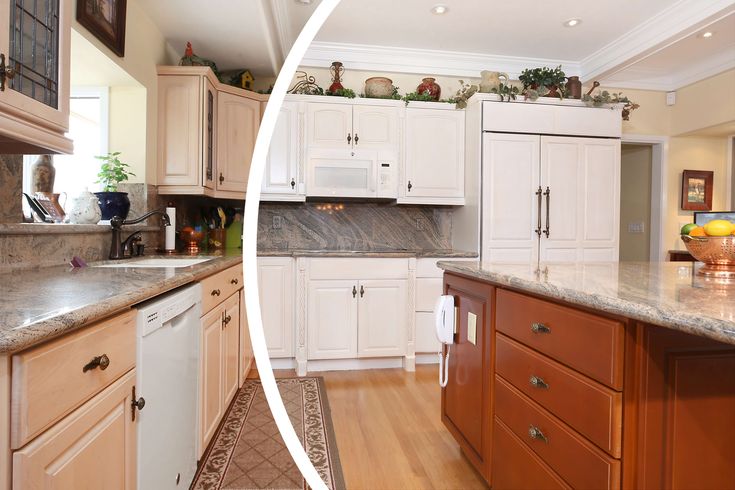 ‘To refinish wooden kitchen cabinets, first remove the doors, handles and hinges,’ says Ryan McDonough, interior design expert at My Job Quote . ‘Clean all surfaces with sugar soap to remove stubborn grease and dirt. Lightly sand with a fine grit paper and work with the grain rather than against. Hand sanding is best for working around detail such as bevelling on cupboard doors and decorative trim.’
Cleaning the doors and drawers takes a lot of hard work. You can scrub and wash them down with synthetic steel wool and soap and water and for tough greasy stains, use TSP (available at Amazon) and water. Leave everything to dry once you’re done.
3. Clean hardware
As well as the cabinet doors and drawers, it’s a good idea to clean handles and hinges too. Place in a large bowl of soapy hot water for around 30 minutes and scrub gently to remove any grease and residue. Rinse with clean water and dry. If needed, you can always give them a polish.
3. Strip the cabinets
Make sure you open all windows and doors to ventilate the room.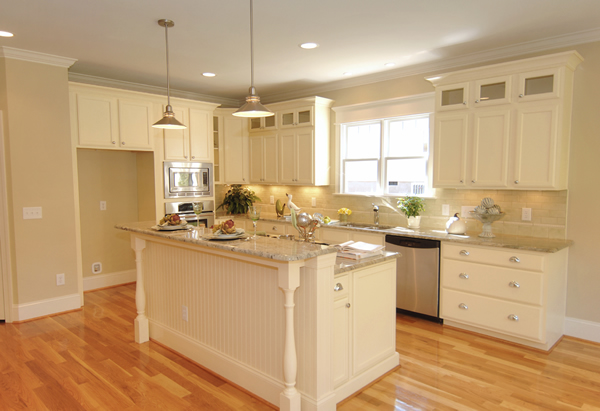 Even better if you can take the cabinet doors and drawers outside. Next, you need to check what finish is already on the timber as this will determine which stripper agent is needed. In most cases, a varnish remover will do the job. After you’ve stripped the finish, you can repair any holes or scratches in the wood.
If yours is a painted kitchen, it may not be made from timber. If this is the case, skip this step and move on to sanding.
4. Sand kitchen cabinets
Next, either hand sand with sandpaper or use a sanding sponge to scuff the existing finish and provide an adhesive surface. Ideally you should use a low-grade 100 or 15-grit sandpaper.
A hand-held vacuum dust buster is ideal for clearing up the dust afterwards, though it is also worth wiping down the sanded surfaces with a slightly damp microfiber cloth to remove all traces of dust. Allow to dry before moving on.
5. Refinish in your chosen varnish, wax or paint
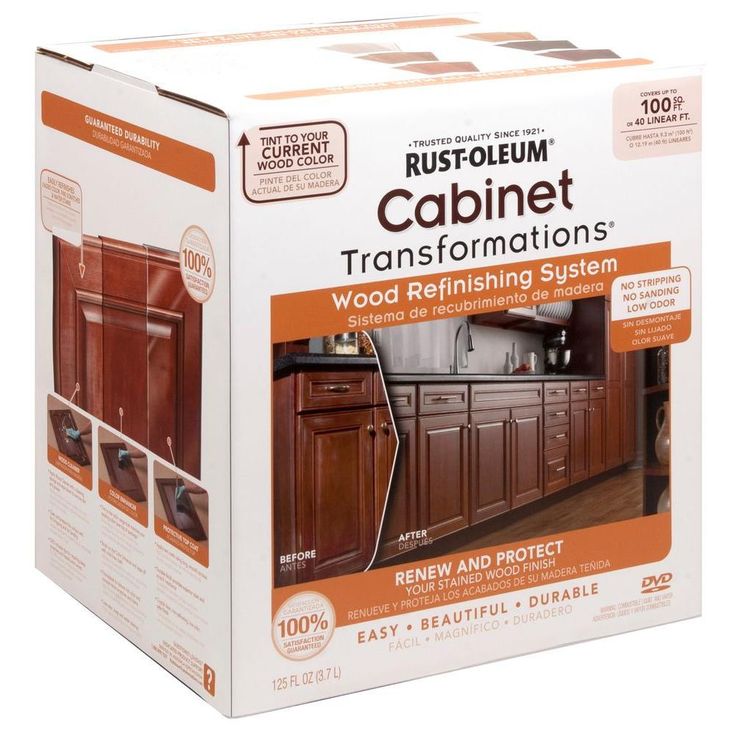
Finally, you can apply your chosen finish. For wood kitchen cabinets, you might use a product that brings out the natural beauty of the wood, such as Restor-A-Finish or Feed-N-Wax (both at Amazon). You can find tips for painting kitchen cabinets in our separate guide, including the best paint finishes to choose.
Once you’re done and it’s all dry, replace the handles – or install kitchen cabinet handles in a different material or style – and fix the doors and drawers back into place.
How can I refinish cabinets without sanding?
To refinish cabinets without sanding, simply use some mineral spirits and a rough sponge to clean and gently scuff up the area.
What is the difference between refinishing and refacing?
Refinishing kitchen cabinets involves changing the finish or color of the existing material whereas refacing kitchen cabinets means placing a new material on top.
Hayley is an interiors journalist, content provider and copywriter with 26 years experience who has contributed to a wide range of consumer magazines, trade titles, newspapers, blogs and online content.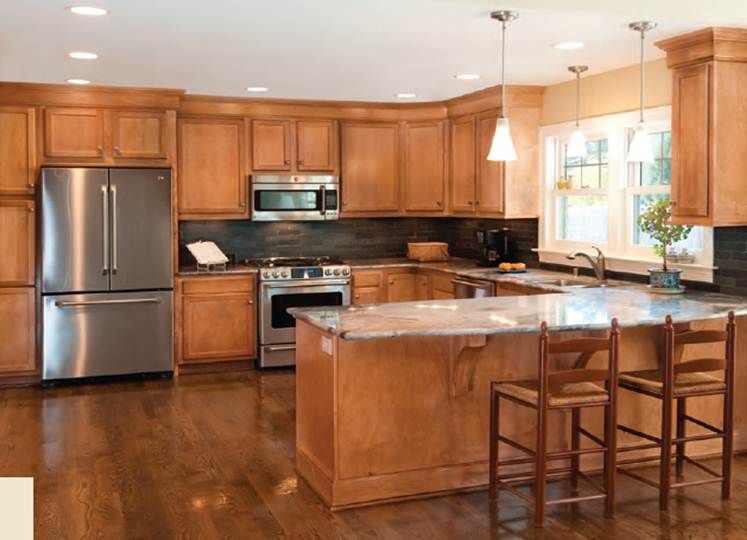 Specialising in kitchens and bathrooms, she has twice won the CEDIA Award for Best Technology feature. Hayley writes for H&G about kitchens, bathrooms, cleaning, DIY and organizing.
How to restore an old wardrobe, basic techniques with comments
It happens that old furniture becomes unusable. You can use it, but the appearance does not cause positive emotions. To extend the life of the product, you need to restore it. Before you restore an old cabinet, you need to decide on a set of tools, as well as on the technique that will be applied.
Contents
- What you need
- Restoration steps by painting
- Using craquelure
- Decoupage
- Video
- Photo
What you need
The components that will be used in the restoration of the product depend on the chosen method of work. If you do not have certain skills in decor, do not despair - we recommend paying attention to the following types of work:
- cabinet painting;
- application of craquelure varnish;
- decoupage technique.

Even a teenager can carry out the indicated methods of repairing a product. Do-it-yourself cabinet restoration involves having an idea or choosing the style of a future masterpiece. To do this, you should turn to the existing interior: if it is made in a vintage style, the craquelure varnishing technique is suitable. If the interior is made in a classic style - choose painting with subsequent application of the image. When the design of a room requires elements of romance, decoupage is a good solution.
Restoration of a chipboard cabinet begins with the repair of visible defects. To proceed to the decor of facades and ends, you should carefully examine the hinges of the product, check the integrity of the fittings. Open the cabinet and inspect the drawer slides, and check the interior for chips and holes. All observed defects must be eliminated. This is easy to do with a hammer and nails, as well as by changing faulty mechanisms for new counterparts.
A universal list of tools for restoring an old cabinet with your own hands looks like this:
- sandpaper or grinder - to give the plane a flat and smooth surface;
- screwdriver or screwdrivers according to the diameter of all bolts - for possible adjustment of the product and removal of accessories before stripping;
- spatula - for covering holes and chips;
- paint roller and narrow brush - in order to renew the coating;
- wood glue or PVA;
- replacement screw set.
Directly for the decoupage technique, you will need napkins with a pattern or ornament, acrylic varnish, a special thin synthetic brush with fan-shaped bristles. Also, the restoration of an old cabinet implies the presence of a primer, putty for wood, paint for working in the staining technique, masking tape. To apply craquelure, you will need a varnish of the same name. nine0003
Tools and materials for decoupageIt is necessary to immediately decide on the idea of restoration, because without an idea it will not work to make a beautiful product.
Consult with household members and find out about their desires.
Stages of restoration by painting
Before studying the master class on painting a product for storing clothes, it is recommended to carry out preparatory work on wood. These include cleaning and grinding the old coating. It is important to achieve a smooth surface so that when painting, the brush applies the composition evenly. nine0003
For small areas, use sandpaper; for large areas, use a grinder. The final stage of preparation always involves the use of sandpaper on wood of the finest grit.
As soon as the work with defects is completed, decorators advise to proceed to the primer. This stage is no less important than the painting itself. It is necessary to restore an old cabinet with your own hands with high quality, so the primer will be an excellent solution: it will hide all the cracks and fill the pores. nine0034 In addition, a primed finish will absorb less coloring compound.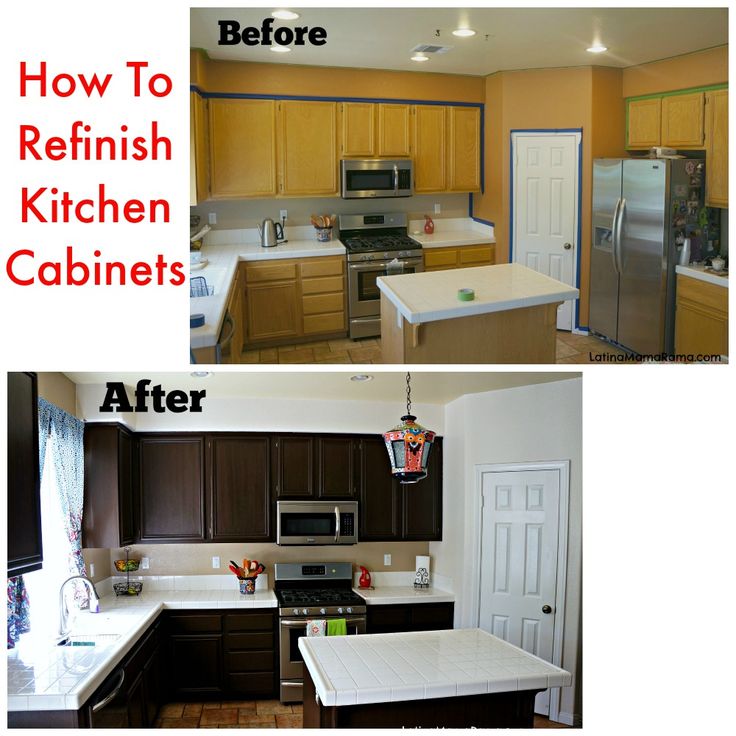
After waiting for the product to dry completely, we restore the cabinet with paint:
- unscrew all the fittings that will prevent the brush from penetrating into narrow places;
- those elements that cannot be removed are sealed with masking tape to preserve their original appearance;
- for painting wood, it is better to use special acrylic compounds - they lie better on a plane and create a protective layer of the film. Pour the paint into the container for the roller and get to work; nine0008
- first we process all the internal elements: shelves, compartments, mezzanines. After that, we proceed to painting the facades, as shown in the photo;
- after the first coat has dried, apply a second, and if necessary, a third coat of paint. This is necessary to achieve color brightness and complete filling of all gaps;
- the dried cabinet must be varnished in several stages.
Restoration masters advise you to show your imagination and make the wardrobe not in a monochromatic design, but add several colors to the facades.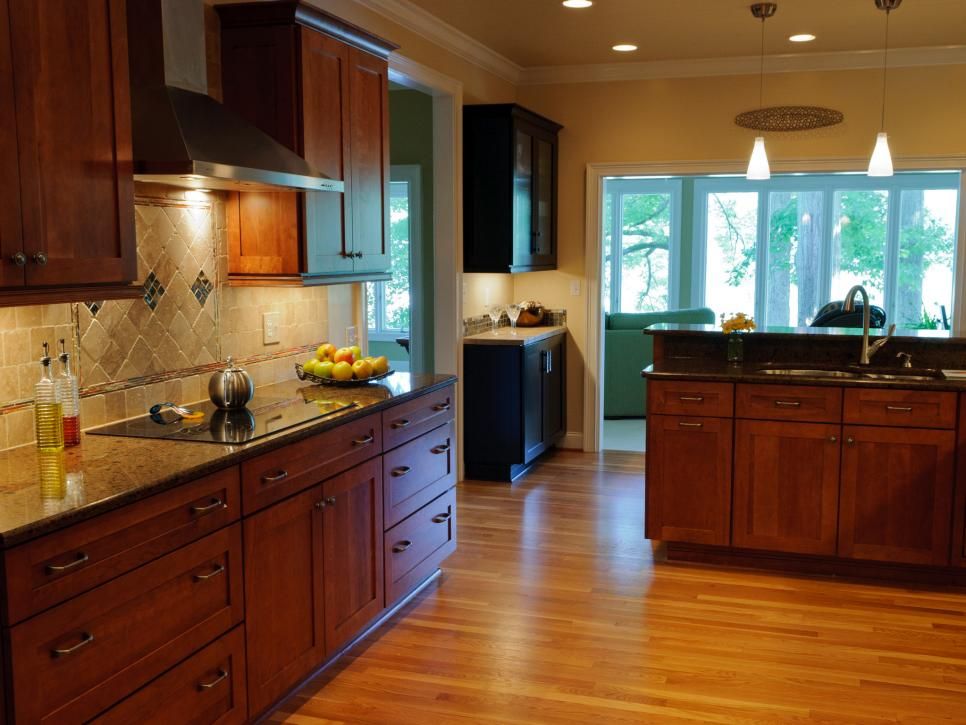 The simplest option is geometric shapes. To do this, use masking tape to seal some part of the facade and paint the remaining area in a different color. For originality, you can arrange a cabinet in a contrasting design. nine0003 Removal of old coatingSanding of partsFilled chips with puttyFirsting the surfacePainting of partsVarnishing
Using craquelure
The technique of coating wooden products with a special varnish, consisting of 2 components, will allow you to transform an out-of-fashion closet. With its help, it is really possible to create an old wardrobe used by grandmothers. To perform the work, you will need PVA glue, craquelure, acrylic paint and varnish, a wide brush.
The technique also does not require specialized talents, all manipulations are similar to normal dyeing. The algorithm of actions looks like this:
- preparation - the old product is sanded, if necessary, putty is used to seal large holes. The final stage of preparation will be a primer in several layers;
- coloring - for work you will need compositions of 2 colors: dark and light.
 They do not have to be in harmony - the dark version serves to design cracks, and the light one - for the main coloring. Using a brush, apply a dark color, evenly distributing it over the surface of the product;
 - craquelure - once the paint layer is dry, craquelure can be applied. This must be done quickly and preferably in several layers - the greater the thickness of the varnish, the more visible the cracks will be. Dry the product to a state of slight sticking of the fingers; nine0008
- second color - a master class on craquelure at this stage suggests applying a light color and waiting for gradual drying. As soon as the coating dries, a characteristic mesh will become visible;
- Lacquering - a fully dried restored cabinet is covered with acrylic lacquer to fix the effect.
When choosing craquelure, it should be borne in mind that if there is an image on the cabinet, you should not touch it. For this, a two-phase composition is used, the work with which is characterized by application in 2 stages.
nine0003
This technique is suitable for the restoration of cabinet fronts, however, similar manipulations can be performed inside the product. A beautiful vintage wardrobe will appeal to all lovers of vintage interiors.
Decoupage
Modern art stores will surprise any novice craftsman or amateur with an abundance of assortment of napkins and paper for decoupage. Napkins are small and are often used to decorate small items. In the case of a wardrobe, they can be considered as elements for the design of drawers or mezzanines. Decoupage paper is available in large sizes, so it will be optimal for this type of work. nine0003
Before restoring a wardrobe, choose a plot for the product. These can be floral motifs, historical ornaments, images of people, heroes, or just vintage pictures. Decoupage consists of several stages:
- the surface prepared for repair is sanded and primed in several layers. After that, light acrylic paint is applied to give the background;
- at this stage, paper materials are applied to the surface of the cabinet, mentally inventing the plot and location of each detail; nine0008
- Transferring an image to a surface is considered one of the hardest things to do.
 You can use the "file method" for this. Prepare a regular office file, remove the top 2 layers from the napkin and place it face down on the file. Next, take a spray bottle with water and gradually moisten the entire napkin. As soon as it gets wet, gently try to expel all the bubbles out with your fingers. If this is not done, wrinkles will be visible on the product. As soon as the napkin has become even and smooth, we apply it along with the file to the surface of the cabinet. Carefully delete the file and proceed to the next step; nine0008
 - using a thin synthetic brush and special glue, we process the surface of a napkin or paper in 1 layer;
- as soon as the napkin sticks and dries, it is necessary to treat the plane with acrylic varnish. The photo shows decoupage options for old cabinets.
Refurbished furniture gives the room a fresh look - it looks original, non-standard. Such products will delight all guests, positioning the owner as a beginner decorator.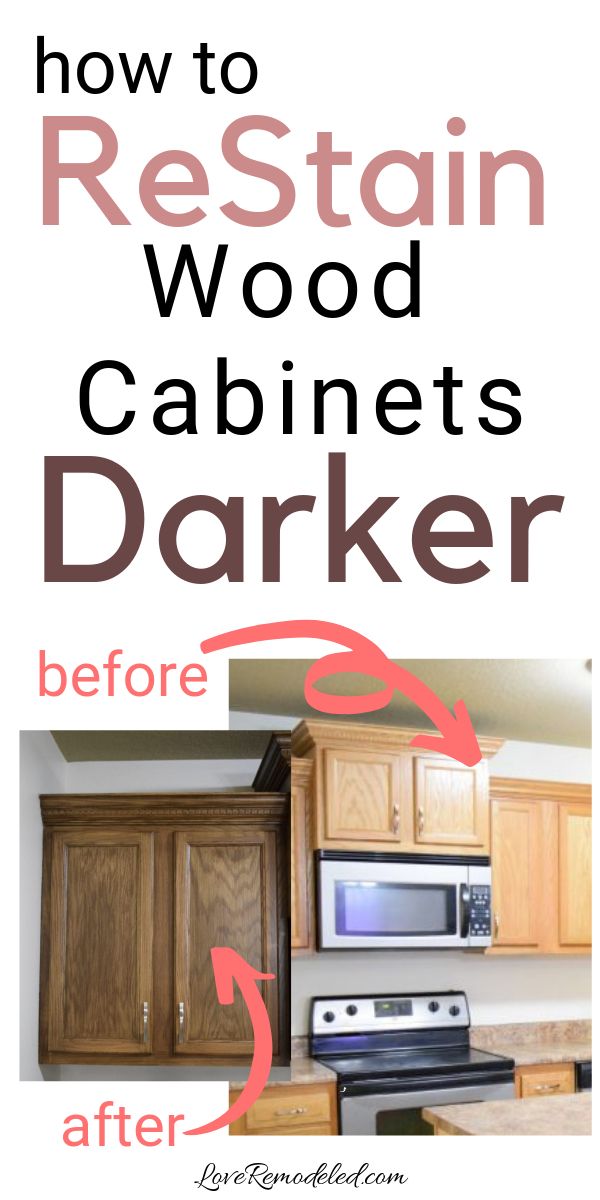 nine0002 August 19, 2021
Restoration of a chest of drawers from the times of the USSR
Let's modernize the chest of drawers with a bright color and an active print. The technique is suitable for sideboards, chests of drawers and cabinets of Soviet times. We remove the varnish from the surface and putty all the chips. We grind walls, doors and shelves to smoothness.
The facade is covered with bright chalk paint. For the doors, we will select a stencil: with a pattern, the design will become more interesting. If there are two doors in the chest of drawers, then it is very important to place the pattern symmetrically. We apply a matte varnish on top of the painted surface. The handles can be left the same, but updated and cleaned. Or abandon the original ones and pick up new ones to the chosen color of the facade. nine0003
The design of the dresser may be different. Bright on the inside, minimalist on the outside. With a color pattern on the facade and doors.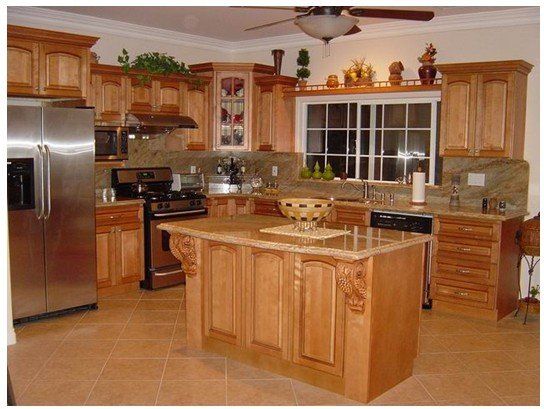 With protruding elements from convex rails. Take the time to figure out what to do with the old chest of drawers. And only when the picture has taken shape, proceed to the alteration.
Turning a chipboard cabinet into a piece of furniture art
First you need to wash and degrease the surface. After drying, proceed with the alteration. While the cabinet is drying, there is time to buy paint, wood putty, matte varnish, a brush and a narrow roller at the building supermarket. For surface decoration, you can also choose pine moldings. They can be replaced with slats of a suitable size or plywood with a thickness of 8 millimeters. nine0003
Let's get down to the actual change. The first task is to remove the veneer at the ends and level the surfaces of the cabinet using a grinder and putty. Then we mark the doors and attach moldings to them with liquid nails. Painting a closet is the most responsible job. You need to paint at least two layers, leaving the paint to dry.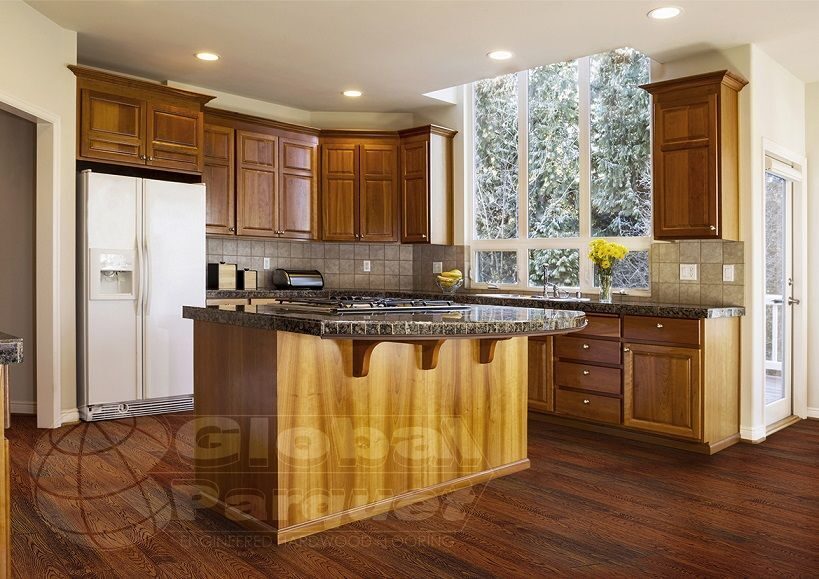 It is more convenient to paint over moldings with a brush; a purchased roller is useful for other parts of the cabinet. This is a long part of the rework, but the result is worth it.
Lacquer coating will help to fix the paint layer, it is better also in two layers. You can add unusual handles and glue spicy wallpaper on the inner wall. Voila - the cabinet is ready. Modern, stylish and beautiful. It remains to choose a room for the renovated handsome man and present the result of the restoration to family members. nine0003
The second life of the Soviet armchair
The condition of the upholstery and filler of the chair is unimportant, even if they crumble and completely become unusable. We are not going to save them. Carefully unscrew the legs from the frame and disassemble them into parts. Having treated with a solution for washing, it is easy to remove the old varnish coating with a spatula. The final stripping of the legs is grinding the surface with a grinder.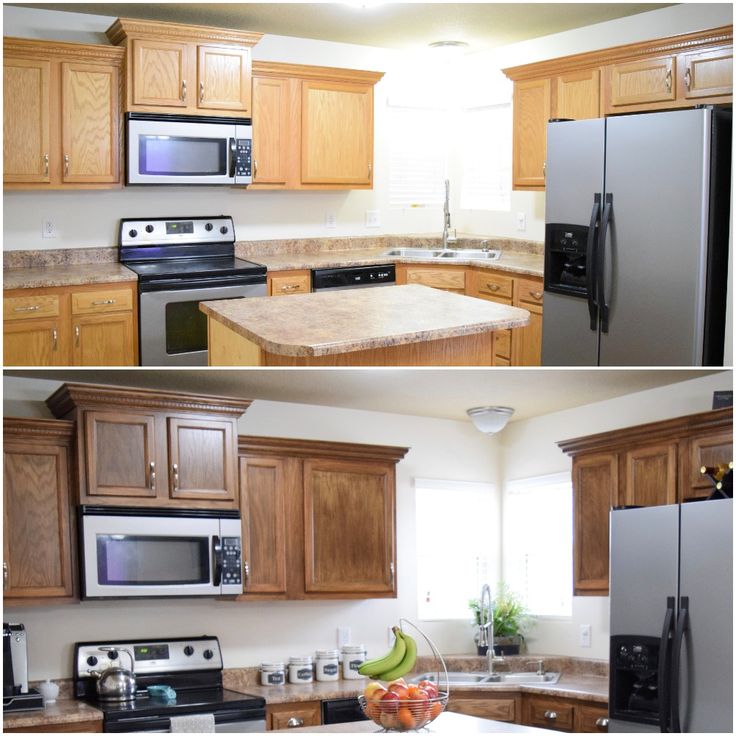
It's time to apply a fresh coat on the surfaces of the legs. We put everything in two layers: stain, wood oil, wax and again oil for a glossy shine. Let the legs dry thoroughly between each layer. You can move away from the mid-century modern style and paint with colored paint, for example, contrast. nine0003
We fix new slings - that part of the frame that holds the seat and back. We put a thick fabric on them. So the slings will not cut the filler. For softness, add a couple of layers of foam rubber, and cover with a thin padding polyester on top. The case is small, it remains to sew a cover from a fabric of a suitable color and texture. The updated chair is ready!
His Majesty the sideboard - a new life
The old sideboard inherited from my grandmother is an excellent opportunity to remake and search for your restoration vein. To begin with, the furniture will have to be well cleaned and degreased. We remove decorative elements from facades, mirrors, handles and fittings. nine0003
We release the surface from the old varnish. First, let's go through a grinder or manually with sandpaper. We remove the veneer from the ends with a spatula, the process will go easier when heated with a hair dryer. Chips, cracks and holes must be sealed with wood putty.
The thing is small: paint the sideboard in your favorite shade and decorate the doors. It is convenient to use stencils for drawing a picture with paint. Volumetric elements can be created from hardening modeling paste or bought ready-made in the store. nine0003
Saving an old lacquered cabinet
An old Soviet lacquered cabinet is easy to find. Although she is over 50 years old, her form is very relevant. And the strong body with all its appearance shows: we must save! Here is the correct sequence of actions.
The lacquer coating is removed with a grinder, exposing a beautiful woody texture. Emphasize it with colored wax. Polished doors are painted with a rich color in two layers.