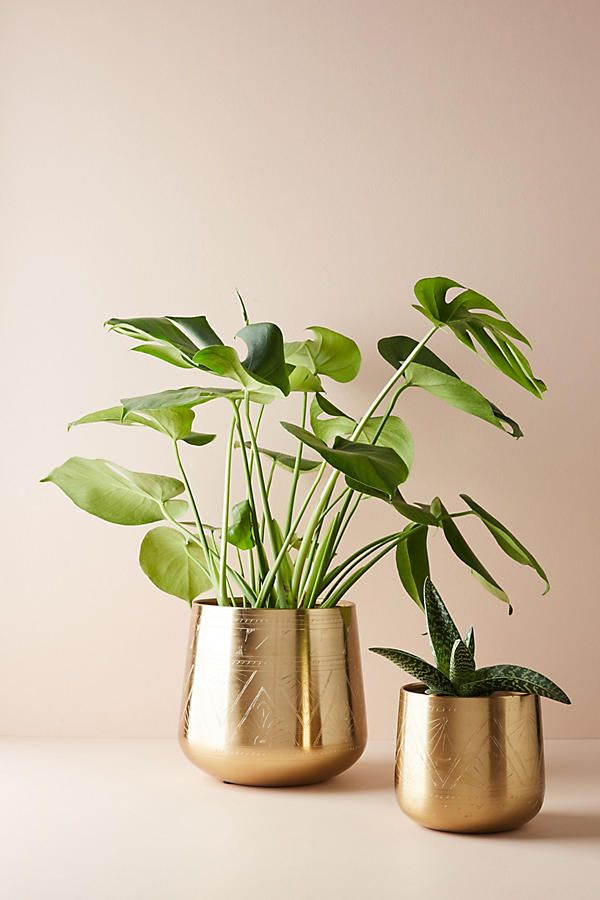
Plant peas in pots
How to Grow Peas in Containers
By
Kerry Michaels
Kerry Michaels
Kerry Michaels is a container gardening expert with over 20 years of experience maintaining container gardens in Maine. She specializes in writing and capturing photography for gardening and landscape design for print and broadcast media, including the Discovery Channel, Small Gardens, and Disney, among others.
Learn more about The Spruce's Editorial Process
Updated on 06/23/22
Reviewed by
Debra LaGattuta
Reviewed by Debra LaGattuta
Debra LaGattuta is a gardening expert with three decades of experience in perennial and flowering plants, container gardening, and raised bed vegetable gardening. She is a Master Gardener and lead gardener in a Plant-A-Row, which is a program that offers thousands of pounds of organically-grown vegetables to local food banks. Debra is a member of The Spruce Gardening and Plant Care Review Board.
Learn more about The Spruce's Review Board
Rev Stan/Flickr/CC BY 2.0
Project Overview
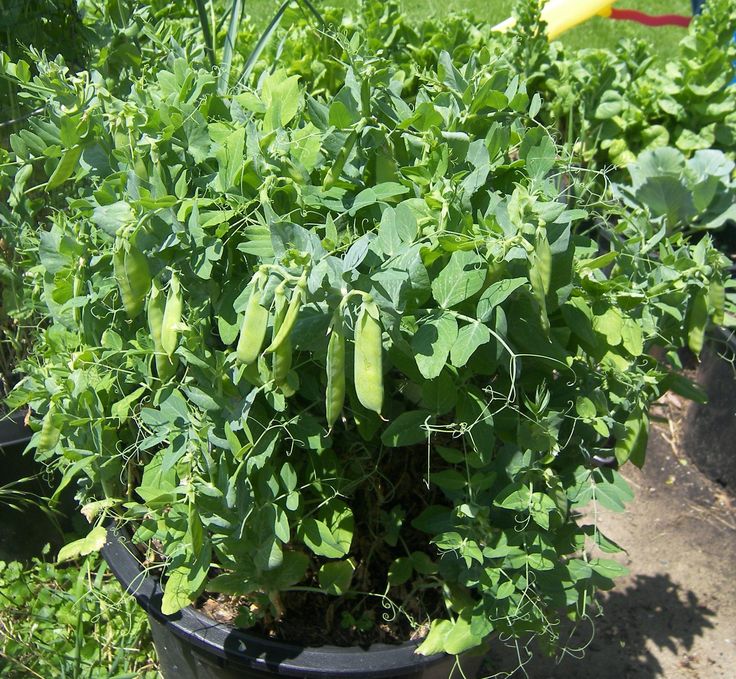
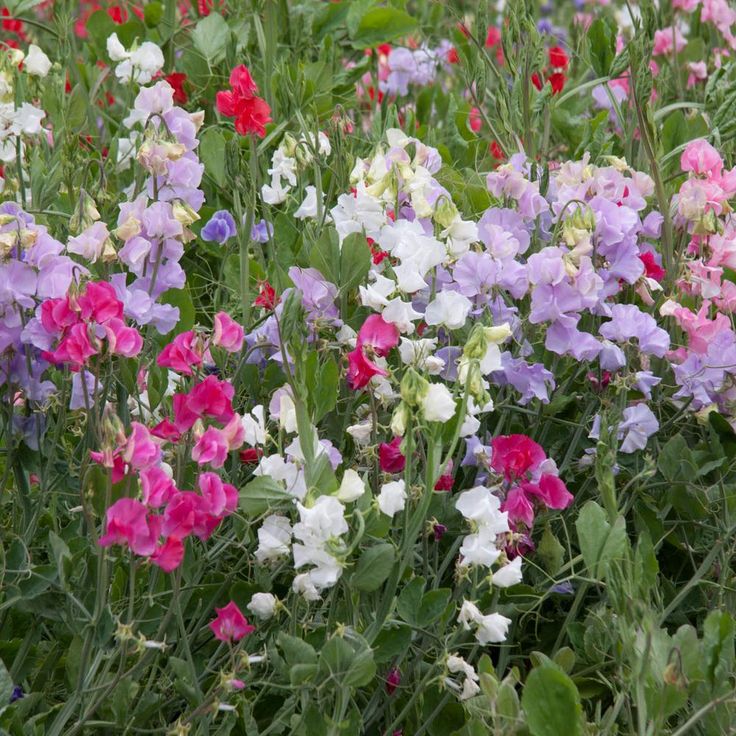
Peas are the perfect vegetable to grow in a container garden. They grow quickly and don't need much attention but will yield a surprisingly large harvest for a little bit of effort. The must-haves for growing peas are full sunlight and moist soil. Peas prefer cool conditions, so planting them early in the season is your best bet for a plentiful harvest. Once the weather begins to warm, your peas will stop producing. You can pull them up at that point and start a different heat-loving vegetable in the same container.
Peas take between 60 and 70 days to grow to maturity from seeds. They don't have deep roots, so consider using planters at least 8 inches, going up to about 18 inches deep—plant peas about 1 to 2 inches deep and at the minimum 1 inch apart. You should be able to grow a second pea crop in late summer for a fall harvest. If your growing season is long enough, it might be possible to plant an early crop for a late spring harvest, then convert your planter to another fast-growing vegetable for the summer heat.
Some favorite types of peas for container gardening include:
- Sugar snap peas
- English peas (including the 'Little Marvel,' 'Tom Thumb,' and 'Early Frosty' varietals)
- Snow peas
Equipment / Tools
- Garden trowel
- Garden gloves
Materials
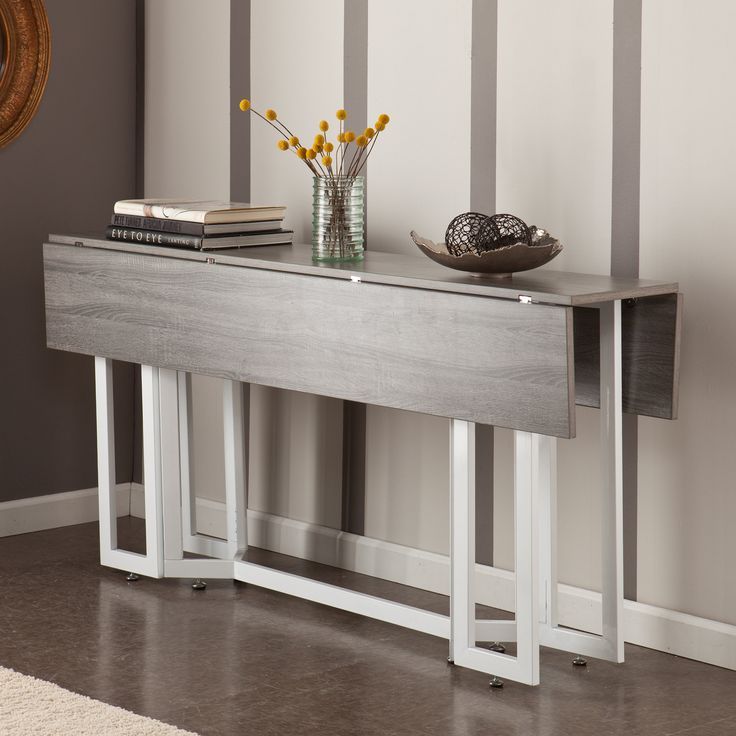
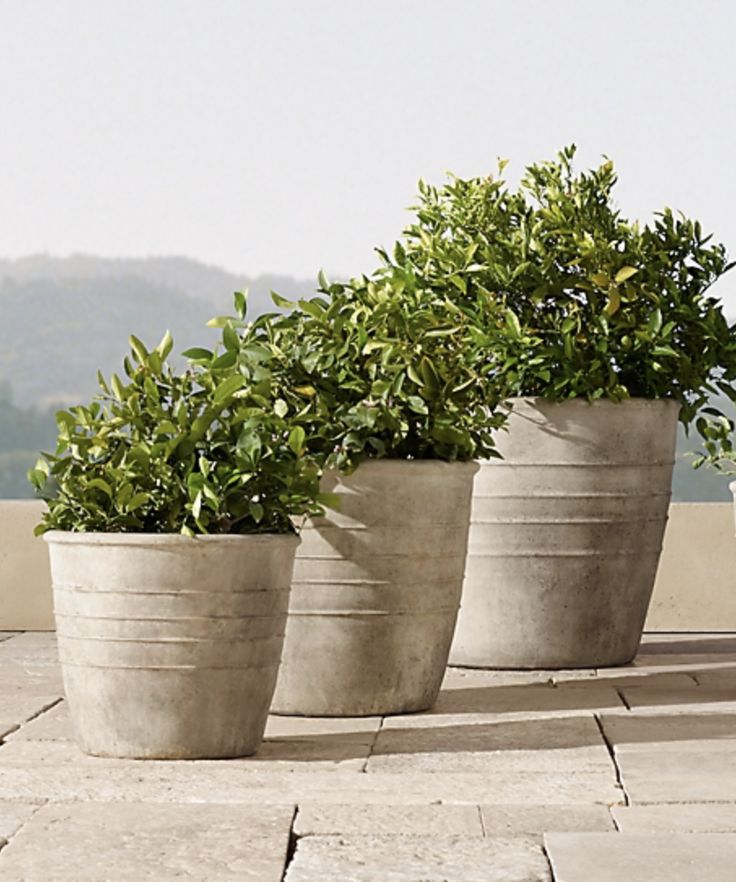
- Large planting container with drainage holes (8 to 18 inches deep)
- Plastic screening, coffee filter, or porous landscape fabric
- Potting soil
- Fertilizer (if needed)
- Pea seeds
- Legume inoculant (optional)
- Support structure
-
Prepare Your Container
Cut a piece of plastic screening large enough to cover the drainage hole in the bottom of the container you've chosen.
 If you don't have screening, you can use a coffee filter or a piece of porous landscape fabric to cover the drainage hole.
 Tip
If your container is enormous, fill the bottom third with empty, clean plastic containers, soda bottles, milk jugs, or any insoluble lightweight thing that will take up space without impeding water flow. It saves money on potting soil and keeps the container light. Separate the soil from filler material with a sheet of plastic screening or porous landscape fabric; cleanup will be easier at the end of the season.
-
Fill Your Container With Potting Mix
Pour potting mix into your container; stop filling at least 3 inches from the container rim. If your potting soil doesn't have fertilizer already included in its mixture, add in a general, all-purpose formula. Keep in mind that peas don't need much fertilizer—if you use too much, the nitrogen (a common ingredient in most fertilizers) will harm production, and the plants will produce large pods with small or no peas inside them.
 After filling your container, smooth out the soil, so it is relatively flat but not compacted.
 -
Plant Your Pea Seeds
Though it's not mandatory, treating your pea seeds with a legume inoculant will produce a more significant pea yield and healthier plants. For faster germination, you can soak your seeds in water overnight. Then, while they're still wet, shake them in a bag with the inoculant.
Sow your peas evenly. Plant peas at least one inch apart. The number of peas depends on the surface area of the container. You can plant two peas together to increase the chance of germination in that spot. With the flat part of your hand, press them onto the surface of the soil, and then add 1 to 2 inches of soil on top of the seeds. (Make sure not to add more than that, or the peas might have trouble germinating.) Water your container deeply with a watering can or a hose nozzle set to a gentle spray.
Tip
If more than one seed sprouts in the same spot, pull the weaker pea shoot.
 Pea shoots make an excellent, fresh salad topping.
 -
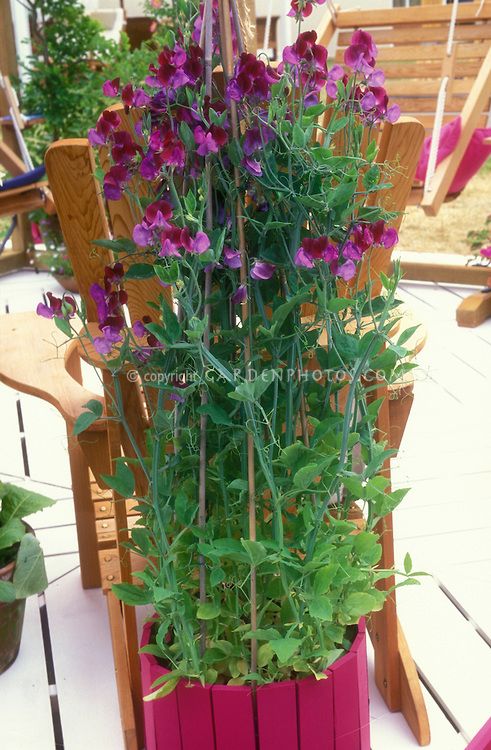
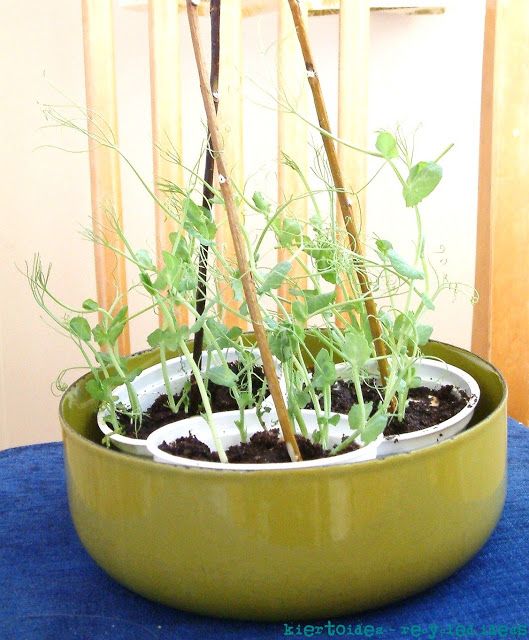
Set Up a Trellis
Most pea varietals are climbing plants, so they need a trellis or support structure for the vines to climb. Peas do not naturally cling very well with their tendrils, so you might have to help them get started by using wire ties to secure the stems to the structure. Bamboo stakes tied together at the top with twine into a triangle shape work well. Or you can place your container near a deck or railing that can serve as a "trellis" for the plants.
-
Care for the Peas
Peas are relatively easy plants, so this is just about the only care required. Keep the soil moist but not wet as your pea seeds germinate, sprout, and begin to grow. And make sure that your containers receive at least six hours of full sunlight each day. Because you fertilized the potting soil before planting the seeds, no additional feeding is necessary—peas are legumes that naturally "fix" nitrogen into the soil by absorbing it from the air.
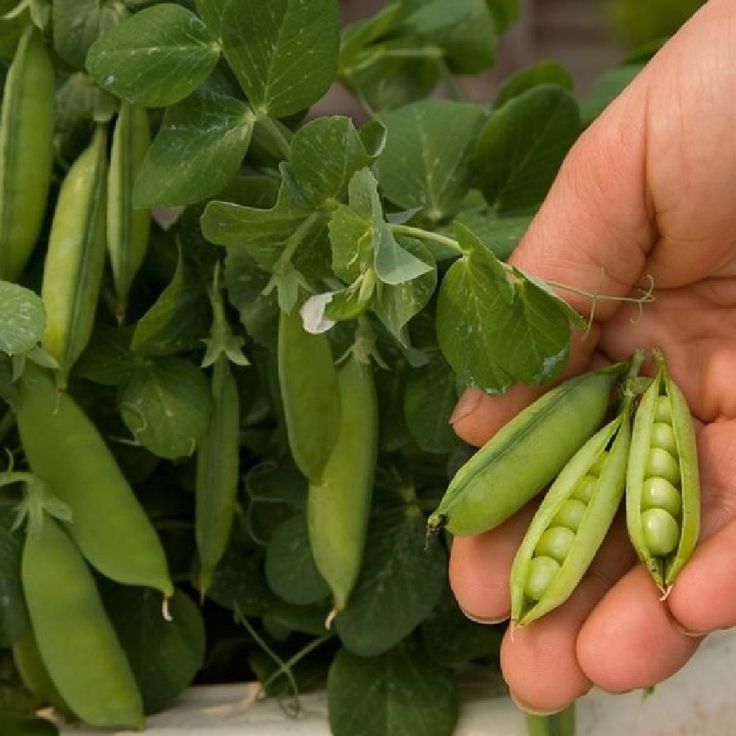
Harvest your pea pods as they ripen. For sugar snap peas, harvest them when the pods are still young, which is when they are the sweetest and tender. When harvesting English peas that you will shell, wait until the pods swell, letting you know that the peas inside are big and juicy. For snow peas, pick them from the plant before the peas inside become large and tough.
Elva Etienne/ Moment/ Getty Images
Watch Now: 19 Timelapses Perfect for Plant Lovers
Article Sources
The Spruce uses only high-quality sources, including peer-reviewed studies, to support the facts within our articles. Read our editorial process to learn more about how we fact-check and keep our content accurate, reliable, and trustworthy.
Peas. University pf Connecticut Home and Garden Education Center.
Everything About Growing Peas In Containers and Pots
Learn
Growing Peas in Containers & Pots to plant them on your apartment balcony or patio and enjoy a fresh harvest!Follow this article and learn every bit of detail on Growing Peas in Containers and enjoy a bountiful harvest in no time!
Check out our article on growing grapes in containers hereCommon Names: Pisum sativum (Scientific Name), garden peas, shelling peas, snap peas, sugar peas, sugar snap peas, snow peas, Chinese peas, edible-podded peas, matar, erbese, batani, ater, pois, English peas, green peas, sweet peas
USDA Zones: 2-11
Best Container Size for Growing Peas
The size of the pot will depend on the types of peas and the varieties you’re growing.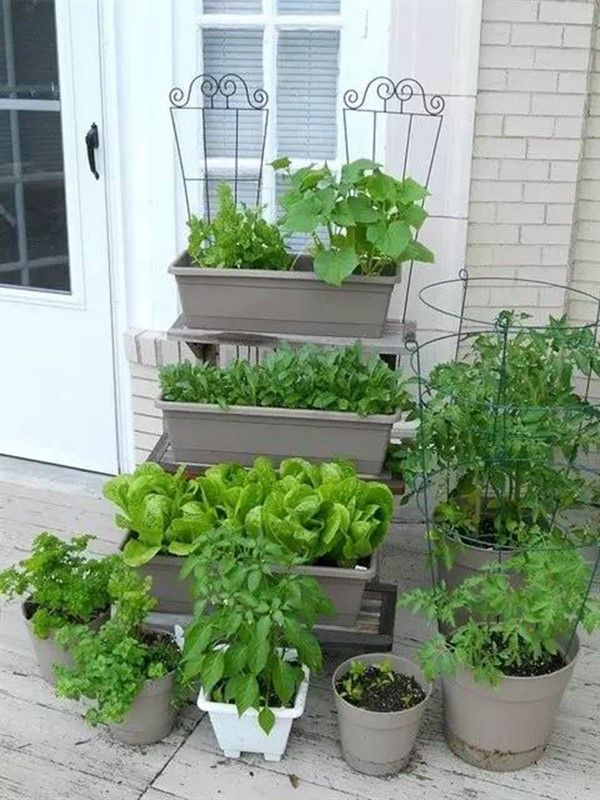
- For tall and large bushier varieties, choose pots that are 8-12 inches deep and as wide as possible. Maintain the spacing of 3 to 5 inches between each plant.
- For dwarf and short varieties, get pots that are 6 inches deep. Maintain the spacing of 2 to 3 inches between each plant.
- Ensure better drainage and promote airflow. If you’re using shallow containers, consider adding a fast-draining potting mix.
- To keep things simple, any 3 to 5-gallon container that is between 6-12 inches deep and at least 12 inches wide and has drainage holes can be used to grow 3-5 plants at least.
Best Types of Peasimpecta.se
1. Garden Peas
Also known as shelling peas, the peas inside are usually plump and medium to large in size with a moderately sweet to sweet taste.
2. Snow Peas
These have sweet but very small peas inside, and the whole pods are edible. The flavor is moderate, and they can be eaten raw, but it’s best to use them in stir-fries, soups, and salad dressing.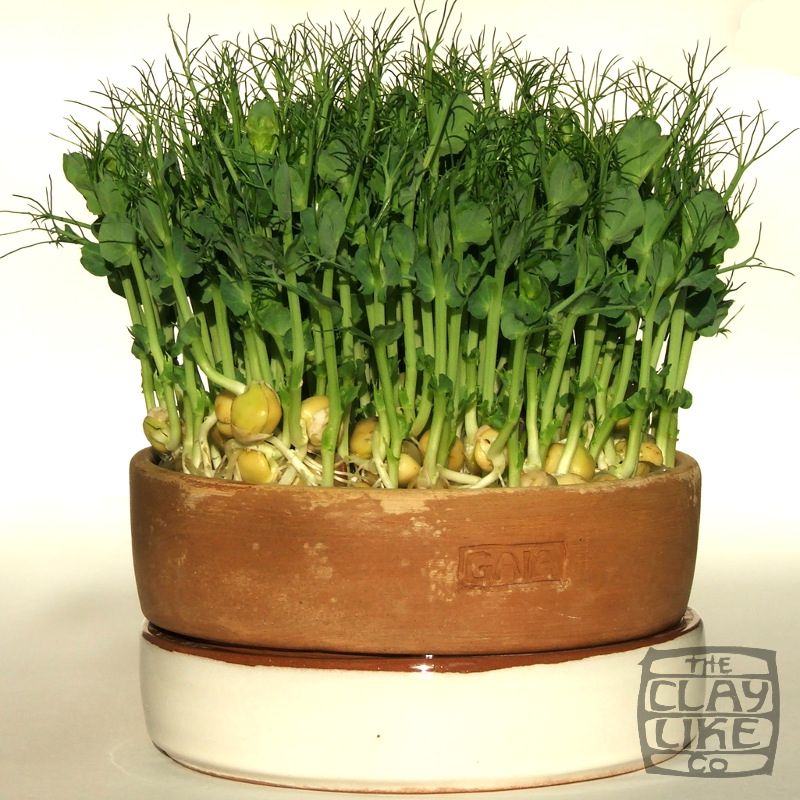
3. Snap Peas
Also popular as snap peas, these are a cross between the garden peas and snow peas. The seeds or peas are noticeable and can be shelled. They can also be used as a substitute for snow peas in recipes.
Want to grow Kiwi in pots? Click hereSelecting the Right Variety of Peas to Growlmrk21
For limited space gardeners, bush varieties that are tall and take less ground space are better. They produce more in lack of space and utilize the vertical space well. If your balcony or patio is windy, choose varieties that are a little short.
We suggest you grow either regular garden peas or snap peas. Snap peas are better as you can use them instead of snow peas as pods are edible and also enjoy them like garden peas.
If you are looking to grow your own peas in a jiffy, there are many early maturing varieties, like ‘Maestro’ and ‘Sugar Bon.’ If you want more information, a quick web search can help you in finding out the best pea varieties for containers. While you pick your favorite cultivars, don’t forget your climate and growing conditions.
Here’s a helpful list of different varieties of peas. Check that out!
Tip: If you’re growing more than one variety of peas, appoint a separate container for each. This will help in identifying them.
Growing Peas from Seeds
Growing peas from seeds is really easy, and it requires a few steps given below:
- Sow seeds 1 or 2 inches apart in the seed mix or directly in the desired pots, an inch or two deep.
- It’s false that peas seedlings don’t transplant well; you can plant them when they’re 4-5 inches tall.
- You can also scatter the seeds briskly over the growing medium and later cover them with the soil with no more than a 1-inch layer.
- Water well to keep the soil moist but not wet. Keep the germinating seeds in part sun to full sun.
- Seeds will germinate in a window of 7 to 30 days; it depends on the soil temperature.
 Temperatures above 60 F (15 C) expedite germination.
 - You can also soak the seeds in water for 24 hours before sowing to speed up the germination process and pre-treat them with liquid seaweed for better growth.
If you like, at the time of planting seeds, add legume inoculant in the soil or make a slurry with the inoculant and then mix with seeds. It increases the productivity and health of legumes like peas. To learn more about this, click here.
Want to grow watermelon in pots? Click hereWhen to Plant Peas?
Plant them in early spring and spring for the succession planting as soon as the soil temperature is above 40 F (5 C).
- The best part about growing peas in containers is you can control the temperature and growing conditions. Keep them indoors for a while until the weather starts to warm up or if you’re starting your young plants off outside on a balcony or patio, protect them using a cloche or mini greenhouse.
- If the summers are cool in your area, grow them in summers as well. For a fall and early winter harvest, plant them between mid to late summer. If winters are mild where you live, plant them in fall, say 8 weeks before frost.
- In frost-free zones (hot climates), plant them in late fall and throughout the winter months until spring. For a bumper harvest, sow early-maturing and late-maturing varieties and do succession planting.
- Impatient gardeners are better off growing snow peas as they can be harvested early before maturity.
- Also, you can start with seedlings for sale in nurseries and save 3 weeks in the process.
- While young pea plants are tolerant to frost, pea pods and blossoms are not. Follow this video guide to protect your crop from cold temperatures and frost.
Growing Peas Indoorsreddit
Growing peas indoors is possible if you have a south or west-facing window that receives at least 5-6 hours of direct sunlight. A six inches deep windowbox is OK to grow dwarf varieties of peas.
You can also plant tall varieties if you’ve space. For support, poke short stakes close to the plants when they’re 4-6 inches tall without damaging the fragile roots.
Water carefully and moderately to avoid diseases. Rest all the other growing requirements are similar to growing peas in pots outdoors, which you can read below.
Find out the best vegetables for pots hereRequirements for Growing Peas in Potsthegardeningcook
Position
Peas can grow part sun to full sun but prefers a sunny location with a steady wind and good air circulation. However, if you’re growing peas in warm weather, i.e., summer or in a hot climate, keep them away from the intense afternoon sunlight.
Soil
Use a loamy and well-drained commercial potting mix or prepare your own but never substitute it with regular garden soil when growing plants in containers.
If you’re planting peas in a very sunny location, increase the moisture-holding capacity of your soil or water more frequently.
Peas are not fussy about soil pH and do well in slightly acidic to neutral soils.
Watering
Peas prefer cool and moist soil but avoid overwatering and constantly soggy situations. Otherwise, the plants will rot or produce a lower yield.
Also, you can’t let the soil to dry out completely, especially when the plants are germinating or producing pods.
Container-grown peas need a greater supply of water than their garden-grown counterparts. Make sure the topsoil is never dry, and the plants don’t show signs of wilting.
Temperature
Peas grow well in moderately cool weather. They don’t tolerate extremes of temperature. They grow best in spring and early summer in the cool climate and late fall and winter in the tropics.
Peas grow well in temperatures between 45-80 F (7-27 C). At the same time, the optimum temperature falls in the range of 60-75 F (15-24 C).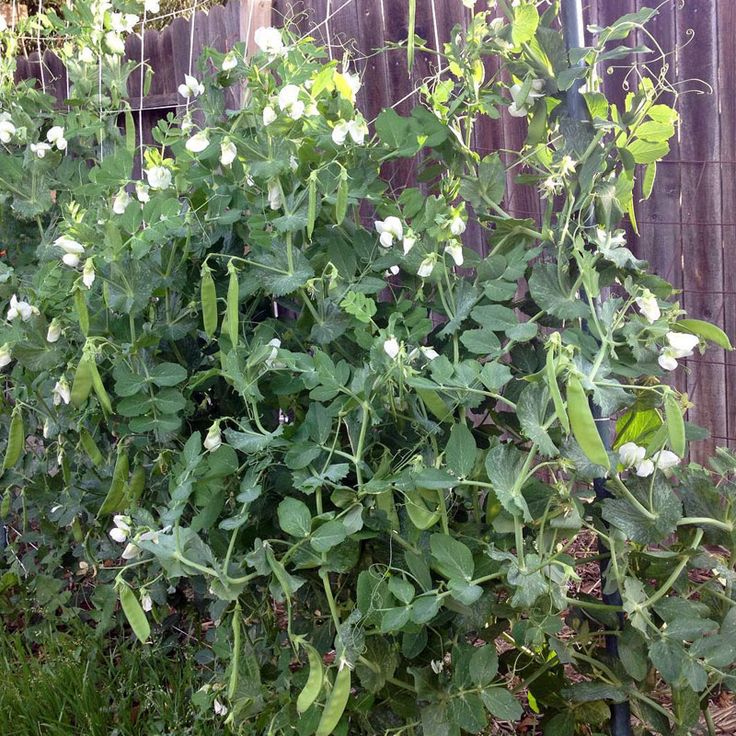
Spacing
If you are growing several varieties together in the hope of a quicker harvest or to experiment, ensure to develop each of them in a separate container.
Maintain a spacing of at least 3-4 inches between individual rows. For example, if you’re using a window box of 6 or 8 inches breadth, don’t create more than two rows.
You can grow the peas closely, 2-3 inches apart from each plant. For really tall and bushier varieties, maintain 3-5 inches of spacing. Also, place a stake or bamboo pole in the container, especially if you are dealing with tall or climbing varieties.
Green Pea Carewingfoot_em
Mulching
Mulching is a great way to curtail weeding and conserve moisture. But it’s often not required in container gardening. However, you can add a thin layer of organic mulch over the topsoil.
Wood chips, grass clippings, straw, twigs, and shredded leaves are some of the mulching options.
Fertilizing
Peas don’t require heavy feeding as they produce nitrogen intermittently on the ground. However, in containers, fertilizing peas moderately is necessary.
Add 1 tablespoon potassium (K) per 2-gallon of potting soil before planting peas in containers. Later on, fertilize with 5-10-10 or 20-20-20 general-purpose fertilizer (*in 1/2 or 1/4 strength, depending on how your plants are doing) once in 2-3 weeks as soon as your young plants establish themselves or from 10 to 14 days after the germination.
If you prefer to choose an organic way to fertilize peas, side-dress the plant with compost or well-rotted manure twice during the growing period; as banana peels are rich in phosphorus and potassium, you can also use them to feed your plants. How? Click here to learn more.
Support
Peas are natural climbers, and they require support to grow. Dwarf or bushier varieties can do without support but don’t produce a bountiful crop.
Vining peas are just the opposite. They need trellises for support; some varieties can grow up to eight feet tall. If you are too lazy to make a trellis, just place a stake near the plant when it’s young without disturbing the delicate roots.
Here is an easy DIY video tutorial that will teach you a quick way to create support for peas.
Check out our article on growing cilantro in containers hereCompanion Planting: What to Grow with Peas?shutterstock/MarinaGreen
The good thing about planting peas in pots is that you could grow additional crops in the same space. Avoid growing chives, onion, and garlic as they outcompete the plants in the vicinity and retard their growth.
Peas do best when grown along with slow-growing crops like turnips, carrots, and radish. Take advantage of the nitrogen-fixing ability of peas by growing leafy greens like lettuces, celery, and spinach.
Pests & Diseases
- Climbing varieties of peas are generally more resistant to diseases. It’s always better to grow these plants away from the soil where all the pathogens and pests lurk in search of a hospitable host.
- Giving support to peas using trellis or stake improves the air circulation and saves this vegetable from many diseases and pests.
- Crop rotation is a necessity to prevent seasonal diseases. Don’t grow peas in the same container for more than five years in a row.
- Preclude the onset of root rot by avoiding overwatering and growing peas in well-drained drained soil.
- Spring plantings carry the risk of developing powdery mildew. Use bicarbonate sprays intermittently in summer.
- Of course, your best bet is to grow hybrid varieties or those that are resistant to wilt and mildew.
- Spray liquid seaweed on the leaves and vines on hot days to strengthen disease resistance.
- As you’re growing peas in containers, you can easily control the pests. Keep your eyes on aphids, a major problem for peas. If you see them, wash them with a blast of water or use insecticidal soap.
- A minor pest infestation can be removed by hands by squeezing with fingers.
- Spider mites are one more menace. To remove them, target them with a jet of water or use insecticidal soap. Neem oil is also a very effective organic way to get rid of them.
Harvesting Peas
1. Harvesting Garden Peas
Harvest whenever the pods become bright green, round, and turgid. To find that out, you can gently touch the pods if they’re looking full.
Begin working from the bottom to the top, snapping off individual peas while holding the plant gently to avoid snipping off the stem. Remember, the more you’ll pick, the more peas you’ll get.
2. Harvesting Snow Peas
Snow peas have flat, edible pods; they give you greater and quicker yield because you get to eat the entire pod with tiny peas inside them before they mature.
You should pick snow peas early, soon after the flowering and pods are forming. Before picking, gently squeeze the pods and see if peas are there and moving.
3. Harvesting Snap Peas
Snap peas pods are edible, and you can harvest them like snow peas–early, before the peas start bulging in pods. Or harvest them to your liking to eat the peas raw when they’re really sweet.
You can also pick them late like regular garden peas till the pods become fat and round. This will happen in 2-3 weeks after flowering.
Learn about growing Armenian Cucumbers in containers hereHarvesting Pea Shoots
Not just the pea pods, you can also harvest the flowers and top young growth of your pea vine as all parts of it are edible.
Snip off the top growth, including young and tender pea shoots and tendrils that cling to the trellis for support. This trimming will also encourage bushier growth.
Frequently Asked Peas Questionscaribbeangardenseed
1. How Tall Do Peas Grow?
Depends on the variety! Some pea plants can climb up to 6 to 8 feet in height. There are dwarf varieties as well that can’t grow more than 1 to 2 feet tall.
Average pea varieties restrict only to 3 to 4 feet in height.
2. How Many Peas Should You Plant for Adequate Yield?
Plant at least 20-30 plants to have a bountiful harvest for one person. If you’re growing 5 plants in a container, you’ll need 5-6 containers like that.
3. How Long Do Peas Produce?
Remove all the pods, or else your plant will stop producing them at all. And don’t uproot the pea plants yet after harvesting them the first time. Look out for flowers, if they’re appearing and the weather is favorable, they may bear more pods.
In another case, after picking up all the peas, if your vines are turning brown, leaves are yellow, and flowers are falling, it’s due to the hot weather, and your vines are about to die. Time to remove them!
Also, if you see a white coating on plants, it’s mildew, and if you already had a successful harvest, it’s better to say goodbye to your pea vines.
4. How to Grow Peas in a Hot Climate?
Peas are grown as a traditional crop in many tropical regions in late fall, winter, and spring. The trick to growing peas in hot weather is to water them a lot. Keep the soil evenly moist all the time.
Also, if the sunlight is very intense in your area, save them from the afternoon sun.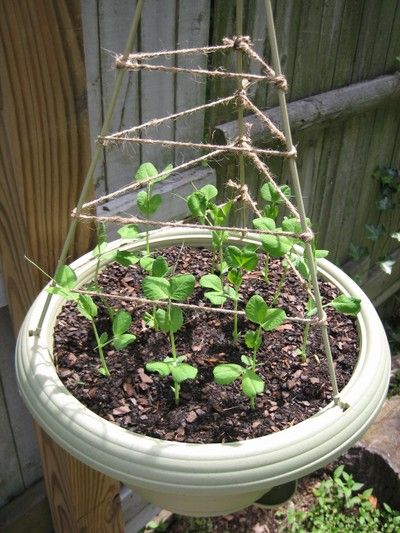
window sill or balcony cultivation
Almost every gardener grows peas on his personal plot. But on the windowsills, this culture is much less common. Although there is nothing difficult in getting a crop "in captivity", no. The plant is not capricious, it does not require any special care. Of course, not all varieties are suitable for growing at home, but from the existing variety it is quite possible to choose a few suitable ones. Most often, sugar peas are planted on the windowsill, in which not only grains are suitable for food, but also the beans themselves, and shelling - it is highly valued for its taste.
Contents
-
1 Pea varieties suitable for home cultivation
-
1.1 Photo: home grown varieties of sugar peas
-
1.2 Photo gallery: common varieties of shelled peas
-
-
2 Preparation of planting material
-
2.
 1 Video: preplant preparation of pea seeds
-
-
3 How to grow peas at home on a windowsill: optimal conditions
-
4 Seed planting procedure
-
5 Further plant care and harvesting
-
5.1 Video: planting peas and further care of the crop
-
5.2 Video: growing peas at home
-
Pea varieties suitable for home cultivation
Peas at home are not the most common crop. Much more often, all kinds of greens and herbs are grown on the windowsills. But in principle, there is nothing impossible in this. Pea grains are not only tasty, but also very healthy. Its greens can also be eaten, it is a worthy alternative to lettuce leaves.
It is quite possible to grow peas on the windowsill even for those who have never cultivated them in the garden
For indoor growing, choose low-growing varieties from the sugar or shelling category. In addition to compactness, they have another advantage - more juicy leaves than grain peas.
Of the sugar varieties, the most popular are the following:
- Ambrosia. A relatively recent achievement of Russian breeders. It is specially noted that it is very well suited for fresh consumption, cooking all kinds of culinary dishes. A variety from the category of early ripening, the crop ripens in just 45-55 days. The height of the plant reaches 50–70 cm. Pods with a slight bend, tapering to the top, long (8–10 cm), slightly flattened. They are painted in salad color, there is no hard “parchment” layer. The lowest beans are formed at a height of about 35 cm without touching the ground. The grains are shriveled, yellowish in section. There are 6-8 of them in each pod.
- Zhegalova 112. A variety that has proved the presence of undeniable merits to more than one generation of gardeners. These are mid-late ripening peas. Beans reach technical maturity 50-60 days after germination, fully ripen after 90-110 days.
 The stem is quite high (120–180 cm), with long internodes. The plant will definitely need support. The beans are almost straight or with a barely noticeable bend, the top is blunt. The average length is 10–15 cm, diameter is 2.3–2.5 cm. Each pod contains 5–8 seeds. They have an irregular rounded-angular shape, they are slightly flattened at the rib. Painted in green with a grayish tint. Harvest ripens massively.
 - Sugar girlfriend. Variety from the category of medium early. The growing season is 65–70 days. Stem height - 130–150 cm. Beans with a more or less pronounced bend, not long (7–8 cm), of different widths. The lowest ones are formed at a height of 70 cm. There is no “parchment” layer. The grains are medium-sized, wrinkled, pale yellow on the cut. Each pod contains 6-8 pieces. Compared to other varieties, it is characterized by a higher protein content (about 25%). Its other advantage is resistance to fungal diseases, including all types of rot.
- Sugar Oregon (also known as Oregon Sugar).
 A variety from the category of mid-season, the crop ripens in 55–70 days, the fruiting period is extended. The stem is not particularly long (up to 1 m), but when grown under optimal conditions, it can stretch more than is convenient at home. Pods with a slightly pronounced bend and a blunt top, elongated (9-10 cm), as if flattened. Each has 5-7 peas. The "parchment" layer is not very noticeable, but it is present. However, peas can be eaten with the pod. The taste is very good, the variety is considered a delicacy. The grains are medium in size, light yellow on the cut, the surface is slightly wrinkled. Aeration greatly affects the yield, so the room must be regularly ventilated.
 - Children's sugar. Variety from the category of medium early. The stem is of medium length, about 95 cm. The beans are wide, with a slight bend, the top is pointed. The "parchment" layer is missing. The lower pods are formed at a height of 30-35 cm. The taste is very good, the peas are soft and sweet.
 The surface of the grains is wrinkled, on the cut they are yellow. The variety is unpretentious in care, valued for consistently high yields.
 - Inexhaustible 195. A variety from the category of medium early, reaches technical maturity in 45–60 days, full maturity in 70–90 days. Stem with long internodes, height varies from 75 cm to 115 cm. Pods with a slight bend or completely straight, blunt top. Sometimes there are "constrictions". The length of the bean is 8–10 cm, the diameter is 1.5–1.8 cm. Each pod contains 6–7 peas. Lime-coloured grains turn yellow when overripe. The shape is irregular - they are rounded-angular, slightly flattened.
Photo: home grown varieties of sugar peas
- Ambrosia peas were bred relatively recently, but have already managed to prove themselves from the best side
- Goroh Zhegalova 112 successfully passed the test of time
- Peas Sugar girlfriend - one of the novelties of the Russian selection
- Sugar Oregon peas cannot be called sugar in the full sense of the word - the “parchment” layer is still present, albeit weakly expressed
- Children's sugar peas are valued for their excellent taste
- Peas Inexhaustible 195 stands out with grains of an unusual lime color
Shell peas can also be grown on the windowsill.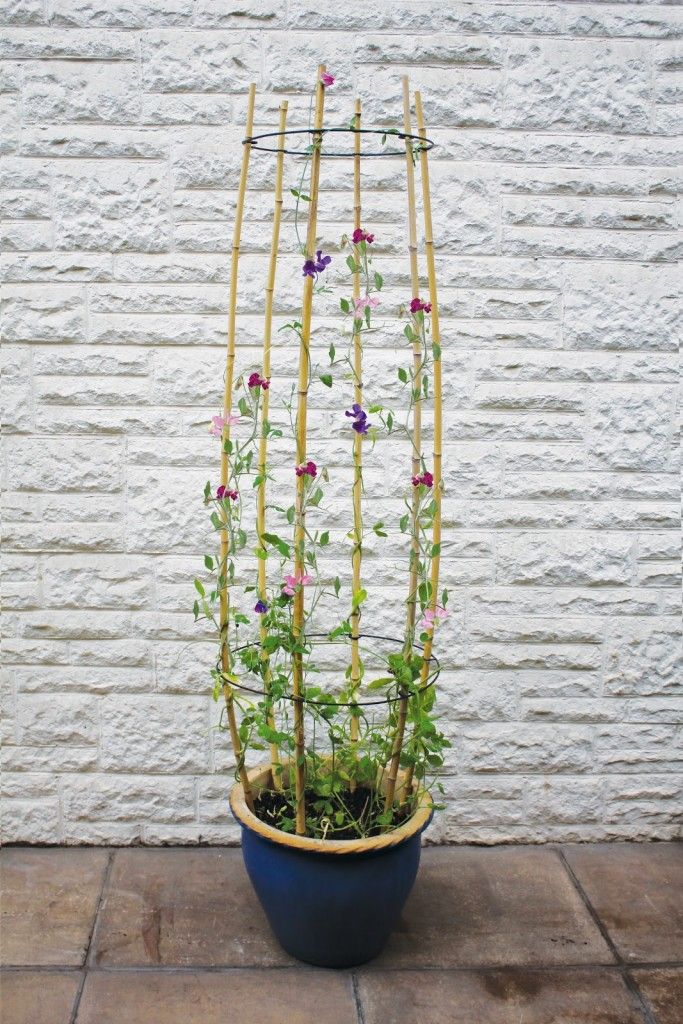 He eats only grains, the beans themselves are inedible.
- Oscar. A variety of peas comes from the Czech Republic. Belongs to the category of ultra-early. Harvest ripens in 42-45 days. The stem is quite short, about 70–80 cm. The pods are long (9-12 cm), strongly curved, apex pointed. Each has 10-12 peas. The lower beans are formed at a height of 40 cm. The grains that have reached technical maturity are green, on the cut they are pale salad. The shell is strongly wrinkled. The variety is resistant to diseases, especially to Fusarium wilt. Harvest ripens together.
- Adagum. The variety belongs to the category of mid-season. Harvest ripens in 68–73 days. The stem reaches a height of 70–80 cm, the internodes are short, and there are few leaves. The presence of a well-developed mustache is characteristic. The beans are quite short (7 cm), without a bend, with a pointed top, deep green in color. Each pod contains 6-9peas. Usually one plant produces 12-16 beans. The grains are medium-sized (or closer to large), dark green, on the cut - lime, the skin is wrinkled.
 The variety demonstrates good immunity to powdery mildew and ascochitosis, but does not have absolute protection.
 - Early Gribovsky 11. Technical maturity occurs in 54-63 days after germination, full - in 66-73 days. Stem with short internodes, its height reaches a maximum of 35–40 cm. Pods are even or with a slight bend, dark green. The average length is 8–10 cm, diameter is 1.2–1.4 cm. Each pod contains 6–8 peas. The grains are rounded-angular, slightly flattened. As they mature, they change color from green to yellowish. Fruiting is friendly. The most dangerous disease for the variety is ascochitosis.
- Hava pearls. A variety from the mid-season category, gardeners have been growing it for over twenty years. The process of crop ripening takes 55–70 days, fruiting is friendly. The height of the stem is 78–97 cm, in total there are 18–20 internodes on it, the pods begin to form at a height of 11–14th. Beans with a slightly pronounced bend, the tip is pointed. The average length is 7–8 cm, diameter is 1.
 2 cm. Each contains 5–9 peas. The grains are not particularly large, almost one-dimensional, glossy, in the form of a cube with rounded corners, painted in lime color, white-yellow on the cut. The variety is valued for its good resistance to all types of rot.
 - Faith. Variety from the category of early ripening. Harvest can be harvested 48–63 days after seed germination. By this time, the beans reach technical maturity. Peas are recommended for canning. The height of the stem does not exceed 55–65 cm. The beans are straight or with a barely noticeable bend. The length is 6–9 cm, the diameter is 1.2–1.4 cm. Each contains 6–8 grains. The parchment layer is strongly pronounced. As it matures, the color of the pod changes from salad green to lime. The peas are not particularly large, irregularly rounded-angular in shape, yellowish, strongly wrinkled, one-dimensional. The variety is often infected with ascochitosis.
- Sunrise. Peas reach technical maturity in 67 days. Stem height - 65–75 cm.
 Beans begin to form at a height of 18–20 cm. Leaves and stipules are dark green, medium in size. The parchment layer is clearly visible. The peas are bright green, lettuce cut, slightly flattened vertically, the surface is wrinkled.
Photo gallery: common varieties of shelled peas
- Oscar peas are one of the first to harvest
- Adagumsky pea resists diseases well, but does not have absolute immunity
- Peas Early Gribovsky 11 are characterized by mass fruiting
- Peas Khavsky pearls are relatively rarely affected by rot
- Pea Vera is a very popular early variety.
- The stem height of Voskhod Pea makes it suitable for growing at home.
Preparation of planting material
Preparation for growing peas at home begins with the selection of quality seeds. They are the key to a bountiful harvest in the future.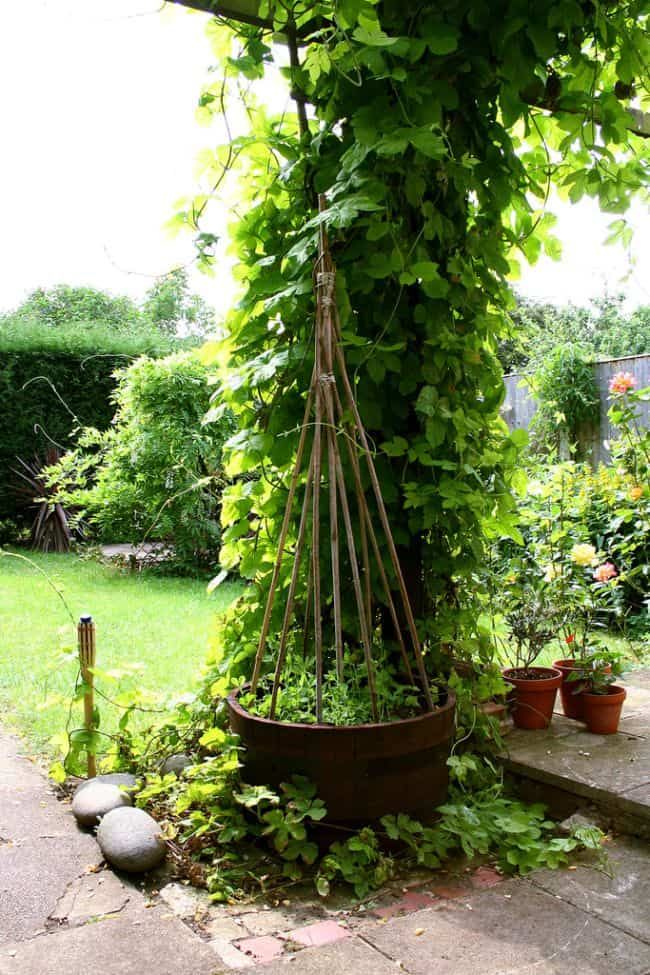 You can buy them or make your own. They remain viable for two years.
Pea seed pre-planting stage one - visual inspection
First of all, the peas are sorted out and carefully examined, discarding those that have obvious defects - violations of the integrity of the skin, other mechanical damage, spots resembling traces of mold and rot, non-standard sizes and shapes, and so on.
The remaining seeds are immersed for 10-15 minutes in soft water with the addition of table salt (20 g per liter). If there is no melt or rainwater, ordinary plumbing is also suitable. But it will have to be defended for at least a day, waiting for the precipitation, resembling grayish-white flakes. You can also add a few drops of apple cider vinegar or citric acid crystals. Those peas that float to the surface can be thrown away immediately. Unusual lightness means the absence of the germ. Such seeds will not give seedlings, this is obvious.
Soaking pea seeds in saline allows for the rejection of those that clearly will not germinate
Peas that have passed the potential germination test are prepared for germination.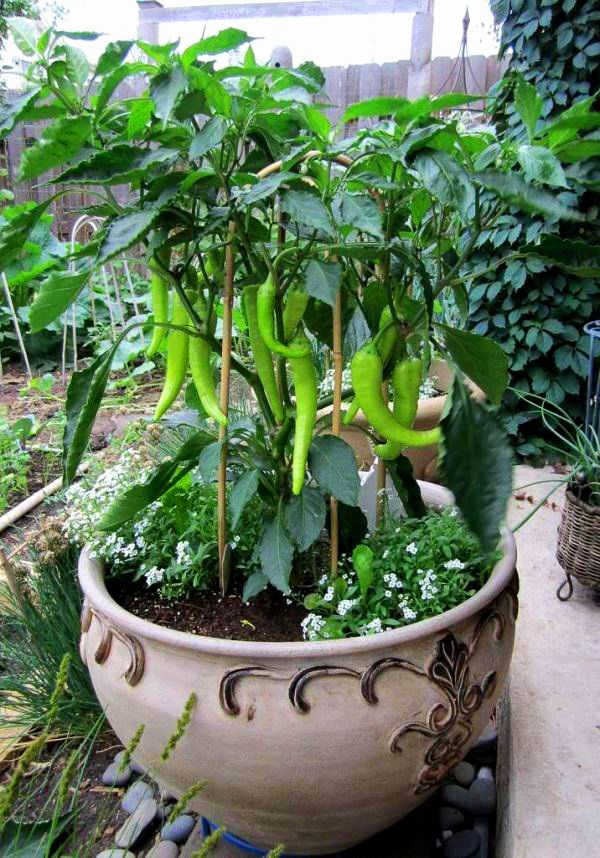 The grains extracted from the saline solution are washed in running water and the excess is allowed to drain, spreading them on linen napkins or cotton towels. Then they are soaked in a bright crimson potassium permanganate solution to prevent the development of fungal diseases. Water with the addition of boric acid (0.1 g per 0.5 l) is also suitable. The procedure in the first case lasts 6-8 hours, in the second - 15-20 minutes.
Potassium permanganate solution is one of the most widely available disinfectants
After that, the peas are washed again and kept for 4-6 hours in plain water, heated to a temperature of 40-45ºС. During this time, it is advisable to change it at least once or twice, because it cools down. After a specified period, they are removed from the water and dried.
The final stage of preplant preparation is germination. A piece of cotton cloth or cotton wool is moistened with water and squeezed lightly so that it does not drip.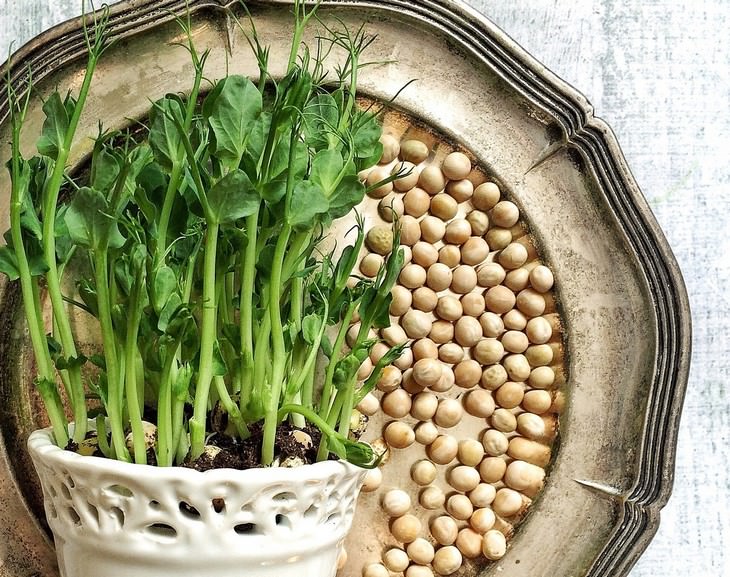 To speed up the process, you can add a biostimulant to the water. Both purchased preparations (Epin, Kornevin, Heteroauxin, potassium humate) and folk remedies (aloe juice, honey, succinic acid) are suitable. Seeds are laid out on this fabric and covered with the same piece on top. It is undesirable to use gauze. Appearing seedlings are confused between the threads, it is almost impossible to extract them from there without breaking them. And paper napkins very quickly spread into porridge, because the material will have to be constantly moistened as it dries. By no means should this be forgotten. If the fabric dries, the seeds will simply disappear.
If pea seeds are wrapped in cheesecloth, germinated peas will be very difficult to remove without damaging them
The resulting "package" is placed on a plate and put in heat. Suitable, for example, a heating battery or a window sill illuminated by the sun most of the day. Seeds are ready for planting, in which the sprout has reached about a centimeter length. They hatch somewhere in 2-3 days, the whole process takes 5-6 days. Such peas sprout 4-5 days earlier than unprepared ones.
Germinated pea seeds show faster and better germination percentage than unprepared
The procedure is carried out in such a way that the seeds can be planted in the ground immediately after it. They don't even need to be dried.
Some gardeners recommend simply pouring warm water over the peas. But in this case, for those who do not have much experience, it is easy to spoil the planting material. If bubbles appear on the surface of the water, this means that some of the seeds have died due to a long stay in it. Usually the night is enough, and in the morning the peas can already be planted. They will swell, but will not germinate. Accordingly, the emergence of seedlings will also be delayed.
Video: Pre-plant preparation of pea seeds
How to grow peas at home on the windowsill: optimal conditions
Peas do not have any special requirements for growing conditions. But it is advisable to familiarize yourself with the “wishes” of the culture in advance in order to create an optimal or close to this microclimate for it. Only in this case is it possible to obtain a bountiful harvest.
Peas are one of the most cold-resistant horticultural crops. This quality is preserved when grown at home. The plant feels great at a temperature of 16-18ºС, so the pots in spring and summer can be safely taken out to the balcony, even unglazed. But peas tolerate heat relatively poorly. At 25ºС and above, the process of plant development is greatly inhibited, it seems to fall into "hibernation". This negatively affects future yields. Therefore, at home, it is undesirable to plant grains in June or July. As a rule, these are the hottest months. The critical minimum for culture is approximately -5ºС.
At home, peas must receive enough light
Peas belong to plants with long daylight hours. For normal development, plants require a minimum of 12 hours of light per day. In summer, the pots are put on the windowsill of a window facing south, southeast, southwest. If there is not enough sun (and in most of Russia it is, especially in winter, late autumn and early spring), artificial light sources will have to be used. Both special phytolamps and conventional ones (fluorescent, LED) are suitable. They are placed about half a meter above the container with peas, from above, at a distance of about half a meter, at a slight angle.
Phytolamps help provide daylight hours of the required duration
Peas have a very positive attitude to fresh air, they are not afraid of drafts. The room must therefore be regularly ventilated. Spraying is also useful to him, especially in the heat.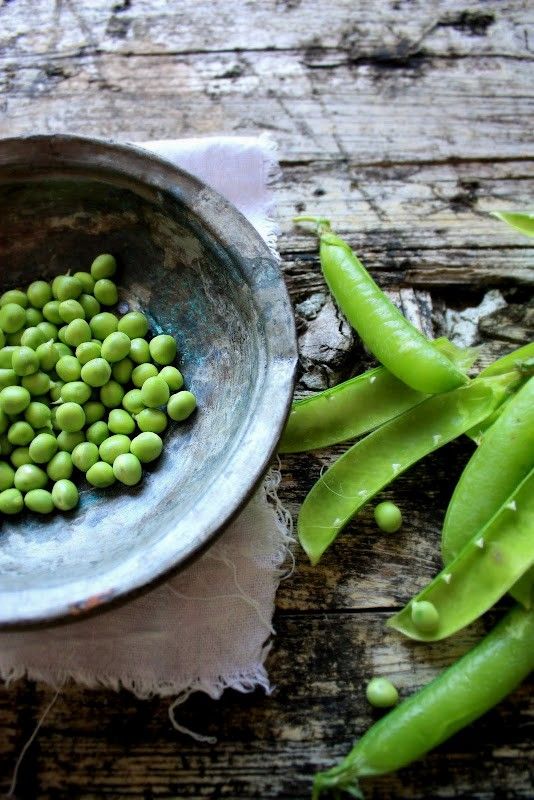 You can raise the humidity in the room in other ways - place more other plants in the room, arrange basins with cool water, put wet pebbles or expanded clay in the pot tray, buy a special device.
The root system of peas is developed, the presence of a powerful taproot is characteristic. When grown outdoors, it goes into the soil for about a meter. At home, this, of course, is impossible, but you still have to choose a deep, spacious container that resembles a bucket for culture. Too little soil in flat pots, this can cause overheating of the roots and a sharp decrease in yield. The preferred material is natural ceramic. It provides normal aeration and does not allow moisture to stagnate in the soil.
Pot for growing peas must be deep and spacious
Peas prefer a nutritious but light substrate. Regardless of whether you buy soil or mix it yourself, baking powder must be present in the composition - coarse sand, perlite, vermiculite, crushed dry sphagnum moss, coconut fiber, straw.
Crushed dry sphagnum moss gives the soil the required looseness
Other necessary component - humus or rotted compost. It will provide the mixture with the necessary nutrition. It is strictly forbidden to use fresh manure. It saturates the soil with nitrogen, peas, like all legumes, have similar properties. And an excess of this macroelement negatively affects the immunity of the plant, contributes to the active formation of green mass to the detriment of flowering and fruiting.
Humus improves soil fertility
To humus and baking powder, taken in approximately equal volume, add the same amount of ordinary earth. You can use the soil from the garden (best of all from the one on which any Solanaceae or Pumpkin grew before), a purchased universal substrate for seedlings or houseplants, forest soil. The latter is best taken from under any deciduous trees, except for birch.
Any primer must be sterilized before use.
The easiest way is to put it for several days on an unheated balcony in winter or hold it in the freezer. Other methods are roasting in the oven or steaming.
Varieties of peas whose stem length does not exceed a meter do not need support. Just to be on the safe side, they can be let curl around a bamboo support. They are sold at any store with houseplants.
It is quite possible to build a support for low-growing pea varieties on your own or simply buy it
If you chose a more “overall” variety, you will have to build something resembling a trellis. The simplest option is several vertical supports and horizontally strong threads, fishing line or thin wire stretched between them. The optimal cell size for the resulting grid is 10*10 cm. Being correctly placed, it performs not only a utilitarian function, but also a decorative one. This "green screen" looks very unusual and original. Just do not put a net entwined with peas against the wall butt. Under such conditions, normal air exchange is impossible.
Planting procedure
Prepared pea seeds are planted in a common container, wide and shallow. If you immediately provide each of them with an individual large capacity, there is a high risk of acidification of the soil and the development of rot. In principle, landing in plastic cups or peat pots is acceptable, but then a pick will still be required. The root system of peas simply does not have enough space.
There is nothing complicated in the disembarkation procedure itself. They operate according to the following algorithm:
- Containers are filled with disinfected soil, moderately watered and leveled. 3-5 cm should remain to the edge of the container. If there are no drainage holes, they must be made independently. Drainage is desirable at the bottom - a layer of fine expanded clay, crushed stone, pebbles, brick chips about 2 cm thick.
Initially, pea seeds are sown in common containers
- Seeds are sown in grooves about 2 cm deep.
 The interval between them is 5–7 cm. The row spacing is 7–8 cm. The peas are placed with a sprout down. The grooves are sprinkled with soil, without ramming it. Then the soil is moistened again by spraying from a spray bottle. The container is covered with glass or a piece of polyethylene, turning it into a greenhouse. Before germination, peas do not need light. However, regular watering is required as the top layer of soil dries out and daily airing. It is enough to remove the shelter for 10-15 minutes to get rid of the accumulated condensate.
 Seeds of peas are planted in the soil with the sprout pointing downwards
- After the seeds germinate, the shelter is removed. The culture is provided with daylight hours of the required duration, naturally or artificially. The optimum temperature is 18–20ºС. Regular watering is still important. The soil must not be allowed to dry out. About a week after germination, the first feeding is carried out by watering the peas with a solution of simple superphosphate (2–3 g per liter of water).
Prepared pea seeds germinate fairly quickly
- In the phase of the second true leaf, the seedlings dive. They are seated in separate containers with a volume of 0.3–0.5 liters. You can reuse one common box, but it must be large enough. The optimal distance between plants is at least 5 cm. The soil is used the same as for seed germination.
- They are removed from the old container together with a clod of earth on the roots, trying to minimize its integrity.
- Seedlings are planted in holes about 5 cm deep.
- Keep peas in partial shade for 4–5 days after picking, protected from direct sunlight.
- Seedlings that have reached a height of 12–15 cm are tied to a support if necessary.
Seedlings of peas after picking, if necessary, tie up to a support
Further plant care and harvesting
Caring for peas is simple, both in the garden and at home. The main component of agricultural technology is proper watering. Regular loosening of the soil in a pot is also important, this provides access to fresh air to the roots and prevents the soil from turning sour.
It is necessary to loosen the soil when growing peas both in a pot on the windowsill and in the open field
Most varieties begin to bloom a month after planting seeds in the ground or even a little earlier. Harvest ripens in another 20-25 days. For many sugar varieties, this period is reduced to 10-15 days. There are no problems with fruiting. Pea is a self-pollinating crop, it copes with this task perfectly without any outside help.
Pea fruits, even in "captivity" are tied without outside help
Before flowering, plants should be watered twice a week if the weather outside is optimal for the crop. As soon as the buds open, the intervals are reduced to two days. In the heat, even daily watering and additional spraying may be required. In any case, only soft water, heated to room temperature, is used.
It's easy to determine if it's time to wait or if it's time to wait - the soil from the top layer, when rubbed in the fingers, feels like "prickly", it's impossible to squeeze it into a lump. Every time, about half an hour after the procedure, when the moisture is already absorbed, the soil is loosened to a depth of about 5 cm.
It is strongly not recommended to pour peas. This compacts the soil, making it difficult to aerate. It also increases the risk of developing fungal diseases.
In addition to top dressing carried out even before diving, it is enough to fertilize peas three times during the active growing season. The first time the procedure is carried out immediately before flowering, the next - with an interval of 12-15 days. The nutrient solution is prepared by dissolving 1.5–2 g of simple superphosphate and potassium sulfate in a liter of water. There are also special fertilizers for legumes, which you can easily buy at any specialized store. They do not contain nitrogen, which the plant saturates the soil on its own.
Fertilizers for legumes do not contain nitrogen - this macronutrient is produced by plants themselves
Those who prefer natural supplements can use dry screened wood ash or make an infusion.
Wood ash is a natural source of potassium and phosphorus
Video: planting peas and further care of the crop
Beans are harvested as they mature. The diameter of the grains in the state of technical maturity is not less than 6–7 mm. Ripe beans left on the plant inhibit the formation of new ovaries.
Regular picking of mature beans stimulates the emergence of new buds, thereby increasing the yield
The lowest pods ripen first. Fruiting in most varieties is extended, lasting about two months. During this time, 0.5–0.8 kg of beans are removed from one bush. They are carefully cut with scissors or a sharp knife. Do not pull, twist or pull the pods. It is very easy to cause significant damage to the plant itself.
A sign that the fruiting period is ending is a hardened stem. But you can extend it a little by removing all the leaves from the lower half and pinching the top. This procedure stimulates the appearance of new shoots.
If you have a garden, don't just throw away mature plants. The cut leaves are tossed into the compost heap. And the crushed roots are an effective and absolutely natural fertilizer, a worthy alternative to manure and humus. It not only increases the fertility of the soil, but also improves its texture.
Peas are sick at home quite rarely, and with proper care - almost never. The most dangerous disease for planting is powdery mildew. At the same time, it is undesirable to use chemicals to combat the fungus, they are deposited both in the soil and in the beans themselves. The first symptoms are a powdery greyish-white coating and blurry yellow spots on the leaves. Gradually, the “flour” darkens and seems to thicken, the affected tissues turn brown, dry and die.
Powdery mildew is one of the most common fungal diseases that affects both houseplants and horticultural crops
For prevention, a few crystals of potassium permanganate are periodically added to the water for irrigation, and crushed chalk or sifted wood ash is added to the soil during planting. To cope with a disease detected at an early stage, folk remedies are enough. Peas are sprayed with a solution of colloidal sulfur, mustard powder, diluted with water in a ratio of 1:10 with kefir or whey with the addition of iodine, infusion of onion or garlic arrows, wormwood. As a rule, 2-3 treatments with an interval of 3-5 days are sufficient. In the absence of effect, fungicides of biological origin are used (Strobi, Alirin-B, Thiovit-Jet).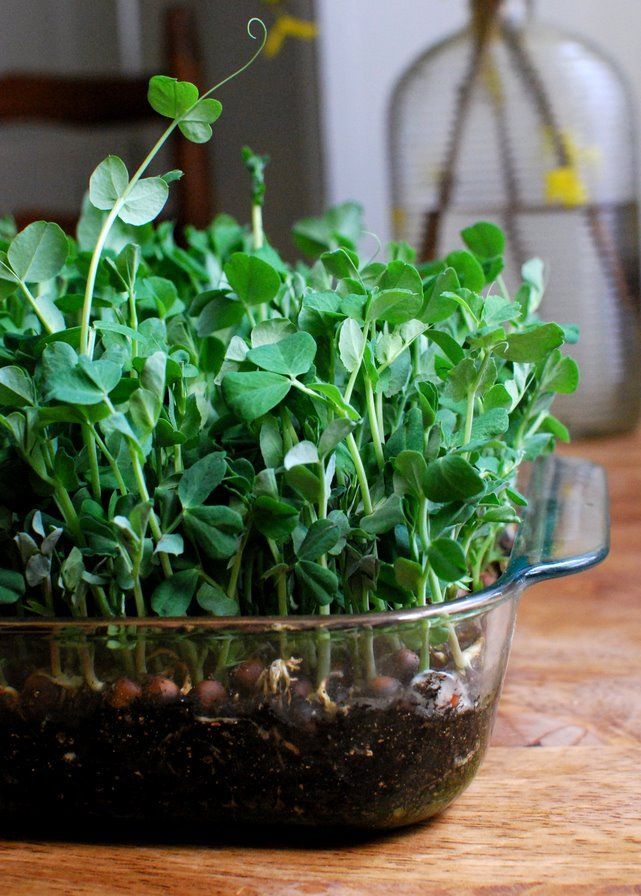
The second common household disease is root rot. Often it develops as a result of regular waterlogging of the soil. It is also dangerous because the fungus parasitizes on the roots for a long time, the aerial part of the plant looks healthy. And when the stem begins to blacken and soften, becomes slippery to the touch, the soil is covered with a layer of mold and spreads the smell of rot, it is too late to save the plant. It must be destroyed as soon as possible - this is the source of the spread of infection. Preventive measures to prevent the development of root rot are the same as those recommended for the preventive control of powdery mildew.
The obvious symptoms of root rot of peas appear only when it is too late to save him - the development of the disease has gone too far
Video: growing peas at home
Peas are not only tasty, but also very healthy. Therefore, it is difficult to find a garden plot that does not have at least a small bed with it. But grains, which are loved by both adults and children, can be enjoyed not only in season. Preparation of peas for planting is similar to that of seeds intended for open ground. Directly planting in the ground and further caring for the crop is nothing complicated. In fact, the latter consists in loosening the soil, watering and fertilizing.
- Author: Julia Golova
27 years old, higher legal education, broad outlook and interest in a variety of topics.
Rate this article:
(8 votes, average: 5 out of 5)
Share with friends!
How to sprout peas at home?
Author Biomaster Reading 5 min Published
Peas are a multifunctional vegetable, housewives use it for various purposes.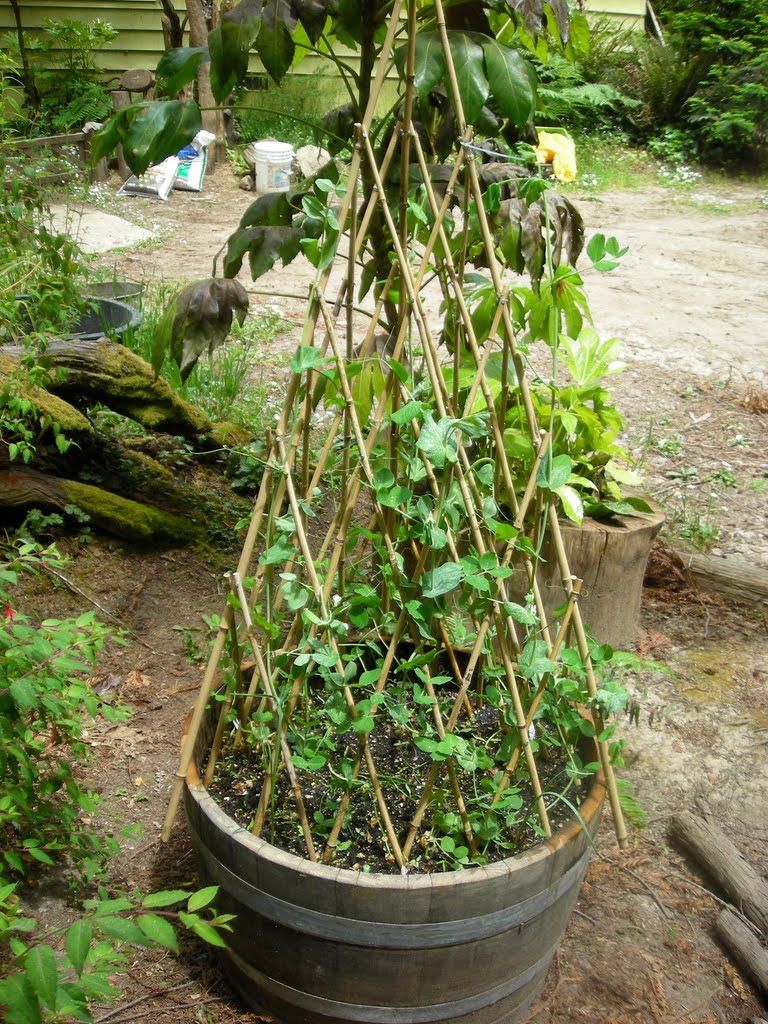 Some people like to eat it raw, others cook various dishes with it, and still others prefer to preserve or dry it. However, not only delicious green peas are eaten. Stems and shoulder blades of peas (sugar varieties) can also be used in cooking. In addition, spatulas are high in vitamin C, which makes them an excellent prophylactic against colds. How to germinate peas at home and what is required for this?
Contents of the page
Conditions for growing peas
Lighting
Growing this crop at home is necessary on the brightest balcony, as peas love good lighting.
Temperature
The plant is not afraid of cold, and it is very unpretentious in care, so growing it at home will not be too difficult.
Peas tolerate low temperatures down to -5 degrees, so even on an unglazed balcony it will bring good results. Although at the initial stage it is better to grow peas on the windowsill.
Container
The flower pot is not suitable for planting containers for peas. It is best to take an oblong box made of wood or plastic for growing a plant at home. At the bottom of the container there should be holes for the outflow of excess moisture.
Watering
Water the peas as soon as the surface layer of the soil mixture dries. Irrigation compacts the top layer of the earth, and this crop needs maximum air penetration to the root system. Therefore, after each introduction of water, it is desirable to loosen the soil. This procedure will allow you to grow a good crop of beans at home.
Soil and its fertilizer
Garden soil harvested from September-October is suitable for planting peas. The land is taken from those areas where the pumpkin or nightshade crops have recently been harvested. The taken soil is diluted with loosening components in a ratio of 1:3. As a baking powder, you can take sand, small stones, sawdust or peat. Before planting peas on the balcony, it is better to treat the soil mixture with a special preparation that prevents fungus and other diseases. An earthen mixture for planting can also be fertilized with a solution of mineral top dressing.
To grow a good crop at home, you need to feed the plant on time. While the ovaries have not yet formed, the culture is fertilized with top dressing, which contains potassium and phosphorus in abundance. In order for the leaves and stems to be strong and healthy, fertilizers containing copper should be applied to the soil as a preventive measure.
Selection and preparation of seeds
At home, before planting in prepared soil, the seed can be germinated in the tissue, so later on the seedlings will rise faster. However, peas can be applied to the soil without germination, after soaking them in a solution of potassium permanganate or fertilizers. But first you need to choose seeds for planting at home.
Most often, gardeners choose peeling and sugar varieties of peas. The latter have a more pleasant taste, while the latter are easier to grow at home. Treated seeds are planted in loose, moist soil to a depth of 2 centimeters.
When planting, form even rows, observing an interval of 2-3 cm, the distance between peas should be 1-1.5 cm. After planting, watering is necessary.
How to germinate peas?
Once the legume variety has been selected, we proceed to germination. To germinate a seed, you need a small tissue flap. The fabric is best taken from natural fibers (linen or cotton).
We take grains and wrap them in a piece of cloth, fill them with water and wait for 2-4 hours. Then the excess liquid must be squeezed out so that the material remains wet. Keep the grains in a moistened flap for 3 to 6 days. By now, the beans should have sprouted.
The main rule is a damp cloth, if it dries out, the seeds will be lost. After pecking, the seed should be planted in a prepared container to a depth of 1-2 cm, buried and watered.
Planting and care instructions for peas
- It is possible to grow seedlings on the balcony with or without "sprouting seeds".
 In the latter case, the selected peas should be soaked in water to which a small amount of fertilizer has been added.
 - When the seed swells, it is transferred to the soil. Peas are planted in rows, retreating between them 5-10 cm, there should also be an interval of 1-3 cm between the grains. After planting, the container must be covered with a film.
- After germination, the film is removed and the container is placed in a well-lit area. On the balcony, the seedlings will feel perfect, because thanks to the ventilation, the optimum temperature for growth is maintained.
- When the "young growth" has grown enough, it must be transplanted into a permanent container. When transplanting, do not damage the root system. There should be an interval of 17-23 cm between planted sprouts in a new container. For the first 2-3 days after transplanting, it is better to protect young plants from direct sunlight by shading them.
- When the seedlings grow to 12-15 cm, tie the stems to the support.