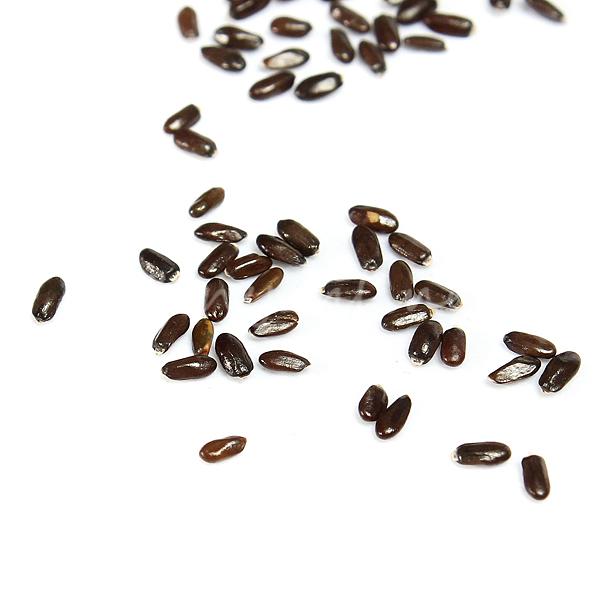
Plant kale seeds
How to Germinate, Water, and Harvest
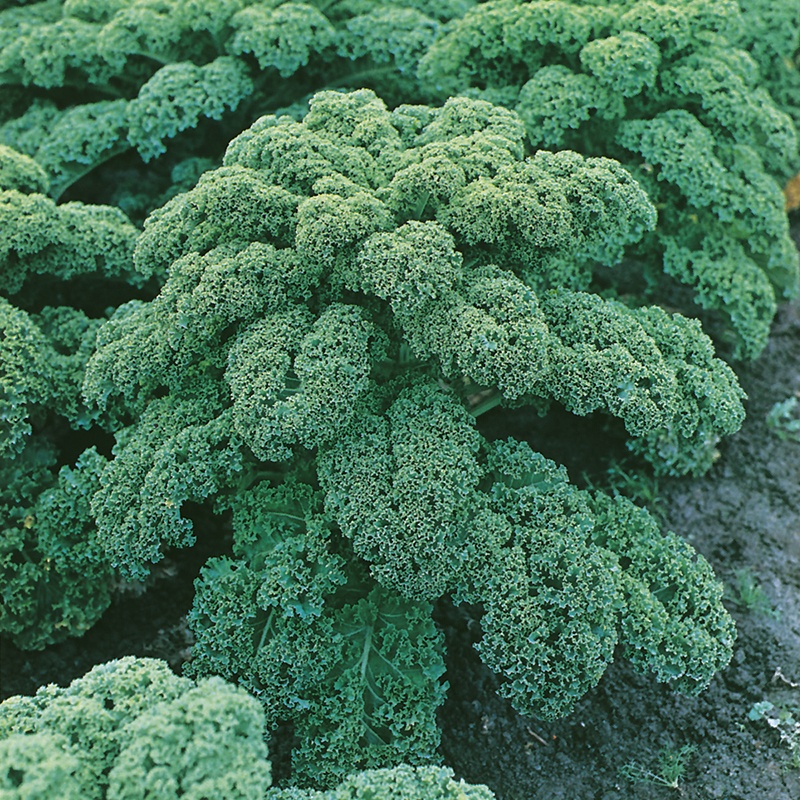
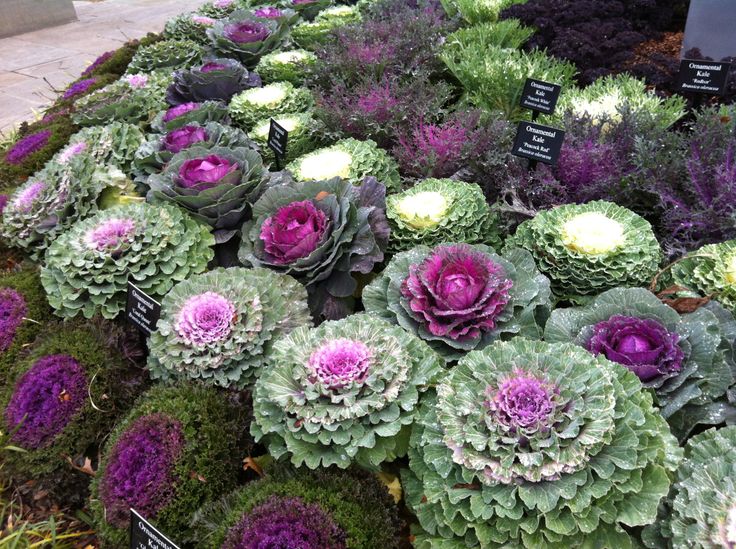
Kale (Brassica oleracea) is essentially a form of cabbage that doesn't have the tightly formed head associated with most cabbages, and it's grouped in the cooking greens category with collards, mustard, and Swiss chard. Kale plants can be quite ornamental, with textured and curly leaves that come in shades of green, purple, and other colors. Kale has a relatively fast growth rate and can grow from seed to harvest in about three months. It is best planted in the late winter or early spring and can also be planted in the late summer for a fall to winter harvest. Kale does come back every year, but this biennial plant takes two years to complete its growth cycle—so it grows leaves in its first year, while seeds and flowers develop in its second growing season.
| Common Name | Kale, ornamental kale |
| Botanical Name | Brassica oleracea |
| Family | Brassicaceae |
| Plant Type | Annual, biennial, vegetable |
| Mature Size | 1–2 ft. |
| Sun Exposure | Full sun, partial sun |
| Soil Type | Loamy, moist, well-drained |
| Soil pH | Acidic |
| Bloom Time | Spring |
| Hardiness Zones | 7–9 (USDA) |
| Native Area | Europe |
How to Plant Kale
Kale is a fast-growing vegetable that does best in a planting location with full sun. Plant kale seeds about 1/2 inch deep, leaving at least 1 1/2 to 2 feet between each plant. High nitrogen content in the soil is important for kale to grow its leaves, so adding a few inches of organic matter like compost to a well-draining soil mixture will encourage a healthy harvest.
When to Plant
Kale can be planted three to five weeks prior to your area’s projected last frost date in the spring. In most regions, gardeners can harvest kale in the summer by planting it at this time.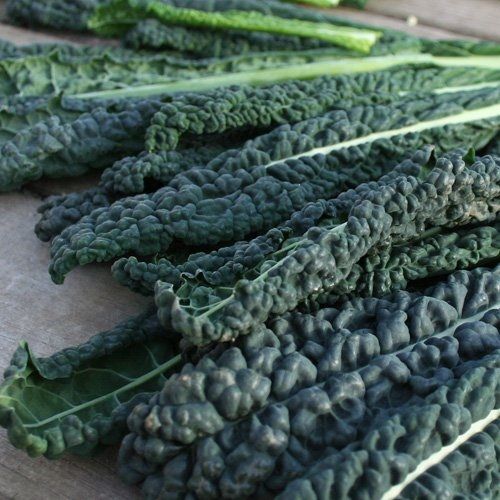 It can also be planted in late summer roughly six to eight weeks before your first fall frost.
Those in warm climates (zone 8 and above) can continue to plant in the early fall for a late fall to winter harvest. Kale takes roughly three months to reach maturity from seed, while cuttings will mature in about one month.
Tip
Cuttings are an inexpensive way to create new plants. Plant your kale in early spring if you plan to take cuttings in late summer. Kale cuttings should be taken in about three months once the plant has become established.
Selecting a Planting Site
Kale grows equally well in pots, garden soil, raised garden beds, and other containers. Kale can grow indoors as long as you have adequate lighting. Soil that’s rich in organic matter and has sharp drainage is ideal, and the planting site also should get ample sunlight. Be sure the kale isn't too close to taller plants that will shade it. Growing kale in a window box can also be successful in south- or west-facing windows, but in very hot climates, east-facing windows can help prevent scorching from the afternoon sun.
Spacing, Depth, and Support
Space kale plants roughly 1 1/2 to 2 feet apart, and plant them at the same depth they were growing in their nursery container. Seeds should be planted around 1/2 inch deep. No support structure is necessary.
Kale Care
The Spruce / Debbie Wolfe The Spruce / Debbie WolfeThe Spruce/Debbie Wolfe
Light
Kale needs full sun to partial shade in most climates, as the fullest growth will occur when the plant gets six or more hours of direct sunlight on most days. However, if you live in a hot, dry climate, provide your plant with some shade, especially from the strong afternoon sun. Heat can make the leaves wilt and lose their flavor.
Soil
Kale plants like to grow in a rich soil that's high in organic matter with a slightly acidic pH (6.5 to 6.8). The high nitrogen content provided by organic matter is crucial for healthy leaf growth. The soil also should drain well.
Water
Kale needs consistent amount of water to stay healthy, generally growing best in 1 to 1 1/2 inches of water per week.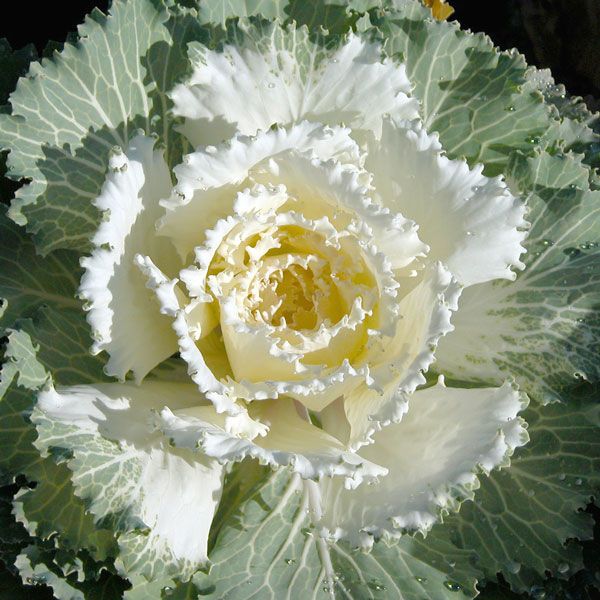 Water your kale plants regularly to keep the soil evenly moist but not soggy. Along with cool temperatures, moist soil helps to keep the kale leaves sweet and crisp, rather than tough and bitter. Mulching around your plants can help to keep the soil cool and to retain moisture.
Temperature and Humidity
The plant is usually considered a cool-weather vegetable and can handle some frost once they're mature. The optimal soil temperature for planting kale is 60 to 65 degrees. All varieties prefer cool temperatures and will be sweetened by a touch of frost. Hot weather turns kale bitter. Kale is a biennial plant, taking two growing seasons (or years) to complete its life cycle, but it's usually grown as an annual. It will collapse if exposed to heavy frosts or snow. But it can be grown throughout the winter in USDA zones 7 through 9 if the winters are mild and there is adequate water.
Fertilizer
When planting, mix fertilizer into the top 3 to 4 inches of soil. Then, feed your kale throughout the growing season, following the instructions on your fertilizer label. Use compost or a high-nitrogen vegetable fertilizer.
Types of Kale
There are many kale varieties, and they're all worth a try. The curly-leaf varieties tend to hang on longer in cold weather. But the flat-leaf types generally become established faster. Here are some varieties to consider:
- 'Hanover Salad' is a fast grower and an early producer. It has a pleasant taste for eating raw in salads.
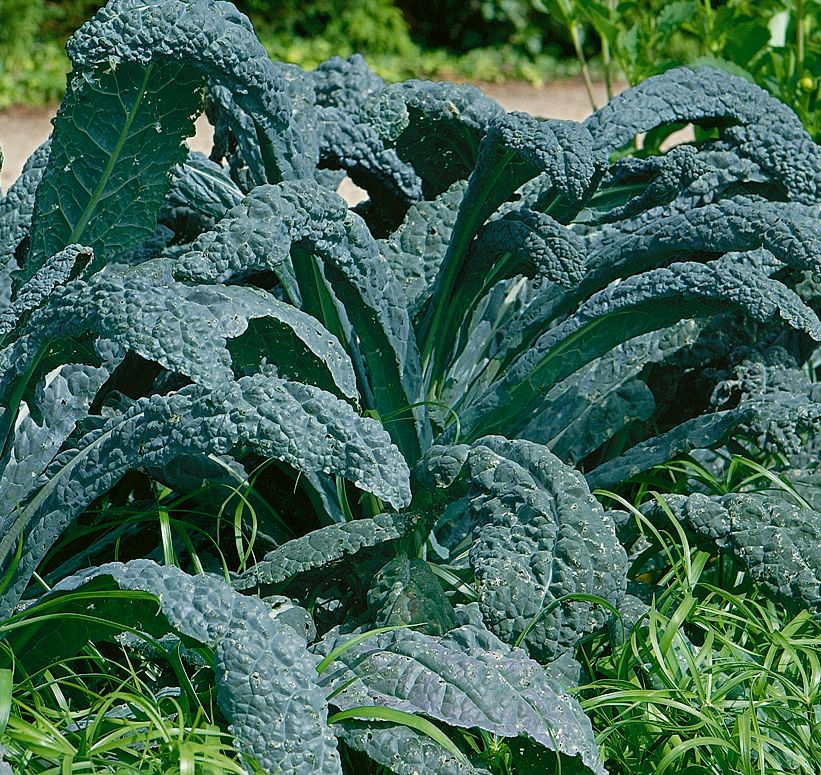
- 'Lacinato' is a puckered heirloom kale from Tuscany. It is sometimes listed as Tuscan or dinosaur kale. Its thick leaves are hardy enough to be harvested even after a snowfall.
- 'Redbor' has magenta leaves with curly edges. It features a mild, crisp flavor and texture.
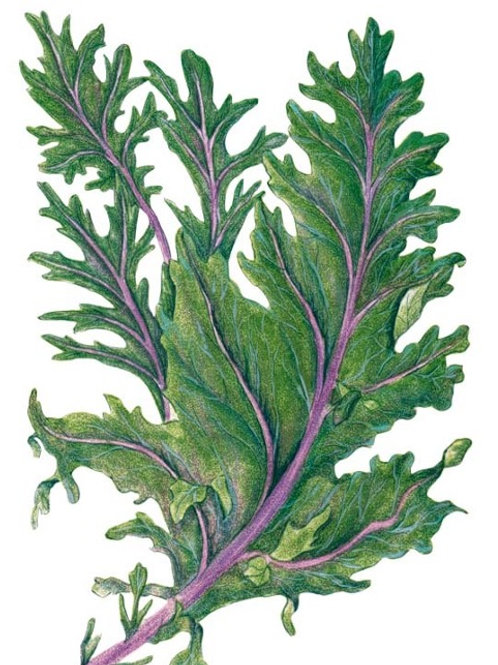
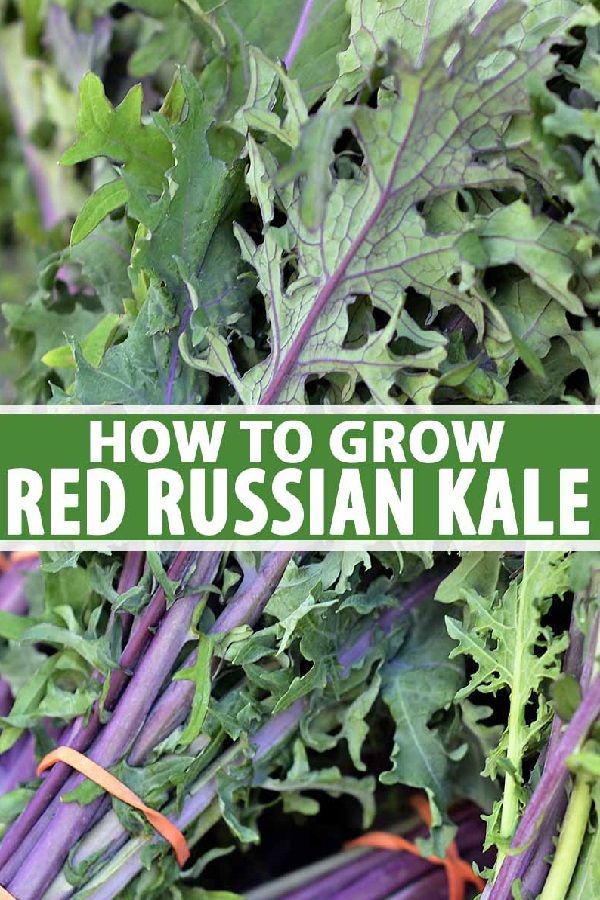
- 'Red Russian' has smooth, tender leaves with purple veins and edges. It is considered one of the sweetest varieties of kale.
- 'Vates' is a dwarf, curly, bluish-green kale that is both heat- and cold-tolerant. It is derived from 'Dwarf Blue Curled Scotch' kale.
Anna Yu/Getty Images
'Redbor' kalevalery_green/Getty Images
'Red Russian' kaleromiri/Getty Images
Kale vs. Chard
Kale and chard have similar appearances. Their leaves are often large, crisp, crinkled, and deep green. Their difference comes in their taste. Kale is generally stronger, with a bitter and earthy flavor. And chard is a much milder green. Plus, kale’s thick stems are typically best removed before eating while chard’s stems may be tenderized by cooking them.
Harvesting Kale
Expect to wait approximately two months for your kale plants to mature from seeds. Check the days to maturity on your seed packet or plant label for more precise timing. Spring-planted kale will be good for harvesting throughout the summer months, but it's especially tasty after a light frost.
You can harvest young kale leaves to use fresh in salads or allow your plants to mature for use as a cooked green. Remove the older outer leaves, and allow the center of the plant to continue producing. Kale will keep in the refrigerator, ideally in the crisper drawer, for about a week.
How to Grow Kale in Pots
Kale is easy to keep in pots. Not only does this make the plant mobile so that you can move it into adequate sunlight and protect it from severe weather as needed, but it also helps to protect it from garden critters, such as rabbits, that might munch on the leaves. Plus, container growth is ideal if you don’t have garden space or the right soil conditions.
Select a pot with at least a 12-inch diameter. It also should have ample drainage holes. An unglazed clay container is a good option because it will allow excess soil moisture to escape through its walls, helping to prevent root rot. Use a quality potting mix; an organic mix made for growing vegetables is a good option.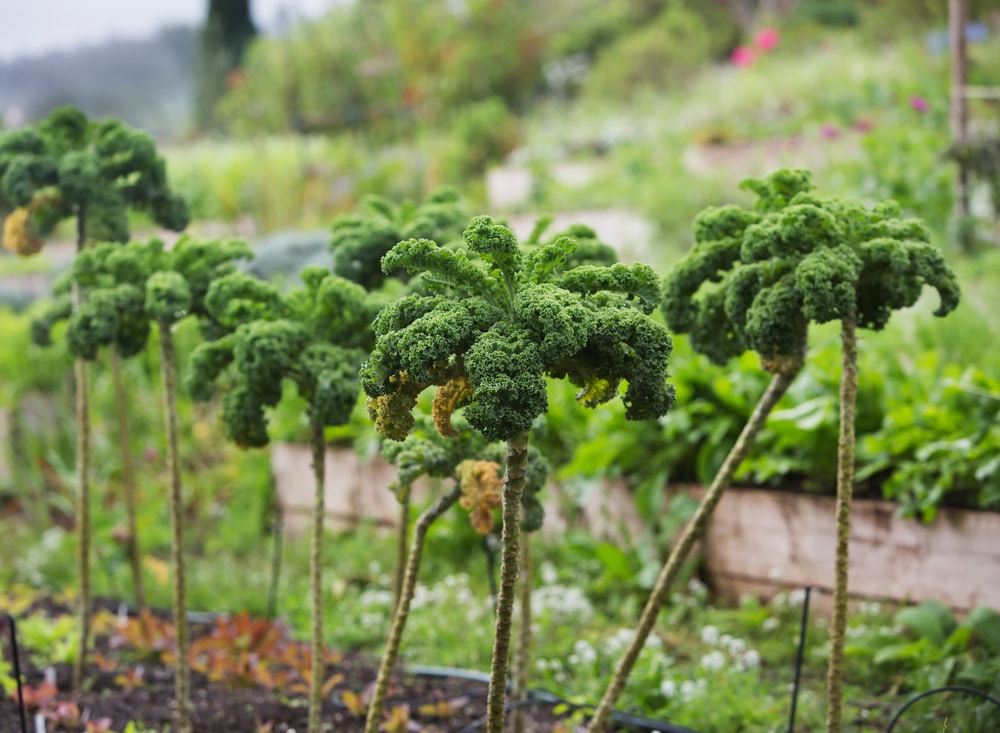 Transplant your kale into the pot at the same depth it was growing in its previous container, and water it after planting.
Propagating Kale
Kale is most commonly planted from seeds or nursery plants, but it can also be propagated via cuttings. Kale does regrow after cutting, but it requires a specific propagation process. To pick kale to keep it growing healthy, cuttings must be taken from the oldest leaves. Here’s how:
- Use gardening shears to cut a stem from the bottom of the plant on its side, choosing one with multiple leaves from the main stem (do not propagate from the plant's center). Remove the leaves on the lower half of the stem. Trim the bottom of the stem right below a leaf node at a 45-degree angle.
- Dip the cut end in rooting hormone.
- Plant the bottom half of the stem in a moistened soilless potting mix in a small container with drainage holes.
- Continue to keep the growing medium moist. Roots should develop in a few weeks.
 If you can gently tug on the stem and feel resistance, you’ll know roots have formed. After that, it’s ready for transplanting.
How to Grow Kale From Seed
Growing kale from seed can begin inside or outside depending on your region. Kale can be direct seeded in the garden or started indoors and transplanted into the garden. You can direct seed in cold climates as soon as the soil temperature is at least 45 degrees Fahrenheit.
- Start plants indoors in a seed-starting mix about six weeks before your last expected frost date. Kale seeds germinate quickly in warm soil and should sprout up within five to eight days.
- Cover the seeds with about 1/2 inch of soil, and keep the growing medium moist.
- Transplant your seedlings from indoors after the danger of frost has passed.
Common Pests and Plant Diseases
Kale is a member of the cabbage family, which is notorious for attracting insect pests and for rot diseases. Kale is susceptible to black rot and clubroot, as well as aphids, cabbage loopers, cabbageworm, cutworms, flea beetles, and slugs. The best defense is to monitor the plants often for signs of eggs or feeding, such as holes in the leaves. Treat problems as soon as they arise.
Watch Now: How to Make Tuscan Kale and Squash Salad Crisps
Article Sources
The Spruce uses only high-quality sources, including peer-reviewed studies, to support the facts within our articles. Read our editorial process to learn more about how we fact-check and keep our content accurate, reliable, and trustworthy.
Kale. Cornell University Growing Guides.
How to grow kale – from seed to harvesting
(Image credit: Getty Images)
Once you know how to grow kale there’s no going back. It’s healthy and tasty, easy to cultivate and looks good in your garden. What’s not to like?
It’s easy to grow kale from seed, too. Also known as borecole, kale is a member of the cabbage family, a brassica. It is hardy and grows best in cooler temperatures – the cold weather gives the leaves a sweeter flavor.
Kale is the original superfood. It contains fiber, calcium, vitamins C and K, iron and antioxidants, plus many other beneficial nutrients. It is a versatile green that can be fried, steamed, and even oven-roasted to make a healthy vegetable snack. The young leaves can be eaten raw as a salad or added to smoothies.
Read on to find out how to grow kale from seed.
See: Kitchen garden ideas - easy ways to get started
When do you plant kale?
(Image credit: Getty Images)
When you plant kale depends on when you want to harvest the leaves.
To grow kale as an early summer crop, the seeds can be sown indoors in modules or seed trays in early spring, or sown directly into the ground once it has warmed up in spring.
'Starter plants can be transplanted outside 3-5 weeks before the last frost in your area,' says Amy Enfield, horticulturalist for Bonnie Plants .
For a fall or winter harvest, plant out 6 to 8 weeks before the first fall frost. In warmer areas (zones 8, 9 and 10) you can continue planting through the fall.
How do you start kale seeds?
(Image credit: Future)
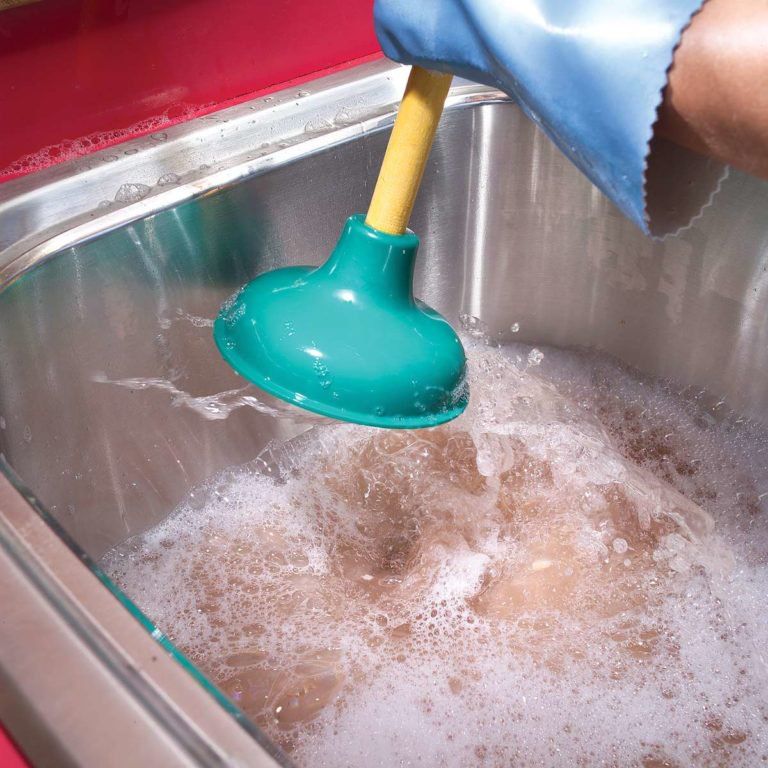
If you’re starting the kale seeds off inside, you can simply sprinkle the seeds onto potting compost, lightly cover with compost and water.
If you prefer, you can soak the seeds in tepid water for 24 hours before sowing. This should speed up germination.
If you’re sowing in rows directly into the earth, sow 3 or 4 seeds together, every 12 inches (30cm), half an inch (13mm) deep, allowing 18 inches (45cm) between rows.
In this clip from Gardeners' World , TV gardening expert Monty Don shows how to plant out young kale plants and advises trampling the soil with your feet to firm it. This will help to hold the plants solid in fall and winter winds.
See: Small vegetable garden ideas - from layout designs to the best crops to grow
How long does it take to grow kale from seed?
(Image credit: Future)
You can expect to see your kale seedlings germinating in five to eight days.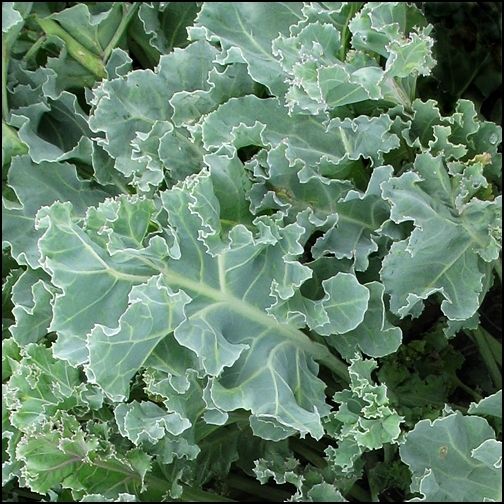 Keep them well watered until you are ready to pot them on or plant them out.
Is kale easy to grow?
(Image credit: Future)
It is very easy to grow kale. It’s a tolerant plant that can survive cold temperatures and shady conditions – just three hours of sunshine is enough although it grows well in full sun to light shade in a well-drained soil.
If you're transplanting seedlings into your vegetable plot, allow at least 12 inches (30cm) between each plant, and 18 inches (45cm) between rows as they grow into quite sizeable plants. Adding well rotted manure to the earth before planting will get your kale off to a good start, and you can top up with an all purpose liquid plant food to give it an occasional boost.
Amy Enfield, horticulturalist for Bonnie Plants, says: 'Kale is a fairly fast growing plant. The soil should be kept consistently moist which usually means providing plants with 1-1.5 inches of water each week (water whenever the top inch of soil is dry to the touch), mulching around the plants with finely ground leaves, weed-free hay, straw, pine needles, or finely growing bark will help keep the soil cool and moist.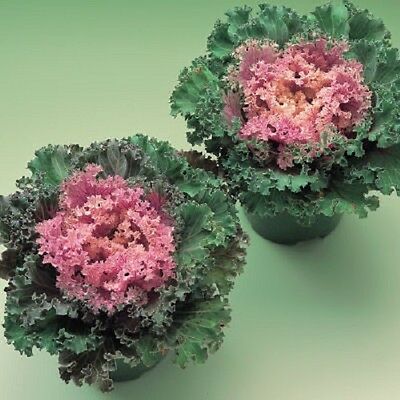 '
'
A regular watering routine will help to prevent the leaves from wilting in warm, dry weather.
See: How to grow spinach – in pots, indoors or in raised beds
Does kale come back every year?
(Image credit: Future)
Most kales are biennials, meaning they will take around two years from seedling before they eventually bolt and produce flowers and seeds. However, if you’re growing kale for its harvest of leaves it’s more likely that you’ll replace it every year and it will be more successful that way.
You can also treat it as a ‘cut and come again’ crop, where you harvest the tender young top leaves for salads, leaving the stem to overwinter and produce side shoots of bigger leaves for cooking. Monty Don agrees, saying, 'The more you pick it the more fresh leaves come.'
Amy Enfield adds, 'Kale leaves have their best flavor when they’re “kissed” by a light frost, making fall harvests sweeter than spring harvests. To harvest, pick the oldest, lowest leaves first. Discard any that are yellowed or ragged. Take as many leaves as you like, as long as you leave at least four leaves at the top of the plant (the crown). In zones 7-10, kale will produce new leaves all winter long.'
Can you grow kale in containers or raised beds?
(Image credit: Future)
Kale can grow just as happily in pots or raised beds as it does in open soil. However, the plants can reach up to two feet high when mature, so use a large pot – at least 12 in (30cm) diameter – filled with compost mixed with grit to improve drainage.
(Image credit: Future)
Cavolo Nero – sometimes regarded as a different plant altogether, but it is a type of kale and its name means ‘black kale’, or black cabbage. ‘Nero di Toscana’ has dark, almost black leaves.
Redbor – Vivid burgundy-colored leaves on a striking plant that would look good in a flowerbed let alone a vegetable patch.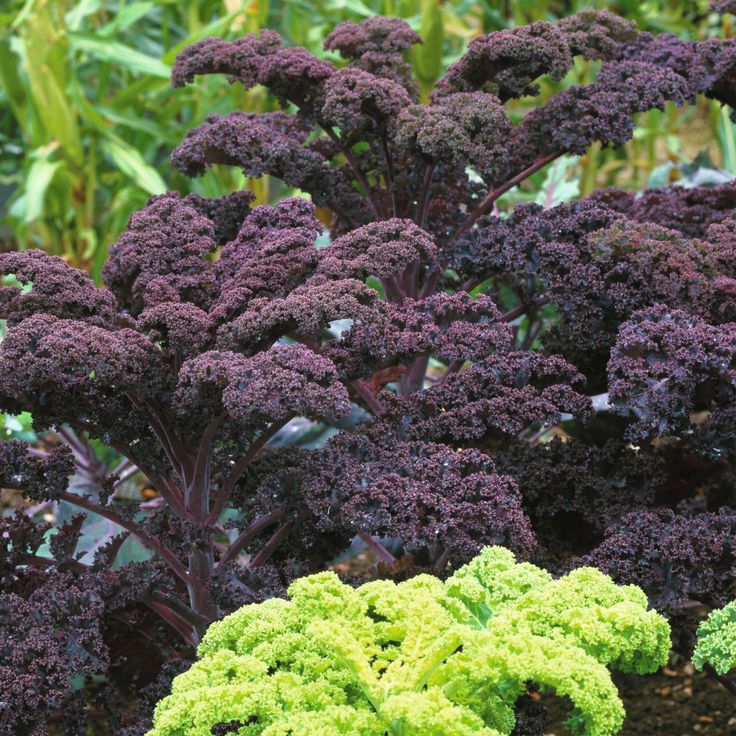 The leaves turn an intense shade of purple as the weather turns colder.
Kapitan – the classic curly kale, with densely curled, deep green leaves
Yurok – a hybrid Lacinato-type kale, highly recommended by Don McCulley, owner of Swallowtail Garden Seeds , who says it 'has an exceptionally long harvest window. Puckered blue-gray leaves maintain their color and tenderness longer on the plant than other kale. Its robust, 30 inch tall plants produce heavily, and are highly resistant to frost and heat.'
See: How to grow microgreens – a guide to growing superfoods
Common problems when growing kale
(Image credit: Future)
Kale is fairly resistant to pests, compared with other members of the brassica family, however young plants will need some protection from birds. Pigeons in particular can reduce the tender leaves to ribbons. Covering your plants with insect proof netting will help to keep off birds, caterpillars (the net will prevent butterflies laying eggs on the leaves), and cabbage root fly.
Amy Enfield adds: 'There are several garden pests that like to munch on kale – cabbageworms, harlequin bugs, and cabbage aphids. Cabbageworms prefer cabbage, broccoli, and cauliflower to kale, but if you see the cabbage white butterflies flying around your plants, keep your eye out for the velvety green caterpillars. Black and orange harlequin bugs usually feed on old, stressed kale plants. Gray-green cabbage aphids are usually found clustered in the folds of frilly kale leaves. Badly infested leaves can be picked off and discarded.'
Karen is the houses editor for homesandgardens.com and homes editor for the brand’s sister titles, Period Living and Country Homes & Interiors, and an experienced writer on interiors and gardens. She loves visiting historic houses for Period Living and writing about rural properties for Country Homes & Interiors, and working with photographers to capture all shapes and sizes of properties. Karen began her career as a sub editor at Hi-Fi News and Record Review magazine.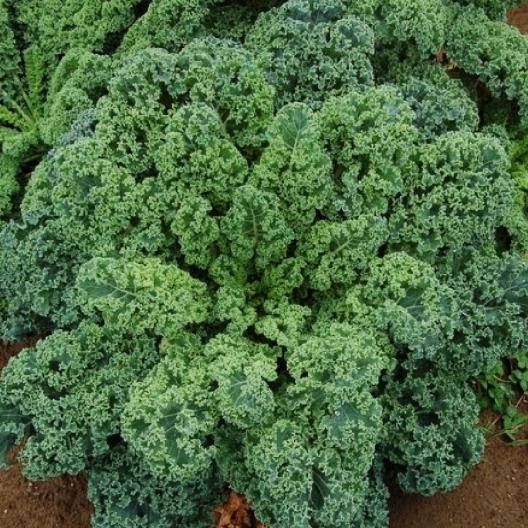 Her move to women’s magazines came soon after, in the shape of Living magazine, which covered cookery, fashion, beauty, homes and gardening. From Living Karen moved to Ideal Home magazine, where as deputy chief sub, then chief sub, she started to really take an interest in properties, architecture, interior design and gardening.
Sowing cabbage with seeds in open ground and in a greenhouse + video
Many gardeners enjoy cultivating cabbage, but not everyone is good at it. For various reasons, it is not possible to grow seedlings at home or in a greenhouse. In this case, it is possible to perform direct sowing of seeds in the ground, which is suitable for many types of this crop (white cabbage, kohlrabi, Beijing, broccoli).
Contents
-
1 Site preparation for cabbage planting
-
2 How to choose cabbage seeds for planting
-
2.1 Video: how to choose cabbage seeds
-
2.2 How to get seeds yourself
-
2.
 3 Video: harvesting cabbage seeds
-
-
3 Seed preparation for planting
-
3.1 Calibration
-
3.2 Germination test
-
3.3 Heating and disinfection
-
3.4 Soaking
-
-
4 How to plant cabbage seeds in the ground
-
4.1 Sowing time
-
4.2 How to sow cabbages
-
4.2.1 Video: sowing cabbage in the ground
-
-
-
5 Planting cabbage seeds in a greenhouse
-
5.1 Soil and seed preparation
-
5.2 Sowing seeds
-
5.2.1 Video: how to plant cabbage in a greenhouse with seeds
-
-
-
6 Cold sowing of cabbage
Preparing the site for planting cabbage
Before you start planting a crop such as cabbage, you need to choose and prepare the site correctly. Future beds should be placed in an open and unshaded place. To prevent the development of diseases and pests, it is necessary to follow the rules of crop rotation, alternating the planting of crops. Cabbage in the same place should be planted no earlier than after 4 years. The best predecessors for it are potatoes, onions, legumes, cucumbers.
Cabbage likes loose and fertile soils with sufficient moisture. To achieve a good structure, organic fertilizers such as manure or compost are applied to the soil at the rate of 5–7 kg per 1 m². It is best to fertilize the soil in the fall for digging.
When preparing a cabbage bed, manure is introduced in autumn for digging
Until spring, nutrients will turn into a digestible form for plants. Depending on the type of soil, mineral fertilizers are additionally used:
- on peat soils, which are characterized by a lack of potassium, the application of 20-40 g of potassium chloride per 1 m² will be required;
- on sandy soils that are poor in potassium and phosphorus, add superphosphate 40–60 g and potassium chloride 20–50 g per 1 m²;
- acidic loams must be deoxidized by adding lime or ash 80–100 g per 1 m².
In addition to organics, mineral fertilizers are applied to the soil, and loams are deoxidized by adding ash
For cabbage, soils with acidity close to neutral (pH 6.5–7) are most preferred. On acidic soils, the culture is subject to the development of a disease such as keel.
In autumn, a plot for cabbage is dug up to a depth of 20–25 cm and left unloosened until spring. With the advent of heat, the earth is leveled with a rake. Before sowing, the beds are dug up to a depth of about 7 cm, followed by leveling. If the land has not been prepared since autumn, then in early spring the site is dug up to the depth of a spade bayonet and raked with a rake.
How to choose cabbage seeds for planting
The choice of seed material should be given special attention, because the volume and quality of the future crop directly depend on it. Let us consider in more detail what criteria should be taken into account when selecting seeds:
- Cultivation region.
 There are many varieties of cabbage that are bred for specific regions, which is always indicated on the package with seeds. If this information is not available, then a table is provided that can be used to determine when sowing and harvesting takes place. The longer the growing period of cabbage, the warmer the region needed for its cultivation.
 - Soil characteristics. Depending on the variety chosen, it is necessary to take into account the type of soil on which the crop gives the best yield.
- Terms of maturation. Cabbage is divided into several groups according to ripening: early (ripens within 50–120 days), medium (90–170 days) and late (160–270 days). When choosing seeds, you need to take this indicator into account, and not plant a single type of crop.
- Why cabbage is grown. The choice of variety also depends on what the vegetable will be used for: for salads, pickling, or for fresh storage. Such information should be given on the label or packaging.

- Resistance to diseases and pests. Each variety has its own characteristics. So, there are varieties that are endowed with resistance to diseases and pests, but they cannot boast of high yields, and there are productive varieties, but with less resistance. This indicator must be taken into account, since appropriate care will have to be provided.
- Crack resistance. It is better to give preference to varieties that are not prone to cracking, because because of this nuance, not only the appearance of the heads worsens, but also problems arise with storage: cracked heads are not stored for a long time.
- Local varieties. To grow cabbage on your site, it is better to purchase zoned varieties, that is, local selection. After all, it is precisely such seed material that is best suited to your climatic conditions.
Video: how to choose cabbage seeds
How to get seeds yourself
Gardeners think about getting their own cabbage seeds if they like some variety, but there is no certainty that next season there will be an opportunity to purchase it. Everyone can produce seed material. The main thing is not to use hybrid varieties for these purposes, since they do not retain varietal characteristics.
First you need to understand that for seeds, cabbage is classified as follows:
- mother liquor is a common plant of the first year of cultivation, which forms a head of cabbage;
- seed plants - planted in the second year, from which flowers and seeds are formed.
Plants with a large head of cabbage, a small stalk and few leaves near the head are chosen as a mother liquor
Only quality planting material of the variety to be propagated is selected for mother plants. Medium-late and late varieties are best suited for these purposes. This is due to the fact that they are better preserved until planting next season. Cabbage to be used as a mother plant should have as large a head as possible, and the stalk and green leaves should be as small as possible. For queen cells, short plants with a thin stalk, a small number of outer leaves near the head should be selected.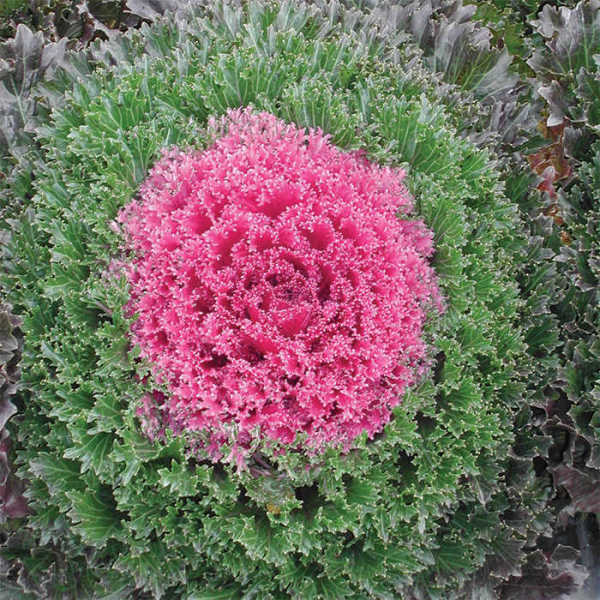
Flower stalks will develop from the stalk of cabbage the following year, from which seeds are subsequently collected
Harvest first year plants before frost. If they are slightly frozen, then you need to give them a little time to “move away”. For the purposes under consideration, it is better to sow cabbage directly into the ground. Such plants have a more powerful rhizome, a short stalk, and are better preserved. The queen cells are harvested together with the root and the earthy clod, after which the root system is dipped in liquid clay and the rosette foliage is removed. Then they are removed for storage in the basement, providing a temperature of + 1-2˚С. If the temperature indicator is less than 0˚С, then the mother plants will freeze and will be susceptible to diseases during planting. When the temperature rises above + 10˚С, only leaves will grow together with peduncles.
For planting queen cells, you need to choose a site where snow does not linger for a long time in spring.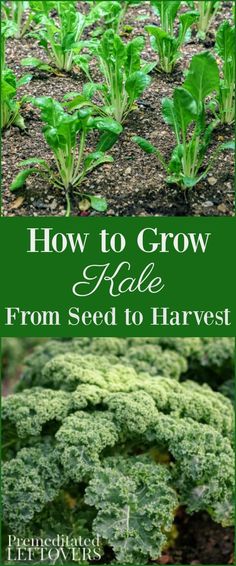 Fertilizers are applied the same and in the same quantity as for planting cabbage. Plants are planted at the end of April, having previously coated the rhizomes with a mixture of clay and mullein. The procedure is carried out with a distance between the queen cells of 60 cm, deepening the plants in the holes to the very head. After planting, the bushes are watered and shaded in the first days, and also protected in case of return frosts by covering with a film. Care comes down to the same procedures as with ordinary cabbage: weed removal, loosening, watering, top dressing.
Plants of the second year produce flower stalks, which are tied to supports
After 2 weeks, when the mother plants are established, remove the remaining old leaves and petioles to avoid rotting. When flower stalks are formed, tie to the supports. Shoots that do not bloom, as well as extra flower stalks, are removed. The flowering period lasts about a month. After flowering, seeds in pods mature in 1.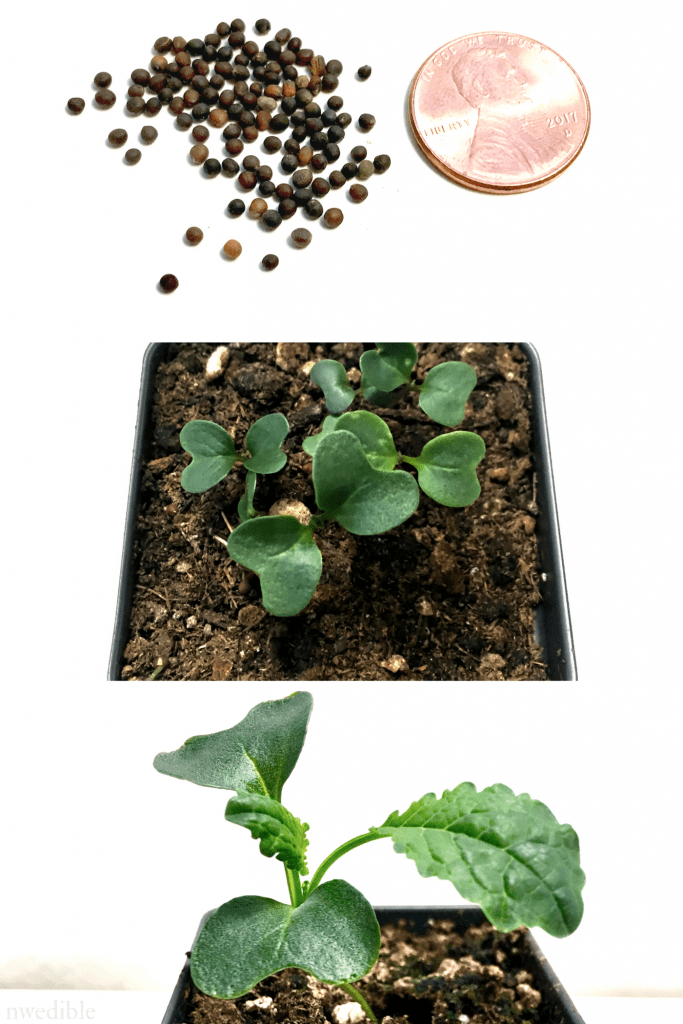 5 months. They need to be removed before they are fully ripe, as the very first ones will start to fall to the ground from the opening pods. Seed material is dried and stored.
Video: picking cabbage seeds
Seed preparation for planting
Preparing cabbage seeds for sowing is not a difficult process, but it is of great benefit. The future harvest largely depends on the correctness of the preparatory measures.
Calibration
Seeds must be calibrated before sowing by soaking them for 5 minutes in a 3% salt solution. In this case, lighter grains will float, and heavy ones will sink to the bottom. The seeds that are on the surface are drained, and the remaining ones are collected, washed in clean water and dried. They must be used for sowing.
Cabbage seeds are sized to select the largest ones and are used for sowing
Germination test
Cabbage seeds are checked for germination in order to understand how suitable they are for sowing and what can be expected. To do this, they are wrapped in a damp cloth for 5 days and placed in heat (+20–25˚С). During this time, you need to monitor the moisture content of the fabric and, if necessary, moisten it. For ease of calculation, it is better to take 100 seeds. The grains are inspected daily, germinated are counted and removed. Seeds that hatched in the first 3 days indicate the friendliness of seedlings, and germination can be judged from germinated during the week.
Heating and disinfection
By heating the seed material, it is possible to increase its quality and yield, as well as reduce the likelihood of developing diseases such as phomosis and bacteriosis. Warming up can be done in several ways:
- Immerse the seeds for 1.
 5–2 hours in water at a temperature of +60°C. The value should not be exceeded, as germination will deteriorate sharply.
 - The seeds are heated for 2.5–3 months at a temperature of +25–35˚С, while eliminating the possibility of their overheating. The grains are poured onto cardboard and placed on a heating battery to maintain the specified temperature.
In order to prevent the development of a number of other diseases, the seeds are soaked in a 1% solution of potassium permanganate for 25 minutes.
To prepare a 1% solution of potassium permanganate, it is necessary to dissolve 1 g of potassium permanganate in 100 ml of water.
To disinfect cabbage seeds, they are treated in a 1-2% solution of potassium permanganate
Soaking
In order for cabbage seeds to germinate better, they are immersed in a solution with nutrients for 12 hours. Sodium humate, Potassium humate, Ideal, Epin are suitable for these purposes.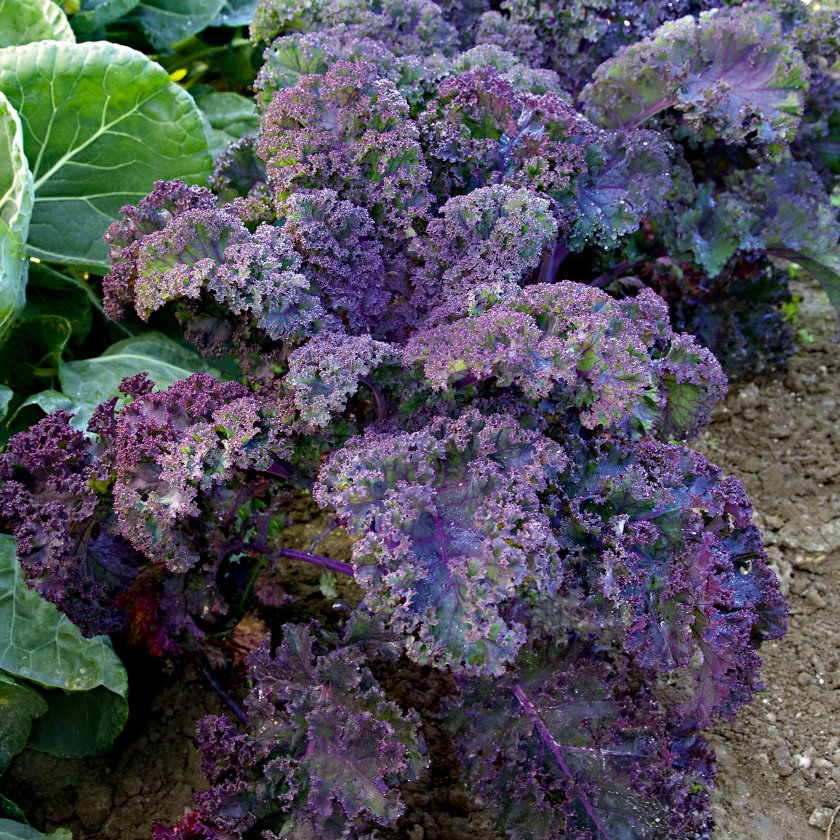 At the end of this treatment, the grains are washed in clean water. The nutrient solution can also be prepared independently from wood ash. For this, 2 tbsp. l. ash is poured into 1 liter of water and insisted for a day, after which planting material is placed in the infusion for 3 hours.
Then the seeds are soaked in water for 12 hours until swelling. To do this, they are laid out on a saucer, filled with water (+15–20˚С) and placed in a warm place. The liquid needs to be changed every 4 hours, and the cabbage grains should be mixed. After swelling, they are laid out on a damp cloth and placed in a refrigerator (+1–3˚С) for a day. Thus, hardening is carried out, which increases the cold resistance of seeds and accelerates their germination.
You can speed up the germination of cabbage seeds with the help of ash infusion, in which they are soaked for 3 hours
How to plant cabbage seeds in the ground
For planting cabbage seeds in the ground, it is important not only to prepare the soil and seed, but also to complete this procedure in a timely manner.
Sowing time
Planting dates depend on the variety, species and region of cultivation. Early varieties of cabbage are cold-resistant and can withstand temperatures as low as -5˚С. It is not suitable for long-term storage, so after harvesting it is immediately eaten. At the beginning of April, the bed is covered with a film so that after 2 weeks the earth warms up for sowing. In this way, you can sow cabbage, for example, at the latitude of the Saratov and Voronezh regions, and harvest in the second half of July.
In the south of Russia (Krasnodar Territory, Rostov Region), cabbage seeds can be planted even earlier - in early March, and harvested in the third decade of June. As for sowing crops in open ground in the middle lane, here the dates are at the beginning of May. In the Urals and Siberia, spring frosts are longer than in the European part of Russia, so direct sowing of early cabbage is more difficult.
How to sow cabbage
When the site and seeds are prepared, the time has come, you can start sowing.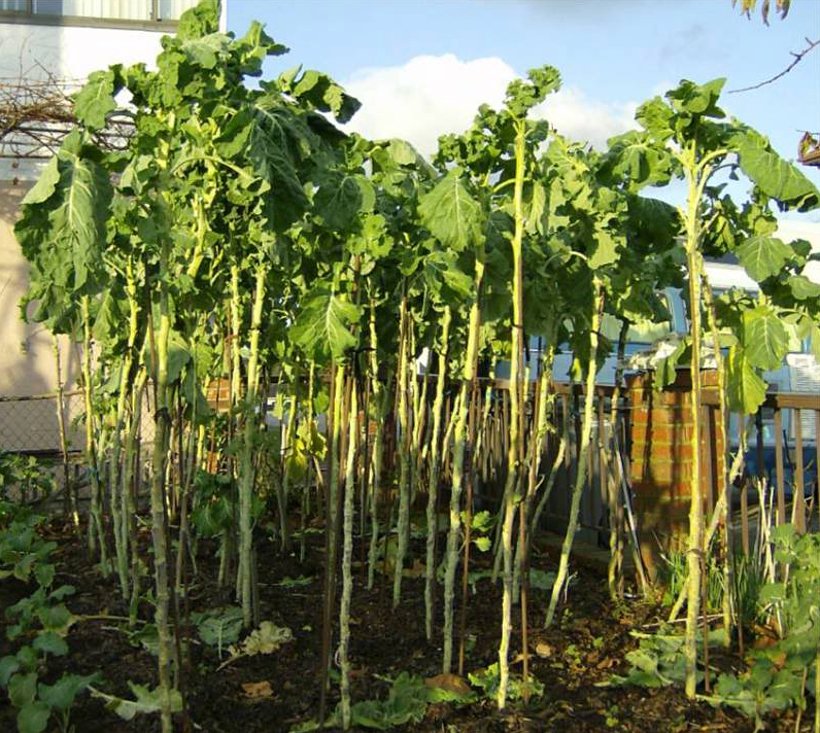 The whole process boils down to the following steps:
- Small holes are made in the beds.
After preparing the site, the beds are leveled with a rake and shallow holes are made
- Planting holes are shed in such an amount of water that they are saturated to a depth of 20 cm. After watering, the holes are left for 1–1.5 hours to warm up.
- The pits are lightly sprinkled with earth, “nests” are made and several seeds are planted to a depth of 1–2 cm, crushed with soil and lightly tamped.
2 seeds are placed in each hole to a depth of 2 cm, sprinkled with earth and lightly tamped
- Plantings are covered with glass jars.
After sowing the seeds, cover the planting holes with jars or plastic bottles
Planting several seeds in one hole is due to the fact that after germination one strongest sprout is left, and the weaker ones are removed.
The distance between the holes depends on the type of cabbage.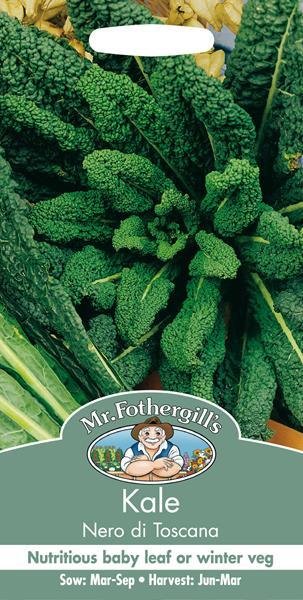 So, early-ripening varieties are planted from each other at a distance of 40 cm, and medium and late-ripening - 50–65 cm, since they are characterized by larger sizes. In most cases, when growing cabbage, they resort to square-nested and ordinary planting patterns. In the first case, planting is carried out at a distance of 60 * 60 or 70 * 70 cm, in the second - 90 * 50 cm. After germination and as the plants develop, standard agrotechnical measures are performed: watering, fertilizing, loosening, weed removal.
Cabbage planting pattern depends on the variety being planted and ranges from 40 cm to 70 cm between plants
Video: sowing cabbage in the ground
Planting cabbage seeds in a greenhouse
Sowing crops in greenhouse conditions, as well as in open ground, begins with the preparation of the soil and planting material.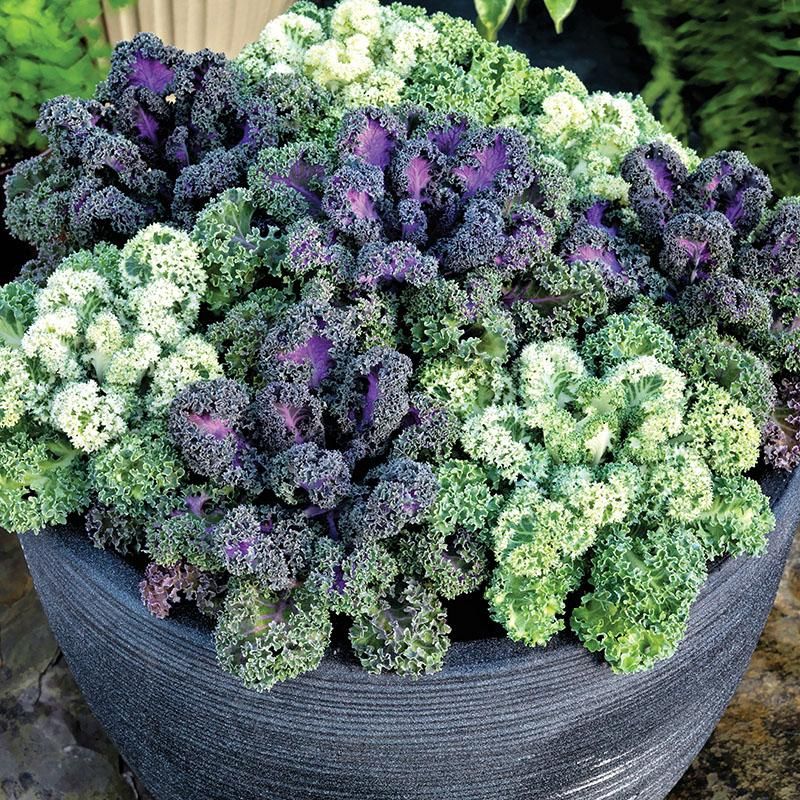
Soil and seed preparation
Since cabbage is very fond of moisture, this feature must be taken into account when choosing and preparing the soil composition, making it fertile and light. The ground must consist of the following components:
- 2 parts manure;
- 1 part of sod land;
- 1 part sand.
To prevent the development of blackleg, add 1–2 tbsp. wood ash. To enrich the soil with microelements, it will be necessary to add potassium sulfate (20 g), ammonium nitrate (15 g), superphosphate (45 g) per 1 m ² . The soil of this composition will be able to provide the plants with the necessary nutrition. As for the preparation of seeds, the procedure is similar to those that are carried out when sowing in open ground.
When preparing the soil in the greenhouse, organic matter and mineral fertilizers are applied
Sowing seeds
The scheme of planting cabbage in closed ground depends on the method of cultivation.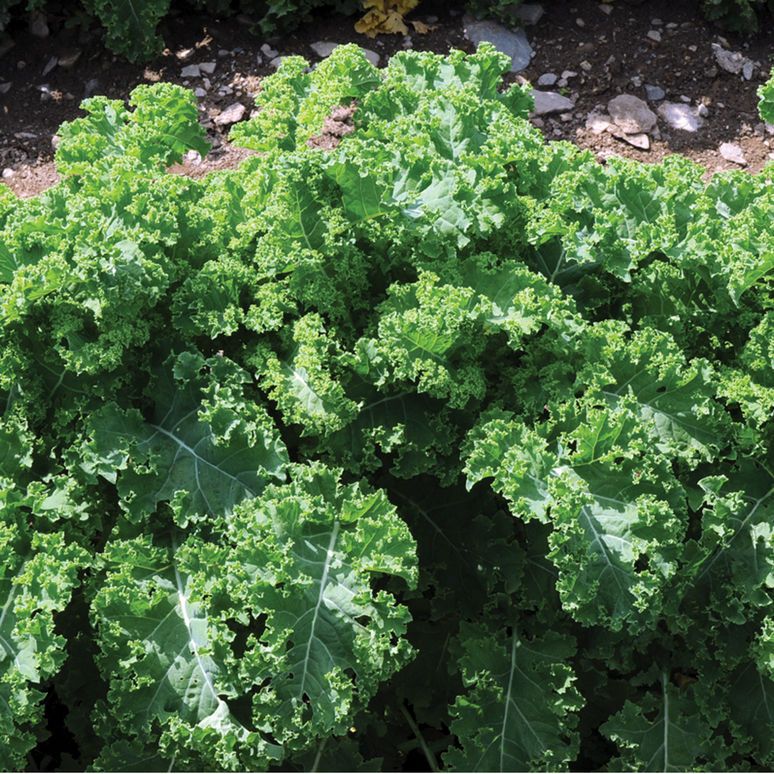 If you adhere to the basic principles of cultivation, that is, to make a pick, then a distance of 2 cm is made between the rows, and the seeds are planted at an interval of 1 cm. If the pick is not planned, then the distance is made somewhat larger:
- between rows of 5 cm;
- between planting material 3 cm.
For sowing cabbage seeds, make shallow furrows spaced 2 cm apart
After preparing the furrows, they are spilled with water, seeds are planted and covered with soil. To avoid confusion, each variety is recommended to be designated.
For faster emergence of seedlings, the bed with plantings must be covered with a film. As soon as sprouts appear, the film is removed so that growth is not interfered with.
Planting cabbage in the greenhouse can be more dense if picking plants is planned
For the normal development of seedlings, it is necessary to ensure optimal temperature conditions. During the day the temperature should be +15–17 ˚ С, in case of cloudy weather +13–15 ˚ С, at night +7–9 ˚ С. bringing them up to standard. When shoots appear, the temperature is lowered to + 8–10 ° C in the daytime, and the readings are also somewhat corrected in cloudy weather. Subsequent cultivation activities consist of standard farming techniques followed by transplanting plants into open ground.
For the normal development of cabbage in a greenhouse, it is necessary to ensure optimal temperature conditions
As for the timing of planting cabbage in protected ground, they depend on the region and the cultivated variety. In addition, it must be borne in mind that seedlings are planted on the site at the age of 1-2 months.
Video: how to plant cabbage in a greenhouse with seeds
Cold sowing of cabbage
When cultivating cabbage at home, plants need to provide good lighting and low temperatures, otherwise the sprouts will be pale and elongated.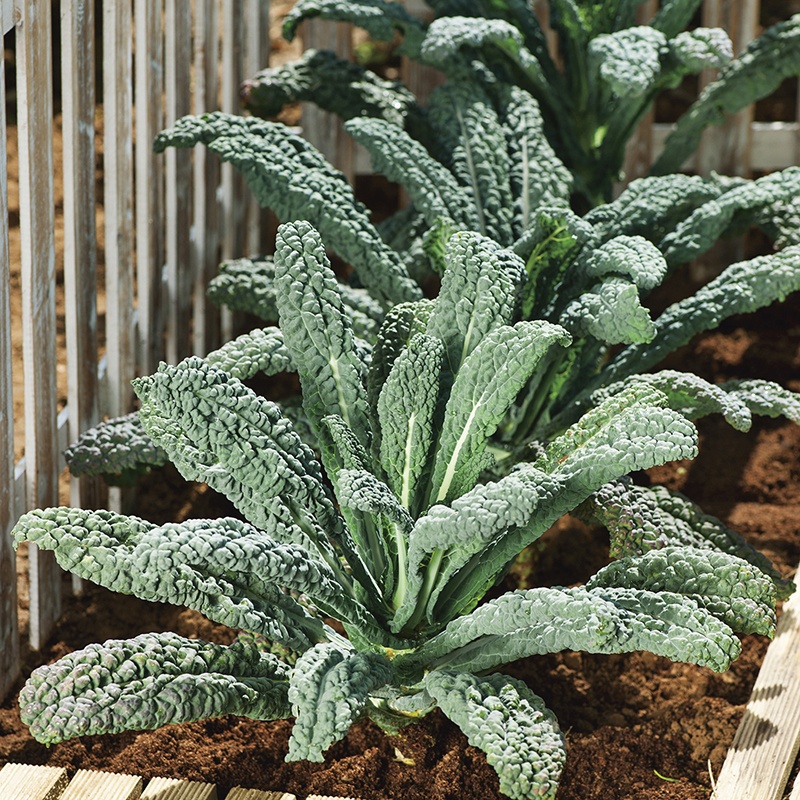 Such conditions are easy to create on the street. In this case, the seeds are planted in a seedling box, lightly sprinkled with earth and watered well. After planting, the container is taken out to the balcony, if it is an apartment, or to the garden, when grown in a private house. The place for installing the box is chosen sunny, and a cover is made of film on top. Sprouts should be expected in 10 days. Transplantation to the site is carried out as soon as 1-2 true leaves appear.
When growing cabbage in a cold way, crops with a seedling box are taken out to the balcony or in the garden under the film
By growing cabbage in a seedless way, it is possible to reduce labor costs, which is especially important with the arrival of spring. In addition, some varieties are preferable to grow by direct sowing in the ground. Knowing how to choose and prepare seeds and soil correctly, as well as to sow with due regard for the timing, it will not be difficult to get a good cabbage crop.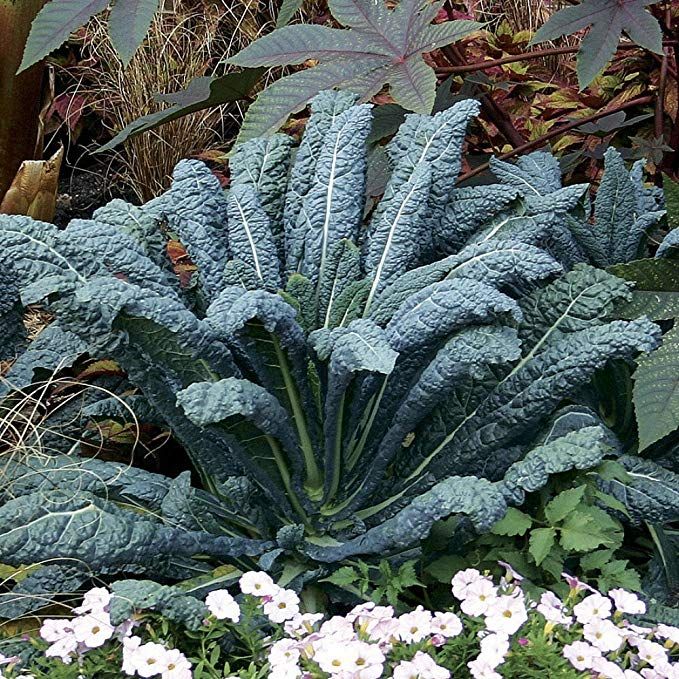
- Author: Vladimir Dolzhenkov
Rate this article:
(3 votes, average: 5 out of 5)
Share with friends!
terms and rules for planting, caring for, growing
Cultivation of cabbage is a profitable and useful business, because it is a reliable ally in the preparation of various soups, borscht, excellent pickles and salads are obtained from it, and it is simply very useful. To get a good harvest on your site, you need to properly plant and grow cabbage seedlings at home.
 In general, it is possible to sow from the second half of February until the end of the first half of April.
 However, in different regions of our country, the time of the procedure may differ: in the Middle lane - in March, in Siberia, the Urals, in the Leningrad region - the end of March or the beginning of April, in the South - the second half of February.
Please note! This material tells in detail about the timing of sowing cabbage for seedlings.
Cabbage Planting Guide
There are several steps to follow. The success of the whole business depends on the correct implementation of them. Let's consider in detail all the steps that need to be performed.
Choosing and preparing a planting container
Experienced gardeners advise to sow cabbage seeds for seedlings in a common container, and in the future, when the right time comes, dive seedlings. The optimal container for seedlings is a wooden or plastic box .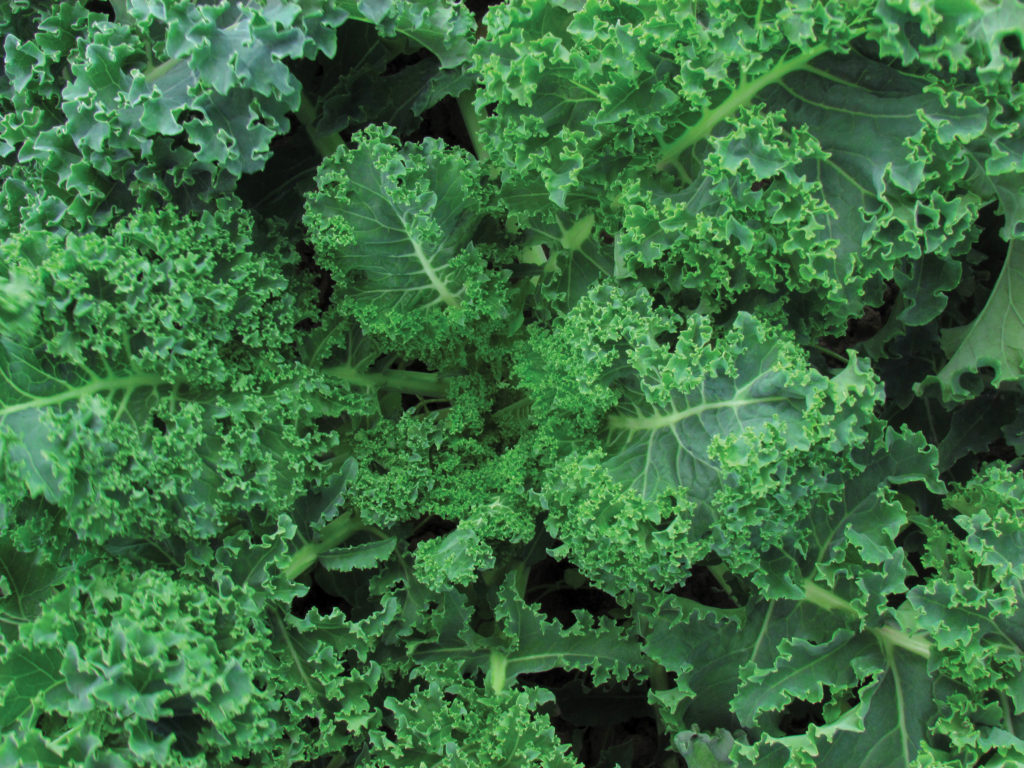
Can also be planted in individual plastic cups (volume 200 or 250 ml), plastic cassettes, peat pots.
Important! There must be drainage holes at the bottom of the container!
An important role is played by the disinfection of the landing container. First of all, it must be washed, and then treated with a solution of potassium permanganate.
Ground preparation
The soil for growing cabbage seedlings must be fertile, have normal moisture and air permeability and neutral acidity. You should not use the soil from the garden, especially if cruciferous plants were previously grown there, as they can be affected by identical diseases.
The best option is to prepare the soil for planting seeds with your own hands at home. A suitable composition includes the following ingredients in equal proportions:
- soddy ground;
- pure river sand.
After disinfection, it is recommended to loosen the soil. And as a final chord , add wood ash in the ratio - 1 tablespoon per kilogram of soil.
Selection of seeds
For the normal cultivation of the right seedlings and vegetables in the garden, as well as for a rich harvest, it is necessary to initially select high-quality seed. It is recommended to buy seeds in trusted stores and from reliable sellers. The packaging of the seed itself must contain all the necessary information about the variety, manufacturer, sowing dates and harvest ripening.
It is also worth focusing on cabbage varieties and already purchase seeds depending on your preferences. For example, if you want heads of cabbage for long-term storage, then you need to buy seeds of late varieties, and if you want to get a crop as early as possible, then you need to choose an early variety.
Seed preparation
To prevent seedling diseases, increase germination and make seedlings strong and strong, it is necessary to prepare cabbage seeds before sowing.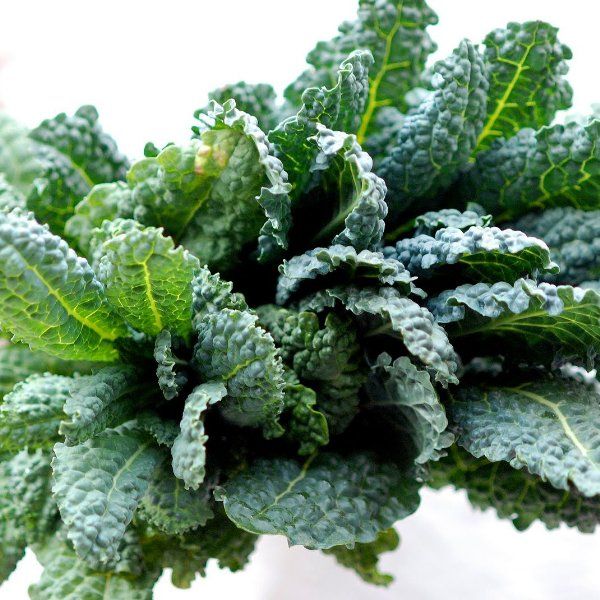 Decontaminate as preparation:
- Wrap the inoculum in a cloth bag or gauze.
- Immerse in pink potassium permanganate solution.
- Soak them in the solution for twenty minutes.
- Rinse and dry.
There is also another effective method of preparation - heating, it awakens the seeds and eliminates pathogens. Warm up as follows:
- Heat the water to +50°C.
- Pour the liquid into the thermos.
- Place seeds in a cloth bag and submerge in water.
- Leave seeds in water for 5 minutes.
- Rinse and dry to free flow.
Please note! If you bought coated cabbage seeds, then you do not need to carry out preparation, such specimens have already undergone the necessary manipulations and are completely ready for planting.
Planting instructions
When sowing, it is important to follow each step correctly.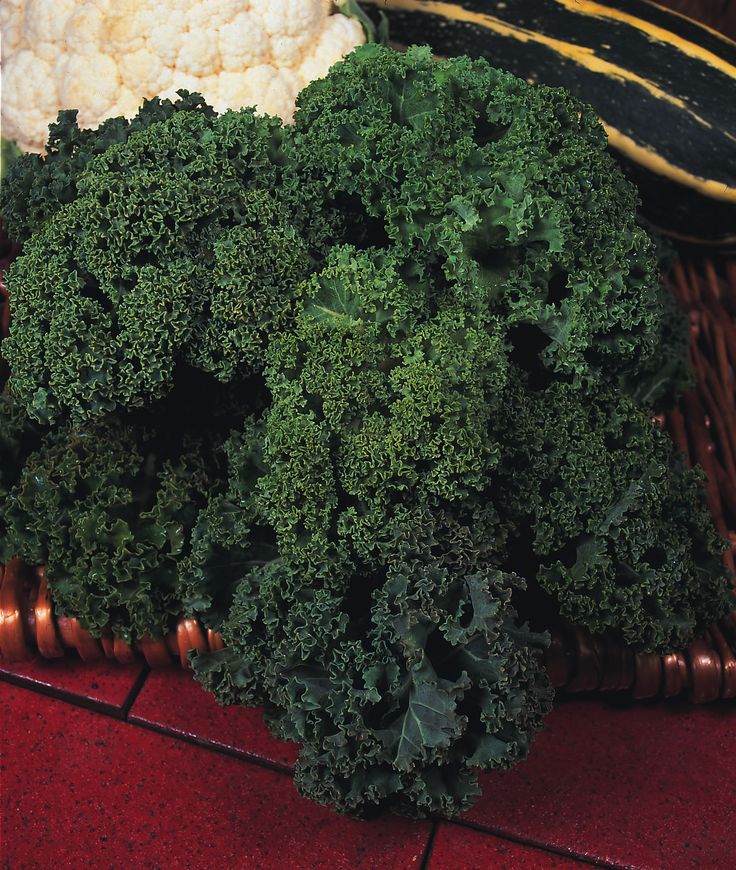 The following step-by-step instructions for planting cabbage seeds for seedlings will help you complete the procedure successfully: Expanded clay, pebbles are perfect as drainage.
Video: how to plant cabbage seeds.
The main stages of caring for cabbage seedlings
Despite the fact that caring for cabbage seedlings is a painstaking and responsible task, anyone can do it. The main thing is to show patience, attention and properly care, according to the recommendations.
Temperature setting
Immediately after sowing seeds, it is necessary to provide a temperature of +18-20°C . Under these conditions, seedlings should germinate in about five to ten days.
After germination, it is imperative to change the temperature regime! So that the seedlings do not stretch, grow the root system and harden, plants should be transferred for seven days to a cool place, where t is 15-17 degrees Celsius during the day, 8-10 at night.
After the recommended time , the seedlings should be transferred to a room where a higher temperature is maintained: during the day + 14-17 ° C, at night + 9 degrees.
The above temperature recommendations apply to white cabbage seedlings. If you grow cauliflower seedlings, then the temperature of the content should be + 5-7 ° C higher, as it does not like lower t.

Watering
Water for irrigation of cabbage seedlings should be exclusively at room temperature, settled and clean. Seedlings of the culture love moist soil, but excess moisture is dangerous, as is deficiency, as it can cause a black leg and kill plants. Seedlings should be watered as the topsoil dries up .
After sowing and before emergence, watering should be done by spraying with a spray bottle.
And after germination, this should be done, as a rule, once or twice a week. When watering, moisture should not fall on the leaves of the seedlings!
Lighting
Cabbage seedlings should be provided with adequate lighting. Required length of daylight hours - 12-16 hours . If necessary, use phytolamps. Additional illumination will prevent lack of light. Also, seedlings should be placed on the southern or southwestern windows. Full lighting is the most important condition for the successful cultivation of cabbage seedlings, so a lack of light should not be allowed.
Top dressing
Nutrients found in the soil help seedlings grow and develop normally. That is why timely feeding of cabbage seedlings will strengthen their immunity, help to resist pathogenic pathogens and environmental influences.
Seedlings can be fed according to the following scheme:
- The first feeding is recommended to be carried out a week after picking. The following mixture can be used as a fertilizer: superphosphate (four grams) + potassium sulfate (two grams) + urea (two grams) + a liter of water.
- Second top dressing - The best time to fertilize is two weeks after the first top dressing. Fertilizers can be used the same, only the ratio changes: now the amount of substances in one liter of water needs to be doubled.

- Third top dressing - Fertilizer should be applied three days before planting in open ground. Fertilizers will help plants take root and adapt faster in a new place, reduce stress from the procedure. As a fertilizer, you can use the drug in liquid form "Kemira Lux".
Important! Before feeding, it is necessary to water the seedlings with plain water, this will prevent the roots from burning.
How and when to pick cabbage seedlings
The time for picking cabbage seedlings is determined by the state of the plant — seedlings should be in the phase of one or two true leaves. It is advisable to perform the procedure on a cloudy day. The soil can be used the same as for sowing. But as a landing capacity, you can choose both individual and common container or bulk cassettes. The main thing is that , the diameter of individual containers was 5-7 centimeters, and landing in a common box was carried out according to the scheme 5x5 centimeters.
Learn more