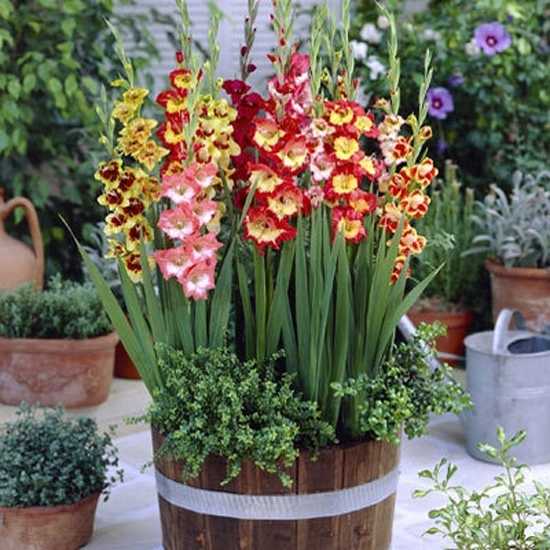
Plant gladiolus bulbs in pots
How to Grow Gladiolas in Pots
By
Kerry Michaels
Kerry Michaels
Kerry Michaels is a container gardening expert with over 20 years of experience maintaining container gardens in Maine. She specializes in writing and capturing photography for gardening and landscape design for print and broadcast media, including the Discovery Channel, Small Gardens, and Disney, among others.
Learn more about The Spruce's Editorial Process
Updated on 09/14/21
The Spruce / Heidi Kolsky
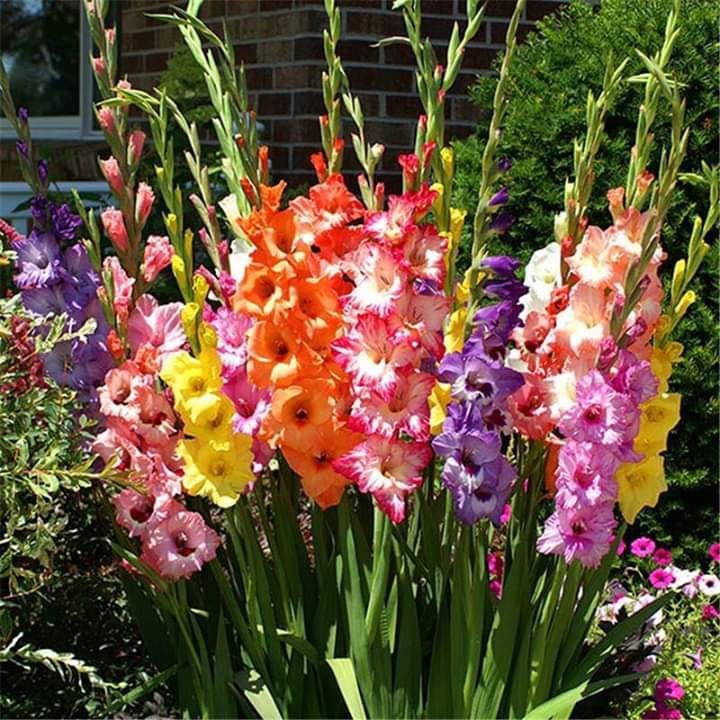
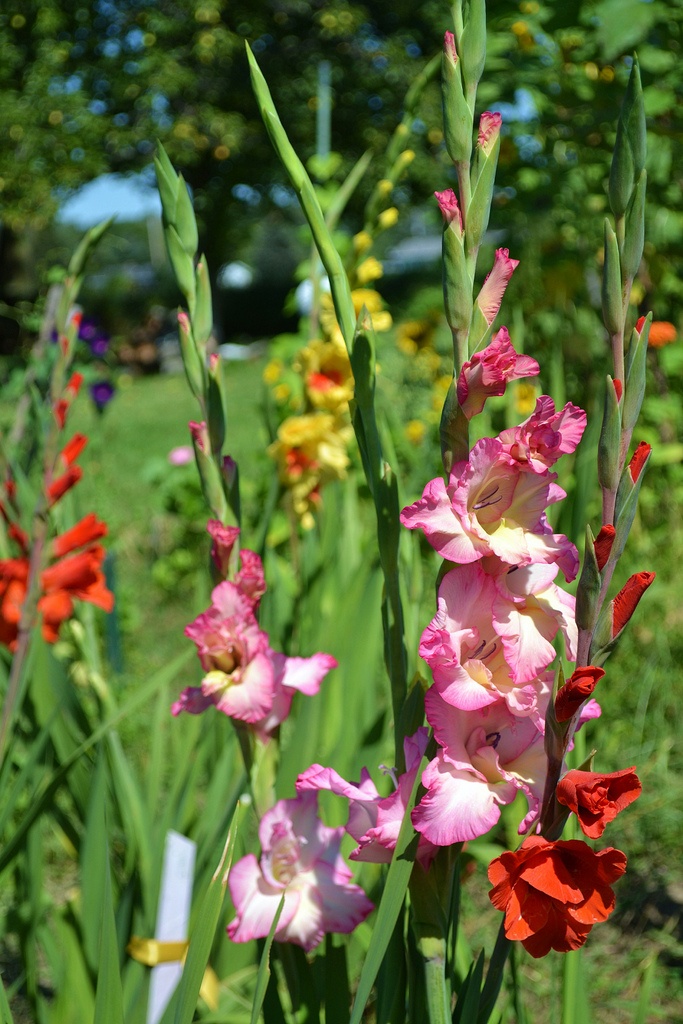
Gladiolus' tall graceful spikes come in a huge array of flower colors and are long-time favorites of novice and professional gardeners alike. However, before the flowers are in bloom and after the blooms have faded, the plants themselves are not particularly attractive—their sword-like foliage is unremarkable, and the plants can make an otherwise beautiful garden bed look rather messy and unkempt.
Many gardeners learn to plant gladiolus among other flowers to disguise them until their spectacular bloom period. But there's another solution—by planting gladiolus in containers, you can place the growing plants wherever you want until they bloom and are ready for you to harvest for cut arrangements. Once cut, you can then either treat them as an annual flower and discard the stems and corms, or let the foliage fade, then dig up and save the corms for replanting next year. Here are some tips for successfully growing gladiolus in pots.
When to Plant Gladiolus in Pots
The rule of thumb for gladiolus is to plant them at the same time you would plant sweet corn in your area—assuming you are planting in the ground. If you are not a vegetable gardener, this means that garden gladiolas should be planted about two weeks before the last spring frost. Gladiolas require 70 to 90 days to flower, which means that corms planted at the beginning of May will flower in mid-to-late summer. Gladiola enthusiasts often stagger plantings every two weeks to ensure a supply of flowers for cutting throughout the summer and early fall months.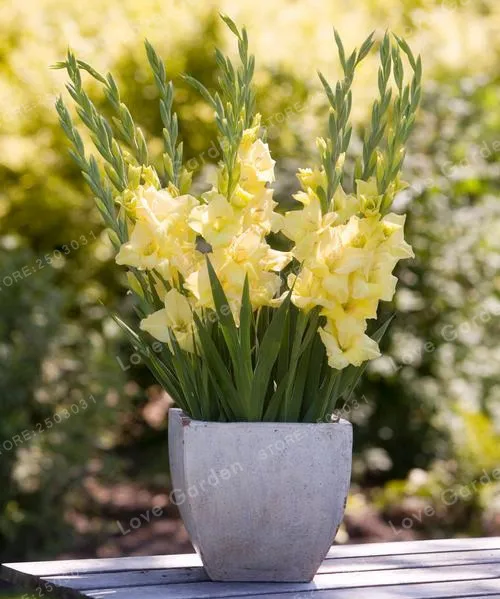
However, when planting your gladiolus in pots, you can plan to plant them even sooner, as the soil in pots warms up much faster than the soil in the ground. You can plant up to four weeks before the last expected spring frost, provided you are willing to protect the plants on the inevitable nights when frost is still expected.
How to Pot Gladiolus
Gladiolus is a fairly forgiving varietal, and corms purchased from reputable nurseries and garden centers are usually hearty and easy to grow. They do have some important requirements, however, in order to thrive in your potted garden. Here's how to care for them properly:
- Choose a tall enough pot: Gladiolus can grow to be very tall—some reach 3 to 4 feet in height—but their root systems are not very robust. Because their typical planting depth is only about three to five inches, you will need to drive deep stakes into your soil in order to help support the stalks. Gladiolus planted in short, squat pots will still grow, but without the support of long stakes they can easily blow over.
 Choose a pot that's at least 12 inches deep to accommodate your gladiolas, guaranteeing there is at least 2 to 4 inches of soil below the corms.
 - Provide good drainage: Make sure your chosen pot has ample drainage holes. If the soil remains wet, the corms will most certainly rot. Some gardeners even place one to two inches of gravel in the bottom of the container (covered with a layer of landscape fabric) to prevent the soil from draining down and clogging the drainage holes. Additionally, you can opt for a clay or terracotta pot to help wick excess moisture from the soil.
- Use the proper potting soil: Gladiolus like fast-draining soil so their roots don't sit in water, so be sure to choose high-quality, loamy potting soil. If your potting soil doesn't already include a slow-release, all-purpose fertilizer, add one in before you plant.
- Plant the corms three to five inches deep, root side down: The corms will usually have one or more "eyes" on top, sometimes found under a papery corm tissue; these are the future plant stalks, so this is the side that should face up.
 For a season-long display, plant a new pot every two weeks—however, be aware of the first frost date in the fall for your area. Glads take between 70 to 90 days to grow and bloom, so if you have short summers, you may be able to get in only one or two plantings.
 - Position the pot in full sun: Gladiolas are sun lovers. They prefer full, unobstructed sun for most of the day, but will still grow provided they get at least six hours of sun in the middle of the day. One of the advantages of planting them in pots is that you can move them around as sun patterns change throughout the day (and season) to ensure they get plenty of light.
The Spruce / Heidi Kolsky
Caring for Gladiolas
Potted gladiolas are fairly easy to care for if you follow some simple tips:
- Stake and support: These top-heavy flowers will flop over unless you stake them. Once the plant stalks are about 6 inches high, pack soil around their base to improve their stability.
 You can also stake the stalks individually or create a corral by using bamboo stakes with string or twine.
 - Water heavily once a week: A single soaking once a week is much better than light waterings several times a week. After you cut the flowers, continue to water the foliage and corms until the leaves begin to dry up and turn brown.
- Cut them early: Gladiolas are ready to be cut as soon as the lowest buds on the stalk start to show color. Cut the stems on an angled bias and quickly put the flowers into water. For longer-lasting blooms, change the water in your vase daily.
- Leave the foliage in place: After cutting, the corms will replenish themselves if you allow the foliage to remain in place until it turns brown and dries up, at which point you can dig them up and save them for the following year. If you plan to discard the corms instead, you can remove and dispose of the foliage and stalks immediately.
The Spruce / Heidi Kolsky
Overwintering Gladiolas
If you live in USDA hardiness zones 7 and 8, you may be able to overwinter your gladiolas right in the pot by mulching them with hay or straw.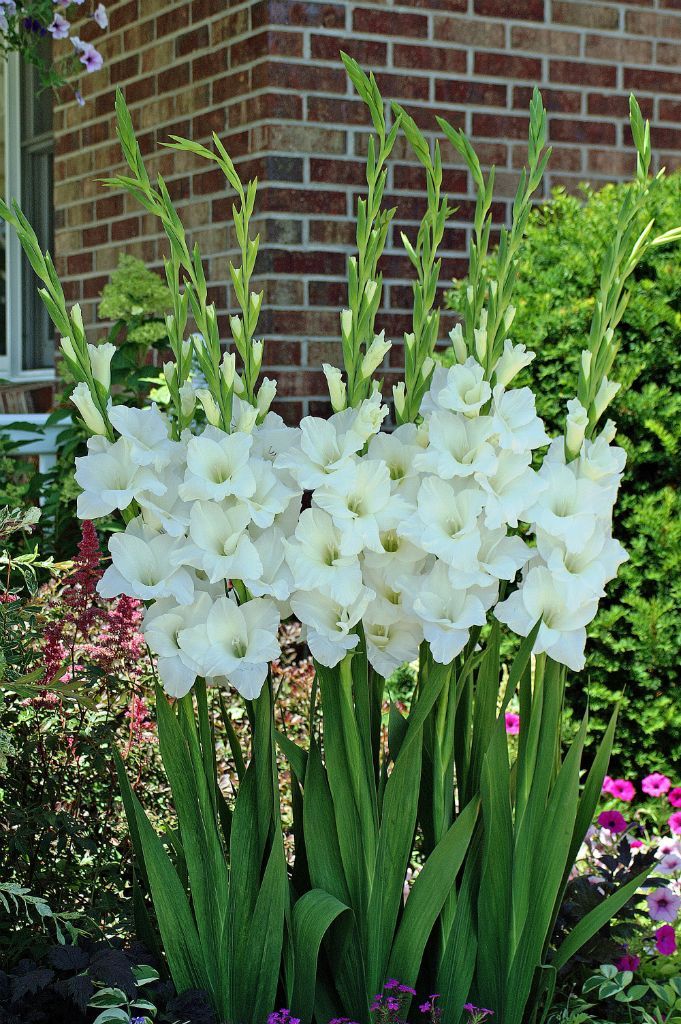 You can also try putting the whole container in a dark, cool indoor space for the winter.
In colder climates, you can try to overwinter your gladiolas by digging up the corms before the ground freezes—roughly eight weeks after blooming. Clean off the soil, either by washing or brushing, and cut off the stalk as close to the corm as possible. Gladiolas normally form new corms on top of the old corms; you will be discarding the shell of the old corm and saving the fresh, new corm for replanting. You may also notice a few small offshoot corms—"baby" corms or cormlets—attached to the main corm. These can be saved and replanted, though it may take several years before they are mature enough to produce flowering plants.
Ensure that the corms are completely dry before storing them in mesh bags, open paper bags, or boxes for the winter. Store them in a dry, well-ventilated, cool area that doesn't freeze—a basement or garage works well, so long as it maintains a temperature between 38 and 58 degrees Fahrenheit.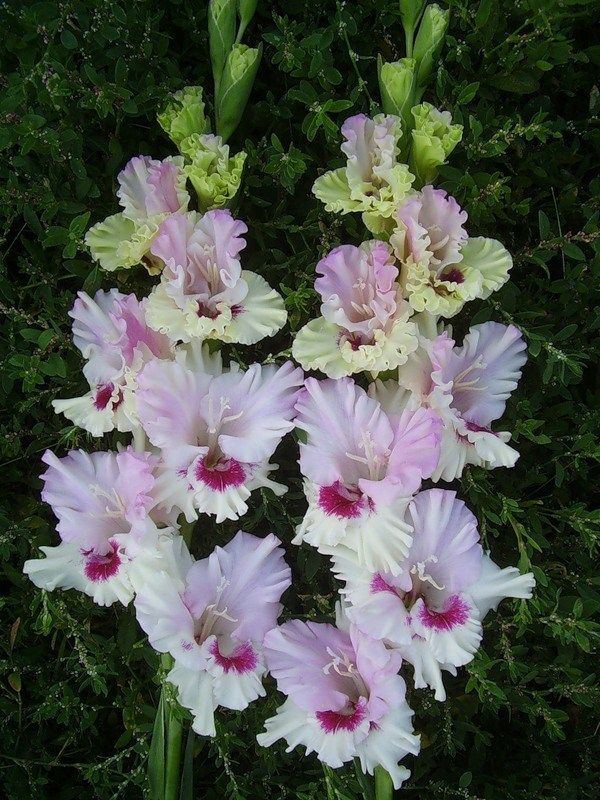
How to Plant Gladiolus in Pots | Home Guides
By Jann Seal Updated May 06, 2021
The long stalks of the perennial gladioli (Gladiolus), bursting with a wide variety of colors, are the result of spring planting. Growing container gladiolus is not difficult, and the reward is several seasons of stunning color. Since gladioli can grow to several feet tall, select a size that fits your container, such as Gladiolus ‘Glamini’, which grows from 12 to 18 inches. The larger varieties can topple over as they mature. With very little attention, your potted gladiolus will brighten your garden throughout the summer months.
Tip
Select a pot that drains well; gladioli don’t like wet feet. The taller, the better, as the corms need suitable drainage. A wide, stable pot is best, suggests Pyracantha.co.uk.
A Brief History of Gladiolus
The gladiola (Gladiolus) capital of the United States was located in Ft. Myers, Florida, from the 1930s until 1980, as reported in the News-Press.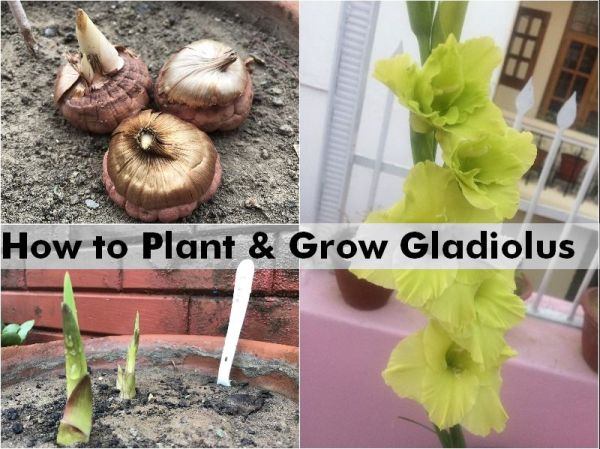 The sandy soil, the sun and that the land was mostly frost-free in winter led to thousands of acres of gladiola in the summer months. Native to South Africa, the elegant sword flower became a world traveler, first landing in Europe, then crossing the ocean to America. It finally found the perfect breeding ground in the sunny South, where millions of stalks were harvested and spread across the country to celebrate the spring and summer months.
As the gladiola originated in South Africa and the Mediterranean area, full sun is necessary to successfully grow the flower. In the language of the flowers, gladiolus means "remembrance" and "infatuation," and when given as a gift, the sword-shaped stalk signifies that it pierces the heart.
Planting Gladiolus
Gladioli grow best in U.S. Department of Agriculture hardiness zones 7 and above. Gladioli grow, not from bulbs, but from "corms." Resembling small, flat onions, the corms have a tiny spike at the top.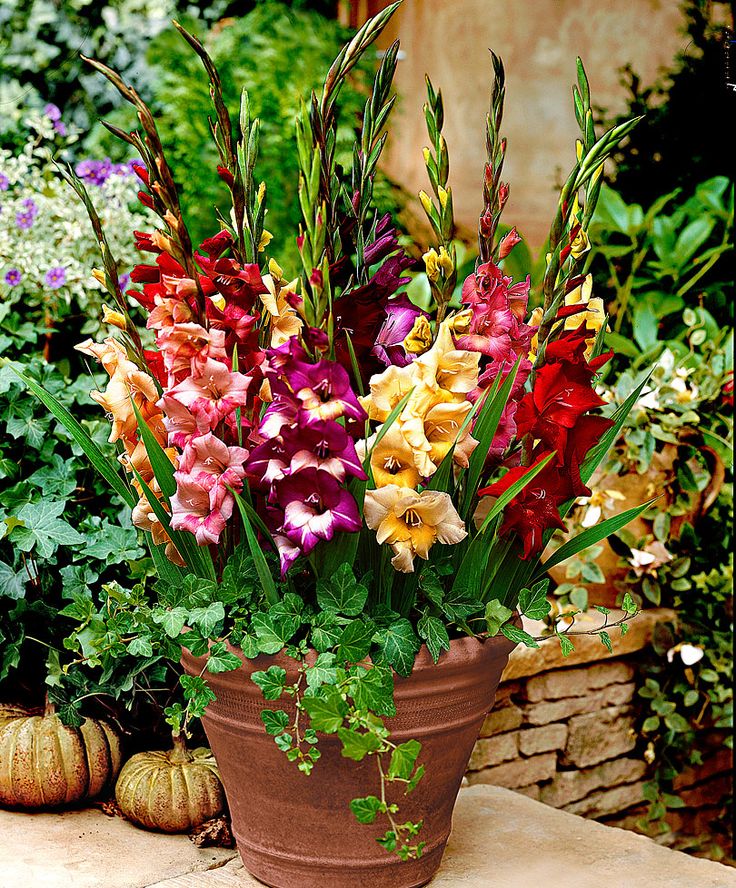 Plant the corms, spike-side up, at least 6 inches deep in soil that has been supplemented with compost and grit or gravel. Monty Don, the famed British gardener from Gardeners World, recommends planting the corm twice the depth of its size.
Spread the corms at least 6 inches apart. If you want continuous flowering throughout the summer, stagger the corms. Cover with the soil, water it, and place the pot in an area that receives lots of sun. Water weekly. Once they start to sprout, pour a well-balanced liquid fertilizer as far from the stem as possible in the container. When flowering, a tomato fertilizer should suffice.
Recycling Potted Gladioli Corms
As the flowers die off, deadhead them and wait for all the stalks to flower. Once the flowering cycle of the potted gladioli is complete, cut the remaining stalks at an angle, leaving at least four leaves to feed the corm. Continue to water it because the corms need hydration. In cooler areas, the corms must be dug up and overwintered before the first freeze. Clean off the corm, cut the stalk to within an inch of all the corm, and set them in a breezy but warm location for two weeks before placing them in a mesh bag for storage at 35 to 50 degrees Fahrenheit, according to Gardeners.com. In warmer climates, mulch the container and wait until the following spring for shoots to appear.
References
- Gardeners World; How to Grow Gladioli
- Pyracantha: Planting Gladiolus Bulbs in Pots
- Gardeners: The Basics of Gladiolus
- News Press: A Look Back: Ft. Myers the Gladiolus Capital
Resources
- University of California Agriculture and Natural Resources: Gladiolus—Gladiolus Spp.
Writer Bio
A versatile writer, Jann enjoys research as well as doing the actual writing. A career in television writing, as a magazine contributor and editor and celebrity interviewer, Jann adapts to her environment, having traveled the world, living overseas and packing and unpacking her treasures for a new location over 30 times.
Gladiolus in a pot: cultivation technology
Do you want to plant gladioli in pots? Then, you should familiarize yourself with the correct selection of planting containers, the intricacies of planting, the features of caring for gladioli, and also the rules for maintaining optimal climatic conditions. Following the advice of professionals, you will definitely be able to maintain the health and beauty of gladioli.
Article content:
- landing containers
- Landing
- Caring for potted gladioli
- Optimum conditions for gladioli
Most gardeners are familiar with gladioli at least in general terms. These flowers can be a great decoration for a flower bed or outdoor flower garden. It is believed that gladioli are exclusively outdoor flowers, since adult plants are large - tall stems and a powerful root system that goes deep into the ground. In this regard, gladioli require a lot of space for a normal existence. However, today breeders have also bred miniature varieties of gladioli that can be bred even in an apartment. As part of this article, we want to tell you about how to plant gladioli in a pot.
Pots
Gladiolus pots can be an excellent decoration for a balcony, loggia or terrace. However, you should know some rules for breeding these flowers so that the plants feel good even in cramped conditions.
So, the first step in preparing for planting skewers, as gladiolus is also called, is the choice of a suitable planting container. Pots should be large enough, since even dwarf gladioli are still quite massive. It is better from the very beginning to take containers with a volume of more than 6-7 liters, and preferably 10. Here you need to follow a simple rule - the larger the pot, the better. It is important to note that the pot should not just be large in volume, but deep.
Skewers do not tolerate excessive soil moisture, so pots should have drainage holes through which excess water will escape. For the same purpose, before planting a gladiolus bulb in a pot, it is recommended to lay a drainage layer of pebbles or broken shards on its bottom. They will allow water to pass through, but will not allow the soil to wash out of the pot.
A nutrient substrate is poured over the drainage layer. Under gladioli, it is better to use loose, moisture-intensive soil with a high humus content. The latter is of great importance, since nutrient deficiency can negatively affect the viability of the plant.
Planting
It is recommended to take only healthy, undamaged corms for planting, since diseased planting material may not germinate, and if it does, the plant will develop much more slowly. Speaking about how to plant gladiolus bulbs in the spring, it is important to understand that there are no strict time frames here. Since we are talking about varieties that are planted in pots and not in open ground, weather conditions for planting do not matter. The most preferred time for planting is April-May, but many flower growers plant skewer in March. The main thing is that by the time of flowering the daylight hours should be as long as possible (that is, flowering should occur in June-July).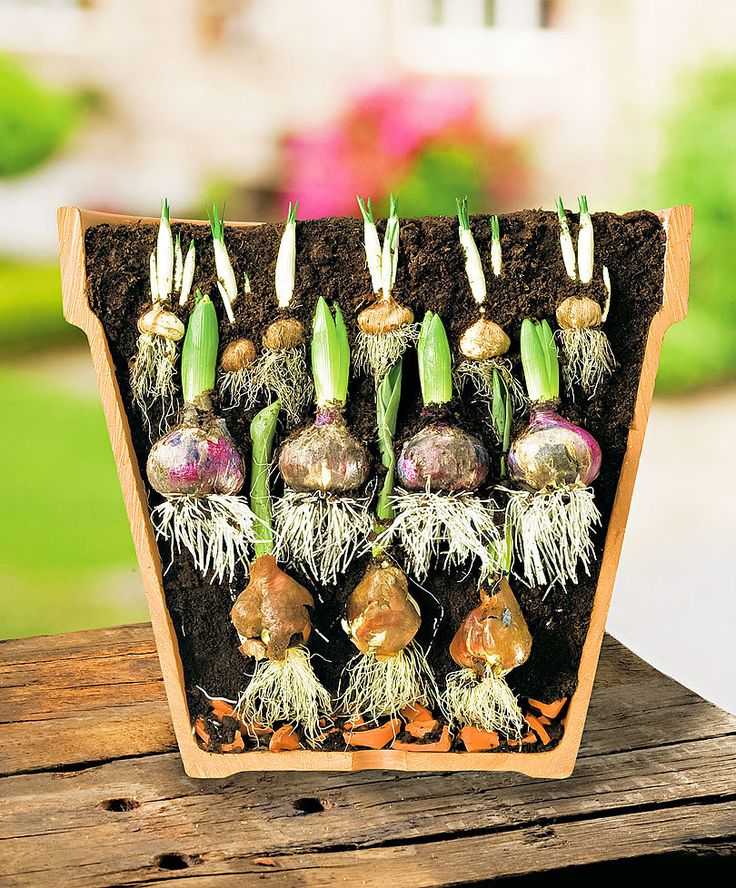
The bulbs are placed at a depth of about ten centimeters. If you plant gladioli not one by one in separate pots, but, say, in a long container, then the distance between the bulbs should be at least six centimeters.
If you figured out how to plant gladioli with bulbs in a pot, and did everything right, then the first sprouts should break through in two to three weeks. After germination, gladiolus pots should be placed in a warm, well-lit place where young plants will not be threatened by wind and drafts. When the gladioli bloom, do not let them get in the rain, as it can greatly damage the flowers.
Caring for potted gladiolus
We have already covered how to plant gladioli bulbs at home. Now let's take a closer look at the basic rules for caring for gladioli in pots: They love moisture, therefore, with insufficient watering, they quickly wither and may even die. However, at the same time, they are no less sensitive to an excess of water in the soil.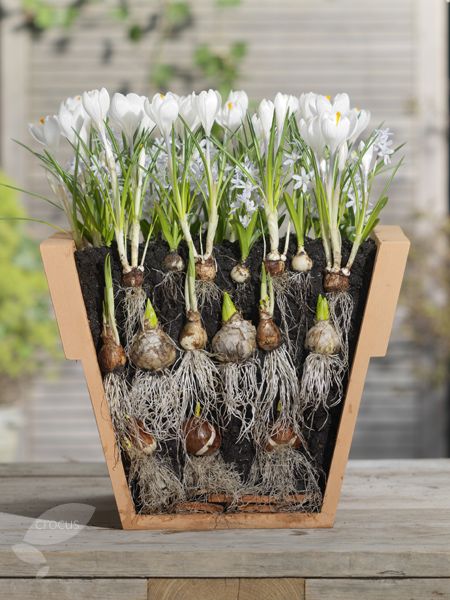 Problems with soil moisture are directly reflected in the flowering stem, which stops growing, bends, which causes irreparable damage to its decorative qualities.
 The second time, top dressing is applied after the appearance of the sixth leaf. With the beginning of the formation of inflorescences, a third portion of fertilizer should be applied. However, there is an alternative system - weekly top dressing in small doses.
 Optimal conditions for gladiolus
We would also like to tell you about a few tricks used by flower growers who grow gladioli in pots.
- Gladiolus require a lot of sunlight, so the plant pot should be placed on a windowsill or balcony if weather permits. Having planted gladioli in a pot, on warm sunny days (but not in hellish heat) they can be put out in the garden.
- To prolong flowering, place the pot in as cool an environment as possible - ideally around 13°C.
- Gladiolus generally do not like heat, so temperatures up to 20°C are ideal for them. If you put them in the summer in the southern part of the house in a room without air conditioning, the skewers may die.
- Cut the flowering stem shortly after flowering, but do not touch the leaves, for a strong planting stock. They should wilt naturally. At the same time, continue watering and periodically fertilize the soil in the pot. When the leaves finally die, they need to be cut off, after which the pot can be moved to a cool dark place.
- In the fall, when it's time to separate the "babies" from the rhizome, after removing them from the pot, give the bulbs time to dry out. Only then can the corms be separated and planted separately.
Planting gladioli in pots + video
Content
- 4.
 1 Watering
 - 4.2 Top dressing
- 4.3 How to avoid deformation of the peduncles
Flowers with bulbs do not need to be planted outside in a flower garden. So gladioli are often found in places where no one expects. Many skewer lovers have flowers in pots on the windowsills and right on the street.
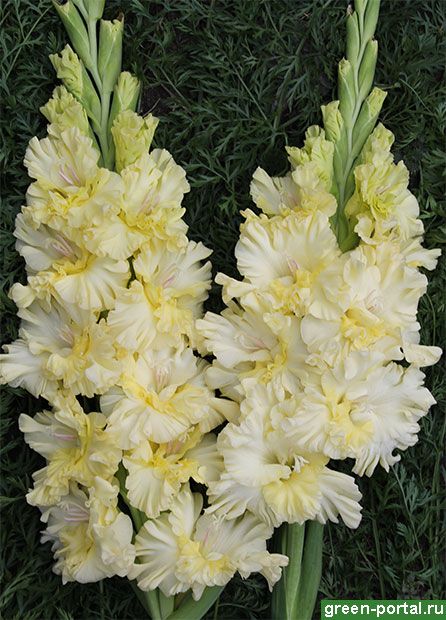
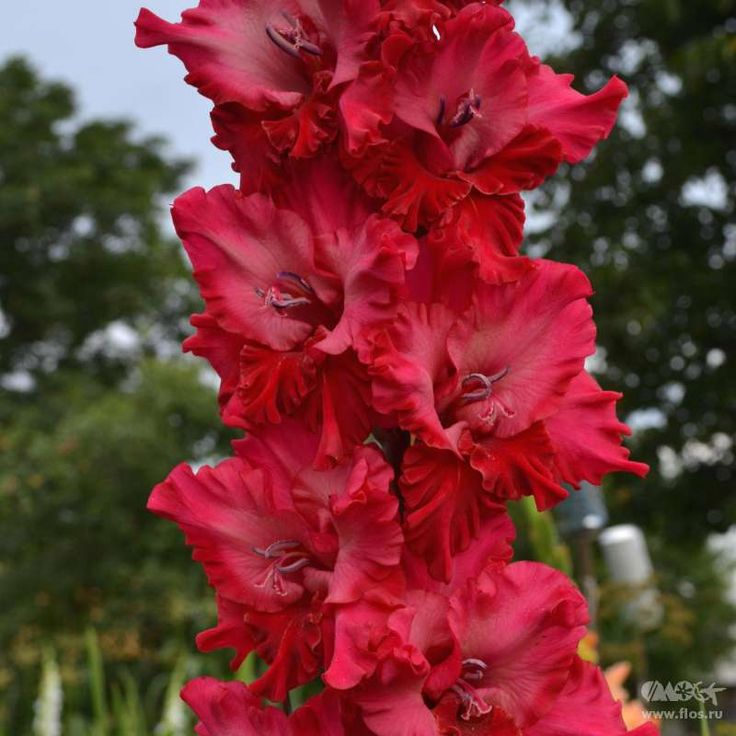
The green leaves of the gladiolus resemble a knight's sword, which gave the flower its name. The flowers are delicate, graceful with a varied color palette. Today, there are a huge number of varieties of gladioli, which are valued by lovers for their long flowering in the cut.
Attention! To grow a gladiolus in a pot, you need to follow special rules. We will talk about them today.
A few words about gladioli
In nature, gladioli grow in the Mediterranean and African subtropics. They require soil rich in nutrients and warmth.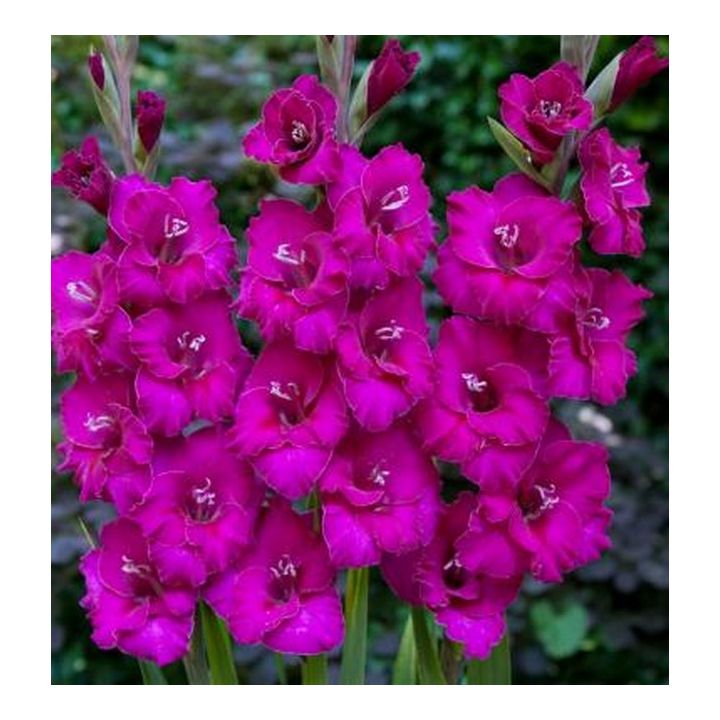 Cold wind can cause the death of the plant.
Warning! In one place, gladiolus bulbs can be grown for only two years.
When growing gladioli in a room, a decorative decoration is obtained, but only if the soil is sufficient for full development. When asked if gladioli can be planted in pots, the answer is unequivocal - yes.
Growing skewers in a pot has its own characteristics:
- Several bulbs are planted at once to obtain a lush bouquet.
- Agrotechnical procedures for the care of bulbs and plantings are required.
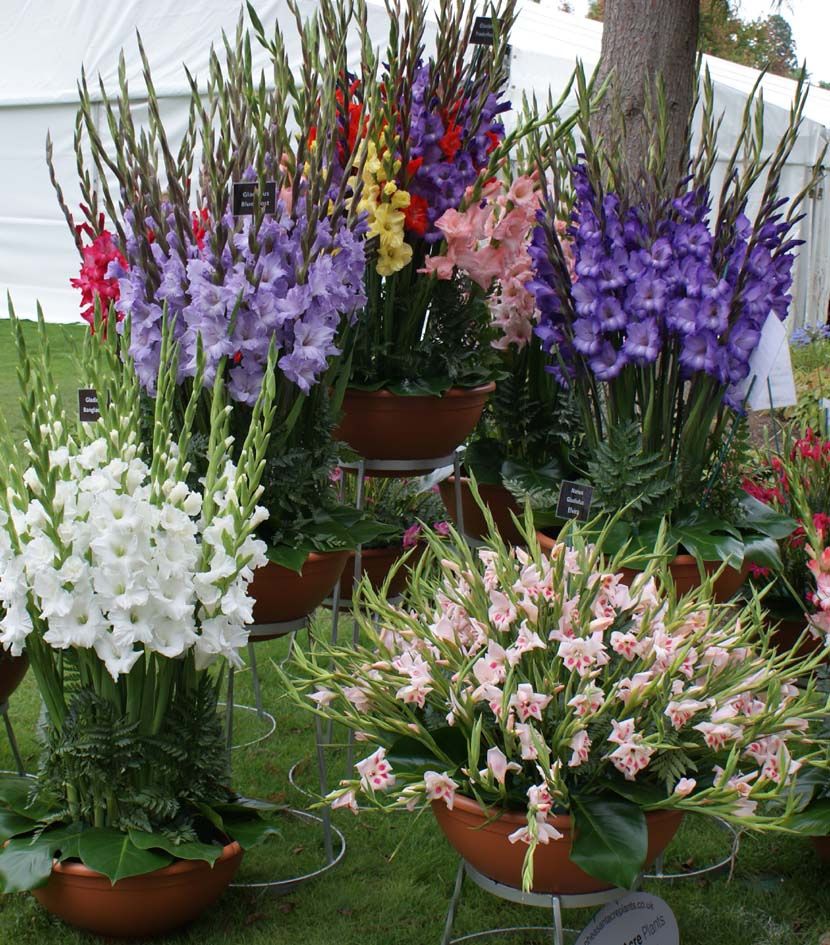
Russian breeders have created mini varieties, the height of which varies between 30-50 cm. The flowers are also smaller than usual, but the color of these regal plants is the most diverse. Gladiolus grown in pots are in no way inferior to those planted in the ground. You can see for yourself by looking at the photo.
Planting rules
The method of growing gladioli in pots is not new. It was used by the ancient Greeks. Let's take a look at the features.
Preparing the container
Before planting gladiolus, you need to decide on the choice of container. Usually this is a pot with a depth of at least 40 cm and a diameter of 20 cm or a little more. This will allow the gladiolus bulbs to develop successfully.
Flowers suffer if moisture stagnates in the pot, so you need to make drainage holes in the bottom to drain water. Broken shards, small pebbles or glass pieces can be used as drainage.
Which soil to choose
Soil is poured over the drain. Gladiolus should be planted in loose, structural soil. It absorbs water well. Often flower growers use ready-made compositions for indoor flowers.
If the soil is prepared independently, you need to choose fertile, black earth. Loam is also suitable, only coarse-grained sand will have to be added to it. It is pre-washed under running water. The height of the soil should be at least 30 cm so that the root system is comfortable.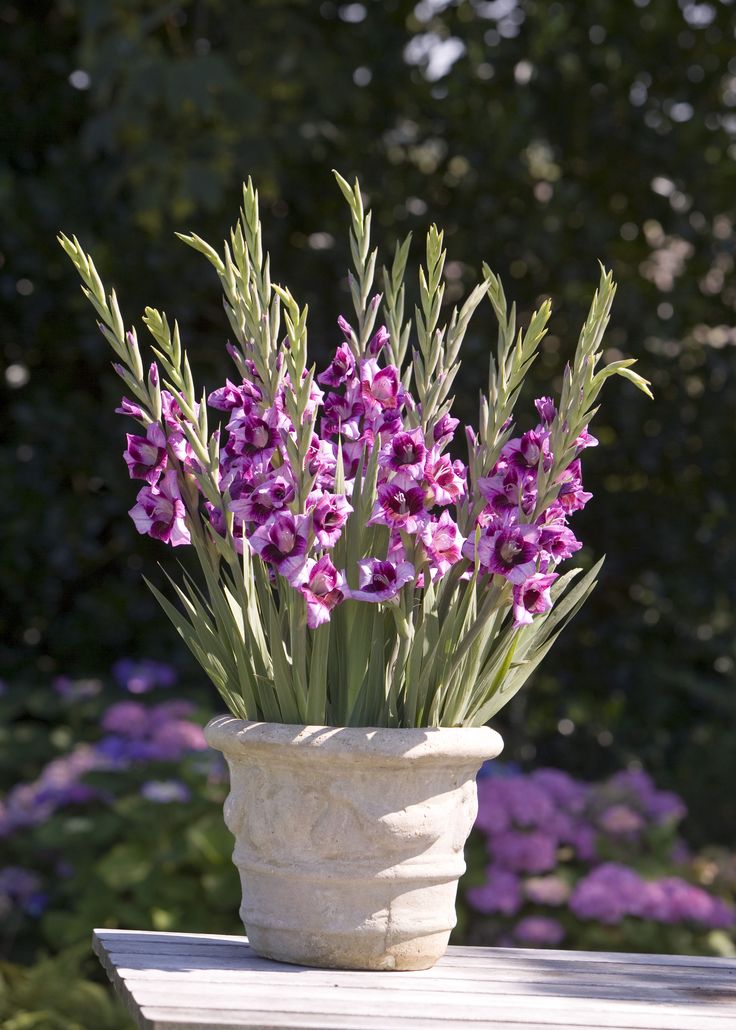
The soil is first spilled with boiling water, adding a little potassium permanganate. Such treatment is necessary for the destruction of spores of fungal diseases. You need to add a little wood ash to the soil, it serves as top dressing.
Peculiarities of planting bulbs
In order to plant gladioli correctly and ensure their full development, it is necessary to take into account the depth of bulb planting. This parameter directly depends on the diameter of the planting material. If there is loose soil in the container, then the bulb is deepened by 4 of its diameter. On heavy soils, the embedment depth is equal to three diameters. Between the bulbs keep a distance of 5-6 cm.
Preparing planting material
As a rule, bulbous plants are planted in April-May. But some flower growers start planting gladioli in March if the bulbs woke up earlier.
In this video, experienced flower growers will share how to prepare gladiolus bulbs for planting in pots:
Before planting gladiolus in pots, each bulb is peeled. This must be done carefully so as not to damage the sprouts. Bulbs with dark spots, dried up are subject to rejection. In some cases, planting material can be reanimated. Small damages are cut out and smeared with brilliant green, fungicide solution or sprinkled with crushed charcoal.
Bulbs with a diameter of 3-5 cm (as in the photo below) are the best planting material. They will give powerful flower stalks, there will be a lot of flowers on them.
Attention! The soil is shed moderately. When the bulbs are planted, the soil is mulched on top.
How to treat the bulbs
Bulbs must be treated against pests before planting. For these purposes, you can use different methods:
- soaked in a solution of potassium permanganate, Bordeaux mixture or copper oxychloride;
- use the drugs "Maxim", "Fundazol", "Aktara", "Karbofos", taking into account the recommendations;
- are treated with Dichlorvos, putting the bulbs in a plastic bag.
 The package is tied and the bulbs are kept for half an hour.
Features of planting gladioli in pots can be seen on the video:
Care rules
The first step to get a blooming bouquet of gladioli is done. Now you need to understand the features of pot growing.
Watering
Gladiolus is capricious in terms of substrate moisture. The slightest drying of the soil has a negative effect on the development of the skewer, can cause death. But you should not overmoisten the soil either: the bulb will begin to rot. Gladiolus should be watered moderately to avoid curvature of peduncles, reducing decorativeness.
Watering will depend on ambient temperature and humidity. In the heat, moisten the plant at least 3 times a week. To increase the moisture resistance of the soil, experienced flower growers advise mulching it with peat or humus.
Top dressing
Rules for the care of flowers planted in pots require top dressing. In order for gladioli to please with beautiful, lush inflorescences, it is necessary to carry out root and foliar top dressing with complex fertilizers:
- The first time they make top dressing when the third leaf appears on the gladiolus.
- Fertilize a second time with six skewers.
- When the gladiolus throws out the peduncle, it needs to be fed a third time.
How to avoid deformation of peduncles
The peduncles of gladiolus, although powerful, are long enough. They cannot be held upright due to the heaviness of the flowers, and often break at the internodes. One of the reasons is insufficient, one-sided lighting.
Usually 5 to 6 bulbs in a pot, when they bloom they form a whole bouquet. To prevent deformation of plants, they are tied to pegs, but they spoil the look of the flower garden.
Tip! It is best to use a decorative openwork mesh. Then our gladioli will resemble a bouquet in a package.
Growing conditions
Every grower has a lot of tricks for growing gladiolus in pots, they are always happy to share them with beginners.
What you need to know:
- Gladiolus is a lover of the sun. If the flowers are in the apartment, with the onset of heat, the pots are taken out to the balcony. There is enough light and heat. In summer, containers with planted gladioli are put outside.
- Gladiolus flowers best when they are not exposed to direct sunlight, so the best place for pots in the garden is partial shade.
- The south window is chosen in the apartment, shaded if necessary. Air humidification is necessary to create comfortable conditions. You can spray water from a spray bottle or place pallets filled with moss next to flowering gladioli. This plant perfectly retains moisture and releases it into the air gradually.
Pest control
As you can see, if you put in the effort, you can always grow gladioli in pots. Fortunately, there are not so many pests living on the skewer. First of all - thrips. These are small creatures, their appearance is not always immediately noticeable. Insects suck juices, multiply very quickly. Thrips can be killed with pesticides. Aphids bother flowers. Sometimes it is enough to sprinkle the flowers with tobacco dust.
Flowers planted outdoors in pots may suffer from slugs eating away the succulent parts of the wedge-shaped leaves, flowers, stem. The decorativeness of the flower is lost. But this is not the worst threat from slugs. If they get to the tubers and roots, the plant dies.
Slugs threaten gladioli grown in flowerpots on the street. They breed where there are weeds. Therefore, it is necessary to fight mercilessly with them not only in the pot itself, but also around it.
Tip! Experienced flower growers recommend sprinkling the soil around the container and in the pot itself with salt or narrow down with mustard powder. If it comes into contact with delicate skin, these products cause burns. Many pests do not risk moving through dangerous areas.
Obtaining planting material
When growing gladiolus in a pot, one should not forget about the formation of future bulbs. They will be required for planting next year. To do this, after the gladiolus has faded, cut off the peduncle.
Attention! Leaves should be left in place.
After some time, they will dry out on their own. Watering and fertilizing are carried out as usual. After the leaves have completely dried, they are cut off along with the stem, and the pot with bulbs is stored in a dark, cool place. If the plant was grown on the street, then the container is brought into the room before the start of frost.
At the beginning of October, the bulbs are taken out of the container, shaken off the soil, examined for pests. If at least one is seen, all planting material is treated with chemicals as a preventive measure.
The bulbs should then be placed on a sunny window sill to dry the scales.