Painting on a plastered wall
A Complete Guide to Painting Plaster Walls
For well over a century, plaster interior walls were the preferred construction in American homes. From antique mansions to old country cottages, these beautiful walls can still be
found in many homes today. Modern homeowners are probably familiar with drywall or sheetrock, but not plaster. This guide will answer all your questions about painting your plaster walls.
Can you paint plaster walls?
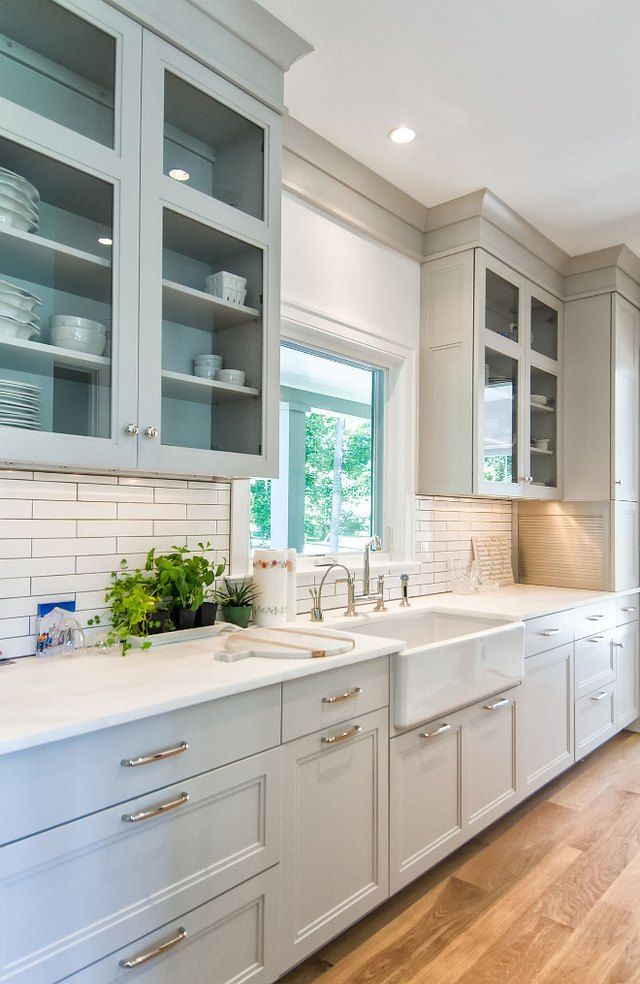
Many classic homes may come with perfectly intact plaster walls hidden behind dated wallpaper or layers of peeling paint. The good news is you can paint these walls with the same equipment you would use on sheetrock! From a classic restoration to a modern restyle, you can make plaster walls look great with a fresh coat of paint.
James Toney Tests Positive For Steroids, What This Means For Boxing bulking steroids uk trump vs. big pharma on drug prices. any bets?
Paint on plaster will only look as good as the prep work underneath it though, so make sure not to skip any steps.
Preparing Plastered Walls for Painting
Safety Tip: Most older house paints contain lead. Always wear eye protection and a respirator when sanding or stripping old paints.
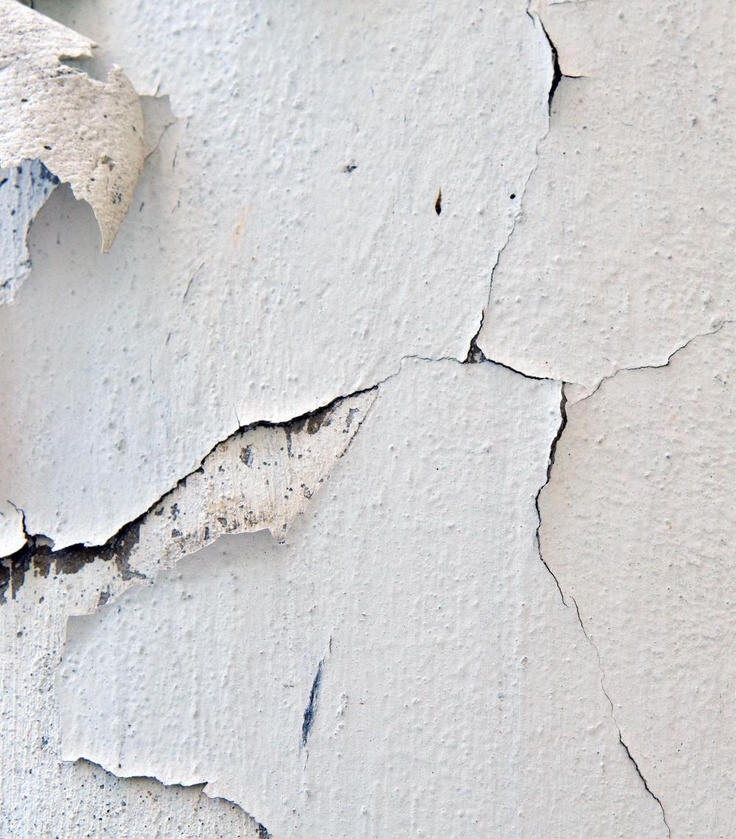
Remove Old Paint
The first step to painting old plaster walls is to remove whatever is covering them. Old paint can be removed in two ways:
- Paint scrapers and sandpaper – For chipped and peeling old paint.
- Chemical Strippers – For paint that’s relatively intact.
Patch and Repair Plaster
Once you have the walls stripped down to bare plaster, you’ll need to repair and patch any cracks or old damage. This process can be tedious, but it’s one of the most important steps. Plaster walls are unforgiving, and any cracks that are left alone will likely spread.
Paintable caulk can be used to fill minor cracks. It remains flexible, so the crack will be less likely to reappear. Larger holes from old bolts or longer cracks should be patched just like drywall and sanded.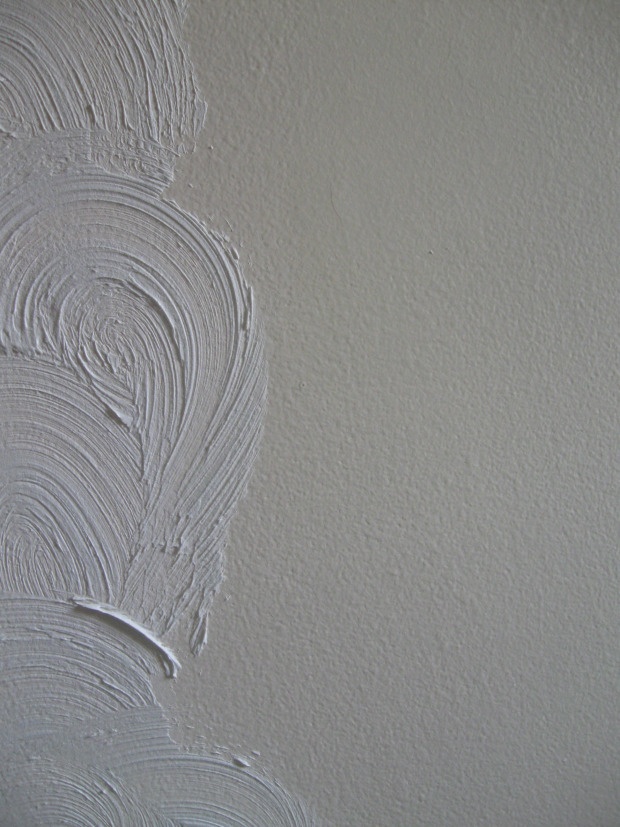 The goal is to create a smooth, even surface with no visible cracks or holes.
To do that, start by blending any patches or new plaster into the old plaster with rough grit sandpapers. Once the surface is roughly level, smooth the surface with high grit sandpapers to create a smooth surface for the primer coat.
What’s the best primer for plaster walls?
Plaster walls are more vulnerable to moisture than drywall, and require high-quality primers. Oil-based primers are the best option for old walls. They have superior stain blocking abilities, and will keep any old stains from bleeding through to new paint. Oil-based primers are also great at sealing out moisture, which can be a major problem for old plaster walls. Perhaps most useful are oil primer’s ability to fill and seal the surface of the plaster.
Kilz brand primers are known for their stain-blocking capabilities and are available at many home improvement centers. For a premium option, Sherwin Williams offers durable primers specifically for plaster.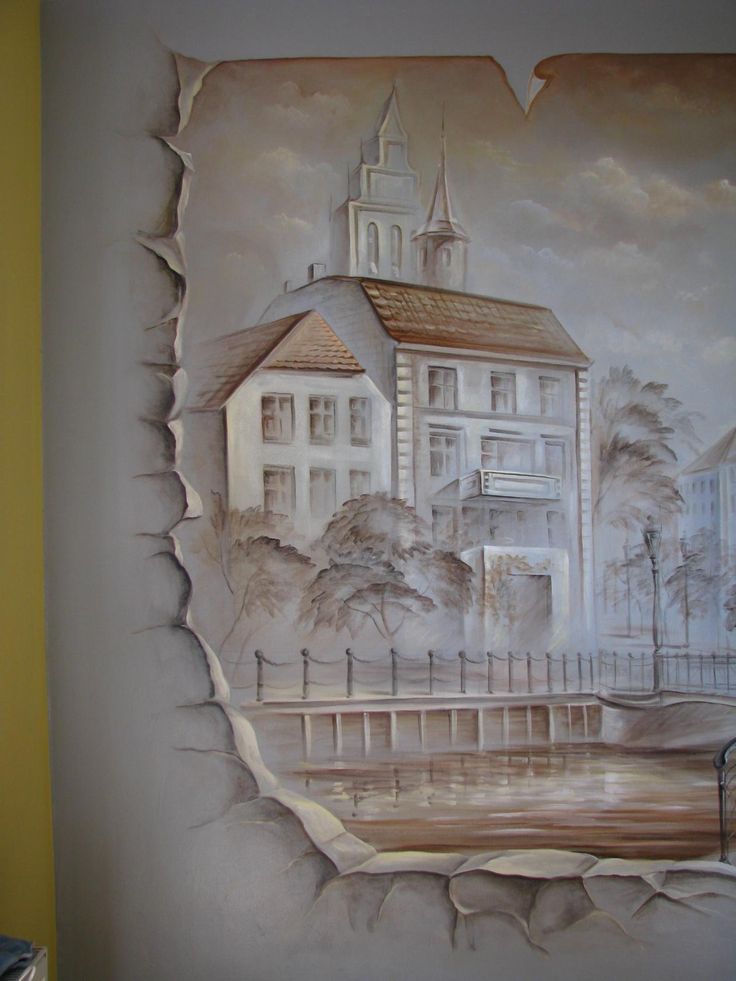
Some bright colors, especially reds and yellows, will usually look better with a tinted primer. The paint shop or home improvement store should know if your paint requires this, and can mix the appropriate primer.
What is the best paint finish for plaster walls?
Plaster walls can be finished in any luster, from high-gloss to ultra-matte. The most versatile finish for most home applications is a satin finish that combines the soft warmth of a matte or flat finish with the ease of cleaning that comes with semi-gloss or gloss finishes. If your home has traditional Victorian styling, a softer finish will finely complement lacquered or glossy enameled trim around doors and around ceilings.
Flat or matte finish paint will not be as easy to clean and will show scuffs much easier than satin paint, but the lightly textured finish can be very useful for hiding minor imperfections in the underlying plaster.
What kind of paint should I use on plaster walls?
The best kind of paint for plaster walls is whatever color appeals to you!
Once plaster walls are properly patched and primed, they can easily take any color or finish. Satin and eggshell finishes are very popular, and lighter, neutral shades of cream and white are ideal if resale value is a concern.
There is one kind of paint you shouldn’t use: all-in-one paint and primer. The label is misleading, as these paints do not actually have a primer in them. Instead, they are blended to create a thicker, more durable coat.
While durable paint is not a bad thing, these products won’t help with the two largest problems that primer solves on old plaster: making paint stick to the wall better and blocking decades of potential stains from bleeding through to the fresh paint.
Painting Plaster Walls
So your plaster has been patched and the surface is smooth and primed. Now it is time to paint!
Plaster can be easily painted with the same techniques as drywall. Even with a good coat of primer, plaster walls are notoriously thirsty for paint. Using a roller for open spaces and brushes around trim and borders, spread an even coat of your choice of paint. Don’t try to completely cover the wall in one go. Two or three thinner coats will create a much prettier finish than one thick coat, which is likely to end up running and looking uneven.
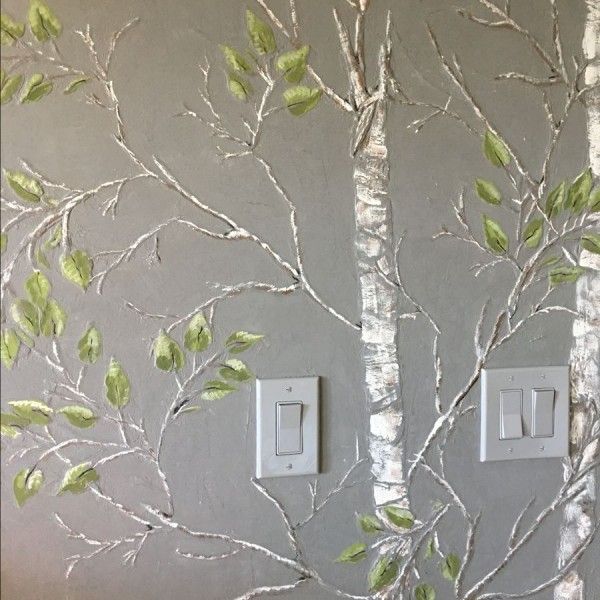
Plaster walls also lend themselves to creative painting schemes, like sponged paint and rustic, antiqued finishes.
Five Steps for a Flawless Paint Job on Plaster Walls
Old plaster walls most likely experienced years of homeowners hanging pictures, painting, and placing wallpaper. Because of this, they usually entail a more extensive preparation process for a new paint job than drywall. Here are the five steps to follow for an optimal painting experience and results:
Test the Walls for Lead
It is crucial to make sure that your plaster walls are free of paint containing lead, as it was a commonly used paint ingredient of the past. This is because continued exposure to lead poses a number of serious health risks. Always double-check with an at-home lead test kit before proceeding with any other steps.
Remove Old Paint
If the lead test doesn’t detect any contaminants in your plaster walls, it’s safe to start removing old paint. If there are any visible paint chippings, peelings, or loose plaster, it’s best to scrape them away to ensure that you have an even surface free of bumps. A putty knife is a great tool to help you with this process.
Fill Cracks and Holes
Plaster walls are prone to developing holes, dents, and cracks over the years. For smaller cracks and holes, a paintable caulk is your best friend for fixing them! For larger areas of damages and dents, repair the area by adding mesh tape and filling the area with a compound.
Sand Down The Walls
Sanding down your plaster walls is essential for smoothing out anything that wasn’t taken care of with the previous steps. It gives you one last chance to level out the walls before priming it up! Use both rougher and finer sandpapers to achieve the best results.
Apply High Quality Primer
When you’re happy with the smoothness of your wall’s texture, you’re ready to apply a high-quality primer. Old plaster walls are better off with an oil-based primer. This is because oil primers are far more superior at preventing any stains from water and other materials from showing through, which is a more commonly found problem with plaster walls.
After the primer is completely dry, you’re well-equipped to begin the fun part: painting!
Need Help Painting Plaster Walls?
Find a professional painter near you. If you need a home painter in South Jersey, including Marlton, Cherry Hill, and Moorestown, give Pizzazz Painting a call today! Call 609-702-8200 today.
How to Paint Old Plaster Walls | Home Guides
By Mona Culberson Updated December 14, 2018
Old plaster walls are more temperamental than drywall so you have to put a little more elbow grease into the preparation work before you paint. Don't take short cuts on the prep work or you may find yourself doing repairs later. Fix damaged areas of the walls with a patching compound recommended for use on plaster and apply an oil-based or shellac primer to seal out moisture.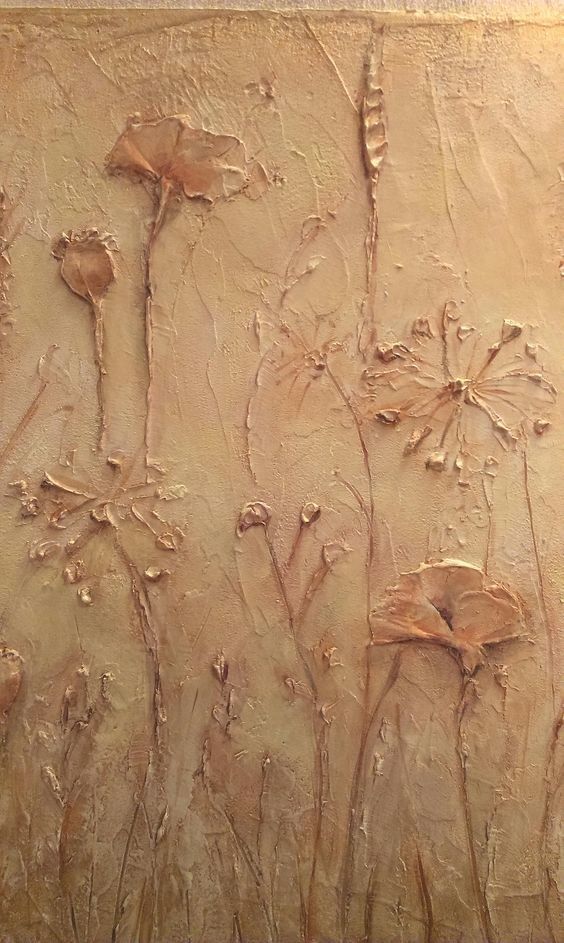 Follow with a top-quality latex paint to give your old plaster a new look.
-
1.
Move the furniture to the center of the room. Cover the floor with drop cloths. Take the pictures and switch outlet covers off the walls, and remove the nails with the claw end of a hammer.
-
2.
Inspect the walls for damaged areas of plaster and use a scraper to remove crumbled, flaking pieces. Spot-prime the areas you scrape to ensure that the patching compound adheres.
-
3.
Fill the holes and large cracks in the plaster with plaster patching compound, using a putty knife. Cut a piece of mesh tape the appropriate size to fit and place it over the patched area. Use the putty knife to apply a thin layer of patching compound over the tape. Allow the patch to dry completely. Sand the patched areas using a fine-grit sanding block. Apply a second layer of patching compound, allow it to dry and sand it smooth to the surface. Remove the sanding dust with a vacuum or clean cloth.
 Use a caulking gun to apply a bead of latex painter's caulk to small cracks.
 -
4.
Sand the walls with a fine-grit sanding block to smooth and dull the surface. Wash the walls with soapy water and allow them to dry completely.
-
5.
Wipe the dust from wood trim and facings with a clean, damp cloth. Mask the crown molding and baseboard trim with painter's tape.
-
6.
Pour primer into a paint pail. Cut in (outline) the perimeter of the walls with primer using a 2-inch, angled paintbrush. Cut in the corners where two walls meet and everywhere else a roller can't fit.
-
7.
Insert a medium-nap roller cover onto a roller handle and place a paint pan liner in a paint pan. Pour a manageable amount of primer into the pan. Submerge the roller into the pan and roll it back and forth over the grid lines to distribute the primer evenly on the roller. Apply a coat of primer to the walls. Allow the primer to dry for the amount of time recommended by the manufacturer and repeat the procedure to apply a second coat of primer.
 Allow the primer to dry completely.
 -
8.
Clean the primer from the paintbrush and paint pail. Use paint thinner to clean up oil-based primer or denatured alcohol to clean shellac. Refill the pail with paint. Use the angled paintbrush to cut in the perimeter of the walls with a smooth line of paint. Dab the paint into crevices.
-
9.
Discard the paint pan liner used for primer and place a new liner in the pan. Insert a new, medium-nap roller cover on the roller handle. Pour a manageable amount of paint into the pan and load the roller evenly with paint. Apply a coat of paint to the walls, rolling over the brushed cut-in line. Allow the paint to dry for the amount of time recommended by the manufacturer and apply a second coat of paint. Allow the walls to dry completely before replacing outlet covers and wall hangings.
Things You Will Need
Drop cloths
Hammer
Scraper
Primer
Plaster patching compound
Putty knife
Mesh tape
Fine-grit sanding block
Vacuum
Clean cloths
Caulking gun
Latex painter's caulk
Painter's tape
Paint pail
2-inch, angled paintbrush
Medium-nap roller covers
Roller handle
Paint pan liners
Paint pan
Paint thinner
Denatured alcohol
Paint
Tip
Latex primer can be used but alkyd primers are recommended for best results on plaster.
Use trisodium phosphate (TSP) to clean heavily soiled walls.
Use a paint pole to extend the reach of the roller.
Warning
Do not sand walls painted before 1978 as they could contain lead.
Primer and paint emit fumes; ventilate the area accordingly.
Solvent-based products are not volatile organic compound compliant in all areas. Consult your local and state regulations or the U.S. Environmental Protection Agency to determine if the product that you are using complies with VOC regulations in your area.
Resources
- Painting and Decorating Concourse: Lead Paint Warning
- Environmental Protection Agency: Volatile Organic Compounds (VOCs)
Writer Bio
Mona Culberson began working on the assembly line at a large manufacturing company in 1983, where she worked her way up into several positions of business responsibility. In 2005, she began a career in roofing, interior design and remodeling. She works daily as a professional painter/home remodeler/handywoman while lending her husband's roofing business a helping hand in her spare time.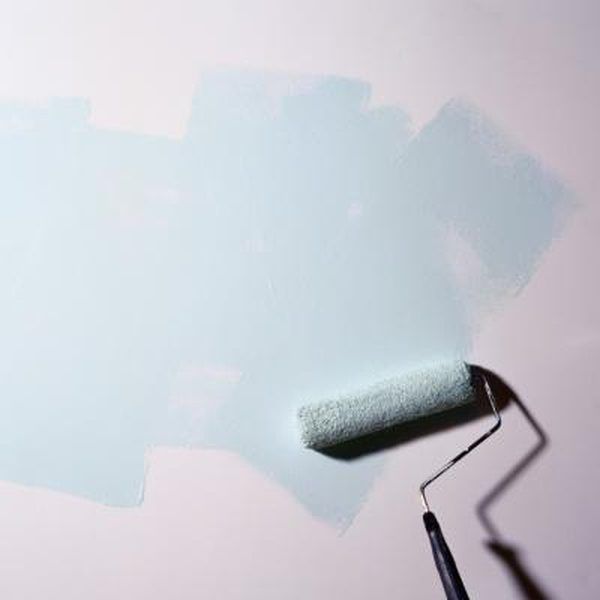
subtleties of painting on wet and dry surfaces
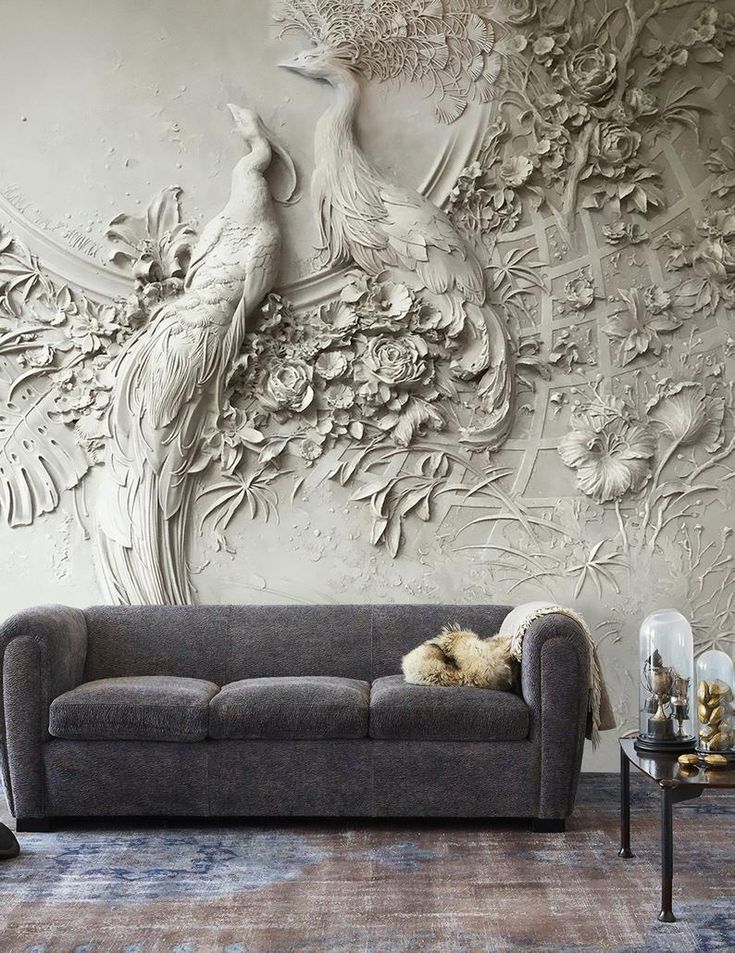
Painting on a plastered wall has been used since ancient times. In many countries, ancient temples, public and residential buildings were painted this way. And in general, a person has painted pictures on the walls since the time of primitive caves.
For a long time, this type of decoration, wall decoration was forgotten.
Note: Painting with water-based paints on damp plaster is called Fresco, it is also called Alfresco in another way.
However, it is in modern interiors that frescoes look unusual and elegant.
Master or artist must be well versed in the peculiarities of writing on plaster. After all, it is a living material that can absorb different compositions with different intensity.
And so that when the colors dry, the image does not deform, does not turn pale, you need to skillfully select and prepare paints, as well as the wall.
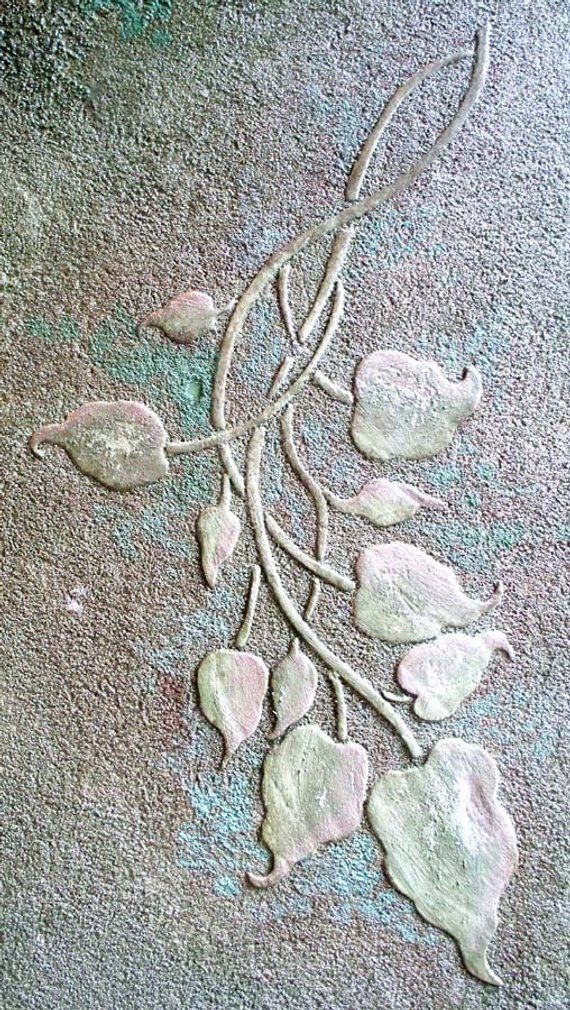
Today, master finishers use a variety of techniques to decorate interior spaces. They strive for originality in every design project, inventing new materials and ways to use them. Everything so that every house, every room has its own style. Customers want to see their home beautiful, unusual, cozy.
Everyone has been to a church at least once and seen ancient frescoes on the walls. These picturesque paintings, made many centuries ago, retain the brightness of the image. They fascinate with their plots, transparency of colors, lightness of texture. Such frescoes give the interior airiness.
This technique of painting on plaster has been known since ancient Rome. Frescoes decorated not only temples, but also the ceilings and walls of palaces. Depending on the type of wall processing, two ways of executing paintings can be distinguished - on a dry wall and on a damp one.
Wall painting technique with paints on dry plaster.
Wall painting on dry plaster called Alsecco. Use paints mixed with raw eggs, glue-based, water-based. Painting on dry plaster is more resistant to polluted air and dampness. Thus, it is possible to paint the walls of buildings from the side of the street.
The technique of wall painting with paints on dry plaster appeared later than frescoes. Compared to light translucent frescoes, painting on dried plaster looks bright, colorful, and does not lose its original appearance for a long time.
Wall painting on dry plaster is carried out by artists. Therefore, the facade of the house with such decoration or the interior of the room looks elegant and chic.
What makes the Alsecco technique unique.
- Paints are based on natural materials: water, lime. They can paint the walls even in the nursery. They are absolutely safe for health.
- Durability. Colors based on natural ingredients adhere well to plaster, do not crumble, do not fade.
- All the details of the picture are carefully written.
- Resistant compositions are not afraid of the impact of natural factors, a sharp change in air temperature. The Alsecco technique is used to decorate plastered exterior walls and facades of buildings, painting blank walls and solid brick fences.
Important! In this technique, paintings on any subjects made in different artistic styles will look quite harmonious.
The technique of wall painting with paints on dried plaster should be well mastered by a person who approaches the matter with a soul and has an artistic vision.
Disadvantages of wall painting on dry plaster.
The complexity and responsibility of the work presupposes its execution by a true master-artist. This work is unique, exclusive, it is impossible to repeat it exactly. Therefore, the cost of finishing will be higher than screen printing. The work will take a long time to complete. Therefore, one cannot count on the quick completion of the design of the room with wall painting on dry plaster.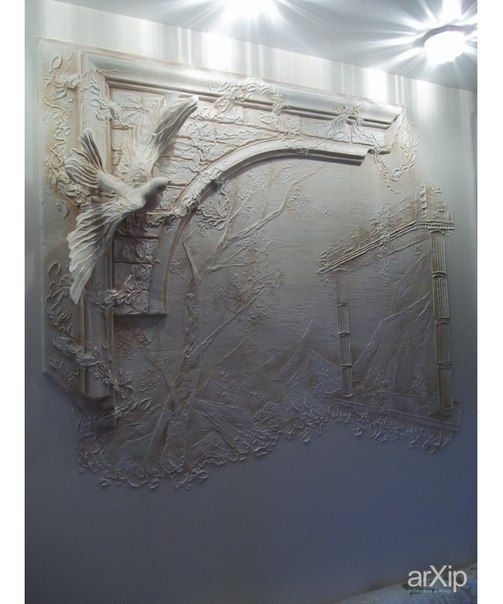 In order for the artist to work calmly, without haste, discuss with him in advance how long you need to focus on.
Room functionality may change. Therefore, such expensive design projects should decorate offices, living rooms, libraries
Advice! Choose a plot for a painting thoughtfully, expect that the painting is applied for a long time, so that in 2-3 years you do not have to close it up, spend money on a new painting.
How to prepare the wall surface for the artist's work.
If you want a perfect picture on your wall, prepare it well. The wall must be cleaned of old paint or wallpaper. Traces of dowels or other defects should be carefully repaired with putty. After that, cover the surface with a primer and plaster again. Achieve a completely flat surface. Once it dries, prime it again and let it dry. Place for a masterpiece is ready!
The subtleties of dry plaster work are that the material is applied in several layers. Each next layer is applied to the dried previous one.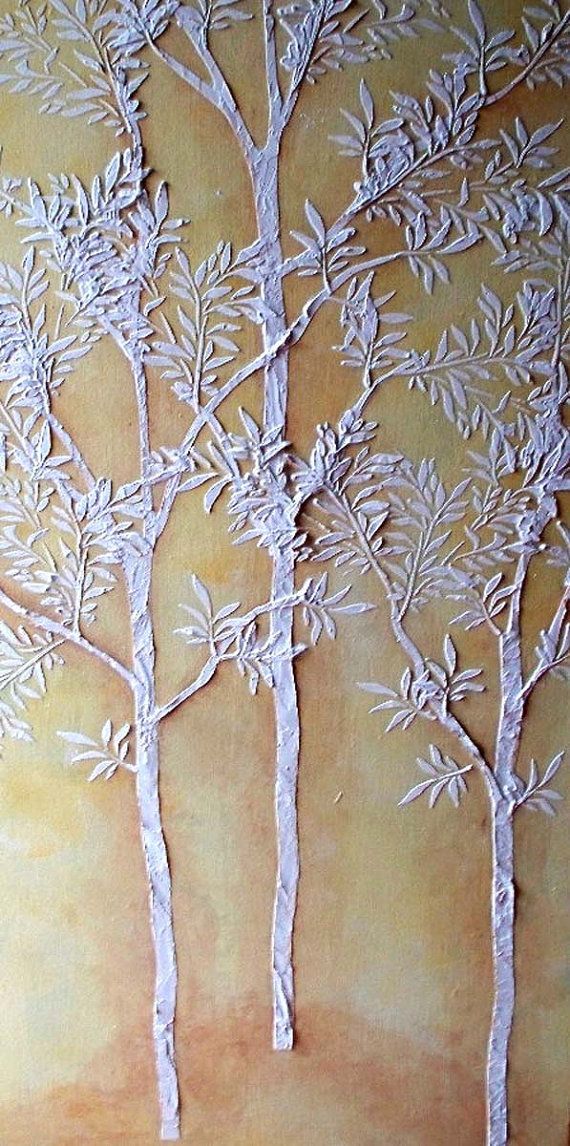
Painting on wet plaster with water-based paints.
Plaster for painting on wet plaster is prepared in a special way. It contains brick chips, which hold water for a long time and do not dry out. The other main ingredient is lime. They take the highest quality lime, quench until the process stops completely with plenty of water.
Linen threads and crushed hemp are added to the plaster to prevent cracking of the wall surface. They bind the plaster mortar.
The wall is prepared as follows. Create irregularities, recesses for better adhesion of the solution to the wall. The old coating and dirt must be cleaned off. The surface is constantly moistened, and the solution is applied in at least three layers.
Technology of painting on wet plaster with water-based paints.
First, the artist creates a life-size drawing on paper.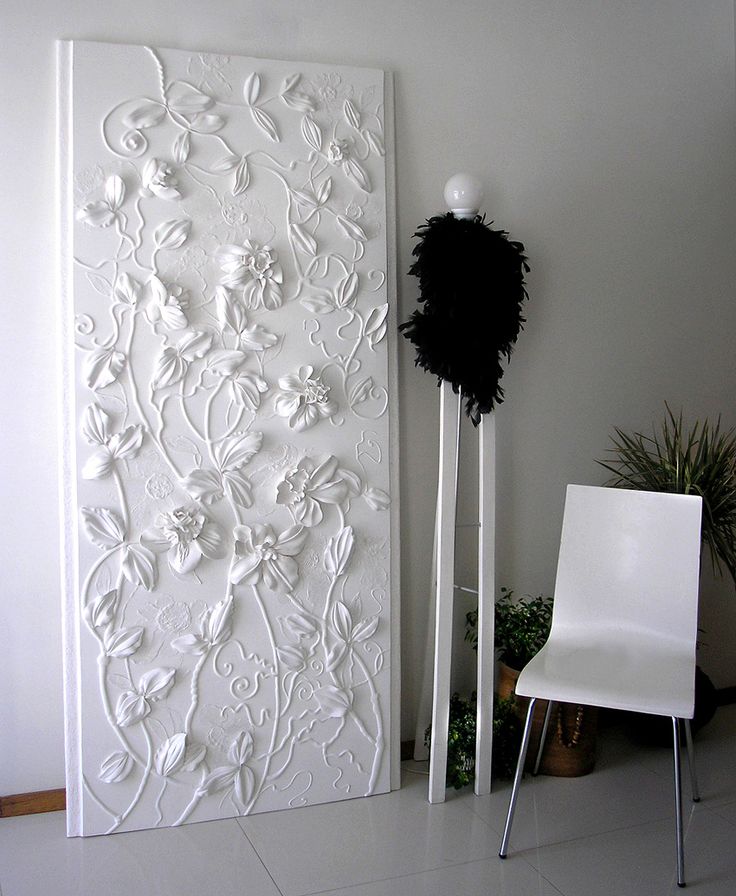 It is cut into separate pieces. Parts of the drawing are applied to the surface of the wall or ceiling and circled along the contour.
The main background is usually bleached with lime. Then each circled segment is filled with color. The fresco must be painted quickly. This requires the artist to be precise in the stroke.
In order not to waste precious time until the plaster has dried, the master must work quickly. To do this, a color drawing is made in advance. Then the tones and borders of the color are applied. Each section is written with shadows.
Remember! Paints for frescoes have a peculiarity - mixed with lime, they brighten when dried.
The craftsman will have to adjust to the nature of the surface. If the surface under the finishing plaster absorbs little water, then the drying of the fresco will be slow. If there is brickwork below that absorbs water, then the process will accelerate.
If 4-7 coats of plaster are applied, the surface will take longer to dry.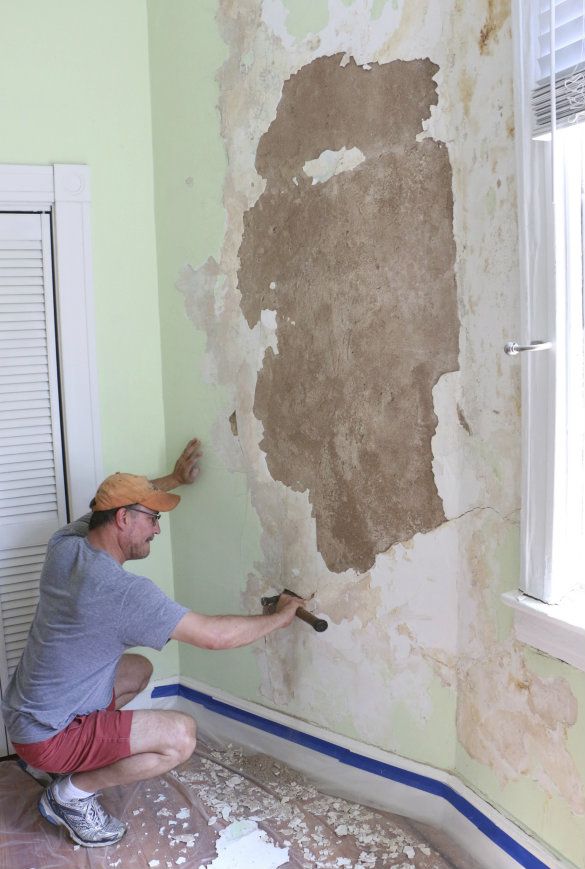 Moreover, each next layer should be thinner than the previous one. If the surface dries out, does not absorb paint well, this area is cut off, a new composition is applied to this place. The main thing is that the seam is invisible.
Application of frescoes in modern interiors.
Gone are the days of paper photo wallpapers. But pictures of nature, flower arrangements are so desirable to have in your apartment or house. Painting on plaster is a durable, original way to make dreams come true. Made by the artist according to your individual project, they will please the eye for many years.
How to hang pictures on plastered walls
Hanging a picture should be easy, right? You find the right place, hammer in a nail, and lean back in your chair, admiring your art. But when you have plastered walls, it's not that easy. If you've been wondering how to hang pictures on plastered walls without causing all sorts of damage, you're not alone. We recommend that you look at the purchase of radio devices.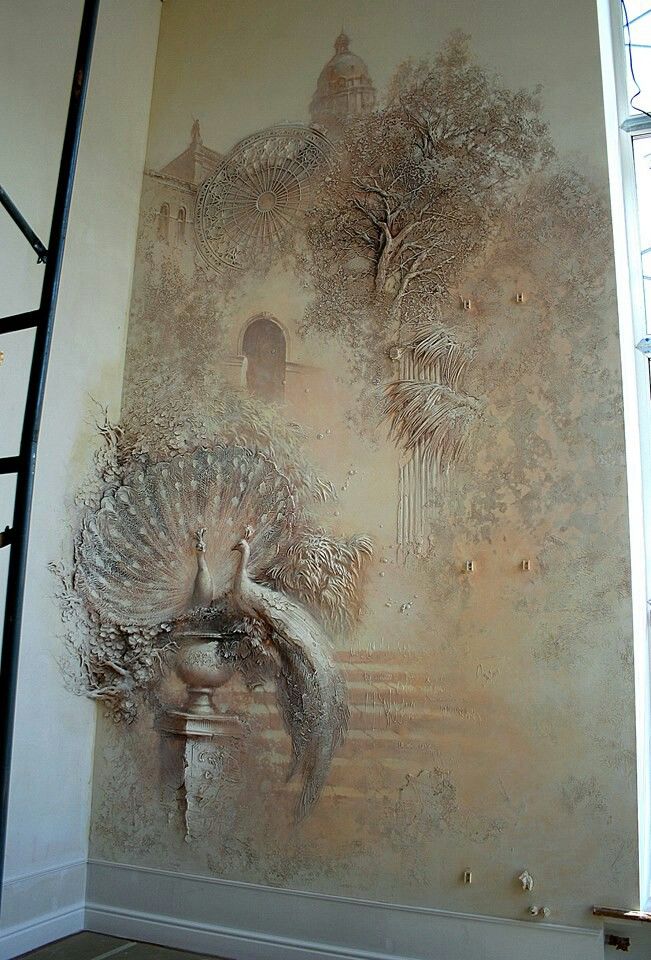
First of all, it is useful to know a little about plaster and how it differs from other materials. AS Hanging Display Systems explains that until the 1940s, stucco was the most popular choice for interior walls. The battens and plastered walls are made up of layers of wood called battens placed close together on wall studs. According to Bob, the builders apply multiple layers of plaster to the lath to form a thick, strong wall with a smooth Vila.com finish.
Although many homes have used gypsum boards instead of plaster in recent years, plaster is still sometimes used for interior walls because of its greater strength, fire resistance, and insulating properties.
How to hang pictures on plaster walls
Contents of the article
- 1 How to hang pictures on plaster walls
- 2 How to hang heavy objects on plaster walls
- 3 Using the system for hanging pictures on plaster walls
- 3.1 Similar items
Paintings or other items weighing less than 30 pounds require nothing more than plaster hooks that are angled to evenly distribute the weight. The only other tools you'll need are a measuring tape and a hammer and you're done. But you might want to dismiss plaster nails, BECAUSE hanging display systems warn that they can cause cracking. Instead, they recommend using a screw that won't ruin the plaster.
If your painting weighs less than 5 pounds and the wall surface is smooth, you can probably get by with glue hooks. The advantage of this is that they are very easy to use. First, make sure you have a clean wall surface (use soapy water or rubbing alcohol and leave to dry completely). Remove the protective strip from the back of the hook, then stick it to the wall at the desired location.
Another option is double-sided tape, but only if your painting is very light (think 2 pounds or less). Just make sure your walls are absolutely clean and dry. First stick the tape to your picture frame, then press it firmly against the wall to secure it in place.
How to hang heavy items on plastered walls
Because plaster can't support much weight, anything heavier than a light painting can put too much pressure on your wall.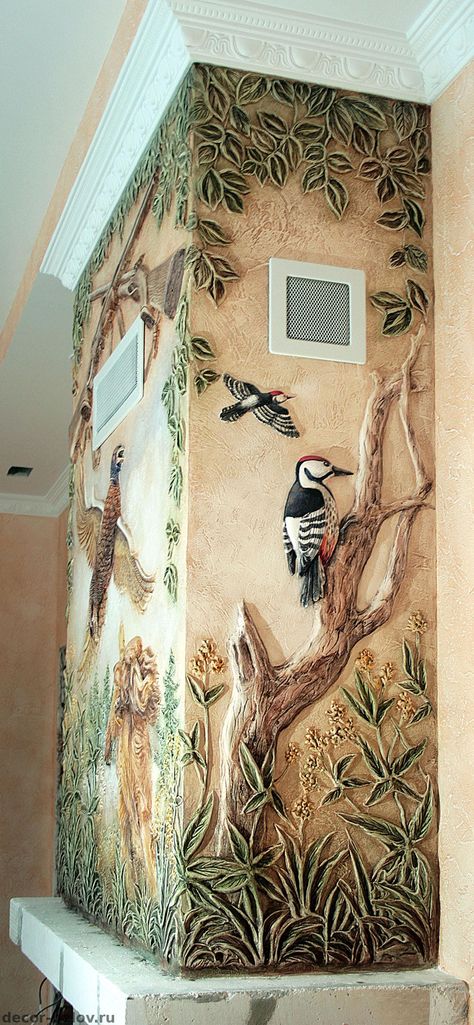 So things like heavy paintings, flat screen TVs, and floating shelves require a different approach.
The first and decisive step is to find a stud in your wall, because it is the strongest part and therefore can support the most weight. Butterfly House recommends buying a carnation finder for this purpose. You will also need 2" wood screws, plastic anchors, a drill and your drill bits.
If you use masking tape for marking and drilling, you will reduce the risk of chipping and cracking plastered walls. Then it's just a case of drilling a small hole in the wall and hoping you stumble upon a tree! If you do this, you will need to apply more pressure to the drill. (If you're not hitting the wood, you're in the space between the pieces of lath and need to reposition.) Once your screw is in the stud, you can hang your item.
Using the system for hanging pictures on plastered walls
Another good option for hanging pictures on plastered walls is a picture hanging system, such as the universal click rail hanging kit.