Painting designs on kitchen cabinets
29 Painted Kitchen Cabinet Ideas You Can Easily Copy
Devon Grace Interiors
Looking for a quick way to transform your kitchen? Invest in a fresh coat of paint—and remember that your walls aren’t the only thing worth repainting. Since cabinets are the most visible element in any kitchen, they probably deserve a tune-up more than your walls do.
“Nothing is more impactful than a fresh coat of paint,” Mary Maloney, owner and principal designer at Bee's Knees Interior Design, says. “Paint can revive, refresh, and add new life to a tired and dated kitchen.”
When it comes to repainting your kitchen cabinets, there are a few things you’ll want to consider. For starters, what does the rest of your space look like? “Plan and coordinate carefully,” Maloney says. “Think about how the colors will relate to all the other elements and connecting spaces.”
Then, consider other factors—like your home’s architectural style, and how long you plan to live in your home before reselling it. (Spoiler alert: If you plan to sell soon, Maloney recommends keeping your space as classic and versatile as possible.)
Once you’ve narrowed down your selection, you’ll still have plenty of great paint colors to choose from. So to help you pick the perfect shade for your space, we’ve rounded up some strikingly painted kitchen cabinets, and we asked designers to share their go-to kitchen cabinet painting advice.
01 of 29
Becca Interiors
If you're having trouble picking a paint color, use your space as a starting point.
“We love a pop of color, but you really need to map out a game plan that is going to make sense for the long haul,” Maloney says. “What colors will work best with the architecture and style of your home?”
02 of 29
Goldalamode
Can't settle on a single cabinet color? Paint your cabinets two different colors. Two-toned cabinets have become a popular pick for kitchens. And while you can choose any two colors you like, you’ll probably want to ground your base cabinets with a dark color and pick a lighter shade for your wall cabinets.
03 of 29
Amy Bartlam
Kitchens are filled with decorative accents. And if harmony is your goal, you probably don’t want all of them to be bold.
“Pick a focal point,” Maloney says. “Who is going to be the star of the show—the colorful cabinets, the exotic marble countertops, the statement backsplash?” Decide whether your cabinets are the statement-maker, and if they're not, keep them subdued.
04 of 29
Bespoke Only
When choosing a paint color, consider how you can add contrast to your space. Olga Hanono, the principal designer at Olga Hanono, says she loves to pair a classic kitchen with a surprisingly bold cabinet color.
“If your kitchen is very traditional, I recommend that you choose a strident color to give it a touch of creativity,” she says.
05 of 29
Julian Porcino
When choosing a paint color, don't just take a shade at face value. Pay attention to the color's undertones and consider how they'll pair with the other undertones in your space.
“Mistakes are common, and often occur due to a conflict of undertones,” Maloney says. Undertones are typically either warm (yellow) or cool (blue), and you’ll want to stick to one or the other.
06 of 29
Finding Lovely
There's nothing wrong with keeping it simple. Warm white cabinets are a favorite for a reason—they reliably look good.
“We love color, and we get excited when a client lets us ‘play’ with color, but you can’t go wrong with a classic white cabinet,” Maloney says. “A warm white is a favorite ‘go-to’ for cabinetry.”
07 of 29
Reena Sotropa
Your cabinets should pair well with the rest of your kitchen, so turn to your backsplash for color inspiration. Match your cabinets directly to your backsplash, or use your cabinets as an opportunity for contrast: If your backsplash is bold, could you mellow out your kitchen with a neutral cabinet color?
08 of 29
Erin Williamson Design
If you're painting your cabinets more than one color, consider divvying up your shades by cabinet style. Paint your base cabinets one color and your wall cabinets another. Or make your floor-to-ceiling cabinets a different color than the other cabinet styles in your space.
09 of 29
Becca Interiors
Black may seem like an odd color for kitchen cabinets, but the bold neutral can look great in classic and contemporary kitchens, alike. If you find yourself drawn to a dark color, go for it.
10 of 29
Design: Mindy Gayer Design, Photo: Vanessa Lentine
Keep your kitchen sleek by matching your cabinets to your walls—and matching your walls to your ceiling. This top-to-bottom approach will create one continuous wall of color, which is sure to make a statement, even if the color you choose is white.
11 of 29
Design: Mindy Gayer Design, Photo: Vanessa Lentine
Color isn't the only thing you can play with when it comes to cabinetry. Texture can make your space more dynamic, too. “I like not only using paint for the cabinets,” Hanono says.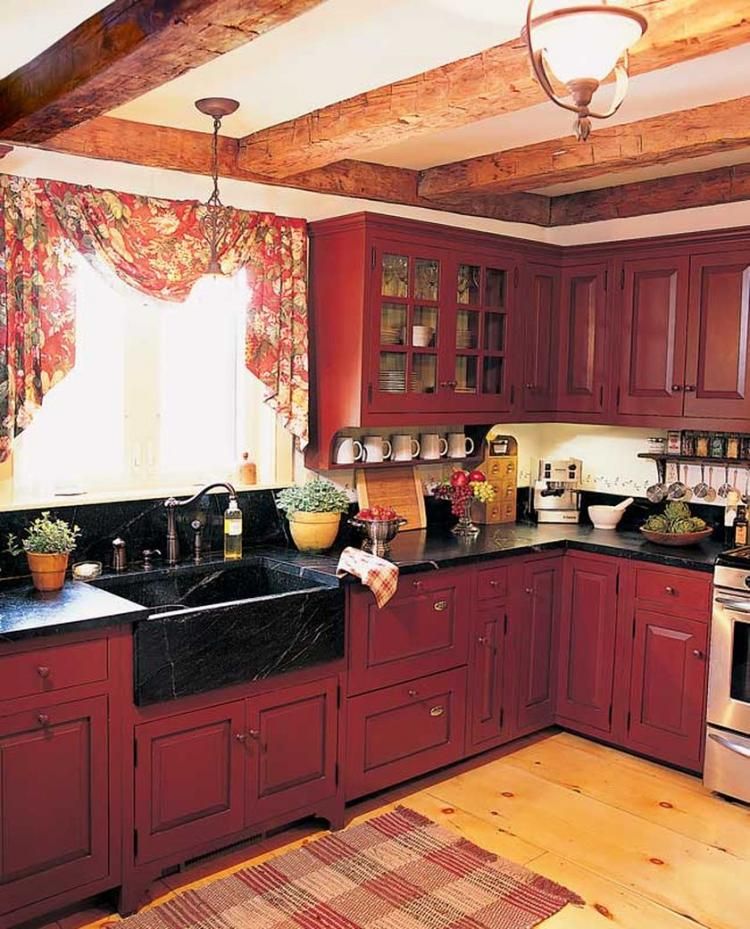
She notes that by layering paint over a textured material—like a mesh cabinet door or a deep-grained wood—you can “give a special touch” to your kitchen.
12 of 29
Finding Lovely
If you have any glass door cabinets, consider the items you store inside them. Since glass is transparent, these items will shine through—affecting the way your paint color looks. Treat these items like you’d treat the other accents in your kitchen: Choose a cabinet color capable of complementing them.
13 of 29
Julia Robbs
Since your kitchen counters probably touch your kitchen cabinets, you want the two to pair well. “The cabinet colors you select must play nicely with your solid surfaces,” Maloney says.
Keep your colors complementary, and balance out your space. If your countertops are particularly bold, keep your cabinets subtle—and vice versa.
14 of 29
Finding Lovely
Cabinets come in different styles, and you want to make sure the paint color you choose suits the kind of cabinets you have.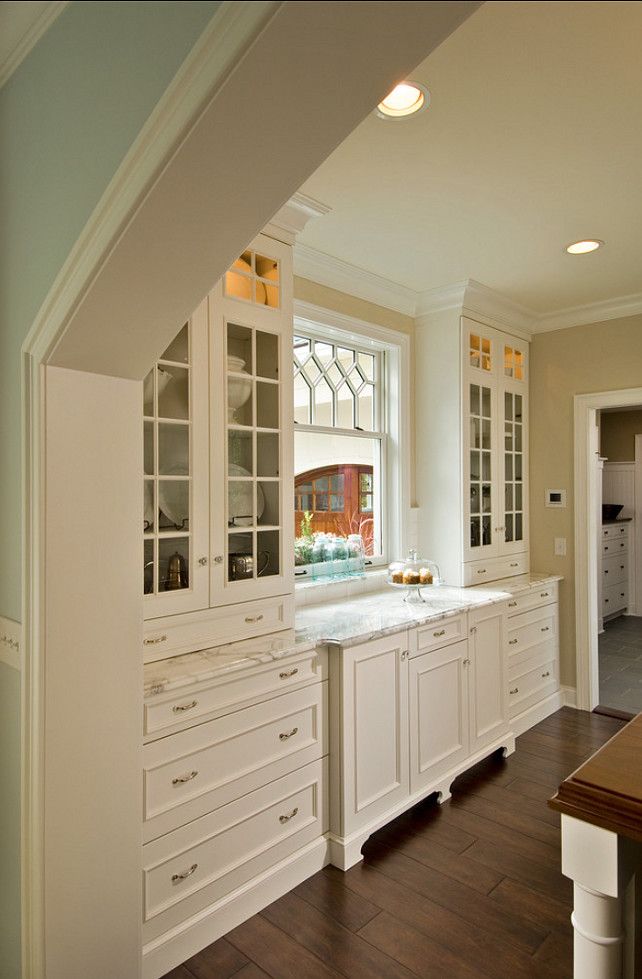 If your kitchen is lined with modern slab cabinets, complement them with a contemporary color, or add contrast by pairing versatile shaker cabinets with a surprisingly bold shade.
15 of 29
Jessica Nelson Design
When choosing a paint color, you need to consider every color that's in your kitchen—and every color you can see from your kitchen. (This is particularly important if you have an open floor plan.)
“Are there open site lines visually connecting your kitchen to other living areas?” Maloney says. “If so, you must think about how all the colors relate to each other—do they play nicely together?”
16 of 29
Design: Mindy Gayer Design, Photo: Vanessa Lentine
If you went all out with your kitchen—pairing bold countertops with textured light fixtures and a statement ceiling—your cabinets may be a good place to take a breather. Choose a neutral that will lend your space the cohesion it needs. And if that sounds boring, remember that neutrals abound.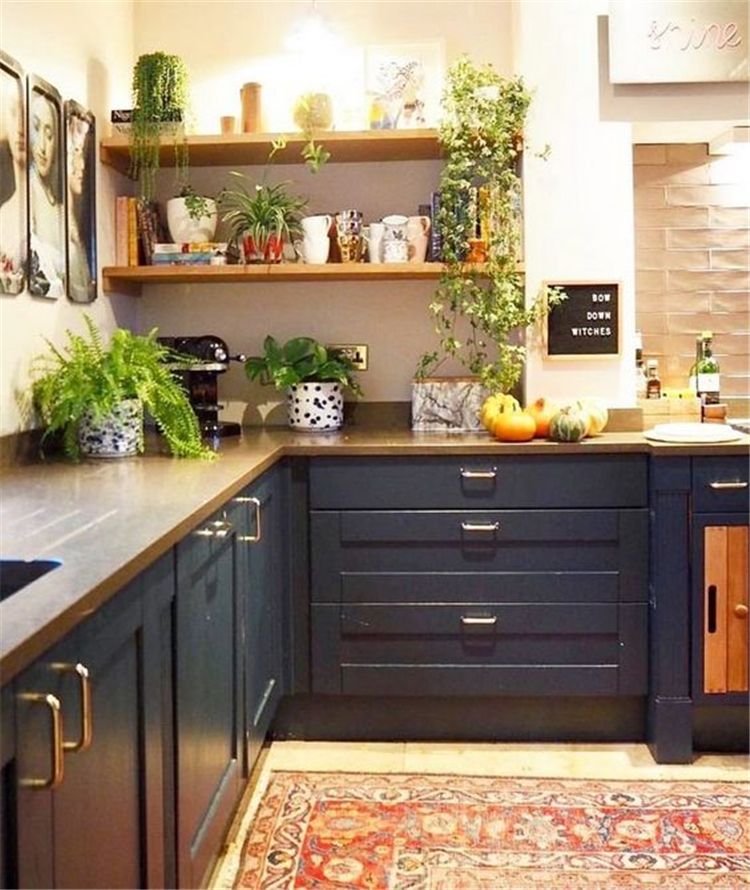 (Your options aren't limited to cool white or warm white.)
17 of 29
Ashley Montgomery Design
A range hood is an eye-catching element in any kitchen, so consider painting it the same color as your cabinets. This is an easy way to bring your space together, and it can look particularly statement-making if your range hood is situated between matching cabinets or shelves.
18 of 29
Design: Mindy Gayer Design, Photo: Lane Dittoe
Cabinet exteriors get all the attention. (And rightfully so—they're the first thing someone will see when they step into your kitchen.) But cabinet interiors deserve some love, too. For a striking effect, paint your cabinet interiors the same color as your cabinet exteriors. Then they're sure to look great, whether they're open or shut.
19 of 29
Proem Studio
Your floors may not be the first place you turn for kitchen cabinet inspiration. But since they're a major part of your space, they're worth keeping in mind.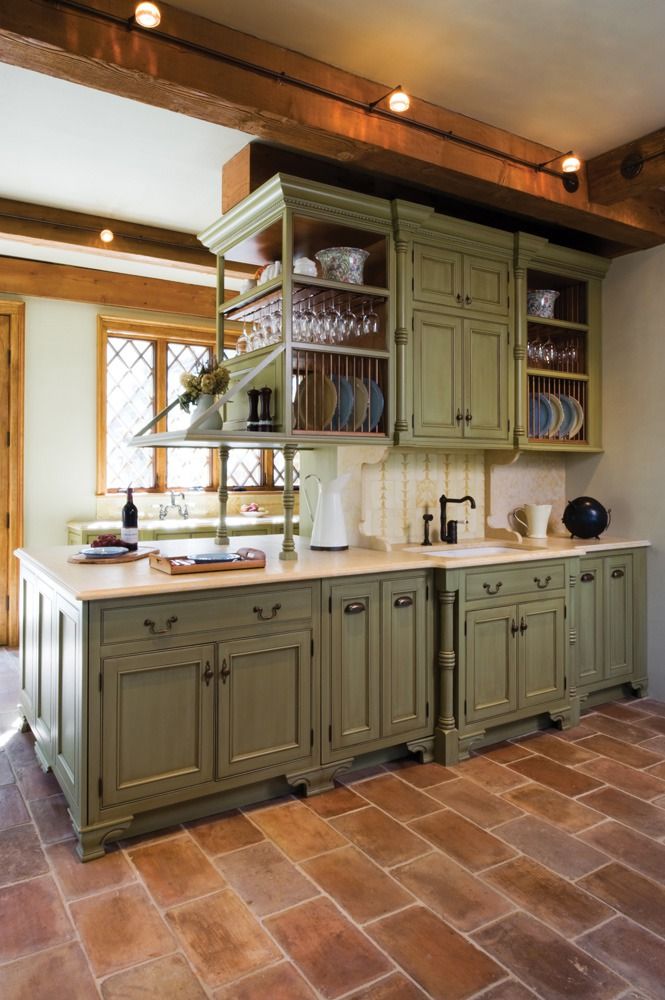
“You need to factor in your flooring, backsplash, and countertop materials,” Maloney says. So keep your undertones consistent. And if your floors are particularly striking, balance them out with subtler cabinets.
20 of 29
Becca Interiors
If you want your cabinets to blend into your space without matching your walls exactly, choose a color that's a shade or two darker than your walls. Since the shade will be in the same color family, it should naturally suit your space—while adding a subtle dose of contrast to your kitchen.
21 of 29
Amy Bartlam
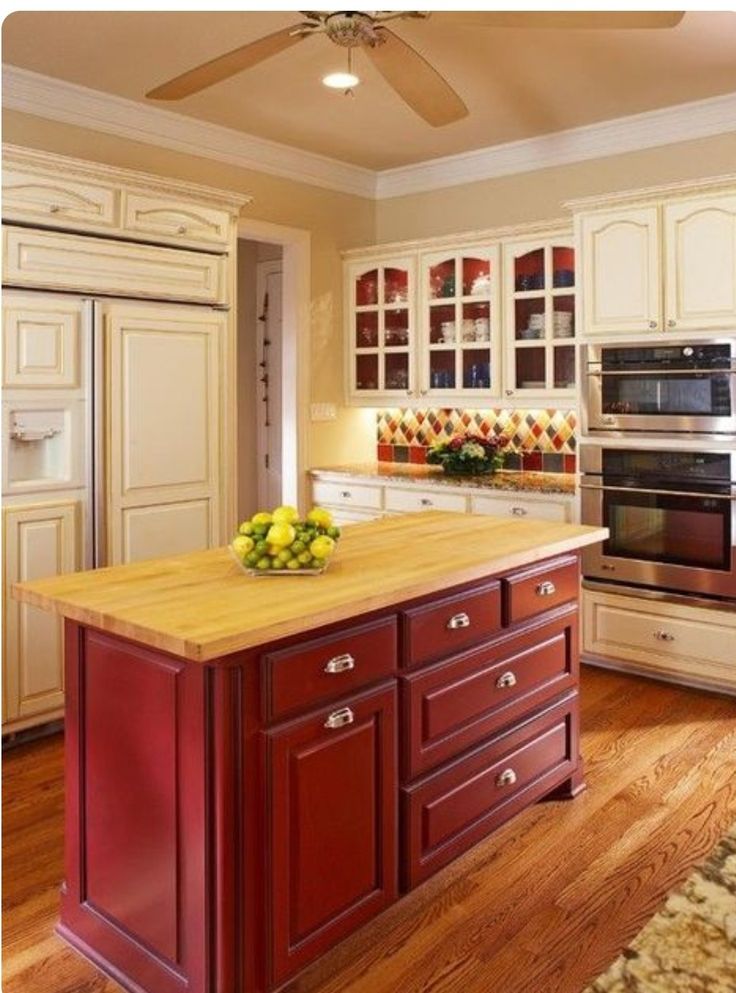
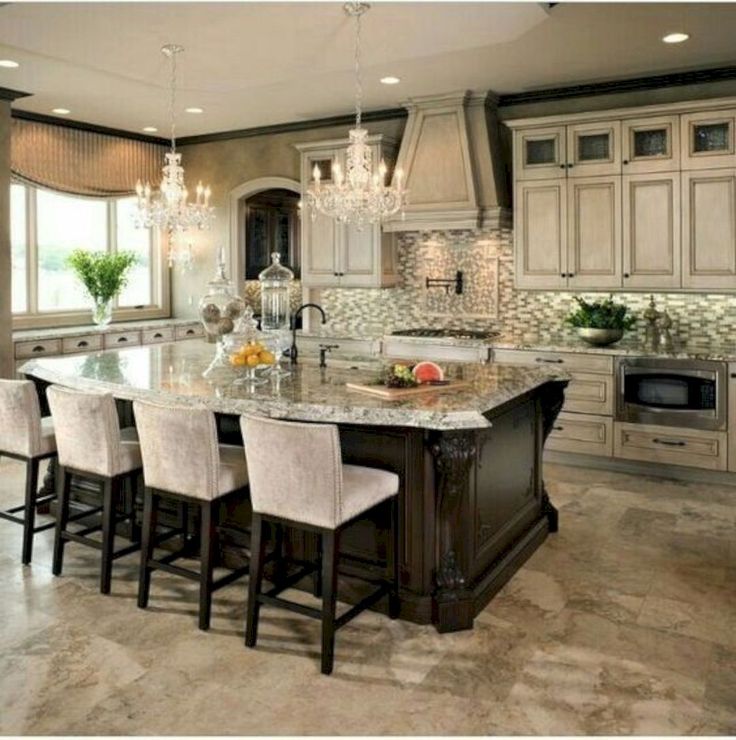
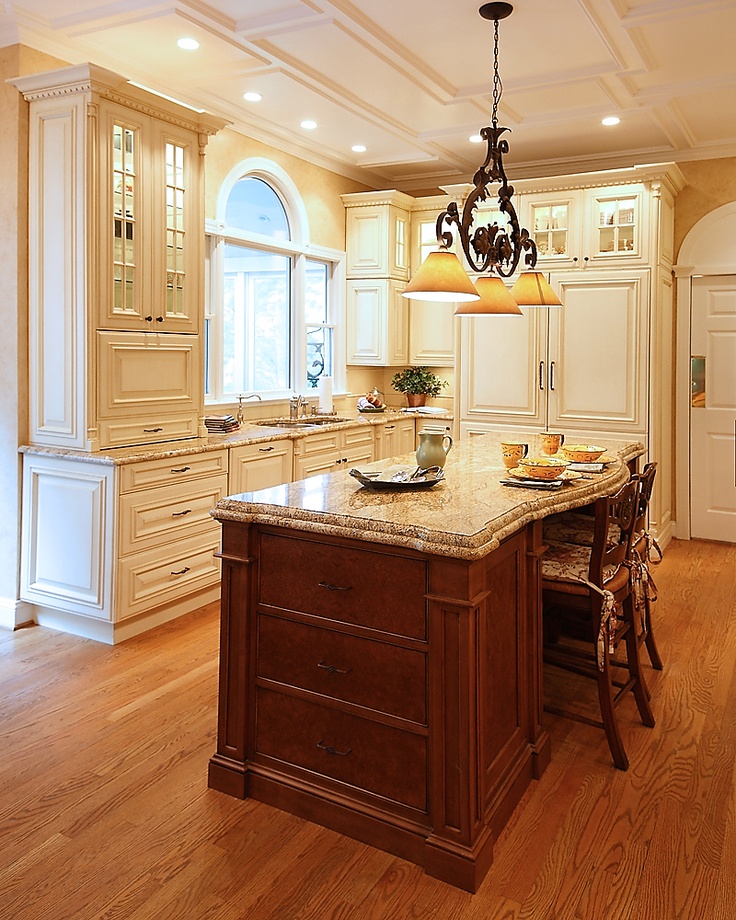
Craving a kitchen that feels classic but not conventional? Paint your cabinets a subtle shade, and save the pop of color for your island. “You can play it safe by introducing a pop of color for the island area,” Maloney says.
22 of 29
Tyler Karu
Remember that you don't have to paint all your cabinets. In fact, by painting most of your cabinets—and leaving some unpainted—you can create a pop of un-color that’s just as bold as a pop of color.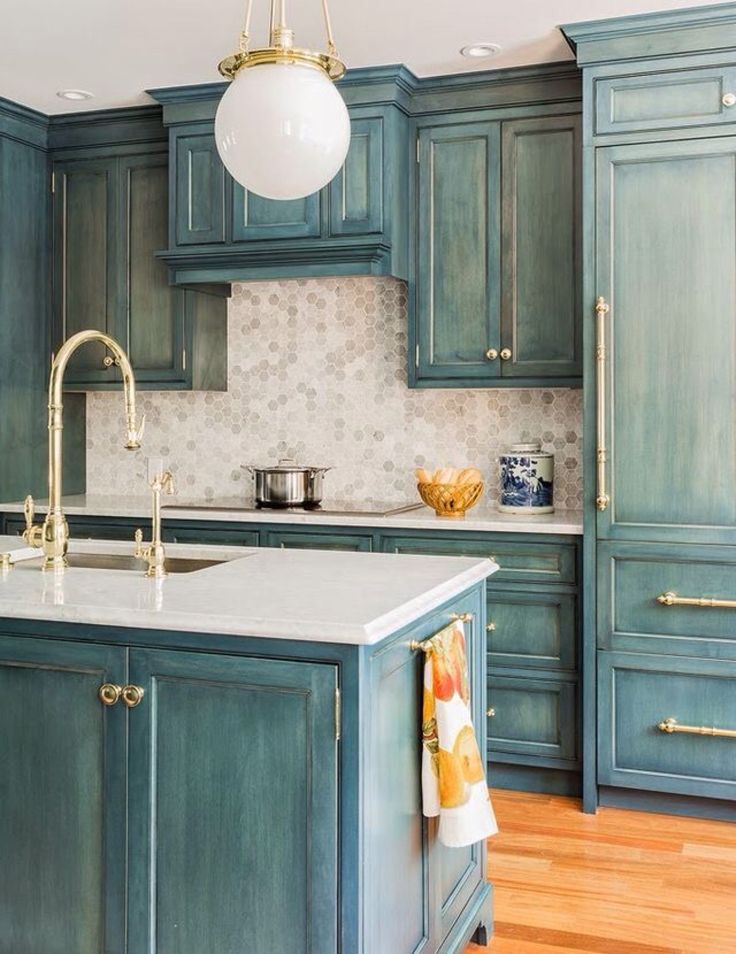
23 of 29
Tyler Karu
On-trend colors can be incredibly tempting, but Maloney cautions against them. “Stay away from anything too trendy, and think about what you are going to love for the long haul,” she says.
24 of 29
Design: Mindy Gayer Design, Photo: Vanessa Lentine
One sneaky place to add an accent color? Your cabinet interiors. If your cabinets are open, this can be a great way to add contrast. And if your cabinets are closed, this detail can serve as a fun finishing touch—one that’s only visible when your cabinet doors are open.
25 of 29
Devon Grace Interiors
Picking three different cabinet colors may seem like overkill. But if all three shades are neutrals, they should play surprisingly well together.
26 of 29
Homemade by Carmona
If you can’t commit to wall-to-wall color, designate a few statement cabinets to paint a vibrant shade. Look around your space for worthy candidates: could the tiny cabinets above your oven become the pop of color you’re looking for?
27 of 29
Devon Grace Interiors
Anxious about adding color to your space? Push yourself to take a risk. “I encourage people to dismiss their fear of colors and experiment,” Hanono says. “You can add a lot of freshness to your kitchen with a bit of color.”
28 of 29
Devon Grace Interiors
No kitchen cabinet is complete without a little hardware. So factor accents—like hinges, doorknobs, and drawer pulls—into your painting plan. “If you wish to update or replace hardware, make that decision before the painting begins,” Maloney says.
After all, your new hardware might affect your cabinet color choice. And if it’s a different size than your old hardware, you might have some holes to fill in before painting.
29 of 29
Calimia Home
Colors can look different at different times of day, so spend time with the colors you’re eyeing before committing to them. “Do color tests,” Hanono says. “Colors don't always match.” And they don’t always look the way you thought they would, either.
12 Ways to Revamp Your Kitchen Cabinets for the Ultimate Makeover
30 Painted Kitchen Cabinet Ideas in A Variety of Beautiful Colors
Painting your kitchen cabinets is one of the easiest ways to completely change the look and feel of your kitchen on a budget.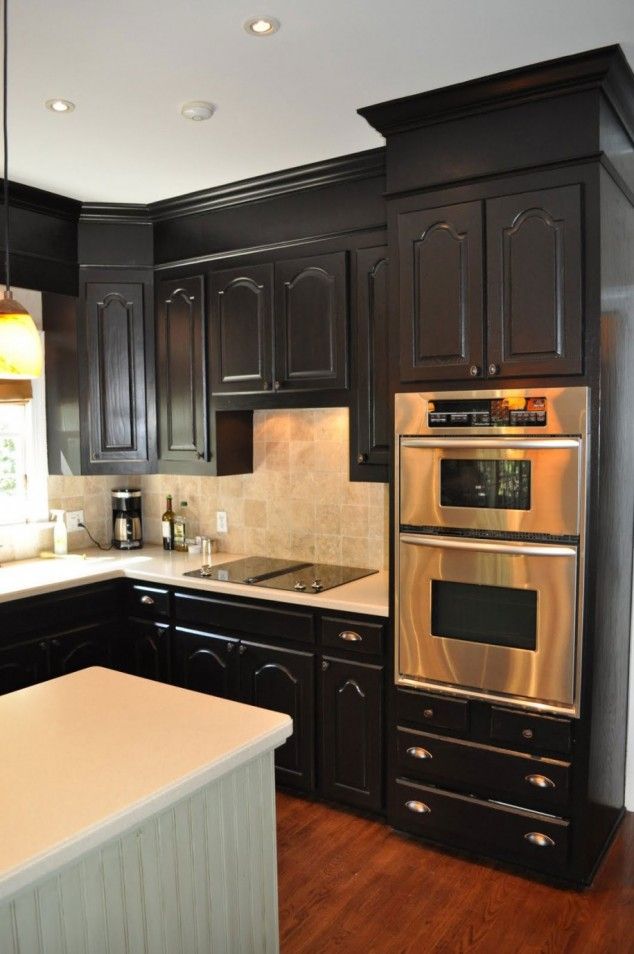 These 30 beautiful painted kitchen cabinets include ideas for many different styles of cabinets painted with a whole range of gorgeous colors.
Painted kitchen cabinets are very popular and it isn’t hard to see why.
A fresh coat of paint can make even the most dated kitchen look fresh and new in just a few days. It really is amazing how much painting your cabinets can completely transform your kitchen even if you don’t change anything else in the room.
You can hire a professional to paint your cabinets, but I highly recommend painting your own kitchen cabinets as a DIY project.
Painting cabinets isn’t a particularly difficult or complicated DIY and you will save thousands of dollars by doing it yourself rather than paying someone else.
But even if you decide DIY isn’t for you, hiring a professional to paint your cabinets is still much more affordable than taking on a full kitchen remodel.
This post contains affiliate links which means if you make a purchase after clicking a link I will earn a small commission but it won’t cost you a penny more.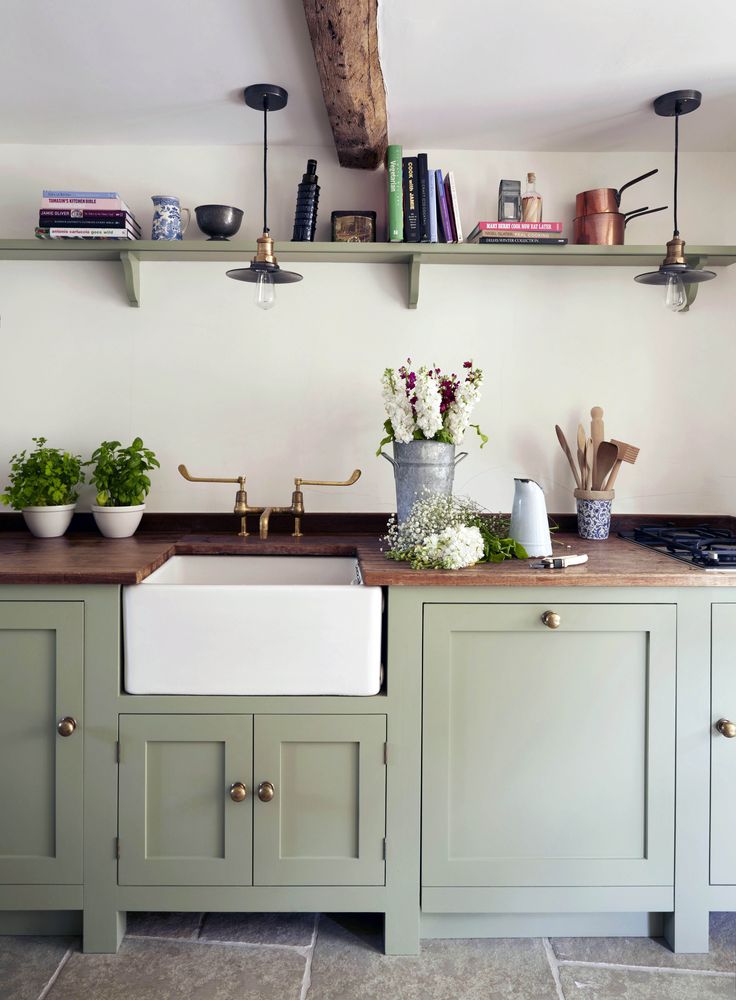 Click here to see my full disclosure policy.
Before we get to all the beautiful kitchen cabinet inspiration, I want to share a few tips for choosing the right paint for your kitchen cabinets.
When you decide to paint your cabinets, you have two very important decisions to make –
- What paint color to choose.
- And what type of paint to use.
Choosing the best paint color for your painted kitchen cabinets
Choosing the right paint color for your kitchen cabinets is the fun part. But it can also be extremely intimidating.
Your kitchen cabinets are usually the biggest component of your kitchen. That’s why painting them can completely transform your whole kitchen.
But that also means that the color you choose is going to have a huge impact on your finished kitchen so you want to choose a color you are going to really love.
Different paint colors can give the same kitchen a completely different feel.
White or gray might be perfect for that modern farmhouse look while a deep dark green or even black can give a more contemporary, sophisticated look.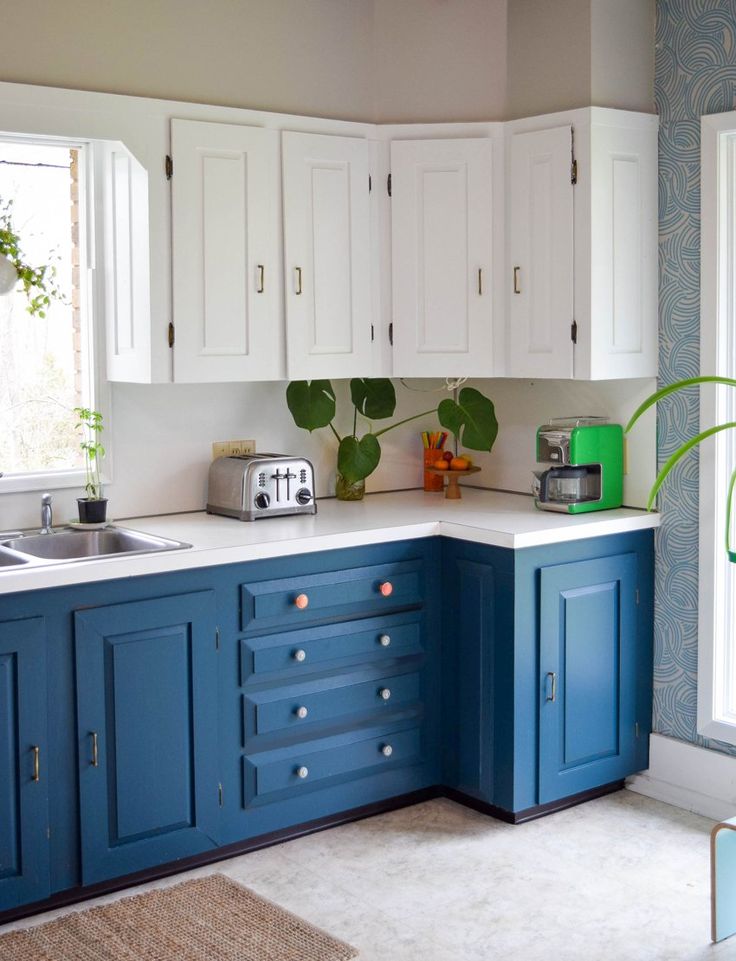
The most popular colors for kitchen cabinets right now are white, gray, shades of blue, shades of green, and black. But that doesn’t mean you can’t choose any color you like – I’ve even seen pink kitchen cabinets that looked beautiful!
I’ve gathered kitchens with cabinets in a wide range of colors below to make it easier to see how different paint colors affect the look and feel of different kitchens.
Choosing the best paint for your painted kitchen cabinets
Just as important as the color is what type of paint you use to paint your cabinets.
Most of us use our cabinets every single day, opening and closing cabinets and drawers repeatedly, and all of that use can quickly destroy a poor paint job.
The biggest factor in making sure your beautiful paint job will last is using a high quality paint that is meant for cabinets. This isn’t the time to grab some leftover wall paint and start painting.
The great thing about painted cabinets being so popular is there are now lots of great cabinet paints out there with new ones coming out all the time.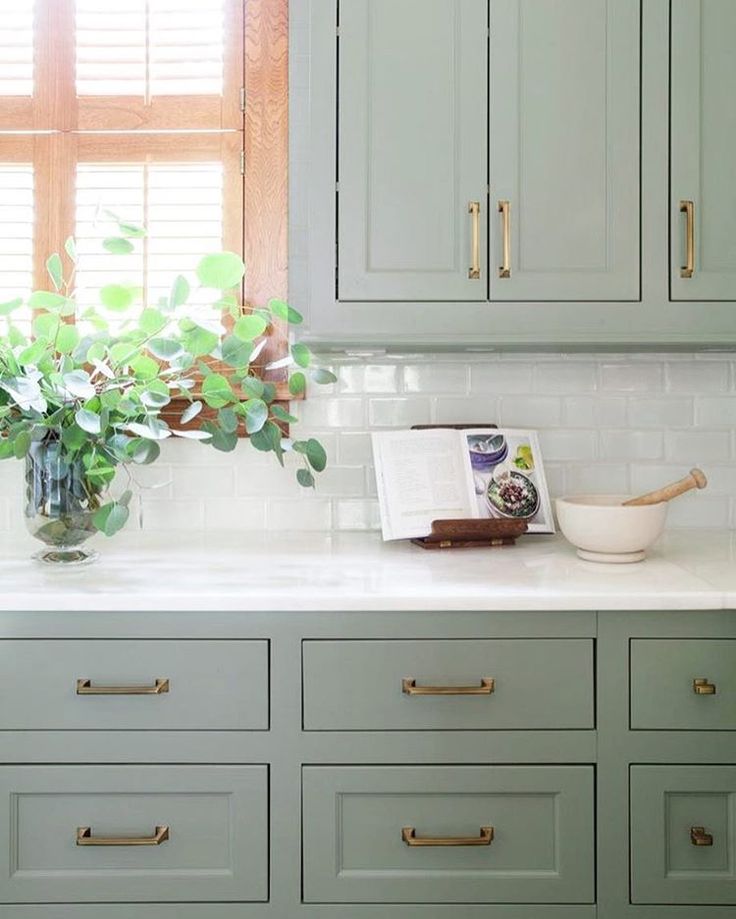
I haven’t tried all the cabinet paints available, so I can’t comment on all of them, but I do have two paints that I highly recommend for painting kitchen cabinets.
Both of these paints hold up well to moisture and regular cleaning, resist yellowing over time, and dry to a very durable finish.
My top paint picks for painting cabinets
Benjamin Moore Advance
Benjamin Moore Advance is a self-leveling, non-yellowing, paint that helps block stains. It is also low VOC, low odor, dries to a hard finish, and does not require a separate sealer. You will need to use primer before using this paint on wood cabinets.
General Finishes Milk Paint
General Finishes Milk Paint is actually an acrylic paint, not a true milk paint, and doesn’t usually require primer. It is easy to work with, goes on smoothly, and dries to a hard finish. A separate sealer is not required, but it is recommended to use a sealer for high-traffic projects like painting cabinets.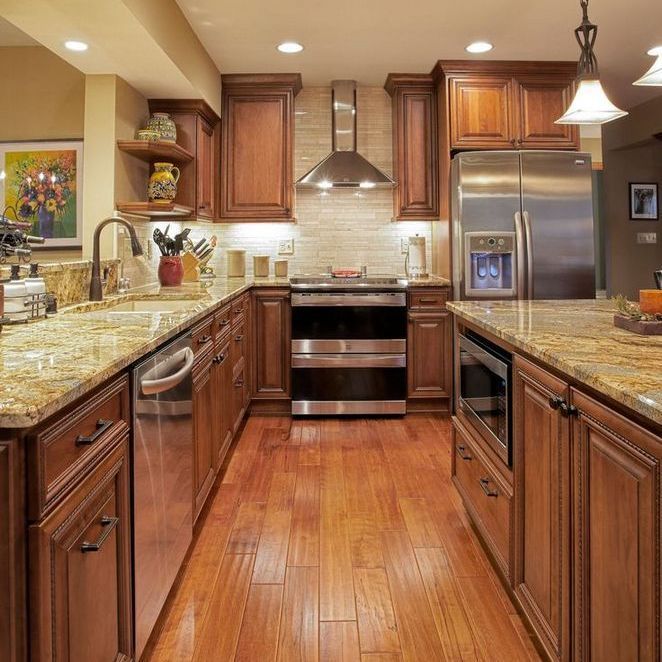
General Finishes High Performance Topcoat is my top pick for sealing painted cabinets. I’ve used General Finishes Milk Paint + High Performance Topcoat to paint my bathroom cabinets as well as many furniture pieces and they have held up beautifully.
Kitchen Cabinets Painted White
You can never go wrong with classic white cabinets. They look beautiful in any style kitchen and work well with every type of countertops, backsplash, or flooring.
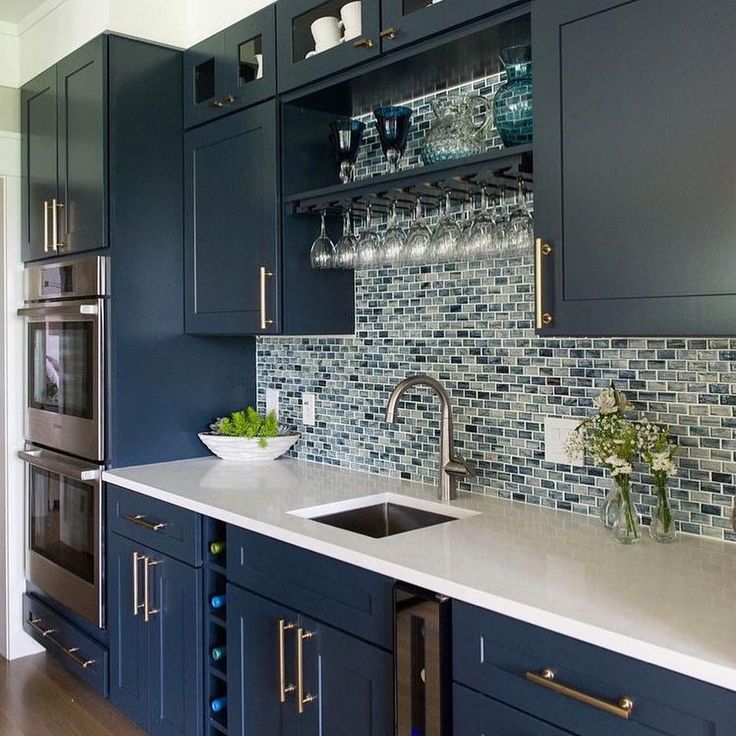
Blue Painted Kitchen Cabinets
Blue painted cabinets have gotten very popular in recent years and it's not hard to see why! Whether it's a dark navy or a lighter shade of blue, painting your cabinets blue is a great way to really make them stand out.
Gray Kitchen Cabinets
If you want a great neutral color for your cabinets, but white's not for you, gray may be the perfect choice!
Kitchen Cabinets Updated with Green Paint
Green is an increasingly popular choice for painted cabinets and once you see these gorgeous makeovers you will understand why!
More DIY kitchen projects I think you’ll like:
- 21 Best Budget Kitchen Makeovers
- Painting oak kitchen cabinets white: the secret to perfectly smooth cabinets
- How my painted countertops look after three years of use
- Where to buy inexpensive cabinet knobs and pulls
I’d love for you to pin this post on Pinterest!
Furniture painting, how to do it yourself and what you need for work
A good way to decorate, update or give the elements of the decor a certain style is furniture painting.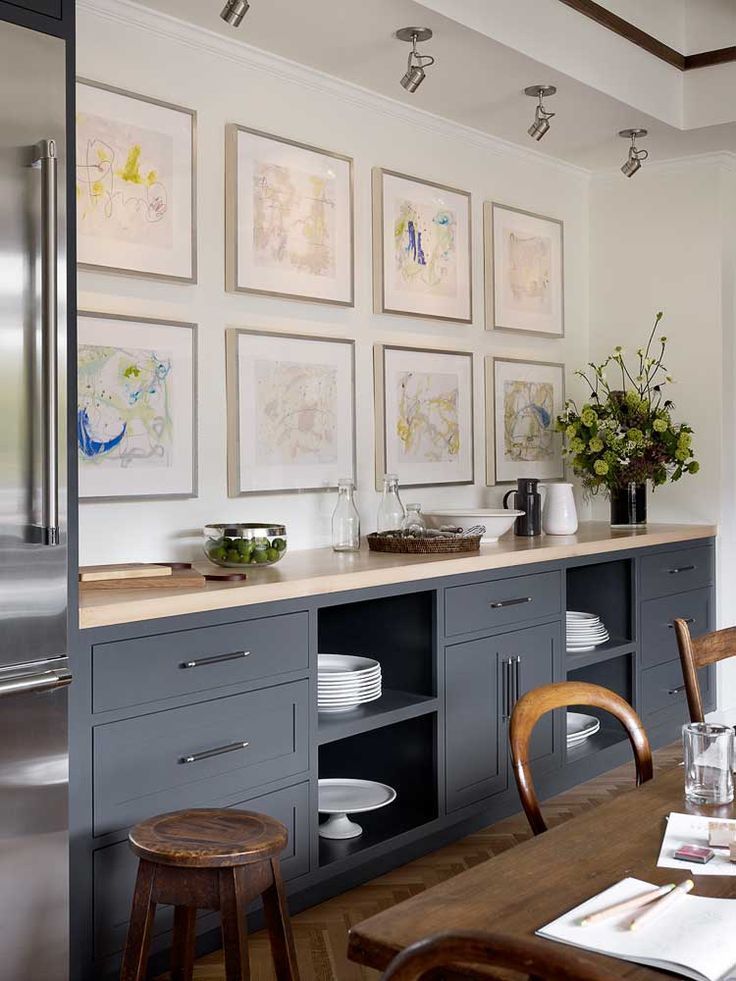 From any, even the oldest interior items, you can create a unique work of art. Everything is limited only by imagination and patience.
Contents
- Best furniture to use
- Popular painting options
- Tools and materials needed
- Paint for covering
- Article
- Lac
- Brushes and painting roller
- Brushes for drawing, pencil, paper and line 9000 Video
Which furniture is better to use
Of course, there are no restrictions on the choice of items. The main factor determining suitability is the material. For the implementation of the plan, old furniture made of wood is better suited. This is precisely its value relative to modern products made from chipboard and fiberboard. “Sawdust furniture” is definitely not suitable.
Wood surface is easier to work with. Old paint or varnish can be easily removed, various defects (chips, cracks) can be removed or left to give the effect of "aging".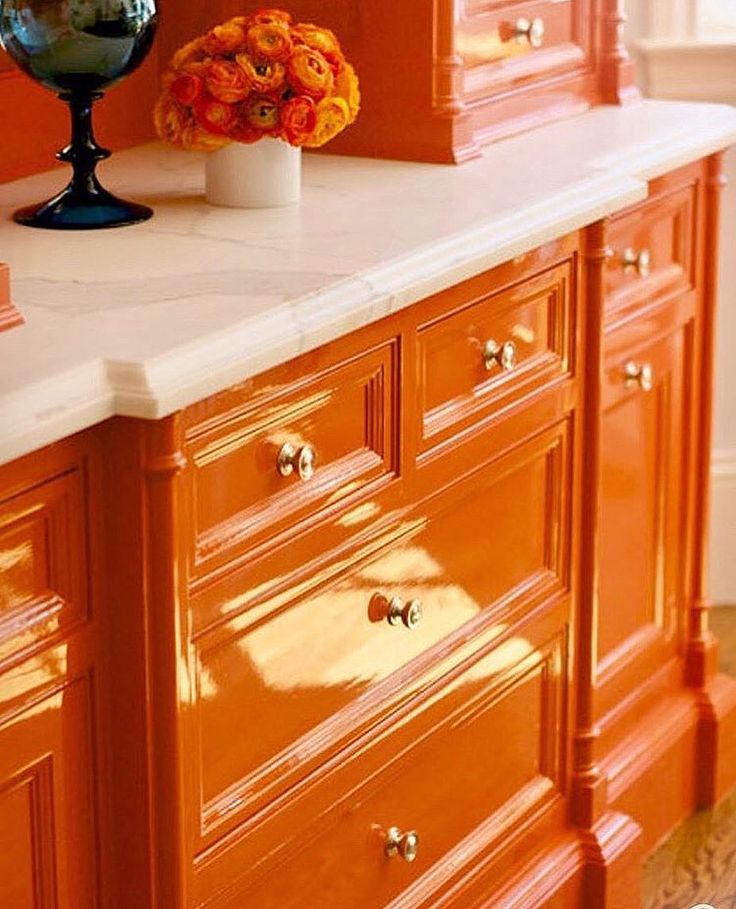 In addition, most of the ways of applying drawings are designed specifically for wood. Any pattern or ornament looks good under varnish on a wood texture. Suitable furniture, covered with natural veneer. An example of this is an old wardrobe or chest of drawers made of multilayer veneered plywood. After removing the old varnish or paint, the surface is primed, painted in the desired color and a pattern is applied.
But furniture made from modern materials should not be crossed off the list. Acrylic-coated MDF facades can be painted in any style after some preparation. Acrylic coating is a layer of paint that is polished after drying. This type of coating is often used in the manufacture of facades of kitchen sets.
Modern paints and varnishes allow them to be applied over various coatings. There are also paints designed for painting glass without special preparation.
Popular painting options
The most common option is a simple decorative painting of furniture.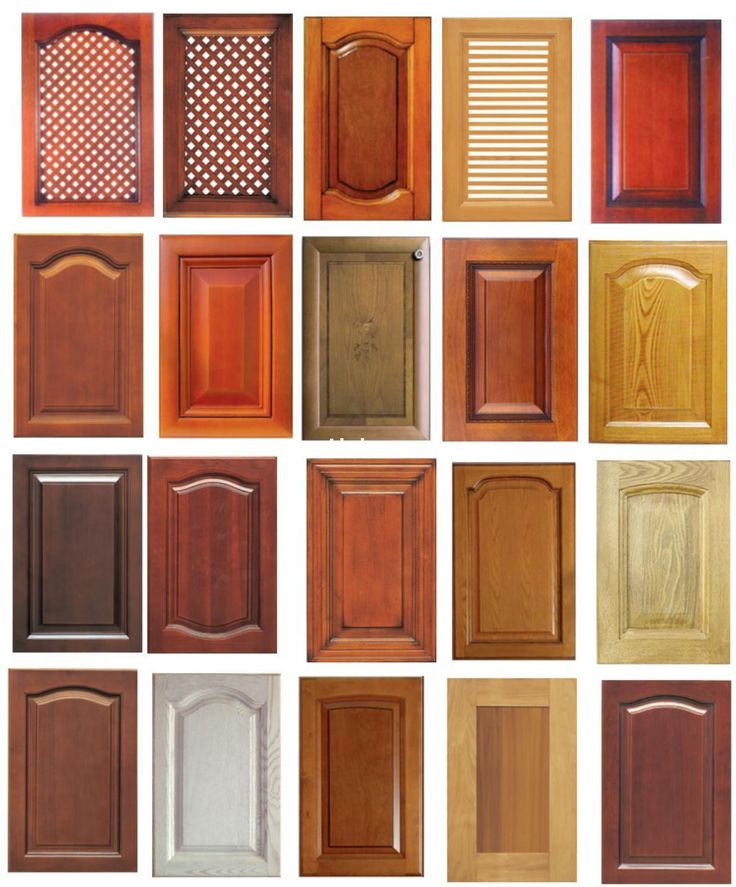 Basically, this is the application of small elements, ornaments or repeating patterns. For a simple drawing, paint of the same color is used, and to simplify the process, templates or stencils are used for painting. This type of decoration is suitable for modern furniture. Gilding is widespread. This type of painting is typical for interiors in classical styles. Figured elements of furniture decoration are decorated under gold.
Artistic painting is a more complex option. This is a rather painstaking work, all stages of the kora are performed manually, including the smallest details. Painting on furniture can be in the form of a pattern or a small fragment, as well as a complex three-dimensional pattern. Author's works are especially appreciated.
A separate place is occupied by the production of semi-antique interior items. This also includes the restoration of old furniture. Various painting techniques and styles are used in the work. Surfaces and trim elements are subjected to "aging" in various ways.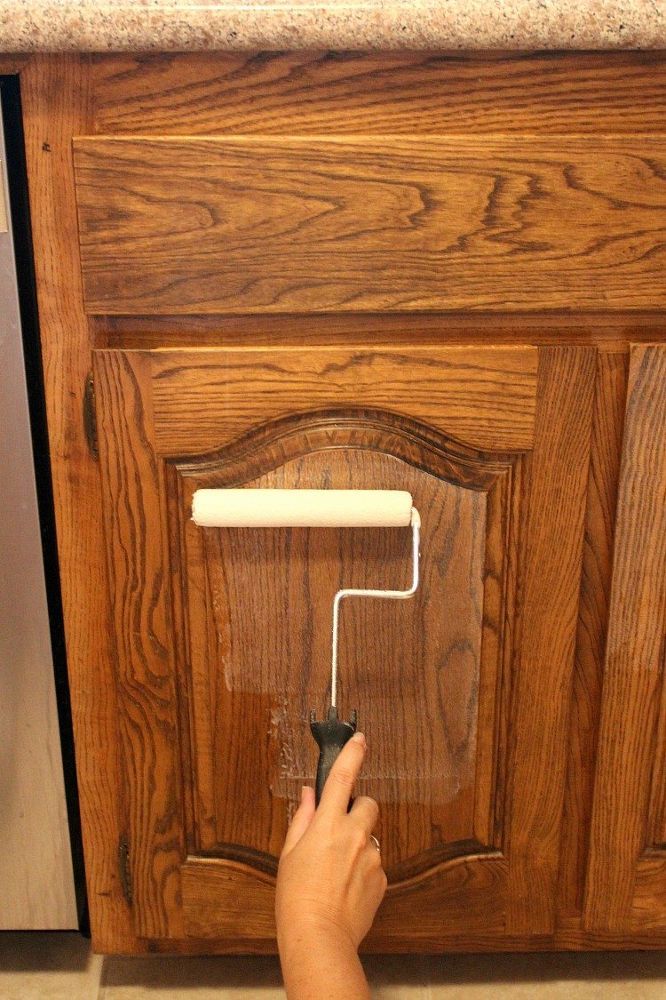 Antiques are very popular among wealthy people and collectors. Usually this type of decoration is made to order.
Tools and materials required The basis for the coating is a primer. It must be designed for woodworking. Acrylic-based primer does a good job.
Any latex or acrylic paint will work for the top coat. The surface is better to make matte. Gloss doesn't always look good. A good option would be paint in an aerosol can. This will allow you to apply it in an even layer.
Art paints
Acrylic paints are often used for furniture painting. They are well suited for drawing various patterns. You can also use oil mixtures. Their traditional purpose is painting.
Lacquer
It acts as a protective coating. It is possible to use alkyd or acrylic varnish for furniture. Also, like paint, it can be matte or glossy. Applying a layer of varnish over the drawing is the final stage of work.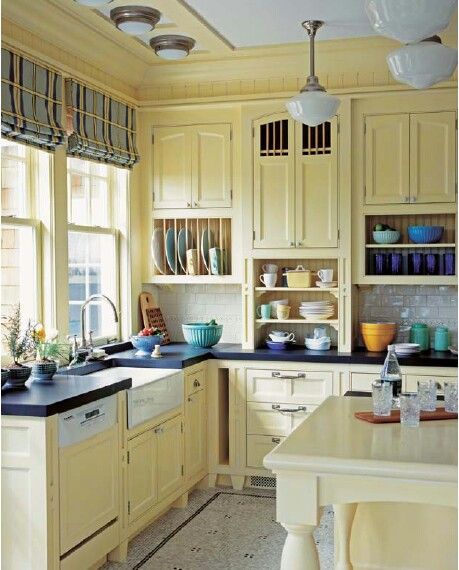
Paint brushes and roller
A roller may be needed to apply primer and paint over a large area. With curly elements, a wide brush will help to cope.
Drawing brushes, pencil, paper and ruler
Draw fine patterns and lines with fine art brushes. For acrylic paint, it is better to use brushes with synthetic bristles. It won't stick. Oil paint will require a brush with natural bristles.
A simple pencil, paper and ruler are useful for sketching and marking the surface for drawing. In addition, you may need to make templates or stencils for painting.
Surface preparation tool
Remove old varnish or paint from furniture by sanding it with sandpaper. You will need "sandpaper" of different grain sizes for a more thorough surface treatment. In some places, the old coating will have to be removed with a spatula.
Some types of varnish or paint can be removed from old furniture with special chemicals.
You can find them at any hardware store.
Use a cloth to remove dust. A brush with a long and hard bristle will help to sweep dirt out of cracks and other hard-to-reach places.
How to create a design and implement an idea
Do-it-yourself furniture painting is a long and painstaking work. The process may take a long time. Sometimes it takes more than one day or even a week. It is especially difficult if there is no experience in such a matter, it does not matter if we paint old furniture or give a new look to modern objects.
For beginners, a few tips will not be superfluous:
- Any work begins with a sketch or sketch. You can develop a design yourself or borrow the idea of painting furniture from a photo on the Internet. In any case, transferring a drawing from paper will be easier than inventing everything on the go;
- In the absence of experience, you should not immediately take on a large amount of work.
 First, paint a small object;
 - If you can dismantle the furniture, do it. The individual parts are much easier to work with;
- Free space. There should be enough space to work. It is possible that the furniture will have to be rotated, tilted or moved;
- Do not neglect the quality of surface preparation. Polishing defects can spoil the look of even a very talented painting. Dust and small particles lead to the same result;
- Primer is a must for painting or painting. It is easier to work on a surface covered with soil;
- Each coat of primer, paint or painting must be thoroughly dried. Minimum - a day for each layer.
The process of implementing an idea consists of several stages. The first one is preparation for priming and painting. The classic version with old wooden furniture involves the removal of the paintwork. To do this, you will need coarse and medium grit sandpaper or a special chemical agent - a wash and a spatula.
- After removing varnish and paint, sand the surface with fine sandpaper. This will get rid of excessive roughness and small scratches. If there are large chips and cracks on the furniture, they are puttied and sanded;
- The next step is to apply the primer. This is done with a brush or roller. Drops and streaks should be avoided. In extreme cases, you can get rid of them using a sponge, or wait for the layer to dry and sand it with sandpaper;
- Next comes the painting. The paint is applied in two or three thin layers. The result should be a smooth and even surface. After drying, you can proceed to the most interesting, but no less time-consuming stage - drawing;
- Furniture with paintings - not necessarily an old wardrobe or chest of drawers, covered with patterns on all sides. More often it is a small pattern or a repeating pattern. To apply the same patterns, use a stencil or template. These can be simple butterfly stencils, small patterns, or large patterns with complex patterns.
There is more than one way to paint furniture. Hand painting is especially appreciated. Painting can be considered the pinnacle of skill. Combining various ways and techniques of painting, it is possible to create truly unique things:
- Those who do not use a brush can use the decoupage technique. This method is usually used on small pieces of furniture, but large surfaces can also be decorated;
- The final stage of work is the coating of the painting with a transparent varnish. It is advisable to apply several layers. This will save the drawing from accidental damage and make it possible to wipe or wash the furniture.
The art of painting makes any object unique. You can paint furniture using any traditional or modern direction. Furniture painting in the Russian style is very popular: Khokhloma, Zhostovo, Mezen. Each of them is unique in its own way. And of course, nothing prevents you from creating your own, no less unique style.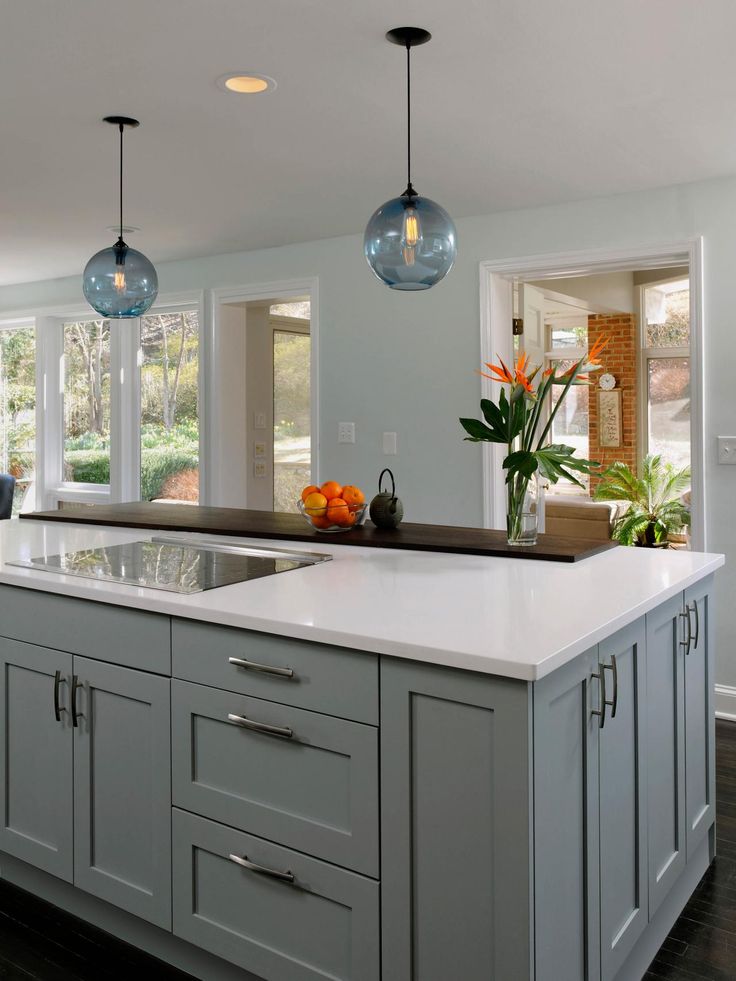
Wall paintings for the kitchen are varied. They may differ in the methods of application, technique of execution and the level of skill of the performer. Drawings on the wall in the kitchen can hide the flaws of the room and emphasize its advantages. In addition, they are used for zoning space and giving the room an original design.
Contents
- Techniques and methods depending on skill level
- Wall preparation
- Styles
- How and with what you can apply yourself
- Image transfer through stencils
- Modeling
- Stickers
- Draw 3d drawing
- Interior ideas
Techniques and methods depending on the level of skill
It should be understood that painting a beautiful composition in the kitchen is not an easy task and requires a certain skill. Even a novice master can make simple kitchen drawings. Walls can be painted in different ways, including:
-
Art painting with paints
-
Airbrush
-
Lettering and chalk drawing
-
Decoupage
-
Use of stencils, stamps, templates
Artistic painting of complex compositions in the form of frescoes or landscapes is recommended to be entrusted to professionals. You can draw simple patterns on the wall in the kitchen yourself, without having certain skills.
WATCH VIDEO
Airbrushing is not only for professionals. Beginners will be able to cope with this method of painting with the help of special stencils and an airbrush.
Lettering will also require some skill in the art of application. However, there is the possibility of applying simple inscriptions and ornaments.
Decoupage is gluing paper appliqués onto walls. Even a beginner can cope with this application method. Before starting work, the walls must be leveled so that the image is smooth and beautiful.
Drawing with stencils does not require any specific experience. It is enough just to circle it along the lines.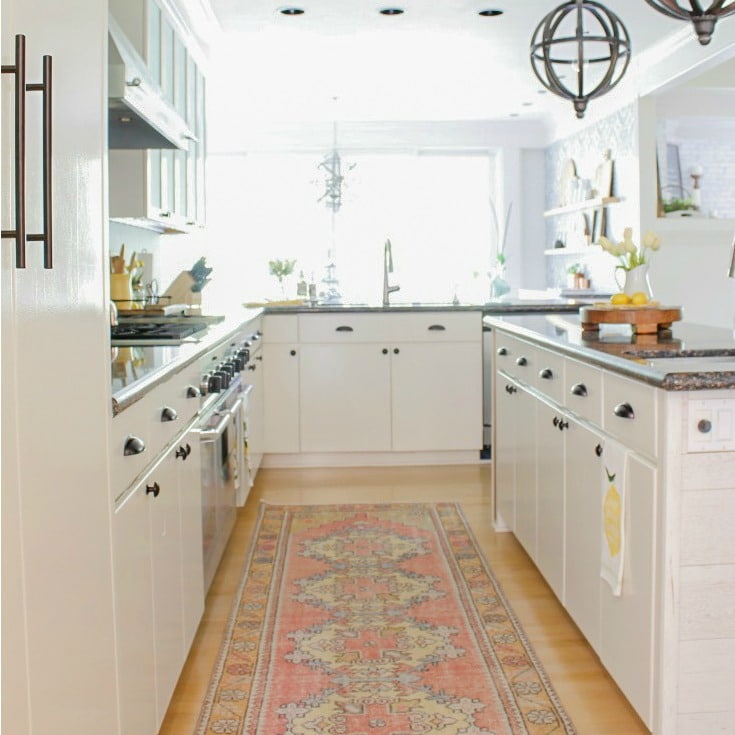 The main thing that may be needed is patience and the right pattern for the kitchen.
Wall preparation
Before starting work, the wall surfaces must be carefully prepared. Otherwise, all work may be spoiled.
The first thing to do is level the walls. After that, they proceed to pasting them with non-woven wallpaper. It is recommended to use wallpaper for painting. It is not necessary to glue them, you can simply sand the surfaces of the walls and walk on them with a primer. Walls must be clean, dry and free of grease.
The room should also be prepared in order to paint the kitchen walls. Furniture must be taken out of the room so as not to stain it. If this is not possible, it is covered with a film to protect it from ink.
WATCH VIDEO
Styles
You can draw anything on the wall in the kitchen.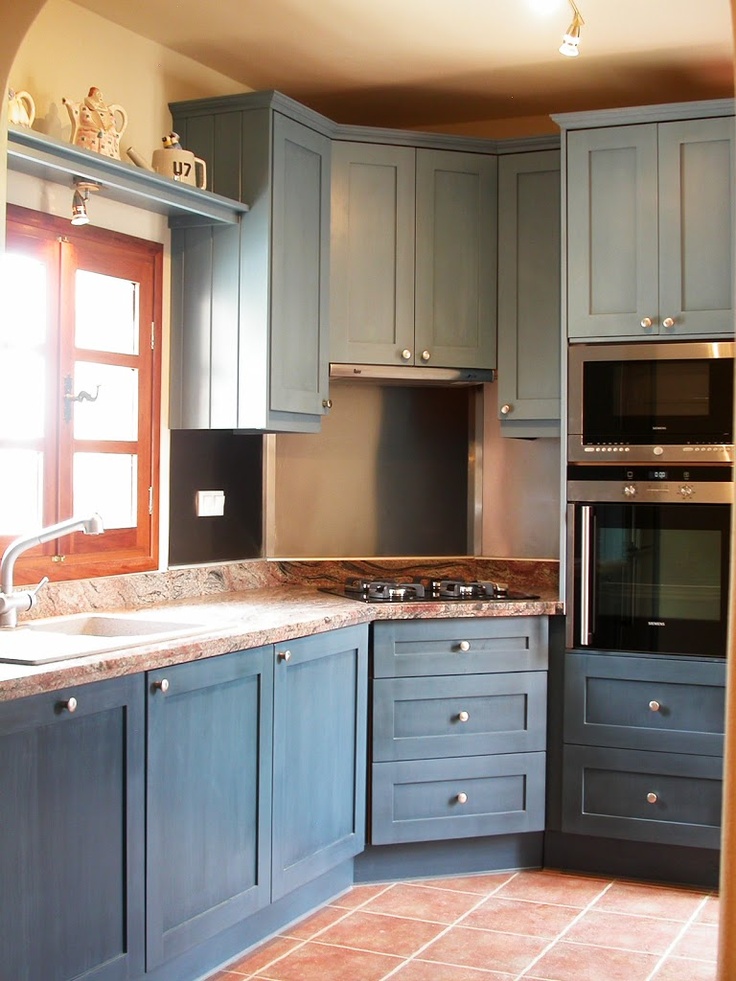 All images differ in style, they can be divided into several groups:
-
Images of flowers, trees (the most popular theme is cherry blossoms or trees with birds)
-
Representation of various geometric figures
-
Landscapes
-
Still lifes
-
Patterns and ornaments are applied mainly with stencils
-
Culinary themed kitchen wall art
In some cases, a drawing is applied in the kitchen to the entire wall. This requires experience. For beginners, it is better to choose simple compositions of medium size.
How and with what you can apply yourself
What to paint on the kitchen walls? Illustrations can be very diverse.
With your own hands, you can transfer pictures through stencils or draw using stamps or templates.
Large wall-to-wall illustrations can be made using simple templates. For example, draw a large tree on the surface of the wall and paint over it with black paint. Such an image will look very impressive on the wall.
Image transfer through stencils
Drawing for the kitchen on the wall using stencils is available to everyone. Stencils or stamps can be purchased at a hardware store or made by hand. The process of transferring an image from a stamp looks like this:
-
Thin the paint first. It is better to use acrylic.
-
Take a stamp and dip it in paint.
-
When the paint is evenly distributed over the surface of the entire stamp, it must be carefully applied to the wall in the place where the pattern should be.
It is recommended that you first try to apply the image through a stencil or stamp on an unwanted surface. If everything goes well, you can start transferring the image to the wall.
Transferring an image through a stencil is slightly different from applying with a stamp:
-
First apply the stencil to the wall
-
Then trace the drawings for the kitchen with a pencil on the stencil
-
The final stage - coloring the picture
WATCH VIDEO
You can draw anything in the kitchen on the wall in this way. Stencils of any size and shape can be downloaded from the Internet and printed on a printer.
Sculpting
Wall art for the kitchen can be made in the style of stencilling. To do this, you need a gypsum mixture. First, outlines are drawn on the wall with a pencil, and then plaster is used. It is necessary to apply several layers to make the work voluminous. At the end, the drawing can be covered with paint.
Special individual items are also sold. They are ready, they just need to be glued. The main thing in this matter is to choose the right parts and carefully glue them to the wall and to each other.
Stickers
The easiest way to add designs to a kitchen theme is to use stickers.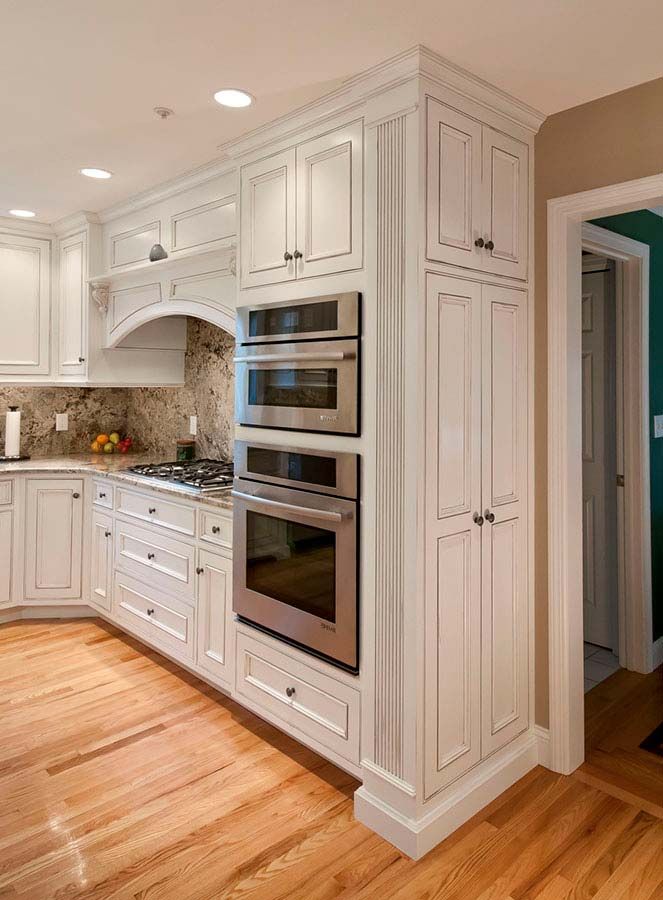 The stores offer a huge selection of images on any subject. Such patterns on the kitchen wall will last a long time. In addition, they have many more advantages, for example:
-
Keep their original appearance for a long time
-
Easy to apply
-
Different types of stickers available
-
You can choose the most suitable for a particular interior
Draw a 3D drawing
It is not so easy to draw a picture on the kitchen wall with your own hands and you will need a certain skill in drawing. You can depict anything, voluminous drawings look spectacular and there should be no questions about what to draw in the kitchen. The author can independently make a decision and draw everything that he has in mind.
Interior ideas
Graphic kitchens look very nice and stylish. Such graphic drawings of the kitchen will transform the room and make it unique. Graphic images above the dining area will be a great addition to the overall atmosphere of the kitchen.