Paint walls like a pro
How to Paint a Wall Like a Pro
Painting the interior walls of a room is one of the most straightforward and popular do-it-yourself projects in a home. A fresh coat of paint is an affordable way to transform a room. Before you get started on painting your home, read these useful tips on how to paint a wall like a pro.
-
01 of 09
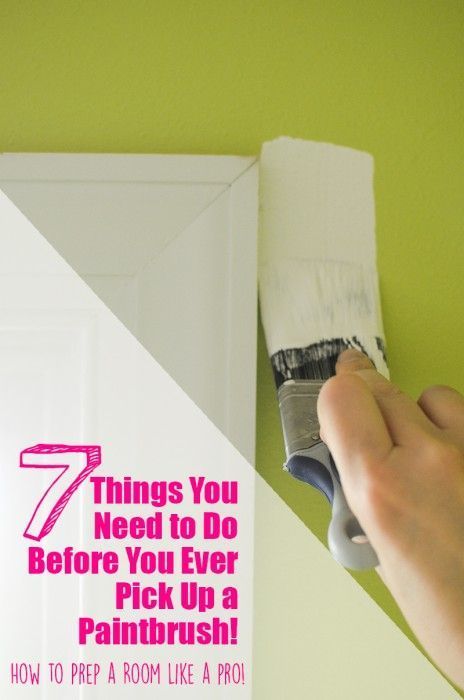
Remove Light Switch and Outlet Covers
Hero Images/Getty ImagesBegin by unscrewing all electrical light switch and outlet covers from the walls. To help ensure the outlet or light switch screws do not get lost place the screws and the covers into a small plastic bag. If there are a variety of different sized screws or outlet covers place each pair of cover and screws in their own plastic bag and on the front of the bag write down the location of the electrical outlet so you can quickly install the cover again later.
A fresh coat of paint is an affordable way to instantly transform a room.
-
02 of 09
Ask for Large Scale Paint Swatches
Jenny Dettrick / Getty ImagesInstead of paying for sample size paint to swatch on your wall, ask for large-scale paint swatches as they make it easy to visualize what the paint would like on the wall and can be easily moved around the room or taken off the walls, unlike the painted swatches.
Make sure to test out your paint swatches in the room so that you can see what the colors look like with natural light and in the evening with the lights on in the room. Often artificial light will change the look of the paint color by casting a more yellow or blue tone to the color of paint so it is important to always test your paint swatch in the room before painting.
-
03 of 09
Protect the Room
fstop123/ Getty Images
Lay drop cloths on the floor and all furniture within the room to protect them from the paint.
 Next using painter's tape apply tape around the moldings and window frames. Make sure to apply firm pressure when applying the tape to ensure the paint will not be able to slip under the tape.
 -
04 of 09
Prep the Walls for Paint
Katja Kircher/Getty ImagesBefore you begin painting it is essential to prep your walls for painting. Fill in all holes in the wall by applying spackling paste with a utility knife or palate knife to the hole. Once the spackling paste has dried use fine grit sandpaper to sand the area until smooth and proceed to sand off all paint drops or bumps on the walls.
Wipe down the walls with a damp cloth to remove any of the dust from sanding to prevent the dust from sticking to the paint. If the walls have any grease on them use a cleaner designed to remove grease on the walls as the paint may not adhere to greasy walls.
If you wish to paint over dark walls make sure to paint a coat of primer before you begin painting as this will reduce the number of coats of paint you will need to paint later.

-
05 of 09
Line Your Paint Tray
Adie Bush/Getty ImagesLine your paint tray with plastic tray liners, a piece of tin foil or a plastic bag so that you can easily clean your paint tray when done by throwing out the liner instead of spending time scrubbing off all the excess paint.
-
06 of 09
Cut in Walls and Ceilings
Chase Jarvis/Getty ImagesBefore you use the paint roller use a paintbrush to paint around the baseboards, ceiling, wall corners, and windows to cover the areas that cannot be easily painted with a paint roller.
When painting near the ceiling use an angled brush as they will help prevent getting paint on the ceiling.
-
07 of 09
Paint Overlapping "W"s
Photodisc/Getty ImagesWhen painting with a paint roller, roll the paint in overlapping "w" so there are no clear roller marks.
-
08 of 09
Extend Your Reach When Painting
alvarez/Getty ImagesPurchase an extendable paint roller, or find a paint roller that lets you screw in a handle to the base and attach your broom handle so that you can reach up to the ceiling without climbing onto a ladder.
-
09 of 09
Wrap It Up
littleny/Getty ImagesIf you are taking extended breaks between painting coats place all your paint brushes and rollers into the paint tray and place the paint tray into a plastic bag. Tie the plastic bag and it will keep your paint from drying out for a day or two.
Watch Now: Best Paint Shades for Small Spaces
How to Paint a Room: 10 Steps to Painting Walls Like a DIY Pro
AD It Yourself
Learn how to paint a room in your home or apartment with these easy DIY steps and brighten up any space in no time
By Lindsey Mather and Elizabeth Stamp
All products featured on Architectural Digest are independently selected by our editors. However, when you buy something through our retail links, we may earn an affiliate commission.
Learning how to paint a room properly is essential for beginning DIY’ers, new homeowners, and veteran home improvement experts alike. After all, it’s pretty painless, relatively inexpensive, and—should something go horribly wrong—easy to fix. But before you grab your roller and get started with your first coat, it’s essential to have a plan of attack. So we asked a handful of experts for their best painting tips and tricks to get you started. Read on to learn how to paint a room and see step-by-step what you’ll need to do to make sure your project is a success.
While San Francisco based designer Nicole Hollis may have turned heads for painting the exterior of her home jet black, we're prone to the moody blue she chose from Farrow & Ball for the bar.Douglas Friedman
1. Plan your approach
Start by thinking about how you want the finished project to look and remember that you’re not limited to four walls or an entire room in the same color. Consider painting an accent wall in a bold hue or highlighting moldings in a contrasting shade or finish.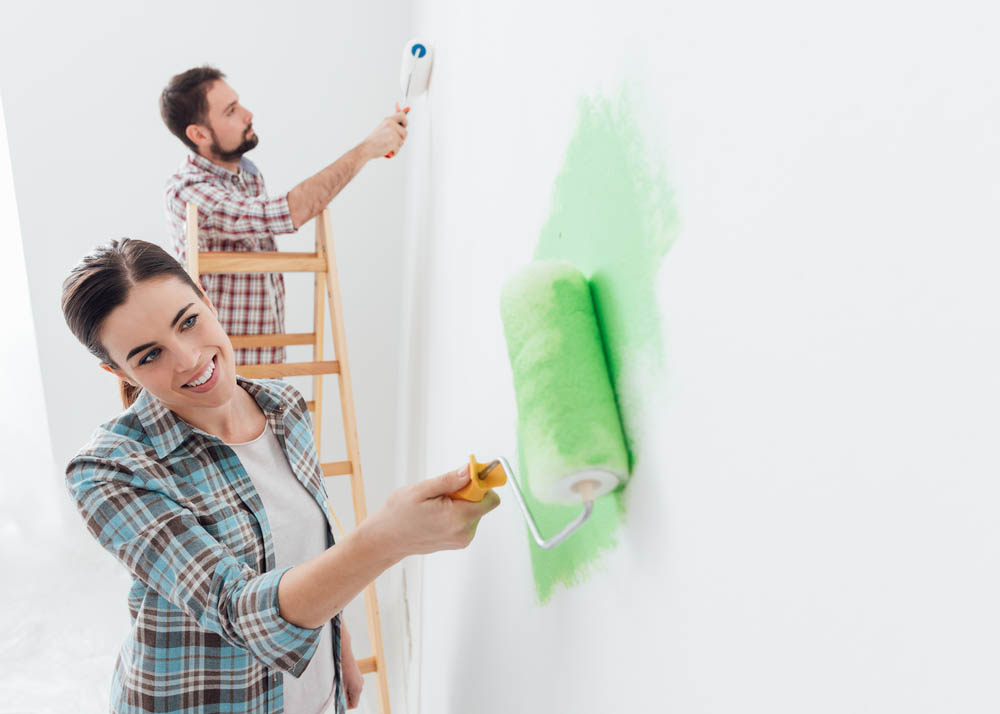 And don’t forget to look up and see whether the ceiling could use a refresh as well.
Alexander Gorlin used Parma Gray by Farrow & Ball on an accent wall in a New York apartment.
2. Choose your color
Browsing through fan decks and paint chips can be overwhelming. Start by figuring out the general color characteristics: Do you want a warm or cool shade? Neutral or saturated? If you have existing furniture or art, you’ll also want to consider how the shade will complement them. Once you have a sense of what you’re looking for, pick a few shades and get samples—lots of direct-to-consumer brands, like Backdrop and Clare, will send you adhesive swatches you can slap on the wall for a better sense of shade (and it’ll save you a trip to the store). Test the colors to see how they look in the room at different times of day.
Many paint companies also have tools on their websites that will let you upload a photo of your space and preview different colors on the walls. But colors can look different in real-world conditions, so you’ll still need to try it out in the space.
Test samples of your color choices in the room to see how they look in different lighting conditions.
Photo: Richard Drury/Getty Images
3. Pick out your tools and materials
Every project is unique and you may need different tools depending on the paint you choose and the condition of your walls, but there are a few must-haves:
- Paint
- Paint roller
- Paint roller extension pole
- Drop cloths
- Paintbrushes
- Paint tray
- Sandpaper
- Painter’s tape
- Rags
- Putty knife
Click here for a shopping list to order all the paint supplies you’ll need to get started—from sanding and priming to your very last touch-ups.
Gather all the essential tools before you start.
Photo: Anika Salsera/Getty Images
4. Determine how much paint you’ll need
Whether you’re painting a powder room or the exterior of your house, the general rule of thumb is one gallon per 400 square feet, says Carl Minchew, vice president of color innovation and design at Benjamin Moore.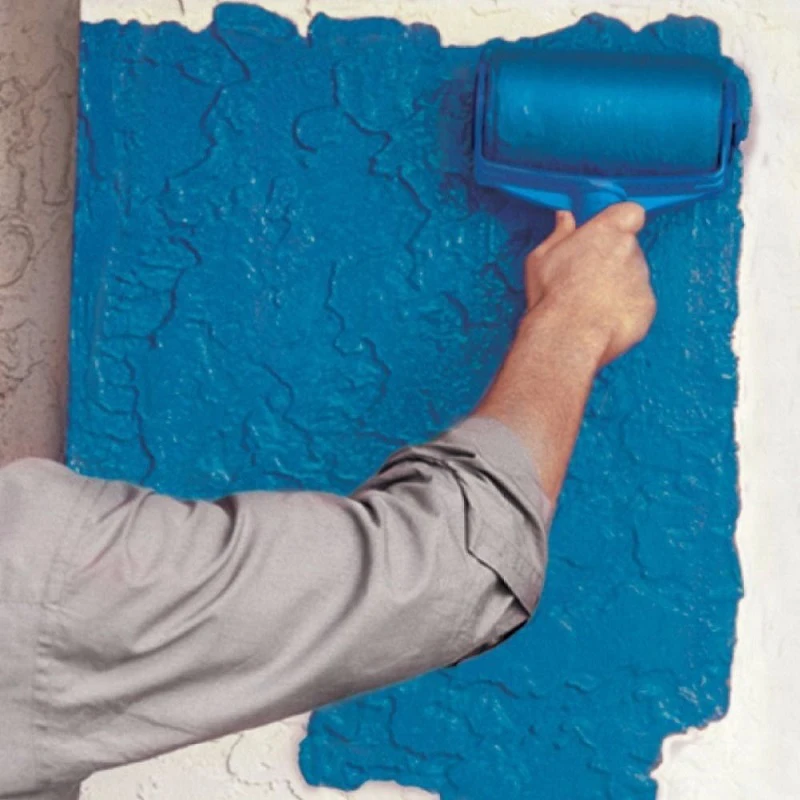 But that’s just a rough guideline: To get a more precise number, which you’ll definitely want for large projects, use a paint calculator like the ones provided by Benjamin Moore or Pratt & Lambert; they take into account window and door measurements. (And both assume two coats of paint per project.)
Most Popular
Planning on whitewashing a charcoal gray wall? You’ll likely need additional paint when going from dark to light. On the other end of the spectrum, a deep color base tends to require more coats of paint than a lighter color, says Carolyn Noble, color marketing and design manager at Pratt & Lambert. She recommends applying a gray-tinted primer to the surface before you paint your walls a saturated color to help reduce the number of applications. When it comes to finish, you may have heard that the glossier it is, the higher the coverage rate, but it’s not enough of a difference to change the number of gallons you need to buy, Minchew says.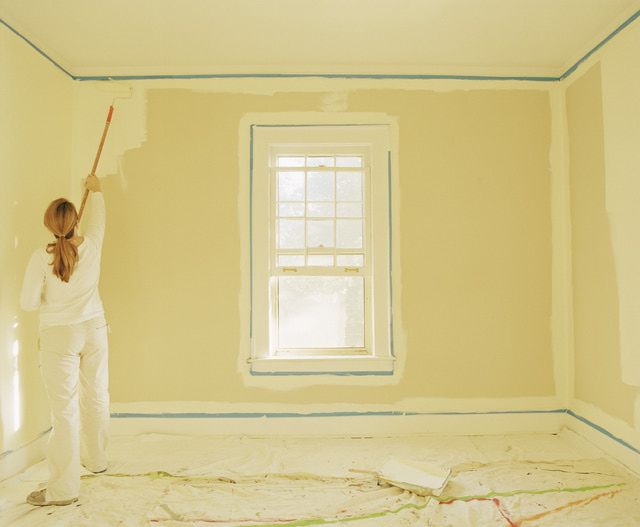
If you’re painting a highly textured surface rather than a smooth one, buy a little extra, says Julianne Simcox, Pratt & Lambert associate brand manager. Cabinets with complicated millwork require more paint, too; Minchew suggests purchasing about 10% more than calculated.
Calculate the correct amount of paint you’ll need to spare yourself trips back to the store and wasted paint.
Photo: Daniel Acker/Bloomberg/Getty Images
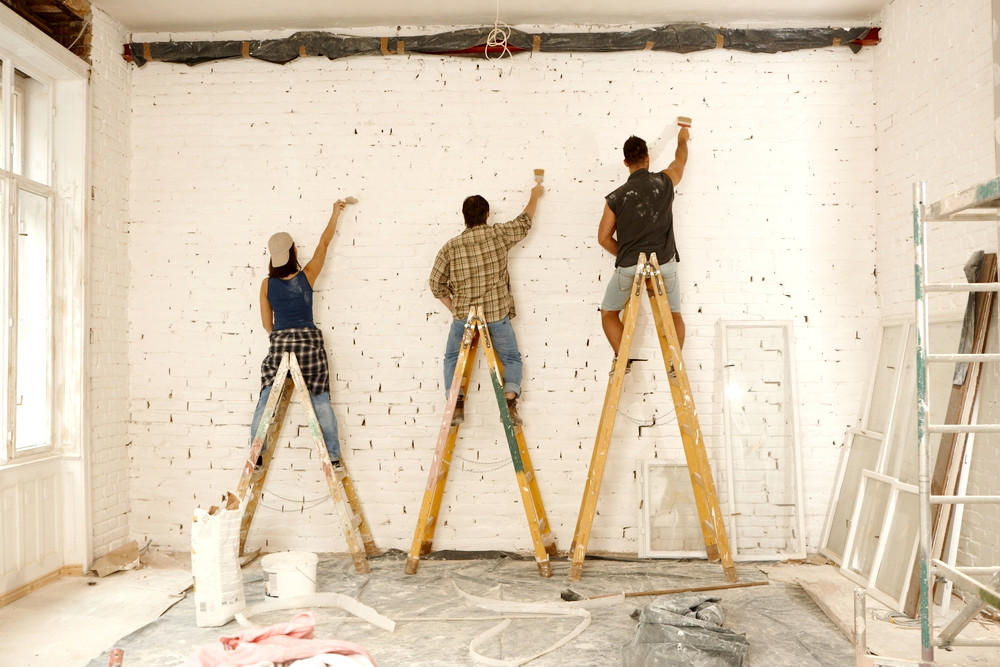
5. Prep the walls and the room
You don’t want to damage your favorite sofa or that heirloom Grandma gave you, so empty the room of all the furniture. If you don’t have enough space to relocate everything you own, push it all to the center of the room. Cover the pieces with a drop cloth or lightweight plastic sheeting and do the same with the floor, as well as any cabinetry or countertops that might be in danger of excess splatter. “Don’t skip the drop cloth—paint will splatter, we promise,” say New Jersey contractors—and cousins—John Colaneri and Anthony Carrino, the stars of the HGTV series Cousins Undercover and Kitchen Cousins as well as The Build Up and Grand Design on Ellen DeGeneres’s Ellentube.
Grab a roll of painter’s tape—the cousins recommend FrogTape—and firmly apply it to the edges of the room’s corners, base and crown moldings, and door and window casings, using a putty knife to seal if needed. “Getting a good seal so paint doesn’t get under the tape is everything, plus it will pull away clean after everything is dry,” Colaneri and Carrino say. If you dare (or have an artist’s steady hand), you can skip taping entirely. Remove light switch and outlet covers and apply painter’s tape to protect outlets and switches from paint drips. Before you get started, make sure you know how to repair drywall so you can clean up any nicks in the walls.
Most Popular
Protect floors and furniture with drop cloths.
Photo: Patti McConville/Getty Images
6. Mix your paint
Use a wooden paint stick to stir the paint, and re-stir often throughout the project. Paint that isn’t stirred consistently can lead to the ingredients separating and you’ll risk compromising the true color you’re going for.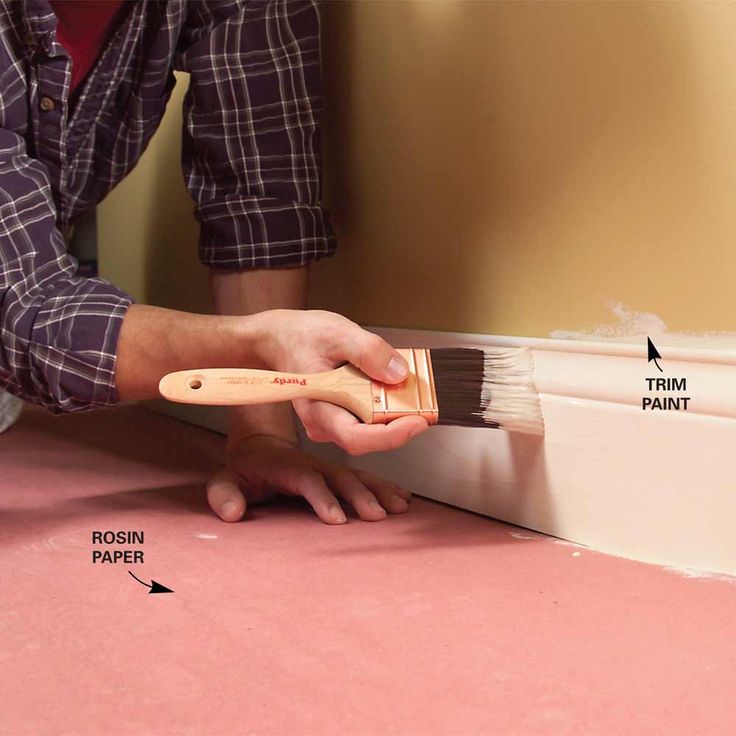 If you’re using more than one gallon of paint, combine the cans in a large bucket in case there is a slight variation in color.
Mix your paint early and often.
Photo: Tetra Images/Getty Images
7. Pick your painting techniques
Your paint is mixed and your roller is at the ready, but make sure to plan a strategy before you get started. Work from the top of the room down, starting with the ceilings. Planning a bold focal wall? Paint the adjoining light-colored walls first. “Don’t worry if you get paint on what will be your accent wall—the dark paint will cover up whatever lighter paint found its way there. After the lighter wall dries, tape off that edge so the dark color doesn’t bleed onto your new paint,” Colaneri and Carrino advise. If you’re covering up dark walls with a brighter hue, plan on three coats: your primer, plus two coats of the new color to ensure nothing shows through.
Most Popular
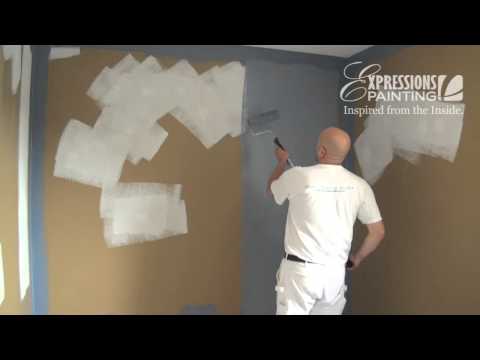
Tackle one wall at a time.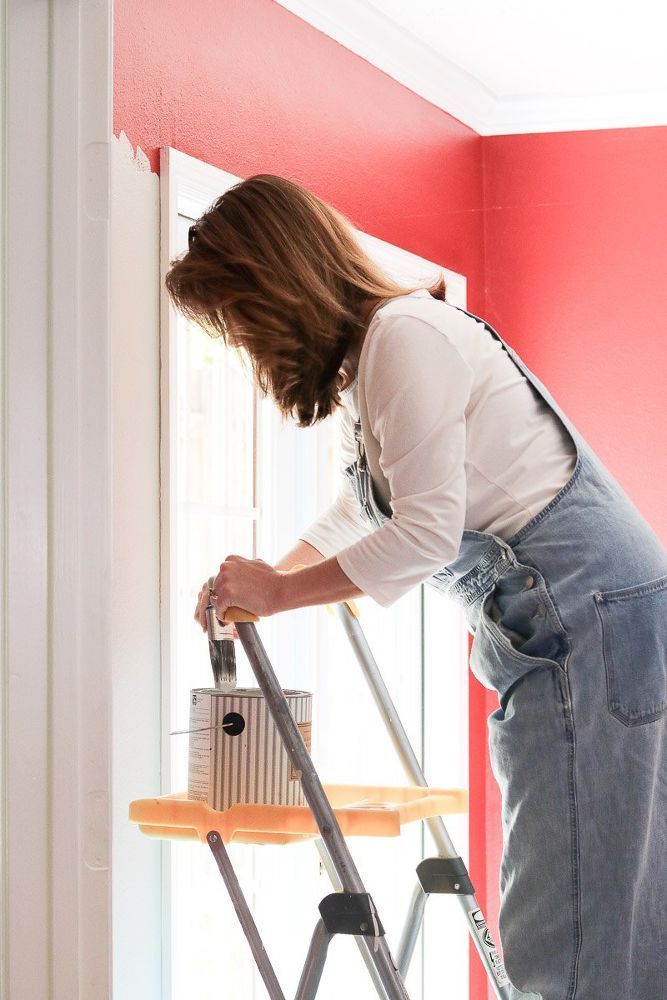 Take a brush and “cut in”—paint along the molding and the corners from top to bottom—while your painting companion uses a roller to cover the main expanse of the wall, staying away from those more precise spots. When applying paint with the roller, use long strokes in a W pattern for ample coverage (and to avoid those pesky roller marks). Once the wall is dry to the touch, it’s ready for a second coat.
If you are painting the trim, remove the painter’s tape and wait for the walls to dry before applying tape to the walls. Start with the trim closest to the ceiling, move on to door and window frames, and, finally, the baseboards.
Start by cutting in near moldings and corners with a brush.
Photo: Banks Photos/Getty Images
8. Don’t forget ventilation
Watching paint dry is no fun. Make sure your space is well ventilated throughout the project by opening windows and using fans. “Keeping the room warm and a fan blowing definitely helps speed up the drying process,” the cousins say.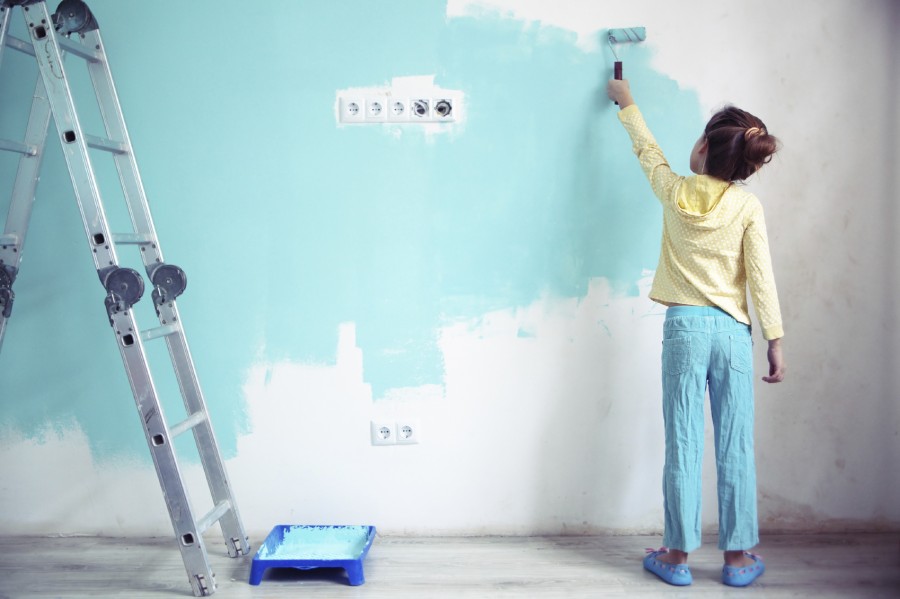 “If it’s a damp day, it will take much longer for the paint to dry.”
Open a window or use a fan for ventilation.
Photo: Stephen Simpson/Getty Images
9. Clean up
You’ve done multiple coats, but it’s not time to relax just yet. Remove all the painter’s tape and gather drop cloths, making sure any spills or splatters are dry before you move them. For latex- and water-based paints, clean brushes with soapy water, though oil-based paints will require mineral spirits. You can use a painter’s brush to clean and reshape bristles. If you want to reuse roller covers, use the curved edge of a 5-in-1 tool to remove the excess paint under running water (they’re also useful for opening a paint can, removing nails, and scraping).
Most Popular
Clean brushes with soap and water if you used latex- or water-based paints.
Photo: Ableimages/David Harrigan/Getty Images
10.
 Give yourself enough time
The amount of time your project will take depends on the size of your room, how you’re painting, and your skill level. For instance, using a dark shade on the walls and painting the ceiling and trim will take longer than just doing the walls in a neutral color. While some spaces can be done in a few hours, others may take several days. Be sure to budget more time than you think the job will need and don’t forget to take prep and cleanup into account.
Shopping guide
ExplorerenovationDecoratingpaintDIYAD It Yourself
Read MoreHow to paint walls with high quality
Can you imagine how the walls painted by the best professionals look like!? So, after reading this article, you will be able to repaint ceilings and walls on your own at the level of not just a pro, but a real painting guru! So what are the secrets...
There are at least 7 rules that every highly skilled painter adheres to. Let's see what ideas are worth peeping and using during repairs.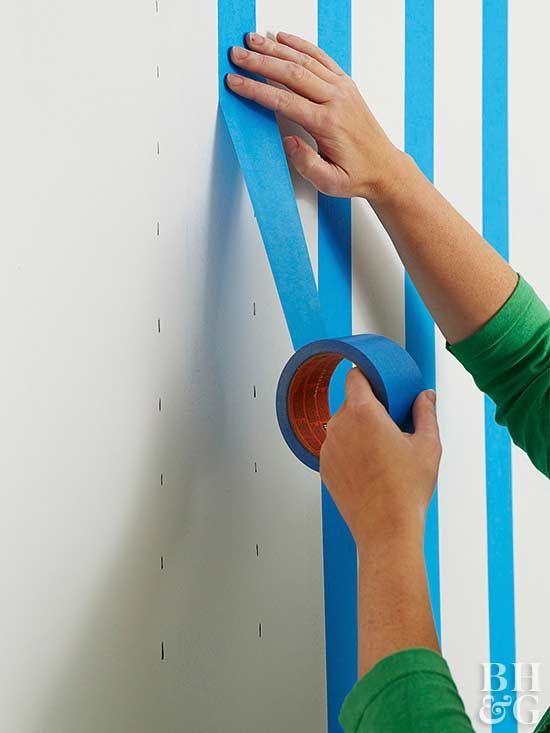
1. A professional picks a color
Did you know that there are hundreds of shades of white? And a professional not only knows this, but is also well versed in them. He, no worse than a designer, can choose such a shade of white walls that the room will never seem cold and uninhabited to you, and he can also help you choose a clear, joyful white.
And in order not to get confused and understand well, a professional usually has a whole collection of tinting fans and color tables, where each color and shade has its own number. Also, the pros always do test paints before starting to paint the entire wall. And these are not small specks of paint applied to a piece of paper attached to the wall, but large (about 1 sq.m.) paint marks on the walls in the very room where the renovation is being done. To be able to look at this wall for a couple of days at different times of the day and under different types of lighting. nine0003
Stealing an idea: Never - and again - never finally choose a paint color from a photo on the screen. Because it is not a fact that the shade was adequately conveyed in the photo, and that the settings of your monitor match the monitor of the person posting the photo on the Internet. On the screen of a monitor or phone, you can only look at some color, but in order to determine its shade, go to the points of sale for fans and samples.
2. Professional conjures base
A professional painter will fiddle with a wall for a long time before starting to paint. Because the foundation really requires careful preparation. The most common mistakes made by non-professionals are to save on primer and not level the walls. Meanwhile, achieving a perfectly smooth surface is worth it, even if the walls are painted on wallpaper. And skipping the priming stage will result in a decent expense already due to the fact that a lot of paint is simply absorbed into the wall.
Stealing an idea: the surface of walls and ceilings should not only be perfectly smooth and well primed, it should be clean. Even just a little bit of microscopic dust or dirt can significantly reduce the quality of the finish. Before painting, arrange a general cleaning: go over the walls with a brush, or even better with a vacuum cleaner.
3. A professional honors the application conditions
A real pro knows exactly the weather forecast for the day of painting, air humidity and temperature in the room, and if something is not according to the rules, he simply does not take up work. Yes, all these parameters are really important and should not be neglected. Where can an ordinary person learn such subtleties? Elementary: in the instructions on the manufacturer's website on the paint page, find the "How to use" section, for example, here. nine0003
Stealing an idea: if there are no problems with a thermometer, then where can I get a hygrometer (humidity meter), which is not very popular in our country? You can borrow it from friends who keep terrariums, or who have small children, or buy it at Detsky Mir or a pet store.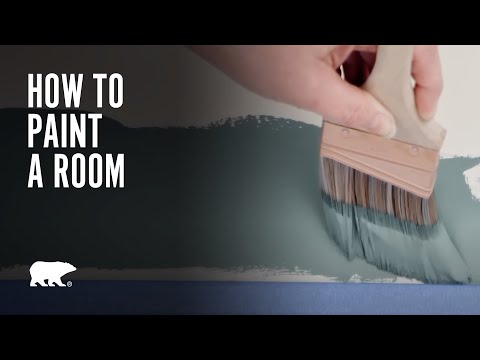
4. The professional uses special tools
The professional painter, of course, has the most comfortable overalls, which are neither hot nor cold, and paint is easier to wash off from the fabric. An experienced craftsman does not skimp on professional tools, uses simple but facilitating devices, and knows thousands of useful life hacks. nine0003
Stealing the idea: few people use the paint grid, and in vain: when working with a roller, it is much more convenient than a paint tray. The usual tray often tips over, the paint is not very evenly distributed over the roller, and moving around with the tray is not so convenient.
It is even more practical to cover the floor with a non-thin film that is constantly torn, peeled off and creates a risk of slipping, and buy a thick tarpaulin - once and for many repairs ahead. Foreign stores sell special waterproof canvases for painting (canvas drop cloths), which are really convenient to use. nine0003
5.
 A professional paints in 2 tones
 A professional painter has proven this many times in practice: the wall that is the worst lit, for example, in which there is a window, it is better to paint a tone lighter than the rest. The same should be done if one of the walls is covered with textured plaster (the texture itself gives a slight shadow and the paint will appear darker). That is, 2 colors are selected for one room: one tone is darker than the other.
Stealing an idea: paint is usually applied in several layers so that the color of the base does not show through the paint. To save money, you can apply the first layer with the remains of the same paint that you bought as a sample, of course, only if it is a close enough color.
6. A professional keeps a paint diary
True mega-professionals remember many of the objects they worked on, not by address, but by paint numbers! And yet, without relying on memory, they carefully write down the article numbers of paints and make colorings in their magazines. And years later, when the customer asks to update the walls with the same shade, the master will have no questions. nine0003
Stealing an idea: buying paint with a small margin is also worth it in order to put an extra can in the pantry (watch the expiration date). In case a child decides to write a ketchup masterpiece on the wall.
7. A professional breaks the rules!
A true professional knows perfectly well that any rule can be "forgotten" if the situation requires it. And feel free to experiment. After all, many interiors dictate the rules themselves with their style and character: it’s not at all everywhere that walls should be ideally sanded or carefully painted over. nine0003
Stealing an idea: remember that many masterpieces and discoveries were made through error and experimentation.
What should I do if I have questions about painting the walls?
Brand Belinka always strives to give you the necessary and useful information without imposing anything. If you have any questions about interior or facade paints or wood products, ask them in the "questions and reviews" section on the belinka.ru website or right here, in the comments on diy.ru. nine0003
How to learn to paint walls like experienced craftsmen
Repair0
Planning to paint the walls yourself? Haven't tried before? Below you will learn how to learn how to paint walls like real professionals.
Tips
- A true craftsman will tinker with the wall before he starts painting the walls . After all, the foundation always needs good preparation.
- nine0115 A professional always knows the weather forecast for the day of painting the walls , air humidity and room temperature, and follow all the rules.
- A professional always works in special clothes that make it comfortable to paint.
- Plan ahead. First, think about how you want the finished project to look, and remember that you are not limited to four walls in one color scheme. Consider painting the accent wall a bold shade or highlighting moldings with a contrasting shade or finish. nine0118
- Use quality brushes; cheap ones will make the job even harder.
- Poor quality paint is thin, runs, splatters and requires many coats. Higher quality paint is thicker, smooths on application, better covers uneven surfaces and stains, and covers the primer better, usually in one coat or two coats. Use only quality paint. nine0118
Paint Walls Like a Pro
To begin with, use a large cellulose sponge and a solution of water mixed with a few drops of mild dishwashing liquid to clean the walls of dust, dirt and grease.
Remember to use blue masking tape to protect areas you don't want your paint on, such as the floor, doorknobs, window frames, and door frames.
A true professional will never stain anything with paint. Pull long strips of tape just inside the outer edges of these areas. nine0003
It is also very important to pour enough primer so that it almost completely fills the hole towards the bottom of the tray, without covering the corner of the tray where the ribs are. Lower the roller into the primer, rolling it back and forth over the ribs of the tray a few times to remove excess. Check that the roller is completely covered with paint. Run the roller up and down the wall using a primer.
Attention! Always follow the manufacturer's instructions on the can. nine0003
Once it's time to paint the walls, dip a 2" angled brush into the paint. Run the brush along the outer edge of the ribbon. Continue to apply paint close to the trim trimmed with tape, drawing it outward about two to three centimeters from the tape. Fill the tray with paint; dip your roller into it, eliminating any leftovers.