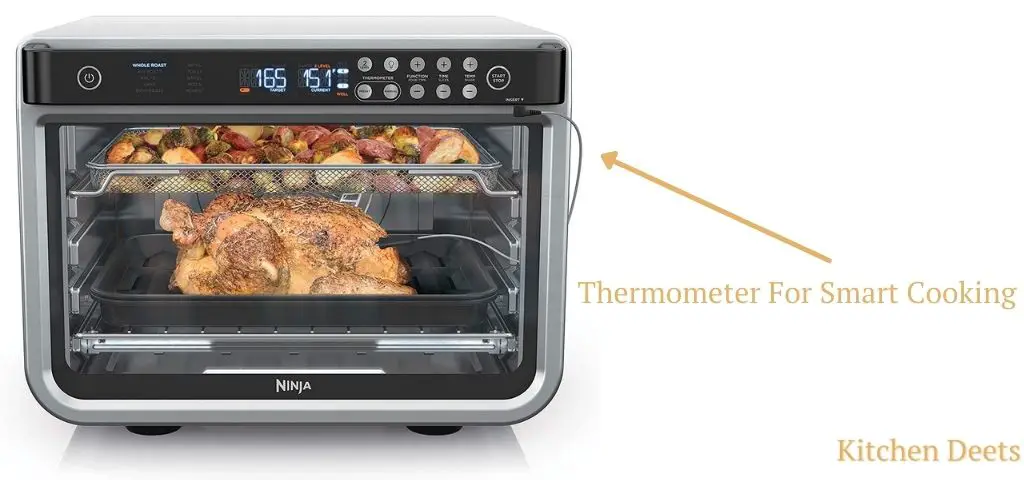
Ninja 8 in 1 oven
Ninja Foodi 8-in-1 Flip Mini Oven review: a compact cooker
We tried out the Ninja Foodi 8-in-1 Flip Mini Oven to see if it's a good choice for your kitchen. Designed to slot right into smaller kitchens without taking up too much space, this oven has a unique flip feature that allows it to be folded away when not in use, massively reducing its footprint on your kitchen counters. It's a popular choice for those in apartments, or simply those who need more space to cook in their kitchen, but is the Ninja Foodi 8-in-1 Flip Mini Oven any good? We put it to the test, making cauliflower buffalo wings, air frying salmon, and roasting vegetables to see if it's a must-have toaster oven.
Ninja is known for making some of the best toaster ovens, and given that it also makes great air fryers, it's no surprise that the Ninja Foodi 8-in-1 Flip Mini Oven combines the best of both. It has an air fryer mode, as well as broiling, toasting, and even dehydrating function. The bottom can be opened for easy cleaning, but I found that some areas were tricky to reach when I did try and clean the oven after prolonged use.
If you lack cooking space in your home or you want a compact toaster oven to take some of the pressure away from your regular oven, the Ninja Foodi 8-in-1 Flip Mini Oven is a great choice. I love how easy it is to flip away and press it against the kitchen wall, which will buy you a lot of space on your kitchen counter if you're dealing with a chef's kitchen or a smaller space.
Today's best Ninja Foodi 8-in-1 Digital Air Fry Oven deals
Reduced Price
£199.99
£179
View
Low Stock
Reduced Price
£199
£179
View
£179. 99
99
View
Show More Deals
Ninja Foodi 8-in-1 Flip Mini Oven: Specifications
(Image credit: Ninja)
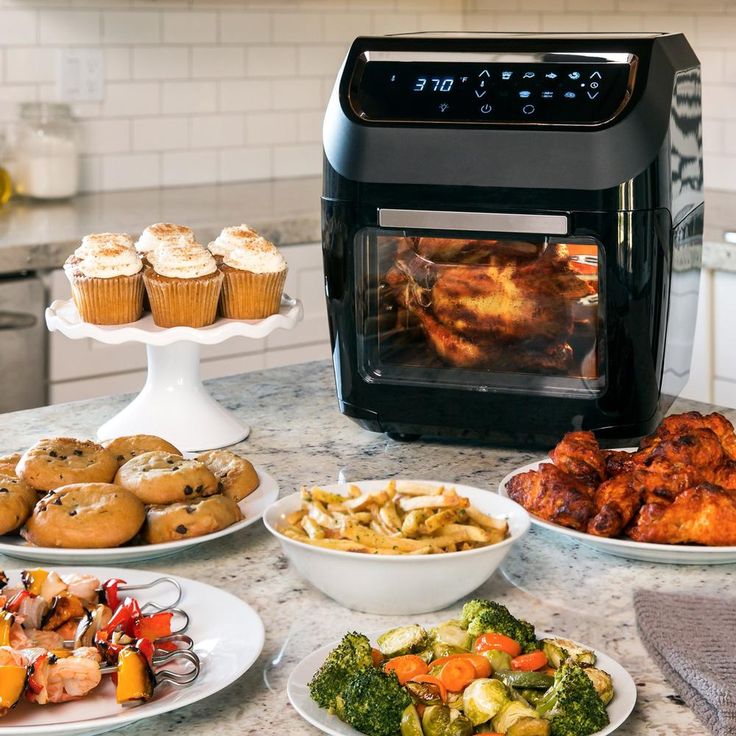
- Capacity: 13" pizza, 9 slices of toast or 4-lbs in air fry basket
- Cooking programs: 8
- In the box: Cooker unit, crumb tray, air fry basket, sheet pan, wire rack
- Modes: Air fry, air broil, air roast, bake, dehydrate, toast, bagel, keep warm
- Power: 1,800 Watts
- Dimensions: 19.72 x 7.56 x 14.96 inches
Ninja SP101: unboxing
(Image credit: Future)
The Ninja Foodi 8-in-1 Flip Mini Oven comes in a large, hefty box with a range of inserts to easily slot inside the oven. When the oven is not in use, you can turn it back onto a rear flip-away base, and then push it back against your kitchen wall. This clears plenty of space in front of the oven, which is great for preparing food before putting it inside the oven to cook.
When flipped up, your oven can open from underneath. This gives easy access to clean the inside of the oven, and when you remove the crumb tray you'll find it easy to remove any splashes or food residue.
(Image credit: Ninja)
The cooking modes in the Ninja Foodi 8-in-1 Flip Mini Oven include air frying, air roasting, air broiling, as well as baking, toasting (as well as a mode for bagels) and even dehydrating.
The timer and temperature can be adjusted using the dial, and then it's a case of pressing down on that dial to start or pause your cooking mode.
The control panel on the Ninja Foodi 8-in-1 Flip Mini Oven. I received the UK model, which has the same modes but calls them slightly different names.
(Image credit: Future)
Toasting in the Ninja Foodi 8-in-1 Flip Mini Oven
A toaster oven is designed to replace the best toaster as well as microwaves and air fryers, but if it can't toast, that won't save you on the space a toaster will take up in your kitchen.
The Ninja Foodi 8-in-1 Flip Mini Oven comes with a toast and bagel mode. You can choose the level of browning and the amount of slices inside your oven when cooking on the toasting mode. The bagel mode will heat from only one direction as opposed to above and below, which will leave the edges of the bagel soft and perfect for making a warm sandwich.
(Image credit: Ninja)
I was impressed by both the bagel toasting and the regular toasting in the Ninja Foodi 8-in-1 Flip Mini Oven. Everything came out even, with some slight marks from the wire rack on one side of the toast. I didn't find that the top toasted more than the bottom when using the regular toasting mode, so it's perfect for sandwiches, paninis, and warming pastries.
Cooking fish in the Ninja Foodi 8-in-1 Flip Mini Oven
I've become accustomed to using the best air fryers when cooking fish at home, so I tried the Ninja Foodi 8-in-1 Flip Mini Oven out on the air roast mode when cooking salmon.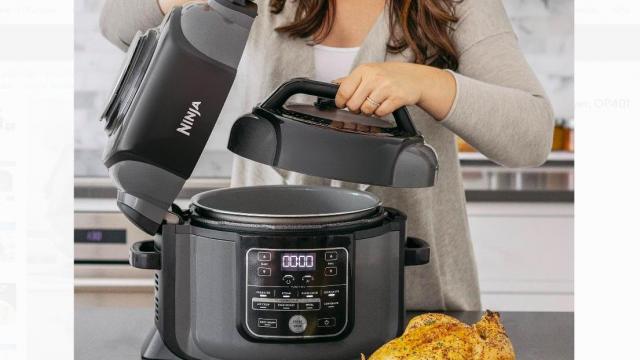
Salmon is quite a fatty fish, so I've found that a lot of fat can drip away when cooking it in an air fryer. This happened with the Ninja Foodi 8-in-1 Flip Mini Oven too, and I was concerned that the juices dripping away would cause an issue if they fell directly onto the heating element.
The Ninja Foodi 8-in-1 Flip Mini Oven crumb tray sits underneath the heating elements, but they are guarded by a metal grated cover. You can put a drip tray underneath to prevent the fat from the salmon falling onto the elements.
You can illuminate the inside of the Ninja Foodi 8-in-1 Flip Mini Oven using a button the control panel, which made it easy to monitor it while it was cooking.
My salmon cooked in the same time as an air fryer, about 12 minutes in total, which is a lot less than if I'd cooked it in an oven. The fish was crispy and perfectly cooked, and there was no difference in cooking between the fish that was at the back of the oven, and the one at the front.
Making chicken wings
I used the air fryer tray to make chicken wings with the Ninja Foodi 8-in-1 Flip Mini Oven. After marinating my chicken in buffalo sauce for a few hours, I laid it out in the air fryer tray and put it in the oven. The air fryer tray can only go in the top oven latch, but you can put the wire rack beneath it to cook other elements of a meal simultaneously.
(Image credit: Ninja)
Like salmon, chicken wings are quite fatty, so there was a lot of fat and also buffalo marinade dripping down from the tray insert to the dripping tray. This became baked-on, and a little tricky to clean.
With a pre-heat time of only a minute, the SP101 has the wings cooked in record time. After 15 minutes in the oven they were perfectly cooked and ready to serve. I had to use oven gloves to hold the tray while I put the wings onto a plate, and then left the oven to cool fully before putting it back against my kitchen wall.
(Image credit: Ninja)
Baking in the Ninja Foodi 8-in-1 Flip Mini Oven
Anyone who's read my reviews of the best stand mixers will know that I'm an avid baker, so I was keen to try the Ninja Foodi 8-in-1 Flip Mini Oven out to bake.
The Ninja Foodi 8-in-1 Flip Mini Oven doesn't come with a muffin tray, but you can buy a 12-cup muffin pan on the Ninja site if you love to cook cupcakes.
I used the baking sheet, which is 13x13 inches, to place my cupcake cases in the oven. I was concerned that they would touch the top of the oven when they rose, but I had no issues. I would definitely refrain from cooking bread or a full-sized cake in the Ninja Foodi 8-in-1 Flip Mini Oven, but that's down to the smaller internal capacity as opposed to any issues in its ability to cook.
Cleaning
(Image credit: Ninja)
The insert trays, including the drip tray, can go in the dishwasher with the Ninja Foodi 8-in-1 Flip Mini Oven. That's great, because a lot of stubborn oil and residue can become baked onto the inside of the air fryer.
When you remove the crumb tray you can pull the base open and clean the inside of the oven. Ninja advises to just use soap and water to do this, but I found that the heating elements became quite dirty and difficult to clean if I didn't clean them after every use.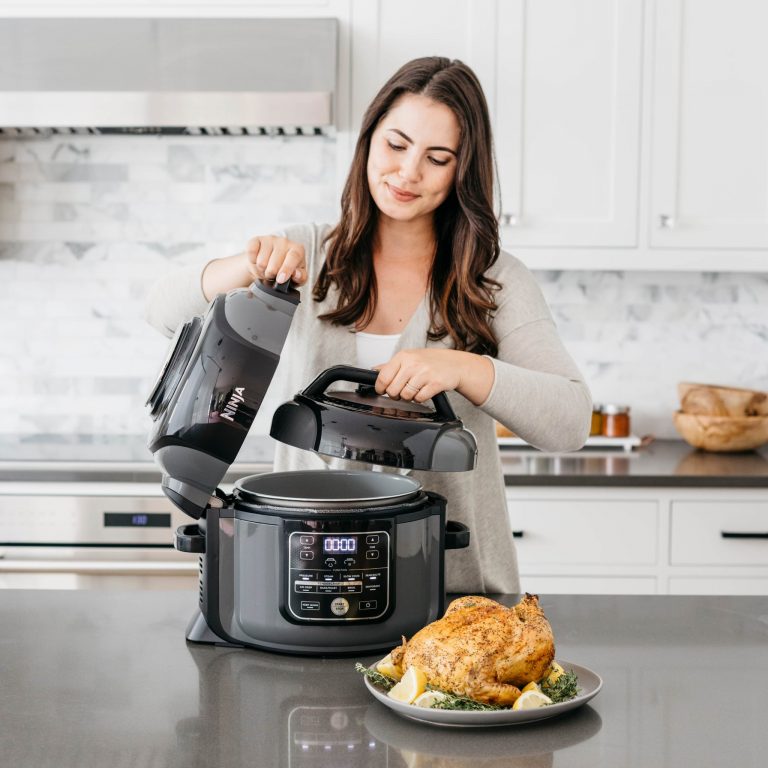 This didn't create any issues in cooking, but it did lose some of the aesthetic value of the oven.
Should you buy the Ninja Foodi 8-in-1 Flip Mini Oven?
(Image credit: Ninja)
If you plan on using this as your primary oven, you may struggle with the shortness of the cooking space. Not all trays slot into every cooking space in the oven, and it is definitely too short to bake bread or cakes. You will also struggle to fit a whole chicken into this oven, so I would suggest opting for a larger toaster oven if you plan on using this as your primary cooking unit. If you have an oven to cook larger items and want a smaller toaster oven to cook side dishes or make speedy midweek meals, the Ninja Foodi 8-in-1 Flip Mini Oven would be great for you.
Another big reason to buy the Ninja Foodi 8-in-1 Flip Mini Oven is the pre-heat, which is so quick that it can save you a lot of time when cooking. The cooking and toasting is even, the quality of the air frying is great, and the controls are very easy to get to grips with.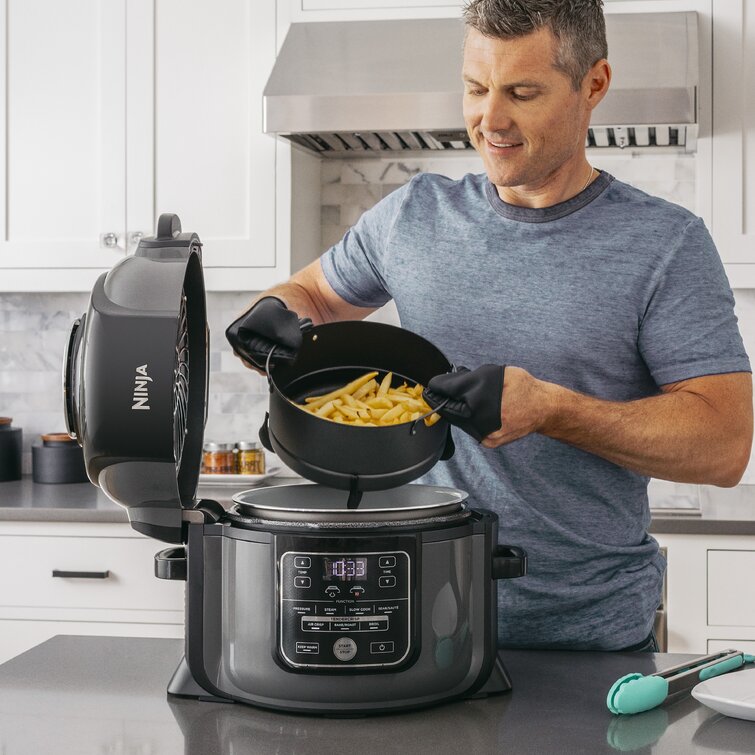
As I've said, I found cleaning in the Ninja Foodi 8-in-1 Flip Mini Oven quite tricky. The inserts can go in the dishwasher, which is great, but the heating elements themselves are hard to clean because they cannot be removed.
Today's best Ninja Foodi 8-in-1 Digital Air Fry Oven deals
Reduced Price
£199.99
£179
View
Low Stock
Reduced Price
£199
£179
View
£179.99
View
Show More Deals
About this review, and the reviewer
Millie Fender is our Editor for all things small appliances at Homes & Gardens. She spends a lot of time testing everything from toasters to air fryers and recommending the very best ones to readers.
All our reviews are tested from home, and the Ninja Foodi 8-in-1 Flip Mini Oven review is no exception. Millie tested it from August to November to fully make the most of all its capabilities before bringing you this review.
Millie Fender is the Small Appliance and Cooking Editor on the Homes and Gardens Ecommerce team. She specializes in cooking appliances and also reviews outdoor grills and pizza ovens. Millie loves to bake, so she will take any excuse to review stand mixers and other baking essentials. All of Millie's reviews are conducted at home, meaning she uses these products in her own kitchen, the way they're designed to be used. Millie is from Bath, England, and she grew up surrounded by classic Georgian architecture and interiors. She dreams of buying her own house and filling it with antiques, but for now, she lives in a sunny London flat with a very busy kitchen.
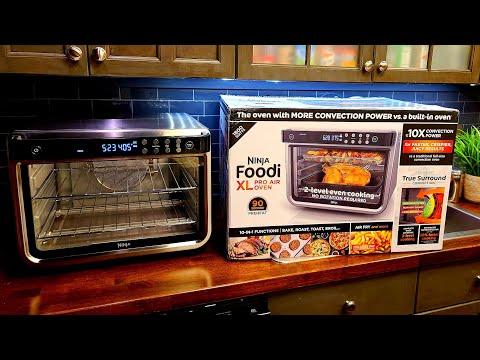
The Ninja Foodi Air Fryer Oven review
With continually updated technology and new brands hitting shelves all the time, air fryers continue to be one of the hottest kitchen gadgets on the market. No wonder there’s been a rash of new products that seek to combine air fry technology with the traditional appliances people already have in their kitchens.
The Ninja Foodi Digital Air Fry Oven is one such product. Building off the success of the existing Ninja Foodi, it combines an air fryer and toaster oven into one convenient package. But is it worth the investment? We tested the Ninja Foodi air fry oven to see if it could actually combine two pieces of equipment in one without sacrificing on the performance of either.
How does the Ninja Foodi Digital Air Fry Oven look and feel?
Credit: Reviewed / Jackson Ruckar
The Ninja Foodi oven is narrow and can be flipped up on its side for storage.
As soon as you take it out of the box, you get a sense that this countertop appliance is a high-quality product. Constructed of brushed stainless steel, it’s beautifully finished with rounded corners and has a digital control pad. It’s also wider and shorter than a typical toaster oven.
When cooled and not in use, the Foodi Air Fry Oven can be flipped up on one side to stand up at the back of the counter, an odd but convenient storage solution. Rather than a towel bar handle in the front, it has a small one off to the side that you use to open the door. While it’s unusual and takes a bit of time to get used to, this handle functions perfectly fine and helps make the oven more space efficient.
The Foodi Digital Air Fry Oven comes with an air fry basket, a cooking rack, a nonstick sheet pan, and a crumb tray that also seem sturdy and well made. They’re larger than the ones you typically find in a toaster oven, as the oven is so wide.
What can the Ninja Foodi Digital Air Fry Oven do?
Credit: Reviewed / Jackson Ruckar
This toaster can air fry, dehydrate, toast, bake, air broil, and keep food warm.
As the name implies, this Ninja countertop oven air fries. And just like a typical toaster oven, it also toasts and bakes. It also air roasts, air broils, dehydrates, and keeps food warm. Because it’s so short, however, it can’t hold a whole chicken like many toaster ovens in its price category.
The manufacturer encourages using the large sheet pan to make sheet pan dinners and includes a formula and some recipes for them.
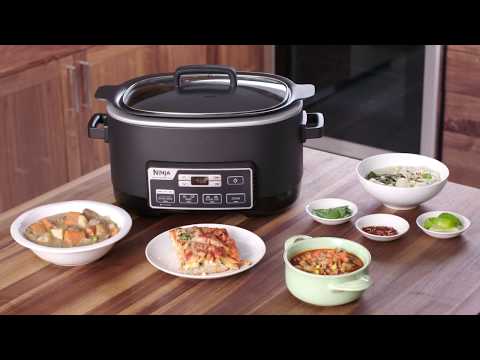
If you’re looking for other multi-functional appliances that can slow cook, pressure cook, grill, and more, Ninja also offers the classic Ninja Foodi Pressure Cooker and the Ninja Foodi Grill, both of which we've tested.
What we like
- It’s beautifully designed.
- The digital controls are easy to read and intuitive to navigate.
- It’s quiet.
- It’s an excellent toaster, and does a good job of baking a sheet pan dinner.
- To check on food, there’s an oven light.
- For storage, it easily can stand on its side.

- It cooks fast.
What we don’t like
- It’s expensive.
- It can’t roast a whole chicken.
- There could be more cooking guidelines for specific foods in the cookbook.
How does it perform?
Credit: Reviewed / Sharon Franke
The air fry setting left fries unevenly cooked.
Air frying
To be blunt, it’s not the best air fryer on the market, but it’s also far from the worst. The Digital Air Fry Oven air fries unevenly, and food prepared from scratch seemed baked, not fried. On the website the manufacturer claims it can air fry 4 pounds of food at once. While we could pile up that amount of fries in the air fry basket, the loaded basket couldn’t fit in the oven at the rack position recommended for air frying.
Toasting
Credit: Reviewed / Sharon Franke
The Ninja toasts very evenly, but there's no setting that allows for extremely light toast.
The Foodi Digital Air Fry Oven can accommodate nine slices of packaged bread without squishing them. And it can toast them fairly evenly, too. When used to toast two slices, it gives impressive results, browning exceptionally evenly. It does, however, toast to a golden-brown shade on both the light and medium settings, so it could be a disappointment if you like your toast only lightly browned. It has a special bagel toasting setting and it browns bagel halves very uniformly.
Air roasting
Credit: Reviewed / Sharon Franke
Our sheet pan dinners came out beautifully cooked.
Ninja recommends using their oven to air roast sheet pan dinners with a protein (like steak, chicken, or seafood), vegetables, and spices. After following the oven booklet’s recipe for Spicy Chicken, Sweet Potatoes & Broccoli, I was impressed with the result. All of the ingredients (about 3 pounds in total) came out lightly browned and tender in just 22 minutes and made a tasty sheet pan dinner for four. This technique does seem like a very good use for this appliance.
Baking
Credit: Reviewed / Sharon Franke
Biscuits browned evenly in this toaster.
You’re not going to be able to fit an entire loaf or Bundt pan in this Ninja, but you can use it to bake a cake or muffins in a shallow pan, or small items like cookies right on the sheet pan. Biscuits baked up just as well as from a full-size oven.
Air broiling
Chicken breasts came out juicy and browned on both sides in just 20 minutes. However, even when cooked well-done, steaks looked gray on the outside and in no way resembled broiled or grilled meat. So, while this oven is fast, it can’t consistently deliver the kind of searing you expect from broiling.
Dehydrating
Credit: Reviewed / Sharon Franke
The dehydrate setting works fine, but you can't fit enough to make it worthwhile.
Although its wide air fry basket holds more food than the ones in a typical air fryer (or the racks in a toaster oven), the Ninja is still only able to dry a small amount of food. After running the dehydrator for 10 hours, I was rewarded with a small bowl of banana chips. At least the machine kept quiet as it worked.
Keep Warm
The Ninja kept a small macaroni and cheese casserole at a safe serving temperature for a full two hours. As you would expect, however, the food was dried out by then. If you’re not going to serve food within a half hour or so, you are probably better off just cooling and reheating it.
Is the Ninja Foodi Digital Air Fry Oven easy to use and clean?
Credit: Reviewed / Jackson Ruckar
The Ninja has an easy-to-use digital interface, although it does smudge.
The digital control panel on the Ninja oven is well laid out and easy to read. Its interface centers around a knob that you turn to select the time and temperature (or number of slices and doneness) for each function, and it’s fairly intuitive to program.
We love the fact that the oven preheats automatically and the preheat time is just one minute, so it doesn’t add appreciably to the cooking time. During cooking, the product is quieter than most air fryers, and you can turn on an interior light to check on your food’s progress.
The sheet pan and the air fry basket can be cleaned in the dishwasher. In the standing position, the back opens, giving you access to the inside for cleaning.
The Ninja Foodi Air Fry Oven comes with a very thorough and easy-to-understand owner’s guide, as well as a booklet that contains recipes and cooking charts for air frying and dehydrating and a leaflet with instructions on how to build a sheet pan meal. It would be helpful if there were also charts to use as guidelines for baking, air roasting, and air-broiling.
Warranty
Ninja offers a one-year limited warranty on the Foodi Digital Air Fry Oven and a 60-day money back guarantee.
What owners say
On Amazon, the Ninja Foodi Digital Air Fry Oven has earned itself 4.7 stars from nearly 15,000 customers who praise its convenience, ease of cleaning, and fast cook times. They say it looks great on the counter, and stows pretty efficiently when not in use. Some detractors complain that the interior is not tall enough for their cooking needs.
Is the Ninja Foodi Digital Air Fry Oven worth it?
Credit: Reviewed / Jackson Ruckar
Although it's not an amazing air fryer, this is a great toaster oven.
Yes. If you're looking for an air fryer and a toaster oven, this product is definitely worth your consideration. It’s an excellent toaster and a fair air fryer. The only real drawbacks are that it has a large footprint on your countertop and can’t roast a whole chicken. If you have the counter space and are in the habit of buying rotisserie chickens at the supermarket, we say go for it.
We do recognize that it’s not an inexpensive appliance, but it costs equal to or less than the Breville and Cuisinart ovens that are its main competitors. If you decide to spring for it, definitely try out the sheet pan meals.
Get the Ninja Foodi Digital Air Fry Oven on Amazon for $200
Related content
The product experts at Reviewed have all your shopping needs covered. Follow Reviewed on Facebook, Twitter, Instagram, TikTok, or Flipboard for the latest deals, product reviews, and more.
Prices were accurate at the time this article was published but may change over time.
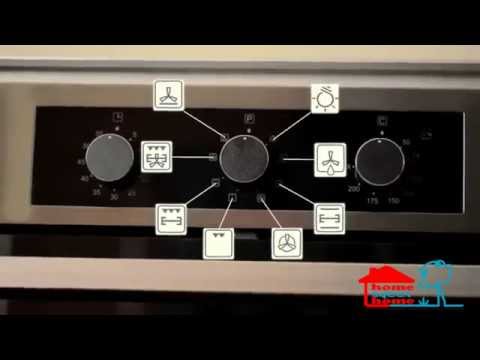
Ninja SP101EU multifunctional oven 8-B-1-Instructions
Multifunctional stove
SP101EU
Instruction
9000 INSTRUCTIONS BEFORE USE Basic safety precautions should always be followed when using electrical equipment, including the following: WARNING NOTE: For durability, we recommend washing accessories by hand. AIR FRY: Cook traditionally fried foods such as chicken wings, french fries and chicken nuggets with little or no oil. NOTE: The DRY and KEEP HEAT functions are not available on all models. Our cord management system is designed so that it does not interfere with oven operation. We offer a range of custom made accessories for your Ninja® Foodi® multifunction oven. Visit ninjakitchen.eu to expand your options and take cooking to the next level. To turn on the appliance, plug the power cord into the wall, turn the oven over to the cooking position and press the button. NOTE: The appliance heats up quickly, so we recommend preparing all the ingredients before switching on the oven. Aerofry Use the dry roasting basket. For greasy, oily or marinated ingredients, use a fry basket with a tray underneath. Shake the basket. Turn the basket and tray 180°. Roasted grill Oven Toast Bagel Dehydrate Keep warm NOTE: Keep warm not available on all models. The device should be thoroughly cleaned after each use. ERROR MESSAGES Why does the oven not turn on? TWO (2) YEAR LIMITED WARRANTY Ninja® Warranty How do I register a warranty? IMPORTANT INFORMATION What are the benefits of registering my warranty? How long is the warranty on our products? What is covered by the warranty? What is not covered by the warranty? What happens when my warranty ends? Where can I buy genuine Ninja parts and accessories? THANK YOU https://ninjakitchen.eu Business registration 9000 --- Voltage: 220-240V ~ 50-60Hz TIP: You can find the model and serial number on the QR code label located on the base of the device. This label indicates that this product must not be disposed of with other household waste throughout the EU. To prevent possible harm to the environment or human health from uncontrolled waste disposal, dispose of responsibly to promote the sustainable reuse of material sources. ninjakitchen.eu report this ad illustrations may differ from actual product. We are constantly striving to improve our products; therefore, the specifications given here are subject to change without notice. 3 10697 2 1141 3 2192 623 Photo: picshype.com Pizza A photo: anypics. Cheese Burger A photo: anywalls.com Chimichanga A photo: oloom.info Nachos A photo: motto.net.ua Jalapeno Onion Burger A photo: flickr.com Plum cake A photo: confectionertop. Fruit ice A photo: 1zoom.ru Unusual concerts in the Peter and Paul Cathedral. 12+ Jazz, medieval and classical music on the organ. See schedule As you remember, all Teenage Mutant Ninja Turtles bear the names of Italian masters of the Renaissance, so their love for the traditional dish for this country - pizza - seems quite logical. And Michelangelo loves pizza most of all of the brothers: once he almost fell victim to the cunning villain Schroeder, who decided to disguise the sensor as an anchovy and follow the heroes. Ingredients: Preparation: First, turn on the oven to heat up to 190°C. Then knead the dough from the sifted flour, baking powder, water and olive oil. Roll out the dough to half a centimeter thick. Line a baking sheet with parchment paper. Lay the rolled out dough on a baking sheet. Brush the base with tomato puree. Bon appetit! The only comic book hero who is aware that he is a comic book hero constantly says the word "Chimichanga", and the performer of his role in the movie - Ryan Reynolds - announced his approval for the role with the phrase "Time to eat chimichanga" on his blog. Ingredients: Preparation: Bulgarian pepper cut into strips, onion into half rings. Fry them together over high heat, stirring often, until half cooked. Chimichanga! When Tony Stark was released from Afghan captivity, he immediately ordered a real American cheese burger. Ingredients: Preparation: Cut the onion into quarter rings and the mushrooms into slices. In a special dish, heat several types of oil, lay the onion and fry, stirring for about two minutes. Add sliced mushrooms and fry for five minutes. Enjoy! In the movie we saw Bruce Wayne cooking steaks. Ingredients: Preparation: To make the classic homemade nachos: combine vegetable oil, paprika, garlic powder, ground pepper and mix well. Lubricate the cakes with the resulting mixture on both sides, and then cut into portioned triangles. Put the pieces on a baking sheet, sprinkle with salt. Gotham-style nachos are ready! And one more burger in our heroic menu - for those who like it spicy. And the brutal Wolverine with his steel claws probably knows everything about sharpness! Ingredients: Preparation: Mince the lamb meat, add salt and pepper to the mince, mix well and shape into round flat cutlets. Eat with claws or hands! It's time to move on to desserts. As we know from the comics, Peter Parker loves anything his Aunt May cooks, but he's especially fond of pies like the traditional American plum pie. Ingredients: Preparation: Peel and halve the plums. Beat butter or margarine with sugar. Add eggs to it and continue beating. Salt. Mix flour with baking powder and add oil, eggs and sugar to the mixture. Mix with a spoon. Preheat oven to 180°C. Lubricate the form with oil, lay out the dough. Lay plum halves on top and sprinkle them with a couple of tablespoons of sugar mixed with cinnamon. Bake 40-45 minutes until crusty. You will lick your fingers! The handsome Viking Thor has rather strange taste preferences for a stern man: he loves popsicles! Perhaps this dessert reminds him of his cold northern homeland.


 Avoid scratches on the door surface or cuts.
Indicates reading and reviewing instructions to understand the operation and use of the product. Indicates the presence of a hazard which, if not ignored, could result in personal injury, death, or substantial property damage. 
Be careful to avoid contact with hot surfaces. Always use hand protection to avoid burns with c Exploity trace
.
(always apply on a lattice) D STRICTION
(Keep in the lower position) 9000 E 9000. always place under the lower heating element) POSITIONING ACCESSORIES
BEFORE FIRST USE
 NEVER BEEN Wash the main unit in the dishwasher.
 USING THE CONTROL PANEL
FUNCTIONS
FRY: Get crispy on the outside and perfectly cooked on the inside for full size oven meals, thicker proteins and roasted vegetables.
GRILL: Grills meat and fish and evenly browns the top of the casserole.
OVEN: Bakes everything from your favorite cookies to homemade pizza evenly.
TOAST: Toasts up to 6 slices of bread evenly to the perfect level of darkness.
BAGEL: Perfectly toast up to 6 slices of bagel halves when placed cut side up on the wire rack.
DEHYDRATE: Dehydrates meats, fruits and vegetables for healthy snacks.
KEEP WARM: Keeps food hot for up to 2 hours. CONTROL PANEL DISPLAY AND CONTROL BUTTONS
NOTE: The time and temperature will always be the cooking time and temperature that were set when the oven was last used. 
NOTE: Press and hold the START/PAUSE button for 3 seconds to return to the function selection.  When using the Toast or Bagel function, this button will adjust the tint level instead of the temperature.
NOTE: The cooking time and temperature can be adjusted at any time during the cooking cycle.
NOTE. The indicator will automatically turn on when there are 30 seconds left of cooking. POWER CORD MANAGEMENT
8
Version 2 Outlet right 149 Version 3 Outlet behind the oven ACCESSORIES TO PURCHASE
Using the multifunctional furnace Foodi®
Use of cooking 008
If the ingredients are oily, greasy or marinated, place the basket on a baking sheet.
NOTE: The timer will start counting down as soon as the appliance has warmed up. If the ingredients are not ready to be sent to the oven, simply turn the knob to add time.

NOTE: If the cooking time is less than 1 hour, the clock will count minutes and seconds. If cooking lasts more than 1 hour, the clock will count down the hours and minutes.
NOTE: Food cooks faster with Air Roast than with Bake, so for traditional oven recipes, reduce the cooking time by 30% and lower the temperature to 10°C.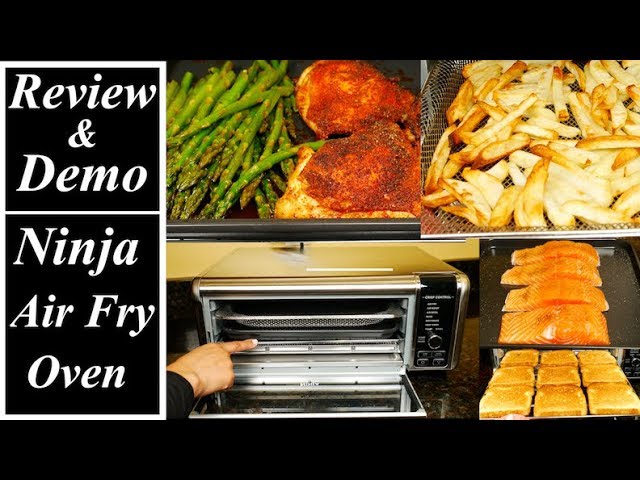
NOTE: The timer will start counting down as soon as the appliance has warmed up. If the ingredients are not ready to be sent to the oven, simply turn the knob to add time.
 Place the baking sheet on the rack and close the oven door, press START/PAUSE to start cooking.
NOTE: If the cooking time is less than 1 hour, the clock will count minutes and seconds. If cooking lasts more than 1 hour, the clock will count down the hours and minutes.  When the appliance beeps to indicate that it is hot, immediately place the baking sheet on the wire rack. Close the oven door.
NOTE: The timer will start counting down as soon as the appliance has warmed up. If the ingredients are not ready to be sent to the oven, simply turn the knob to add time.
NOTE: For best results with baked goods such as cookies, line a Ninja® Oven pan with parchment paper.
 To set the darkness level, press the TEMP/DARKNESS button again.
NOTE: The Toast function has no temperature control and the unit does not preheat in Toast mode. It is very important to choose the exact number of slices to avoid over or under flavor.

NOTE: The bagel function has no temperature control and the appliance does not preheat in bagel mode. It is very important to choose the exact number of slices to avoid over or under flavor.
 Close the oven door and press START/PAUSE to start cooking.
NOTE: There is no temperature selection for the keep warm function.
NOTE: The appliance does not heat up in keep warm mode. 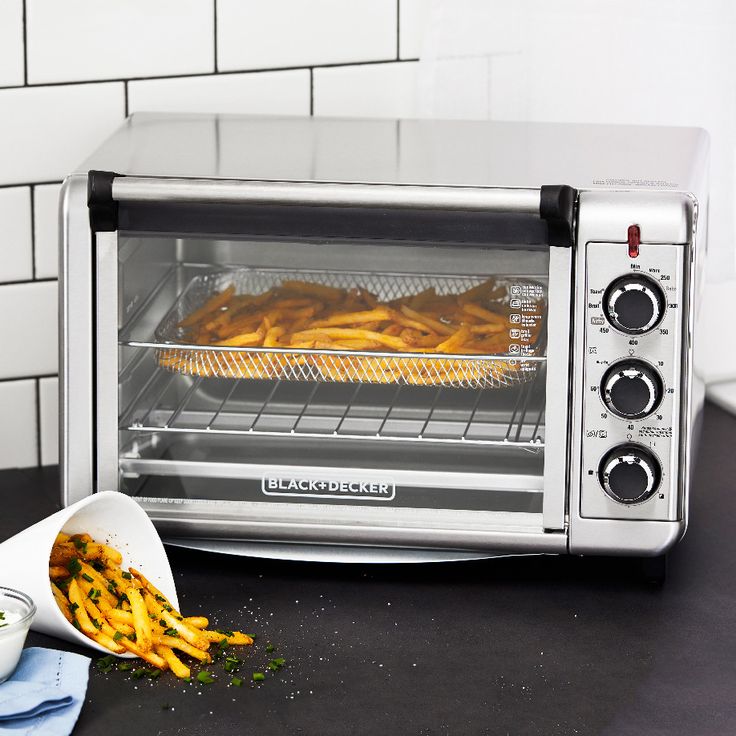
CLEANING, MAINTENANCE AND STORAGE
DAILY CLEANING
NOTE: Empty the crumb tray frequently. Wash by hand if necessary. DEEP CLEANING
WARNING: NEVER place the main unit in a dishwasher or submerge it in water or any other liquid. TURNING STORAGE

TROUBLESHOOTING
"CALL CUSt SrVC" followed by "Er1" to "Er7"
Turn off the unit and call you best customer service on 0800 3.00 so we can help register your device online at ninjakitchen.eu and have your product handy when you call. FAQ
Can the oven tray be used instead of the roasting basket with roasting function?
Do I need to adjust the cooking time and temperature for traditional oven recipes? 
Can I reset the device to default settings?
To restore the default oven settings for each function, press the TIME / SLICE and TEMP / DARKNESS buttons simultaneously for 5 seconds.
Why do the heating elements seem to turn on and off?
Why does steam come out of the oven door?
Why is water dripping onto the counter from under the door r? 
Why is there noise coming from the control panel?
Can foil or baking paper be used?
Can the accessories be washed in the dishwasher? PRODUCT REGISTRATION
When you purchase a product in Europe as a consumer, you have legal rights related to the quality of the product (your “legal rights”). You can exercise these legal rights against your seller. However, we at Ninja are so confident in the quality of our products ("Products") that we give you a two-year manufacturer's warranty. This warranty only applies to the Product when purchased in new and unused condition. These terms apply only to our warranties - your statutory rights as a buyer are not affected. Please note that the 2-year warranty is available in all EU countries.
The following terms describe the preconditions and scope of our warranties issued by SharkNinja Germany GmbH, Kurt-Blaum-Platz 8, 63450 Hanau (Germany) ("us", "our" or "we"). They do not affect your legal rights or obligations of your seller or your contract with him. The same applies if you purchased the product directly from Ninja.
Kitchen appliances require a significant investment. Your new machine should work properly for as long as possible. The warranty it gives is an important factor reflecting the degree of confidence a manufacturer has in its products and workmanship.
Our customer service (0800 000 9063) is open from 9.00 am to 6.00 pm from Monday to Friday. The call is free and you will be immediately connected to a Ninja representative. You will also find online support at www. ninjakitchen.eu.
You can register your warranty online within 28 days of purchase. To save time, you will need the following information about your machine:
To register online, visit www.ninjakitchen.eu from the date of purchase.
When you register your warranty, you can receive our newsletter containing tips, tricks and contests. Get the latest news on new technologies and Ninja launches. If you register your warranty online, you will receive instant confirmation that we have received your details.
For more information about our privacy policy, please visit www.ninjakitchen.eu
Our reliance on our design and quality control means your Product comes with a two-year warranty.
Repair or replace (at Ninja's option) your Product, including all parts and labor, for any defects in design, materials, or workmanship (including shipping and handling charges). Our warranty is in addition to your legal rights as a consumer.

Ninjas do not develop time-limited products. We understand that our customers may want to have their kitchen appliances repaired after the warranty has expired. In this case, please contact our free customer service and inquire about our warranty program on 0800 000 9063.
Ninja parts and accessories are designed by the same engineers who designed your Ninja kitchen appliance. You will find a full range of Ninja parts, parts and accessories for all Ninja machines at www. ninjakitchen.eu
Please be aware that the use of third party parts may void your manufacturer's warranty.
However, your legal rights are not affected.
for purchasing the Ninja® Foodi® 9 multifunctional oven0003
Scan a QR code using a mobile device
Serial number:---------
Purchase date:--------
(Keep receipt)
Purchase store:———————— SPECIFICATIONS
Watts: 2400W  To return your used device, please use the return and collection systems or contact the retailer where you purchased the product. They can hand over this product for environmentally friendly recycling.
SP101EU_IB_MP_Mv1_200903
FOODI AND NINJA ARE REGISTERED TRADEMARKS OF SHARKNINJA OPERATING LLC.
PRINTED IN CHINA Documents / Resources
Posted in NinjaTags: 8-in-1 Multifunctional Oven, Ninja, SP101EU
 ru
ru 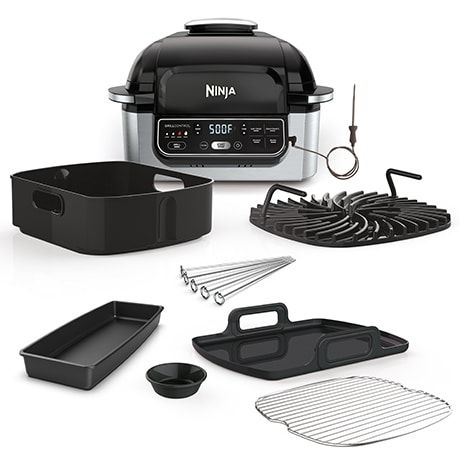 info
info
Pizza from Teenage Mutant Ninja Turtles
 But the Turtles hate anchovies, so the cunning plan was revealed. And to all varieties of their favorite dish, turtles prefer pizza with mozzarella, ham and sweet pepper.
 Grate mozzarella or tear with your hands and scatter over pizza. Put the chopped sliced ham on the pizza. Cut the mushrooms into slices and also add to the pizza. Rinse the tomatoes, cut into slices. Pour over other ingredients. Scatter chopped bell peppers on top. Sprinkle the pizza with oregano and black pepper. Olives and basil can be added to already prepared pizza. Bake the pizza in the oven for 15 minutes.
 Chimichanga from Deadpool
 However, the truth is that Deadpool loves not so much this Mexican dish, but how its name sounds. But this is not a reason not to treat your hero to this hearty and spicy meal!
 We cut the chicken into strips, fry over high heat, often interfere. When browned, we can salt. Add pepper to chicken. Grind the cumin and oregano in your hands. Add to chicken, stir and remove from heat. Next, take the tortilla, warm it slightly in the microwave. After that, it will become very soft, and it will be easier to work with it. Put cheese, chicken, ketchup, white sauce, onion and pepper, beans, cilantro, corn on the tortilla. Next, we turn the left and right edges to the center, cover them with the edge that is closer to us, and wrap them in a tight roll. We fasten the edges with a toothpick. Fry the chimichanga in deep fat or in a pan in a large amount of oil.
 Iron Man cheese burger
 But to endure such trials in order to please yourself with this dish is not at all necessary: in honor of the holiday, you can definitely slightly exceed the daily calorie intake!
 Next, you have to pour in some of the wine and cook over high heat until all the liquid is gone. After you need to add the remaining wine, reduce the heat, continue cooking for five minutes. Sprinkle salt to taste and remove the pan from the heat. Salt the minced meat well, mix, divide into six parts and form flat cutlets that would match the size of the roll. Mix coriander, garlic, black pepper and chili. Sprinkle the cutlets on one side and the other. Heat up a frying pan that has been greased with vegetable oil. Add cutlets and fry on both sides until done. The process will take about 12-14 minutes per side. At the next stage, put the cooked cutlets in a bun, sprinkle with chopped cheese. Scatter the mushrooms on top. Add a leaf of lettuce and cover with the second part of the roll.
 Nachos from Batman
 This process calms him down. But he doesn't really like meat. According to the comics, which were later filmed, Gotham's protagonist has a preference for Mexican corn chips.
 If necessary, divide the pieces into several batches so that the layer is not too dense and each piece is browned. Place in a preheated oven at 200°C and bake for 3-4 minutes or until the tortillas are browned. You will get crunchy corn chips. Sprinkle hot chips with grated cheese, slices of fresh or pickled hot peppers, olives or black olives.
 Burger with onions and jalapeno peppers from Wolverine
 Fry in a pan for 5-7 minutes on each side. Cut the burger buns in half and toast each side for 2 minutes. Put a slice of cheese on the bottom of the buns and heat in the microwave for 30 seconds. Put lettuce leaves on buns with cheese, pour sauce, put cutlets, put onion, cheese, tomatoes, cucumbers, jalapeno peppers on top. Brush the tops of the buns with the sauce and cover the burgers with them. Secure the burgers with long cocktail sticks or wooden sticks and serve immediately.
 Plum Pie by Spider-Man
 Perhaps it is not so high in calories, since Spider-Man is still able to conquer vertical surfaces.
Thor's fruit ice