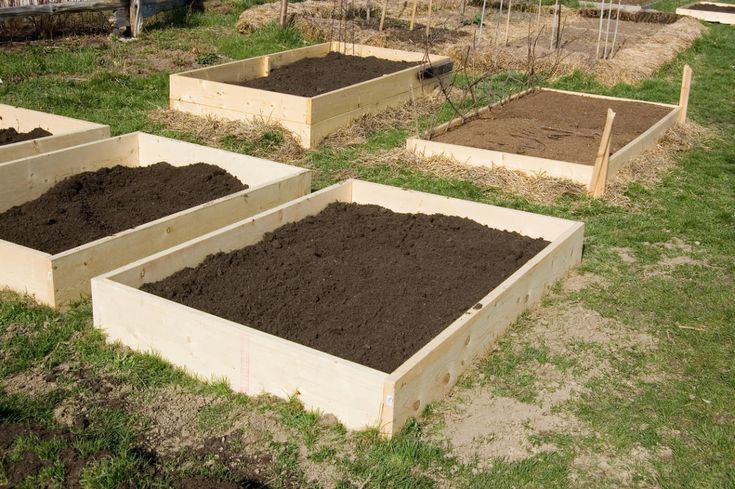
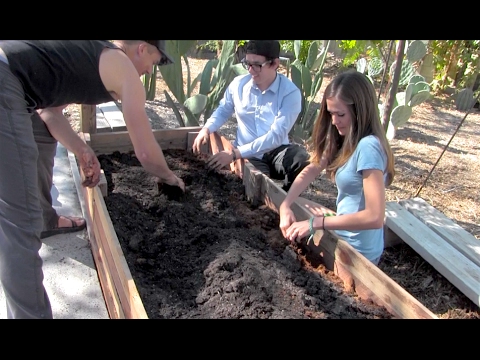
Mixing soil for raised beds
Best Soil Mix for Raised Beds - DIY Blend!
This is the best soil mix for raised beds that will grow healthier plants and cost less than the premixed bags. Instead of buying the bags of raised garden bed soil (and paying the added price for them!), mix up your own blend with three “ingredients” you can buy at any home improvement store!
Wondering what type of soil to fill your new raised garden beds with? Or, looking to replenish the soil in your raised beds in the spring? You’ve come to the right place!
Over the last couple of years, as raised beds have gained popularity, I’ve seen a lot of different premixed “raised garden soil mixtures” at home improvement stores. Of course, the cost is significantly higher than it should be, and I’ve found that many of these bags have fertilizer already added into them. Personally, I don’t use any fertilizer that isn’t natural for my garden, so I prefer to purchase three separate bags of different products and mix them together for a much cheaper raised garden bed soil blend. It ends up costing way less AND grows healthier plants!
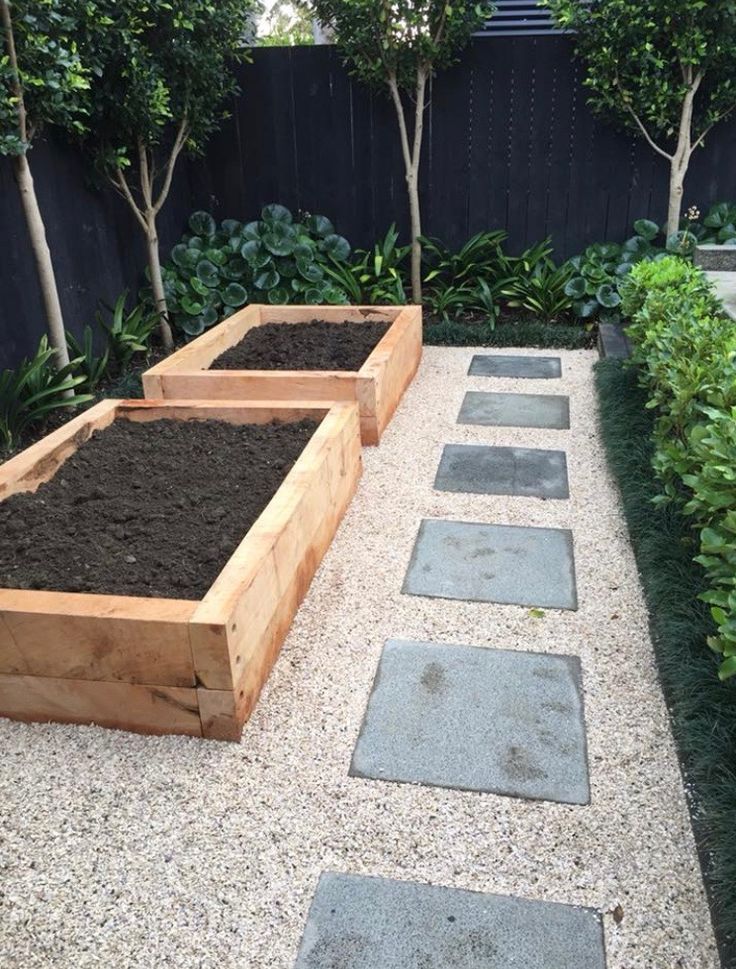
I’ve used this DIY soil combination in my simple raised garden beds and my L-shaped raised garden beds as well as the sofa table I turned into a standing garden bed.
Scroll down to the bottom of this page for a full video tutorial of this post!
DIY Soil Blend Ingredients
- compost (or top soil with compost added)
- peat moss
- vermiculite
Basically, you’ll just mix those three products in equal(ish) amounts in your raised bed. Now, although there’s not an exact science to this mix, there are a few things to note or understand about each of these ingredients so you can grow the healthiest plants!
Compost
This is where all the nutrients for the plants come from. There are a lot of different types of compost you can buy prepackaged like mushroom compost, cow manure compost, chicken poop compost or worm casting compost. Home compost is my favorite (because it’s free and packed with awesome nutrients), so if you have a home compost pile that counts too!
I would highly recommend using at least two different sources of compost for your raised beds. I find this gives the best range of nutrients and my plants have always grown well using this method. Which types you choose is of course up to you!
When filling empty raised garden beds, I prefer to use some top soil or enriched top soil (top soil with some compost already added) to help fill space without spending as much money. If I’m just replenishing soil in the spring, I do not add any top soil because I want as much compost (= nutrients) that I can fit in the space that’s left to fill.
Peat Moss
Peat moss is basically dead moss that has decomposed for a really (really) long time. It is excellent for helping the soil to retain nutrients and helps to retain water long enough for the plants to get the water they need. It also helps to loosen up otherwise denser top soil and compost.
Vermiculite
Vermiculite is the key ingredient necessary for proper drainage and aeration of your raised garden beds. Garden plants do not like it when their roots are sitting in water, so it’s important for the soil to drain water at an appropriate pace (not too quickly or too slowly, either). When mixed in with compost and peat moss, vermiculite provides the perfect amount of aeration.
Yep, and those are the only three “ingredients” you need to put into a raised garden soil mix, and all can be found at the store, right near that premixed bag with the higher price tag!
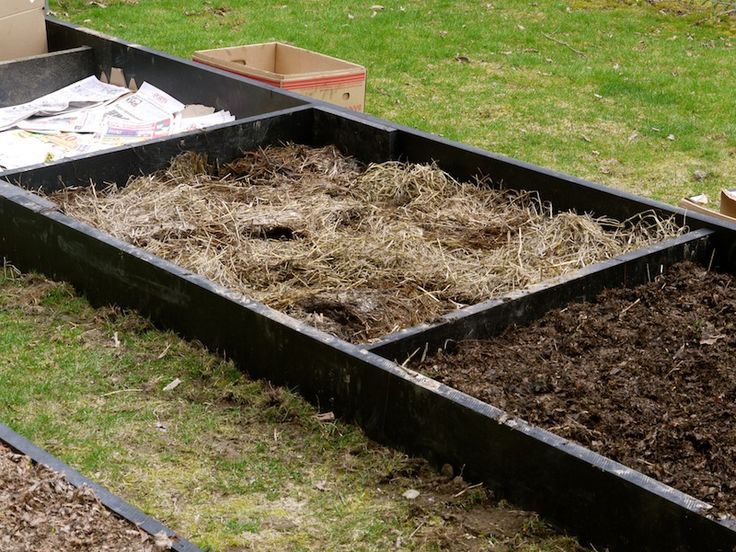
How to Fill a Raised Garden Bed
When filling a new or empty raised garden bed, I like to start by lining it with cardboard or several layers of newspaper. This helps deep weeds from growing up through the bed, and will decompose over time. Then, to save money and avoid filling your entire garden bed with the more expensive ingredients listed above, fill the bottom third of your raised bed with free organic matter from your yard. Dried leaves are my favorite because they don’t often contain seeds or shoots that other material (like soil or mulch) from other places in your yard might be carrying. I’ve also seen people use large logs and branches to fill up space as well.
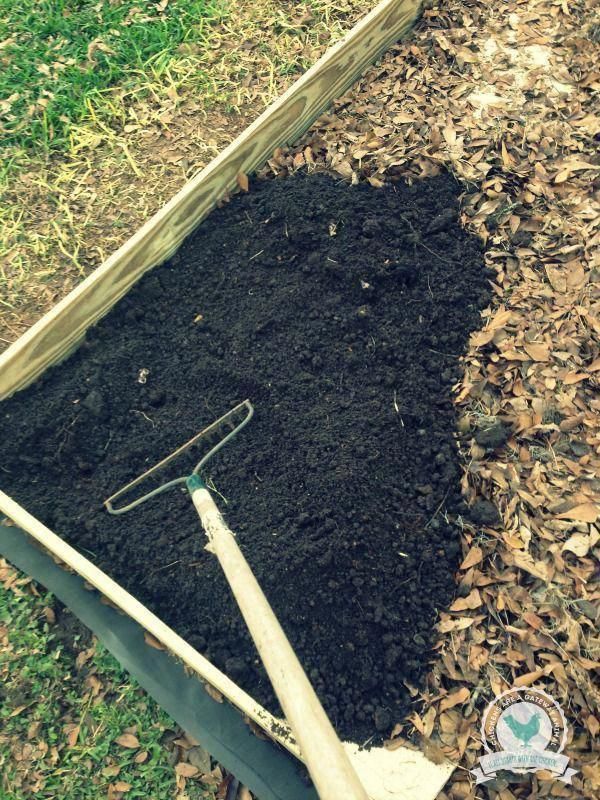
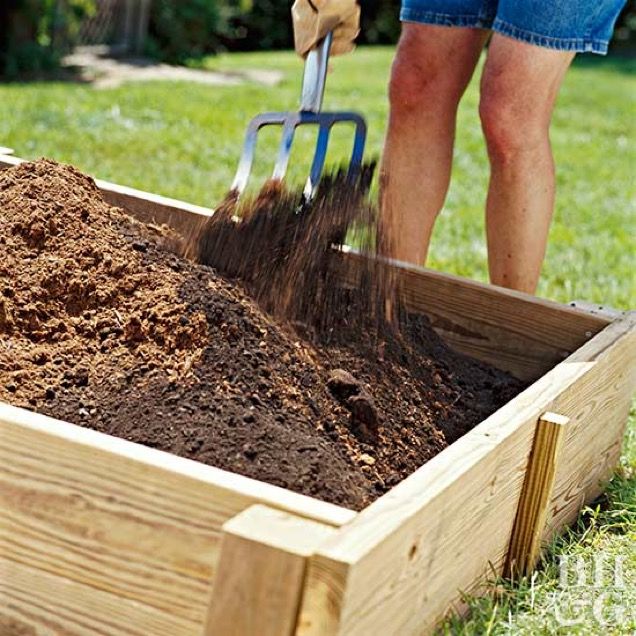
Mixing the Soil for Raised Garden Beds
If you have a large enough container, just mix equal parts peat moss, compost, and vermiculite and then add it to the raised bed. To mix directly in the raised bed, just layer each component in thin layers, and use a hoe or shovel to mix it all together after it’s halfway filled, and then again once it’s completely filled.
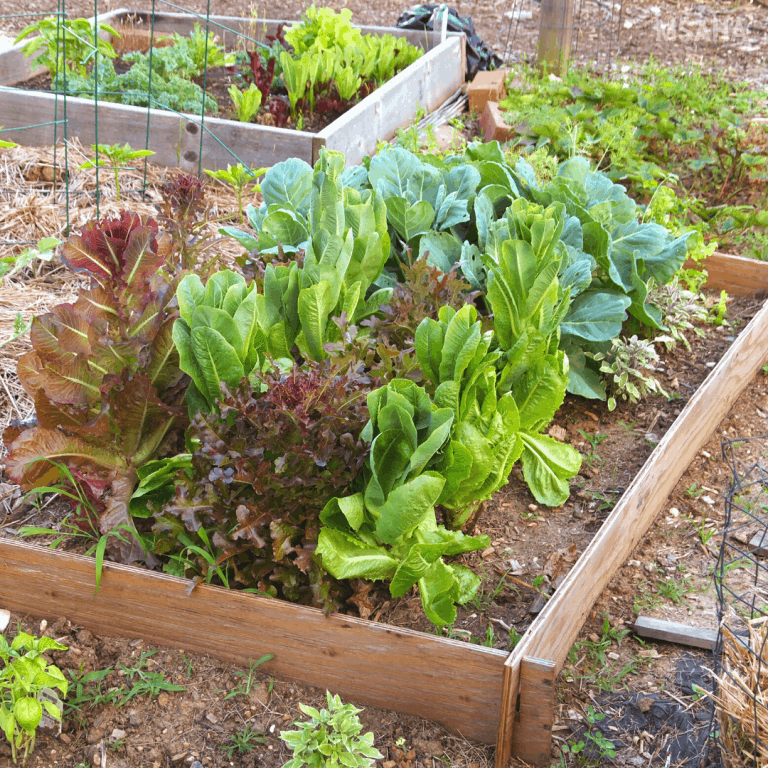
Filling my raised garden beds with this “DIY” mix of compost, peat moss, and vermiculite has helped me to save tons of money over buying the premixed bags AND continues to be the best mix for the healthiest plants that I have used.
Watch the Video Tutorial!
Tutorials for How to Build Raised Garden Beds
Easiest Way to Build a Raised Garden BedHow to Build L-Shaped Raised Garden BedsPin it for later (thank you!)
A Few Other Posts you Might Enjoy
Join the Refresh Living DIY & Upcycling Community
Join the subscriber list to receive one to two emails per month with updates from the blog.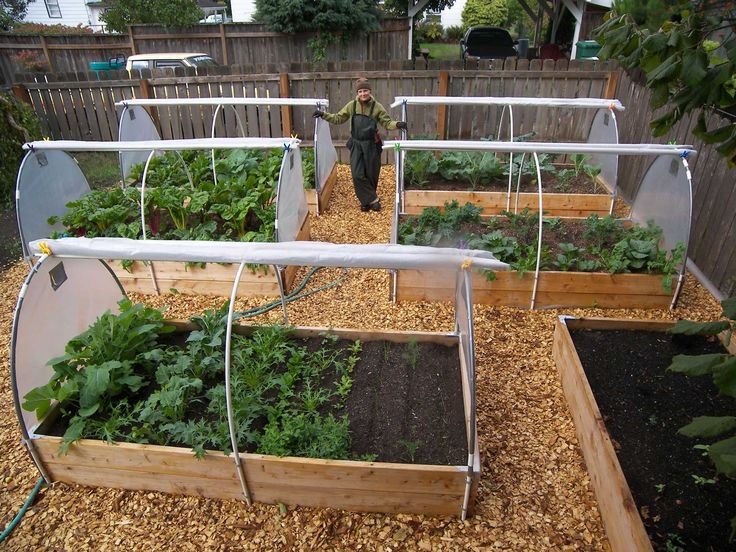 PLUS, you'll gain access to my printables and graphics library. Every new design I create will be added here, and you'll have free access - forever!
3 Raised Bed Soil Mixes Compared
Updated October 2021
Have you ever wondered what kind of raised bed soil mix is the best?
I have been growing in raised beds from the very beginning of my garden journey. In the early years, I used native soil from my property to fill them.
But when I needed to find soil outside my property for three new raised beds, I decided to conduct an experiment. I tested three different raised bed soil mixes and today I’m sharing the results of my year-long test.
(Click below to listen to my discussion on the Beginner’s Garden Podcast, or continue reading.)
*links below may contain affiliate links
3 Types of Raised Bed Soil Combinations
When deciding which raised bed soil combinations I wanted to test, I chose two common mixes that many gardeners use that include topsoil and/or compost I bought in bulk from my local landscaping company.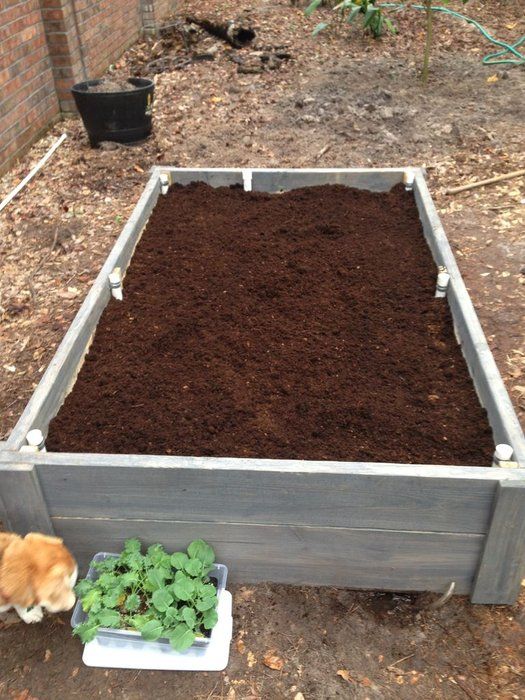
In the third bed I used organic bagged soil only, purchased from Home Depot. Because many gardeners can’t purchase ingredients in bulk, I wanted to test this option to see how it compared.
Here are the three raised bed soil blends I tested:
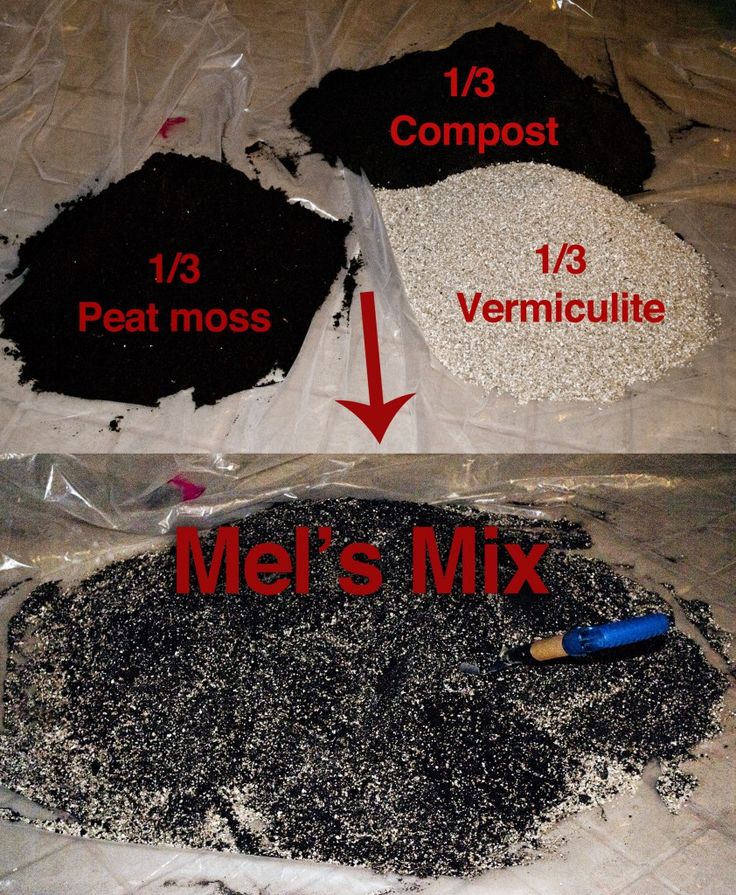
Mel’s Mix
I first chose Mel’s Mix from Mel Bartholomew’s book Square Foot Gardening. This mix consists of:
- 1/3 peat moss
- 1/3 vermiculite
- 1/3 compost
The compost is the key here. In Square Foot Gardening, Mel recommends using compost from as many sources as possible. (Just an anecdotal observation here… those to whom I’ve spoken over the years who have had poor results using Mel’s Mix seem to have had poor quality compost or compost from just one source.)
To achieve as diverse of compost blend as I could, I used bulk compost (compost I bought from a local landscaping company), worm castings, and chicken manure from my own chickens.
Mel’s Mix in Raised Bed #1Perfect Raised Bed Soil Recipe
The second mix I tested is known as the “Perfect Soil Recipe” as recommended by Joe Lamp’l.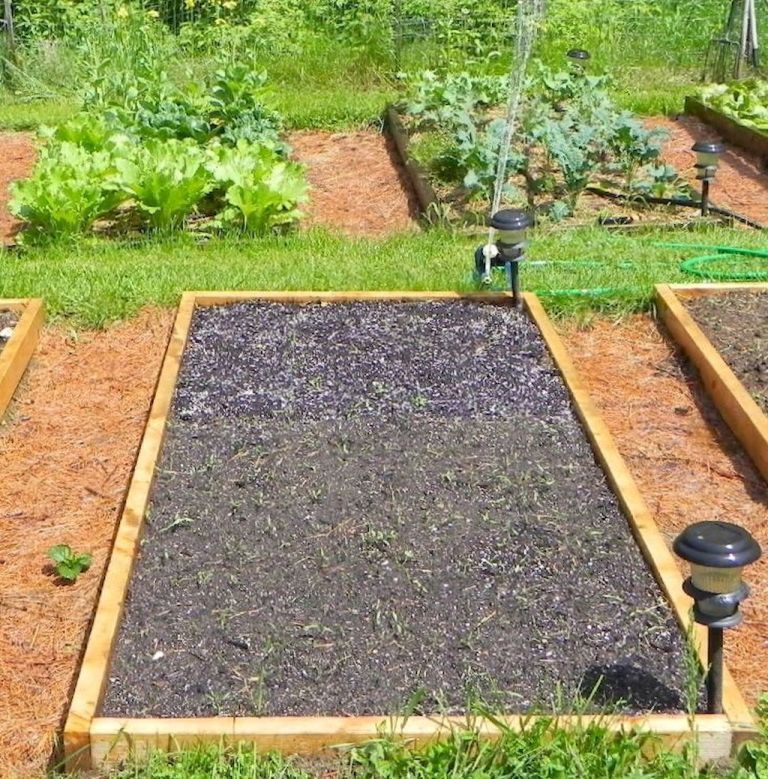 It consisted of:
- 50% topsoil
- 30% compost
- 20% other organic matter.
Joe has many different suggestions on sources of organic matter. I used homemade compost, chicken manure, and worm castings.
“Perfect Soil Recipe” for Raised Bed #2: topsoil, bulk compost, and homemade compost mixed with worm castings and composted chicken manureBagged Soil for Raised Beds
In my third bed, I chose a blend of bagged soil. I purchased:
- four bags (8 total cubic feet) of organic garden soil
- two bags (2 total cubic feet) of organic garden soil “plus” (with extra organic fertilizers)
- two 40-lb. bags of topsoil
- three cups of worm castings.
Most of this I got at Home Depot, but I’ve also seen it in other garden centers.
Method of Testing Raised Bed Soil Mix
In these three raised beds, I planted Roma tomatoes — three per 3’x6′ bed. Each tomato plant I had grown from seed indoors and I planted all nine of them at the same time.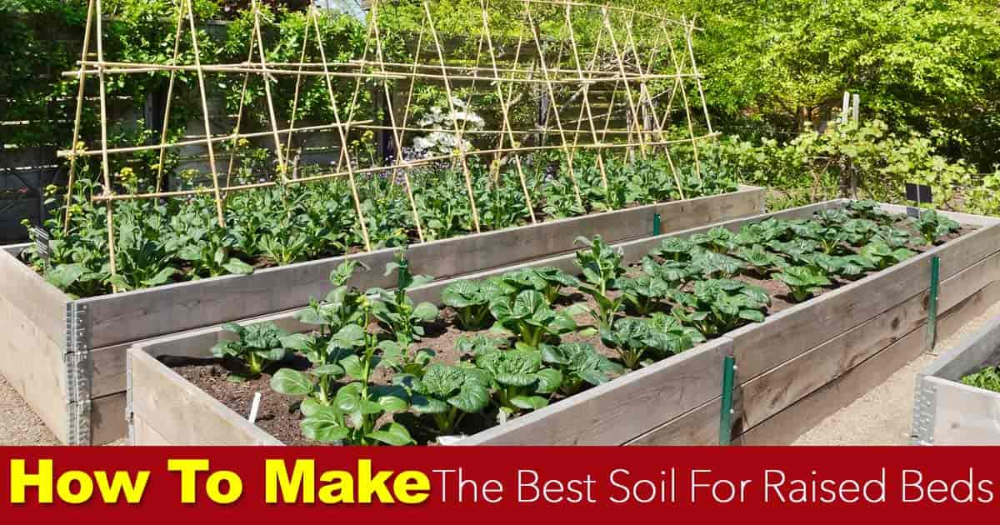
First Impressions
Mel’s Mix
Planting in Mel’s Mix was a dream. It was light and fluffy and wonderful to work with. No matter how much rain we got (and we had a LOT of rain) it never got waterlogged nor had drainage problems. I had no weeds in the first month and my tomatoes started out incredibly healthy.
But the drawback of Mel’s Mix? The ingredients were the most expensive to purchase.
Mel’s MixPerfect Soil Recipe
The bed with the “perfect soil recipe” didn’t start out as great as Mel’s Mix. But, I have to consider a few extraneous factors.
First, we had a record spring rainfall year in 2019, and the topsoil I purchased for the “perfect soil recipe” seemed to contain a lot more clay than I have seen with other topsoil mixes.
In hindsight, I realized that this particular topsoil is sourced from a river bottom. So while I’m sure it contained high amounts of nutrients, it was pretty dense.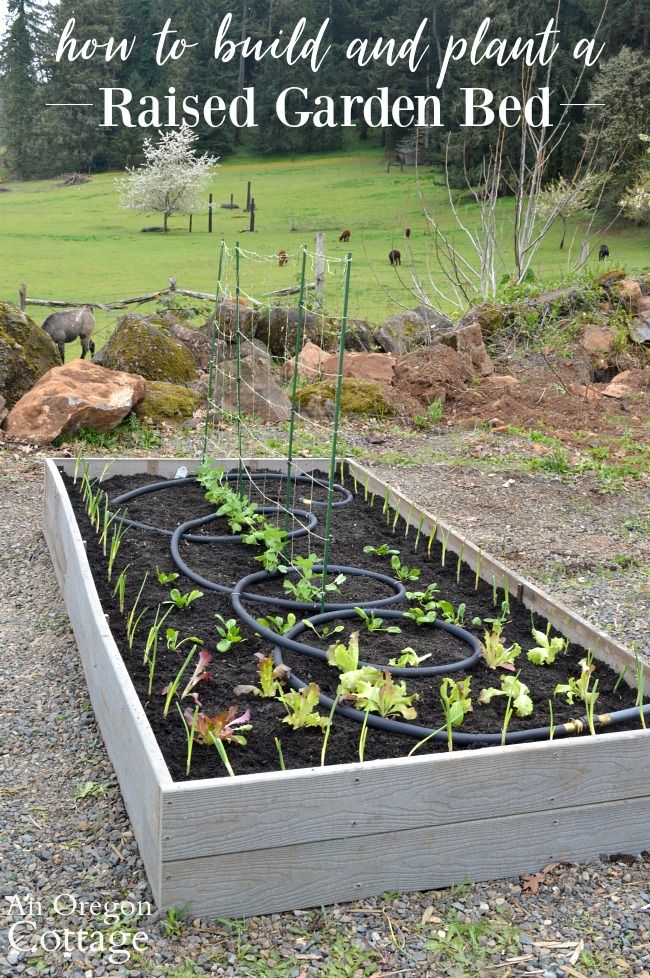 It certainly had a different color and texture compared to bagged topsoil mixes (like the one I used in the bed with the bagged soil).
Because of this (from my observations), this bed didn’t drain well and seemed to compact after the heavy rains. Initially, my tomato plants struggled and were smaller than those in Mel’s Mix.
I also had more weeds in this soil than in the Mel’s Mix, though that was probably due to the higher percentage of my homemade compost.
Bagged Soil Mix
The bagged soil mix was extremely easy to put together and, like Mel’s Mix, was a dream to plant in. It did not compact or have drainage issues in the heavy rain. But, the tomato plants from the very beginning barely grew, something that continued to be an issue for this bed.
After 1 Month
The tomatoes in Mel’s Mix grew vibrantly and were strong with tender leaves. Weeds did start to develop, but they weren’t too bad.
The tomatoes didn’t grow quite as well in the “perfect soil recipe,” but they did grow consistently.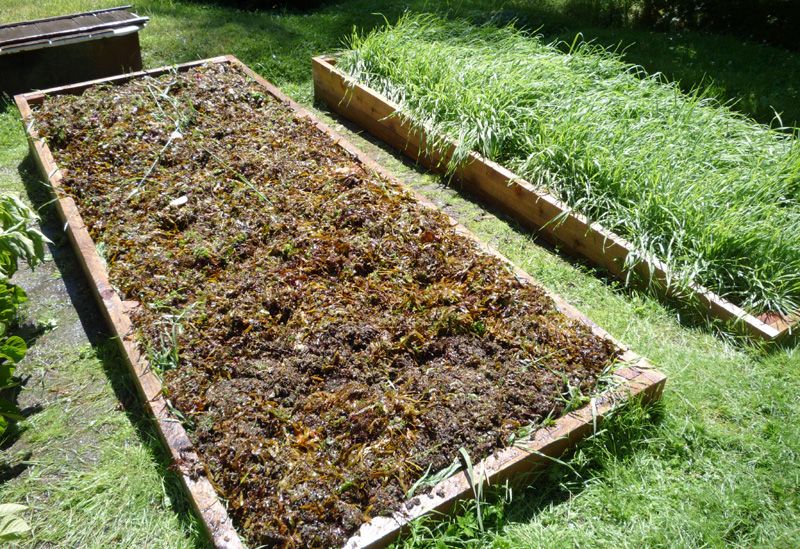
The biggest shock was with the tomatoes in the bagged soil mix. These were not healthy at all. Many of the leaves were very yellow and the plants itself appeared severely stunted. I had planned to keep everything the same in all 3 beds. However, these looked so unhealthy that I started watering them with fish emulsion to try to save them because I feared I would lose them.
Bagged Garden SoilRest of the Season
The tomatoes in Mel’s Mix continued to be strong and vibrant. I expected them to slow in growth due to the high concentration of peat moss.
When I’ve used potting soil with a lot of peat moss in the past, it tends to repel water as it dries out. Surprisingly, this did not happen. I did keep consistent drip irrigation on the beds during the dry summer, and this mix never did compact or dry out as I would have expected.
The tomatoes in the Perfect Soil Recipe bed ended up almost catching up with the Mel’s Mix plants. I think this was probably because the rain let up and the plants were no longer drowning.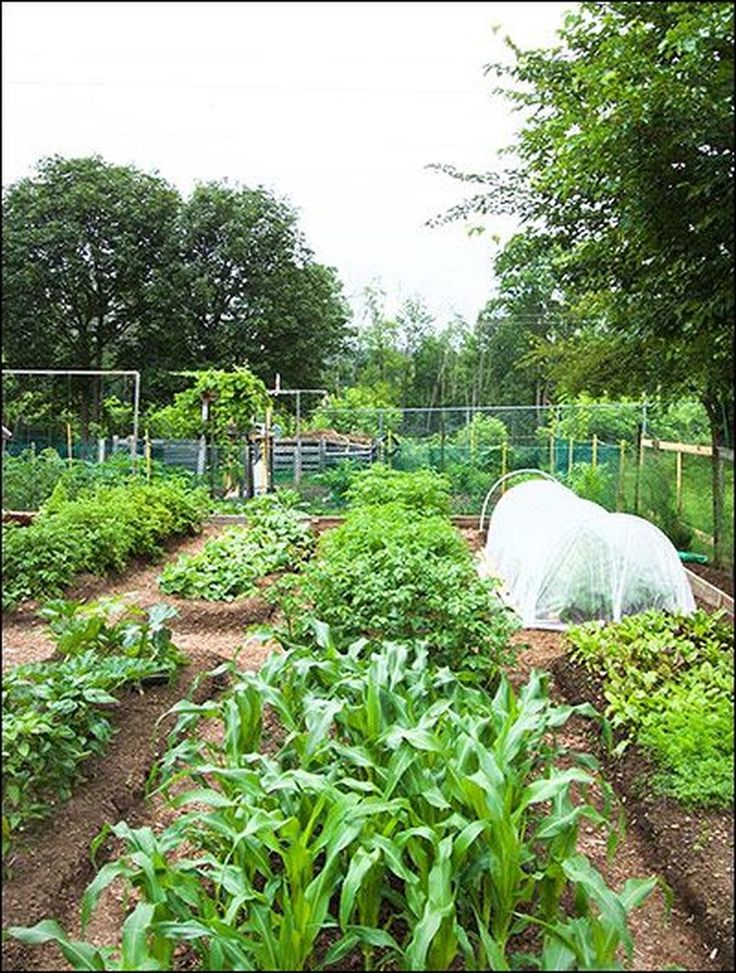
While the tomatoes in Mel’s Mix and the “perfect soil recipe” ended up performing well, I can’t say the same about the tomatoes in the bagged soil mix. Although they didn’t die as I had feared, they never rebounded and never looked healthy.
Total Yield Comparison Between Raised Bed Soil Mixes
The biggest indicator of the success of any raised bed soil mix is the total yield, and this I measured meticulously throughout the garden season.
As mentioned previously, I grew Roma tomatoes in all of these beds. As a determinant variety that bears all at once, I could weigh the harvest within a short window of time before pulling them up and planting a second crop to test.
Below are the yield results from these Roma tomatoes in each mix, compared with Romas I also planted in my in-ground garden. I must point out, in this particular year, my tomato yields were lower overall, probably due to the excessive rainfall and my battle with early blight. Still, you can see the marked difference between the beds.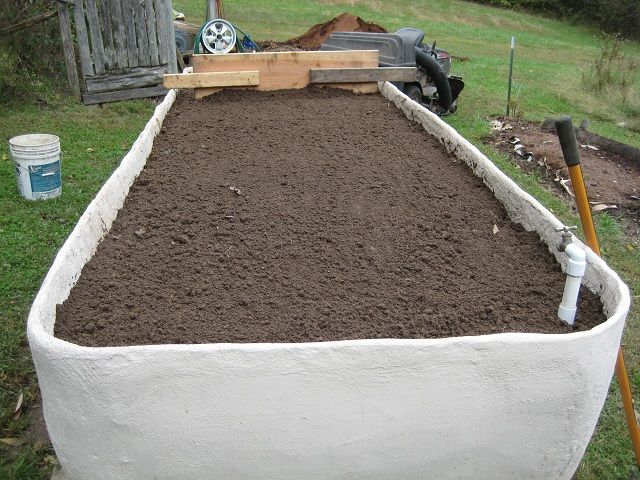
- Mel’s mix: 7 lbs/plant
- Perfect soil recipe: 5.3 lbs/plant
- Bagged soil: 1.34 lbs/plant
- In-ground Roma tomatoes: 2.59 lbs/plant
You can see that my plants in Mel’s Mix did much better than any other soil, and the bagged soil mix was quite disappointing.
Also of note: the Roma tomatoes in the ground suffered more from early blight, and I also planted them slightly closer to one another. Still, this result remains consistent for my garden — tomatoes in raised beds generally out-perform their counterparts in the ground soil.
Fall Broccoli in Different Raised Bed Mixes
As you see above, my first experiment tested the performance of Roma tomatoes in the summer. For my second test, I planted broccoli. The results of that test differed slightly.
In September, I planted broccoli I started from seed indoors both in the Mel’s Mix and the Perfect Soil Recipe beds. I didn’t have enough seedlings to plant them in the bagged soil bed.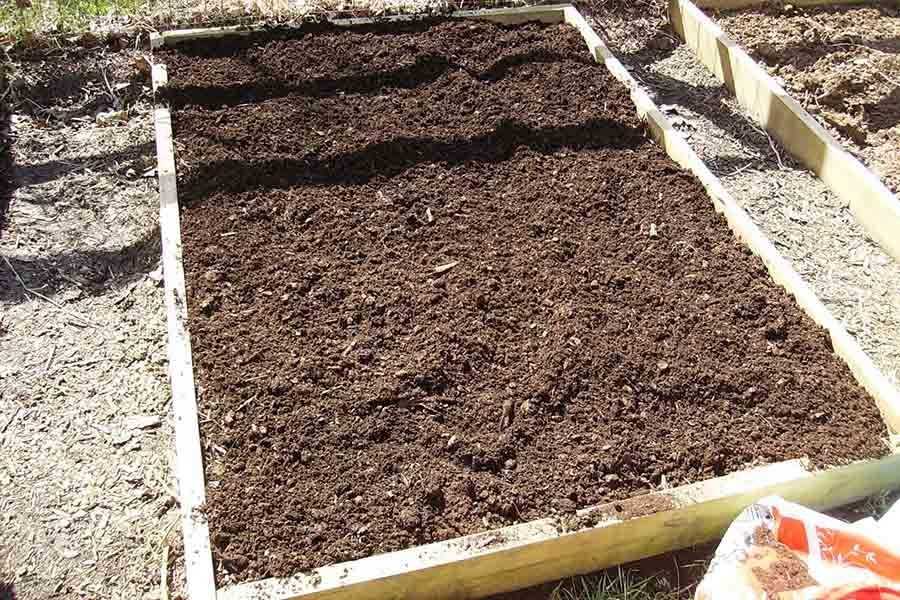 I ended up buying transplants from a garden center and planted them in the bagged soil bed about a month later.
Whatever difference I saw between Mel’s Mix and the Perfect Soil Recipe in the early growth of Roma tomatoes disappeared in the fall-planted broccoli. Both beds performed extremely well and produced lush, vibrant broccoli — the largest I’d ever grown.
I did have a peculiar fall, however. A record-October heatwave prevented this lush broccoli from forming heads, and an early freeze in November damaged the plants severely. Because of this, I barely harvested any heads from this group.
As a contrast, the smaller plants in the bagged soil mix (because I planted them a month later), withstood the cold snap and went on to produce full, large broccoli heads. Though the plants themselves never grew at the rate that those in the first two mixes did, they produced well.
Soil Test Results from 3 Raised Bed Soil Mixes
At this point, my only conclusions could be drawn from observing the growth of two crops — tomatoes and broccoli.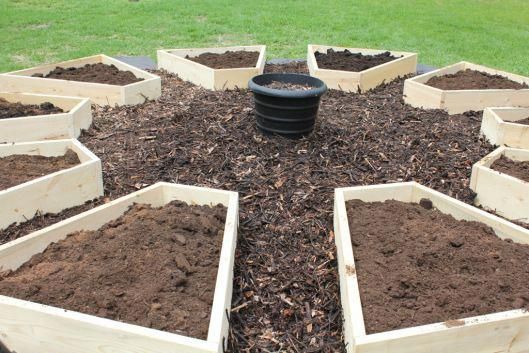 But what would a soil test reveal about the differences between these three raised bed soil mixes?
Prior to the broccoli planting, I sent off soil samples to my local cooperative extension service. Here were the highlights of the differences between the soil test results:
- Mel’s Mix: Ph 5.6 (not surprising because peat moss is naturally acidic). It tested “above optimum” on phosphorus, potassium, and zinc, and all other micronutrients tested.
- Perfect Soil Recipe: Ph 6.8 which about perfect for most vegetables, but perhaps a little on the high side for tomatoes. This recipe showed above optimum levels on phosphorus, potassium, and zinc, and all other micronutrients. Of special note, these levels were also above Mel’s Mix in each. Plus, it had almost double the calcium of Mel’s Mix.
- Bagged Soil Mix: Ph 7.5 — this is high for most vegetables, especially tomatoes. It was also above optimum on phosphorus, potassium, and zinc, but the levels were erratic on some of the micronutrients.
 I also noted a very high amount of sulfate compared to the other two and very high on calcium.
Speculations in Differences Between Raised Bed Soil Mixes
I’m not a soil scientist, and I can’t tell you all the “whys” behind what I found from my test. But between the soil test and my own observations, I have some thoughts about the differences in the soil mixes.
Conclusions on Mel’s Mix
I think that Mel’s Mix performed well because our spring was so wet and the peat moss didn’t have a chance to dry out. Instead, the drainage capacity of the peat moss proved helpful in our rainy spring.
Conclusions on the Perfect Soil Recipe
I believe the Perfect Soil Recipe started slowly because of the amount of rain and because of the high amount of clay in the topsoil I purchased. If I had obtained topsoil with less clay content, I imagine this blend would have rivaled Mel’s Mix or even surpassed it.
Conclusions on Bagged Soil Blend
The bagged mix blend is a mystery to me because this brand was recommended by several trusted gardening friends, and most of those I’ve asked have had a much better experience with bagged soil.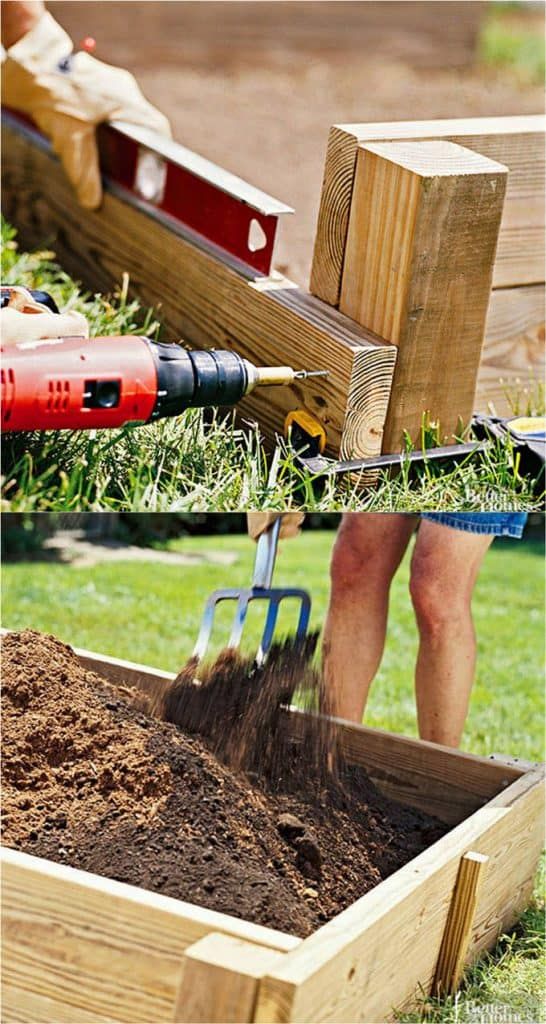 This is also why I am not disclosing the brand — I do not believe my experience is necessarily indicative of all of this brand’s products.
So, if so many people get great results with bagged soil (even organic bagged soil like mine), why were my results so terrible? I have a few theories.
Why bagged soil didn’t perform well in my raised bed:
It seemed like these bags of soil had a lot of tree bark and perhaps it hadn’t broken down enough. Instead, as it continued to break down it tied up nitrogen my tomatoes desperately needed.
I also wonder if the soil was missing some of the micro-organisms and soil life that is present in both native soil and compost. Perhaps this was why it eventually corrected itself with the broccoli — the soil life had a chance to return.
Third — and perhaps most obvious — was the high Ph. Broccoli can tolerate higher pH than tomatoes can.
And although I can’t tell you which of my theories is correct — maybe all three played a role — I can tell you, I learned several lessons from this experience with bagged soil.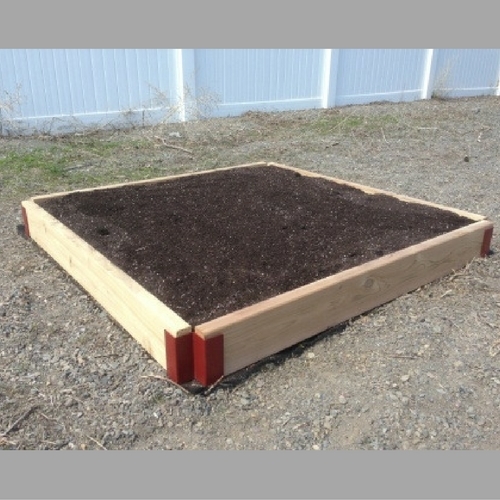
Biggest Lessons
After having tested these three blends of raised bed soil mix, what will I do with future beds?
- Although Mel’s Mix performed better than I expected, it’s not my choice because of the expense. If I were to only build one small raised bed, it would prove worth it, perhaps. But as I expand my raised bed gardens, I just can’t justify the cost of Mel’s Mix when the “perfect soil recipe” (with better topsoil) has the potential to perform just as well if not better.
- The Perfect Soil Recipe seems to have better longevity because of the amount of nutrients found in the soil, and it also had a more neutral Ph.
- No matter what blend I choose, it’s important to add diversity. I would include as many sources of compost and organic material as possible. The greater variety we can have with our organic material the better!
The Best Raised Bed Soil Blend
I loved doing this test in 2019 and since then I’ve continued to test in my garden.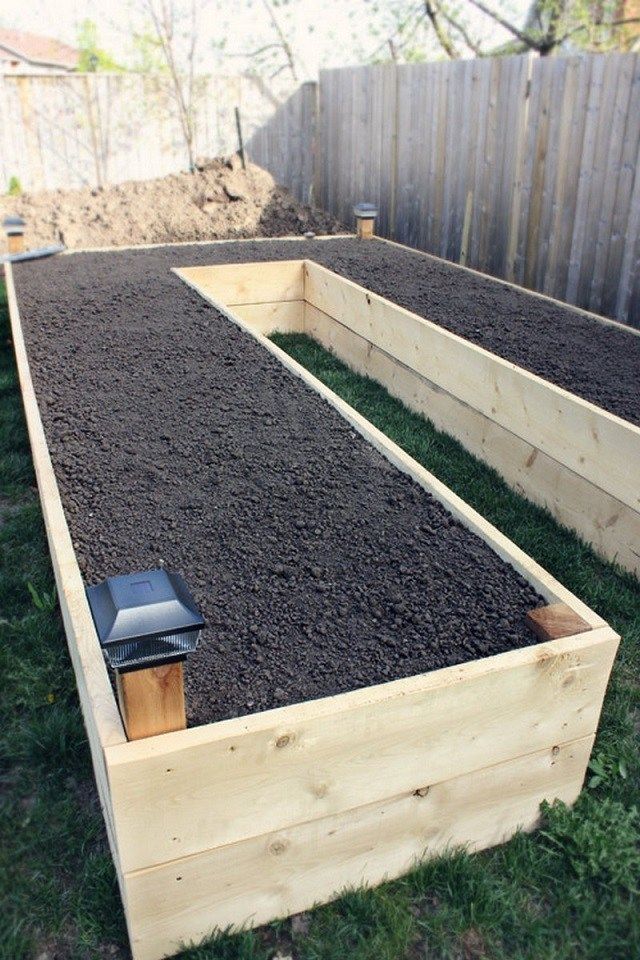 I took what I learned and adapted to what has been my go-to raised bed blend since.
What’s the formula?
- Tree limbs, logs, sticks, fallen leaves, and/or garden debris at the bottom of the bed
- Add roughly a 50/50 blend of compost (bulk and/or homemade) and topsoil (bulk and/or bagged).
The tree limbs and sticks not only help to lessen the amount of soil I need to obtain for a raised bed, but as they break down they create rich, nutritious organic matter.
Although this may be seen as a negative thing, as it breaks down, the soil level will drop. This “forces” me to have to add more compost each season, which continues to increase the longevity of the soil fertility.
The 50/50 blend of compost and topsoil form the basis of the raised bed soil. Sometimes I mix it; sometimes I layer topsoil and then compost on top. Both have worked equally well for me.
When building this new raised bed kitchen garden, I chose a mix of native soil and Joe Lamp’l’s “perfect soil recipe” based on my experiment with raised bed soil the year before.
The key, I believe, is rich organic matter that is alive. You can learn more about that in What’s Wrong with my Raised Bed Soil?
How much soil you need for a raised bed?
One more thing you may be asking is how much soil will you need in your raised bed, regardless of which mix you choose? This handy online soil calculator will get you started.
For a specific calculator on how much peat moss, vermiculite, and compost to purchase if you go with Mel’s Mix, this soil mixture calculator will help you know how much of each to obtain.
What about you? What blends of raised bed soil mix have worked well (or not so well) for you?
How to make high beds with your own hands. How to build bulk high beds? Use of high beds
Very often summer residents and homeowners create high beds, or so-called raised or bulk beds. Such beds are used not only for high gardens, but also for bulk flower beds.
High beds are perfect for people with disabilities, since the beds do not need to be dug up often, it is enough to periodically loosen the ground.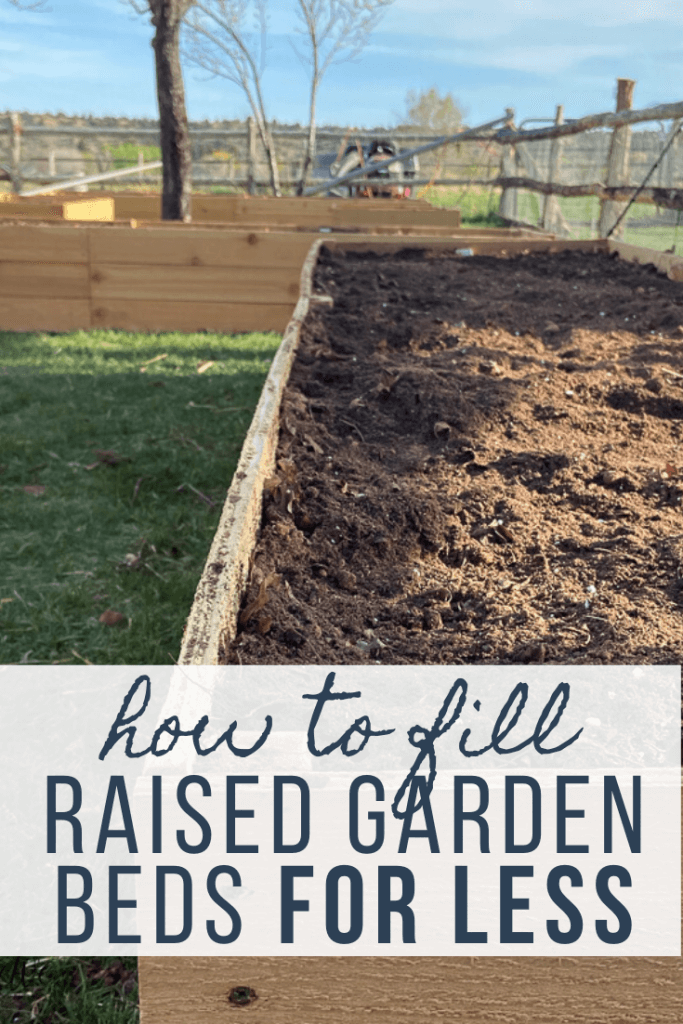
This "raised garden" has advantages and disadvantages.
| High beds pros and cons | |
| vs. | |
| Safe cultivation of vegetables, fruits, berries, herbs, etc. Protection from adverse conditions. | Fast drying soil, regular watering. |
| It does not depend on damaged soil in the garden, since useful purchased soil can be used. | Frequent addition of additional mineral fertilizers. |
| 2-3 times more yield than conventional flat beds | Semi-Mature Organics Resist Therefore Seeds |
| Purchased soil will protect seedlings from decay, weeds and various fungal diseases. | Risk of unfavorable wildlife breeding in the ground |
Ease of harvesting, as well as digging, fertilizing, weeding the garden.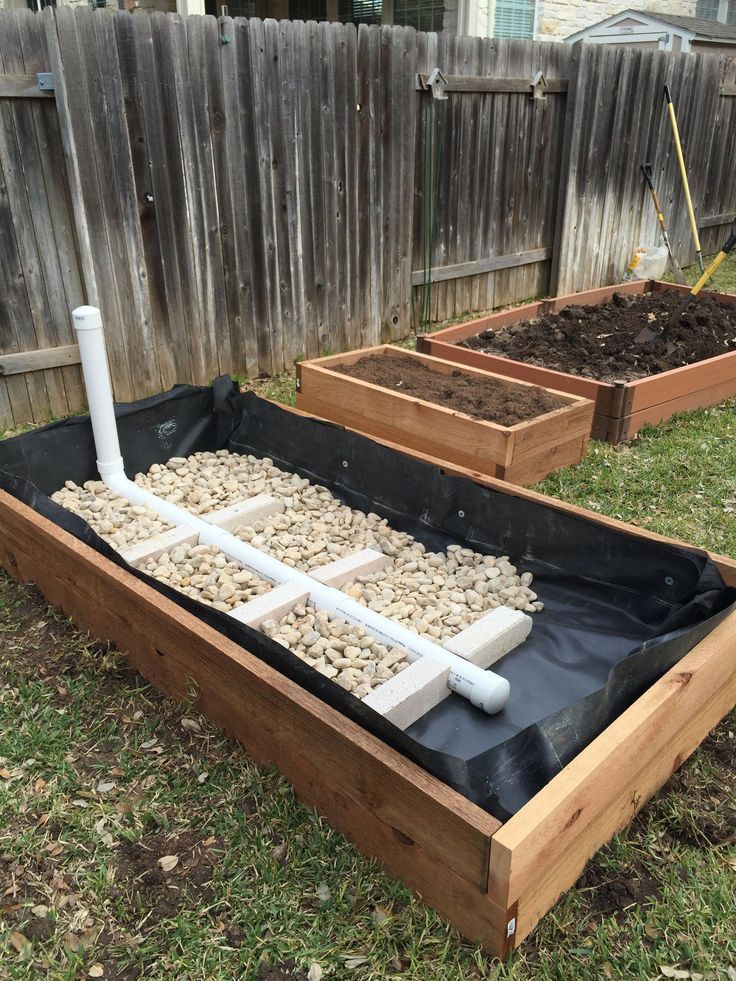 | Plant species restrictions |
| Favorable crop cultivation in the cold season. | Water may stagnate if watered frequently |
| Unusual and original planting decor | Material costs when creating beds |
| Saving the area of planted plants. | |
| The design and shape of the bed can be different | |
| Rapid warming of the soil, which allows you to plant plants earlier | |
| Easy to assemble low growing plants | |
| In spring, snow melts quickly, the ground warms up quickly. | |
| Optimum ground temperature | |
| Good drainage, compacted soil | |
As we can see, the advantages are much greater than the disadvantages.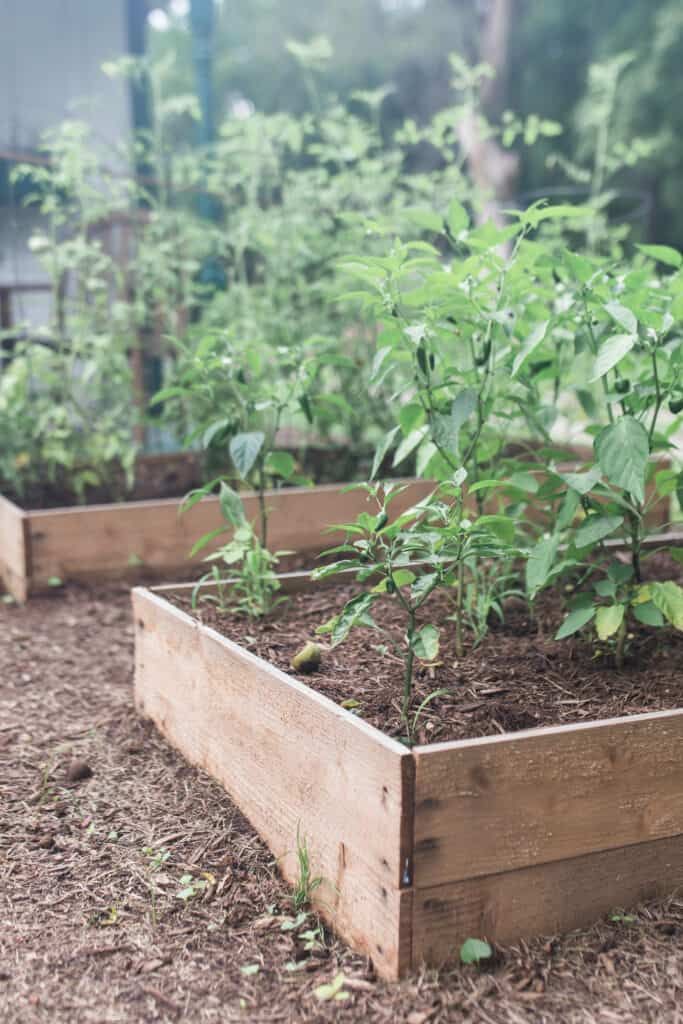
Watering high beds
Raised beds will need to be watered much more frequently than regular flat beds. This is due to the fact that the soil dries out very quickly, so the care of such beds must be approached very carefully.
In high beds, the soil temperature is 10 degrees higher than in simple beds. What ensures the effective development of the root system, in addition to this plant can be planted earlier than usual.
Raised brick beds
The advantage of high brick beds is that such a design will be as reliable as possible. The method of laying a brick structure is carried out in the usual way: it is necessary to mark the required length and width of the beds and lay them with bricks.
A gardener who does not have sufficient skill in laying bricks runs the risk that the bed will be sloppy.
Raised beds photo
How to make raised beds
Properly approach the process of choosing the optimal height, length and width of the beds.
In the presence of good soil, a bulk bed can be built with a height of 15 cm, but if the bed is separated from the ground, then it is better to make it twice as high (approximately 30 cm), this height is optimal for garden plants. For compost warm beds, it is advisable to choose a height of 50 cm and above.
High beds are very convenient in summer cottages, when there is no time to constantly cover the beds at cold temperatures. Thanks to the compost layer, the roots of the plants will be completely safe from sudden frosts, the bed will have an optimal temperature.
Many summer residents build beds at waist level for easy harvesting. However, you should carefully approach the design of wide beds, in this case, with a high height, it will be difficult to reach the middle of the beds.
By and large, the length does not matter, you can choose any, the only limitation will be the length of the suburban area. It is recommended to make fences reliable and stable, so long boards can be strengthened with vertical slats or posts.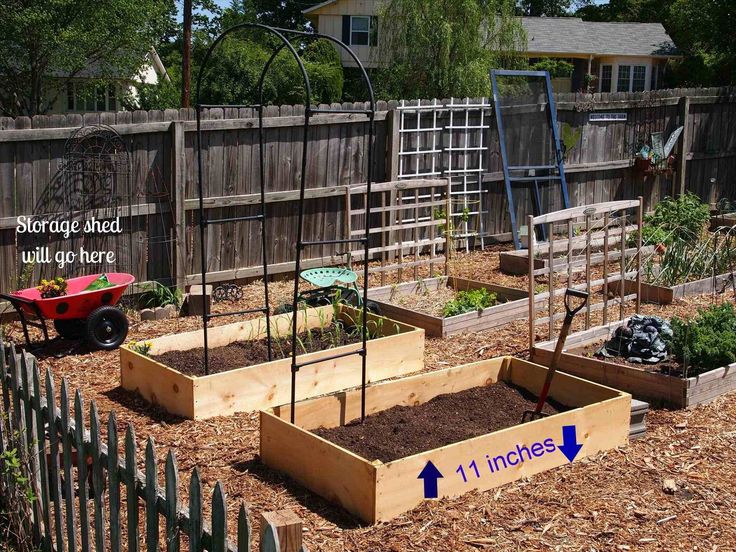
In contrast to the length, the width of the bed is a serious parameter. Seedlings should be planted in two rows. For the bed, choose a width within 100 cm.
In fact, many plants are planted in high beds, but crops such as sunflower and corn are not planted in high beds.
The most commonly used materials for high bed fences are logs, boards, wicker barriers, brick, metal, plastic and slate. The durability and reliability of the fence depends on what material you choose.
So, let's highlight the main stages of creating high beds:
1. To create raised beds, select an area (sheltered from the wind, preferably sunny) and clean it of debris and weeds.
2. Mark out the area. Calculate the height and width. The height is chosen individually, and the width should be no more than 1 meter.
3. Gradually fill the bed. We spread a layer of straw (or sawdust, grass, branches, etc.)
4. Build a wooden structure as a fence.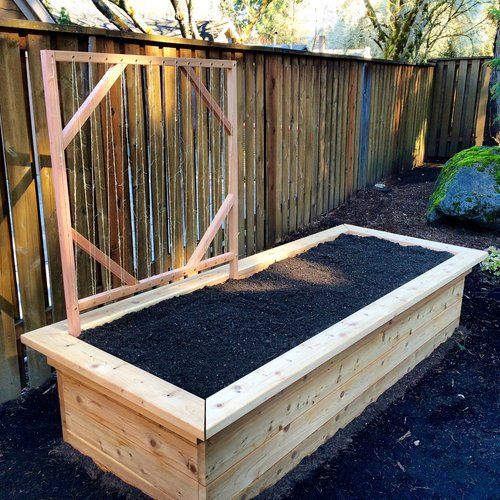 It is useful to lay a metal mesh at the bottom, which will protect the seedlings from other harmful creatures.
5. The next layer is organic matter (compost) necessary to create soil nutrients. It is worth considering that after some time the soil will settle, so the layers should be repeated to the required height.
6. Making the top fertile soil layer (presumably 10 cm)
7. Water the beds with water without mixing the laid out layers.
One of the difficulties that the gardener may face is the creation of the body and frame of the bed.
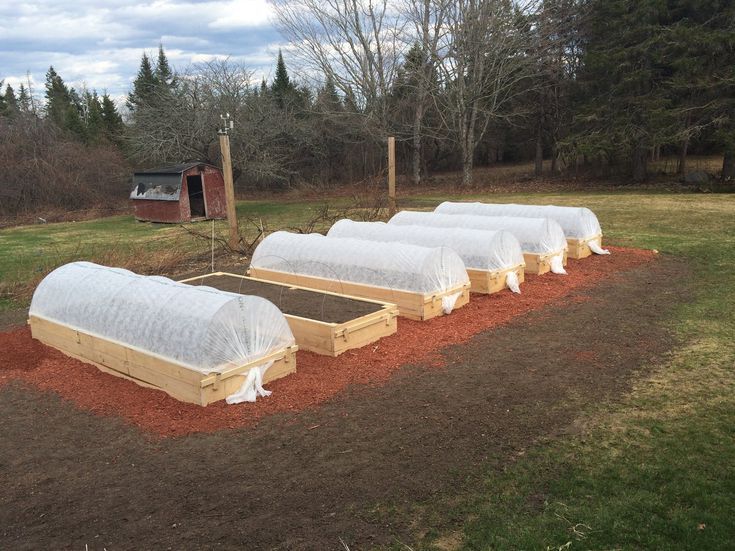
The bed can be protected from precipitation and other external factors with the help of a film.
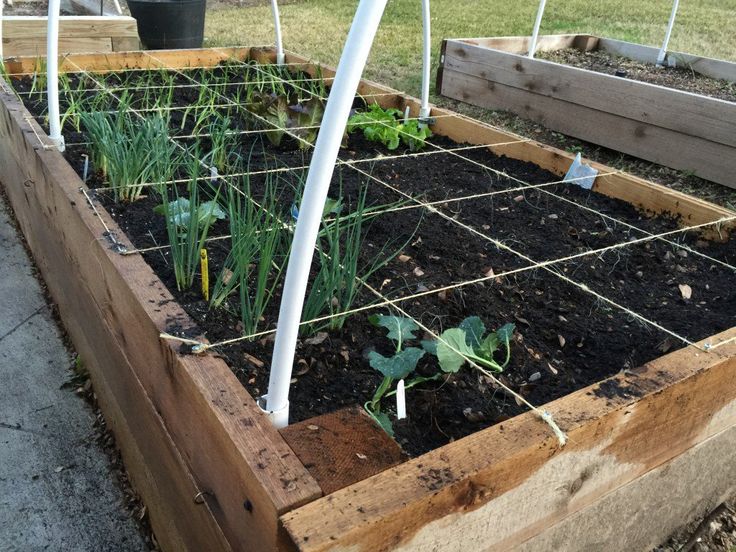
At the ends of a high bed, it is not difficult to install posts that will serve as a support for a trellis if you need it for growing cucumbers, beans and other wicker plants. A canopy can also be attached to these stands to protect tomatoes, peppers and other plants from fog and rain.
Raised beds produce particularly good crops of tomatoes, cucumbers, courgettes, cabbages, peppers, bush herbs and eggplants.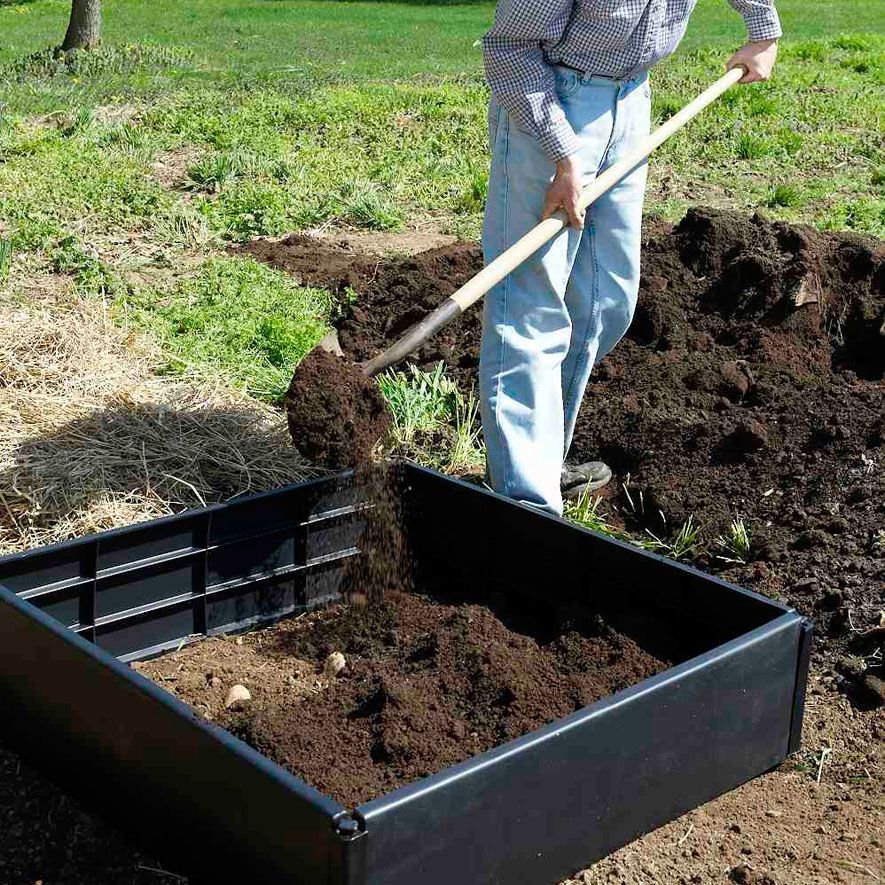 It is important for the first 2 years not to plant seedlings that are capable of creating nitrates: Chinese cabbage, salads, radishes, etc.
Of course, the process of creating high beds requires considerable effort, but does not require special skill. High beds will allow you to open the gardening season, increase productivity and create masterpieces of gardening.
If your harvest is disappointing, and your garden plot is not as productive as you would like, or if your plot of land is small, creating high beds can be the solution to all your problems. Raised beds allow you to garden more efficiently, in a smaller area and on firmer ground.
Steps
Quick Methods
Use an old wooden boat. Using a wooden boat can be a great way to personalize your garden, and it also helps if you don't have building or carpentry skills. To find the right boat, look online for listings such as Craigslist or ask at your local fishing shops.
- Find an old wooden paddle boat (or similar).
 A boat not suitable for use in the water will probably be the cheapest.
 - Paint the boat any color you like and drill some holes in the bottom.
- Place it in a permanent position so that the boat is level. It may be necessary to dig a small trench.
- Line the bottom with plastic and place a small amount of stones or other filler inside to level the bottom.
- Fill with soil and plant as you wish.
Use an old wooden bed frame. You can purchase an antique bed frame to make your garden beds look whimsical and unique. The downside, of course, is that the height can be uncomfortable to sit on and it will be difficult to get to the center of the bed if a very large bed is used. It is recommended to use a baby bed.
- If you can find only the back and front headboards, they can be attached to the correct size bed as described below.
- If the bed frame has sides, you can simply build them up to create a box inside the bed.
 Measure the boards and nail them (on the inside of the bed) to the frame. Fill with earth and plants.
Use old wine cases. Wine crates, tangerine crates or any similar crate can be made into a great planting crate. Just drill holes for drainage, if there are none, fill with earth and plant. Place them on the ground, on a flat or sloping surface.
Project plan
Define and design the shape of the raised bed. Luckily, constructing a raised bed doesn't take long! You just need to build a box with an open top and bottom. You can make it any shape you want. Imagine that you are making a mold to fill it with soil (like pouring cement or gypsum into a mold).
Draw a bed plan, measure your area and add the measurements to the drawing. You will now be able to determine how much material you will need to build the garden.
Decide what materials to use. You can use anything: boards, plastic, synthetic wood, sleepers, bricks, stones or a number of other materials.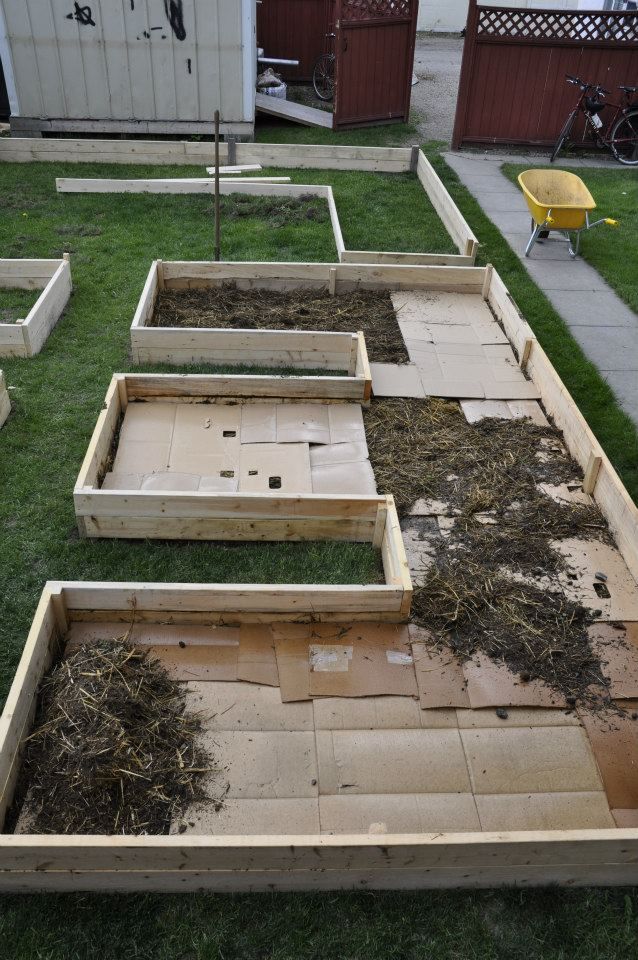 However, using wood is usually the easiest and most effective way. This article talks about creating a garden bed out of boards or synthetic wood.
Collect everything you need. See below for a complete list of what you need. All you really need are boards cut to the right length and at least 60 cm high. If you want to make a triangular bed, you will need three boards. If you want to make a square bed, you will need four boards of the same length. For a rectangular garden bed, you need four boards, two of the same length and two of the other!
Installation of high beds
Install the frame. Use 4 pegs twice the height of the intended bed. Dig holes and place the pegs halfway into the ground. Make sure the pegs are level and in the correct places.
Attach long boards. Measure the greater distance between the pegs, including the width of the pegs themselves, and cut the boards to the appropriate length. Use nails or screws of the appropriate length. Drive two nails or screws into the ends of each board. Arrange the boards on the sides, adjusting the intended height of the bed. Reduce the width of the boards if necessary.
Attach the boards along the short sides. Measure and saw the boards for the short sides of the bed according to the distance between the outer edge of the two boards on the long side. Again, use two nails at the ends of each board, driving them into the pegs.
Create an overhang if necessary. You can create a more attractive bed by adding a ledge to the top edge of the boards. First, take boards of the desired width and cut a 45 degree bevel on the ends of each board in a picture frame style. Purchase wooden pegs half the width of the ledge and use suitable nails to attach them to the outside at the top of the bed. Fit the cut edges of the boards together and nail the ledge to the inside corners at the top into pegs.
Cut a piece of garden plastic or covering material to fit the size of your raised bed.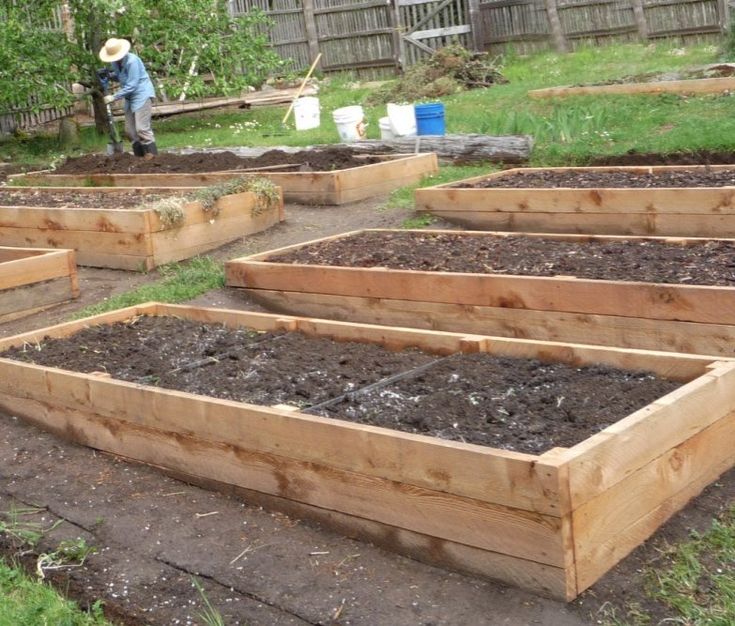 By placing it on the surface, you will significantly reduce the growth of weeds. Seven or eight layers of dampened newspaper or packing cardboard will also keep weeds from growing (be sure to remove the tape from the cardboard).
Use of raised beds
After your garden bed is in place, fill it with soil. Add some compost fertilizer to the base of the bed and then a layer of soil on top of the nutrient rich compost. You can significantly reduce costs by using soil (up to 50%) from other parts of your site. Fill at least 1/3 of your raised bed with compost or manure (available from nurseries or garden centers in 20kg bags).
- Add dry organic fertilizers (such as wood ash, bone meal or blood meal) when building your garden. Follow the instructions on the package.
Proceed to landing. Some people like to grow flowers in high beds. Some prefer to grow vegetables. The options are endless.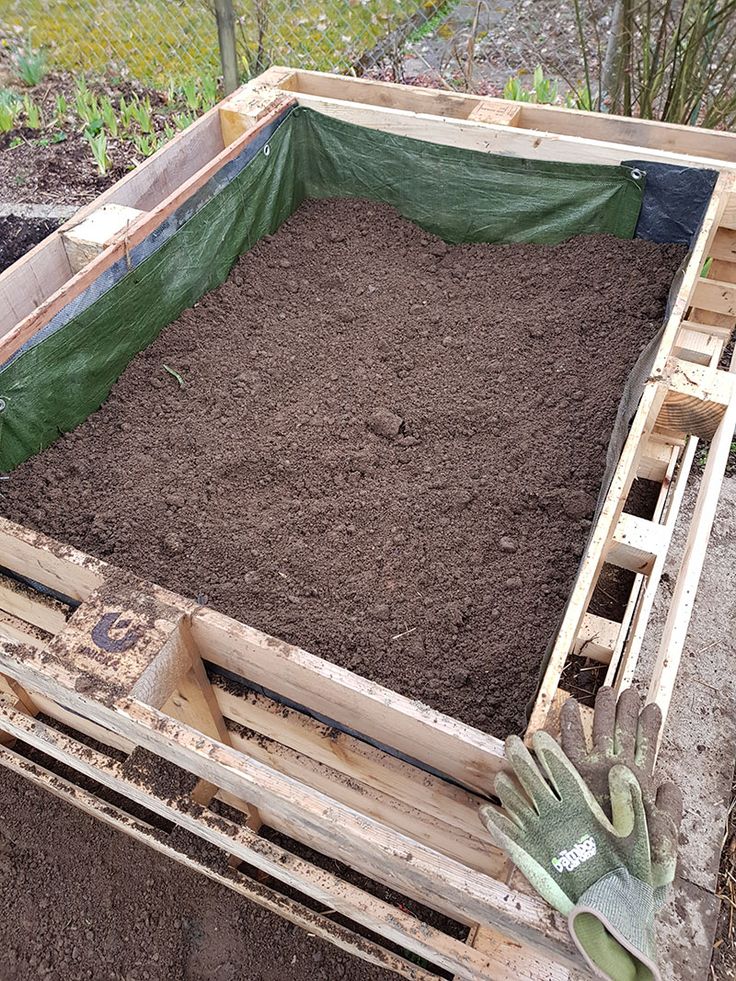 If you want to grow vegetables to eat, raised beds are a great choice for growing lettuce, carrots, onions, radishes, beets, and other root vegetables.
Protect your raised bed from the elements. To build a miniature greenhouse, install the poles on the bed by bending the PVC pipes into an arch shape. Install arches every 1.2 - 1.8 meters.
- Buy a piece of covering material, attach it to the poles, and you have a moisture-retaining, insect-free greenhouse that you can use to grow vegetables throughout the growing season.
- When the plants in one part are so tall that the cover can no longer be used, you can open that part and place the cover on the ground. It may seem strange, but light, heat and moisture will be able to penetrate the coating, but bugs and wind-blown weed seeds will not. Therefore, this step can help you reduce watering, weeding, and pesticide application.
- You can also install a plastic net to protect your own crops from birds and deer.
- Raised beds should ideally be between 60 cm and 1.2 meters wide. 60 cm if the gardener has access to the bed from one side only, and 1.2 meters if the gardener has access to the bed from both sides. It should not be wider, otherwise the gardener will have to step on the bed (thereby compacting the soil) or this will add strain to the back.
- Consider using boards that are 5 cm thick and 30 cm wide, cut to the length of the bed. If you lay them on edge, one on top of the other, on each side of the bed, your bed will be approximately 60 cm deep.
- Decorate your raised bed or even install a light to make it the focal point of your yard.
- Building a high bed with two is much easier and faster than alone.
- You can either buy soil from a garden store, dig in the area, or buy a whole truckload from a farm. Check prices and decide what is best for you. Purchased soil is sterilized and free of weed seeds, but it can be expensive to purchase in large quantities.
 If you take the soil from your site, it will probably contain weed seeds, but the price will be acceptable.
 - You can cut your land costs to almost nothing by stacking grass clippings and straw (but not hay, as it contains seeds) or leaf litter. Water each layer thoroughly and pack it down before adding the next layer. When the bed is full, you can plant plants in it, adding soil to each hole you dug. By the time the roots of the plants begin to spread beyond the recesses made, the compost material will begin to decompose. If you plan to plant seeds, add a thin layer of soil or compost on top. Be prepared to add additional compost each season because compost material shrinks as it decomposes.
- Be creative with your raised bed. You can build a beautiful raised bed out of scrap wood, so don't be afraid to experiment. Raised beds are very useful and affordable.
- Narrow raised beds help conserve water.
- Raised beds are easier to care for than plants planted on the ground.
 If you find it difficult to bend down, you can make the beds higher, up to waist level. Just be sure to build strong enough and water accordingly.
 - Water raised beds frequently. Since they are above ground, your raised beds don't hold water as well as soil on the ground. Place raised beds close to a water source so it will be easier to water them throughout the year.
Warnings
- Raised beds are an attractive place for cats to litter. If there are cats in your area, plant catnip to keep them at bay.
- In some areas, wood-to-ground contact increases the risk of termite infestation to nearby timber structures, including homes.
- Aged, treated wood may contain arsenic, which is a deadly poison and also a carcinogen. Arsenic is no longer used to treat wood, but old lumber may still contain the poison. Arsenic is released when you saw or burn old wood, and can be leached out of wood when it comes into contact with acidic soil or during acid rain.
 While it's very tempting to use this type of wood for your garden beds because it lasts longer, it's best to use regular wood, especially for garden beds, and replace it every three to five years.
 - New treated wood no longer contains arsenic.
- Old wood, however, may contain this substance.
What you need
- Forms for your raised bed (consider using pegs 10cm x 10cm and 60cm high for corners and boards 5cm thick and 30.5cm wide for sides)
- Nails or screws
- Hammer or screwdriver
- Compost
- Soil
- Seeds or seedlings
- Shovel
- Rake
- Barrier (plastic liner or similar) to keep weeds out. Moisture insulation can also be used from the inside of the bed. This will significantly extend the life of the wood.
- PVC pipe and plastic greenhouse (optional) , Deutsch: Ein Hochbeet anlegen , 中文: 建造种植床 , Français: créer un parterre sureleve
This page has been viewed 25,282 times.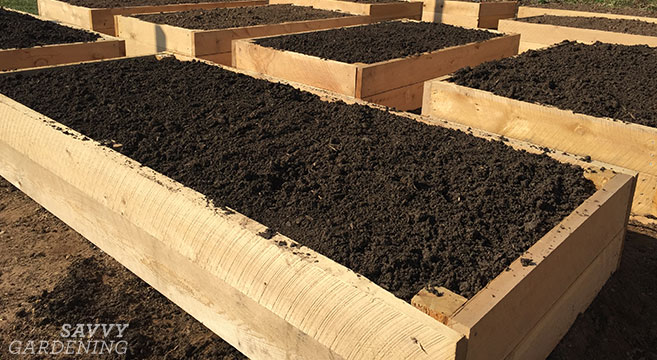
Was this article helpful?
Many summer residents suffer from the fact that the groundwater in the area is too high. Excessive soil moisture is not suitable for all plants, many develop poorly or die altogether. You can solve the problem by making high beds. With such an organization of landings, it is possible to control the degree of humidity. And a nice bonus to such a decision will be an earlier ripening period and a much larger yield.
Advantages and disadvantages
In addition to solving problems with waterlogging, high beds in the garden allow you to sow or plant plants 2-3 weeks earlier: raised above the ground, they warm up more actively due to the fact that the sun heats the walls. This is also facilitated by the decomposition processes occurring in plant waste, which make up a significant part of the backfill. Therefore, such beds are also called warm. If you put arcs on such a bed and cover it with spunbond or other similar material, then the crop can be harvested even earlier.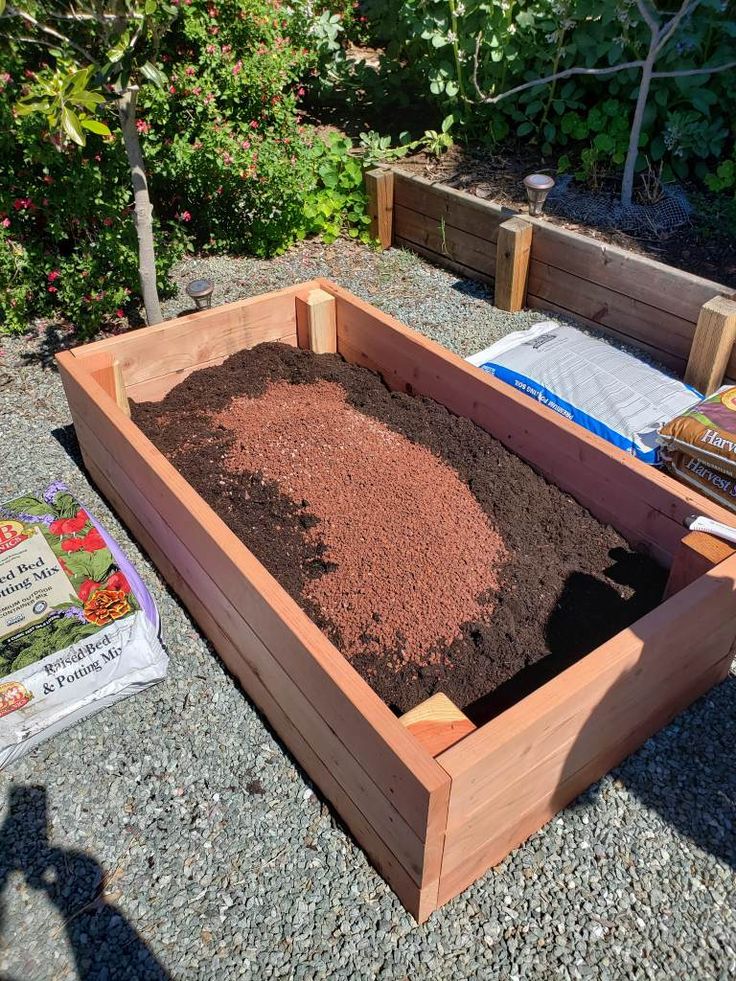
The device is more problematic in regions with a hot climate. The task in this case is not better to heat the earth, but to keep it from overheating. But this can also be solved: use materials with poor thermal conductivity, for example, wood, to fence high beds. For the best effect, you can make double walls, between which you can fill up, for example, sawdust, lay foam, or you can leave an air gap - the best thermal insulation. It is better to paint the outer wall in a hot climate with white paint or whitewash. It is known that light surfaces heat up less. In this case, it will be possible to save the root system from overheating: in the south, the earth sometimes warms up very much and the higher the plant is, the cooler it will be. And over the beds you can stretch the same covering material. It not only retains heat, but also protects against overheating.
Raised beds can also be a good outlet for infertile lands. It is more convenient to lay out the imported soil in the beds, and not distribute it throughout the site.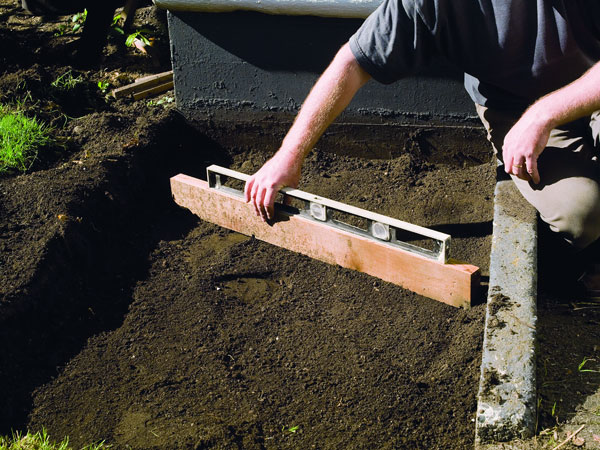 Maintaining fertility contributes to the compost layer, which is located under the layer of earth.
The problem of arid regions is also being addressed. In this case, the fence for the high bed is coated with bituminous mastic from the inside or covered with a film, a rolled waterproofing material is laid on the bottom (on the grid) (the roofing material will quickly rot, so something from the modern type of waterproofing is better). Complete waterproofing cannot be achieved, but to keep moisture inside in sufficient quantities - yes.
Carrots - one to one. The best on a high bed, although the same variety
was planted on a regular oneAs you can see, with a balanced approach, you can solve almost any problem. There are few shortcomings in high beds, but they could not do without them:
- In most cases, you have to make a fence, and this is an expense.
- The complexity of the process. Again, making fences takes time and also moves a lot of earth and plant debris, which is hard work.
- Medvedka and other similar living creatures feel great in rotting leaves, branches, bark. You have to fight them.
- Fertility has to be maintained by updating or completely replacing the "stuffing".
That's all the shortcomings. If you decide on the arrangement of high beds, be prepared for a considerable amount of work. But the harvest will be many times greater. For testing, you can make one or two beds. Then decide if you need them or not.
Dimensions
In one area there are very high beds and not very ...
So, the dimensions of the high beds:
- Height - from 20 cm to 50-60 cm. Here you can see what a difficult task is. The higher the bed is raised, the easier it is to process it - to bend less. But the earth and the rest of the "stuffing" will need more. Another point: if a small bed in height can be under the snow and will be covered from severe frosts, then the high one will freeze through: the sides are also open.
 For those ridges where annuals are sown, this does not play any role, but for perennial strawberries, say, this is a problem. Therefore, the height is chosen based on these considerations. According to the experience of many summer residents for strawberries, the optimal height is 20 cm. Then we can hope that it will not freeze out.
 - Width - from 60 cm to 1.2 m. Choose a distance that makes it convenient for you to process the bed. A distance of 60-70 cm is chosen if the approach to the garden is only on one side. If you can get to it from both sides, you can make a meter or more. It is important that the middle is processed without much stress.
- Length. Here everyone chooses based on the configuration of the site or their desire. There are no recommendations at all.
So that the bed is not too high, part of it can be deepened: dig in 20-30 cm, and already put walls on top. The removed soil will go to backfill (there is often simply not enough land), and the substrate from the lower rough layers can be made thicker.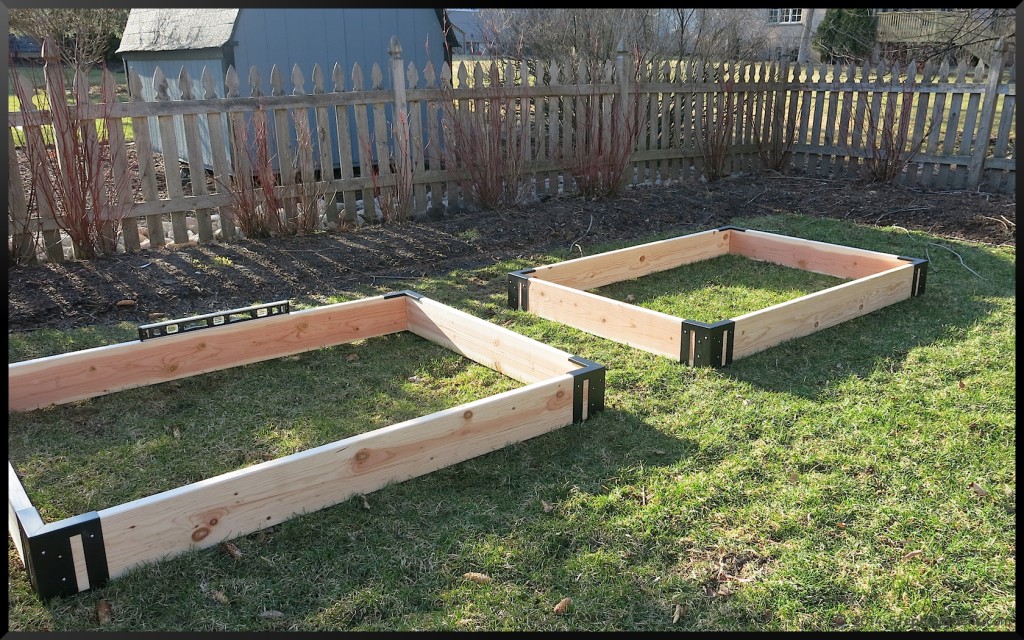 And in order to minimize the cost of maintaining such a bed, you can.
How to fence high beds
Anything that can hold the soil can be used. The most durable curbs are made from brick, stone and concrete.
But a brick costs a lot, it takes a long time to work with concrete. A concrete fence is made according to all the rules: first, a formwork into which reinforcement is laid, then it is poured with concrete and they wait until it sets. But the service life is impressive - decades.
Concrete bed railings are the most durable and will never float
Brick and stone fence is also folded according to all the rules: on mortar with dressing. To reduce the consumption of bricks, the walls are placed in half a brick. And so that the earth does not move it, the rows are reinforced with a mesh.
But even in this version, it will be necessary to install support poles through the meter. If your soil is viscous, heavy, often waterlogged, such walls can be squeezed out.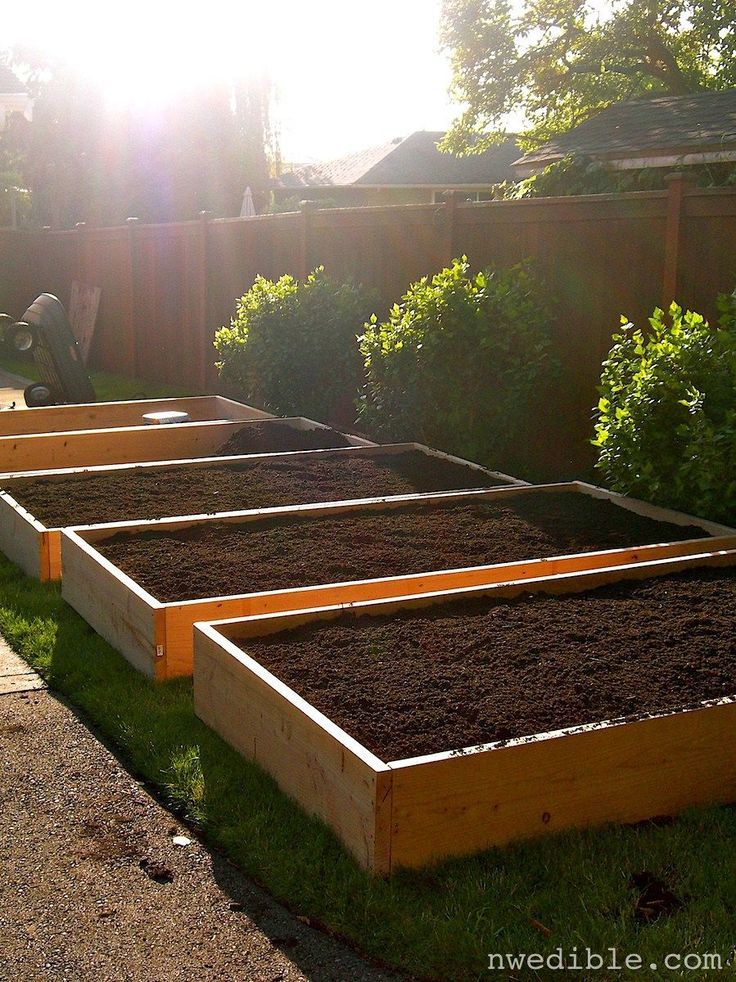 Therefore, put wooden or metal supports that will fix the long walls or make small beds, as for
Fencing for high beds made of expanded clay concrete blocks
They also make fences for high beds from galvanized metal and slate. Slate can be used second-hand, you can buy a new one, wave or smooth - it doesn't matter. Cut the sheets into strips of the required width. There is no need to fear that it is harmful. In slate, asbestos is contained in a bound state, and it does not dissolve in water. It is harmful when it is sawed: the dust rises and enters the body through the respiratory tract. To reduce exposure, wear a respirator and wet the incisions.
They make plastic garden fences. Changed siding? Use it. There are old plastic panels - they are in business. But for plastic, a rigid base is needed. They make it from a metal mesh of thick wire.
Grids can form the basis for pebbles or pellets. Only in this case, a double frame will be needed, inside which stones or some other material are poured. This technique is called "gabion" and not only fences for garden beds are made from it, but also fences. But so that water does not seep through the walls from the gabion beds, the inside of the box is lined with a dense film.
The most popular fencing is wood. You can use boards, timber, logs. Wood is good for everyone, except that it rots.
And since all the conditions for activating this process have been created in the high beds, destruction occurs rather quickly. You can slow down the process somewhat by painting the boards or by impregnating them with a bioprotective compound. But there is still no guarantee against destruction.
But the material can be used cheap, and sometimes even junk: the remains after construction, slabs, old logs, pallets, etc. If desired, you can even make a fence out of branches. Only the bark is desirable to remove: it is under it that there are many larvae and woodworms. Although...they will also process the wood residue that you lay on the bottom of the backfill.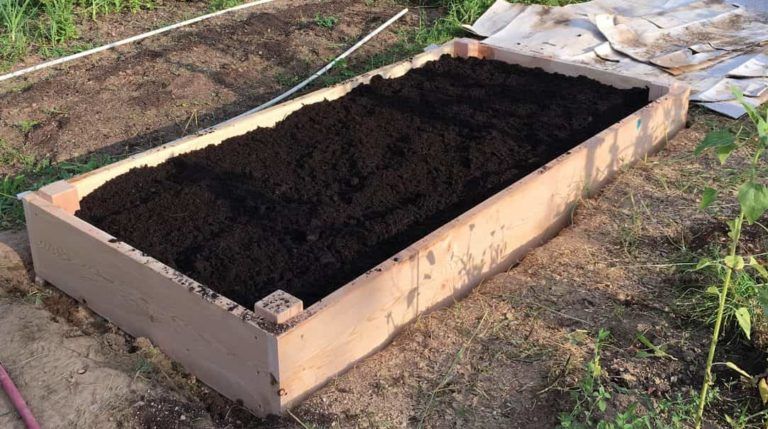 But too many of them are also not needed, so, probably, it is still better to remove the bark.
From the same branches, only freshly cut, you can make a wicker fence. And it will also need to be lined from the inside with a film: to keep water and earth inside.
Even straw can be used. It is tied into small bundles, which are interconnected with a wire. It simply cannot be cheaper, but it keeps water and temperature well. The only disadvantage of this option is that such a fence will last a maximum of two seasons, but rather one. But it can then be used as one of the layers.
There are high beds without a fence: the so-called bulk. The soil in them is poured in the form of hills.
To improve drainage, branches are laid inside such a ridge. To reduce the height of the bed (for example, under tomatoes), it is slightly deepened, throwing the soil to the side. After laying the branches, it is covered from above, often there is a need for additionally imported soil.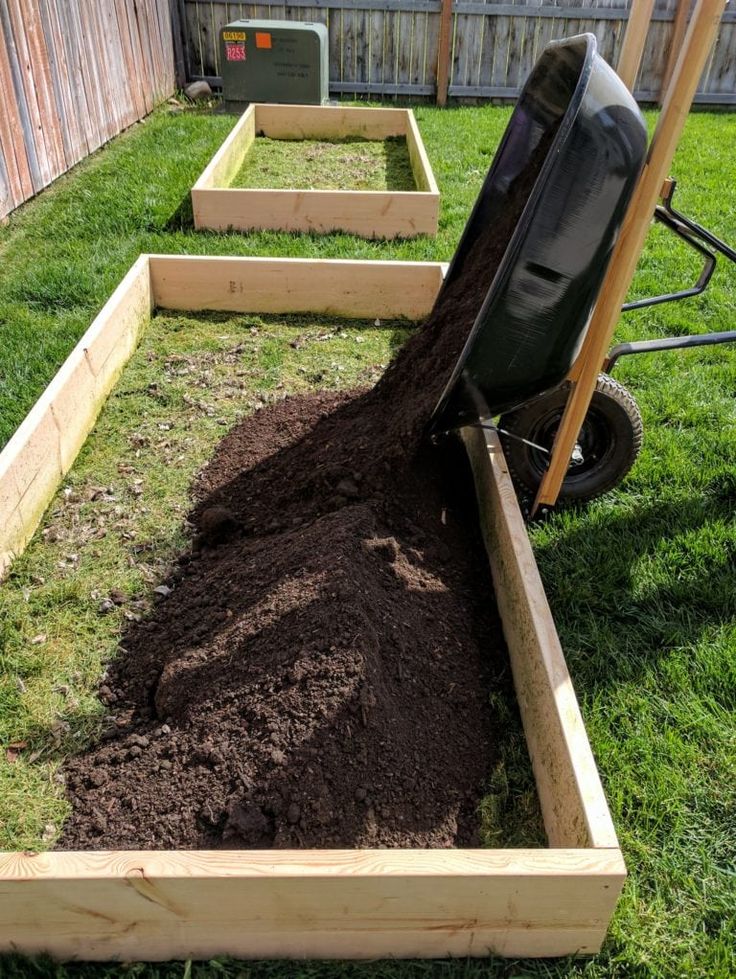 If you can’t choose the row spacing deeply.
The disadvantage of this kind of vegetable garden is that when watering and during rains, the topsoil is washed away. Therefore, they began to make boxes - to avoid washing out the soil.
High bed layers
Framing is just a small part of the job. You still need to fill the received box. It must be said right away that the thickness of the layers depends on the height of the bed that you have chosen, so if any values \u200b\u200bare given, then only approximately. In addition to the size of the bed, the thickness of the layer, for example, the fertile one, is influenced by the choice of plants: 5 cm is enough for someone, and much more is needed for someone.
So, what to put in a high bed - layers from bottom to top:
- A fine mesh metal mesh or a layer is placed on the bottom. You can put cardboard. Mesh and geotextile - protection against rodents and moles. Cardboard plays about the same role, but it is less effective.

- Large wood residues: thick branches, branches, even chocks and bars. This layer serves, firstly, for drainage, and secondly, moisture accumulates in the wood. The more arid the climate in your area, the more wood you need. Moreover, the following wood layers too.
- Shredded small branches, bark. Other coarse plant residues will do: corn stalks, straw. Their mission is also twofold. They store water, and when decomposed, they release heat and nutrients. But when using corn trunks and straw, keep in mind that the bed will soon sink: these remains quickly rot, but the yield will be high, and fertile land can be sprinkled on top.
- Paper, thin cardboard. It is usually lined with a thin layer. They use packing cardboard more often, because glossy paper is not suitable, just like newspapers: the lead base of the paint is not at all what plants need to be fertilized with. If there is an old unnecessary burlap (natural), you can lay it.
- Layer of plant residues: leaves, grass, semi-decomposed sawdust.
 Be careful with sawdust: they strongly acidify the soil. So sprinkle them under plants that love acidic soil, or neutralize the acidity by sprinkling them with a good layer of ash.
 - Fertile land.
In the last two layers, you can add a good portion of mature compost, as well as sprinkle deeper layers with it. This will speed up the “readiness” of the high bed for planting.
Best time to plant and what to plant
It is better to fill the high bed in autumn. During this period, there will be enough “material” and during the winter the processes inside will gain momentum. In this case, you can plant plants in the spring and hope for a high yield. It can be done in the spring, but there are unlikely to be any significant differences in yield: the processes have just begun and will not be able to have a noticeable effect on the fertility of the backfill. Although you will definitely feel the difference in the amount of water for irrigation: much less water is required.
One of the high bed options: metal mesh and reinforced polyethylene film
Plant rotation
In the year of building a high bed, it is possible to plant plants that require high fertility: cucumbers, zucchini, zucchini, pumpkin, any kind of cabbage, eggplant, tomatoes, sweet peppers. The next year, you can plant greens - spicy-aromatic and leafy. Root crops feel good in the second year.
After harvesting the second crop, it is necessary to restore fertility. If the contents of the bed sagged, in the fall they fill up with good earth mixed with mature compost. If there is nowhere to fill up, remove part of the top layer (on a compost heap or in another box as part of the backfill) and replace it with fresh earth with fertilizers.
Strawberry high bed
It differs only in that covering material is spread over the finished “pie”. Holes are made in it, in which plants are planted. This option leads to the fact that moisture evaporates in minimal quantities, and weeds do not grow in the aisle. The second option - mulching the earth also works well, but evaporation is more intense.
Strawberry features are that its roots are located mainly on the surface. Therefore, the fertile layer can be small. But this same feature leads to the fact that in severe frosts it can die. Although there is a decomposition process inside the high bed, warming the soil, if the bed is without snow and not covered for the winter, the root system may freeze.
High bed for cucumbers and tomatoes
It is no different in its structure. Is it only because they need poles and crossbars or stretched wire around the edges in order to be able to tie up bushes of tomatoes or lashes of cucumbers.
DIY high beds
Most often, questions arise not when laying layers in high beds, but when making a box. Since women often do a lot of gardening, right up to making fences for garden beds, many points may not be clear to them. To clarify the most difficult ones, we present photo reports of making a box from boards and slate - the most common fences.
From planks
Several options for how to make high beds from boards were in the photo above. The main snag is usually in the connection at the corners. The easiest way is to overlap them: just put one to the other at 90 ° and knock it down with nails. But there are aesthetes who all strive to do the right thing. And that's right - cut down two boards at an angle of 45 ° and connect them like that. It is this option that will be shown in the photo.
To make it convenient to fix the fence on the ground, vertical bars or pieces of board are nailed in increments of 1.2-1.5 m, the length of which is approximately 20 cm more than the selected bed height.
The lower end of the bar or plank should be sharpened to make it easier to drive the fence into the ground. Then we take a miter box or a circular saw, and cut off the edges at an angle of 45 °. Putting two boards together creates a perfect 90° angle.
For a strong connection on the inside of the corner, we install a bar, to which we nail the boards.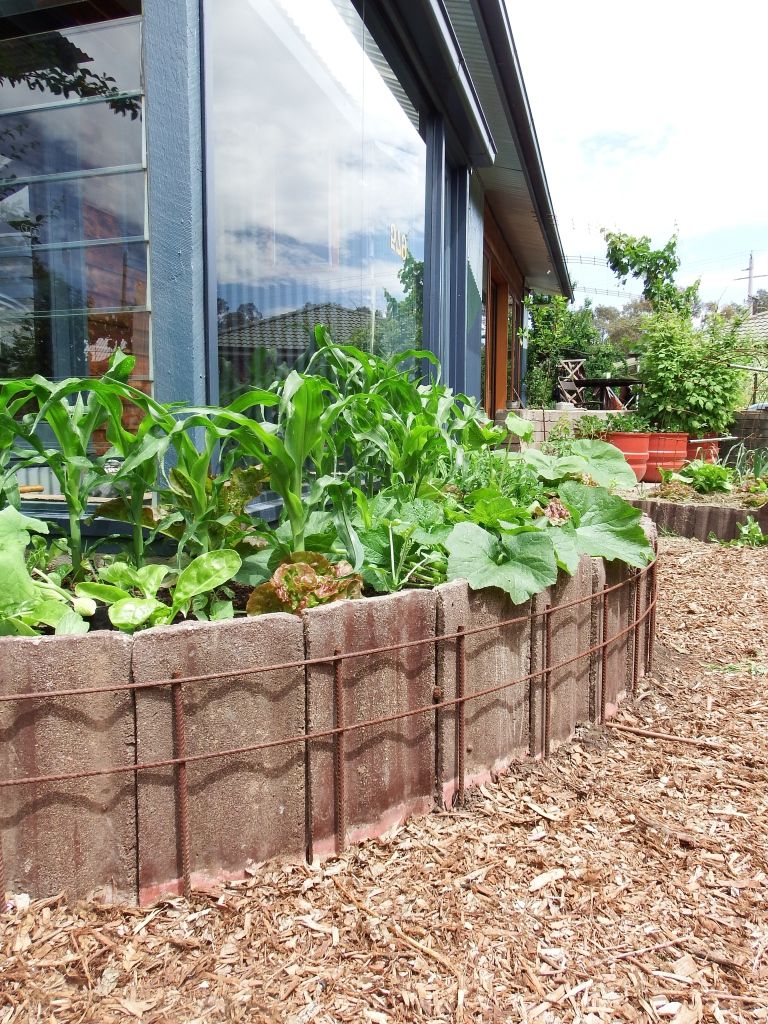
That's what happened. Only he lies "burdens" up. They are hammered into the ground
Fencing for high beds made of wood does not take long, but even easier, connect the boards end-to-end, and nail metal corners for strength (pictured below).
From logs
It is no more difficult to make a similar box from hewn logs. For example, this option: two long sides from logs, and short ones from pieces of boards.
Whitewash the finished fence: both protection from pests and a more attractive look.
From slate
When making beds from flat or wave slate, questions also arise about how to fix it. The easiest way is to dig in. But this is uneconomical: you will have to make the stripes wider by at least 10 cm and still there is no guarantee that the slate will not “float” in the spring. In the muddy earth, it will simply be squeezed out with a mass. You can fix it, but it's too much time and effort.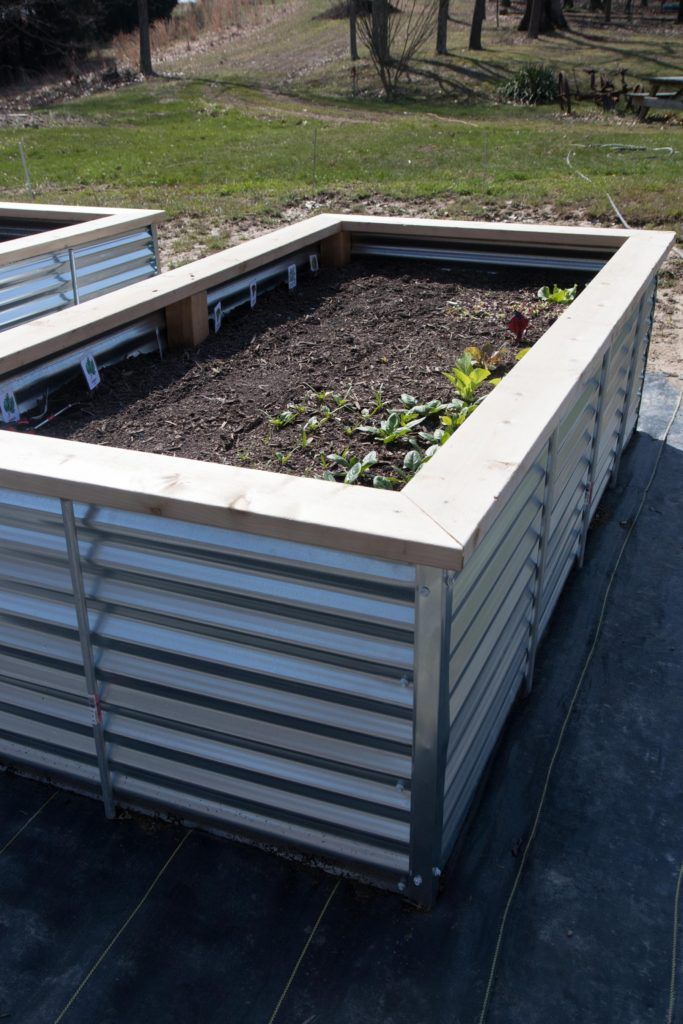
Therefore, most often corners or pipes are driven in from one or both sides of the sheet, which clamp the slate and prevent it from deviating strongly. In the photo, the corners are driven in only from the outside: from the inside, the mass of layers of the high bed will press, so that the fence will not fall inside.
The joints of two sheets are secured with a special welded plate. For reliability, they can be bolted to a wooden bar attached from the other side.
A piece of reinforcement with a welded plate - for insuring the joint of two sheets of flat slate
Another option is to make a frame. Attach a bar or a corner to similar racks with welded plates - for whom it is cheaper. And to this frame, attach the slate cut into strips (it holds well with nails, but it’s easier with self-tapping screws).
Bar frame in high bed enclosure
By the same principle - with guides - beds are made from plastic panels and other similar materials.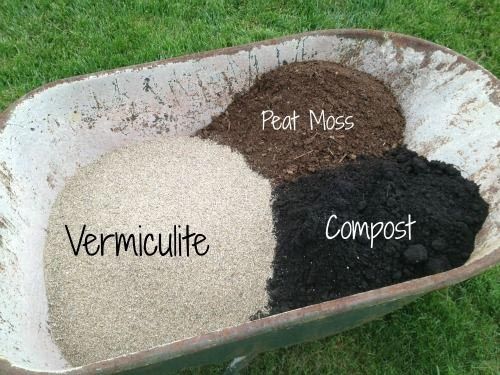 As you understand, especially virtuoso skill is not needed here. The main thing is to keep well.
Reading time ≈ 12 minutes
Cultivation of land in a summer cottage always requires a lot of time and effort. Every plant and vegetable crop needs a certain degree of moisture to ripen well, and groundwater is often higher than normal. The solution to this problem was high beds, you can make them yourself with step-by-step instructions from specialists.
Features of high beds
Tall and smart - a real find for summer residents, they are suitable for growing any plants: vegetables, herbs, berries, fruit trees and garden flowers.
High raised railings have many advantages:
The disadvantage of raised structures can be considered the need for frequent fertilization, enhanced fertilizing with minerals and watering the beds, since the soil inside such structures dries quickly. You can cope with this problem by organizing an automatic watering system or by mulching the soil.
Optimal dimensions:
The optimal height of a perennial should be up to 20 centimeters, otherwise the soil will freeze during winter frosts.
The construction of such structures on their suburban area does not require large financial investments, which is why they are so popular among summer residents. Making high beds with your own hands is shown in the video with step-by-step instructions.
Varieties of beds
Several types of beds are used to organize a vegetable garden on a country plot:
Raised raised beds also available:
How to choose the material
How to make a high structure in your garden? First you need to choose the material suitable for a particular area. Raised beds can be:
- Made of wood. The advantage of this material is its availability, convenience and environmental friendliness. To assemble the structure, you will need boards, bars and logs of different sizes.
 Before use, the wood must be treated with special antifungal and water-repellent solutions to protect the bed.
 - From slate. The assembly of this design is easy and fast, the material is affordable and inexpensive. The slate is quite fragile, so it requires accuracy during installation and further operation. The fence can be painted and painted with ornaments of different colors.
- Made of bricks. A plus is the durability and strength of the structure. Brick or stone beds fit perfectly into any landscape, but are characterized by high cost and a complex manufacturing process. The constituent elements must be connected with a concrete solution. However, in too massive installations, the earth warms up more slowly, so you can not overdo it with the layer thickness.
- From twigs and vines. Sides for beds can be woven from small branches and twigs of trees. This design looks original and elegant, can be used as a decor. Such wicker structures should be covered from the inside with a layer of polyethylene film so that water does not seep through.
 The downside is their fragility, the service life will be no more than one season.
 - Made of metal. Such structures have a long service life, are durable and stable. They are made by erecting a frame of welding metal elements. The material must be coated with an anti-corrosion compound for comfortable use and durable service.
- Made of plastic. The material is strong, durable and easy to install. However, some types of plastic sheets can release substances that are toxic and harmful to plants.
- Concrete. Used for the construction of multi-tiered structures. The fence can be made from separate blocks (as in the photo), or be monolithic. Concrete beds are durable and can be decorated with various decors. The installation process is complex and lengthy.
- Made of metal mesh and pebbles. You can make a bed using the "gabion" technique, which is used to build flower beds. Such a backfill fence consists of a double mesh frame, the inner wall is covered with a film, and small stones and pebbles are poured between the frame posts.
Gabion technique
To make a structure, summer residents sometimes use improvised budget materials, for example, plastic bottles, old empty boxes and small pieces of plastic fences.
Making high beds with your own hands is shown in the video.
How to choose a seat
It is extremely important to choose the right place for the construction of a high bed in a summer cottage. It is necessary to carefully study the territory and draw a diagram of the location of structures.
Things to consider when setting up a vegetable garden with raised beds:
- The ground surface must be level and preferably without strong slopes.
- The place should be well lit by the sun.
- Shade from nearby trees must be taken into account.
Framing is only a small part of the job, it is also important to properly fill the structure with soil. It is necessary to start these works already in the autumn.
Internal filling consists of several layers of different widths. The dimensions of each layer depend on the height and beds.
How to fill the structure with soil:
- Fine metal mesh or geotextile should be laid on the bottom to protect the garden from small rodents and pests.
- Then the first drainage layer is laid with pieces of crushed bark, branches, dry leaves, plant stems and shavings.
- The second layer is various fertilizers, such as manure.
- The third layer is usually formed by a waterproof material: cardboard, clean paper or old natural burlap.
- To create the next fourth layer, you will need organic matter in the form of plant remains and a small amount of mineral fertilizers.
- Fertile soil serves as the last fifth layer, the layer is laid with a thickness of 10 centimeters. Soil should be selected depending on the crops grown.
Once the high bed is completely filled with earth, it must be watered abundantly and left for 3 days, during which time the layers will settle a little.
Then the structure is covered with polyethylene so that the soil warms up well. And only in the spring you can start sowing seeds or planting plants. The step-by-step process of building such a bed is shown in the video below.
Bed-box from boards
Most often, summer residents prefer wood when it comes to making boards for high beds. The advantage of this material is the fact that the tree does not overheat and is easy to process.
It is better to use ash, oak, cedar or larch boards. Pine is considered a budget option, since this type of wood is more prone to decay.
Do-it-yourself high bed-box
Required tools and materials:
- Wooden boards 50*200 mm.
- Metal mesh.
- Nails and hammer.
- Protective impregnation mixture.
- Shovel.
- Measuring tape.
- Miter box for cutting.
Manufacturing process:
Both flat and wavy slates are suitable for creating a structure.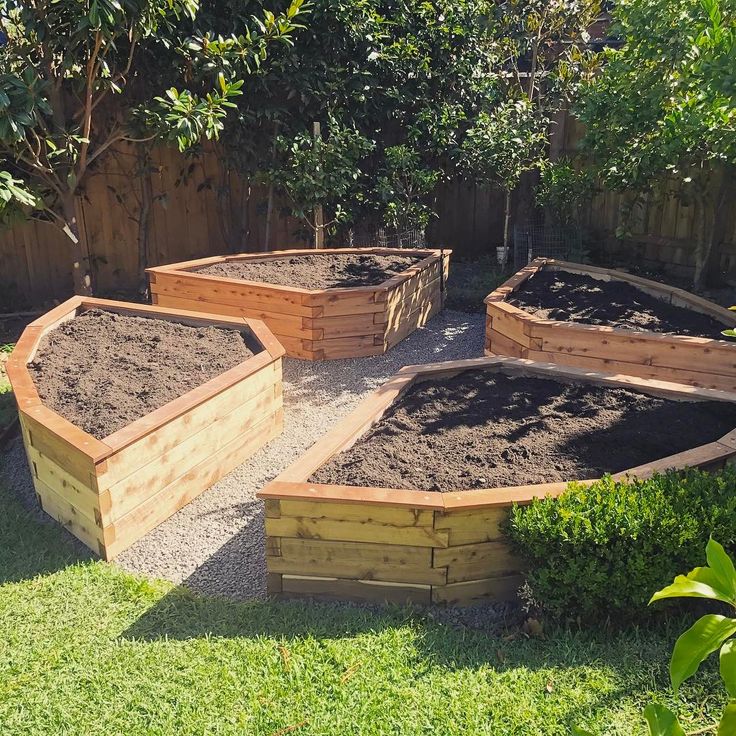 At the end, the material can be painted in any color with special acrylic paint.
Materials and tools:
- Slate sheets.
- Bulgarian (can be replaced with an electric jigsaw).
- Shovel.
- Chalk or pencil.
- Drill (can be replaced with a screwdriver).
- Tape measure.
- Rubber mallet.
- Building level.
- Pegs of wood or rods of metal.
Ribbed slate bed in the summer area
Manufacturing technology:
Raised beds come in a variety of designs, shapes and sizes. With the help of such structures, you can realize any ideas and transform your summer cottage beyond recognition. The garden will look well-groomed, and the harvest will delight with its quality!
Working in the beds requires a lot of physical effort and time, and the harvest does not always correspond to the efforts made. Therefore, more and more summer residents are arranging high beds in their plots, which can significantly reduce labor costs and grow a good harvest.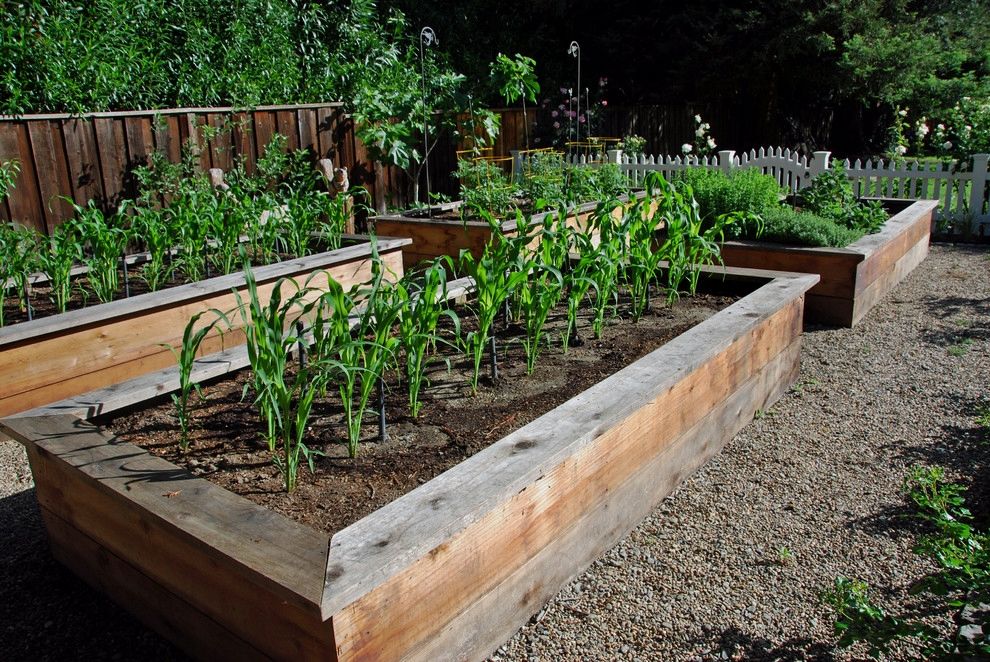
Benefits of high beds
A high bed is a box with a height of 10–15 cm and up to half a meter, which is filled with earth, compost, and rotted manure. The size and shape of the box can be any. Most often it is made rectangular. The width should be planned so that it is convenient to care for the plants. The usual width is 50–80 cm. The passages between the beds are sown with lawn grass, covered with sand, sawdust or concreted. As a result, weeds do not grow in the aisles, the cut grass is used for mulching, and the entire garden looks beautiful and tidy. This is far from the only advantage of high beds in the country. There are many pluses here:
- any plot is suitable for gardening, even completely unsuitable for agriculture;
- tiring digging and weeding is replaced by light loosening of the topsoil;
- high beds warm up faster in spring, which allows you to get a harvest much earlier and plant crops that do not ripen in the area on ordinary beds;
- on a high mulched bed, weeds almost do not grow, and water does not spill under the gardener's feet during irrigation;
- it is not difficult to make drainage on it, this is necessary when growing garden crops that cannot tolerate high groundwater;
- on the sides it is easy to strengthen the covering material to protect plants from frost;
- if there are also shrews on the site, cover the bottom of the bed with a plastic mesh with a frequent cell, and voracious pests will not get to the plantings;
- The bed itself is easy to disassemble for transfer to another location, resizing or repair.

All gardeners will appreciate the convenience of a high bed, because in the process of working they do not have to bend down almost to the ground level.
Fasten a wide cross board to the ends of the bed, and you will have a comfortable bench on which you can put your inventory or sit down to admire the results of your labors.
How to turn the disadvantages of high beds into their advantages
These beds are most useful in humid, cool climates. But in the arid southern regions, their advantages are not so obvious - the earth in a raised box overheats and dries out faster. This is their main drawback. Nevertheless, even in such conditions, the construction of high ridges will be justified if the soil on the site is infertile - rocky, clay or sandy. The box for protection against overheating is built from light materials and filled with imported earth. In the midday heat, a white fabric or agrofiber cloth is stretched over the box.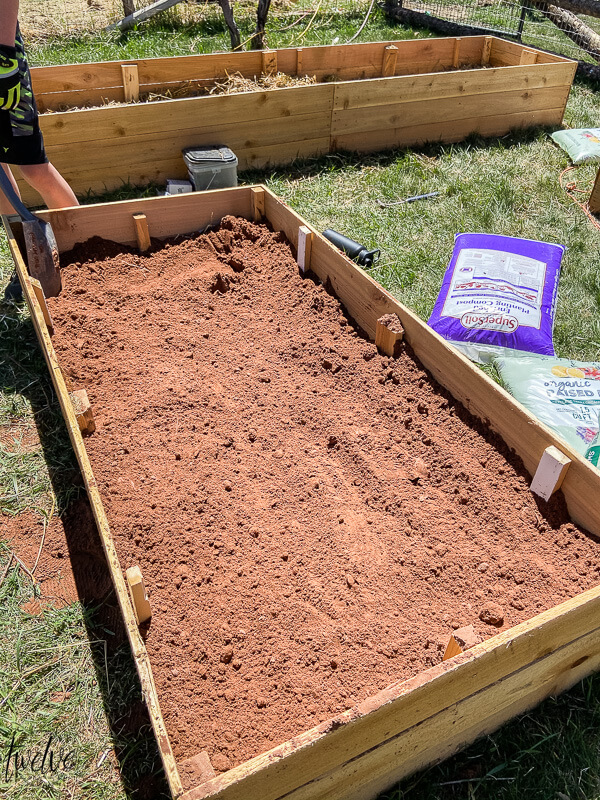 Such a canopy reduces the temperature of the soil and air in the garden and reduces the evaporation of water.
In the southern regions, construction from inexpensive natural stone - shell rock is widespread. If you build sides from it, the bed will last a very long time, and the soil in it will be cool in any heat. This building looks very beautiful.
See for yourself how attractive the high beds in the photo look, built in the country with your own hands from natural stone.
What materials are suitable for building
Raised beds don't have to be so monumental. Almost any building materials are suitable for their device. The main thing is that they do not let water through and keep their shape.
Raised slate beds are popular. Slate does not rot, is water resistant, almost does not heat up in the sun. For arranging a raised ridge, it is not necessary to buy a new slate, it is quite suitable taken from the roof after its repair.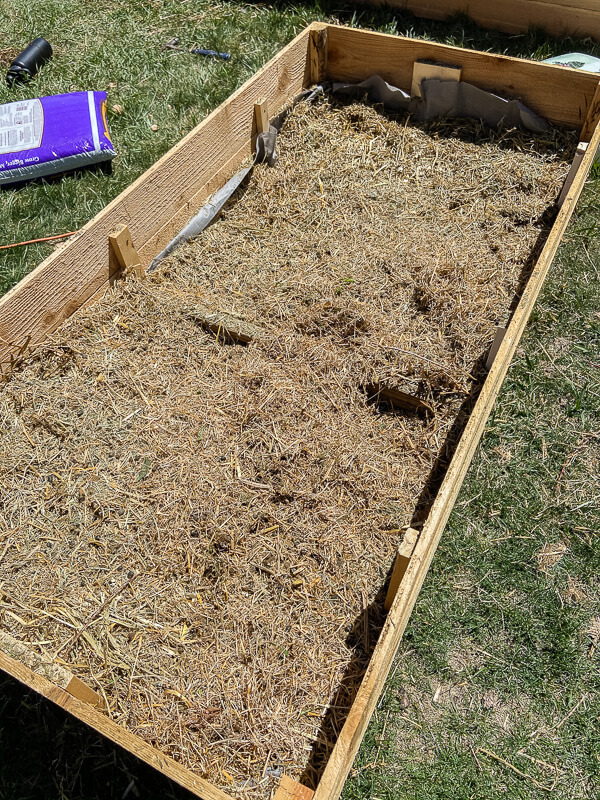
It's even easier to make raised beds out of plastic panels. Unlike slate, plastic does not shatter with light impact, and installation does not require much care. The border of light plastic along the edges of the beds looks neat and attractive.
High beds in the greenhouse are very convenient. Already in April, they can harvest the first crop of radishes.
It is always difficult in greenhouses, as they are usually used for growing a limited set of vegetable crops - tomatoes, cucumbers, eggplants. Therefore, they often have to change the soil. It is much more convenient to do this on high beds.
How to make high beds from boards with your own hands
If the idea of building high beds with your own hands inspired you, a step-by-step instruction will help you do everything without mistakes.
To build a wooden box for a high bed measuring 4000x60x30 cm, we need:
- edged board 2.5 cm thick and 15 cm wide - 18.
 4 running meters;
 - galvanized square pipe or angle 2x2 cm;
- self-tapping screws.
You also need to prepare tools - a saw, a screwdriver, a grinder, a drill, a square, a pencil.
We measure 4 pieces of 4 m for the long sides of the box and 4 pieces of 0.6 m for the end sides and cut off.
Sawn boards should be covered with antiseptic on all sides and allowed to dry completely. Suitable funds "Fire bioshield", "Senezh", "Pinotex" and others. Without such wood processing, high beds made of boards will not last long.
We cut the metal profile with a grinder into segments of 0.4 m for the corners of the box and 0.6 m for the screed of the long sides. Screeds must be made every 1–1.5 m so that the bed does not burst with earth. For one box, 4 pieces of 0.4 m are needed for corners. For screeds, you will need about 4 pieces for a vertical screed and 2 more for a horizontal one. Horizontal segments are fastened with vertical ones at the level of the top board.
We drill holes in the profile for self-tapping screws. There should be at least two for each board. After that, we fasten the profile to the end boards with self-tapping screws. Next, you need to connect the end elements in the assembly with long boards in the same way. One side of the profile will be 10 cm longer than the width of the box. It will be recessed into the ground for the stability of the box.
On each long side, at the same distance, we mark places for ties. Short pieces are screwed to the boards, and short pieces are fastened with long ones. Each tie is similar to the letter "P", screwed to the long sides of the box with vertical crossbars.
If it is planned to cover a high bed with a film or other covering material, the structure is supplemented with arcs. The most reliable are metal ones to withstand the weight of tied tomatoes or cucumbers. For this purpose, an iron bar with a diameter of 8 mm and a length of at least 3 m is used. Each segment of the bar is shaped into a semicircle in its central part, leaving the ends straight.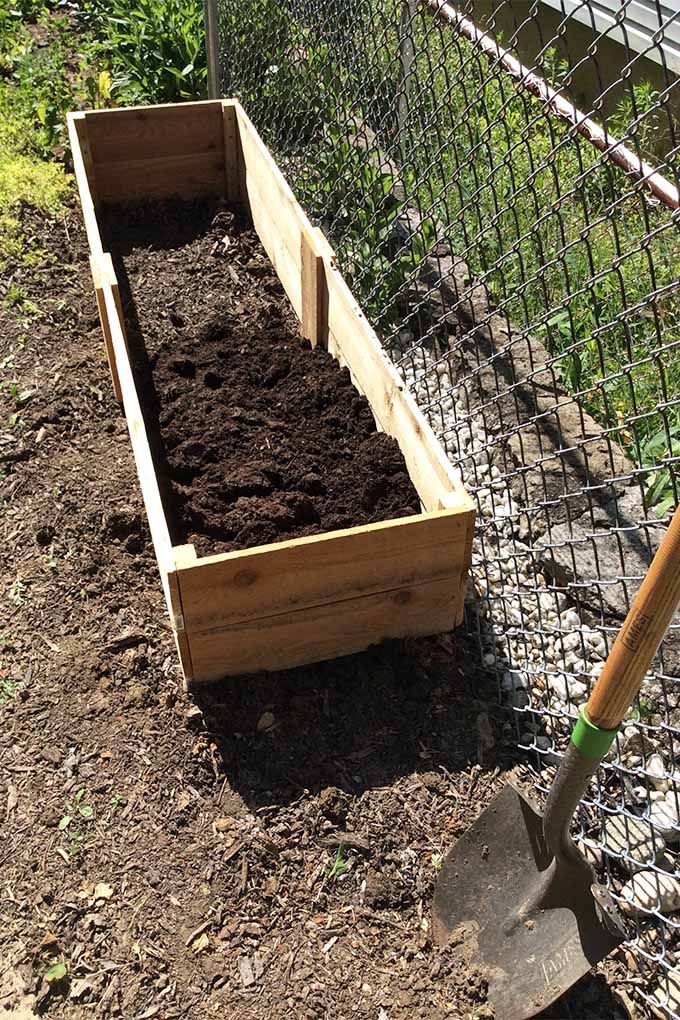 Arcs can be structurally connected to screeds by fastening them with brackets.
The finished structure is transferred to a permanent place that has been vacated and leveled in advance.
The tops of the arches can be connected with strong twine if desired. So the covering material will hold on better and it will become easier to tie up the plants.
Now you know how to make high beds in the country with your own hands. By the same principle, it is easy to make them from any other suitable material.
How to make a high bed warm
We have already seen the benefits of arranging high beds in the country. But such a bed can be twice as effective if you make it warm. All heat-loving crops grow faster on such a bed and bear fruit better. The device of a warm bed resembles a layer cake:
- coarse organics are laid down - branches, leaves, bark;
- semi-rotted compost or manure goes to the middle layer;
- the top of the cake is covered with a layer of garden soil.
Under the top layer, organics begin to decompose with the release of heat, that is, it warms the plants from below, from the cold ground. If such a bed is mulched after planting, caring for it will come down to rare watering and harvesting, which will invariably delight you, because all plants love warmth and an abundance of organic matter in the soil.
Soil plowing
Peeling - the device loosens, partially turns and mixes the soil. Soil peeling precedes plowing, it is carried out with disc harrows to a depth of 5-10 cm. This technique contributes to the destruction of weeds (they are cut), the creation of a loose surface layer of soil, and the leveling of the surface of the site. Peeling increases the moisture content of the subarable layer due to the violation of capillaries in the soil and the reduction of evaporation of moisture from its surface, and also improves the air and water regimes of the soil, and contributes to a more intensive passage of biological processes. Soil plowing is usually carried out immediately after harvesting or simultaneously with it.
Plowing the soil
Plowing provides turning and loosening of the cultivated soil layer, incorporation of fertilizers and crop residues. Plowing of the soil is carried out with plows with skimmers.
In the process of ploughing, the skimmer cuts the most compacted or soddy part of the surface soil layer and drops it to the bottom of the furrow. The plow, lifting and turning over the lower part of the layer, crumbles it and covers with a loose layer the sod turned over by the skimmer or the compacted layer.
The upper soil layer contains a large number of seeds and rhizomes of weeds, eggs and larvae of pests. Plowing with a skimmer contributes to the deep incorporation of weeds and pests, as a result, most of them die.
The most important characteristic of tillage is the plowing depth. It depends on many factors: the biological characteristics of cultivated crops; soil type; climatic conditions.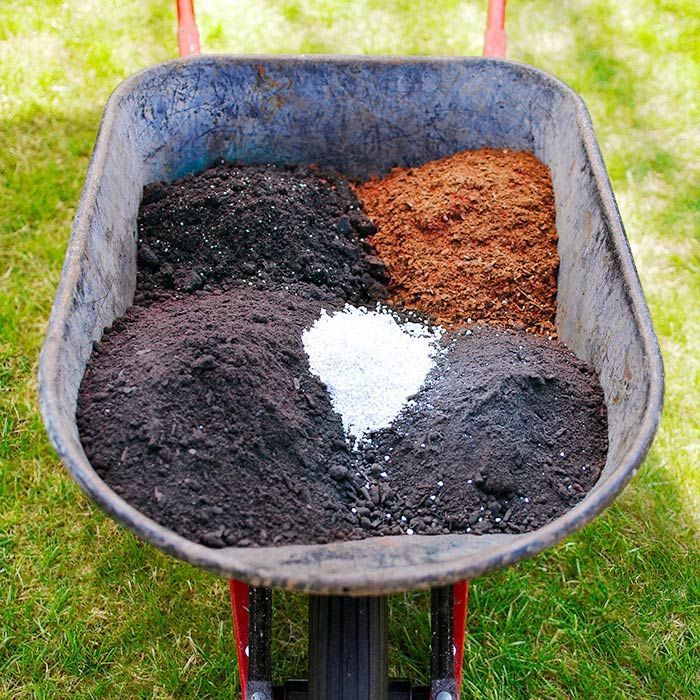 For flowering plants, the optimal plowing depth is 24-28 cm. For high-quality plowing, the width of the seam is of great importance. On light soils it should be more, on heavy soils less. The period of plowing depends on climatic conditions, the condition of the soil on the site, and the biological characteristics of flower crops.
Soil harrowing
Soil harrowing consists in loosening, crushing and slight mixing of the soil without reversing the layer. When using disc harrows and cultivators, a small turnover of the formation and mixing of the earth are obtained. Harrowing is used to destroy the soil crust, level the soil after plowing, incorporate mineral fertilizers, and destroy weeds. It is carried out diagonally across the field in two tracks. During spring plowing, the harrow must be in the same unit with the plow. During the main (autumn) plowing, the soil, as a rule, is not harrowed. The goal is to level the soil with light loosening. For this, drags and loops are used.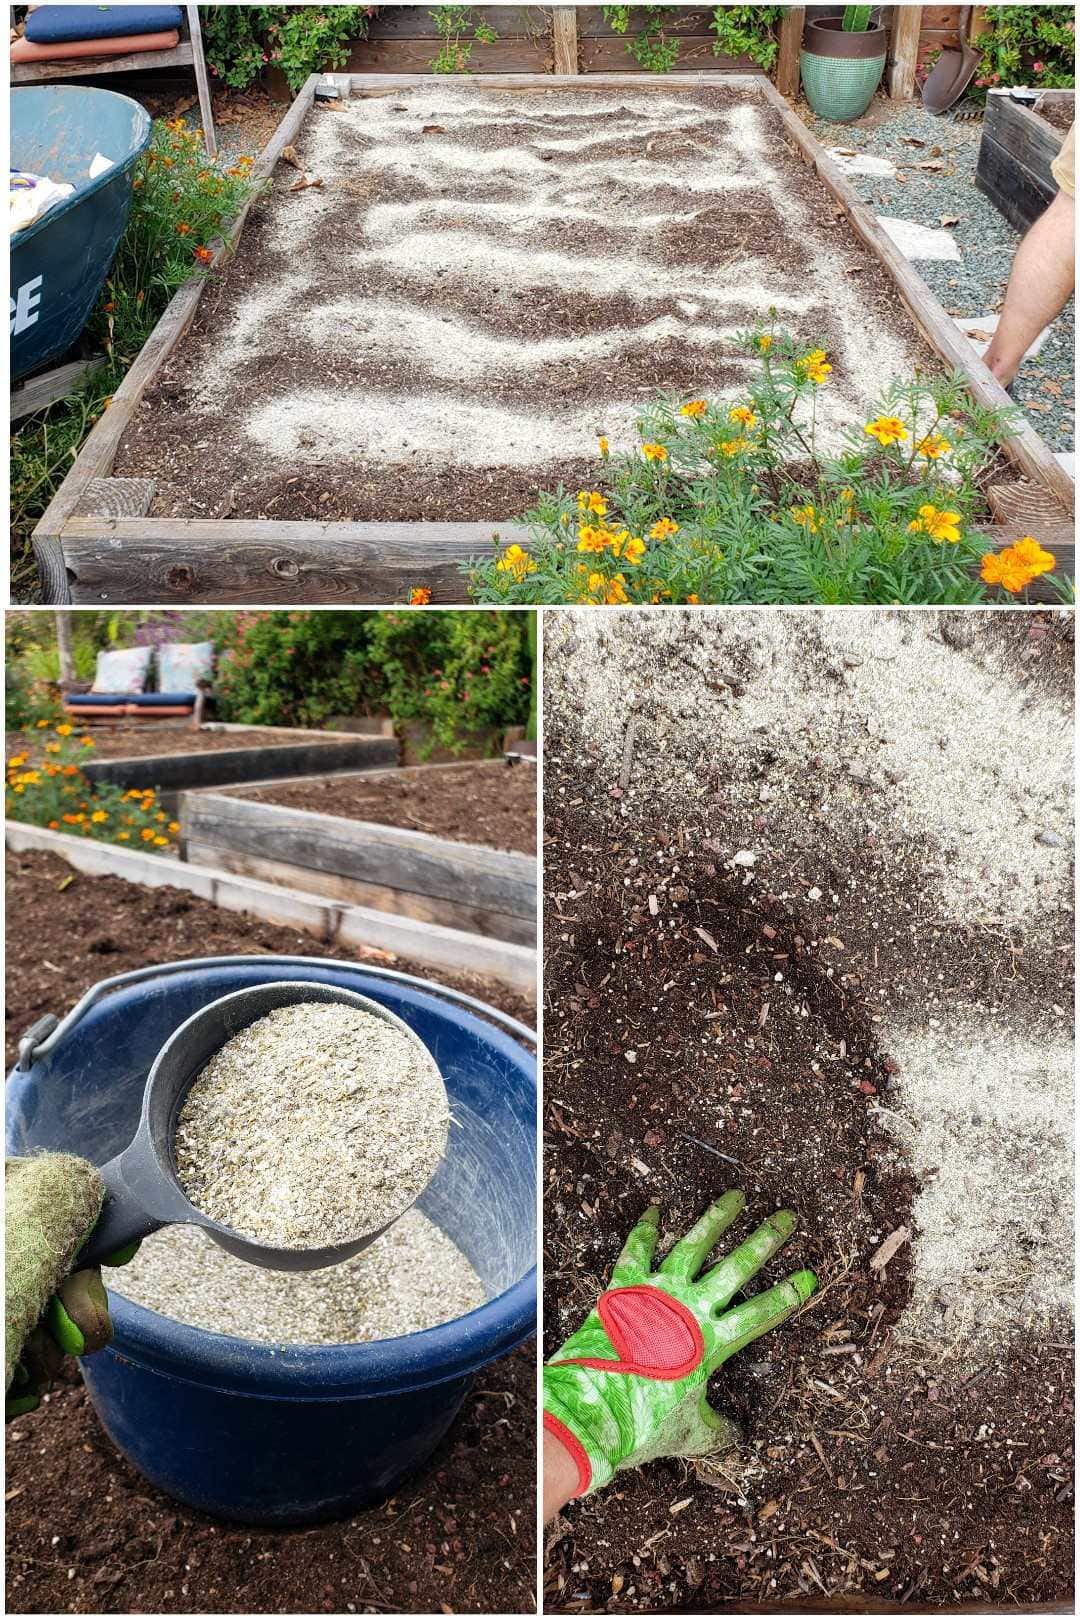
Arrangement of beds
When growing flower plants in the open field, three types of beds are arranged: elevated above ground level, on the same level with it, buried (below ground level).
Raised beds. They are made at high standing groundwater, on heavy soils, in areas with high rainfall. They raise the ridges by 5-18 cm. Such ridges drain the soil, have good aeration and drain excess moisture.
Ridges at ground level. Such ridges are mainly arranged in the middle lane.
Buried ridges. It is recommended to do in areas with light soils, low rainfall in the summer, as well as in areas with high moisture permeability. Ridges are deepened by 5-15 cm.
Ridges are cut with hillers or specially equipped plows. Their width depends on the planted flower plants, but should not exceed 100-120 cm, the length is arbitrary. Orient the ridges from north to south.
Soil compaction
Soil compaction allows you to compact and level the field surface. Soil rolling is carried out with smooth, ringed and ribbed rollers. After rolling, the capillary porosity of the soil increases, which contributes to the influx of moisture to the seeds and the decomposition of plowed organic fertilizers. Often, light harrows are used in the same unit with a roller, loosening the topmost layer of soil to reduce evaporation.
Cultivation of the soil
Cultivation loosens the surface layer of the soil and kills weeds. Soil cultivation is carried out at a greater depth than harrowing. It is used as the plowed soil is overgrown with weeds and the formation of a soil crust. Cultivation is advisable before planting or sowing any crop. For cutting sod and areas heavily overgrown with weeds, disc cultivators are used. There are cultivators with aggregates for simultaneous feeding of plants.
Soil loosening
After heavy watering, a crust forms on the surface of the soil, especially with poor structure. This leads to the drying of the soil, making it difficult for air to reach the roots.