Kitchen kick panel
Cabinet Toe Kicks - Dimensions, Options & Installation
What is a cabinet toe kick? Why do you need them? What dimensions should they be? I'll answer all these questions and more!
At the bottom of every base cabinet in your kitchen or bathroom, you'll notice a recessed area between the bottom of the door and the floor. This area is called a toe kick, and it's an ergonomic feature to make it more comfortable to work at the countertop or sink.
It gives you a spot to slide your toes under the cabinets without bumping into the front, so you can get up closer to your work. Without a toe kick, you'd have to bend forward and strain your back.
This post contains affiliate links for your convenience. Purchases made through these links may earn me a small commission at no additional cost to you. Please visit my disclosures page for more information.
Cabinet toe kick dimensions
The toe kick is usually set back 3-4" from the front of the cabinet and 3-4" from the bottom. It needs to be deep enough for your feet to fit, but not so tall that it wastes space that could have been used inside the cabinet.
The standard depth of a toe kick is 3", which is what you'll find on most commercially available cabinets. You can go deeper if you have big feet that need extra space, but you shouldn't go less than that.
The standard height of a toe kick is 3 ½", although you can go up to 4" without losing much space in the cabinet above. I built our base cabinets with 4" tall toe kicks simply because our Roomba tends to get stuck under anything shorter!
Cabinets without toe kick
Some people prefer the look of base cabinets without a toe kick, or an open bottom with legs. While this is fine for storage cabinets like the one below, it isn't recommended for a kitchen or bathroom.
Not only will a cabinet without a toe kick be uncomfortable to work at, but it will quickly get damaged. Even if you think you won't need it, you might find yourself scuffing the front with shoes or the vacuum cleaner more often than you might expect.
If you're thinking of making your cabinets look more like furniture by adding feet instead, consider the additional cleaning that you'll need to do underneath. Crumbs and pet fur can end up deep under your cabinets, and no one wants to clean under there! A toe kick seals off this area and makes cleaning the floors much easier.
Also keep in mind that the next owner of your home will expect a functional kitchen, and they might not appreciate your aesthetic choice to skip the toe kicks.
What is toe kick molding?
Toe kick molding is a piece of trim that matches your cabinets, and is used to hide the seams and gaps between the cabinets and the floor.
When you're installing base cabinets, shims are inserted to bring all the boxes level and plumb. Walls and floors are rarely perfectly straight, and the shims hold the cabinet boxes at the correct angle so the countertop is flat.
However, these shims can create unsightly gaps between the toe kick and the floor. My base cabinets span across both tile and hardwood, and there was more than a ¼" difference from one end to the other! It took quite a bit of shimming to get the countertop level.
I'll be using a thin piece of trim painted to match the cabinet doors to cover up these gaps. A scribe tool will help to transfer the irregular lines to the molding to create a perfect fit! Once it's installed, the height difference from one end of the cabinets to the other won't be noticeable.
How to install IKEA cabinet toe kicks
IKEA cabinets use feet under the cabinet box, which are easy to adjust to accommodate uneven floors. The feet come with little clips to attach the toe kick once you've cut it to size. The video below shows you exactly how to install it!
https://youtu.be/cLqXSjr6wGcVideo can't be loaded because JavaScript is disabled: IKEA Toe Kick Installation / SEKTION Cabinets (https://youtu.be/cLqXSjr6wGc)
How to make a cabinet toe kick
There are two ways to create the cabinet toe kick. You can build a separate platform for the cabinet to rest on, or you can integrate it into the side pieces and cut out a notch at the bottom.
For my DIY kitchen cabinets, I'm building a separate toe kick platform instead of integrating it into the side pieces. This saves on materials, since I'm able to get most of two cabinets out of a single sheet of plywood and use scraps for the toe kick box. Plus, it's easier to level a small platform rather than a huge cabinet when it's time for installation.
For integrated toe kicks, you'll need to add 3 ½" - 4" to the height of the side pieces. Then cut a notch in the lower front corner to create the recessed area. The video below shows you how to use a jigsaw to complete this step.
https://youtu.be/t1xcySmyJaEVideo can't be loaded because JavaScript is disabled: How to Build a Cabinet Lesson 40: Cutting Out Toe Kicks (https://youtu.be/t1xcySmyJaE)
The separate toe kick box can be made from 2x4s or any ¾" material. You can make one long platform for multiple cabinets, or individual platforms for each cabinet box. Just make sure to stick to one height throughout the entire kitchen!
For cabinets that are 24" wide or more, you may want to consider adding a support down the center of the toe kick box to prevent the bottom from sagging. I assembled mine with pocket holes, since the inside of the platform won't be visible once the cabinet is installed.
If the outside corner will be visible (like on a kitchen island), you may need to cut both ends at a 45 degree angle to hide the board ends. You can learn more about how to make a mitered cut here.
Once the platform is level in all directions, it can be screwed into the wall through the back piece to hold it in place. Make sure to use a stud finder to locate the studs and mark them all the way up to countertop height. Once the cabinet is set on top, you'll need to attach it to the wall the same way, and it'll be easier to see the markings.
Kitchen cabinet toe kick ideas
Even though it's only a few inches high, you can put that space under your cabinets to good use! There are a lot of interesting features for toe kicks that will make your kitchen more functional.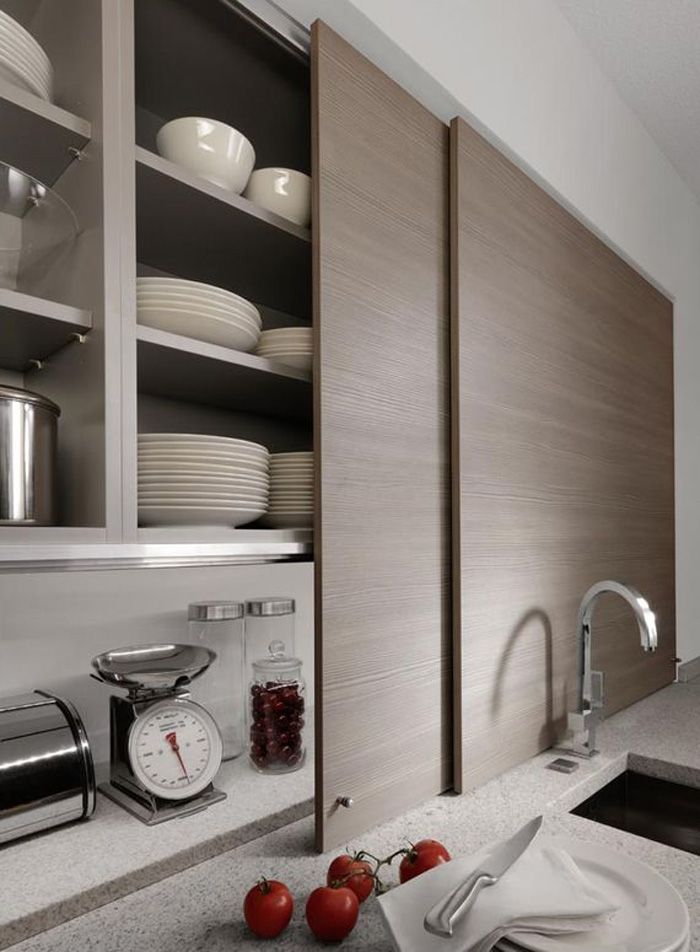
Toe kick heaters and vents
Your kitchen needs heat just like the rest of the house, but you may find the vent blocked by the cabinets. Typically, a hole is cut into the toe kick to allow the heat to escape into the room. A short register plate covers up the hole and prevents debris from getting inside.
The problem with this method is that it heats up the entire underside of the cabinet, instead of directing it out into the room. A short duct that connects the heating vent to the register funnels the hot air out where you need it!
Toe Ductor Toe Kick Duct KitToe kick drawers
If you have a small kitchen, every square inch of space is valuable. Toe kick drawers are perfect for cookie sheets, cooling racks and other flat items, as long as you remember they're down there!
These small drawers are easier to install when you're putting together a new kitchen. Kraftmaid offers this feature on some of their cabinets, or you can build your own like the one in the video below. You can also retrofit existing cabinets with a few modifications.
https://youtu.be/ideCiArksxw?t=396Video can't be loaded because JavaScript is disabled: Toe-kick Drawer for hidden storage [Part 2: Home Bar] (https://youtu.be/ideCiArksxw?t=396)
Usually these drawers operate with push-to-open drawer slides. Keep in mind that using your shoe to press on the drawer front will quickly lead to scuff marks, and bending all the way down to the floor to retrieve items isn't great for your back. If you have pets, you may also discover that their fur finds its way into these drawers (ewww!)
Toe kick lighting
If your kitchen feels too dark, toe kick lighting is an easy way to brighten it up! Motion activated sensors can turn on the lights automatically when you walk into the room, so you can sneak to the fridge for a midnight snack.
Toe kick lighting can be as simple as an adhesive LED light strip that sticks to the underside of the base cabinets and plugs into the wall. You can also hire an electrician to hard wire the lights to each cabinet for a more custom look.
Toe kick vacuum
This is a great feature that I added to my pantry cabinet! I removed the bottom and the toe kick, and installed a motion-activated vacuum on the floor inside. Now we just sweep crumbs to the pantry and they're automatically sucked up without having to open the door!
There are also kits that incorporate the vacuum directly into the toe kick. This one may be easier to install when you're renovating an entire kitchen, so you can easily cut out the hole and wire it up.
Hopefully this article helped answer all your questions about cabinet toe kicks! If you're interested in learning more about building your own kitchen cabinets, check out the articles below!
Page not found - The Handyman's Daughter
We didn't find the posts for that URL.
Latest Posts
Learn how to use a track saw square to ensure your guide rail is straight and your cut is square without checking every time! The track saw has been a …
Read More about How to Use a Track Saw Square
Get your front yard ready for Halloween with these DIY outdoor Halloween decorations! You'll find scary and not so scary ideas in this list! Want to decorate your front porch …
Read More about 20 Fun or Scary DIY Outdoor Halloween Decorations
Suck up sawdust at the source! Learn the difference between a dust collector vs shop vac vs dust extractor so you can choose the right one for your workshop! Are …
Read More about Dust Collector vs Shop Vac vs Dust Extractor
Tired of tripping over bicycles in your garage or shed? Get them organized and out of the way with one of these smart DIY bike rack ideas! Is it impossible …
Read More about 10 Smart DIY Bike Rack Ideas for your Garage
Are you confused about the difference between sanded vs unsanded grout? Learn how to choose the right one for your tiling project here! Sanded grout refers to grout that uses …
Read More about Sanded vs Unsanded Grout - Which Should I Choose?
You find grout and caulk in similar places, but they're not the same thing. Learn the difference between grout vs caulk and where to use them! Grout is a cement-like …
Read More about Grout vs Caulk - Where are they used?
Learn how to install cabinet hinges so the door fits perfectly! I'll show you how to measure, drill and install concealed hinges step by step! Concealed hinges, also known as …
Read More about How to Install Cabinet Hinges Step by Step
Want to make your own cabinet doors, but don't know where to start? Check out these easy DIY cabinet door ideas in a huge range of styles! Want to give …
Read More about 17 Easy DIY Cabinet Door Ideas on a Budget
Trying to decide between cedar vs pressure treated lumber for your outdoor project? Find out the difference and pick the best one for you! Are you wondering about the difference …
Read More about Cedar vs Pressure Treated Lumber
Coasters are an easy project you can make in just a few hours with scrap wood! Find the perfect DIY wooden coaster design in this list! Coasters are a great …
Read More about 15 Easy DIY Wood Coaster Design Ideas
Tired of cluttered drawers in the kitchen, bathroom or office? I've found 15 genius DIY drawer organizer ideas for every room of the house! Tired of rummaging around in the …
Read More about 15 Easy DIY Drawer Organizer Ideas
Are you wondering if you can paint over wallpaper? Find out whether you can, and whether you should, in this article! Yes, you can paint over wallpaper. But should you? …
Read More about Can You Paint Over Wallpaper?
After four weeks of weeding, digging, planting and building, my backyard makeover is done! Check out the before and after of this amazing transformation! This backyard makeover was a ton …
Read More about Backyard Makeover Before and After
Old wallpaper can make a space feel dated. This tutorial shows you how to remove wallpaper three different ways to give your room a new look! When we bought our …
Read More about How to Remove Wallpaper - 3 Different Methods
Need storage for your Playstation, Xbox and Switch? Make this simple DIY game console shelf with adjustable shelves for all your video games! Back in 2019, I made this built-in …
Read More about DIY Game Console Shelf
Making Shaker cabinet doors is easier than you think! I'll show you how to use a router table to build these DIY Shaker cabinet doors yourself! There are a lot …
Read More about How to Make Shaker Cabinet Doors
What's the difference between a molly bolt and a toggle bolt? Are they the same type of wall anchor with different names? Find out more here! Are you trying to …
Read More about Molly Bolts vs Toggle Bolts - Which Should I Use?
Is a sliding miter saw worth the extra cost? Let's compare sliding vs non sliding miter saw options so you can decide which saw is for you! The miter saw …
Read More about Sliding vs Non-Sliding Miter Saws
Looking for the perfect coffee table? Why buy when you can DIY! Check out these DIY coffee table ideas with woodworking plans so you can make your own! I'll admit …
Read More about 13 Amazing DIY Coffee Table Ideas with Plans
Are your boards always a tiny bit too short? Learn how to account for saw kerf in your woodworking projects, so each cut is the right length! It happens to …
Read More about What is Saw Kerf and Why It Matters in Woodworking
Toggle bolts are strong drywall anchors for mounting heavy things on the wall without a stud.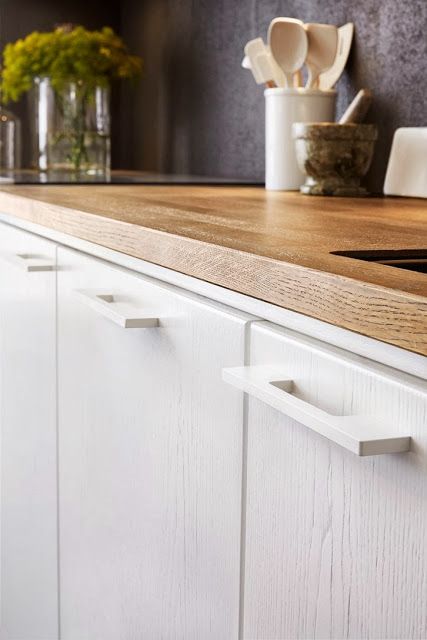 Here's how to use toggle bolts the right way! Need to mount something heavy …
Read More about How to Use Toggle Bolts [Step-by-Step]
Confused by all the different types of hollow wall anchors? In this guide, I'll show you when to use them and the pros and cons of each style. It never …
Read More about 7 Types of Hollow Wall Anchors
Want to add privacy to your windows, while still letting sunlight shine through? Learn how to apply frosted contact paper for windows! Contact paper is magic. I've used it to …
Read More about How to Apply Frosted Contact Paper for Windows
Sawdust may seem like waste material, but it can solve a lot of problems! Here are 10 clever uses for sawdust you might not have thought of! Ugh, the dust …
Read More about 10 Clever Uses for Sawdust
Need extra space next to the grill? Check out these easy DIY outdoor grill station ideas you could make in a weekend with basic tools! Are you struggling to cook …
Read More about 11 Easy DIY Outdoor Grill Station Ideas to Make this Weekend
Build this DIY grill station for your next backyard BBQ! Perfect for a prep space, tabletop grill or pizza oven, with durable concrete pavers on top. Have a tiny balcony …
Read More about DIY Grill Station with Concrete Top
No stud finder? No problem! Learn how to find a stud without a stud finder to quickly and safely hang items on the wall. While an electronic stud finder can …
Read More about How to Find a Stud Without a Stud Finder
Tired of forgetting to track points while playing your favorite backyard game? Check out these 10 cornhole score keeper ideas to buy or DIY! Cornhole is a popular backyard and …
Read More about 10 Cornhole Score Keeper Ideas to Buy or DIY
Learn how to build a workbench out of 2x4 lumber and plywood, and add custom shelves for extra storage! Get the free plans to make your own! Every garage or …
Read More about Easy DIY 2x4 Workbench with Storage
Do you want to update your ugly kitchen, but remodeling isn't in the budget? I'll show you how to paint laminate cabinets successfully! This style of laminate cabinets with oak …
Read More about How to Paint Laminate Cabinets
Learn how to paint melamine so it doesn't peel or scratch off! These painting tricks work great for melamine cabinets and furniture. Melamine is a particle board core with a …
Read More about Can you paint melamine? Yes! Here's how...
Prevent paint from drying out in storage with these handy tips! I'll show you how to store leftover paint so it stays fresh for touch ups! I seem to collect …
Read More about How to Store Leftover Paint
Transform your backyard into the ultimate grilling and food prep space with these amazing DIY outdoor kitchen ideas! Do you spend a lot of time grilling outside during the summer …
Read More about 13 Creative DIY Outdoor Kitchen Ideas
Are you wondering how to paint PVC? In this guide, we'll go over all the tips, tricks, and techniques for painting PVC pipe and trim! Painting PVC starts with good …
Read More about How to Paint PVC [Tips & Tricks]
A speed square isn't just for marking straight lines! Learn how to use a speed square and unlock all these not-so-secret features! There's a lot you can do with this …
Read More about How to Use a Speed Square [7 Different Ways]
Want to build your own cabinet doors? This handy guide will show you how to measure for cabinet doors and get the exact dimensions you need! The most important part …
Read More about How to Measure for Cabinet Doors
Tired of tripping over cords or searching for that tool? Tame clutter in your workshop or garage with these DIY power tool storage ideas! I have a tiny workshop. It's …
Read More about 17 Genius DIY Power Tool Storage Ideas
A pea gravel patio is cheap and easy to install and maintain! But it has a few drawbacks. Learn all the pea gravel patio pros and cons here! Why install …
Read More about Pea Gravel Patio Pros and Cons
Learn how to hide screws in wood so your projects look more professional! I'll show you 7 different methods from beginner to advanced! Why should you worry about hiding a …
Read More about How to Hide Screws in Wood [7 Different Ways]
Have you wondered about the difference between water-based vs oil-based primers? Learn which one to choose for your next project here! Water and oil don't mix, and picking the right …
Read More about Oil-based Primer vs Water-based Primer
Kick panel what is it - ProDemio.ru
Author admin Reading 9 min Views 49 Published
Recently, there has been a growing interest in homemade acoustic installations. Because you can not use only finished products. Now in the literature for radio amateurs and on the Internet you can find a huge number of publications that teach you how to make amplifiers and other audio equipment for cars on your own.
But in order to do this work yourself, you have to face a lot of problems. The sound of a speaker system is important, and design has a big impact on quality. In the car, this affects much more than in the home system. However, motorists seek to improve sound quality by replacing speakers and radios.
What is a kick panel
The kick panel is where all the elements of the sound system should be installed. With this setting, the sound wave of both channels is distributed evenly. However, installing a midrange speaker in the panel is problematic. Sound imbalance can occur due to the fact that there is a significant distance between the medium and high frequency connections. To prevent this from happening, the tweeter must operate at a frequency of 2-3 kHz. The positive side of this setup is that it is absolutely easy to install, and the disadvantage is that it puts a load on the speaker. The kick panel is located near the door under the instrument panel. Any speaker can be installed here. But every car is different, so speaker placement will be different.
Kick panels are made of MDF or chipboard and look like a shell with a membrane through which sound passes. Foam rubber is often used to make the membrane. Door sills are often used in racing cars.
Benefits of installation in the kick panel:
- guaranteed quality - clear sound, no rattling;
- good sound;
- good power.
The disadvantages include:
- in the complexity of the plant;
- speaker can be deformed by feet.
Sometimes in cars they are placed directly under the dashboard. Despite this position, the sound system sounds clear.
Installation of panels in VAZ 2109
The place under the dashboard was chosen well, since the midrange speaker URAL-AS-C1022 has a size of 10 cm, a range from 300 Hz to 3 kHz and will not fit in the pillars and doors. The installation was hidden from prying eyes.
Installation must begin by removing the plastic cover, we will attach it to it. Make a cardboard template to match the bottom of the panel closest to the carpet. It is necessary to measure on the left side and check if the hood opening handle interferes, otherwise, without paying attention to it, you will have to redo the panel. After assembly, the template should be made of wood or plywood with a thickness of approximately 4 mm. By simply screwing the base to the case, the structure may not fit, as it looks like a cone from behind and therefore rests against the case. To avoid such problems, it is necessary to tilt the base of one of the corners by 45 degrees, enclosing wooden triangles. Attach these pads to the self-tapping screws.
Then you need to make sure that the top of the panel fits the speaker. Hole diameter should be 102mm, mounting hole diameter 117mm, and depth 47mm.
To connect the frame, use a 50 mm square bar, which must be fixed in the corners of the top panel. In this case, this bar must be cut so that the geometric axis of the installed speaker faces the tip of the gear shift knob.
Having placed the panels at the right level, you need to create a volume around them. Then from the inside, so that the foam rubber does not get inside the speaker, you need to make a fence out of adhesive tape.
After carrying out the above procedures, you can proceed to two types of foam: dry or wet. The positive aspects of drying: fast filling and ease of use. Its disadvantages are that the foam is not very hard and the pores are quite large. For this reason, the dry type will not be used. The essence of wet foam is that any board should be watered with water and, mixing with a spatula, apply foam only on a wet board. Then apply the foam to the frame with a spatula. After 10 minutes, touch up the applied foam with wet hands. After waiting for drying, remove the excess with a knife and patiently carefully process the finished surface with coarse sandpaper. Foam applied by wet foaming has very fine pores and high hardness. You will have to be patient, as sanding with sandpaper is a lengthy process and will require some effort. Then, when the form appears, you will need to putty small indentations. In other words, to make the surface look beautiful. If painting or processing is required, the surface must be in perfect condition, otherwise all errors will not be hidden, but will be in plain sight. You can improve it even more by dragging everything with a rug. In this case, you should not try too hard when processing with foam and grinding, as everything is perfectly disguised as a carpet. To increase strength, you can take fiberglass and strengthen the structure with it. For the best effect, it must be impregnated with epoxy resin. Basically that's all. Now you can start finishing - carpet. For sound absorption, it is recommended to use a synthetic winterizer. It's not hard to make a banner. It is necessary to cut out the details of the required diameter, smear it well with glue, press and hold for a while.
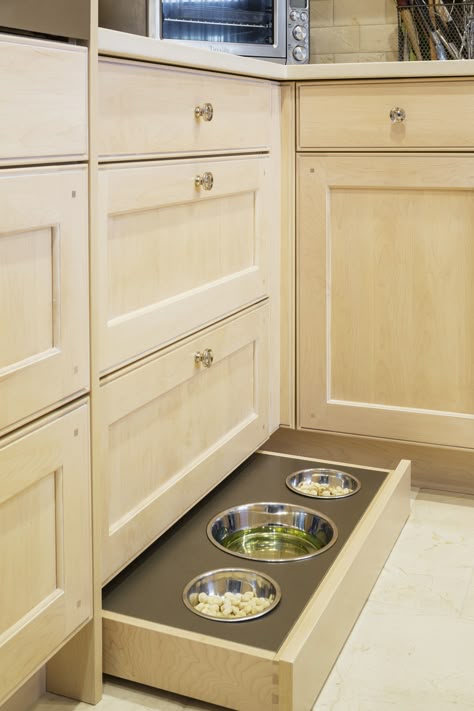
An interesting and important point: as a result, the useful volume was about 0.5 liters. It's by no means a good fit for a midrange driver, but with polyester filling, it's great for a midrange driver. For the bass mid-range, such a volume is critical, and it is useless to hope that it will be possible to get some amount of low frequencies from it.
In general, the described construction turned out to be very strong, clean and attractive in appearance. It can be easily repeated on another machine, while spending a minimum of money.
Good morning everyone! I'll start with the fact that I recently saw on Slavutforum an advertisement for the sale of the 16th speaker, in new condition and at a great price! Since I had a few wheezing pioneer, it was decided to buy new ones!
Coaxial acoustics Ground Zero. I express my gratitude to KOS Slavutaforum for these columns.
The question arose: how to put it in the so-called "kick-panel"?
The decision was not long in coming, but it forced me and my friend Bl1tz to take new steps.
For work you need: football template, plywood, carpet, putty, foam rubber, glue, jigsaw, ring machine, self-tapping screw, stapler, self-tapping screws and several cups of coffee.
According to the model, the ends were cut out of plywood (we make holes in the plywood for the magnet, in a place convenient for you), after which 4 rings were cut from thicker plywood to fit the speaker! After connecting the two rings to each other, we select a suitable angle for the direction of the speakers with a bar, we solve this problem with self-tapping screws. Foam the gap between the rings. After the foam has dried, remove the excess and cover it up! Then we smooth out the resulting bumps with the help of a road train! Having received even surfaces, we tighten the resulting carpet, fixing it with a stapler! We also fasten the butt of the panel with carp, fixing it with glue.
We take rings with panels and quickly run to the machine to try on, because even coffee cools down quickly! Having chosen the optimal arrangement of the rings for you, we fasten them to the panel (self-tapping screws to help), and we fasten the speakers to the rings! We fasten the finished football panels to the body with clips, put decorative nets on the back and enjoy the result, drinking almost cold coffee. Oh, and do not forget to connect the speakers themselves (as I did).
For the great help in the work done, I express my deep gratitude to my friend Bl1tz
And more. Some comrades write: it’s bad to put 16 speakers in the kick panel, they say they’re cool, the tykbox won’t work, they won’t sound, don’t expect bass .. I don’t agree with this. In my example, the acoustics sound decent and have good bass, while these speakers sound from a Chinese green radio.
This setup was done by one of the Americans in his huge 1989 Jimmy GMC Jeep.
It's always a good idea to start building a kick panel by inspecting your car door. In our case, Jimmy GMC 19'89 fairly large doors with very thin panels, possibly pressed cardboard. The lower part is separated for a pocket in the door and in our case it adapts perfectly to the installation of the striker panel.
As you can see, the owner of our car installed sound insulation under the front door trim (factory.
The shape of the future kick-panel was wooden.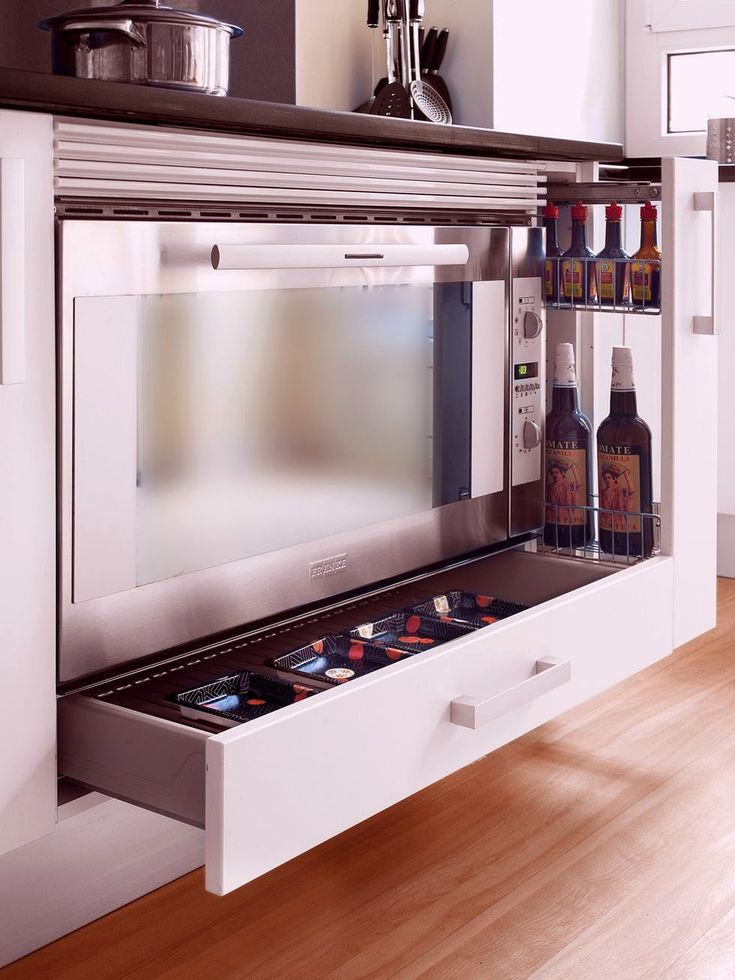 The author cut out several rings from thick OSB (chipboard) and fastened them together with glass beads (trimmings - pillars) from of wood at a certain angle of inclination of several degrees, so that the speaker, after installing the baffle panel, was directed upwards (so to speak, to the listener's ear). aesthetic reasons
All seams in the construction of the kick panel are sealed and putty (or some kind of plaster) is applied to the top to shape our kick panel. Some use polyurethane foam for this.
After that, putty or polyurethane foam is processed by a grinder.
The adhesive is then applied to the top of the joint panel. To do this, you can use a spray gun or any other spray for applying paint or lime. You can also spread the adhesive evenly with a brush.
A fabric is applied over the adhesive to finish the seam panel. Often they take the fabric to match the door upholstery. Sometimes black or white leather or leatherette may be used. Materials of this type look great on door trim of any shade.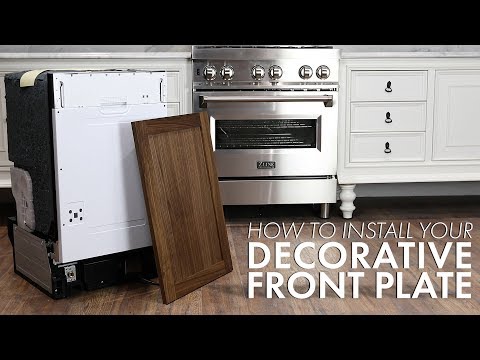
As we noted earlier, the author of this drawing, before applying the putty, fixed wooden elements of a certain shape on the butt panel. After applying the fabric, he cut out the shape of these overlays on it, and then dismantled them.
With this method, he was able to obtain recesses, in which decorative plastic inserts (inserts) were then installed.
The speakers in the kick panel are set at a certain optimal angle. You can calculate this angle from the midrange spectrum of the sound.
- To do this, you can connect a speaker to the head unit.
- If it is possible to cut off all low frequencies on the radio.
- Place the speaker in the approximate installation location and use glazing beads (pieces of wood) to fix it at a certain angle. For fixing, you can use plasticine. By gradually changing the angle of inclination, you can determine the optimal sound of your speaker system in different conditions.
The final design is stunning in two colors - gray and red.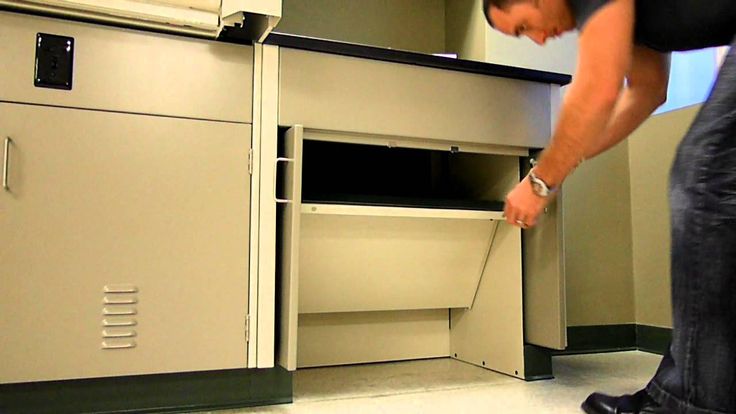 Red plastic inserts wonderfully emphasize the beauty of the red elements of the interior of the car. The peak panel proved to be very rigid, which will most likely avoid resonances and all sorts of rattles if our Jimmy's door is neatly finished.
fastening the panel to the main metal frame of the door is very simple.
Creating a kick panel is a very personal process, so please feel free to share your experience. We will be very grateful if you send us your research materials.
Test Drive SsangYong Stavic: Food Processor
- Home
- Test drives
- SsangYong Stavic test drive: food processor
Author: Ilya Ogorodnikov
A good high-torque diesel engine, increased ground clearance, an integrated frame in the design, a hard-wired all-wheel drive and a reduction gear in the transfer case.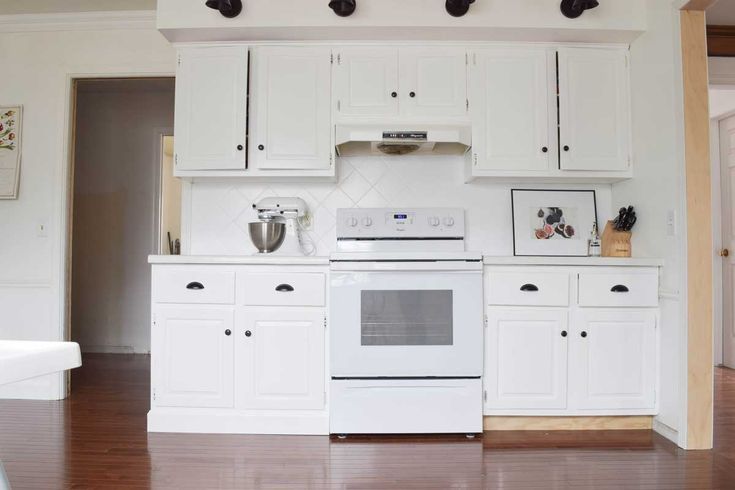 No, we are not here for another trophy-raid, and not even for a test of a harsh “all-terrain vehicle”. We have an amazing car in our hands - a seven-seat Stavic minivan with a full off-road arsenal.
Many mistakenly believe that auto journalists cannot have pain and doubts when buying a new car. The amount of knowledge and experience from the tests, the ability to test almost any car at any time, as well as the availability of insider information and all the ins and outs of a particular model, make it quick and easy to make the only right choice.
I will reveal the secret. It is more difficult for employees of auto publications to choose a car for themselves than for ordinary motorists. That vast amount of knowledge about the advantages and disadvantages of cars gives rise to the same immense amount of doubt. And you want that car, and that one is good, and this one is also convenient, but you can’t take your eyes off that one. You have to calmly pull yourself together and start with the main thing - to prioritize . ..
I can't help myself - I like big cars. I also like to travel, getting as far from home as possible, but I have no desire to spend a lot of money on this at all. And if friends and comrades also manage to go on adventures, it’s absolutely wonderful.
And now I look at the SsangYong Stavic and can not believe my eyes! Some kind of miracle machine - it just fits in all respects at once. Does it happen? There must be a catch somewhere...
For some, it will be obvious from the very first second - Stavik's appearance, to put it mildly, is specific. SsangYongs, in fact, have never pampered the eye with sophisticated design, although there has been a clear improvement in recent trends. So Stavic, against the background of its predecessor Rodius, which domestic motorists reasonably called with the letter “U” at the beginning of the name, looks much more attractive.
Yes, not handsome either.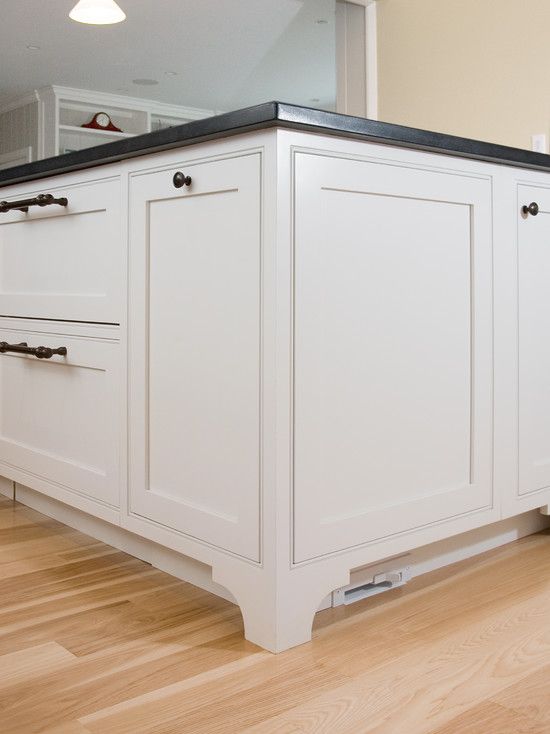 Appearance, by today's standards, is rather outdated: disproportionate, angular and short. But, honestly, the only detail that really confuses is the “feed”, which gives the impression of a trailer welded to the body.
But inside… oh, that's probably why I like big cars. Incredible space, abundance of light and "air" in the cabin, landing in a chair, as if on a captain's bridge, with a view ahead of ten cables - a liner! Just starting to customize the seat for yourself and carefully study the "surroundings", you notice that the interior of Stavik also comes from the past.
The main detail of the front panel is the instrument panel located in the center. This is no longer in vogue, and reading information from it is not very handy - you have to be distracted from the road and peer into small and dull numbers.
A huge two-din radio equipped with a USB port sounds the same as it looks - very modestly.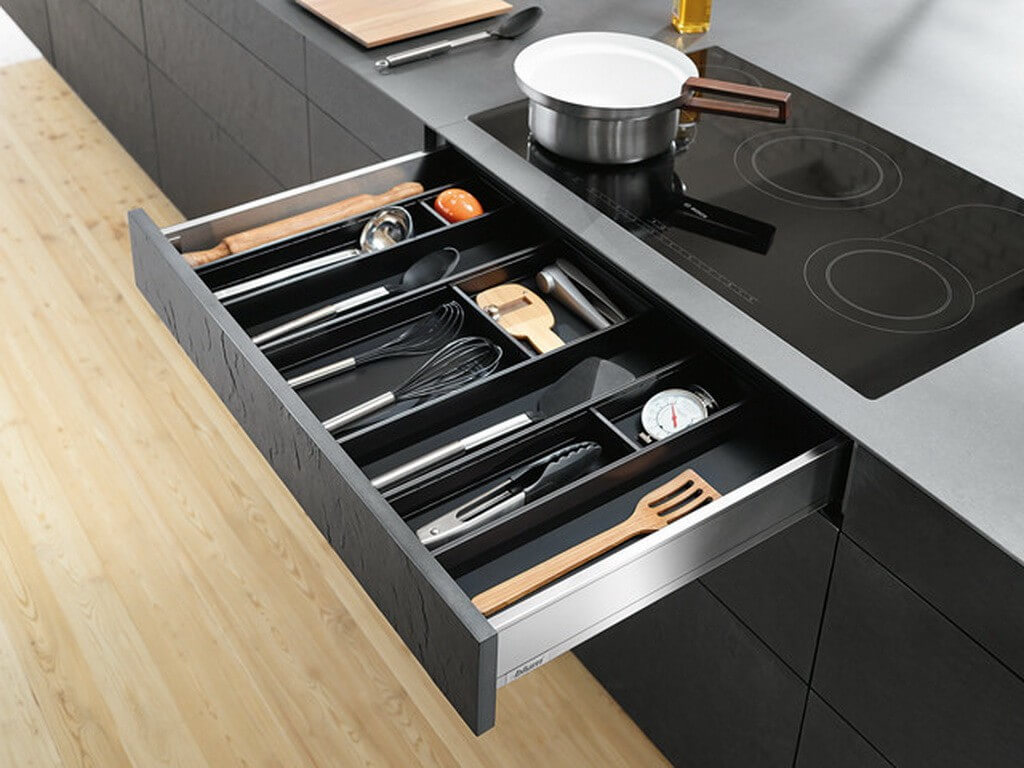 The same epithet is suitable for single-zone climate control. For passengers, only a separate fan speed control is available.
But! Despite the modest, gray style of the nineties, I had no complaints about functionality. Firstly, Stavik has everything that a modern car needs - there is even a heated steering wheel! Secondly, all this is at hand, convenient to use and understandable for perception. Moreover, I was pleasantly surprised by the soft plastic of the front panel and - in part - the doors.
It was not, of course, without drawbacks. The driver's seat does not have a pronounced profile. You can only reach the “lamb” adjustments with the door open. No steering wheel reach adjustment. Some assembly flaws are visible.
Of course, SsangYong has a huge number of compartments, niches and drawers. One central two-story box is worth something. But with the doors, the situation is ambiguous: in each of the front ones there are two large compartments and a bottle holder, in the rear - nothing.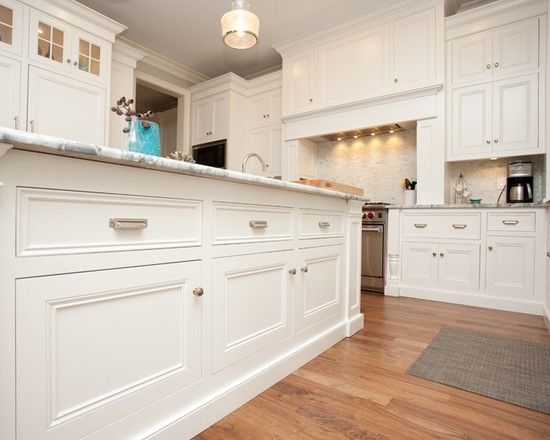
Passenger compartment in size - at least move to live. Two central seats and a rear sofa ride on a sled, configuring free space in the widest range. And taking into account the adjustment of the inclination of the backs and the ability to transform the chairs into tables, you can arrange a real wardroom in the back. What's more, the SsangYong Stavic is one of the few minivans where the rear seats fold down into flat berths.
However, despite the presence of adjustments and armrests, an adult in the second-row seats is not very comfortable - they are small. Due to the short pillow, the legs are almost completely on the weight, unless, of course, you move back and stretch them out.
The reason is not in the mistake of ergonomists, but in the features of the designs for different markets. The fact is that in some countries in Stavik there may be - attention! - up to 11 seats. It is for this arrangement that small seats are designed. There are no complaints about the sofa: there is enough space, it is comfortable to sit, cup holders, pockets, air vents and even a separate 12-volt outlet are available.
With all the spaciousness of the cabin, the trunk did not suffer at all - an impressive 875 liters are guaranteed at least. If you remove all the seats, the Korean minibus is able to carry more than three (!) cubic meters of cargo.
And to transport quite briskly. Under the hood of the SsangYong is the only and well-known diesel engine with a volume of 2.0 liters and a capacity of 149 horsepower, paired with a five-speed automatic.
Despite the rather modest technical characteristics, the more than two-ton Stavic, surprisingly, reacts very cheerfully to the gas pedal - a solid 360 Nm of thrust, available already from 2,000 rpm, affects. In the urban rhythm of traffic, a large and heavy minivan is easily able to give odds to most of its neighbors downstream. The removal of the particulate filter and the weakening of the environmental "noose" to the Euro-4 standards affected.
Cheerfully typing cruising 110 km / h, the motor runs out of steam. Kick-down mostly only enhances the rumble of the motor, but not the acceleration. Speed builds up rather than picks up.
Pleased Stavik stability on the road. Nicely balanced steering and fully independent suspension settings make it easy to control and precisely steer the rear-wheel drive, basically, car. Yes, and with domestic potholes, the car copes quite adequately.
However, on slippery or unsteady surfaces, you need to carefully enter the turns. Stavik, even with all-wheel drive connected and ESP activated, strives to wave the “stern” in a turn. The stabilization system works with a noticeable delay.
The old Mercedes "automatic" copes with its duties acceptable: it switches smoothly, although not always in a timely manner. Funny "peep" on the left on the knob of the automatic transmission - a manual gear selector. As it turned out, it is really convenient to use it, despite the presence of duplicate buttons on the steering wheel. But there is not much sense from the “manual” - the selected gears are not fixed, and there is no point in turning the motor. By 3,000 revolutions, the stock of "Newtons" is gradually reduced to nothing.
And what about off-road capabilities? It can be seen from afar that in this case the main enemy of the SsangYoung Stavic is geometric cross-country ability. A three-meter wheelbase with a total length of more than 5.1 meters with an almost one-meter rear overhang automatically narrows the habitat to “only straight off-road”. Any hill, deep ditch or even a small ravine threatens Stavik with either landing on the “belly” or a torn off rear bumper.
But snow and mud growths on the road, snow and ice porridge of any consistency and depth, even with a high curb under a layer of snow, do not stop SsangYoung. With the "blocked" limber, he rushes like a tank. But in stock there is also a downshift!
The all-wheel drive system on the Stavik is the most amazing feature in a large family van. Instead of the usual "passenger" clutch that automatically connects the drive, SsangYong uses the Part-Time system.
That is, the front-wheel drive is connected directly and rigidly, without the use of a center differential, and there is a downshift in the transfer case. Similar schemes are used, for example, in serious SUVs or utility pickups, such as the Toyota Hilux or Mitsubishi L200.
What is the result?
If we draw an analogy from life, then the SsangYong Stavic surpasses the food processor in terms of the number of functions performed. Not in each of them he is really strong, but together with an experienced driver he can accomplish a feat. Especially if the driver is the father of a large family and an avid traveler.
Sitting in the middle of the intersection of asphalt minivans and commercial vans (with the addition of off-road genes), in many ways the Stavik can prove to be very handy and an indispensable assistant.
To be honest, before the test, I treated this car with some skepticism and incredible curiosity at the same time. Because road trips are an integral part of my life. Only these sorties often take place far from civilization and even outside of any kind of roads. So, returning this non-standard car without sadness, I put the last priority: I still need a serious SUV with a spacious interior, rather than a spacious minivan with serious off-road potential ...
Brief specifications SsangYoung Stavic
| Dimensions (L x W x H) | 5130 × 1915 × 1815 |
| Curb weight, kg | 2 104 |
| Clearance, mm | 185 |
| Trunk volume, l | 875/3146 |
| Fuel tank capacity l | 80 |
| Engine | diesel 2.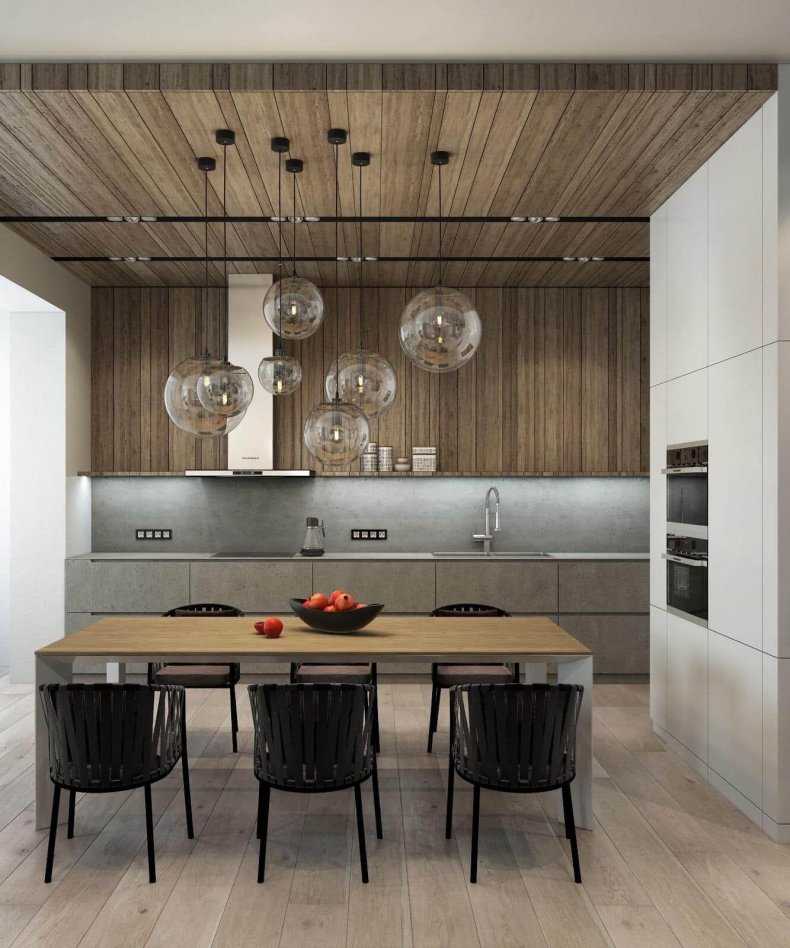 0, 149 hp 0, 149 hp |
| Transmission | automatic, 5-speed |
| Drive unit | pluggable full |
| Acceleration 0-100 km / h, s. | 13.5 |
| Maximum speed, km/h | 181 |
| Average fuel consumption, l/100 km | 8.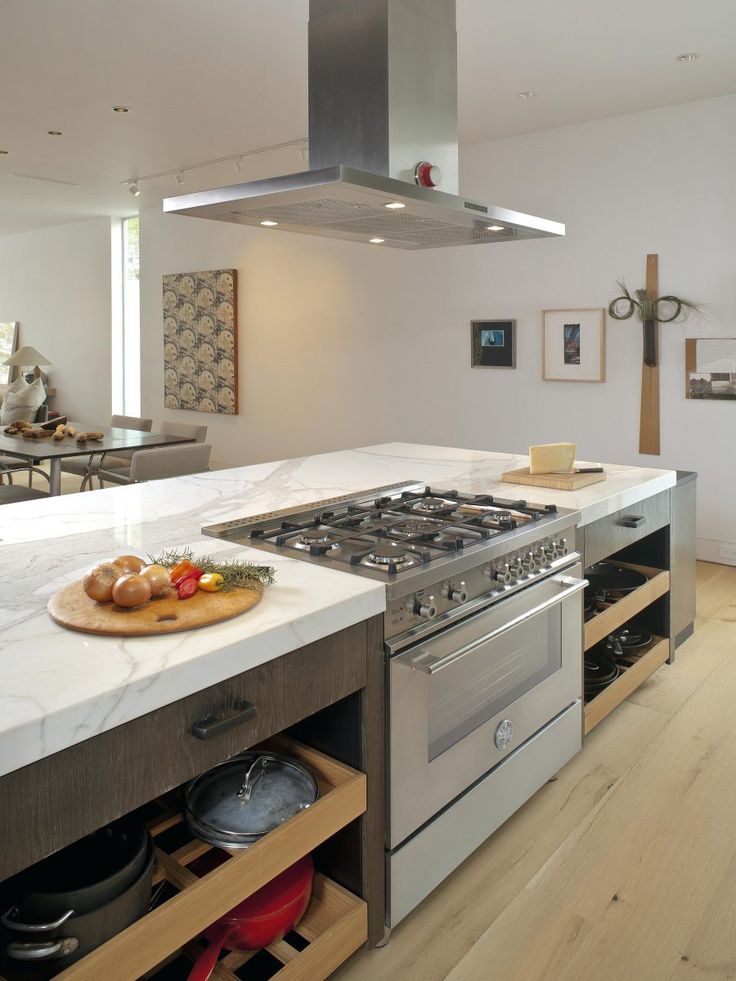 1 1 |
The editors of the portal Kolesa.Ru expresses gratitude to the company "SsangYong Center Petersburg" - the official dealer of SsangYong in St. Petersburg, for the provided car.
See also:
single ssangyong SsangYong Stavic
New articles
Articles / Financial questions What cars can be bought under the state program of preferential lending and how much to save The market for new cars has been in crisis since March. Judge for yourself the rate of decline: in February, 121,442 new passenger cars were sold, and in May only 24,837. All this forced the governments . .. 925 0 one 10/19/2022
Articles / Popular questions On which side do you need to bypass the car when getting on and off and why it is important The life of a driver is full of important little things that are important to observe. Approaching the car, inspect it for visible defects. I got into the car - buckle up, turn on the low beam (if there is no DRL) ... 607 2 2 10/17/2022
Articles / Practice Stop on demand: what breaks in the brake master cylinder Everyone used to know what a master brake cylinder (or just a GTZ) is. Now they remember him much less often: the GTZ has noticeably increased reliability, and on new machines it practically does not fail .... 970 0 one 10/14/2022
Popular test drives
Test drives / Test drive Haval Dargo vs Mitsubishi Outlander: the dog is barking, the stranger is coming In the Haval dealership in the south of Moscow, life is in full swing: buyers look at cars, communicate with managers and sign some papers. While I was waiting for the test Dargo, the same cross... 13904 7 186 13.09.2022
Test drives / Test drive Motor from Mercedes, emblem from Renault, assembly from Dacia: test drive of the European Logan 1.