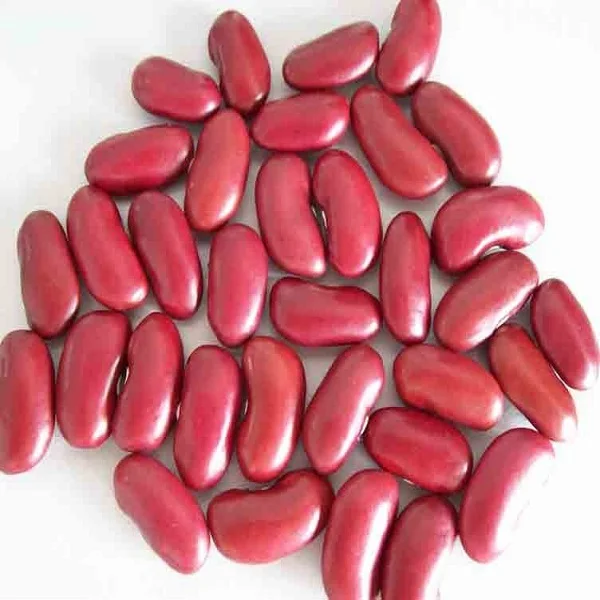
Kidney beans grown
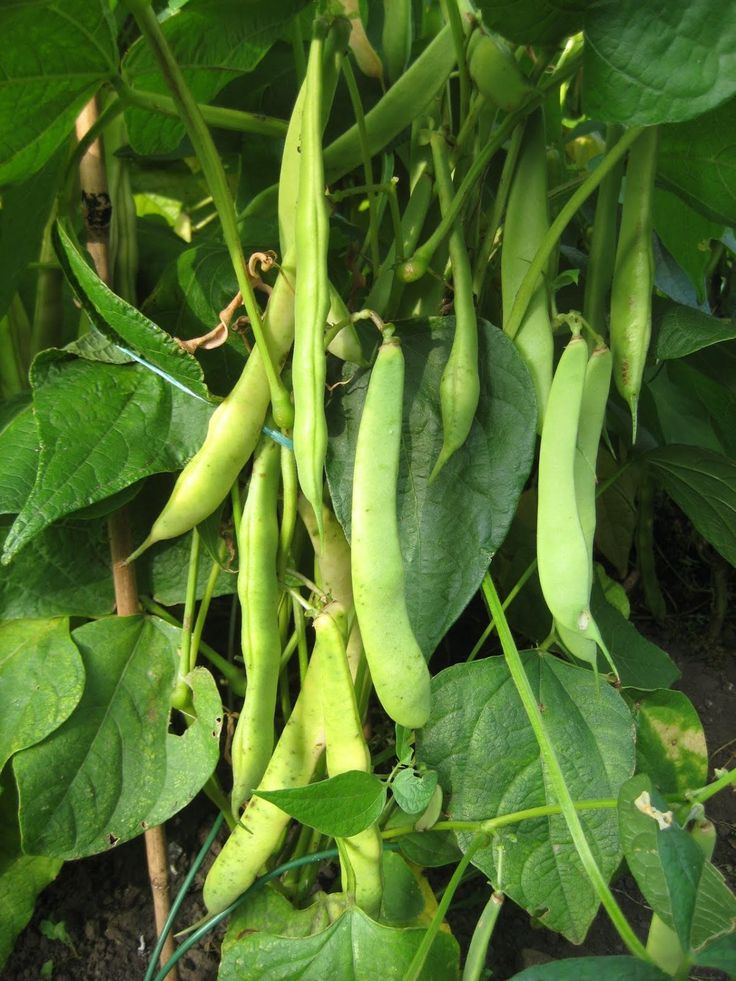
How to grow kidney beans – a healthy inclusion to the home garden
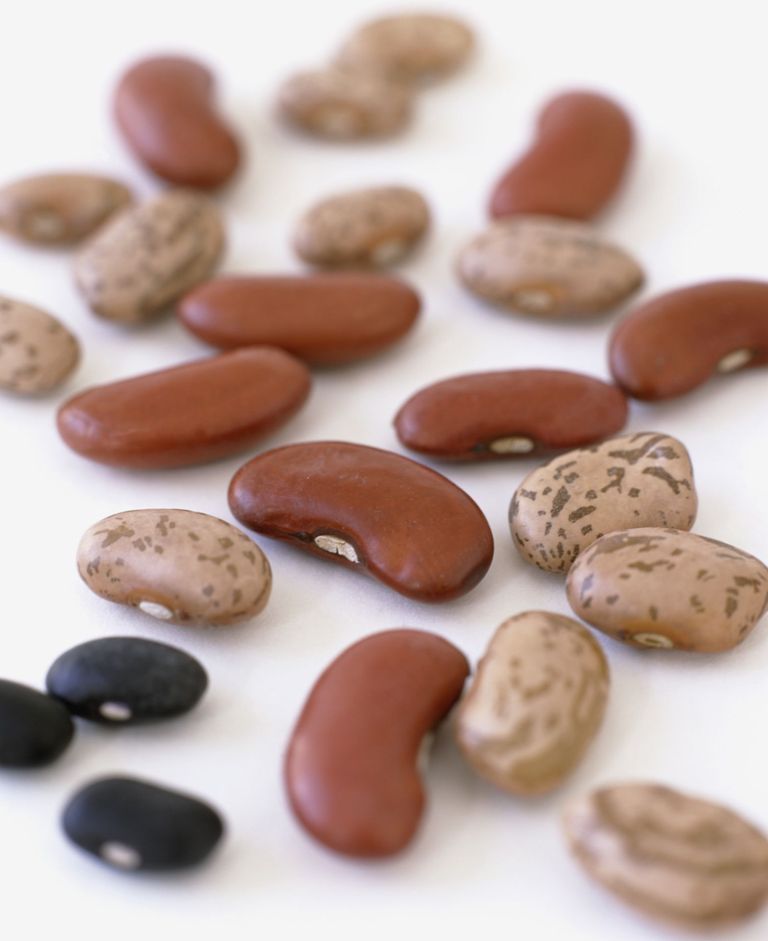
(Image credit: Getty Images)
Learn how to grow kidney beans for a versatile ingredient that’s packed with flavor and goodness.
Kidney beans are a fantastic source of protein and dietary fiber, and are rich in nutrients including iron, vitamin B6 and folic acid. Eating them regularly can help to control blood sugar levels as they are low on the glycemic index, and they can even reduce cholesterol when eaten in place of meat.
So much more than a staple of hearty chilis, kidney beans can be enjoyed in salads, stews and soups. They can also be dried and stored for year-round use, making them a fantastic addition to your kitchen garden ideas.
Kidney beans are easy to grow, but you do need to consider whether your local climate is suitable. 'They grow well in temperate climates, and love a temperature range of around 59-77°F (15-25°C),’ says Aditya Abhishek, a horticultural expert for Agriculture Review .
Bear in mind that kidney beans must be properly cooked before eating, as they contain lectin, which can cause sickness if not diminished through boiling.
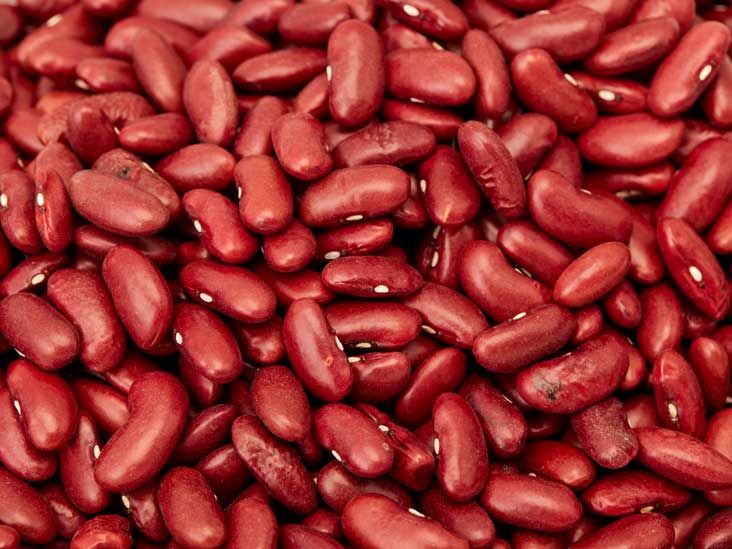
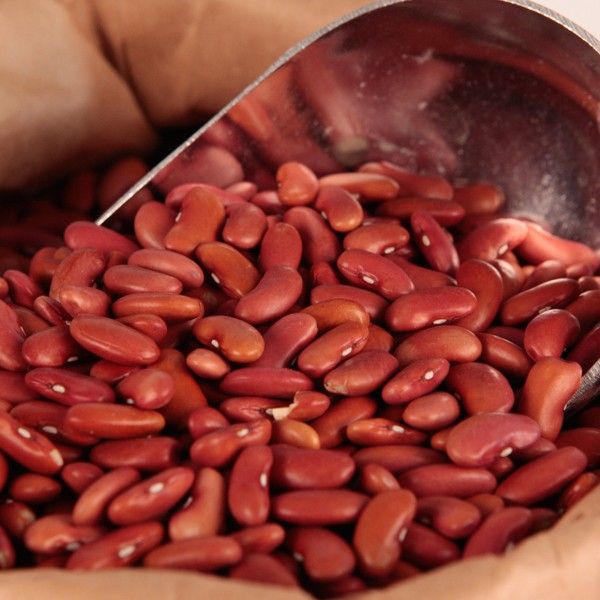
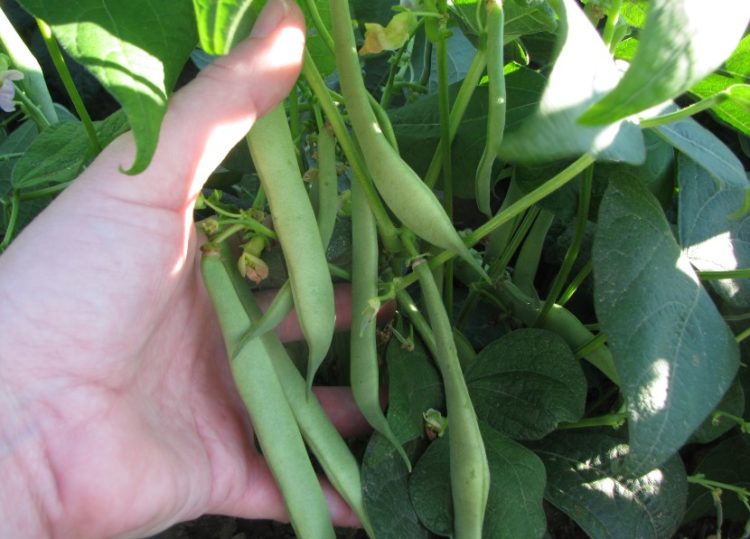
(Image credit: Digihelion / Alamy Stock Photo)
How to grow kidney beans – step-by-step guide
Ideally you should sow your kidney beans in the spring. ‘Generally you can sow seeds from February to March for a good germination rate,’ says Abhishek. ‘However, this can vary according to local climate. In hot tropical areas, you can start sowing seeds from mid October to November.’
The key issue when deciding when to plant kidney beans, is whether the soil feels warm enough. ‘Kidney beans love warm soil, so they should be planted only after the last frosts – otherwise, they will rot,’ says Emilly Barbosa Fernandes, small space gardener at HouseGrail .
- First, choose a good site to sow your kidney beans. ‘Select a spot that receives at least 6 to 8 hours of direct sunlight each day. This will help in good vegetative growth and reduce the risk of pests and diseases,’ says Abhishek.‘You need well-drained, loose soil that is rich in organic matter – soil pH in the range of 6.0 to 7.0 is ideal.’
- It’s important to space the plants to give them enough room to grow, as kidney beans do not like to be transported. ‘Grow pole beans at least 4 inches apart and increase that to 8 inches apart for bush kidney beans,’ explains Jason White, CEO of All About Gardening .
- To maximize chances of success, plant two seeds close to each other, and remove the weaker seedlings as they grow. ‘Sow the seeds 1-2 inches deep to guarantee that the plant will stay firmly in the ground,’ says Barbosa Fernandes. ‘Otherwise, wind or rain will easily break shallowly planted plants.’
- Cover the kidney beans with soil, firm the ground and water them lightly.
- The seeds should germinate within two weeks, but it will take a little time before your beans are ready to harvest. ‘It will take around 100-140 days for the plant to mature, and to produce kidney beans,’ says Abhishek.

- Keep the plants moist, but do not over water them. ‘Kidney beans only need minimal care, so avoid watering them constantly,' says White. ‘Add a layer of mulch to help in retarding weeds and to maintain moisture in the soil.’
It is better to grow kidney beans in the ground, but if you choose a pot of at least 12-inch diameter, they can make a good vegetable garden container idea. Plant one seed per pot.
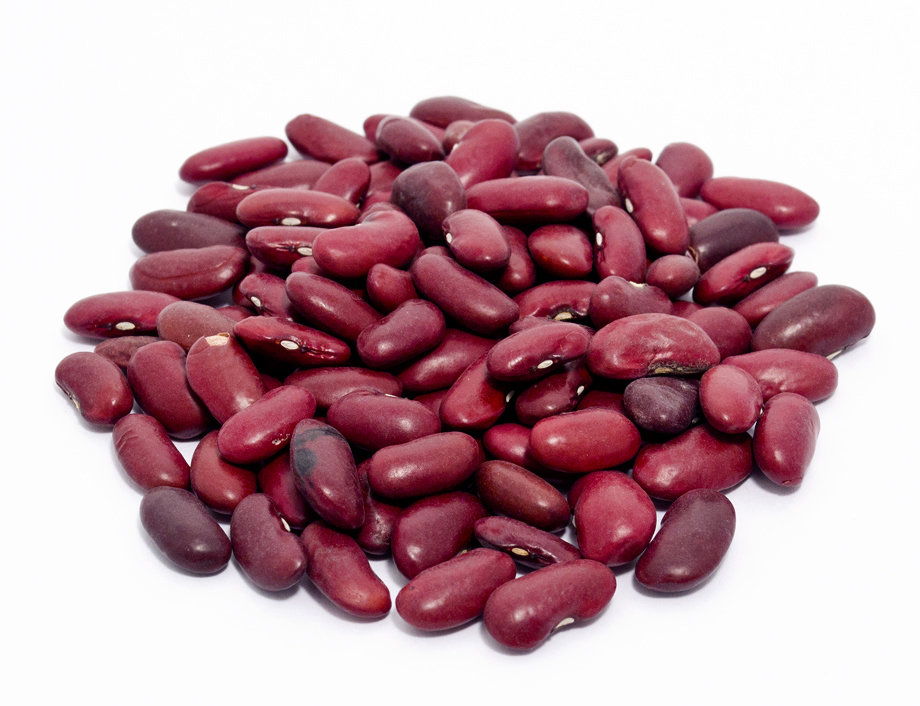
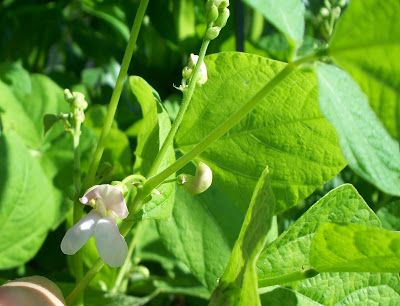
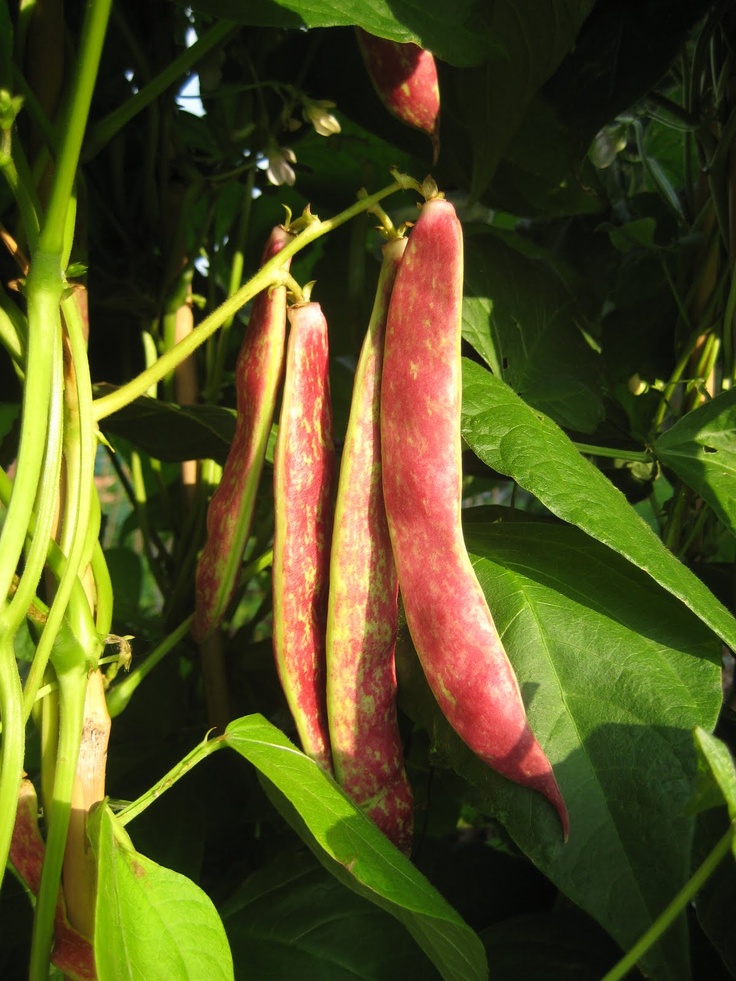
(Image credit: Digihelion / Alamy Stock Photo)
Do kidney bean plants need support?
Pole varieties of kidney beans will require support as they grow, so investigate one of the many vegetable garden trellis ideas.
The most simple solution is to add a cane close to the planting hole, when sowing the seeds. You can then tie in the vines as they grow.
If you are growing a bush variety of kidney bean, then the plants won’t require much support, but do keep an eye on them in bad weather.
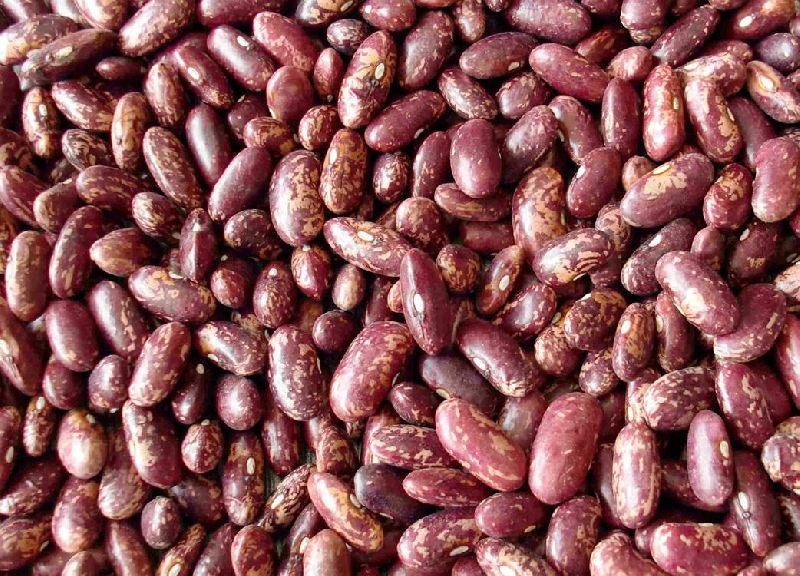
Which variety of kidney bean?
When investigating how to grow kidney beans, there are a number of varieties to choose from, but bear in mind that some are more susceptible to viruses than others.

‘By picking the right varieties you will have better chances to have a good, healthy harvest,’ says Barbosa Fernandes. ‘I advise beginners to pick the kidney bean varieties that are less prone to mosaic viruses such as NY-15 and BY-1.
‘If you want to plant dark red kidney beans, Montcalm is a good variety that is resistant to viruses. Redkloud, Ruddy, and Redkote are good varieties of light red kidney beans that are resistant to major kidney beans viruses.’
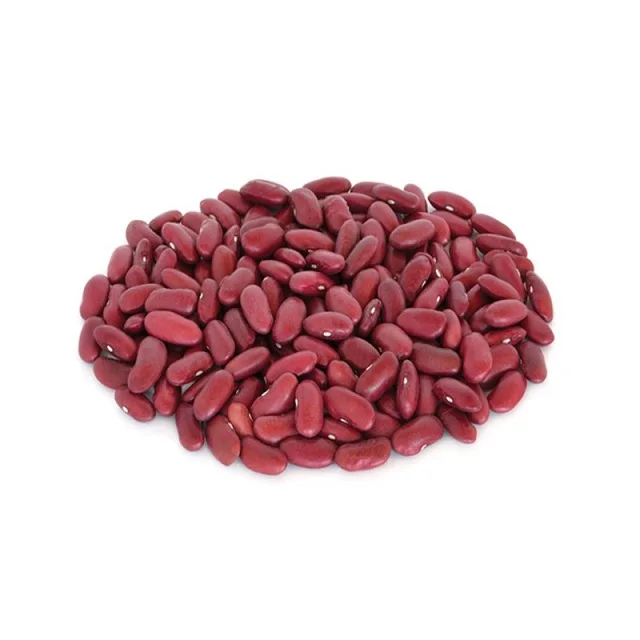
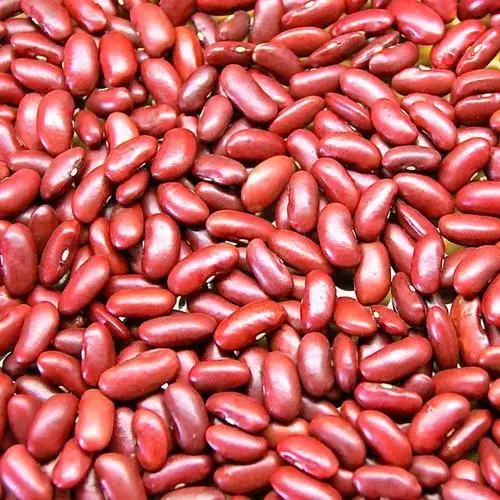
(Image credit: Mongkol Nitirojsakul / EyeEm / Getty Images)
How to harvest kidney beans
You can harvest kidney beans when the pods are plump with well-formed beans – at this stage the pods will have yellowed and the beans will feel quite hard.
One of the benefits of growing kidney beans is that they can be dried and stored away for future use. To do this, remove the plants from the ground and hang them upside down in a dark, dry area.
It will take anything from a few days to a couple of weeks to cure the beans, at which stage you can remove them from the pods and store in an airtight container.
To rehydrate dried kidney beans, soak them in water for at least 8 hours, followed by a good rinse. Then, before eating them you must cook them to destroy the lectin – this requires a minimum boiling time of 10 minutes.
How long does it take to grow a kidney bean?
It takes anywhere from 3-5 months to grow kidney beans from seed to harvest, but germination will happen in as little as a few days.
‘Sprouting typically takes at least five days, but the length of time varies with temperature. Generally speaking, warmer temperatures make beans grow faster,’ says Pascal Harting from Gardening Lord .
Are kidney beans easy to grow?
Kidney beans are easy to grow if you live in a mild climate and have fairly neutral soil. They are low-maintenance plants, and do not like being over-watered.
Kidney bean issues
Keep an eye out for pests when growing kidney bean plants. ‘Leafhoppers, slugs, aphids, and beetles are all attracted to kidney bean leaves,’ says Barbosa Fernandes.
If aphids are present, you can easily make your own treatment spray using a very weak concentration of dish soap.
'While watering kidney bean plants, avoid wetting of leaves as it can promote fungal infection in the plant,' adds Abhishek.
As editor of Period Living, Britain's best-selling period homes magazine, Melanie loves the charm of older properties. I live in a rural village just outside the Cotswolds in England, so am lucky to be surrounded by beautiful homes and countryside, where I enjoy exploring. Having worked in the industry for almost two decades, Melanie is interested in all aspects of homes and gardens. Her previous roles include working on Real Homes and Homebuilding & Renovating, and she has also contributed to Gardening Etc. She has an English degree and has also studied interior design. Melanie frequently writes for Homes & Gardens about property restoration and gardening.

|
||||||||||||||||||||||||||||||||||||||||||||||||||||||||||||||||||||||||||||||||||||||||||||||||||||||||||||||||||||||||||||||||||||||||


How to grow beans at home step by step with a photo
A product loved by many can be obtained without much hassle, without having a summer cottage. You just need to know how beans are grown in a house or apartment. To plant this crop, it is enough to acquire small containers - containers, boxes, pots, which will conveniently fit on a loggia, balcony or windowsill. Beautifully flowering plants will not only provide delicious beans, but also serve as a decorative element.
Contents
- 1 How to choose the right type of beans for your home
- 2 Can you create conditions suitable for beans at home
- 3 Preparing seeds and sowing
- 4 Preparing the soil for planting seeds
- 5.0 Step6 1
- 5.2 Stage 2
- 5.3 Stage 3: Planting
How to choose the right variety of beans for your home
If you decide to plant beans at home, you first need to decide on the choice of variety. There are several options, the best of which are asparagus and ornamental species. Bush beans also deserve attention due to their short growing season, rapid maturation and compact size. The features of early bush varieties allow them to be grown in boxes without much hassle. Skuba and Homestead green are popular. For home cultivation, hybrids that are immune to diseases and insect pests are recommended. Decorative species give out large and beautiful multi-colored beans that are unsuitable for food, but are used for further gardening of balconies.
Early ripe asparagus beans are distinguished by excellent fruiting in the apartment:
- Butter king.Delicate, tubular, large pods are removed no earlier than two months later and used fresh or as a component of preparations;
- Caramel. Variety with increased resistance to diseases of legumes. Produces a crop of sugar pods in two months;
- Saxa 615. A compact variety with small, tubular pods, valued for its high nutrient content and lack of coarse fibers.
When a climbing look is preferred, climbing varieties should not be chosen, as they shade the windows as much as possible. You can advise Krapinka, Rumba, Violetta. Pinching is capable of stopping the growth of the vine, which will bring the moment of the onset of fruiting closer. Climbing plants are fixed on a trellis or cone-shaped wooden tripod. For bushings, it is enough to install a low support.
Shelling varieties are planted in order to obtain dry grains, home conditions are not suitable for this - what is sown is what is harvested.
For those who have decided to plant beans at home for the first time, it is best to purchase several varieties for testing and plant 3-4 seeds.

Is it possible to create conditions suitable for beans at home? If it is possible to provide beans grown on the windowsill with such conditions, the harvest will be early and plentiful. The same applies to planting culture on the balcony. This parameter loses its relevance with the onset of fruiting.
To grow beans in an apartment, prepare loamy or sandy soil and warm up to +12 degrees. Breeding beans at home will not cause problems, in particular, thanks to self-pollinating flowers.
Seed preparation and sowing
Seed should be planted after careful selection and processing. There are criteria for selecting seeds, after which full-fledged specimens remain. The grains should be smooth, with a shiny surface, without traces of pest damage, dark spots, mold, flabbiness, voids. After visual inspection, the beans are poured with salted water.
Floating seeds are discarded. Dry seeds have a hard shell that delays germination.

Bean seed treatment technology is as follows: the seed material is soaked for a day in warm water, which needs to be replaced four times. Growth stimulants play a good role. For the prevention of diseases of seedlings, a weak solution of potassium permanganate, insecticide or fungicide is suitable.
The seeds are then placed in a damp cloth until germination. The air temperature is maintained within +25 degrees. As soon as the first sprouts hatch, the seeds are planted in the ground, covered in a container with a 5 cm deepening. The soil mixture must be watered and the bean seeds laid out with the roots down or sideways, with an interval of 15-20 cm.
The length of the day needed to grow beans is from mid-February to mid-March. For planting on the windowsill, the seeds are prepared in February. On a glazed balcony, beans are sown in mid-May, on an open one - at the end of May.
Heat-loving culture is afraid of frost. In adult form, it is able to withstand a short-term decrease in temperature not lower than -3 degrees.
Seed preparation
The rapid growth of beans allows you to grow the plant without picks, in a permanent container. Each plant will need at least 3 liters of soil. Pots should be 20 cm high, due to the poor development of the root system. Tight containers will make the beans weak and barren.
If it is not possible to equip the containers with drainage holes, a layer of expanded clay is poured on the bottom. You can purchase a universal ready-made soil or prepare the soil mixture yourself. To do this, take equal amounts of humus and sod land, where 200 g of wood ash is added. The use of acidic soil is unacceptable. Deoxidation is carried out with dolomite flour, ash, chalk or lime to pH 6 - 6.5.
Planting stages
It is recommended to plant beans in the closed ground - balcony, loggia - at the very beginning of May. The technology of growing in an apartment differs in terms: they start planting in March. A phased scheme for planting this vegetable crop is proposed.
Step 1
Seeds may be planted dry or already germinated. In the case of choosing the second option, the seed material is placed in a gauze bag and lowered into a container with warm water, which should be added as it evaporates. The first sprouts will indicate the right time to plant the beans.
Step 2
Let's start choosing a container for planting: bush varieties need a soil volume of at least 3 liters, climbing varieties - 35 liters. Having picked up a suitable box, container or pot, we fill it with the soil mixture, the preparation of which was mentioned above.
Stage 3: Planting
At this stage, there are no problems, it is enough to follow simple rules:
- Before planting dry or soaked seeds, it is recommended to shed the soil with hot water or a solution of manganese. Beans are laid out in pits, maintaining a distance of 10 cm. Germinated seeds are recommended to be laid on their side, regardless of the location of the sprout, otherwise it is difficult to determine the correct location of the grain.However, nothing terrible will happen if the placement is incorrect, since the seedlings peck in any case, rushing towards the light.

Optimum planting time is May. The beans germinate already for 5-7 days, begin flowering in a month and a half, and the first harvest should be expected after a few weeks.
Combined cultivation is considered a good option:
- Seedlings grown indoors are taken out to a balcony or loggia with the establishment of warm weather. Sowing is carried out a month before the time of disappearance of the threat of night frosts.
- Early maturing varieties sown in February are grown on the windowsill until fruiting. After harvesting, the containers are emptied and placed on the balcony for planting new plants.
Bean care at home
Plants are watered when the top soil layer dries up. On a loggia or balcony, the frequency of irrigation depends on weather conditions: in the heat, the number of waterings reaches two per day.

To get a good harvest on an unglazed loggia, bean plantings must be protected from rain, preventing water from stagnating in containers. To this end, the containers are moved under the roof, inside the balcony.
Optimal light conditions
The culture does not tolerate shading, so a well-lit place is selected for planting or additional lighting is arranged. However, it must be remembered that daylight hours before fruiting should be short, no more than 12 hours.
When growing beans on a windowsill during the winter months, the boxes are placed on the south side. If this is not possible, additional lighting is provided with a phytolamp. In late spring and summer, the culture feels great on the windows of the western and eastern directions.

An experiment is recommended to determine the difference in yield at different daylight hours. Young plants of the same variety, grown under the same care, are divided into two groups. The first will develop in a short day, the second in natural light.
What and how to feed the beans
The first dressing should be done in the phase of the appearance of true leaves and repeated twice a month. During the growth period, the plant needs organic fertilizers, but at home it is impossible to use mullein droppings and infusion due to an unpleasant, pungent odor. There is only one way out - the regular addition of humus while mixing with the soil. The introduction of such dressings ends in the budding phase. Now beans require potassium and trace elements, the role of which will be played by wood ash. The earth is powdered from above, loosened and watered.
An odorless natural fertilizer, horse manure extract, has been developed for fertilizing plants cultivated indoors.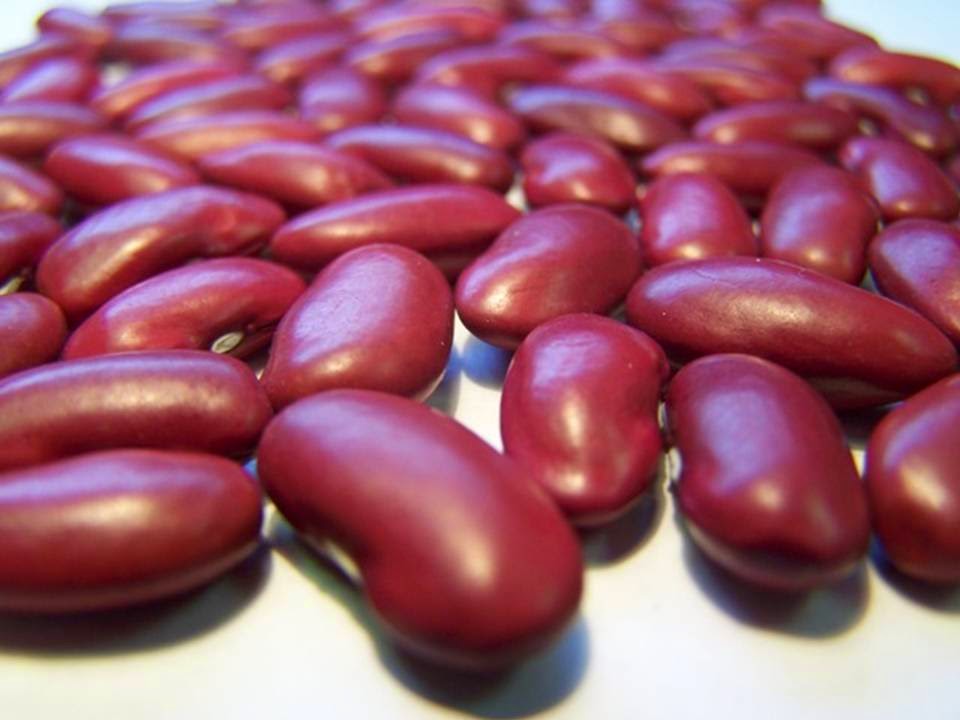
Bean diseases and pests
Home plantings are not protected from diseases and pests. The greatest danger is the bean weevil. In the presence of indoor plants, thrips, spider mites, and aphids can spread to bean bushes. Indoors, pest control should be organized with the help of biological preparations, as safe as possible for the human body and pets.
Freezing dry seeds for two days in a freezer at a temperature of at least -15 degrees helps to get rid of grains.
Beans are affected by bacteriosis and viral anthracnose. Viral infections are incurable, so take preventive measures in the form of spraying plants with special preparations twice before flowering.
First harvest
Mature pods are immediately used for food. When harvesting your own seed material, the fruits are left on the plant until fully ripened. Growing beans at home cannot be called large-scale, but a dozen bushes will provide the owner of the plantations with a harvest two months after sowing.
An unpretentious culture that does not require specific skills and experience to grow at home. The development of beans occurs even in close quarters and lack of lighting. Creating favorable conditions will provide you with no less abundant harvest than when planting in open ground. Important agricultural practices: a sufficient amount of soil, the organization of the lighting regime, competent watering and fertilizing.
How to plant beans at home
Beans are one of the most undemanding crops, while having a high nutritional value, so growing beans outdoors is not uncommon. But the product is so loved by the people that more and more often you can see how beans are grown at home (on a loggia, balcony or windowsill).
It's actually a little difficult - to create conditions for the development of a leguminous plant. Beans need only timely watering, good soil (preferably fertile), plenty of light.
Planting beans on a balcony and loggia attracts fans of growing vegetables at home primarily because there is no need to purchase huge pots, fill them with a lot of soil, which, you see, is not always convenient, for example, on a small loggia.
Due to the fact that the roots of this plant develop poorly, it needs small containers (pots, boxes, containers).
However, some difficulties may arise during the cultivation of leguminous plants, therefore it is important to observe all agrotechnical features that require certain knowledge from a beginner, and skill from an experienced gardener.
Will any variety work?
We note right away that it will be problematic to get grain at home, because you can’t grow much in a pot, and for peeling varieties you need space, that is, a vegetable garden.
The best option for home growing is green beans, which are consumed in the form of unripe pods. Ornamental varieties are also very popular.
In addition, it is recommended to give preference to bush beans, they have a short growing season and ripen faster. It is also compact and does not require the construction of complex structures for tying. Curly beans are a great option for giving.
Since we want to plant beans at home in a way that would not bring us much trouble, it is best to find early bush varieties, for example Homestead Green or Scuba. Undoubtedly, there are plenty of varieties suitable for growing in a box, picking them up is not a problem.
For home cultivation, hybrids that are best resistant to diseases and insects are often recommended, and preference should be given to the most resistant hybrids to these unfavorable factors.
How to germinate bean seeds
If you have purchased seeds and decided when to plant beans on the balcony, carry out a pre-sowing treatment that will save you from troubles in the form of lack of germination, the appearance of unwanted insects, diseases and, as a result, crop failure.
First, inspect all seed, all seeds should be smooth, shiny, free of damage and pest infestation. All low-quality seeds can be easily identified by eye and immediately discarded. Signs of inadequate seed quality are flabbiness, the presence of dark spots, and other visible damage.
The soaking method is used to germinate beans. All the seeds are lowered into the prepared fabric bag, secured with a cord and dipped in barely warm water, left for a while. Add water if necessary. But you need to make sure that the seeds do not remain in the water for too long, soaking is allowed for a maximum of 5 hours.
Beans can also be soaked in a solution of potassium permanganate, in melt water, but the best prevention of plant diseases is treatment with a disinfecting solution of special fungicides and insecticides.
However, this method of preparation of planting material is not always used, because the beans usually germinate well without that.
In addition to soaking before planting the beans at home, bean seeds are also germinated until the root is formed.

The method is convenient in that the plants germinate faster in the soil and have a greater growth force. In the process of germination, each sprout is in almost ideal conditions, which gives it strength and health.
Peculiarities of the soil for legumes
Houses on the balcony in specially prepared two-liter pots for bush forms and 35-liter for climbing forms, you need to collect high-quality soil containing minerals, which has friability. An excellent fertile mixture can be obtained by mixing with humus. For two measures of ordinary soil (you can from the store), they take one measure of humus, which has the ability to reduce acidity in the ground.
Do not allow a large amount of nitrogen to be introduced into the soil, it contributes to the growth of foliage, but in no way stimulates the plant to produce fruits. Superphosphate, potassium chloride, ammonium nitrate - these are three components that will work well for your loggia beans.
How to plant and care for beans
Beginner growers are usually asked how to plant beans at home, upside down or down, with a simple, memorable recommendation. When planting germinated seeds in a recess in the soil, it is advised to lay the beans on their side so as not to be mistaken with the correct location of the grain. They are buried in the ground by about 5-7 cm, and if we use containers, then we maintain a distance between plants of 10 cm.
Watering is mandatory, but not often, the plant does not requires very moist soil. However, the fact that you need to add moisture regularly, don't forget. As soon as shoots appeared, and a couple grew real leaves, you need to postpone watering for a while and wait until it blooms, and after watering resume.