Interior window wall
The Design Trend That Has The Entire EHD Team Seeing The Light...Literally (We're Talking The Glory Of Interior Windows)
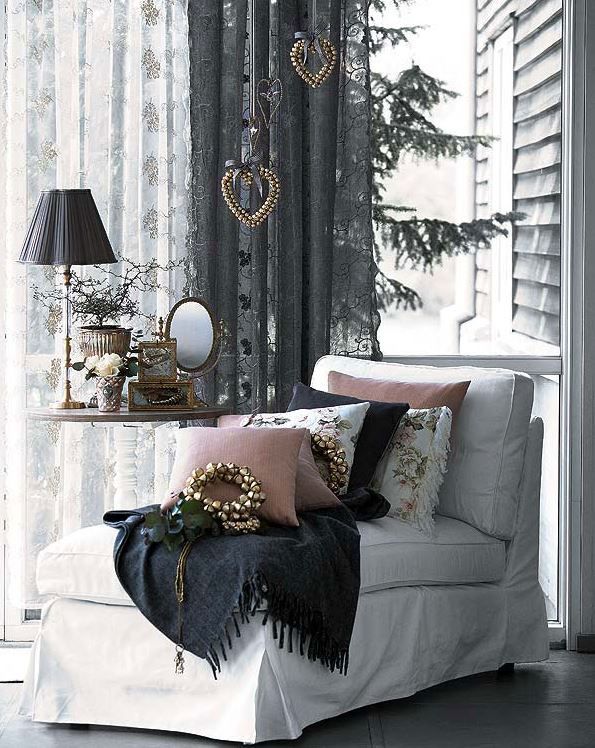
My first apartment in New York was my first peek into “interior windows.” As you can see in the photo below, my room was likely “invented” in the main common space so that the landlord could charge more for the space. Wanna guess how much this room was in 2010?? $740. The craziest part is that it was a STEAL given the prime East Village location. But I digress. So yes, I can’t say “entirely windowless” because up in that crawl space were two rows of chunky glass cubes that let in a tiiiiny bit of light from the front room where the actual light lived. Long story short, it was in that apartment I truly realized the importance of natural light. It not only makes a space beautiful but it helps your mood and prevents you from not sleeping until 1 pm because your body thinks it’s always nighttime.
nyc, 2010 (hence the fishbowl lense), before i made it kinda cuteAre interior windows a new idea? No, not at all. But I have been seeing them way more and honestly I can’t get enough. Let that light in! We need to feel joy again! (kidding…or am I?) They also invite the perfect balance between an open concept home and a traditional closed floorplan.
But Jess, where and/why is an interior window a good idea? Thanks for asking, Jess. One fun/solution-based way is to put one between a load-bearing post and a wall like Emily did in the mountain house dining nook. Since they couldn’t move that post and weren’t in love with the original pony wall, Em and the design team decided not to close up the wall and instead install a window that matched the windows in the nook. This kept things looking and feeling airy.
from: how we are repurposing the original living room windows at the farmhouse (in the pantry??)Emily is actually keeping the good interior window times rolling in the farmhouse. She’s repurposing some of the original exterior windows and using them for the pantry as shown above. It’s going to add just a sweet architectural moment that is also special to this house specifically. Actually adding a vintage interior window (depending on the style you are going for) is SUCH a great way to bring in some soul to a home without having to worry if it’s sealed perfectly like it would need to be if it were being used as an exterior window.
Now, let’s get into all of the examples I found (well, not all but some of my favorites:)). This one above by Michelle Mele is perfect. Had that wall been solid it still would have looked nice but now the whole space feels more open and larger. It feels modern yet classic while also being decorative but ultimately functional (because it lets in light).
design and styling by michelle mele | photo by rafael solid | via rue magI also wanted you to see it from a more pulled-back angle. It really adds so much to this whole space. Let an interior window be a functional piece of art!
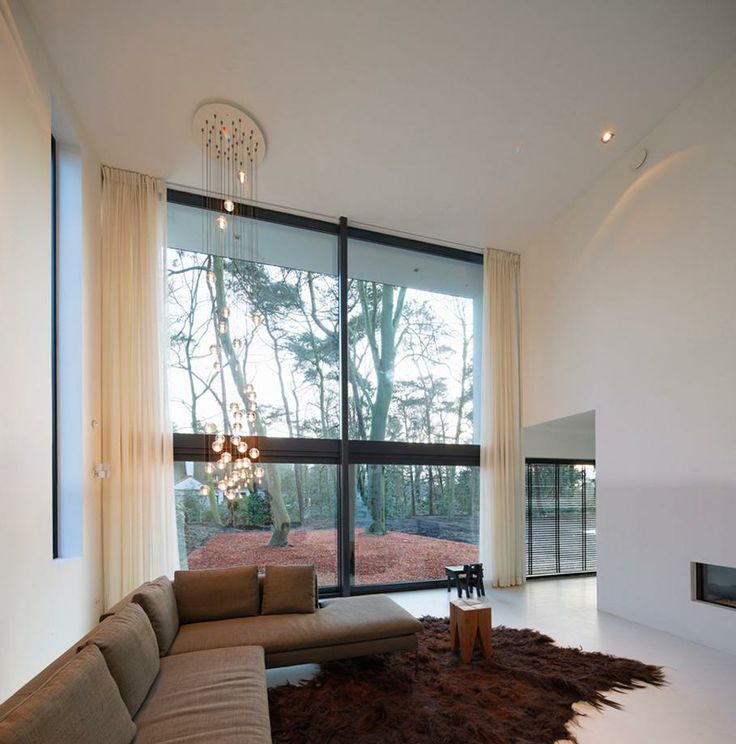
Ok so technically this is more than “just a window” but it has the same function on a larger scale. This window wall gives the feeling of the living and dining rooms being two separate spaces while still letting the light bounce around in both rooms. It’s almost too pretty. Ok, it’s definitely too pretty.
P.S. This was also one of the rooms that inspired me to get my shag rug. I need mine to look like that!
design by blanc marine intérieurs | photo by sylvie liWhat I also love about interior windows is the style variety. This isn’t something that’s exclusively modern, traditional, farmhouse chic, etc. It’s for everyone and every home.
Something else to note is that they don’t just have to be picture windows (ones that don’t open). As shown in this beautiful living room by Blanc Marine Intérieurs with those awesome functional vintage windows. Let that air circulate if it makes sense with the flow of the house and design.
I’m not sure if this entry and interior window were original to this house but regardless it’s so smart. This home is in Seattle so it’s wet and the need for an entry with storage is a must. This example design by The Residency Bureau shows us how to get that needed entry without losing all of that precious light in the living room.
Big, bold interior windows at their finest. When I saw these photos I gasped. They perfectly separate these spaces, add architectural interest, AND make the space feel simultaneously cozy and grand.
design by chip and joanna gaines | via scene therapyBut if you just want cozy, feast your eyes on this home from HGTV’s Fixer Upper by the one and only Joanna and Chip Gaines. It’s the same idea as the space above but on a much smaller and vintage-inspired scale. This is what I mean by adding some soul.
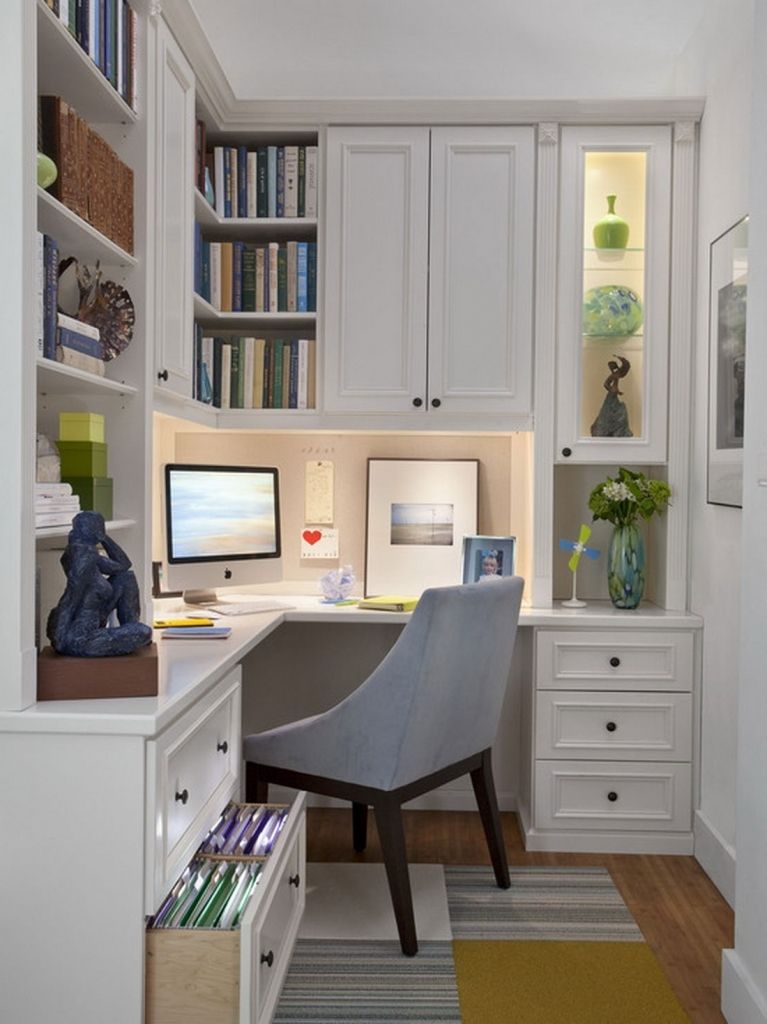
I love that they doubled down (literally) by adding in these functional windows to this home office. It makes everything brighter and if you are a parent this is a great hack to be able to work and still be able to keep an eye on the kids (or animals for that matter).
Or maybe you have a dark laundry room and want to let in some light… how sweet is THIS WINDOW?!
As a simple gal like myself, this window has my whole heart. Molly of HeyFeatherstone installed this one herself and I can’t stop looking at this. Why have a wall when you could have a window?
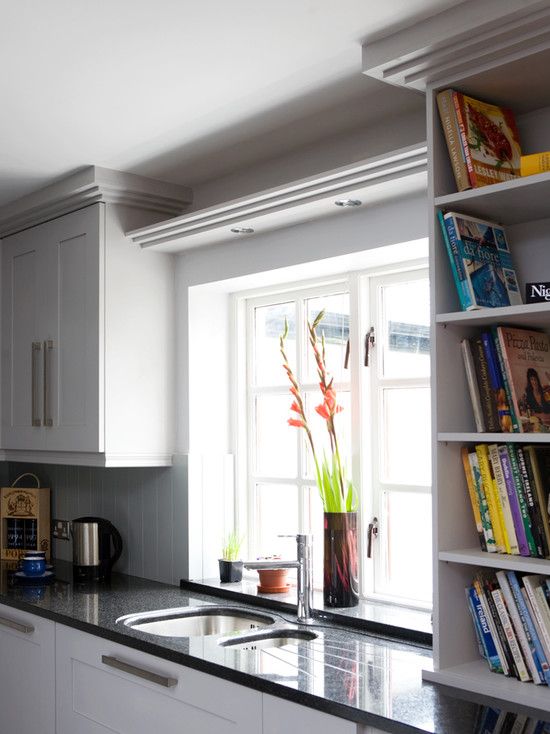
styled by mari strenghielm | photo by lina ostlingThink how great this window wall is for a party? The host can be prepping while there are people around the island and then some can go into the dining room while still feeling like there are all together. But mostly I just think it’s beautiful.
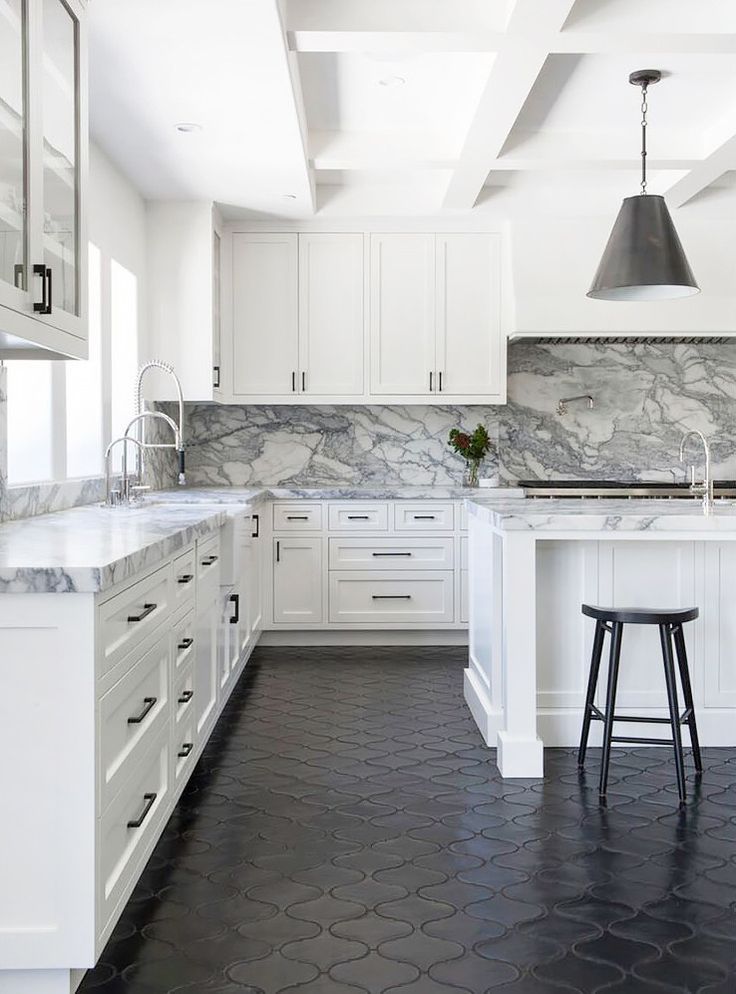
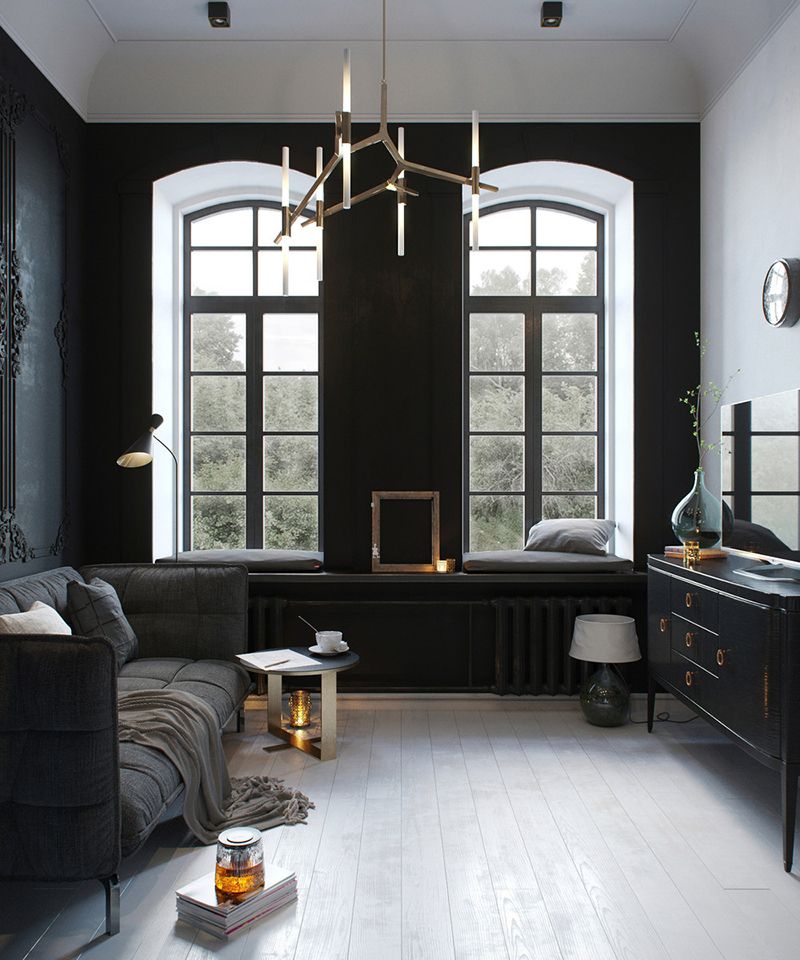
Did y’all think there wouldn’t be an arch?? No way.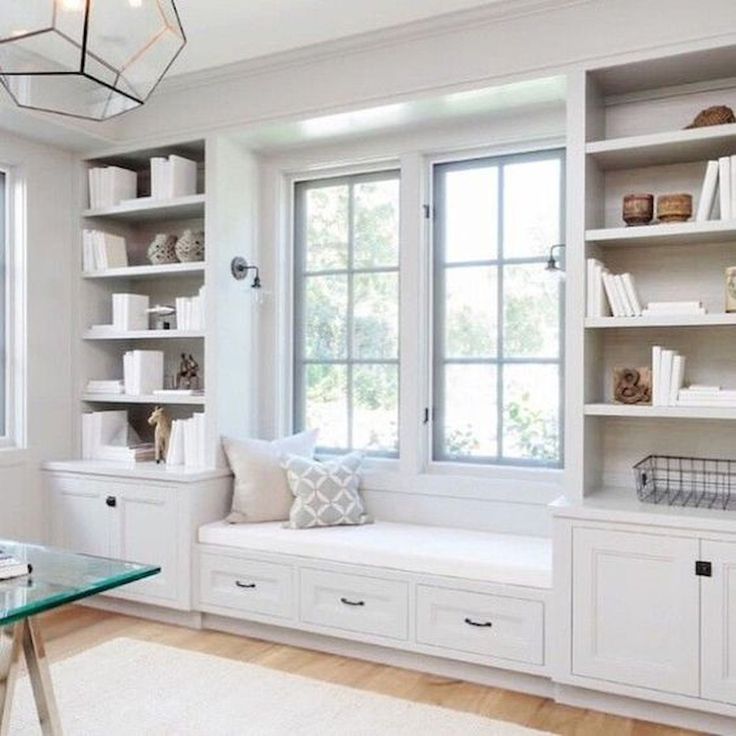 And not just one, we’ve got a double arch. I feel like whoever lives here doesn’t walk but actually floats from room to room, it looks so airy.
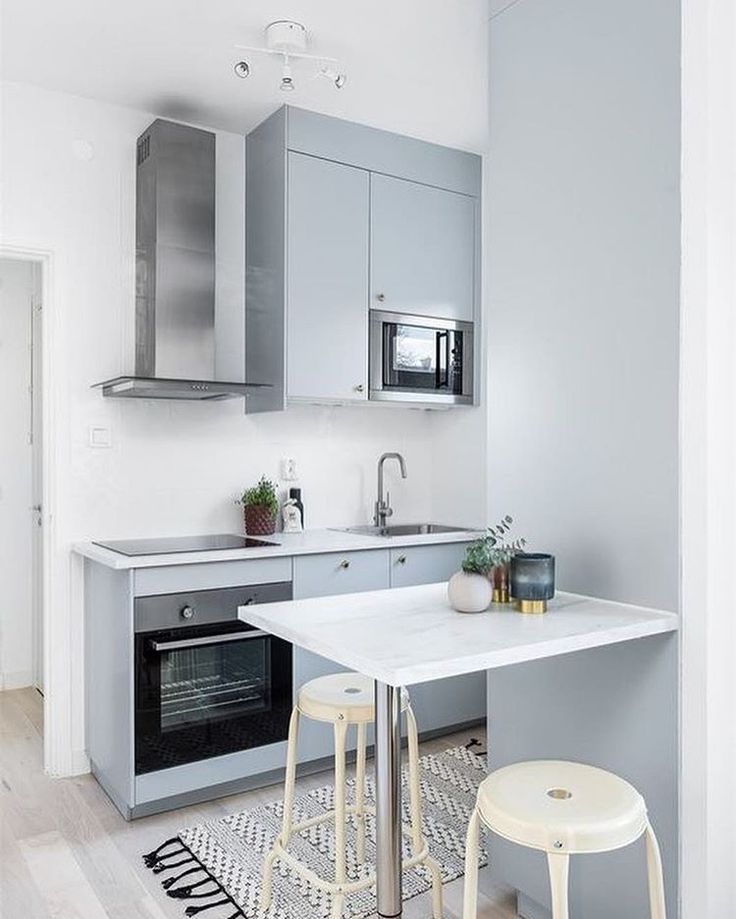
We featured this space by Marianne Evennou in a Link Up a few weeks ago because we all LOVED IT. Not only is this whole space so well designed but that window enclosing the kitchen from the hallway is a knockout. I would assume it also helps with lowering the noise level from the kitchen to the bedroom at the end of the hall. It keeps the kitchen bright but the zones in this small apartment (shared by a brother and sister) clear.
Here are some more photos because I couldn’t not.
design and photo by johanne landbo | via my scandinavian homeDo you have a room in a hallway (like an office or playroom) that doesn’t need all the privacy? Put in an interior hallway window. I can guarantee this helps to make this space feel bigger. Plus who doesn’t want to look at all that cool art as much as possible? Oh and remember that you can always add a curtain in situations like this one for a little bit of privacy when needed.
Modern, organic, and bright. See? Style versatility, people.
photo by steph bond-hutkin | via atomic ranchThey are even perfect in a mid-century modern home. Again, I know this is an entire wall but you should know that it’s an option (and a very good one at that).
design by louis denavaut | photo by christophe coenon | via yellowtraceFrom mid-century modern to modern, modern. When you live in a loft and your bathroom is in the center, why not put in privacy glass windows to brighten things up? I’m really into this kind of glass right now (it’s also been trending) because it’s the same idea as those silly glass blocks but waaaay cooler.
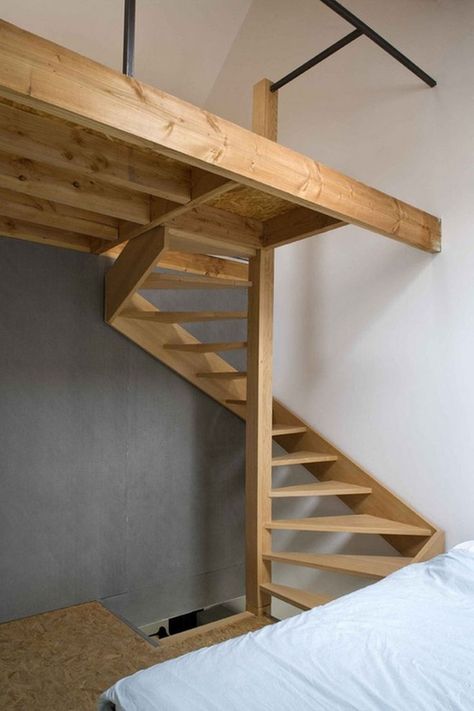
design steven ehrlich | photo and via dwellDo you have very high ceilings spanning to your second floor and don’t know what to do with ALL of that wall space? Well, why not add a functional (or picture) window to the room on the other side of that tall wall? It can add airflow and light and a lot of beauty.
Here’s that window from inside the room:)
design by elizabeth roberts architectsOk so I know I’ve already had some favorites but LOOK AT THIS PERFECT WINDOW. Elizabeth Roberts and her team are one of my absolute favorite firms and this home only confirms that.
design by elizabeth roberts architectsThe way this window (and matching interior shutters) help to gently break up this wood wall is genius. Warm and modern and I want to go there so bad. This is an example of the many ways windows are simply not just for your exterior facing walls. Have some fun!
So what do you think? Do you also love this idea? Or do you want to keeps walls, walls and not have to involuntary look at anyone in your house? Have you already taken a sledgehammer to your nearest wall and are searching Etsy for vintage windows? Let’s talk about it!
Love you, mean it.
Opening Image Credits: Design by Lauren Liess and Beau Clowney | Styled by Kendra Surface | Photo by Robbie Caponetto | via Southern Living Magazine
0 0 votes
Article Rating
How to Build an Interior Window
Interior windows are an unexpected design feature in a home that allows natural light to flow from one room to another. Adding interior windows is also a great way to make a room feel more open without completely removing a wall.
In the flip house, we thought about removing a wall between the family room and living room but decided that the rooms would be more useful if we left it. So we decided to add two interior windows to the wall, one on each side of the media built-ins that I built.
In this tutorial, I’m going to show you exactly how I did it.
Tools & Materials
- Miter Saw
- Finish Nailer
- Table Saw
- Level
- Tape Measure
- Pencil
- Multi-Tool
- Reciprocating Saw
- 1×2 Primed Pine
- Glass
- Black Spray Paint
- Silicone
- Caulk Gun
- 2x4s
Step 1: Determine the Interior Window Placement
Before you start building your interior window, you need to decide where it will be placed. As I mentioned above, we added one window on each side of the media built-ins. I decided on a size for each window and then centered it up in the available space.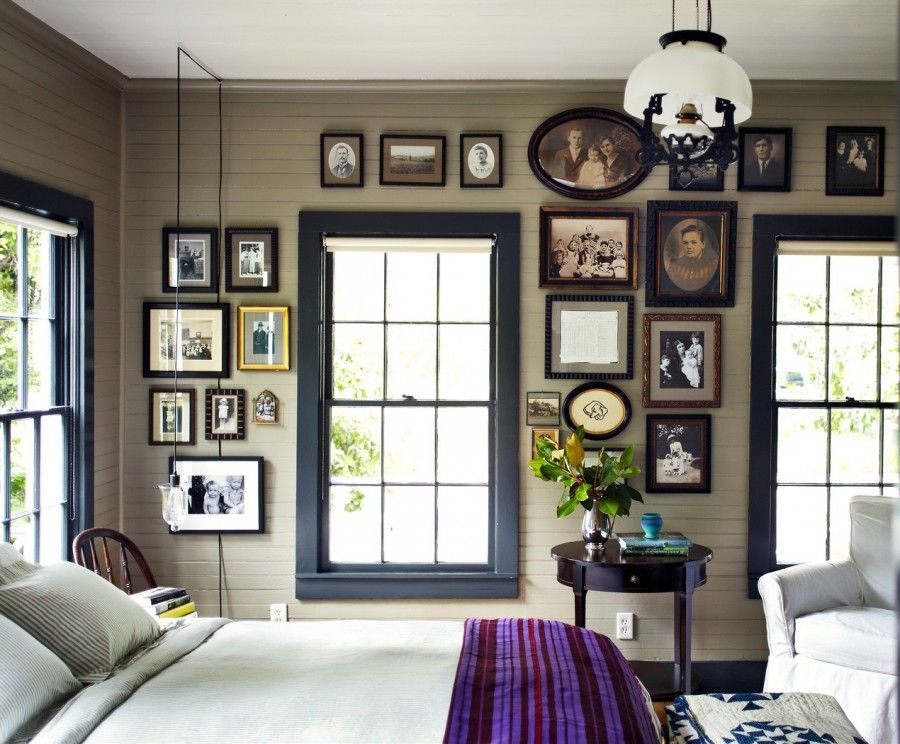
I used a level to mark where the wall would need to be cut out.
Step 2: Cut Out the Opening in the Wall
Using a multi-tool, I cut out the drywall along the marks I made. Then I used a reciprocating saw to cut out the studs in the opening. Then I added new studs to each side. And since this was a load-bearing wall, I had to add headers above each window.
Step 3: Wrap the Opening
For our openings, I decided to simply wrap them with drywall, but if you prefer, you can trim them out with moulding.
Step 4: Measure the Opening
Once the new interior window openings were finished, I measured the width and height. I used the dimensions to size the pieces of glass, which I ordered from One Day Glass. I was a little nervous about ordering large sheets of glass online, but everything was smooth with the ordering and delivery. Although, they did cut the first two pieces two short. They quickly corrected the problem by sending out two new pieces. So it only caused a small delay.
I also used these measurements to determine how many pieces of 1x2s I would need.
Step 5: Cut and Paint the Frames and Grilles
Using a table saw, I rip cut 1x2s down the middle giving me 3/4″x3/4″ pieces. I used these for the frames. Then I rip cut 3/8″ off of the smooth sides of 1x2s leaving me with 3/4″ x 3/8″ pieces. I used this for the grilles.
Once I had all of my pieces cut for both windows, I painted them all using black satin spray paint.
Step 6: Build One Side of the Interior Window Frame
After the paint had dried, I used 2″ finish nails to fasten the inside frame pieces to the opening. I offset the inside frame about 1/16″ off of the center to account for the glass thickness.
Step 7: Insert the Glass
Using a caulk gun, I applied a bead of silicone along the inside of the frame. Then I placed the glass against it, pressing it along the edges. I made sure that the glass made good contact with the silicone.
Then I repeated step 6 for the outside frame.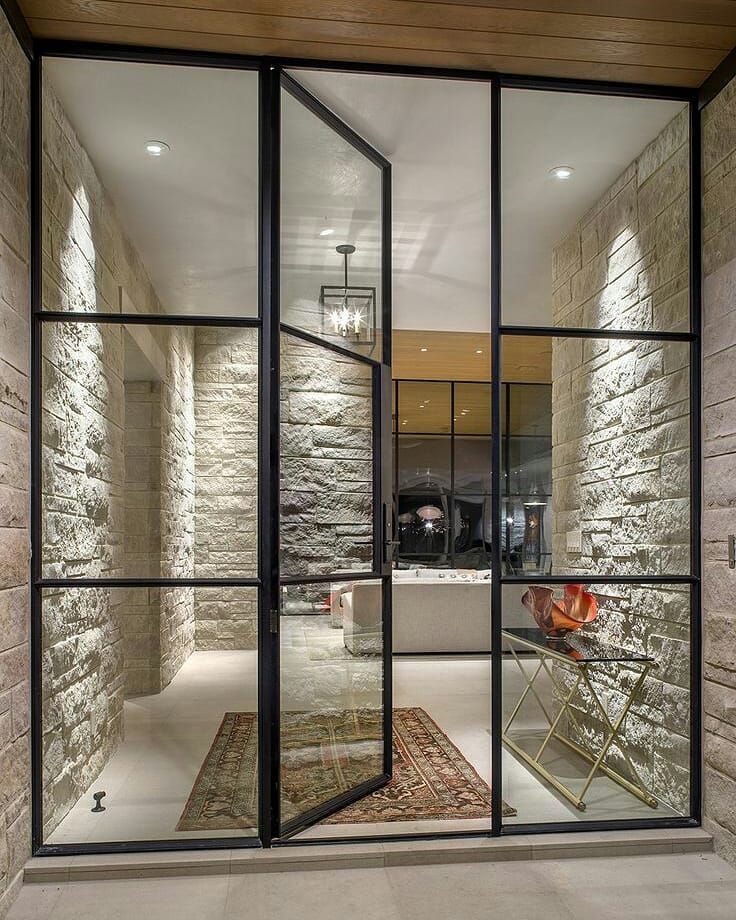
Step 8: Add the Grilles
I decided to go with a 2×4 grille pattern for these windows to match the pantry door. This along with the overall height and width determined how long I cut the grille pieces in step 5.
I applied a bead of silicone to the back of each grille piece and stuck them to the glass. I used a small level to make sure each piece was straight. And I worked on one side at a time. Then I moved to the other side.
Step 9: Finishing Touches
After I had both windows built, I filled the nail holes and touched up the black paint.
Brooke and I both loved the way these interior windows turned out. It added a nice pop of black beside the built-ins and allows a lot of natural light to flow into the sitting room beside the kitchen.
What is a quarter window?
Depending on the builders' choice of technology and material for erecting walls, openings in buildings can have a different configuration - there are windows with a quarter and without.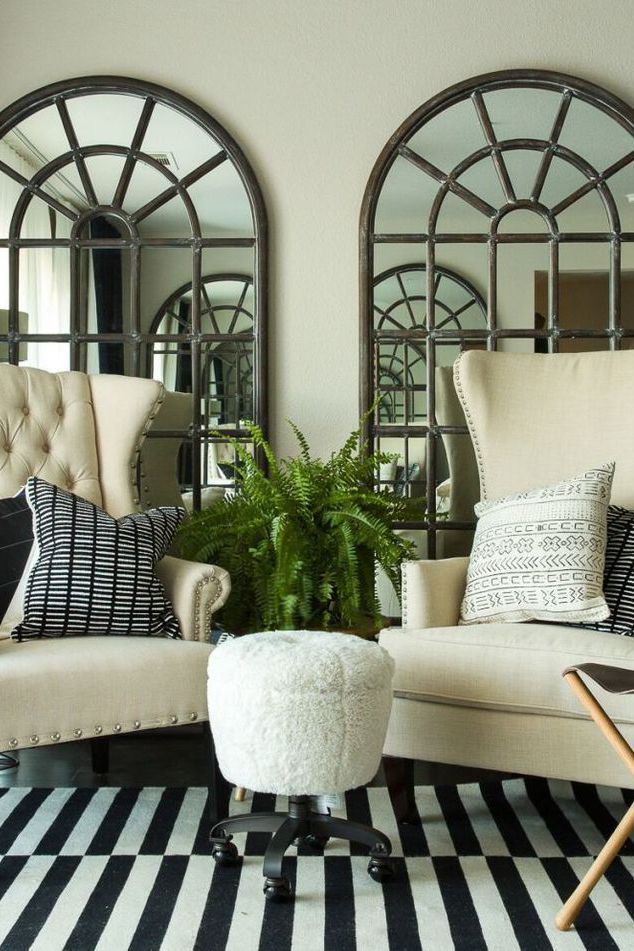 The existing differences do not have a fundamental impact on the main characteristics of the houses. However, the further choice of methods for measuring and installing window structures depends on them. In order to avoid mistakes when choosing windows, determining their correct dimensions and during installation, we recommend that you familiarize yourself with the useful information from this article.
Quarter window: what is it?
A window with a quarter can not always be identified at first glance from the side of the street, but upon closer examination, its distinguishing features are immediately visible. There is a small ledge in the facade plane along the entire perimeter of the opening, including its lower zone. The technology got its name due to the fact that during the construction of walls, the front masonry blocked the window opening for a quarter of the length of the brick. This distance is quite enough so that the ledge does not impede the operation of windows and successfully performs the functions assigned to it. Such a rim provides the window structure with a number of advantages:
- stable position of the structure in the opening – a quarter insures the frame against falling out;
- a higher level of tightness - the presence of bumpers makes it difficult for moisture to enter the assembly seam and excludes blowing through the structure;
- facilitated installation - the ledges serve as a guide and boundary, so workers do not waste time and other resources on additional operations.
Although all of these advantages are of great importance, special emphasis must be placed on a high level of tightness. Thanks to this characteristic, heat losses are significantly reduced, windows fog up less, mold does not form on frames, sashes and slopes.
The presence of a quarter prolongs the service life of the assembly seam, since the side effectively protects the cured foam from the harmful effects of ultraviolet radiation, wind, dust and water.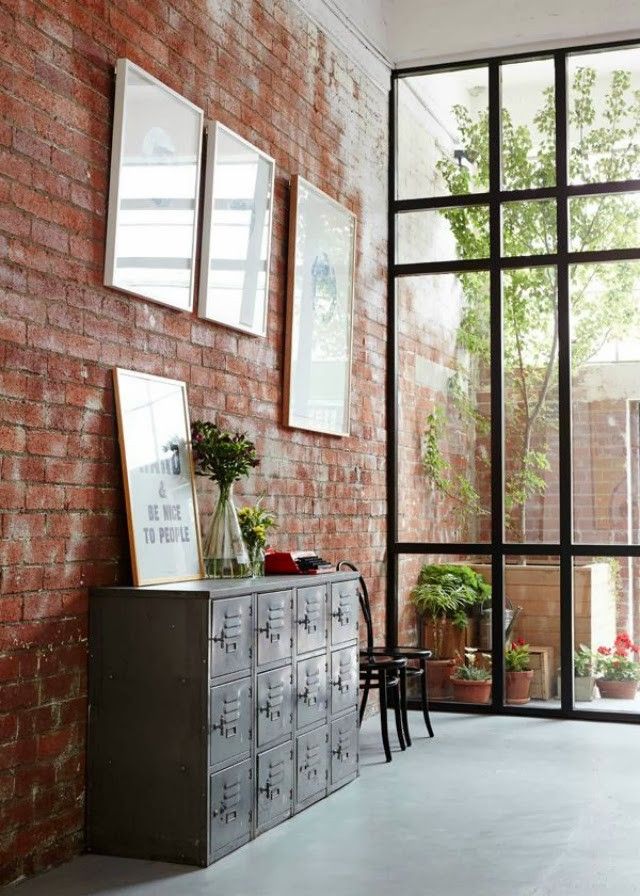
This method of building external walls is also effective in the construction of concrete and wooden houses. In all cases, the resulting rim does not completely cover the frame and serves as an additional barrier and support for it. The presence of a ledge makes it possible to install a quarter window in accordance with GOST.
Window without a quarter - differences
The difference between the two types of openings lies in the relief of the surface of the slopes. It is quite simple to detect it, and even a person far from construction can do it. Windows without a quarter do not have a pronounced transition from internal to external slopes. Smooth walls along the perimeter of openings in such houses allow you to independently determine the dimensions of these sections during the installation of window blocks. That is, during installation, the movement of the frame forward or backward is not limited to any structural elements of the building.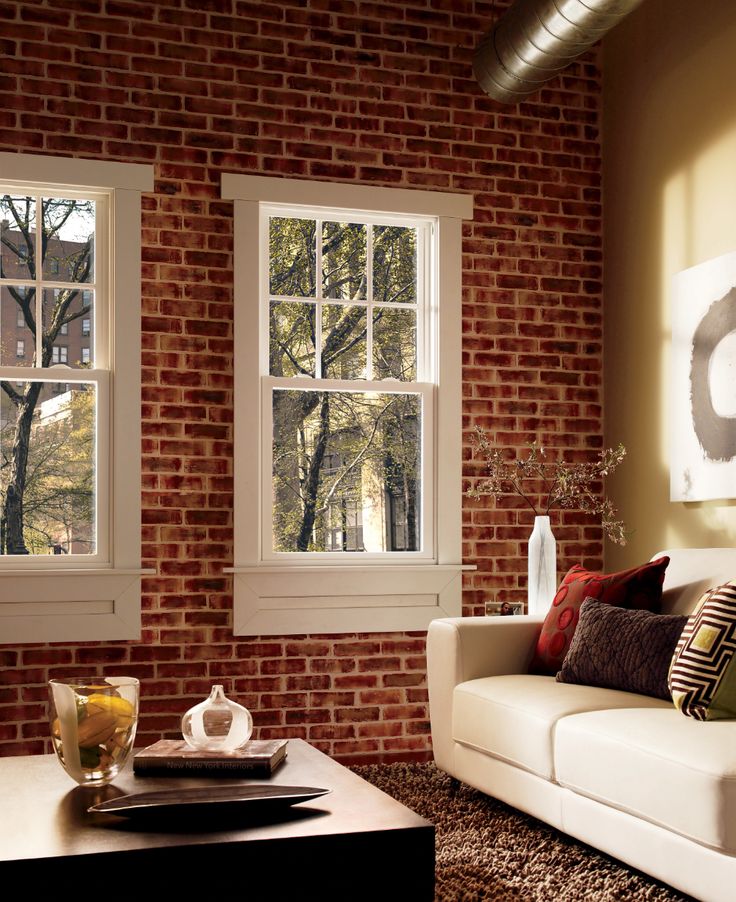
Typically, such openings are found in private housing construction, since property owners simplify construction technologies as much as possible for themselves. In addition, when erecting modern buildings from large-sized foam blocks, it is problematic to create a small ledge in the openings. At the same time, the absence of a rim does not have a critical effect on the main performance characteristics of window structures, but still creates certain difficulties during installation:
- additional protection of the installation seam is required;
- there are problems with the use of PSUL sealing tape, which allows the structure to "breathe";
- it takes more time to give the correct position to the windows and securely fix them in the opening.
If the necessary measures are not taken during the installation of windows in recesses without a quarter, then depressurization of the installation seam and premature wear of the cured foam may occur.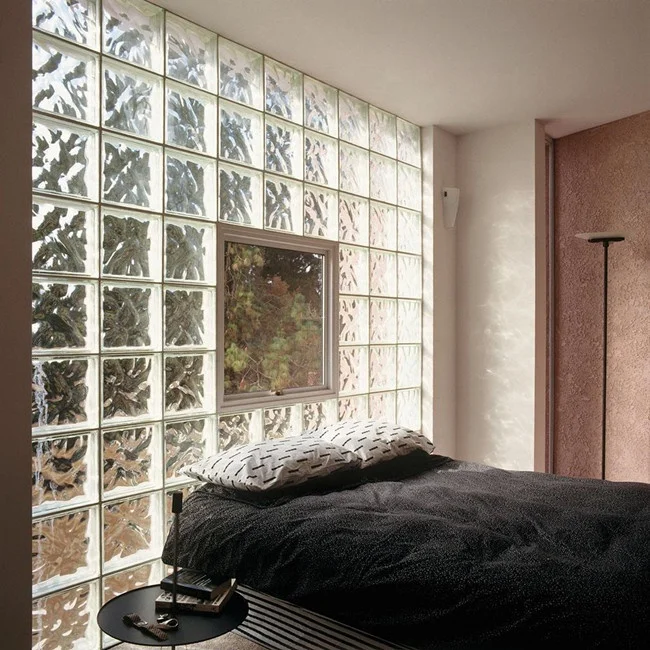 As a result, the energy efficiency of any windows decreases, condensate falls, fungus with mold develops, and even there is a risk of structural deformation. To avoid such unpleasant consequences, you need to correctly measure with subsequent installation.
Features of window measurement with and without rebates
The procedures for determining the correct dimensions of window structures differ for the two types of openings. When taking measurements, it is necessary to take into account the individual characteristics of buildings, otherwise installation problems are guaranteed, which can only be solved by manufacturing new windows.
Since when performing this procedure, there are many nuances that a person without experience will miss out on, a specialist should measure a window with a quarter. Moreover, this service is provided by many manufacturers and dealers free of charge.
However, situations often arise when knowledge of the dimensions of window structures is necessary to obtain a preliminary cost estimate.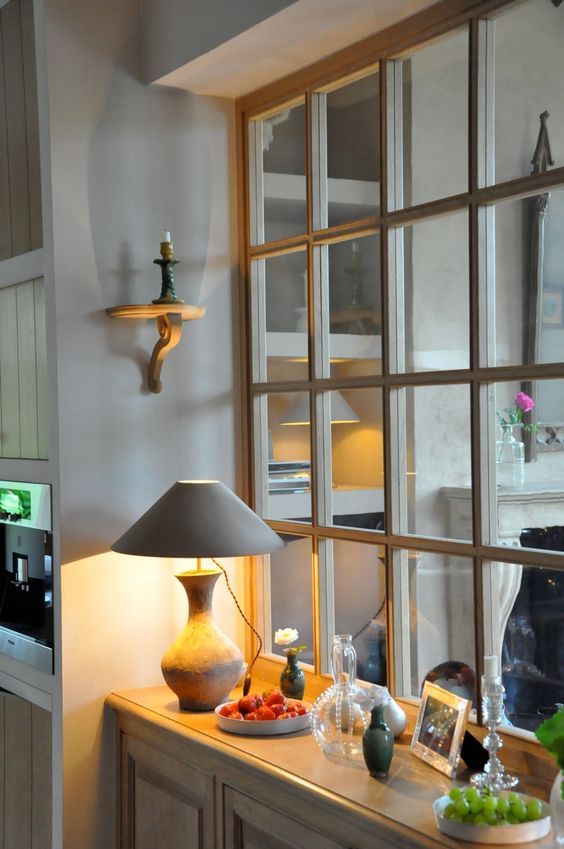 In this case, a small error is not terrible, and you can measure the window for such purposes yourself.
Rebated window measurement
For openings without significant distortions, this is very easy to do. This requires:
- Locate the mounting plane where the window will be installed. Usually, for this, the total wall thickness is divided by 3, after which the depth of the internal slope is measured. Most often it is 2/3 of the wall thickness. Accordingly, the outer slope occupies 1/3 of the total size.
- In the marked plane at three points (right, center and left), the height of the opening is measured. For further calculations, the smallest indicator of the obtained value is left.
- In the same plane below, in the middle and at the top of the light opening, its width is measured. The minimum size is again taken as the calculated value.
- Once the actual height and width are determined, the dimensions of the window can be easily calculated.
 To do this, from the obtained dimensions, you need to subtract the size of the gaps between the opening and the frame. According to GOST 30971-02 tolerances for mounting seams are 40-60 mm on each side.
 - For the lower zone of the opening, when determining the gap, it is advisable to take into account the actual height of the support profile.
The recommended algorithm of actions can only be applied in cases where the openings do not have significant distortions. In more complex situations, a different technique is used, based on inscribing a rectangle into a trapezoid, parallelogram, or irregular quadrilateral. These actions should already be performed only by the master.
Sometimes a quarter is specially made in a straight opening before installation. In such cases, the previously taken dimensions are not suitable for the manufacture of windows. The procedure for determining the correct dimensions must be repeated using the algorithm for openings with a quarter.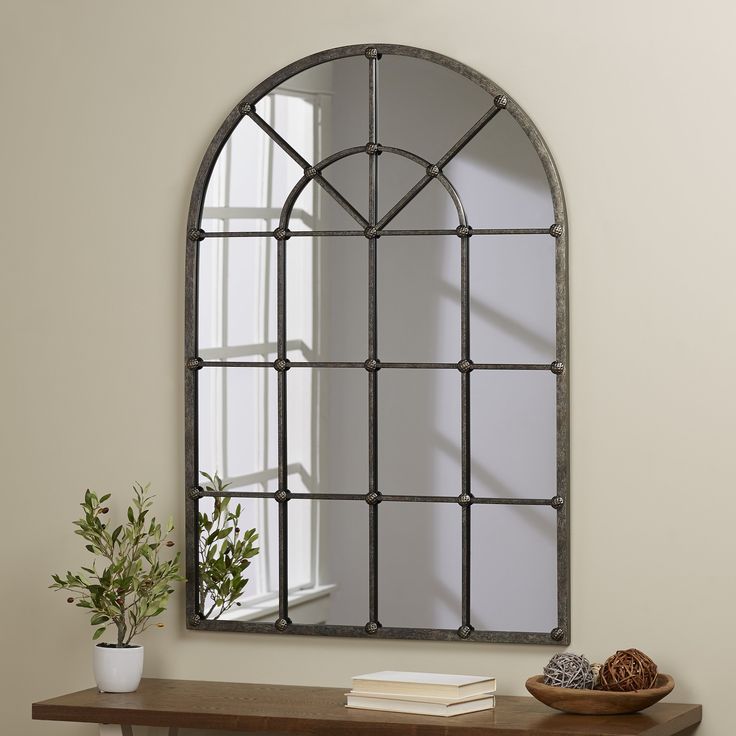
Rebated window measurement
When performing this procedure, you need to correctly measure the light opening and determine what exactly the frame profile will overlap with the protruding section of the wall. After all, a quarter of the window, the dimensions of which should ideally be 65 mm on each side, in practice can be any. According to the rules, the window frame should go inward beyond the light opening:
- from above - by 15-20 mm;
- right and left - by 20-40 mm;
- from below, the frame is raised with the help of a support profile by 10-30 mm above the edge of the gap (this is required for successful installation of the ebb).
However, compliance may not always be possible, as a protruding quarter window in a masonry and concrete or wood wall may be smaller than the recommended dimensions. In such cases, the overlap must be reduced to such an extent that the window fits into the lumen of the inner (larger) opening. If you do not take into account this feature and act as a template, the frame may be wider or higher than the required dimensions, and then there will be problems during the installation of the entire structure or the installation of the ebb. The measurement algorithm itself consists of the following sequence of actions:
- Determine the height and width of the skylight, which is limited by the outer slopes. This is done in exactly the same way as when taking dimensions from a window without a quarter.
- On each side, the dimensions of the internal protrusions are taken along the entire perimeter of the opening.
- Taking into account the data obtained and the recommended tolerances, the calculation of the possible overlap of the wall and the frame in the upper and side zones is carried out. All this is done traditionally, taking into account the width of the assembly seam (40-60 mm), filled with expanding foam.
- For the lower part of the window, the exact size of its elevation above the lower plane of the opening is determined.
- When calculating the height of the frame, you must also take into account the distance between the inside of the wall and the window sill.
Installation specifics with and without rebate
Mounting methods in different openings do not have a fundamental difference. After all, the protrusions only additionally protect the structures from falling out, blowing through and exposure to moisture. At the same time, frames in different types of openings are subjected to the same loads, so they must be fixed taking them into account. Installation of windows in a quarter is carried out according to the requirements contained in GOST 30971-2012, which can be found in a special review on OknaTrade.
When installing windows without a quarter protruding into the opening, it is no different from the procedure according to GOST. All requirements remain relevant - the width of the mounting joints, the distance between the fasteners and the permissible distortions of the structure.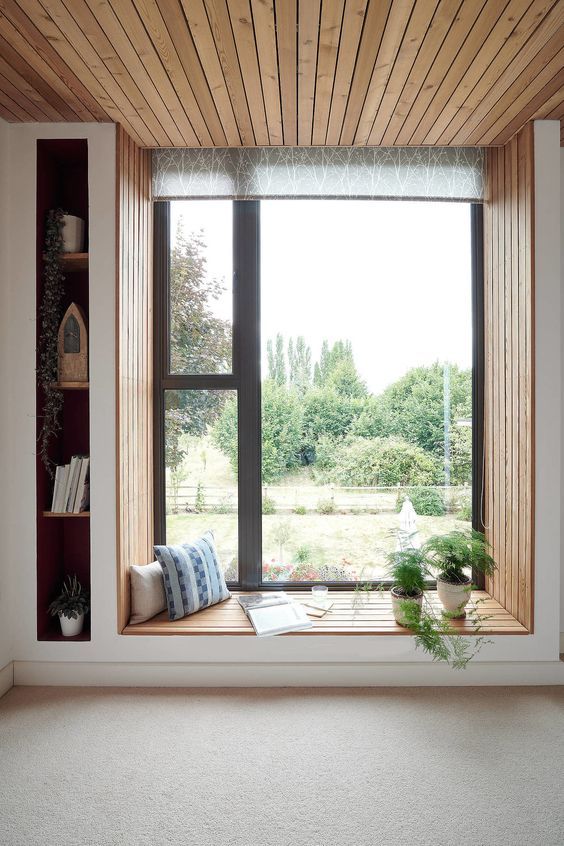 The differences lie in the need to take measures to protect the mounting seam from the outside. For these purposes, it is recommended to use special flashings and external platbands. They help not only to protect the hardened foam, but also allow you to install the PSUL tape, which will give the windows the opportunity to "breathe".
It is preferable to install windows in openings with a quarter. If this is not possible, then all measures must be taken to protect the assembly seam from external influences. It is recommended to discuss this point with the installation team in advance.
Classification. Building parts
Repair and finishing works
Classification of buildings. Buildings are ground structures that house the premises necessary for one or another human activity: residential buildings, schools, theaters, clubs, shops, factory buildings.
By purpose, buildings are divided into residential, public (schools, hospitals, clubs, shops), industrial (power plants, factory buildings, workshops, depots), agricultural (cowsheds, greenhouses, poultry houses, granaries).
According to the number of floors, buildings are single-storey, low- and multi-storey, high-rise.
Buildings are divided into groups depending on their durability and fire resistance.
Degrees of durability of buildings.
For enclosing structures of buildings, the following degrees of durability are established:
- The first degree is more than 100 years;
- Second degree 50-100 years;
- Third degree 30-50 years;
Structures with a service life of less than 30 years are considered short-lived and are used only for temporary structures. Fire resistance is determined by the degree of flammability of the materials used to build the building.
Main parts of buildings (Fig. 1). Each building consists of a foundation, walls, floors, roofs, partitions, windows, doors, stairs and other structural elements.
Fig. 1. The main parts of the building: 1 - base, 2, 23 - walls, 3 - foundation, 4 - window opening, 5 - partition, 6 - interfloor overlap, 7 - floor, 8 - window sill, 9 - plug, 10 - attic floor , 11 - rafters, 12 - crowning cornice, 13 - crate, 14 - roof, 15 - chimney, 16 - dormer window, 17 - balcony, 18 - sandrik, 19 - drain, 20 - pilaster, 21 - belt, 22 - basement, 24 - lintel, 25 - march, 26 - platform, 27 - railing Foundation (3) - the underground part of the building, which serves to absorb the load from the building and transfer it to the base (1).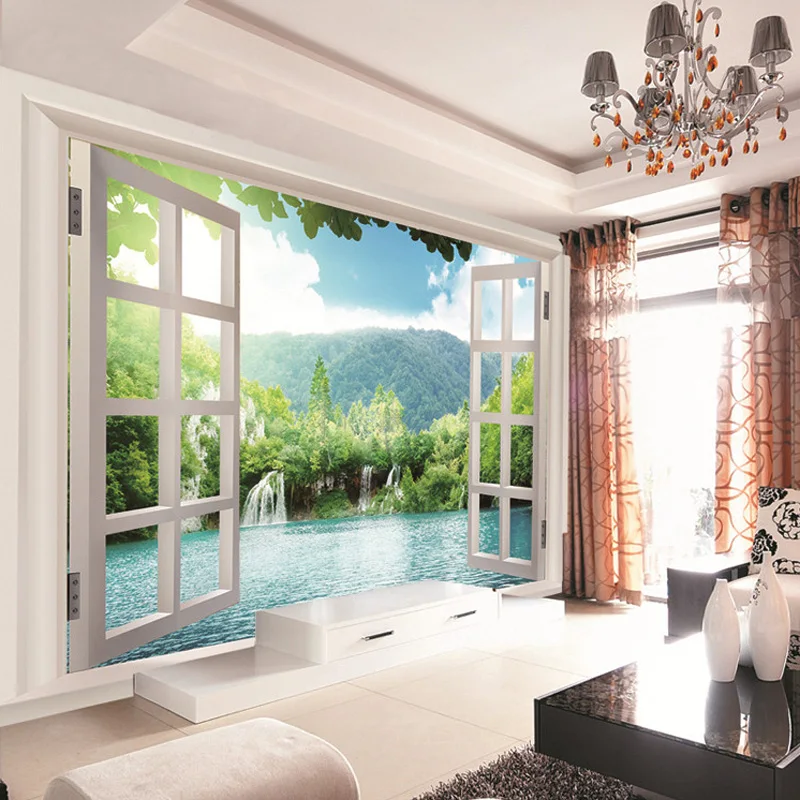 The base can be natural or artificial. The lower plane of the foundation, in direct contact with the base, is called the sole of the foundation. The vertical distance from the surface of the earth to the sole is called the depth of the foundation. The depth of the foundation depends on the strength of the foundation soil, the depth of freezing, etc.
By design, the foundations are tape, having the form of continuous walls; columnar in the form of a system of free-standing pillars; solid in the form of a slab under the entire area of the building and piled, consisting of separate racks interconnected by a reinforced concrete grillage (slab, belt or beam).
Usually the walls of the building are made thinner than the foundation, so on the front side it protrudes somewhat from the plane of the wall, forming a plinth (22). The plinth is more susceptible to dampness and mechanical damage than other parts of the wall. Therefore, its outer surface is plastered with cement mortar or lined with weather-resistant materials.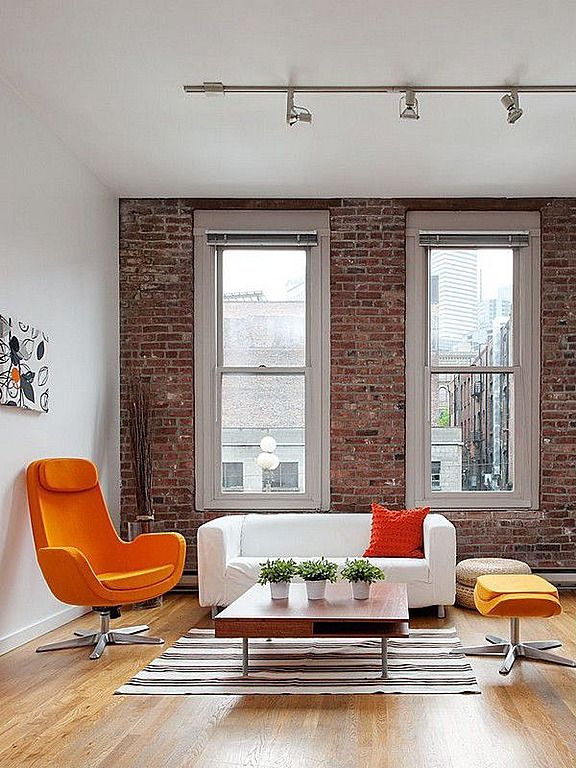 To prevent moisture from penetrating the walls along the foundation, waterproofing from waterproof materials is arranged in the basement at a height of 15-20 cm from the ground level. If the building is designed with a basement, then arrange another waterproofing layer 10 cm below the level of the basement floor. If necessary, the foundations from the outer and inner sides are insulated with tar mastics, on which roofing paper is glued.
The walls separating the premises of the building from the external space are called external (23), and those that divide the internal space of the building into separate premises are called internal (2). Walls can perceive not only their own gravity, but also the load from ceilings, roofs, i.e., perform load-bearing functions. If the walls do not carry any load, they are called non-load bearing.
Often, thin partitions (5) are installed instead of internal non-load-bearing walls. This makes it possible to increase the usable area of the building.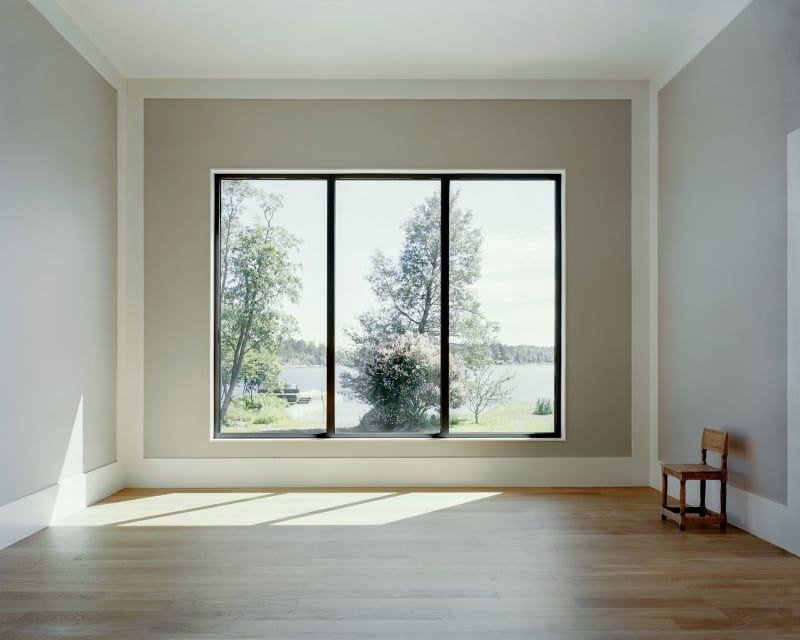 However, the thickness of the partitions must be such that they are non-acoustic and non-thermal.
Openings (4) are made in the walls for windows and doors. The part of the wall that covers the opening is called the lintel (24). The sections of the walls located between the openings are called piers. The walls are ordinary (between the openings) and corner (between the opening and the corner of the building). Niches are called recesses in the walls, which serve to accommodate heating devices, wall (built-in) cabinets, etc.
or semicircular. Rectangular projections are called (20), semicircular - semi-columns. Pilasters and semi-columns are also means of vertical articulation of walls and elements of the architectural composition.
Eaves - a horizontal protrusion of the wall, extending beyond its surface. The cornice located at the top of the wall, that is, under the roof, is called the crowning (12) (or main). Its purpose is to protect the wall from moisture from rain and melt water flowing from the roof.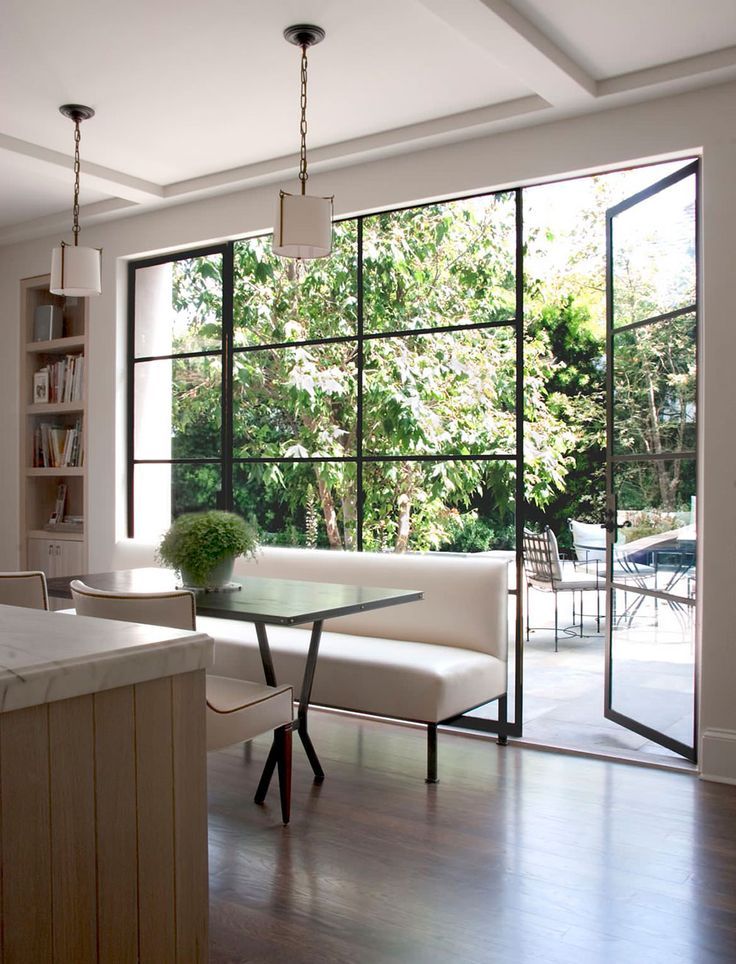 The cornice gives the building a finished look and is also an architectural detail. The departure of the cornice, i.e., the size of its protrusion beyond the wall, is different. In addition to the crowning cornice, intermediate or interfloor cornices are arranged on the walls, as well as small horizontal protrusions of a simple shape, called belts 21. Small cornices that are located above windows and doors are called sandriks 18. Interfloor or intermediate cornices, belts and sandriks protect the walls from rain and at the same time, they add variety to the architectural design of the building.
The finishing elements of the walls located above the crowning cornice include parapets, pediments and gables.
Parapet - a low wall enclosing the roof.
Gable - a section of the wall, usually triangular in shape, enclosing the attic space when constructing a gable roof and limited by its slopes. Gables are sometimes framed by an inclined crowning cornice.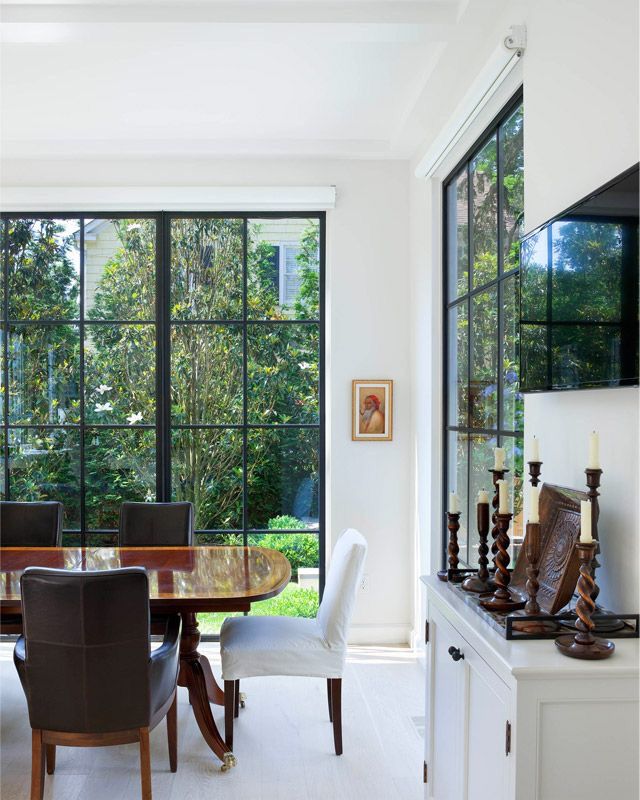 If there is no horizontal cornice that separates the gable from the wall, the triangular top of the wall is called a gable.
Balconies, loggias and bay windows serve to improve the performance of buildings and architectural design. Balcony (17) an open fenced area protruding beyond the plane of the outer wall. The balcony consists of a supporting structure, a floor and a fence. Loggia - a terrace built into the dimensions of the building, enclosed on three sides by walls and open only from the side of the facade. A bay window is a closed balcony that increases the usable area. In plan, bay windows are given a rectangular, polygonal or triangular shape.
Separate supports - racks in the form of pillars (columns) that support floors, roofs, walls and transfer loads from them to foundations.
Ceilings - structures that divide the interior of the building into floors. In addition, floors carry the load from people, machines, equipment and their own gravity. Depending on the location in the building, there are interfloor floors (6), separating floors adjacent in height; attic (10), separating the upper floor from the attic, as well as above the basement, separating the first floor from the basement.
Ceilings are made of wood, monolithic reinforced concrete, precast concrete slabs, gypsum slag blocks, etc. They are supported directly on columns or on wooden, steel and reinforced concrete beams.
The slab forms the floor (7) on the top side and the ceiling on the bottom side. For sound and heat insulation, insulating materials are laid on the upper part of the ceiling, and a plank, parquet floor, ceramic and plastic tiles, linoleum, cement mortar, stone, asphalt, xylolite are laid on them.
Windows and skylights are used to light and ventilate the room. A window opening (4) with an inserted box and glazed covers is called a window. Through the windows, the rooms are illuminated by natural light and ventilated.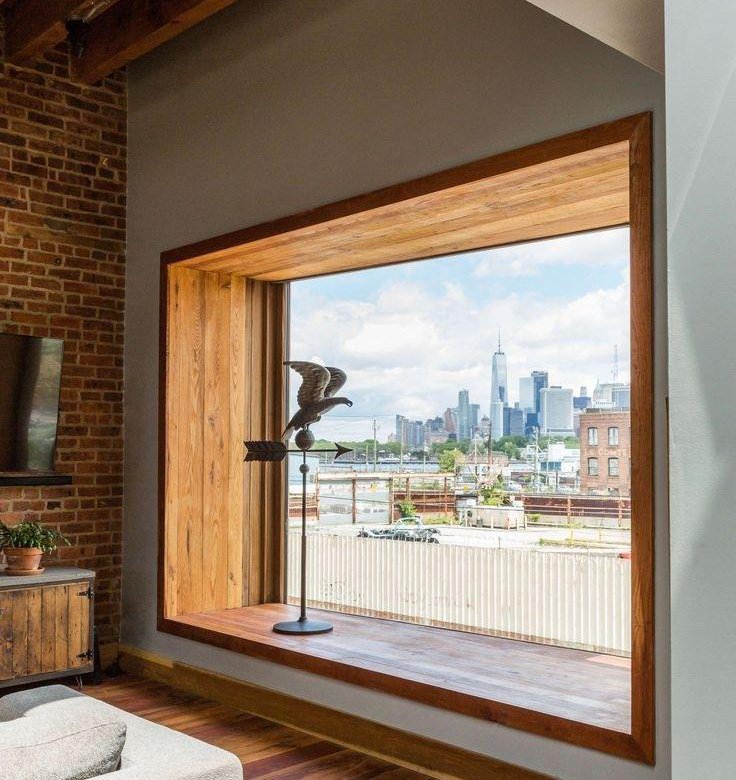 Windows should not have increased sound and heat transfer. In large rooms - workshops, halls - in addition to windows on the roofs, light and ventilation lanterns are arranged, which are given various shapes.
Boxes inserted into window openings occupy only part of the wall in its thickness. The remaining parts on the outer and inner sides outside the box are called slopes, and between the boxes - plugs (9). When single boxes or twin bindings are used, there are no plugs between them. Slopes are divided into internal and external. On the inside, in the lower part of the window, a wide slab is installed - a window sill (8), and on the outside - a narrow slab of cement mortar - a drain (19).
Doors are made in walls and partitions. To do this, arrange openings in which the boxes with the door leaf are strengthened. External and internal doorways, as well as window openings, have slopes, and with double frames, they also have plugs.
Stairs consist of inclined flights (25) with steps and horizontal platforms (26). Stairs are made of wood, reinforced concrete, metal and other materials. Railings (27) must be installed on the stairs, which most often consist of metal racks and a plastic or wooden handrail.
Roof serves to protect the building from rain, snow, wind. It consists of a bearing part and a fence. The bearing part includes the rafters (11), the fence - the roof (14), laid on the crate (13) or on reinforced concrete slabs and screeds.
Roofs are made of asbestos-cement corrugated sheets, flat tiles, wood, rolled materials - roofing paper, glassine and roofing felt, laid on tar, bituminous or other mastics, as well as from roofing steel. Chimney or ventilation pipes (15) and dormer windows (16) go to the roof.
Plaster work. Shepelev.A.M.
Plaster work. Shepelev.A.M
- Table of contents of the textbook. Plastering works. Author. Shepelev.A.M.
- Classification and main parts of buildings.
- Finishing and construction work.
- Occupational safety and fire prevention measures in construction.
- Requirements for scaffolding and ladders.
- Scaffolding.
- Cradles, scaffolds, ladders.
- Plastering tools.
- Plastering equipment.
- Preparation of wall surfaces for plastering.
- Plastering sequence for various buildings
- Stuffing of metal mesh under thick layers of plaster.
- Plastering of wooden walls. Preparing for plastering.
- Wall plaster. Preparation of stone, brick and concrete surfaces.
- Preparation of adobe, fiberboard, reed and straw surfaces.
- Preparation of joints, channels of reinforced concrete slabs, steel beams for plastering.
- Installation of mesh-reinforced structures for plastering.
- Safety. Plastering works.
- Safety precautions when carrying out plastering work.
- Organization of plastering works.
- Plastering. Applying plaster.
- Plaster.