How to take a plant clipping
How to Grow Plants From Cuttings
Grow New Plants at Home With This Easy Propagation Method
By
Marie Iannotti
Marie Iannotti
Marie Iannotti is a life-long gardener and a veteran Master Gardener with nearly three decades of experience. She's also an author of three gardening books, a plant photographer, public speaker, and a former Cornell Cooperative Extension Horticulture Educator. Marie's garden writing has been featured in newspapers and magazines nationwide and she has been interviewed for Martha Stewart Radio, National Public Radio, and numerous articles.
Learn more about The Spruce's Editorial Process
Updated on 10/25/22
Reviewed by
Kathleen Miller
Reviewed by Kathleen Miller
Kathleen Miller is a highly-regarded Master Gardener and Horticulturist who shares her knowledge of sustainable living, organic gardening, farming, and landscape design. She founded Gaia's Farm and Gardens, a working sustainable permaculture farm, and writes for Gaia Grows, a local newspaper column. She has over 30 years of experience in gardening and sustainable farming.
Learn more about The Spruce's Review Board
The Spruce / Jiaqi Zhou
Project Overview
Garden plants can be propagated in many ways, but one of the easiest methods is taking stem cuttings. How to grow plants from cuttings is simple: Trim off a healthy portion of stem, place it in water or a growing medium until it develops roots, and then plant it in a pot or the ground.
Growing plants from cuttings is a common way to create new houseplants, but it can also work for many garden plants. In cold-weather zones, some gardeners take clippings of tender annuals and root them indoors to prepare a supply of new plants for garden planting in the spring.
Here's what to know about how you grow a plant from a stem cutting.
Watch Now: How to Propagate Dipladenia
When to Take Stem Cuttings
Stem cuttings can be taken and rooted at almost any time during the parent plant's active growth period. You also can take cuttings from many woody plants (plants with hard stems) during their dormancy. In cold climates, you can take cuttings in the fall before frost arrives, root them indoors, and then transfer them to pots. By springtime, you will have vigorous potted plants that can go back into the garden.
Types of Plants to Grow From Cuttings
Soft-stemmed herbaceous plants are the easiest to grow from cuttings, but many woody plants can also be propagated with this method. The following list includes examples of plants that grow from cuttings.
- Semi-hardwood cuttings are woody around their base but have softer stems up top. Examples of plants that can be propagated via semi-hardwood cuttings include holly, hydrangeas, and azaleas.
- Hardwood cuttings have woody stems throughout. Examples of plants that can be propagated via hardwood cuttings include crepe myrtle, forsythia, and rose species.
- Softwood cuttings have flexible soft stems.
 Examples of plants that can be propagated via softwood cuttings include clematis, asters, and chrysanthemums.
 - Greenwood cuttings are very similar to softwood cuttings, except that their base is slightly harder and they take a bit longer to grow. Examples of plants that can be propagated via greenwood cuttings include boxwoods, dahlias, and gardenias.
Before You Begin
The key to successful rooting of stem clippings is to find the moisture and temperature level appropriate for each type of plant. Do some research on the species you are trying to propagate to learn the conditions it likes best. You can make your plant cuttings grow faster not only by providing the conditions they like but also by applying rooting hormone to the cut end, which helps to encourage root production. It's also best to take several clippings to maximize your chances of success.
How long plant cuttings take to root varies widely depending on the type of plant.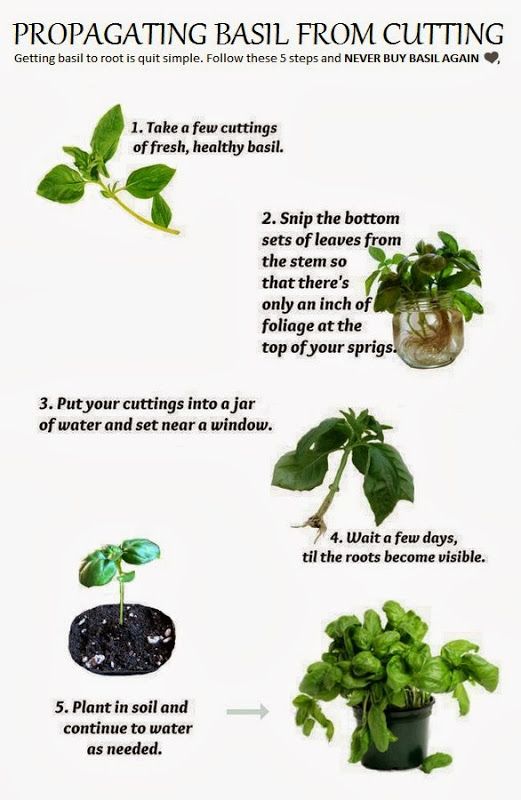 Many herbaceous annuals will quickly grow to maturity. But cuttings from perennials and woody plants, such as shrubs, can be harder to root and take longer to reach maturity.
Tip
It is possible to grow a plant from a cutting in water. Simply place the cut end down in a container partially filled with plain water, and refresh the water every few days until a substantial root system has formed. However, transferring a water-rooted seedling to soil is not always successful, so it's generally better to plant cuttings straight into soil.
Equipment / Tools
- Razor blade or scissors
- Small container for rooting hormone (optional)
- Pencil or stick
Materials
- 6-inch containers for planting
- Soilless potting mix
- Existing plant (parent plant)
- Alcohol
- Rooting hormone (optional)
- Plastic bag
The Spruce / Loren Probish
How to Grow Plants From Cuttings
-
Prepare a Container
Fill a clean 6-inch-deep container with soilless potting mix to hold cuttings for rooting.
 A soilless mix drains well and provides suitably moist conditions that encourage the cutting to root. Don't use ordinary garden soil, as it might contain pathogens that can kill the cutting before it ever takes root.
 The Spruce / Loren Probish
-
Choose a Parent Plant
Select a healthy parent plant from which to take cuttings. Avoid plants with diseases or lots of drooping or dying foliage. The best specimens for cuttings will have plenty of new growth and be large enough that taking cuttings will not harm them.
Tip
Good green growth is more important in a parent plant than plentiful flower buds. Too many flowers can actually hinder the ability of a cutting to grow roots.
The Spruce / Loren Probish
-
Find the Best Stems for Cutting
Choose green, soft (non-woody) stems for cuttings. Newer growth is easier to root than woody, older stems. Look for a stem with a node—a bump along the stem where a leaf or flower bud attaches.
 This point is where new roots will emerge.
 The Spruce / Loren Probish
-
Take the Plant Cutting
Use a pair of scissors or a razor blade that has been sterilized in alcohol to make a clean cut just below a node. The cutting doesn’t need to be long, but it should contain at least two leaves and one node. A cutting that is 4 to 6 inches long is usually sufficient. Longer cuttings sometimes dry out when placed in their growing medium.
The Spruce / Loren Probish
-
Prepare the Cutting
Place the cutting on a flat, hard surface, and make a clean, partial slice through the middle of the node with a sterilized razor blade. Scarring the node will increase the chances of roots emerging from this spot.
Then, remove all but one or two leaves on the cutting. The cutting needs some leaf growth to continue photosynthesis, but too many leaves will consume energy that would otherwise go to root creation. If the leaves are very large in proportion to the stem, cut off the top halves of the leaves.

The Spruce / Loren Probish
-
Apply Rooting Hormone (Optional)
Wet the node end of the cutting, and then dip it in a small container of rooting hormone. Tap off any excess hormone; too much actually hinders chances for success. This step is optional. Some plants root easily on their own, but rooting hormone can help others by stimulating the cutting into sending out new roots.
The Spruce / Candace Madonna
-
Bore a Planting Hole
Use a pencil or similar pointed object to poke a planting hole into the potting mix, rather than planting the cutting straight into the soil. Make the hole slightly larger than the stem diameter. Doing so will prevent rooting hormone from being wiped away when you embed the stem in the pot, and it's also gentler on the stem.
The Spruce / Loren Probish
-
Plant the Cutting in the Soil
Carefully plant the cutting in the hole you made in the potting mix, and gently tamp the soil around it.
 You can fit several cuttings into one container, but space them so the leaves do not touch one another.
 The Spruce / Loren Probish
-
Cover the Pot With Plastic
Place the container with the cutting into a plastic bag. The bag will keep the humidity high and hold in heat. But don’t seal the bag completely because some airflow is necessary to prevent fungal rot.
Keep the container in a warm spot in the house, ideally in an area that has indirect bright light. Don’t put the cutting in full sunlight until new leaves begin appearing along the stem.
The Spruce / Loren Probish
-
Monitor the Cutting
Until roots form, keep the soil slightly moist but not so wet that condensation forms on the inside of the plastic bag. Check regularly for signs of rot, and remove any suspect cuttings as soon as you spot trouble.
After two to three weeks, begin checking for roots by tugging gently on the cutting. When you begin to feel resistance, it means roots have developed.
 At this point, you can transplant the cutting into its own pot or the ground.
 The Spruce / Loren Probish
30 Plants That Grow From Cuttings in Soil
Watch Now: 19 Timelapses Perfect for Plant Lovers
Article Sources
The Spruce uses only high-quality sources, including peer-reviewed studies, to support the facts within our articles. Read our editorial process to learn more about how we fact-check and keep our content accurate, reliable, and trustworthy.
Plant Propagation. University of Maine Extension.
How to Propagate Plants Using Stem Cuttings
By
Jon VanZile
Jon VanZile
Jon VanZile is a Master Gardener who wrote content for The Spruce for over a decade. He is the author of "Houseplants for a Healthy Home," and his writing has also appeared in the Chicago Tribune, and Better Homes & Gardens, among others. Jon began collecting plants over 10 years ago and he maintains a growing collection of rare and tropical plants.
Learn more about The Spruce's Editorial Process
Updated on 10/08/21
Reviewed by
Debra LaGattuta
Reviewed by Debra LaGattuta
Debra LaGattuta is a gardening expert with three decades of experience in perennial and flowering plants, container gardening, and raised bed vegetable gardening. She is a Master Gardener and lead gardener in a Plant-A-Row, which is a program that offers thousands of pounds of organically-grown vegetables to local food banks. Debra is a member of The Spruce Gardening and Plant Care Review Board.
Learn more about The Spruce's Review Board
The Spruce / Claire Cohen
Project Overview
One of the great joys of gardening is propagating new plants. There are many ways to do this, but one of the easiest is by snipping off a piece of stem, placing it in a potting medium, and nurturing the cutting until roots develop. At that point, you can transplant the rooted cutting into a pot or directly into the garden.
Learn How to Propagate Plants by Rooting Stem Cuttings
Propagating through stem cuttings is a form of cloning because the new plant will be an exact genetic match to the parent plant. That's not always the case with the other popular way to propagate plants—collecting seeds, germinating them, and planting. Many hybrid plants produce seeds that don't "grow true" to the parent plants, so rooting stem cuttings is the most reliable way to propagate hybrid plants.
Rooting stem cuttings is most often used to propagate houseplants, but there are many garden plants that you can propagate using this method. In cold climates, cuttings from tender garden plants, such as coleus or impatiens, can be taken in late fall, rooted indoors during the winter, and then planted outdoors in spring. And though it's a bit more difficult, many woody plants can also be propagated by snipping stem cuttings and rooting them.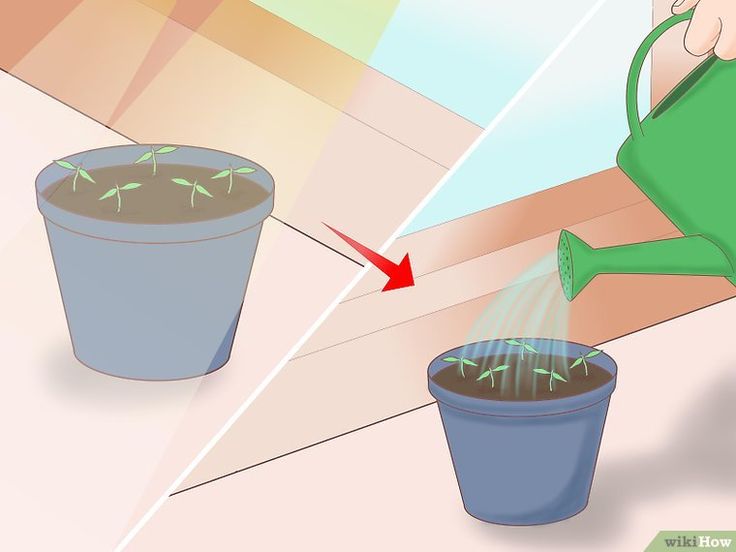
The Spruce
Tip
There are two ways to root stem cuttings: placing them in water or embedding them in potting soil or another growing medium. Many plants, such as coleus, spider plant, and pothos, will readily root in water. But the water method can cause the roots to be quite fragile, and some plants resist rooting in water altogether. It's generally best to root your cuttings in some type of potting medium if possible.
When to Take Stem Cuttings
Stem cuttings can be taken and rooted at almost any time, but the technique is more successful when the plant is not in full bloom. When your goal is to propagate outdoor garden plants over winter, take your cuttings after the plant's bloom period is over in fall, or trim off any flowers or flower buds from the stem you are snipping off. A stem cutting that contains flowers or flower buds is putting too much energy into flower production to allow for good root development.
For shrubs and other woody plants, rooting via stem cuttings is most likely to succeed if you take cuttings from new growth that has not yet become woody.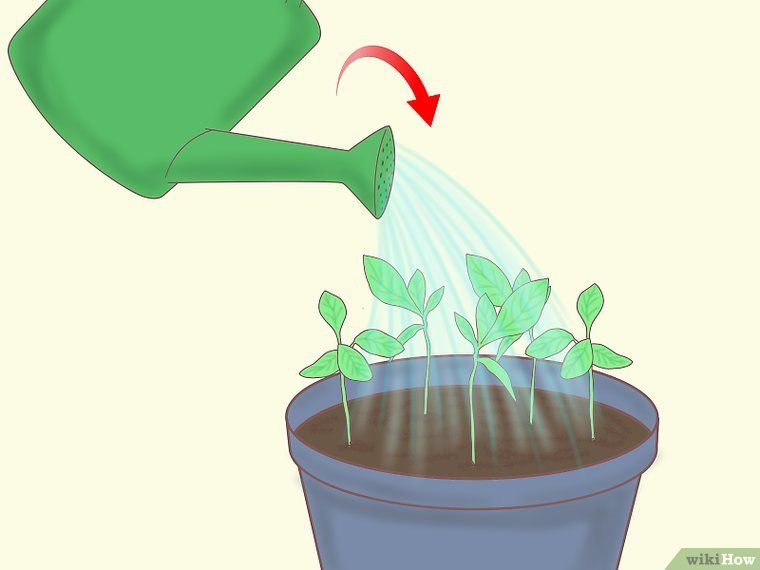 April through June is usually the best time to take cuttings from woody plants. Moreover, using a rooting hormone is essential when attempting to root cuttings from woody plants.
What is rooting hormone?
Rooting hormones, whether in powder, liquid, or gel form, are chemicals that stimulate the growth of roots when applied to the severed end of the plant cutting before placing them in a growing medium.
Before Getting Started
Every plant species has an ideal type of potting mix that works best for rooting its cuttings. For many plants, an ordinary commercial potting mix based on peat moss works just fine. But other plant species root best in a more porous mix, such as vermiculite, sand, seed-starter mix, cactus/succulent mix, or some mixture of these ingredients. Never use ordinary garden soil to root your cuttings. It's always best to use a sterile "soil-less" growing medium because it will be free of soil pathogens that can ruin your attempts at propagation.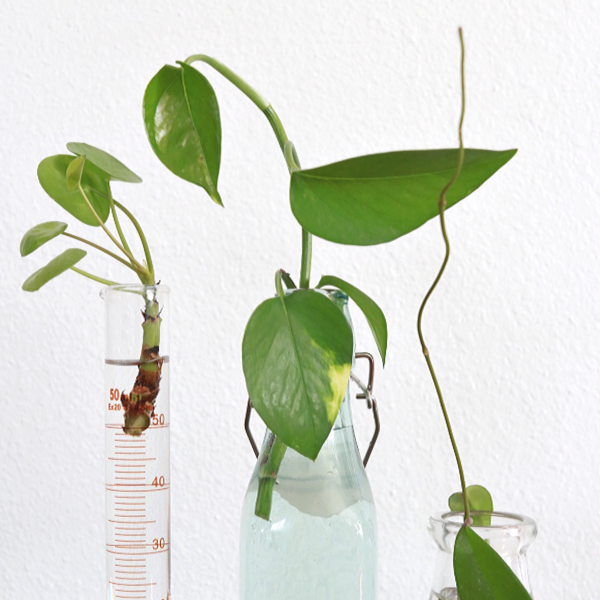
Do a little bit of research on any plant you want to propagate from stem cuttings. It's easy to learn what experts recommend as the best growing medium to use for propagation.
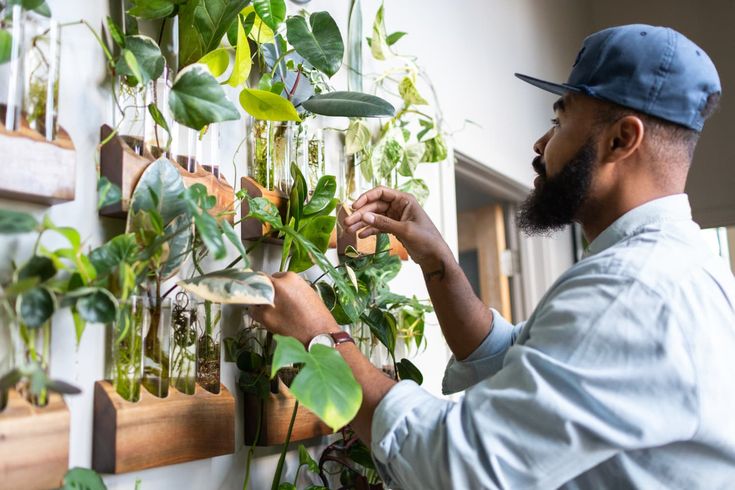
How to Make Your Own Plant Propagation Station
Equipment / Tools
- Sharp knife, scissors, or pruners
- Small trowel
- Pencil or sharp stick
Materials
- Soilless potting mix
- Planting tray or small pots
- Rooting hormone (optional)
-
Take Cuttings From a Healthy Plant
Cut a 3- to 6-inch-long piece from a healthy portion of the parent plant's stem, using a sharp knife or pruners to cut the stem at a 45-degree angle. This angled cut will maximize the area available for roots to develop. If possible, take cuttings from the newest growth on the plant
Each cutting should have at least two or three sets of leaves along its length. Make sure the cutting includes at least one growth node (a bump on the stem from which leaves or flowers sprout) that can be buried in the growing medium.
 Roots will sprout from this node, as well as from the cut end of the stem.
 It's not uncommon for some attempts at propagation to fail, so it's best to take at least three cuttings to ensure success. Woody plants can be especially temperamental, so taking six or more cuttings is a good idea.
The Spruce / Claire Cohen -
Trim the Leaves and Apply Rooting Hormone
Remove the leaves from the bottom node of the stem cutting. Usually, you can simply snap off the leaves. Make sure to retain at least three to four leaves on the stem cutting.
As an optional step, apply a powdered or gel rooting hormone to the trimmed end of the cutting and to the area where the leaves were removed. (Many plants will root successfully from cuttings without the use of rooting hormone, but using hormone can speed up the process, and it might be essential for some hard-to-propagate plants.) If you are using a powdered hormone, it helps to moisten the stem before rolling it in the powder.
The Spruce / Claire Cohen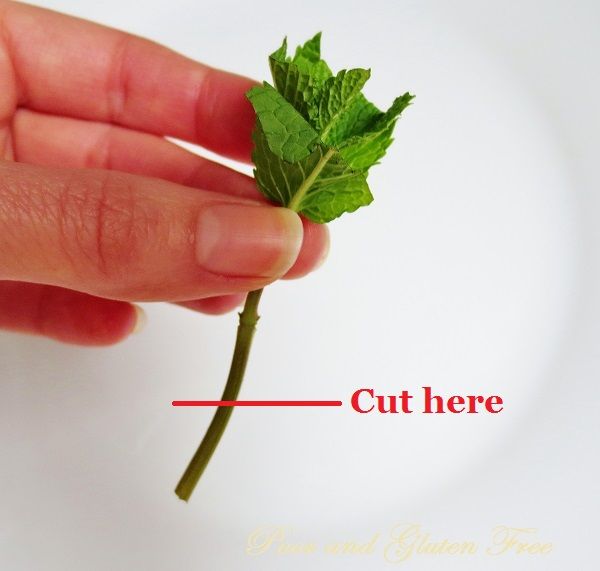 If you are using gel hormone, simply dip the end of the cutting into the hormone.
 -
Plant the Cuttings
Prepare a planting tray or small pots with soilless potting medium, such as a seed-starter mix or vermiculite. Poke a hole in the medium with a pencil. Then, insert the end of each cutting into the growing medium and lightly tamp the mix around the stem of the cutting to hold it upright.
The Spruce / Claire Cohen -
Tend the Cuttings
Most plants will not root well in full sun, so place the cuttings in a location where they will receive a 50/50 ratio of shade to dappled sunlight. For most plants, cuttings thrive on warmth and humidity, and the growing medium should be kept evenly moist but not drenched while roots develop.
Inspect the cuttings every two weeks, looking for new leaf growth and root development. If flower buds or blooms develop, pinch them off. New leaves will assist with root growth, but flowers divert energy away from root development.
Some plant species will require special treatment in order to root their cuttings. For example, the recommendation for some tropical plants might be to place the pot and cutting in a loosely tied plastic bag to increase the humidity level. Or, warmth-loving plants might require that you place the pot and cutting in a particularly warm place, or on a heating mat, during the rooting process. Always research the particular needs of the plant species you are trying to propagate.
The Spruce / Claire Cohen -
Transfer the Cuttings
When you see that new leaf growth is developing along the stem of the cutting, it usually means that healthy new roots are established. Once you feel resistance when slightly tugging on the cutting, it means the roots are sufficiently developed. At this point, you can transfer the cutting to a new pot with fresh potting soil. A small trowel or large kitchen spoon is a good tool for scooping out the rooted cutting and transferring it to its new pot.
The Spruce / Claire Cohen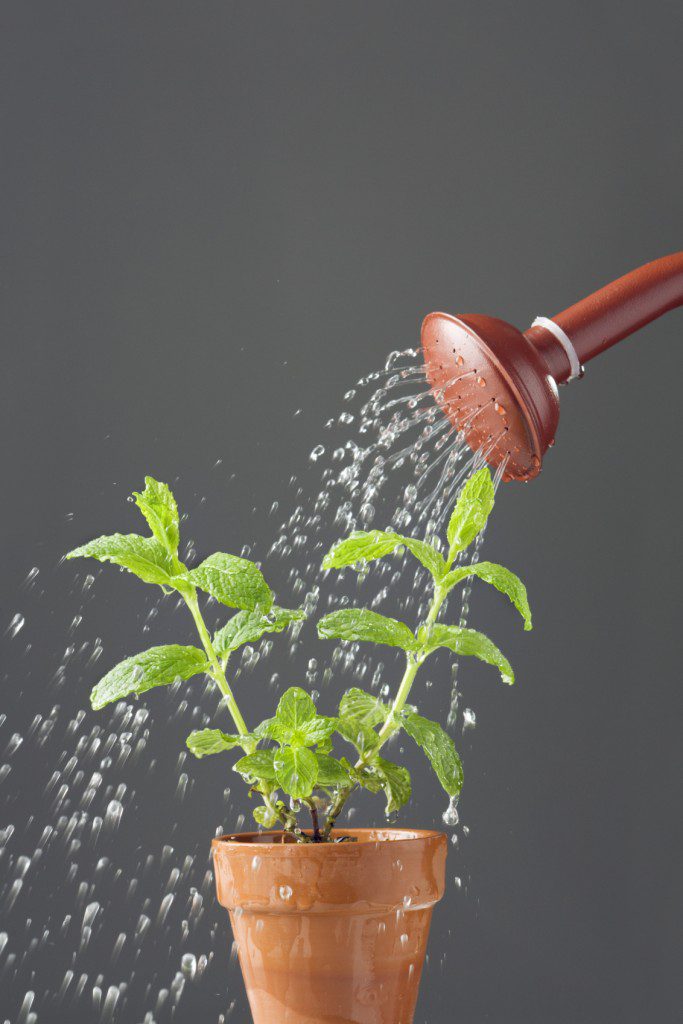
Tip
Remove leaves that turn brown or black as the stems are rooting. Discard any cuttings that turn soft or show other signs of rot or fungal disease, as these will soon succumb to their disease.
Moving New Plants Outdoors
When it's time to move the new plants you propagated from rooted cuttings to the outdoors, it is important to gradually acclimate them to outdoor conditions—a process known as hardening off. This process involves giving the new specimens increasingly longer exposure to the outdoors over a period of one to two weeks. Set the plants outside for only one to two hours the first few days and gradually increase the time exposure. Place plants outdoors during the warmer part of the day, but bring them back indoors during the cool nights. Gradually, the plant will become accustomed to the outdoor environment. Once nighttime temperatures are reliably at 50 degrees Fahrenheit or warmer all night, your new plants can be safely planted in the garden.
30 Plants That Grow From Cuttings in Soil
How to prune indoor plants? — Botanichka
Pruning houseplants is one of the most important care items. And the most individual. There are indoor plants that are not pruned at all, while others require regular shearing. Before pruning put a variety of tasks. It can be reduced to the removal of dry or damaged parts, or it can become the basis of a beautiful silhouette, stimulate more lush flowering or rejuvenation. It is impossible to maintain a compact size and a healthy state of indoor crops without pruning. And although there is nothing complicated in it, you should not forget about the individual approach, and adhere to the general norms and rules.
Pruning houseplantsTypes of pruning houseplants
Pruning is considered an optional item in the care of houseplants. Not all crops need a haircut, but still, almost no plant can do without purely hygienic pruning. It is thanks to pruning that they maintain a healthy and neat appearance of the plant, restore or improve its decorative effect, maintain a balance between the root system, which is so limited in its volume, and the aerial parts. Improving, stimulating, regulating, restraining plants, pruning indoor crops allows them to reveal their full beauty.
Depending on the task of this procedure, there are several types of pruning of indoor plants:
- Cleaning, or sanitary pruning.
- Pinching and shortening shoots, tweezing buds.
- Crown formation.
- Anti-aging pruning.
Some houseplants need only one type of pruning, others need all four. It is not necessary to conduct them at the same time, but it is much easier to do everything you need.
Rules for pruning houseplants
Regardless of the type of pruning, you should start by checking individual houseplant preferences and pruning recommendations for individual plants. There are plants that cannot stand even a simple pinching of the top of the branches, and there are plants that are not afraid of even frequent cutting. In addition to studying general information, it is worth examining the plant itself. A careful analysis of the condition, the selection of unproductive or damaged shoots, the study of how the plant develops, will help you choose the right amount of pruning for each particular plant.
Regularity, consistency in cuts is the main secret of simplifying these actions. If you do not wait until there is a visible need for pruning, do not allow overgrowth, baldness, loss of decorative effect, but constantly keep pets in perfect shape, the need for time-consuming and traumatic pruning will disappear.
Sanitary cleaning is repeated annually, at the beginning of the active growth stage, repeating it as needed throughout the year and keeping the plant clean. Formation is carried out once a year or regularly for crops in need of shearing. Rejuvenation is combined with sanitary cleaning and shaping, carried out regularly or urgently.
When performing all types of pruning, it is important to follow the general rules, which are in many ways similar to the norms for pruning horticultural crops.![]() Their main goal is to take all necessary measures to prevent plant health problems.
Their main goal is to take all necessary measures to prevent plant health problems.
General rules for pruning indoor crops:
1. Work with sharp and well-chosen tools for this task. Pruning already causes enough damage to plants, and there is no need to increase it.
2. Hygiene. When working with indoor plants, you must adhere to the general sanitary rules. Clean hands, tools and surfaces, the obligatory care and disinfection of working surfaces of tools are as important for pruning as the quality itself. Particular care should be taken with capricious crops and those plants that belong to poisonous ones. It is necessary to protect during pruning not only the plants themselves, but also the surfaces on which the work is carried out, and the skin.
3. Transplanting and pruning should not be done at the same time. The recommendations for most houseplants indicate that pruning should preferably be done at the same time as transplanting.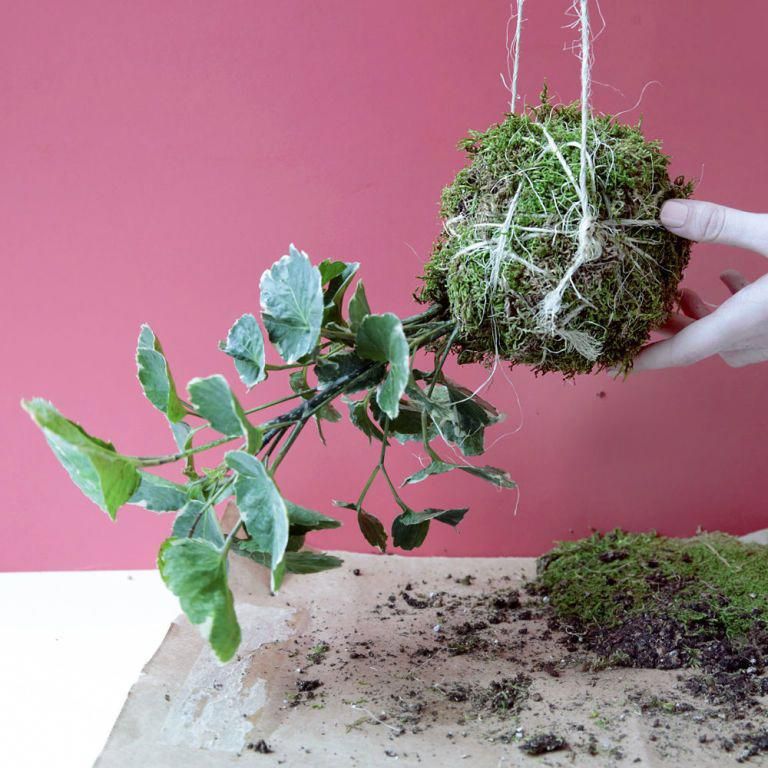 But it is not advisable to carry them out at the same time. Pruning is carried out before or after changing the substrate, leaving a sufficient time period between procedures for adaptation. Each of these procedures causes harm to the plant. And there is no need to strengthen it (as well as the risk of contamination of sections with soil).
4. The cuts must be correct. Cutting only at an angle and above the buds will help you never make a mistake when trimming houseplants. The shoot is radically cut to the very base, to the level of the soil or the point of attachment to the trunk. Partial pruning is carried out, leaving 3-7 mm of the shoot above the kidney. You also need to take into account the orientation of the kidney: its location will allow you to "direct" the development of the crown horizontally or vertically. There are also requirements according to which, on indoor plants, the cut is carried out at such an angle that new shoots grow outward, and not inside the crown, and so that the cut is directed away from the kidney.
5. The general timing of pruning on indoor plants is very arbitrary, because in each case, the time for this procedure is better to choose individually. Pruning is always best done at the beginning of the active growing season and in spring. A long warm season ahead will allow plants to renew themselves even after a cardinal haircut. But this rule can be deviated depending on the development cycle and the condition of the plants.
6. During trimming, the result must be evaluated periodically. Grooming indoor plants, especially when shaping the silhouette, is easy to get carried away. By making periodic stops and inspecting plants near and from a distance, you can prevent the consequences of excessive zeal and restrain your impulses in time.
The most important pruning rule is timely treatment of wounds. You can rely on the plant's own immunity when pinching tops or working with thin shoots. But it is better to disinfect and process any sections, especially on large shoots, immediately.
For this, special preparations (balms or powders for treating cuts on garden and greenhouse plants) and simple products such as crushed charcoal or sulfur powder are suitable. Sections are processed carefully, capturing the entire area. If necessary, the processing is repeated. For plants that secrete a large amount of juice (for example, euphorbia), the sections are allowed to dry before processing.
After pruning, the plant must be given time to adapt. It is placed in "soft", intermediate conditions, protected from excessive heat, dry air and direct sunlight. Watering on plants after pruning is carried out very carefully, avoiding extremes and adhering to the general recommendations for a particular species. Top dressing will help the plant recover faster, but it is better to resume these procedures after the plant starts growing again, and only if there was no transplant shortly before or after pruning.
Houseplant pruningHouseplant pruning tools
All pruning is done with handy, clean and sharp tools. For medium-sized twigs and succulent shoots, you can use a sharp knife (garden knives are preferred, but other types can be used - for example, a stationery knife with its thin blade), if pruning is very delicate - a scalpel or blade. But more often pruning on indoor plants is carried out with hand shears for trimming flowers and plants. Stationery or household scissors cause much more harm to plants.
Pinching (tweezing) most often does not use tools. But sometimes it is better to use small scissors or special tools for shaping bonsai for the work of trimming the tops. With a large collection of plants with strong shoots, it is better to use sharp garden pruners or special pruners for working with flowers and houseplants, which differ in room sizes compared to garden tools.
Scissors and secateurs - the minimum set that allows you to cut both thin and more powerful branches on any plant.
Whatever tool you use for cutting, the main thing is that they are clean and regularly sharpened. Do not cut indoor plants with non-sharp tools. Tissue compression, “torn” edges lead not only to problems with the healing of sections, but are also associated with a high risk of infection. When working with each individual plant, tools should not just be cleaned, but disinfected, ensuring that your actions do not lead to the spread of dangerous diseases. The easiest option is alcohol and boiling water treatment.
Sanitary pruning
This type of pruning is carried out for all indoor plants without exception - even those that have no or reduced shoots. The easiest way to call this pruning is cleaning: removing all dry, damaged or unproductive leaves and shoots, you support the health and immunity of plants. This prevents not only the loss of decorativeness, but also the spread of pests and diseases.
Sanitary pruning is directed:
- to remove thin, weak, old, damaged or dry shoots growing inside the crown;
- removing dry or damaged leaves;
- removal of dry peduncles and withered flowers.

Sanitary pruning does not have strict rules. All dry or damaged shoots are removed to the ground, and if the damage has not affected most of the branch, to healthy tissues. Thin, unproductive branches are cut out completely. Heavily damaged leaves are removed completely, dried along the edge - cut off, leaving a thin strip of dry tissue in front of a healthy area. Faded flowers and inflorescences are cut to the first full leaf or to the base of the peduncle.
Clean the plants after a dormant period, at the beginning of active vegetation, partially repeating this procedure and throughout the season as needed, during and after flowering, during shedding of leaves in deciduous species, etc.
Sanitary pruning must be supplemented by the removal of contaminated parts from the top of the substrate, including the removal of dry fallen leaves and plant residues. If the topsoil is heavily contaminated, then it is better to complete the sanitary pruning by partially replacing the free substrate at the top of the earthen clod with a fresh one.
Pinching (pinching)
Restraining pruning is the simplest. Both pinching (and a synonym for pinching is also popular) and shortening are measures that are carried out throughout the active growth stage in order to prevent excessive branch elongation, stimulate the growth of side branches or improve the quality of flowering. In fact, all these terms are synonymous and we are talking about a very simple procedure - removing the top of the shoot or extra buds. These are mini prunings, the easiest plant shaping and containment measures.
Pinching or tweezing involves the removal of the top growth point, the top pair of leaves, or the top segment of the stems of cacti and succulents. So, after flowering, separating 1-2 segments of each Schlumbergera stem allows you to achieve more abundant flowering in the next season, and pinching the tops of young plants to get denser bushes. Buds are plucked mainly from large-flowered houseplants. Excess buds, formed in large numbers, degrade the quality of individual flowers, so the timely removal of the ovaries allows you to achieve the most spectacular sight.
Tweezing has several tasks:
- Removing the tip of the growth stimulates the growth of new lateral and productive shoots.
- A simple procedure that does not require injury to the shoots and special knowledge thickens the crown.
- The plant is not allowed to stretch, stimulate growth in all directions.
Shoot shortening is somewhat different from pinching. In this case, not only the apical bud is removed, but also the entire excess or excessively elongated upper part of the shoot. By removing a third or half of the length of the branches, the plant is not allowed to stretch, restrain growth in a timely manner and maintain a compact size. Shortening is most often used on indoor vines.
Houseplant pruningHouseplant shaping pruning
Crown shaping are measures used on houseplants, shrubs and bushy perennials that can be made more compact or austere if pruned properly. Stimulate thickening and maintain ideal size, keep the plant in shape or style it - these goals are up to you to decide.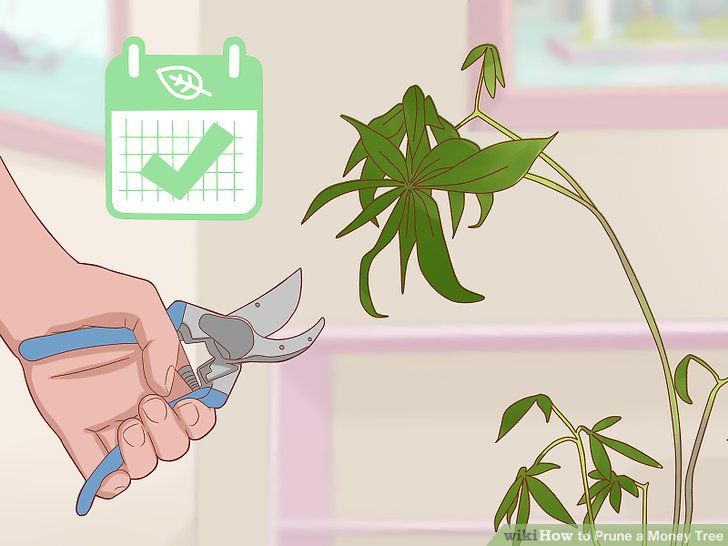
Formative pruning is designed to perform several tasks at once:
- stimulation of the growth of lateral and young shoots;
- flowering stimulation;
- prevention of stretching, formation of long, sparsely leafed, unattractive twigs;
- crown alignment, maintaining its symmetry and attractiveness;
- artificial creation of a strict silhouette - spherical, pyramidal, umbrella-shaped, bouquet, etc.;
- reduction in the size of large plants;
- maintaining a consistent contour or shape;
- foliage thickening.
All these measures help to preserve the beauty of indoor plants and make them more attractive, corresponding to the style of the interior and the tastes of the owners.
Formative pruning is traditionally carried out most often in early spring, when the first signs of active growth of the plant appear, or at the very end of the dormant stage. For flowering plants, pruning can be done after flowering, removing all faded parts and creating the desired silhouette and size, stimulating the formation of shoots that will bloom profusely next year. But you always need to focus on the characteristics of flowering:
- for plants that bloom on annual shoots, pruning is carried out at the beginning of active growth;
- plants flowering on last year's shoots do not form, removing faded parts to the first true leaf;
- Prone to degenerate plants are pruned after flowering with regular rejuvenation.
As part of any formation, there is a mandatory procedure - removal of excess, thickening and unproductive shoots, or general sanitary cleaning. With it, and it is worth starting pruning. Only after getting rid of everything superfluous, proceed to the actual formation.
The most reliable guide for shaping pruning is the symmetry score. The uniform growth of the plant and various deviations from symmetry indicate the areas that need to be trimmed. When creating a strict form, you can use a special template or frame, which is applied to the plant, cutting off all unnecessary. But focusing on uniform growth and determining symmetry will help trim evenly even without a template.
Shaping pruning can be light or heavy. Usually it is carried out, focusing on the desired dimensions or contours. You can cut the shoots of indoor plants up to 2/3 of their length, but you always need to focus on the number of buds and leaves, growth rates, and the plant's tolerance for pruning. Leaving less than 2 buds on the branches is undesirable.
New shoots on a pruned houseplantRejuvenation of houseplants
Rejuvenation pruning, in contrast to the formation of plants, is aimed at crown renewal, growth acceleration and restoration of decorativeness. They are carried out on old or rapidly aging plants, those indoor crops that are naturally prone to stretching shoots, dropping lower leaves, losing their "shape" and compact size. Plants that have suffered from improper conditions of maintenance or care also need rejuvenation.
Without rejuvenation, indoor shrubs and trees, such as roses and hydrangeas, will not delight with their beauty for many years. But rejuvenating pruning helps to always stay in shape for the usual indoor cultures from among the classics like pelargonium and fuchsia.
The timing of anti-aging pruning depends on the age and condition of the plant. The optimal period is spring or after flowering is completed. But in any case, rejuvenation is best done during the stage of active growth, because after cardinal pruning during the dormant period, houseplants may not recover.
Anti-aging pruning is available:
1. Regular. With the constant removal of the oldest shoots, the constant renewal of the crown is stimulated, the problem of loss of decorative effect over time is prevented. Thanks to regular rejuvenation, indoor plants retain a permanent decorative effect, there is no need for radical pruning and there is no threat of plant loss.
2. Cardinal. They are carried out on indoor crops that have lost their decorative effect, are at a respectable age or on plants that have been seriously affected by diseases and improper care (especially too hot wintering or dry air). A strong shortening of all shoots or cutting out parts of the plant stimulates the growth of new shoots and the complete renewal of the crown. Restoring a houseplant after a radical pruning usually takes a lot of time, it completely loses its attractiveness and can please with its appearance only after a long period of time. It is always better to split the rejuvenation into several procedures than to take really drastic measures.
Regular pruning involves cutting old shoots down to 3-5 buds and cutting 1-3 oldest branches that will be replaced by new growth to the base or short stumps. Cardinal pruning is much more aggressive, the shoots of the plant are cut to the level of the soil, the main stem or short stumps. When performing anti-aging pruning, it is important to assess the condition of the plant itself and the features of its development.
In some crops capable of releasing new shoots from dormant buds and giving root shoots, you can not be afraid even of pruning for a stump.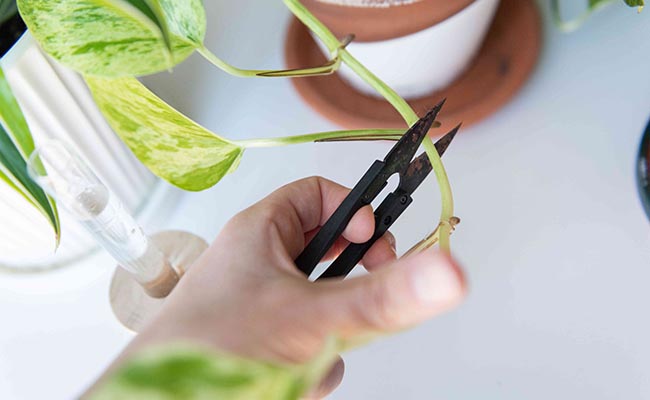 In plants that form a central trunk or are slow growing, too much full pruning is likely to result in their death. But in fast-growing and prone to branching plants, rejuvenation will occur, even if only 1-2 buds are left on the shoots.
A separate type of anti-aging pruning is considered to be a regulating haircut on houseplants that have suffered from improper wintering. Growth, loss of leaves, stretching, which the owners of plants that prefer a cool wintering have to face, are very common. After all, the conditions of city apartments are so different from the optimal range of required temperatures.
Such rejuvenation is carried out more sparingly. Its main goal is to restore the oppressed plant and stimulate crown renewal. Usually, after an unsuccessful wintering, sanitary pruning is carried out, and the remaining branches are cut, leaving 5-6 buds on the shoots, shortening only a few upper nodes.
Easy houseplant pruning guide for beginners
Top
12/28/2020
1 star2 stars3 stars4 stars5 stars
We understand the types of pruning, when it can be done and how to do it right.
Pexels
1 Choose your type of pruning
The first thing houseplant owners need to know is that there are four types of pruning with different functions.
Sanitary
This is the most common and in-demand pruning that needs to be done most often. During this procedure, all dried leaves, branches, aerial roots, faded flower stalks are carefully removed. Sometimes it is carried out urgently if some kind of disease or decay has begun.
If part of the leaf is damaged, you can not cut it to the green healthy part, but leave a thin strip of dried tissue.
This pruning is often combined with topsoil replacement to renew and improve the soil.
Pexels
Shortening
This trimming is also known as pinching or pinching. This is a shortening of the growth point. It is carried out when they do not want a large plant to grow too much. After that, it begins to build up the leaf mass and becomes more lush, without wasting energy on growing in height or width. This pruning is very useful for vines, which often stretch out in length and do not release new leaves.
This procedure is also worth doing if you have a young, fragile plant that has released too many buds. If you reduce their number, flowering will be longer, and the flowers will be larger and brighter.
Unsplash
Shaping
This is a decorative procedure to give an aesthetic appearance. The branches are shortened by no more than two-thirds, and at least two buds are left on them. At the same time, it is important to pay attention to the fact that the cropping is symmetrical and not aggressive.
Pexels
Rejuvenating
It is applied to all rapidly aging or old flowers in the house. This primarily applies to roses, hydrangeas, pelargoniums and fuchsias. Old branches, on which there are no leaves or there are very few of them, are cut off, leaving 5-7 cm from the trunk. After that, the plant is protected from direct sunlight and often sprayed with a spray bottle. This provokes the growth of new kidneys.
Pexels
2 Determine when plants can be pruned
Pruning is carried out during the active growing season - in late February and early March. This is a period of active growth. It is not worth starting it immediately after flowering, as the plant has spent too much energy on it, it goes into a dormant period and is not ready for new stress. After flowering, you can only carefully remove dried flower stalks and leaves.
Broken and damaged branches may be cut at any time if the plant is healthy and not flowering. At the same time, you need to wait until the juice that stands out dries up, and sprinkle the cut with charcoal.
Pexels
3 Remember the Rules for Trimming
There are several basic trimming principles that apply to all types of trimming. Don't forget to stick to them.
- Use good tools. For thin branches, knives or bonsai scissors are suitable, and for thick branches, you need a garden pruner. In this case, the blades must be clean and well sharpened. The sharper the tool, the less trauma, so clerical scissors are not suitable.
- Don't forget about hygiene. All instruments must be processed. You can do this with alcohol or boiling water. It is important to repeat the treatment for each plant that you decide to prune.
- Protect hands, respiratory organs and eyes. If you cut a flower with poisonous juice, wear disposable gloves and a protective mask, take care of your eyes.
- Do not combine pruning with transplanting. You need to let the flower get away from stress, wait a bit, at least two weeks.