How to refurbish rusted metal
How to Paint Rusted Metal
By
Lee Wallender
Lee Wallender
Lee has over two decades of hands-on experience remodeling, fixing, and improving homes, and has been providing home improvement advice for over 13 years.
Learn more about The Spruce's Editorial Process
Published on 11/04/20
mvp64 / Getty Images
Project Overview
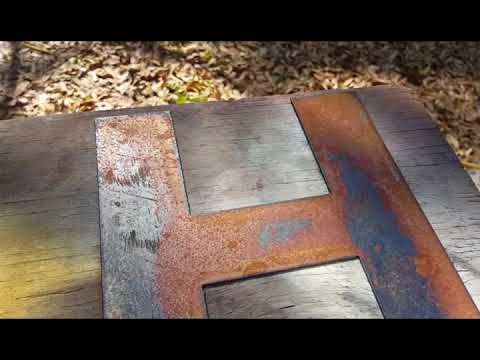
It's all too easy to look at a rusted metal item and think that it cannot be saved. Bumpy, flaking rust hardly looks conducive to a beautiful paint job. But a rusted metal item can be preserved and revitalized with proper cleaning, priming, and painting. With the right techniques, you'll be able to preserve most rusted metal items that still have enough underlying structure.
Basics of Painting Rusted Metal
Can You Paint on the Rust Itself?
Whenever possible, it is always best to sand off the rust and expose only bare, unrusted metal for painting. But it is possible to paint directly on top of the rust, as long as the surface is stable. This paint should always be laid on top of a primer designed for metal.
Will the Rust Show Through the Paint?
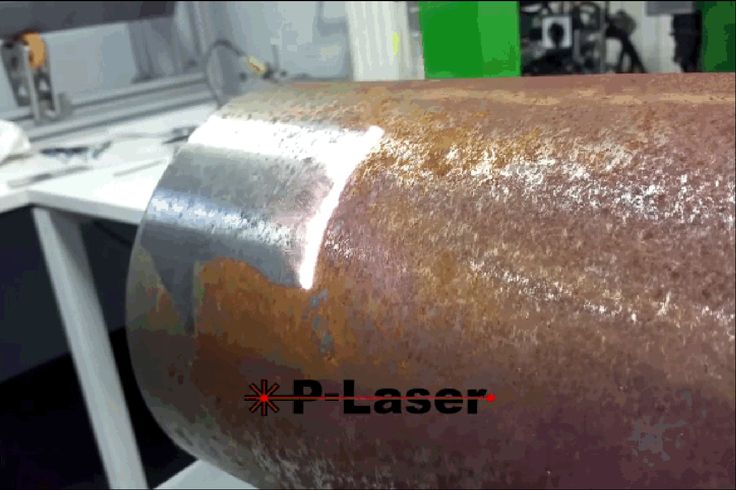
Untreated reddish-brown rust can bleed through paint, especially lighter color paints. Rust conversion primer turns the rust black and its polymers seal the rust against bleeding. As long as the metal is properly primed, the rust should not show through the paint.
Can You Stabilize the Rust Before Painting?
Oxygen, water, and iron are required for oxidation—the process that creates rust. Using a rust conversion primer before painting halts oxidation. Tannins in the rust converter turn the rust black and stop the oxidation. Polymers in the converter seal the metal against oxygen and water.
Make sure that all areas of the metal—even the back side—are coated. Even a small uncoated section is enough to allow oxidation to continue.
When Is an Item Too Rusted to be Painted?
Generally, items that are deeply pitted or pinholed are too rusted for painting.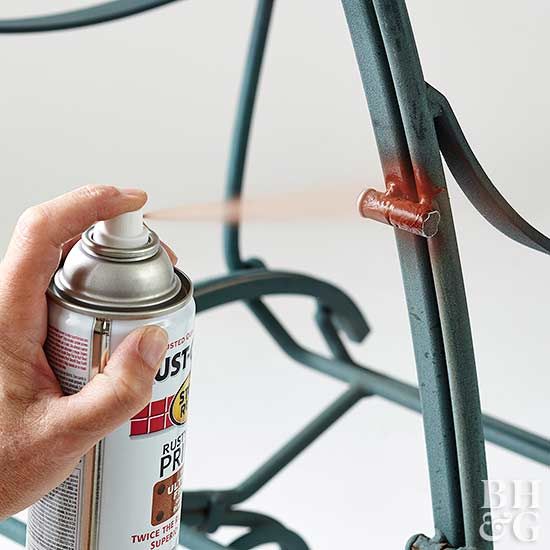 Often, an item might look promising at first. Yet scraping and brushing take off layer after layer of rust, revealing no substantial metal underneath.
Safety Considerations
Painted items with rust may have been earlier painted with lead-based paint. Homes built before 1978 may have lead-based paint. Metal items popular with crafting and restoration such as patio chairs, tables, signs, and housewares may be painted in lead-based paint, too. Observe all safety techniques for working with lead-based paint.
Equipment / Tools
- Wire brush
- Sandpaper
- Shop vacuum
- Putty knife or five-in-one tool
- Latex gloves
- Eye and breathing protection
- Hammer
Materials
- Degreaser or denatured alcohol
- Rust converter primer
- Water- or oil-based paint
-
Remove Loose Rust
Use the wire brush to slough away all of the loose rust and any paint.
 Begin lightly, removing only the rust layers that come off easily. Use a putty knife or a five-in-one tool to scrape away large sections of rust.
 Once the large rusted sections are gone, tap the metal lightly with the hammer to assess whether the metal is strong enough to be painted. It is usually at this point that structurally unstable metal will collapse.
-
Sand the Rust
Sand the rusted metal to remove more of the rust and to smooth down the surface. Frequently clean off the surface and the sandpaper. Sand a few inches beyond the rusted area, as well.
-
Clean the Surface
Use the brush attachment on the shop vacuum to clean off the surface. Use a degreaser or denatured alcohol to clean off any grease or oil. It is difficult to get a rusted area perfectly clean, so the goal is to remove the majority of the flakes and dust.
Tip
Unless you also want to remove paint, avoid using paint thinner or mineral spirits.
 They can soften the old paint, resulting in a rippled or wavy texture for the new paint.
 -
Apply the Rust Converter
With the rusted area cleaned off and dry, spray the rust converter over the rusted area and a few inches beyond. Apply a thin coat and avoid drips. Many rust converters are clear when they are first applied, then turn black. Let the rust converter dry for at least 24 hours.
-
Paint the Metal
Apply the top color coat. Some rust converters may require only an oil-based top coat, not a water-based paint; consult the rust converter instructions. Because the rust converter is black, you may need to apply three or four coats of paint to reach the desired color.
Tips For Painting Rusted Metal
- After brushing and sanding the rusted metal, move to the priming stage fairly quickly to avoid the metal from rusting up again.
- Small pitted or corroded areas can be filled in and smoothed over with a fiberglass-based filler.

- If the area is large or particularly difficult, use a wire wheel attached to a hand grinder instead of brushing with the hand brush.
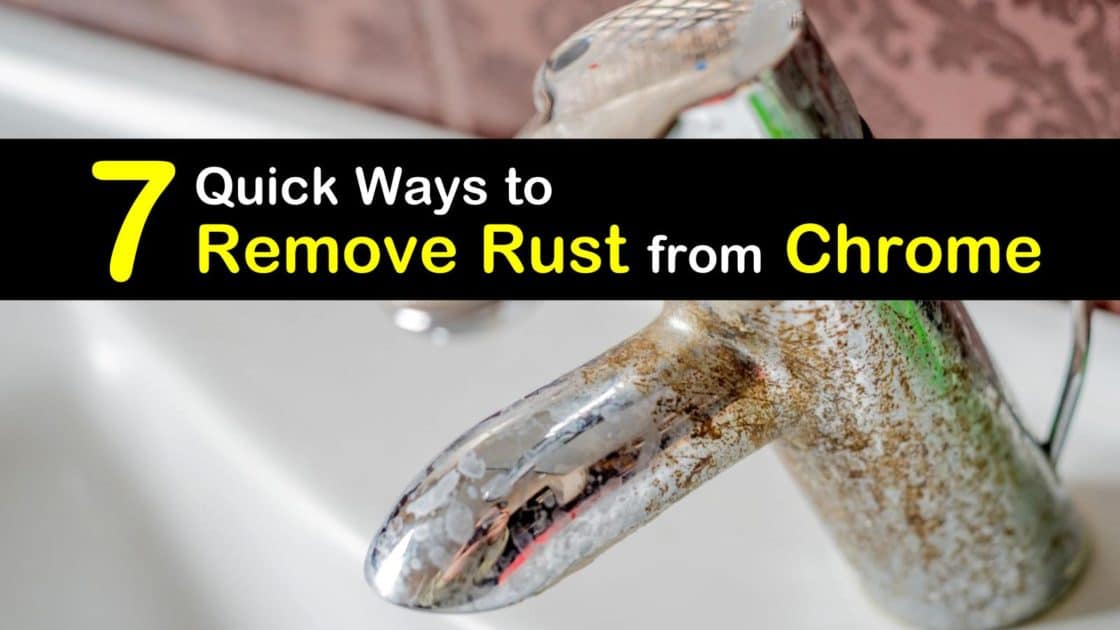
5 Ways to Remove Rust From Metal (Tested & Approved)
Home Projects
Cleaning
DIY
How To
by Ashley Poskin
updated Sep 19, 2022
We independently select these products—if you buy from one of our links, we may earn a commission. All prices were accurate at the time of publishing.
SavePin ItSee More Images
Rust may not be dangerous, but it’s a pain nonetheless. When rust forms on your tools, it can not only make them a mess to hold (hello, rust stains!), but they won’t function as well either. Remember that set of garden shears that barely opens and closes because it’s rusty? Exactly.
For more content like this follow
When water finds its way to the surface of a metal tool and sits there for days on end, the result is that an oxidation process can take place and leave your tool rusty.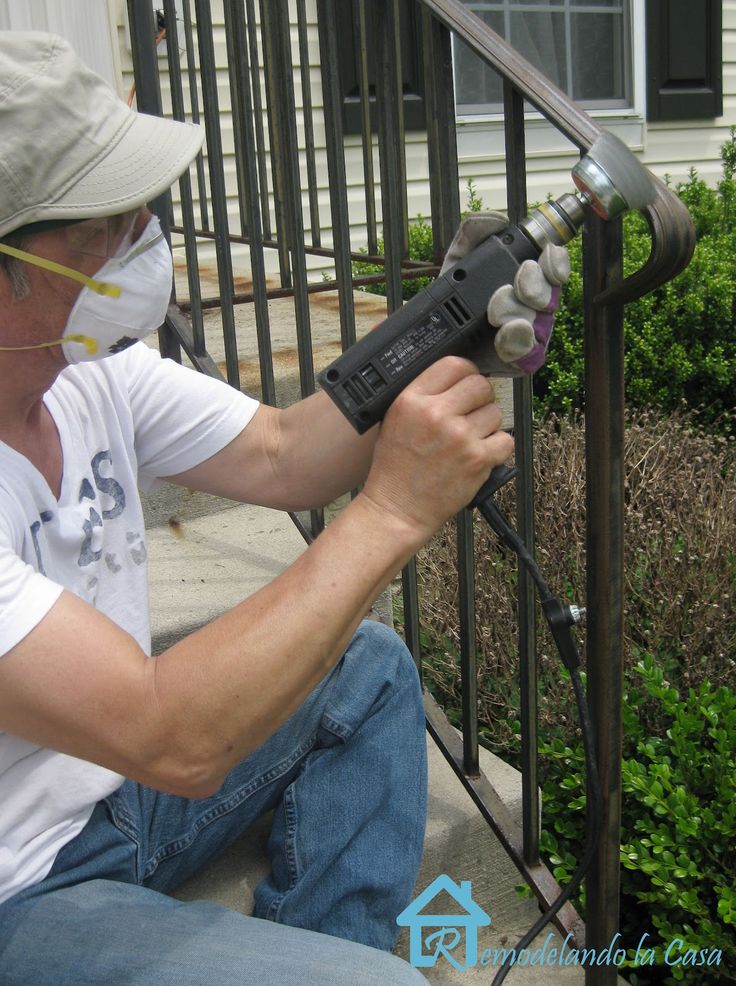 But this doesn’t necessarily mean it’s the end of the road for that item! Wondering how to remove rust? It will take some elbow grease, but you’ll be glad to know that pesky rust can be removed from a metal surface.
We’ve rounded up a few of our favorite methods for how to remove rust, including one of our all-time favorite cleaners, vinegar! A few of these methods might sound far-fetched, but never fear, dear readers—we’ve tested and approved each one before passing it on to you.
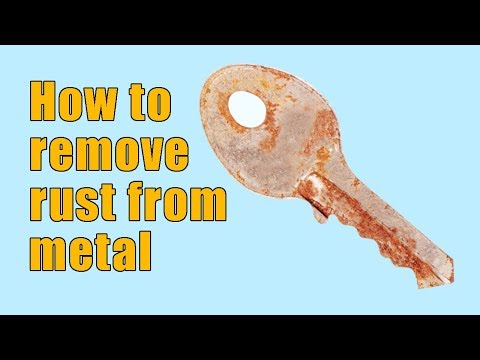
Watch
How To Remove Rust From Metal
SavePin ItSee More Images
Baking soda
Step-by-step method:
1. Rinse the metal item and shake dry.
2. Dust with baking soda (it will stick to the damp areas), making sure to cover all rusty areas.
3. Leave the item for an hour or so, then scour with steel wool or a metal brush, removing the rust down to the metal. (If cleaning a pan, use a scouring pad. )
)
4. Rinse, and towel dry.
Best used on: Less severe rust, baking pans, light rust rings, thin metal.
Pros: Simple method using one cheap, common ingredient.
Cons: Takes up to one hour before you can really start to work away the rust. The key to rust removal is using the steel wool or scouring pad, so be prepared to use some elbow grease.
SavePin ItSee More Images
SavePin ItSee More Images
Vinegar Bath
Step-by-step method:
1. Submerge your item in white vinegar and let sit overnight.
2. Remove your item and scrape with a metal brush or steel wool.
3. If your item can’t be submerged, soak rags in white vinegar and wrap the rusted area.
Best used on: Significant rust found on tools or items that are all steel and can be submerged without compromising the integrity of other surfaces.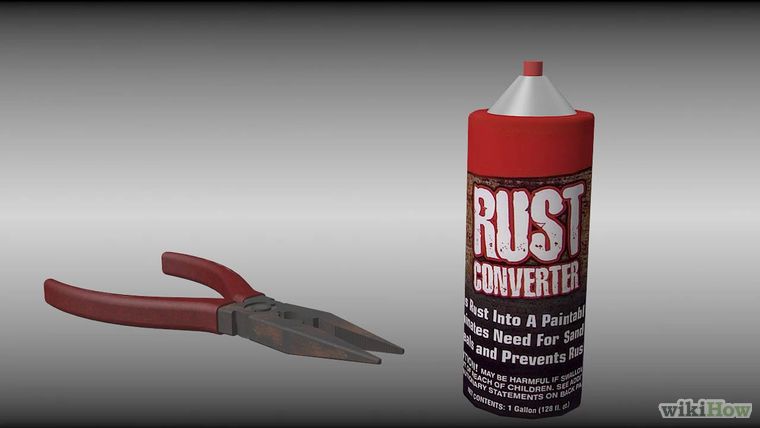
Pros: Super easy “let sit and forget” method. Takes hardly any elbow grease to work away the rust once you remove the item from the vinegar.
Cons: The item needs to soak overnight, so it takes a while to achieve results.
SavePin ItSee More Images
SavePin ItSee More Images
Potato and Dish Soap
Step-by-step Method: Sounds crazy, but it works like a charm! Here’s what to do:
1. Cut your potato in half and cover the open end with dish soap.
2. Use the potato like you would a scouring pad and watch the rust fade away as it reacts with the soap and potato.
Best used on: Small, less-stubborn rust stains on easy-to-reach surfaces.
Pros: Easy and relatively fast method for removing rust. Works great on kitchen appliances. Uses items you probably already have in your pantry.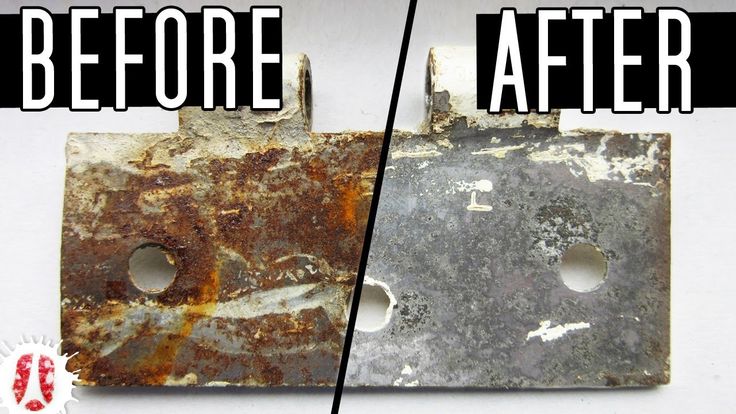
Cons: This is probably the messiest method for removing rust. Be sure to work over a sink, or somewhere outdoors where cleanup is easy.
SavePin ItSee More Images
SavePin ItSee More Images
Citric acid
Step-by-Step Method: You might not have this laying around the house, but it can be easily found at most health food stores. Here’s how to remove rust with citric acid:
1. Add a few inches of hot water to a bowl
2. Sprinkle in 2-3 tablespoons of the citric acid
3. Submerge your item and let sit overnight
4. Remove in the morning, scrub off lingering rust flecks with a brush
5. Rinse and pat dry
Best used on: Significant rust found on tools or items that can be submerged without compromising the integrity of other surfaces and coatings (citric acid will remove paint!).
Pros: Works like a champ! Another “let sit and forget” method.
Cons: Most people won’t have this ingredient in their pantry, but it can easily be found in health food stores or online.
SavePin ItSee More Images
SavePin ItSee More Images
Lemon and SaltStep-by-Step Method:
1. Generously coat the rusted area in a layer of salt
2. Cut a lemon (or lime) in half, and squeeze the juice over the salt.
3. Let the mixture sit for about 30 minutes
4. Scrub away the rust with the rind.
5. If rust remains, repeat the procedure and let the salt and juice sit for another hour or two, until rust disappears completely.
6. Rinse, then pat dry.
Best used on: Less stubborn rust stains. Works great for kitchen knives that have little bits of rust here and there.
Pros: Minimally abrasive process, uses items you’ve probably already got at home.
Cons: If you’re scrubbing rust off a kitchen knife, this process can be tricky to navigate without cutting yourself. Be sure to wear a protective glove, or work on a flat surface to minimize the risk of accidents.
SavePin ItSee More Images
Best used on: Less stubborn rust stains. Works great for kitchen knives that have little bits of rust here and there.
Pros: Minimally abrasive process, uses items you’ve probably already got at home.
Cons: If you’re scrubbing rust off a kitchen knife, this process can be tricky to navigate without cutting yourself. Be sure to wear a protective glove, or work on a flat surface to minimize the risk of accidents.
Re-edited from a post by Sarah Starkey originally published on 3/10/2011.
How to remove rust from metal at home
Published:
Corroded areas can be cleaned with normal aluminum foil. If corrosion is stopped in time, objects can be saved. Effective ways to clean rusty metal objects at home were suggested by housekeeping experts S. Potapkin, Yu. Maricheva, I. Tikhonova and M. Zhukova.
Mechanical removal
Rust is a product of spontaneous destruction of iron and its alloys (steel, cast iron). A yellow-red or greenish coating appears due to the oxidation of the metal under the influence of water, oxygen or chemical oxidizing agents, in particular acids. nine0005
If the metal is slightly oxidized, the rust can be easily removed with hard abrasive tools, among which the most popular are:
- sandpaper;
- drill bits;
- metal brush;
- grinder.
Aluminum foil can remove rust deposits. Do this:
- Tear off a large piece of foil and roll it into a tight ball.
- Dip a foil ball into table vinegar.
- Use the foil as a rust brush - rub the rusted areas with force. The foil is less rough than steel wool, but it does an excellent job of removing rust.
 nine0008
Toilet bowl cleaners
If the rust coating is solid, use radical methods - chemical solutions. Great for removing rust from any iron alloy homemade toilet cleaner. It contains alkali or acid (hydrochloric, oxalic), which dissolves oxide molecules.
The agent is available in the form of a gel, liquid or powder. The gel preparation is best suited for metal processing. To get rid of rust, do this:
- Apply chemical to problem area.
- Leave for 10 minutes.
- Remove rust with a dry cloth or soft brush.
- Wash the metal surface with warm water.
The main condition when using household chemicals is caution. Avoid skin contact with acid and inhalation of vapors. Wear rubber gloves and a respirator when working.
Anti-corrosion agents
Another radical way to get rid of traces of oxidation is the use of special anti-corrosion agents. The chemical solution interacts with the iron oxide, dissolving it in minutes.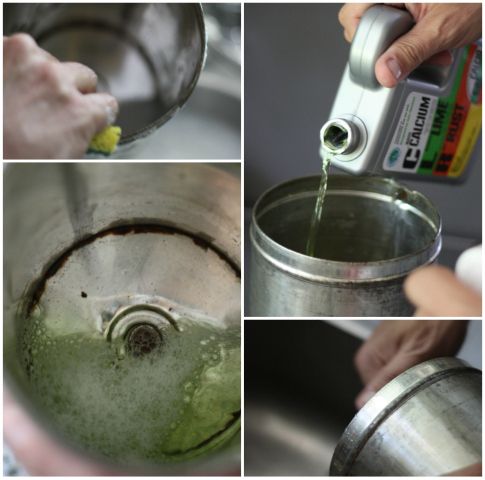 At the same time, the agent forms a protective film that prevents the reappearance of rust. There are 2 types of anti-corrosion agents:
- Acidic. Such funds are applied only to the centers of corrosion, since the acid corrodes intact metal. Some acids that are part of the products are toxic.
- Neutral. More expensive, but effective and safe products that remove dense rust, but do not destroy clean metal areas.
Rust can be removed as follows:
- Clean the metal surface from dirt and loose layer with sandpaper or a metal brush. nine0008
- Treat the rusty surface with a degreaser.
- Brush or spray one coat of rust inhibitor.
- Let dry (approx. 30 minutes). Then clean the rust with a piece of dry cloth.
- Apply a second coat of rust inhibitor.
After drying (2-4 hours) the metal is ready for painting.
Rubber gloves and respirators protect when working with acids: PexelsCitric acid
Citric acid powder does an excellent job of removing iron oxide from the surface of steel objects without damaging the metal.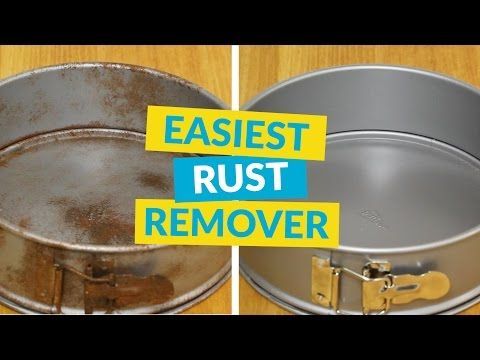 Cleansing instructions are simple:
- Wash the rusty object in soapy water (10 ml of liquid detergent per 1 liter of warm water).
- Pour warm water into a plastic container and add citric acid powder (50 g per liter of liquid). Stir.
- Dip a rusty object into the solution and leave for 24 hours.
- Remove the tool and inspect it. If in some places the oxide has not gone away, rub it with a brush.
- Wash the treated metal in a soapy or soda solution so that it does not oxidize, and clean with sandpaper. nine0008
S. Potapkin and Yu. Maricheva, authors of the work “Desk book on housekeeping. 1000 practical tips for all occasions”, recommend rubbing the treated areas with hot fine sand or wood ash after rust removal. After, if necessary, the cleaned places are painted over.
Vinegar
Synthetic (table) or natural vinegar (apple, wine) is an aggressive product that contains acid. The drug disinfects, kills harmful bacteria on the metal, quickly corrodes rust.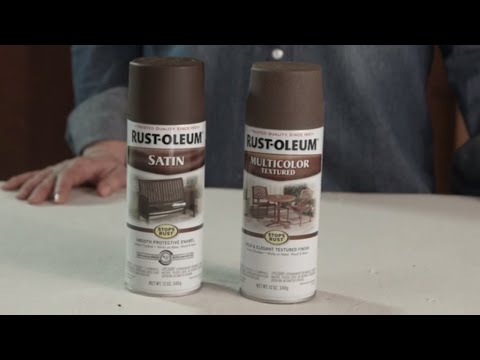 Author of the book “A Clean Home is a Happy Home. Useful tips on putting things in order and comfort "M. Zhukova offers a simple way to clean taps and other metal objects:
- Dilute white vinegar with water 1:1.
- Spread the resulting solution over all rusty areas with a kitchen sponge. Strongly rusty items are best completely immersed in a solution of vinegar.
- Leave for several hours (2 to 24 hours).
- Remove items and brush if necessary. Rinse with water afterwards.
The cleaned surface oxidizes quickly, therefore it is necessary to protect it from oxygen by coating it with grease or paint. nine0005
Soda and salt
Iron and cast iron utensils rust quickly from frequent contact with water. To remove rust from metal utensils, follow these Cosmopolitan tips:
- Scrub the item with an abrasive wire brush. This will remove burnt food debris and the top rusty layer.
- Wipe dry with a cloth towel.
- Put the pot/pan on the stove (high heat).
 Heat until the pan is evenly hot. nine0008
 - Mix baking soda and table salt in equal proportions.
- Apply mixture to hot item.
- Rub problem areas with a brush or coarse cloth. As you rub, the mixture will darken and the cast iron will clear.
- Remove salt and soda residue. Dry the item clean with a dry cloth.
If you need to clean iron tools, do not heat them. Prepare a mixture of salt and soda, add a little water to make a homogeneous thick slurry. Apply the mixture to the rusty areas, soak for 30 minutes, then rub with aluminum foil or a brush. nine0005
After such cleaning, the integrity of the surface structure of the metal is violated, so it is necessary to apply protective agents. The sealer will close the access of water and air to the metal, stop the further spread of rust.
Salt will help get rid of rust: Unsplash / blackieshootOther gentle options
If you are afraid of ruining a metal item, use gentle rust removal methods.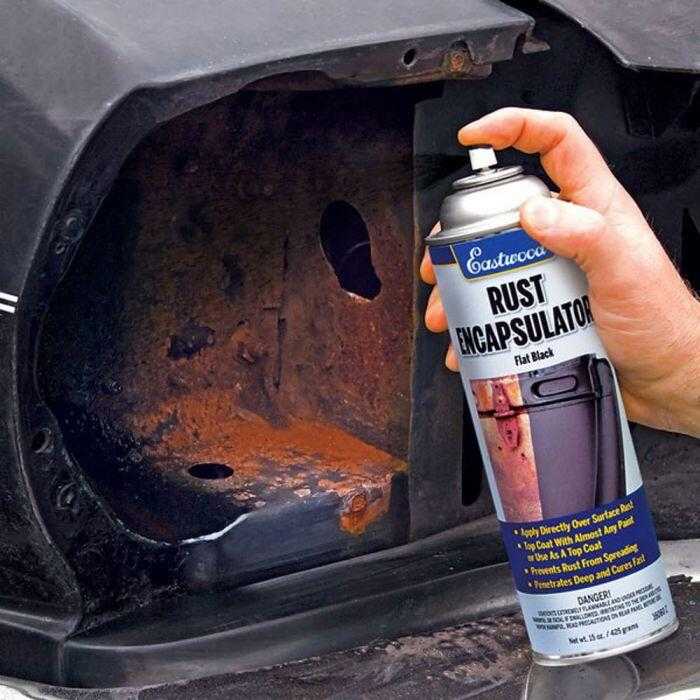 Several options for cleaning iron and its alloys were presented by I. Tikhonova in the book "Soviet Housekeeping":
- Ketchup or tomato sauce. This is the fastest and safest way to remove rust from metal. Apply the tomato composition to the rusty areas, hold for 10-20 minutes and rinse with water.
- Vinegar, salt and flour. This composition removes rust from brass. Mix 120 ml white vinegar, 1 tsp. salt and a few tablespoons of flour to form a pasty consistency. Apply the paste to the rusty area and leave it alone for 30 minutes. Then wipe the surface with a dry cloth, rinse with water and dry with a towel. nine0008
- Potato. The vegetable contains oxalic acid, which destroys rust. Sprinkle salt on a piece of peeled potato and rub the rust.
- Fish oil. It should be applied to problem areas, kept for 2 hours, then remove the rust with a sponge. It should be noted that fish oil forms a film on the surface that prevents further rusting of the part.
Means for combating metal corrosion are different. Choose a rust remover based on the degree of damage to the metal. Sandpaper, fish oil, ketchup or vinegar will cope with small rusty spots, remove extensive rust with aggressive substances or chemical compounds. nine0005
Original article: https://www.nur.kz/household/cleaning/1679507-kak-udalit-rzavcinu-s-metalla-v-domasnih-usloviah/
How to restore any rusty old tool to "ideal"
How to restore rusty old tools (three ways)
Rescuing old tools will require patience, persistent abrasives and good eyesight.
A forgotten tool has a strange attraction. He beckons, attracts. Take it in your hands, and the next thing you will do is scrape off the layer of rust with your thumbnail, trying to make out the name of the manufacturer of this tool. nine0005
Do you vaguely remember how it fell into your hands: either you took it at a sale, or it was a gift from your father-in-law, or maybe it was left as a souvenir by a compassionate neighbor during the move, just so as not to throw it away .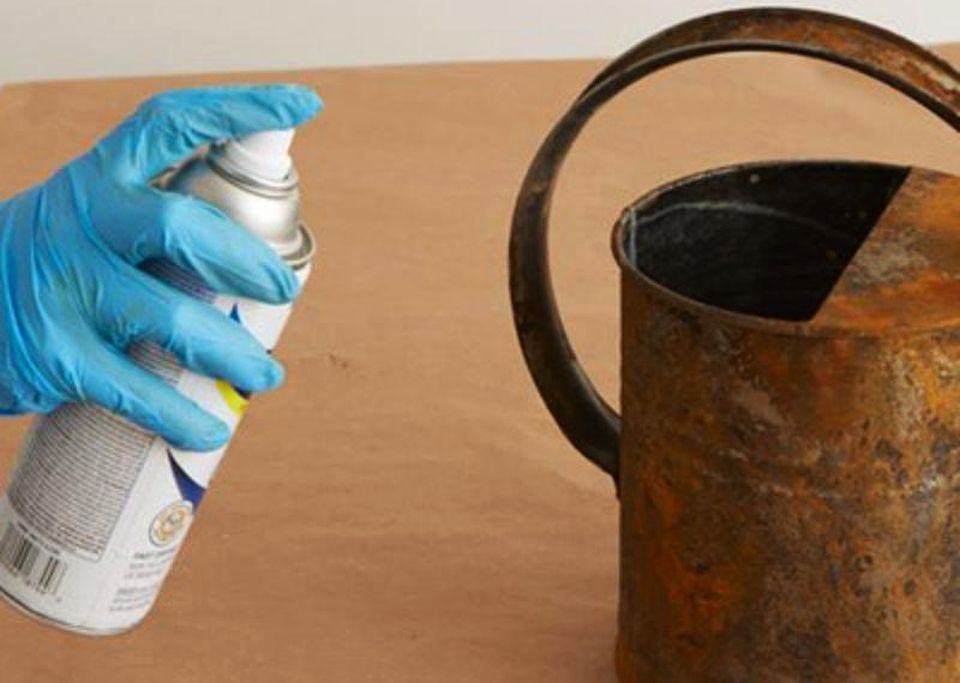 ..
..
"Everyone has these little lost jewels" , - once said my friend, an excellent carpenter, who gravitates towards collecting assorted tools, looking thoughtfully at a rusty hammer lying in the corner of my balcony. Planes, chisels, chisels, hammers, pliers and a whole bunch of rare and strange devices for working with materials of different hardness from different countries and eras decorated his workshop. nine0005
See also: 5 inexpensive auto mechanic tools you can't live without
like a new instrument. They waited for their turn to work, their oiled sides gleaming, each in his place. It always surprised me. How does he keep such old instruments in such great order...? Decided to find out his secret. nine0005
“Restoring them is pretty easy,” said a friend, “but, unfortunately, I'm leaving early tomorrow morning on a business trip, so I won't have time to tell you all the details. You better read about it somewhere on the Internet.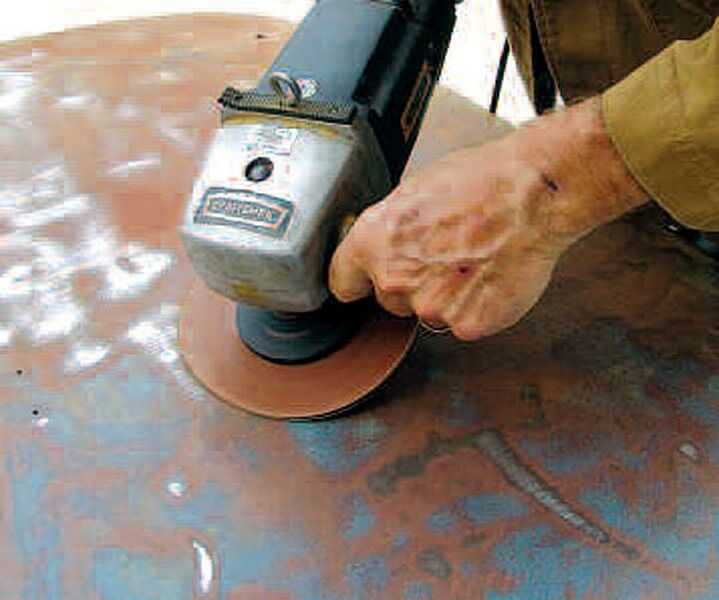 There are a lot of good ways to find it."
And indeed, I found it. I will give excerpts from one such article in this material. In my opinion, it will turn out to be a good instruction for the practical restoration of old instruments that have long been abandoned to the mercy of fate. nine0005
…
“We took a bunch of old instruments with us and went to the studio (a former church in North Salem, New York) to put them in order. We realized that all it takes is some basic chemistry and a bit of effort to salvage tools that look like they've been sitting on the ocean floor for centuries. But is it really rubbish?
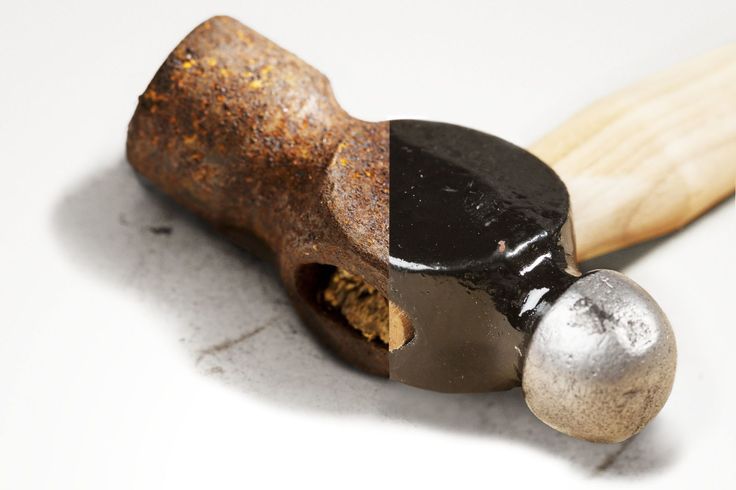
The round head of this figured hammer (in the title photo) looked deader than dead. But as soon as the rust was removed from the metal, the steel touched by rust was polished to a shine, a thin layer of machine oil was applied to the metal and a new handle was added to the hammer, as life completely returned to this thin tool for elegant work.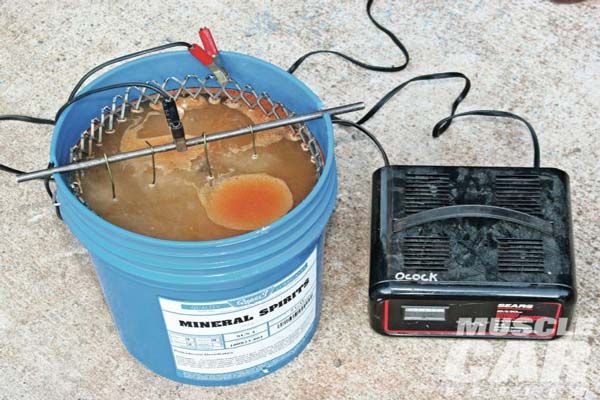 nine0005
Method for cleaning a large area of rust. Rusty, wobbly table saw
1980s Craftsman table saw bought at a church auction for $80
A metal saw that will sit in an unheated garage, store, or barn will rust sooner or later. Condensation settles precisely on steel and cast iron parts, as they are colder than the surrounding air.
Rust makes it difficult for a piece of plywood to slide on a table that should be smooth and non-abrasive. Because of it, it becomes more difficult to expose the blade or adjust its slope. This table is 1980s Craftsman, bought at a church auction for $ 80, very soon will find a second life. Here's how to revive it.
The first step was to remove the saw table from the bed. After that, she was loaded into a Ford F-150 and taken to a warm workshop for further work.
INSTRUMENTS ARE tarnished, and when they are tarnished, they are put aside, and when they are put aside, they start to rust
Then the dismantling of the old equipment began: they unscrewed the cast-iron wings on each side of the saw, removed the engine.
The good news was that the motor came with two capacitors, one to start the motor spinning and the other to provide the extra push to start the winding. So more reliable. The electric motor itself, the motor shaft and pulley were in good shape. Before starting the rust work, all dirt, sawdust and cobwebs were removed from the nooks and cavities of the saw. nine0005
The work for which everything was started has begun.
Next on the agenda was removing surface rust from the saw table and wings.
To do this, , the rusty surface was first moistened with kerosene - it acted as a solvent and coolant (lubricating fluid). Leaving him alone for an hour, the restorers returned with a drill.
To remove rust from , a 240 grit aluminum oxide nylon abrasive brush was clamped into the jaws of the drill. nine0021 At low speeds of about 500 (the drill must be with adjustable speed), moving back and forth, the brush cleaned the rust without much difficulty without damaging the metal surface.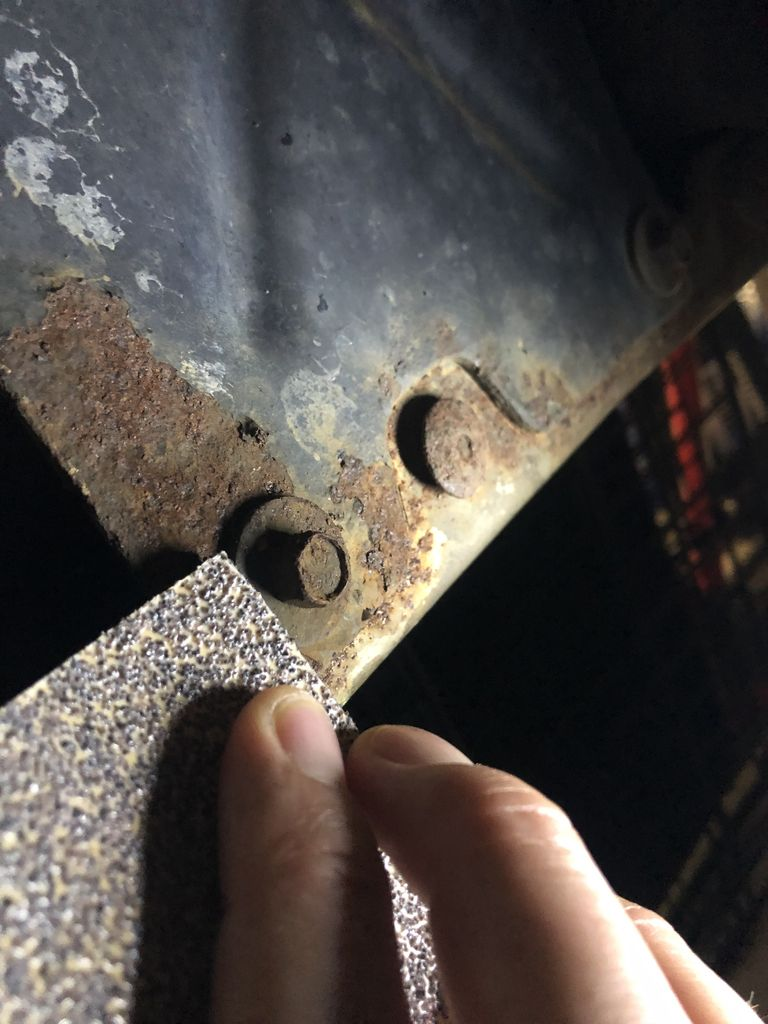
Be aware that removed parts may not fit back into place. This is exactly what happened with the wings that extend the tabletop - it was not possible to align them with the plane of the tabletop. They had to be gently tapped until they were in the grooves in the desired position. The main thing here is not to rush. nine0005
Don't forget to put all parts back on reassembly. In the case of the saw, we are talking about an electric motor, a new saw blade and other small elements that have been put in their rightful places.
Rust removal method is not for everyone: hydrolysis in the fight against rust by Mizantrop vlogger
How to clean up corroded hand tools
Rust can be removed from metal tools and any oxide can be removed. It doesn't even matter how much rust has penetrated the metal structure. nine0005
Here's an example:
To restore a pile of hammer heads and a couple of axes, first remove everything unnecessary from them.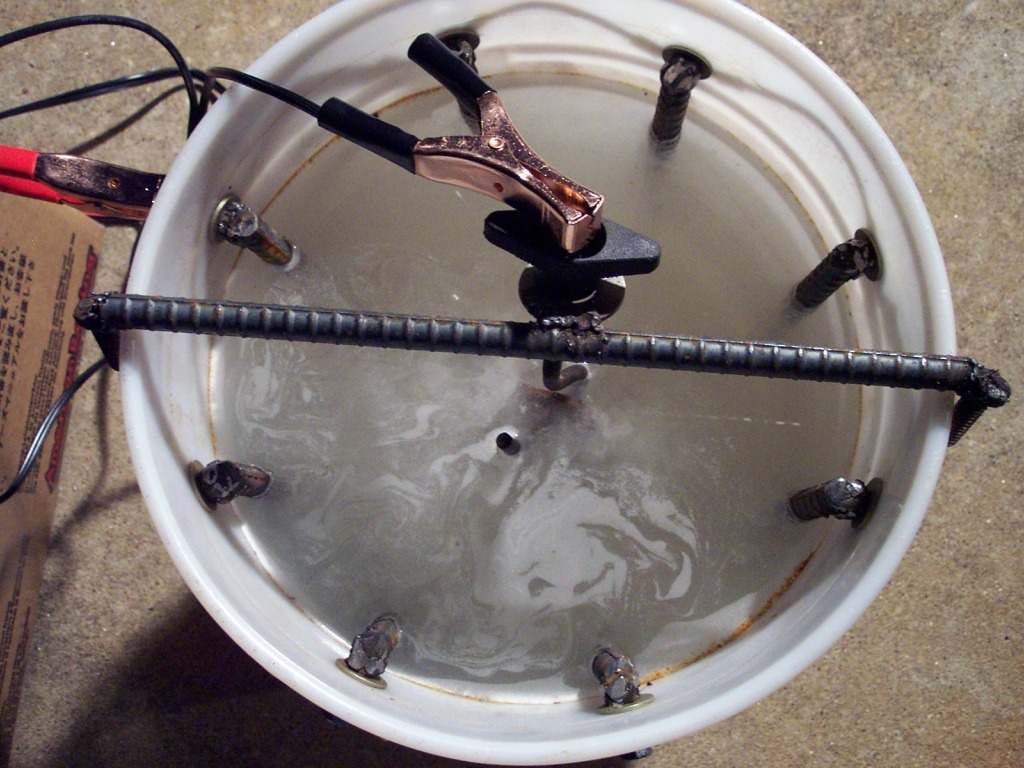 The half-rotted parts of the handles and the old handles will no longer be needed. Usually, in order to remove the handle, it is most convenient, holding a hammer or hatchet in a vice, to knock out the rest of the handle with an object of a suitable diameter. Or splitting a rotten tree with a sharp object.
Corrosion can be removed with white vinegar. nine0022 Place the metal to be treated in a plastic container, pour enough white vinegar to submerge the parts.
Depending on the degree of oxidation, leave the parts for several hours or days.
You will need steel wool for the second cleaning step. Please note that iron wool has eight grades of abrasiveness: from the most gentle - 0000 # to the most rough - 4 #. The thicker the rust layer, the coarser you should use, ideally reducing the abrasiveness as the rust is removed. nine0005
When there is no more rust left, rinse the parts thoroughly in clean water to remove any traces of vinegar, finally wiping the parts dry.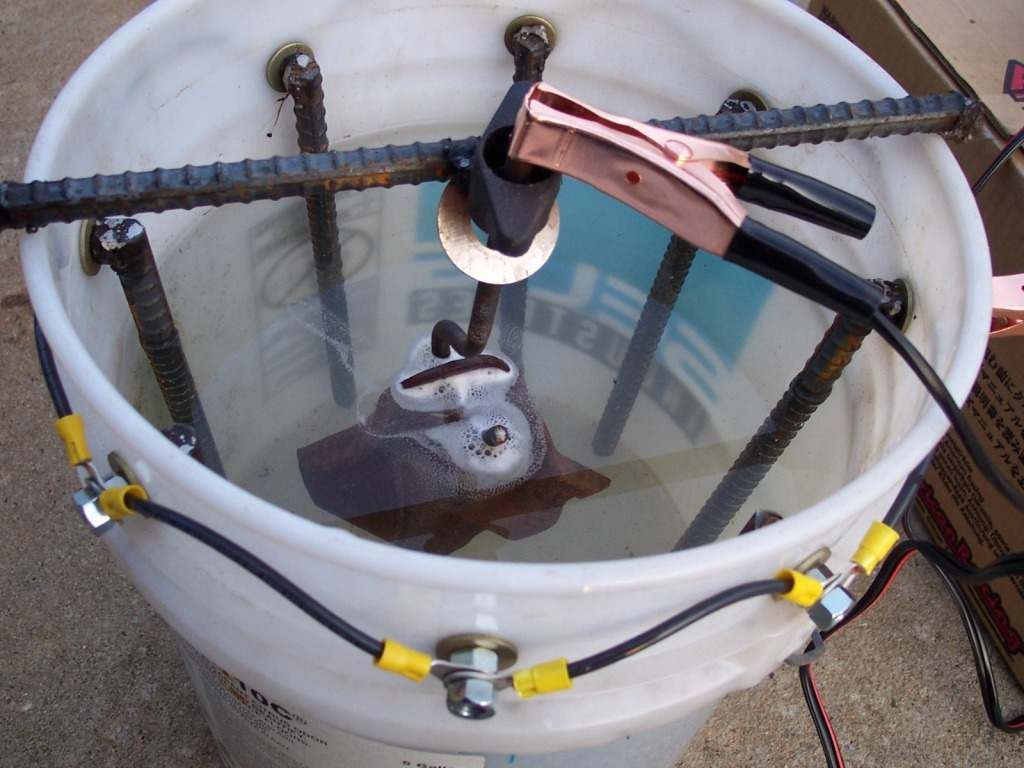
Surface scratched during rust removal can be sanded down with 100 grit on a sanding disc.
Finally the instruments were wiped down with mineral spirits, primed with an anti-corrosion metal primer and painted with glossy alkyd enamel.
The cutting edges of the axes have been sharpened by hand on a series of waterstones used for woodworking tools.
The assembly process was completed by installing the handles and then jamming them.
Restoring a slightly rusty knife
Is it possible to restore precision rusted tools?
The restoration of any composite precision instrument must begin with a thorough disassembly. nine0005
For example, the planer in the photo above. Please note that not all parts are rusted. This means that we separate the wheat from the chaff and work only with those details where there is rust.
Most of the rust was removed with a hand wire brush.